Audio normalization is a crucial technique used in music production to create consistent volume levels across different audio files.
It’s a process that can be as simple or as complex as you need it to be.
Understanding the ins and outs of audio normalization can greatly improve the quality and impact of your music.
In today’s article, we’ll dive deep into everything you need to know about audio normalization, including:
- What audio normalization is & its importance in music production ✓
- Peak normalization, loudness normalization & dynamic range normalization ✓
- The relationship between digital audio & normalization methods ✓
- Factors to consider when you normalize audio ✓
- Compression vs. normalization: when to use each technique ✓
- How the human ear perceives loudness & the role of dynamic range
- The Loudness War ✓
By the end of this guide, you’ll have a deeper understanding of audio normalization and how to effectively apply it to your music projects.
This will ensure that your audio files have consistent volume levels and maintain their dynamic range.
Let’s dive in…
Table of Contents
What is Audio Normalization?
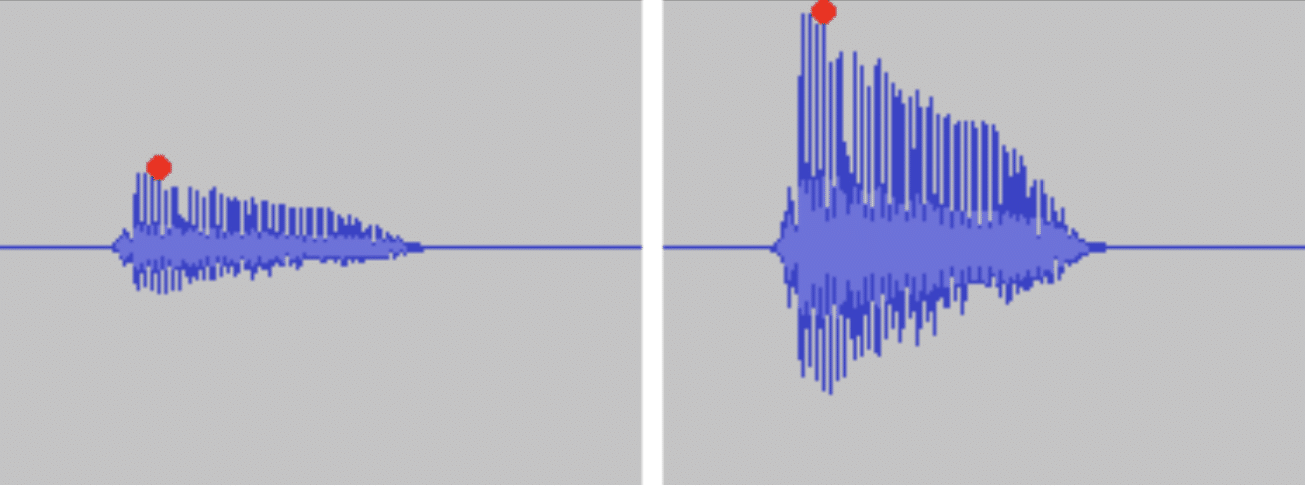
Audio before & after normalization. The red dot indicates the maximum peak level.
Audio normalization (peak normalization) is a digital audio processing technique that uniformly adjusts the volume level of an audio file.
It ensures that there is consistent loudness throughout your entire track.
By doing so, it helps you achieve a more professional and balanced sound.
Normalization is particularly useful when working with recordings that have different volumes.
Or, when you want to match the volume of multiple tracks in a project and ensure they all peak at the same level.
Audio normalization does not dynamically alter the audio signal, as compression does, as it affects the levels in a uniform fashion.
It takes the loudest, highest peak part in the audio and brings the entire file’s level up, reaching the desired normalization level (usually -3 to 0 dB).
Understanding the purpose of audio normalization is essential to using it effectively in your music production.
In essence, when you normalize audio, it may help to create a more uniform listening experience for your audience.
However, in reality, it comes down to ease, convenience, and optimal mixing and mastering of your audio.
This ensures that listeners don’t have to constantly adjust their maximum volume when listening to your tracks, making for a smoother, more enjoyable experience.
When to Use Normalization
Now that you know what exactly audio normalization is, let’s talk about when and how to use it properly.
-
Mastering Your Tracks
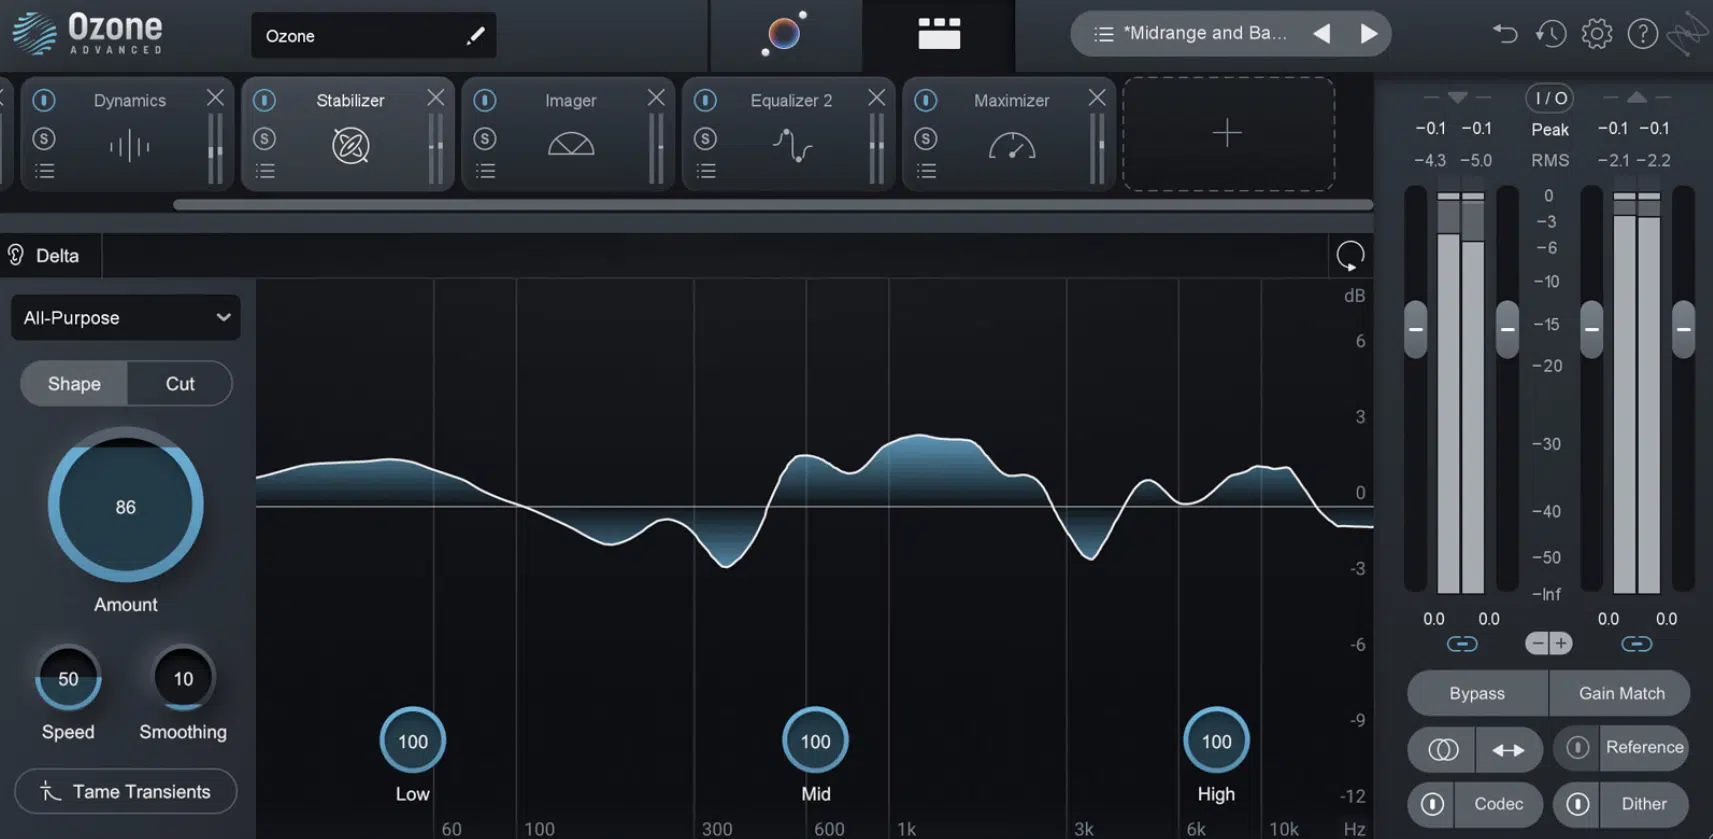
Audio normalization is an indispensable tool when mastering your tracks.
During the mastering process, it’s essential to ensure that your tracks have a consistent volume level.
This way, you and your listeners can enjoy your music without having to constantly adjust their volume.
By normalizing your tracks, for example in your album’s post mix/master, you can achieve a professional, polished sound.
One that stands up to commercial releases and makes it ready for submission.
Speaking of mastering, if you’re searching for the best mastering plugins around, we’ve got you covered.
-
Preparing for Streaming Services
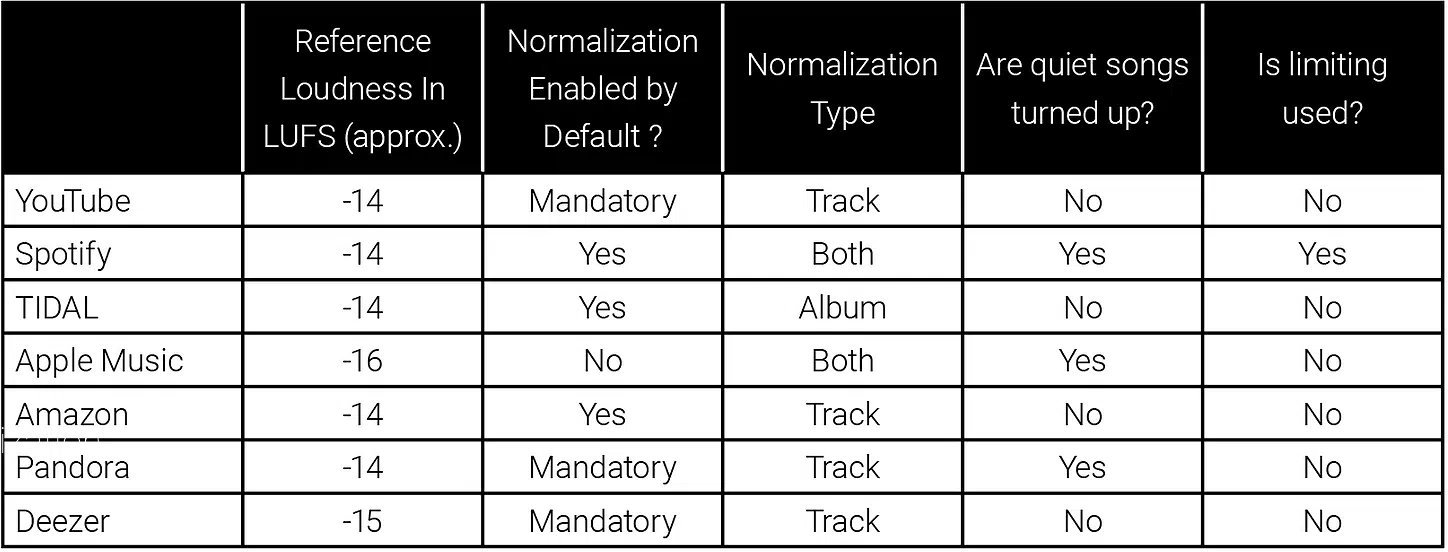
Streaming services have specific loudness requirements that you need to adhere to when submitting your music.
Normalization can help you meet these requirements, ensuring that your music will sound great on these streaming platforms.
By normalizing your files to match the target level of streaming services, you can provide a consistent listening experience for your fans.
Keep in mind, if you don’t implement this process yourself, streaming services will do it on their own, through means of compression, limiting, etc.
This can lead to disastrous translation issues.
Always remember to check out specific streaming services’ loudness guidelines, as each requires different levels.
If you’d like to know everything about how to upload your music to Spotify, we break it all down.
-
Working with Different Audio Files
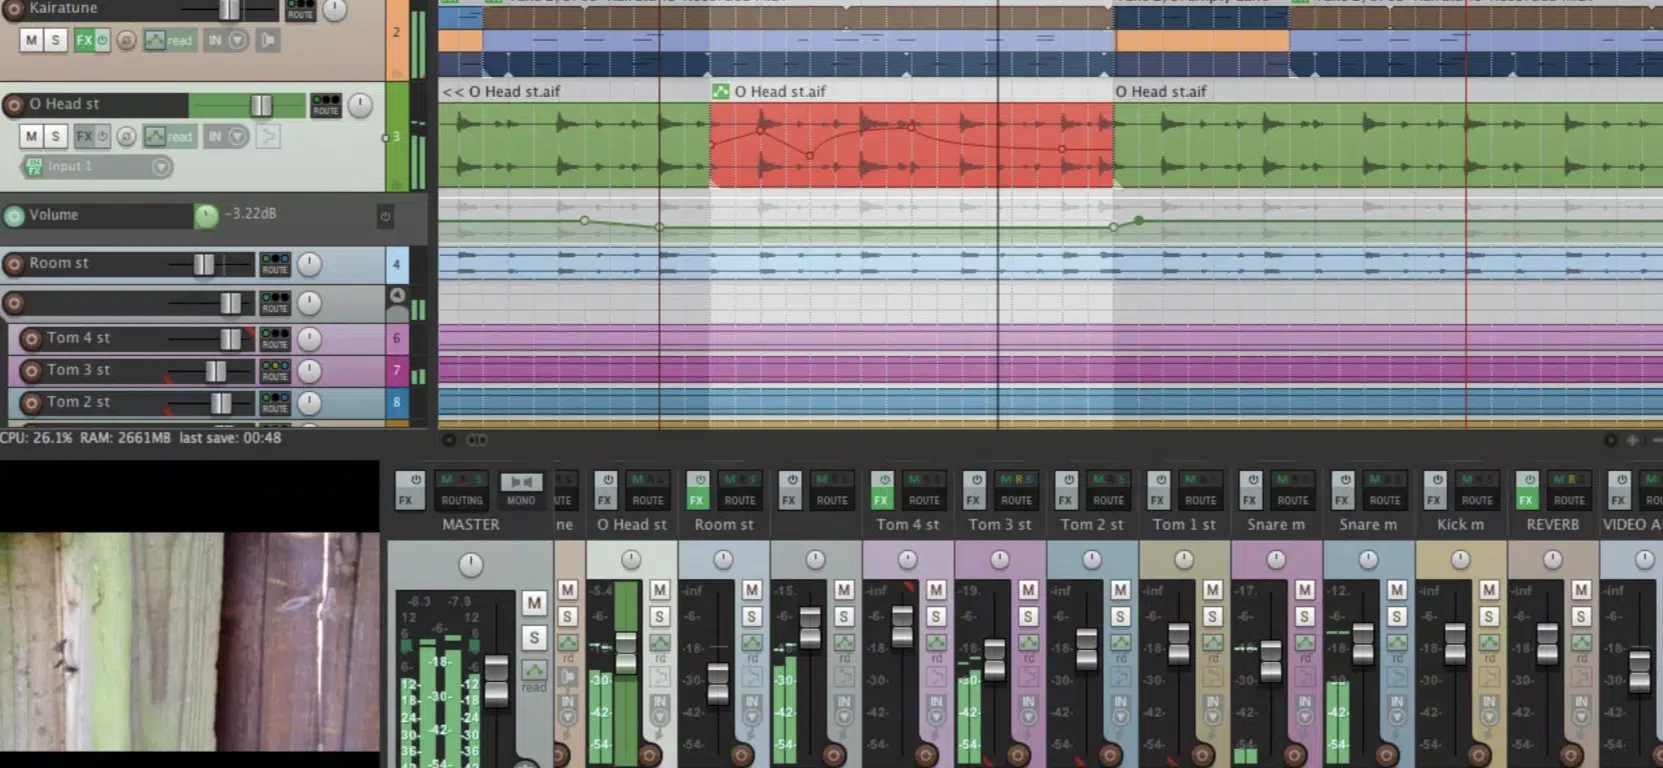
When you’re working with multiple audio files in a project, it’s important to maintain a consistent volume level across all of them (think: processing).
This is especially true if the audio files come from different sources or were recorded at different volumes.
Audio normalization can help you achieve this consistency by adjusting the volume of each audio file to match the others.
From there, you can gauge where your levels currently are, and where they vary, allowing for optimum mixing and mastering processing.
Side note, if you’d like to know how to achieve the perfect mix, we’ve got your back.
Common Misconceptions
I think it’s super important that we include some common misconceptions before moving forward, especially for those just starting out.
1. Audio Normalization And Compression Are The Same
Some people confuse normalization with compression, but they serve very different purposes.
While audio normalization adjusts the overall volume level of an audio file, compression reduces the dynamic range of the file.
Compression can help you achieve a more consistent volume level within a single audio file, but it doesn’t necessarily make the overall volume level of the new audio file louder.
Unless that’s your overall goal, of course.
Either way, compression is used for dynamic, corrective, and enhancement processing, while normalization is more of a utilitarian function.
If you’d like to find the absolute best compressor plugins for this process, look no further.
2. Audio Normalization Fixes Everything
It’s important to remember that peak normalization isn’t a fix-all solution for your audio problems.
If you have issues with the signal-to-noise ratio, distortion, or other audio artifacts, normalization alone won’t solve them.
In these cases, you’ll need to address the root cause of the issue and use other audio processing techniques, such as EQ or noise reduction, to achieve the desired sound.
We’ve got the best EQ plugins of 2023 available if this situation arises.
3. Audio Normalization Increases Headroom
When normalizing audio files, it’s crucial to maintain sufficient headroom in your mixes and recordings.
Headroom is the difference between the loudest point of your audio file and the maximum volume level that your digital audio system can handle.
If you normalize audio too aggressively, you risk introducing distortion and clipping, which can be detrimental to the quality of your music.
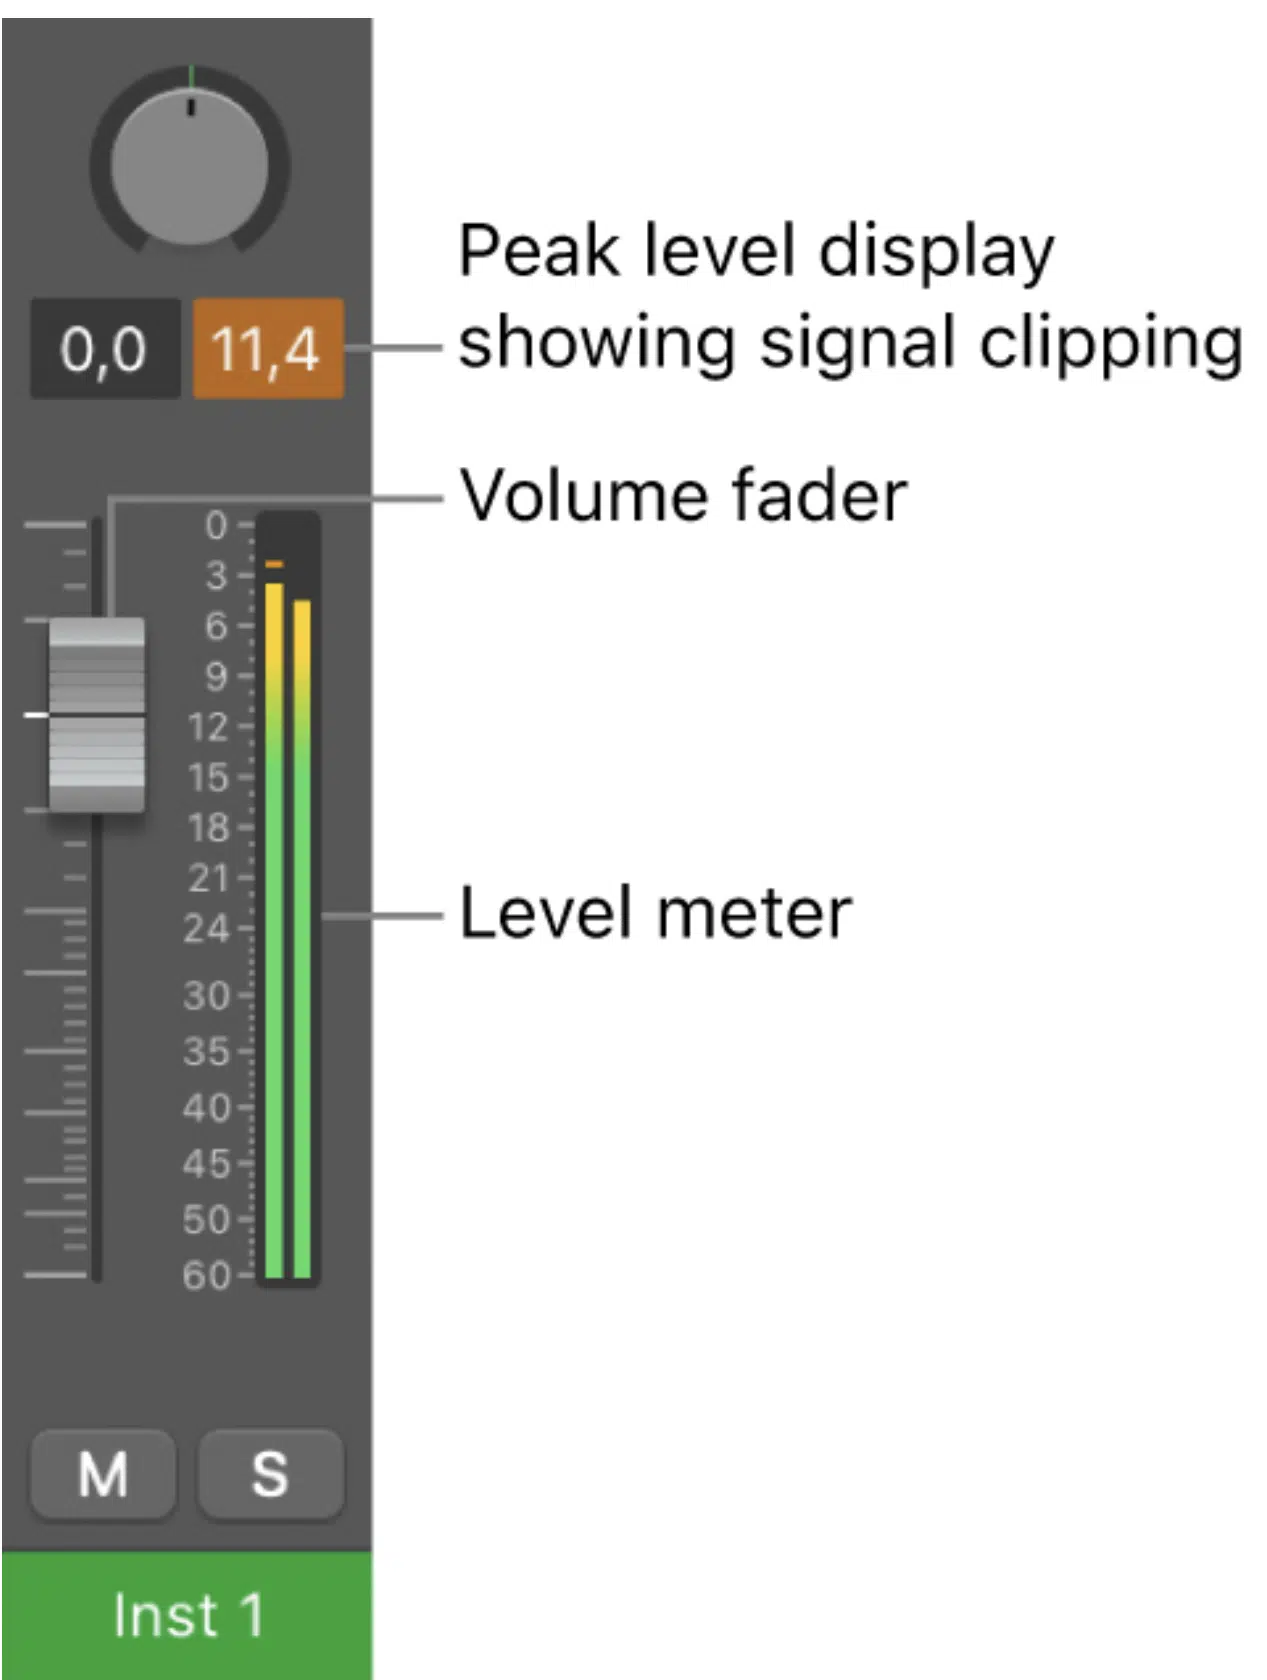
Remember, regardless of the DAW or system you’re using, you should always look at anything that breaches the 0dB mark.
This is because avoiding clipping and leaving sufficient headroom means not venturing down to single digitals.
For instance, I like to look at -16dB as my target headroom number, and for anything above it, I consider clipping (just to leave the appropriate amount of headroom).
This also allows for any compensation needed when you start making things louder during the mastering stage.
The Audio Normalization Process
Now that we’ve covered the most common misconceptions about audio normalization, let’s dive into the actual process.
-
Analyzing Your Audio Files
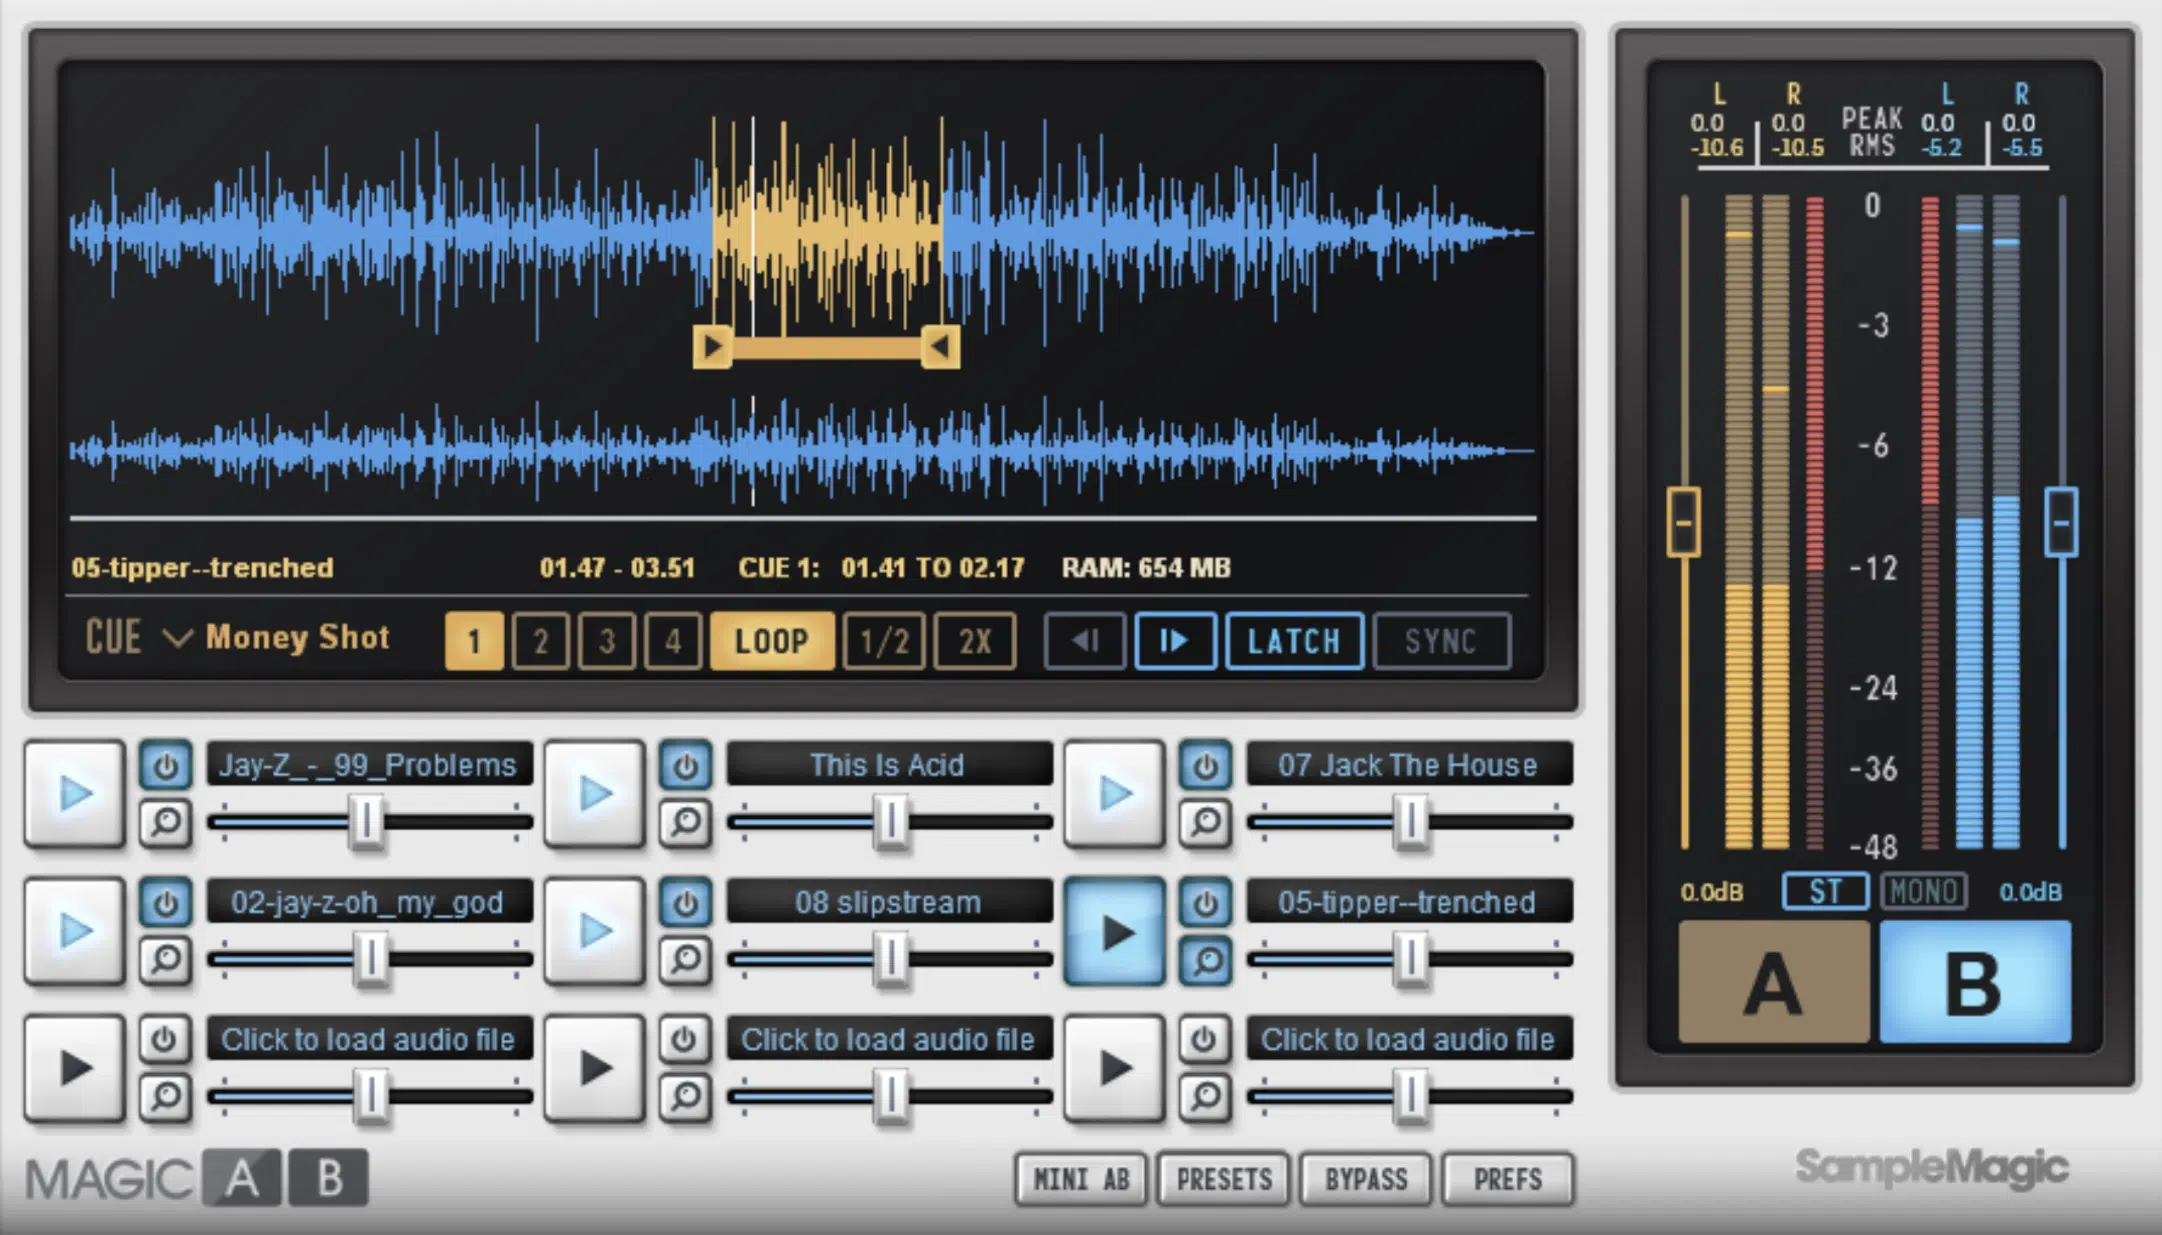
Before normalizing your audio files, it’s important to analyze them and determine their current volume levels.
This analysis can be done using tools built into your DAW or with dedicated audio analysis software.
By understanding the current volume levels of your files, you can make informed decisions about the audio normalization process.
-
Choosing an Audio Normalization Target
Once you have analyzed your files, you can choose the normalization target that best suits your needs.
Factors to consider when choosing a normalization method include:
- The type of audio material
- The desired loudness level
- The type of processing being done
- The target platform for your music
Each normalization level has its own strengths and weaknesses, so it’s essential to choose the one that will yield the best results for your specific situation.
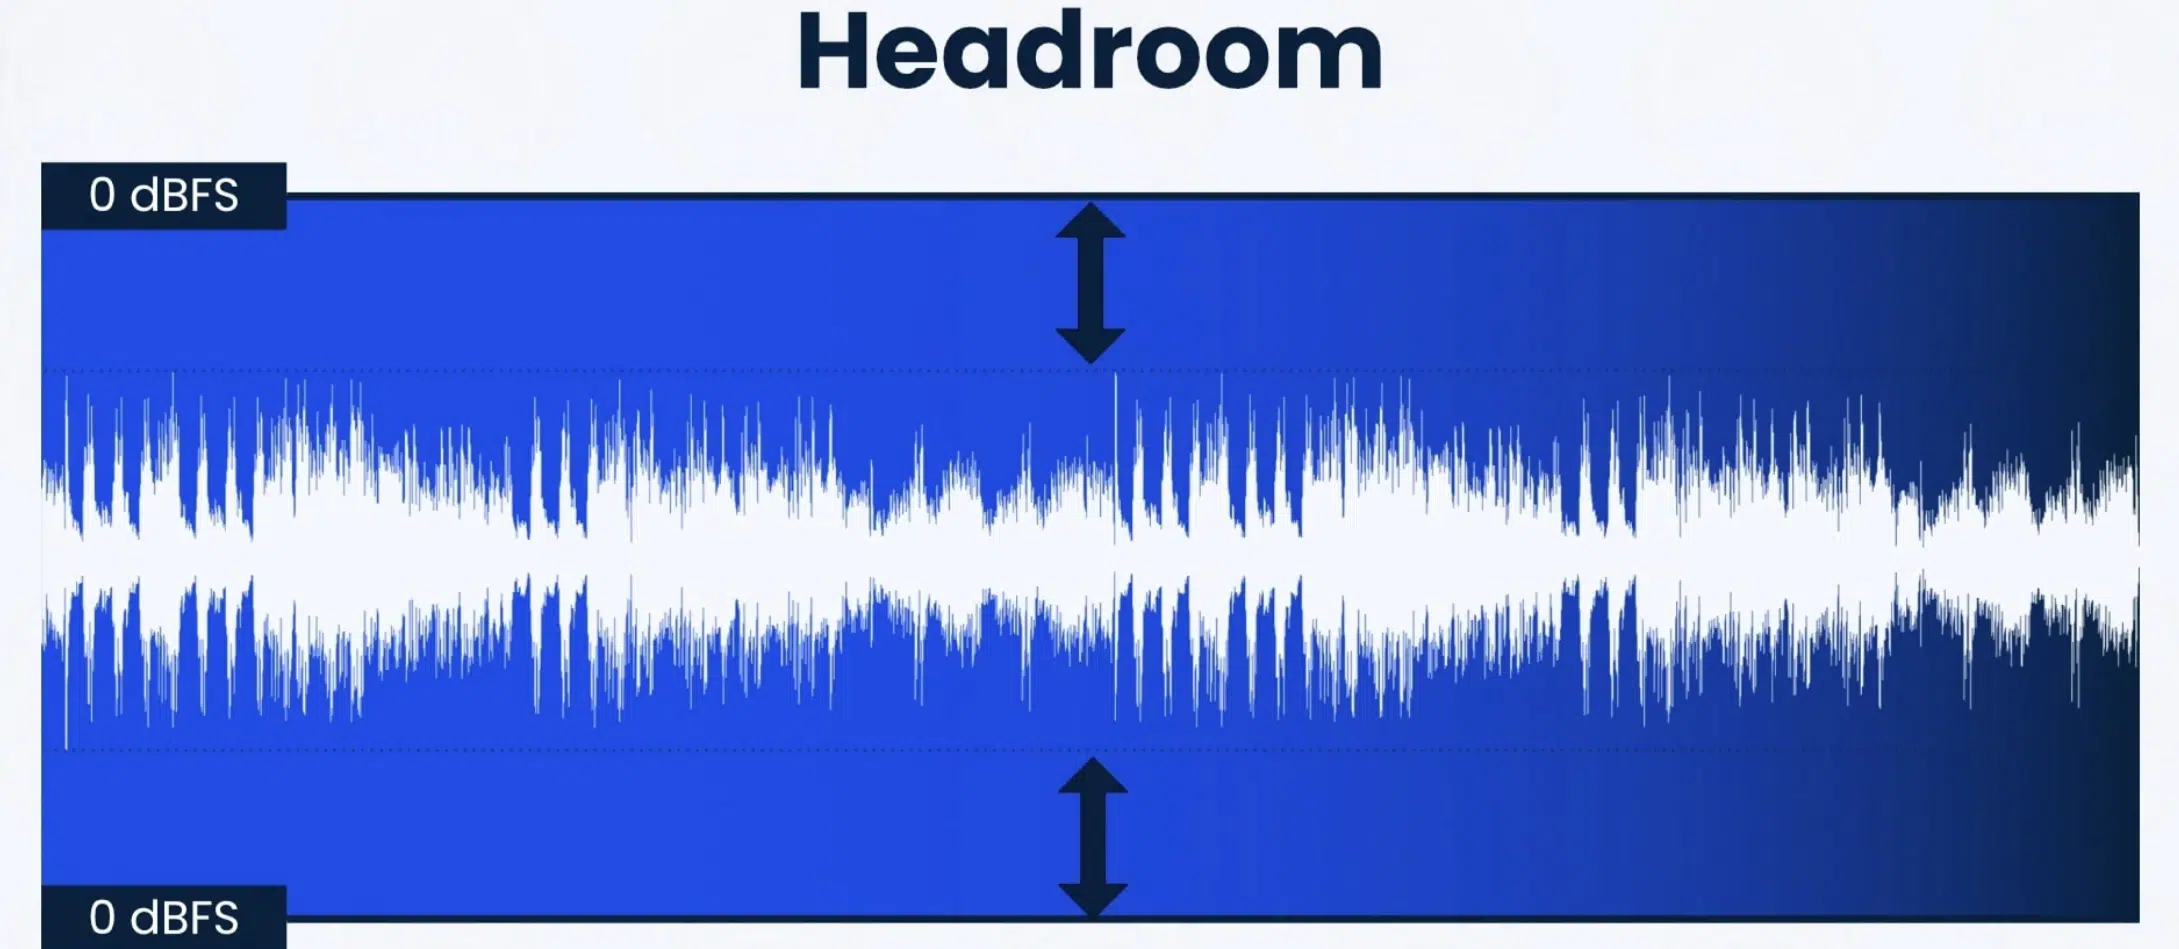
- For mixing situations 一 Stay in the lower double-digits, ideally -18 to -12dB.
- For mastering purposes 一 Anywhere from -8 to -3dB is a safe bet.
Some streaming services and situations will arise where -0dB is warranted, so just make sure it doesn’t surpass that, as that’s right on the border of clipping.
NOTE: During the mixing process, it’s essential to pay close attention to gain staging, as well as RMS volume detection, to determine the amount of gain needed for each track.
Using clip gain adjustments can help you achieve precise control over the volume levels, ensuring a well-balanced mix.
If you need a refresher about gain staging, make sure to check out this extensive article about it.
-
Normalizing Audio
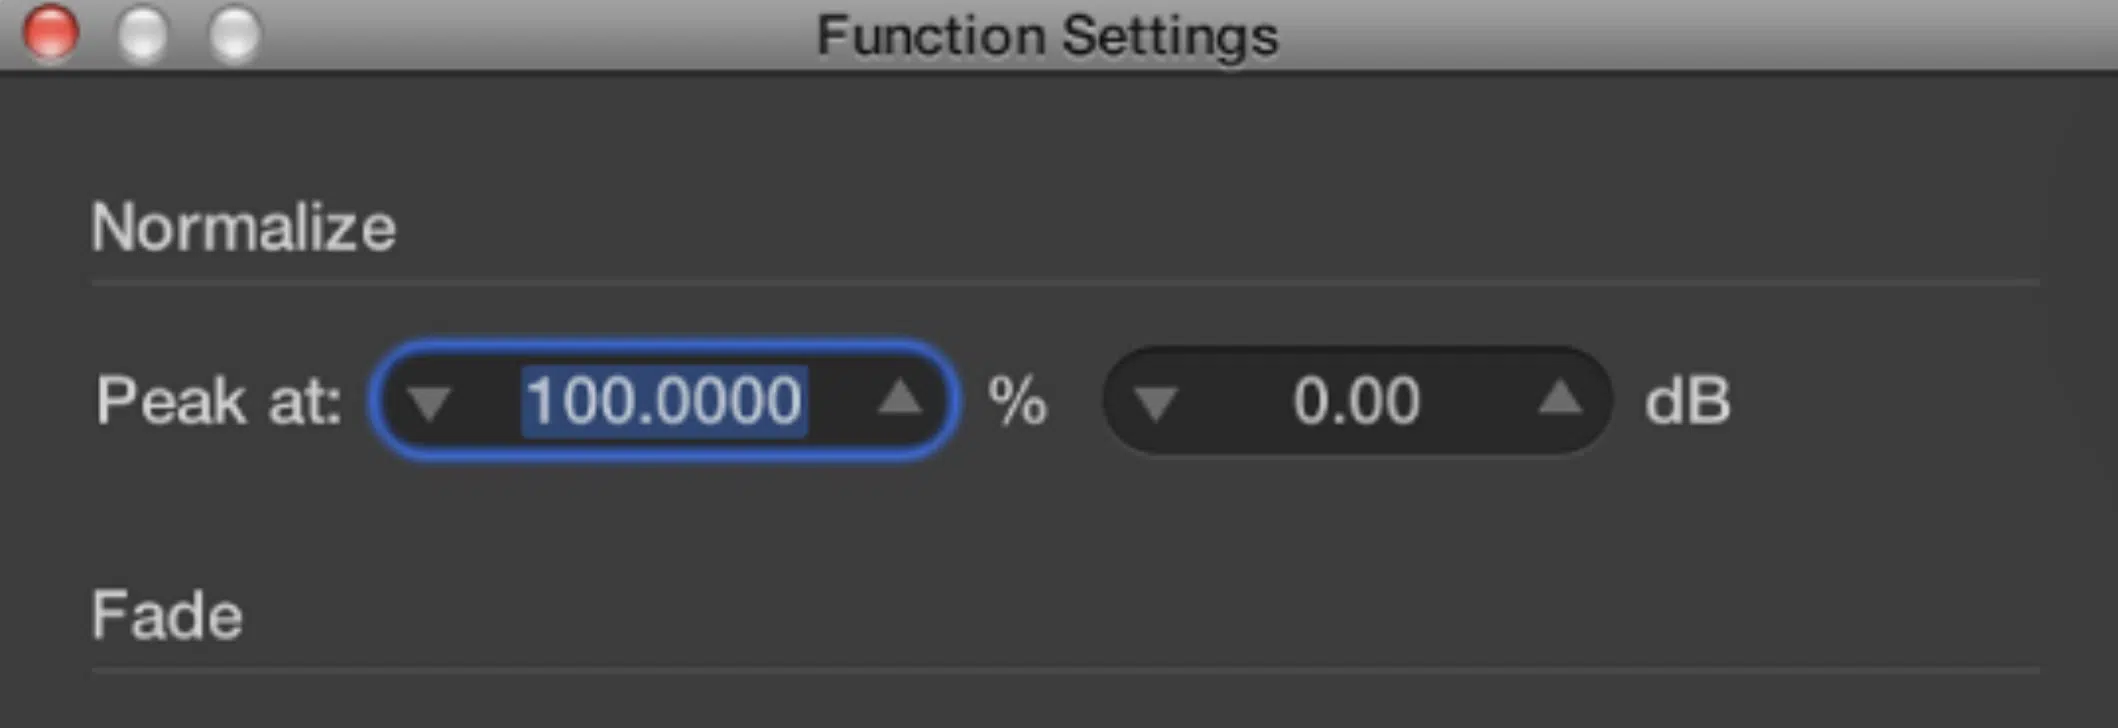
After selecting the appropriate normalization target, you can edit audio files using your DAW or dedicated audio editing software.
Most DAWs and audio editing software have built-in normalization tools that make it easy to apply.
Typically, it’s as easy as highlighting the audio and hitting a command, or simply selecting “Normalize” from a drop-down menu.
Be sure to monitor the results of the normalization process to ensure that the new volume levels meet your expectations and don’t introduce any unwanted artifacts or issues.
Compression vs. Normalization
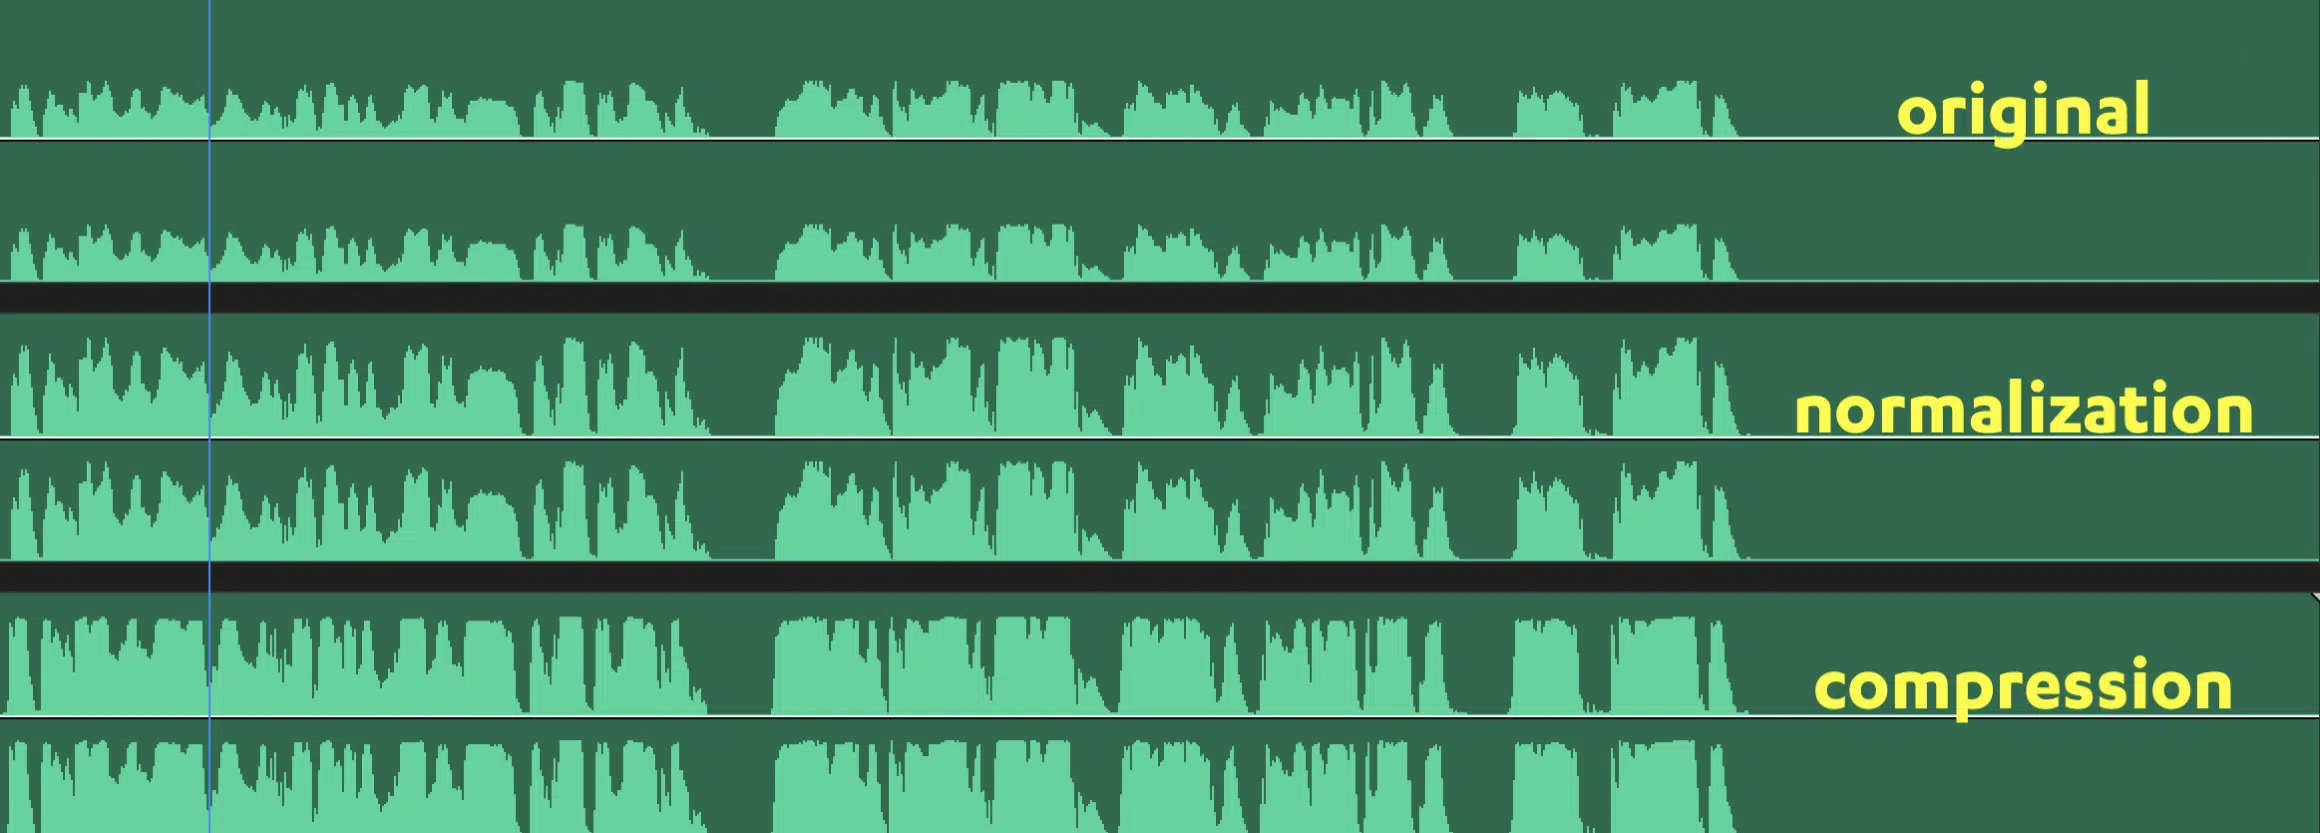
When it comes to normalization, one thing it gets compared to the most is compression.
Knowing the differences and when to use each unique process is crucial as a music producer, so let’s break it down.
Compression and normalization are two distinct audio processing techniques that serve different purposes.
- Normalization 一 Adjusts the overall volume level of an audio file.
- Compression 一 Reduces the dynamic range within the file.
Remember, compression makes the quiet audio file parts louder and the louder parts quieter.
Both techniques can be used to achieve a more consistent volume level, but they operate in different ways and can have different effects on your audio material.
Yes, compression can (and does) make audio louder, but that’s far from its main purpose.
Speaking of compression, if you’d like to learn about more complex forms of compression, such as parallel compression and sidechain compression, we’ve got you covered.
-
When to Use Compression
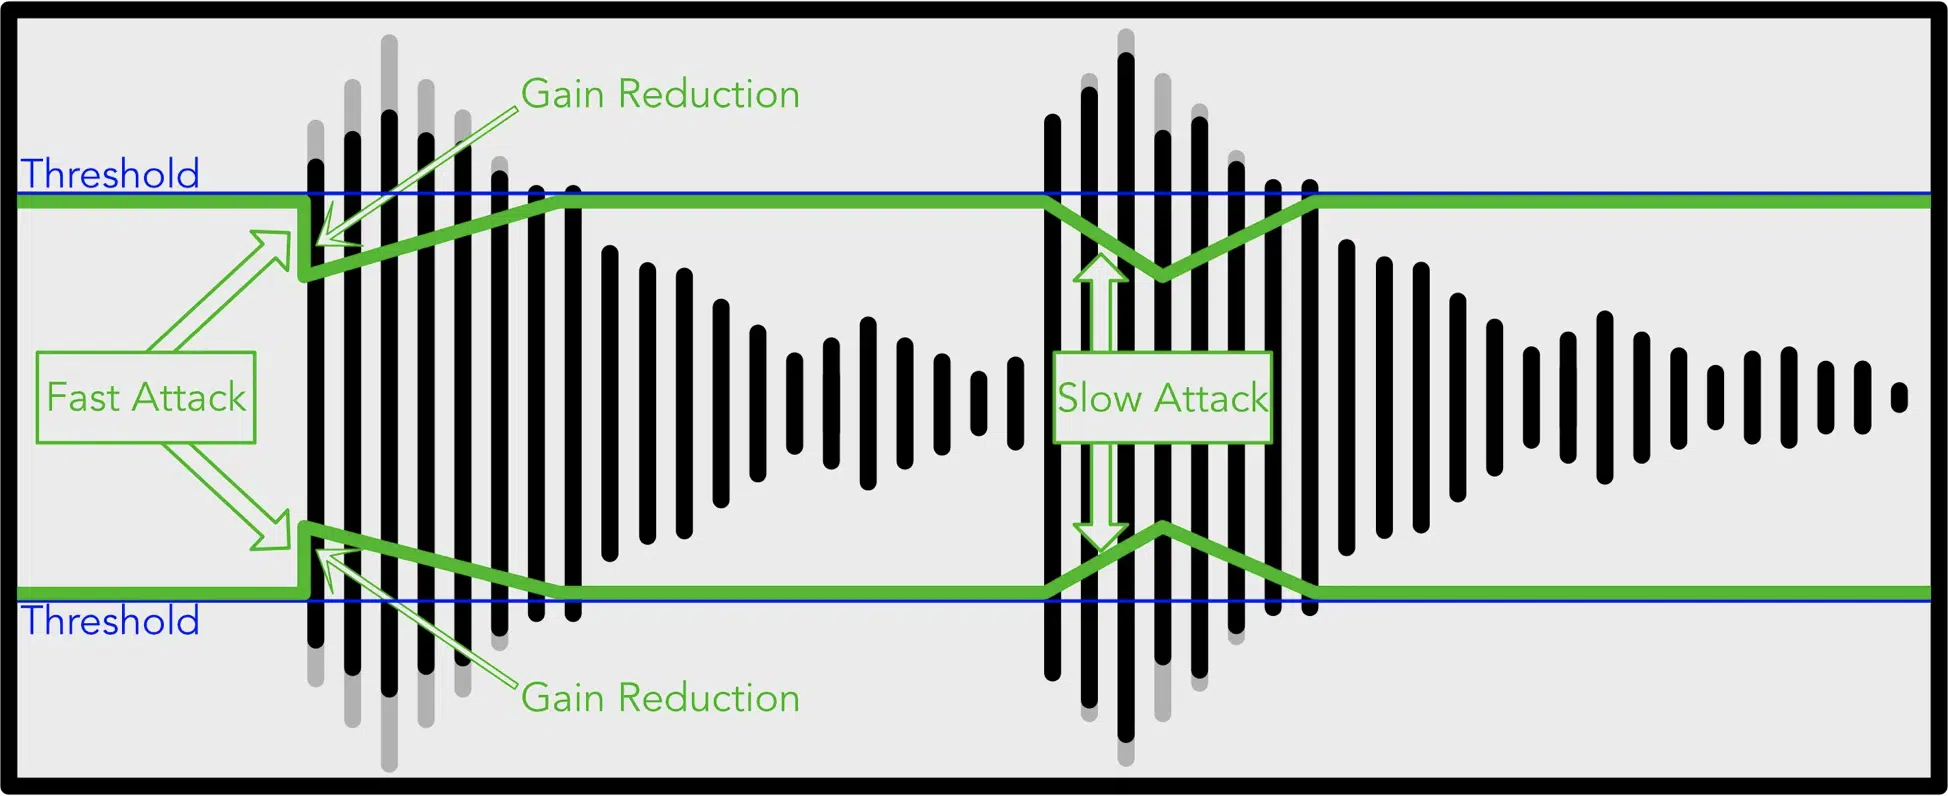
Compression is best used when you need to control the dynamic range within an audio file or when you want to emphasize specific elements within the mix.
For example, compression can be used to tighten up drums or to bring out the details in vocal performances.
Compression can also help to improve the overall balance and cohesion of a mix.
Remember to use the best mixing plugins to enhance your overall process.
-
When to Use Loudness Normalization

Normalization should be used when you need to adjust the overall volume level of an audio file or a group of files.
As we previously discussed, it’s particularly useful when mastering your audio track or when preparing your music for streaming services.
Unlike compression, normalization doesn’t affect the dynamic range within the audio file, making it a more transparent and less intrusive processing technique.
With that said, it also holds no dynamic, corrective, or enhancement purposes, values, or properties.
Dynamics & The Human Ear
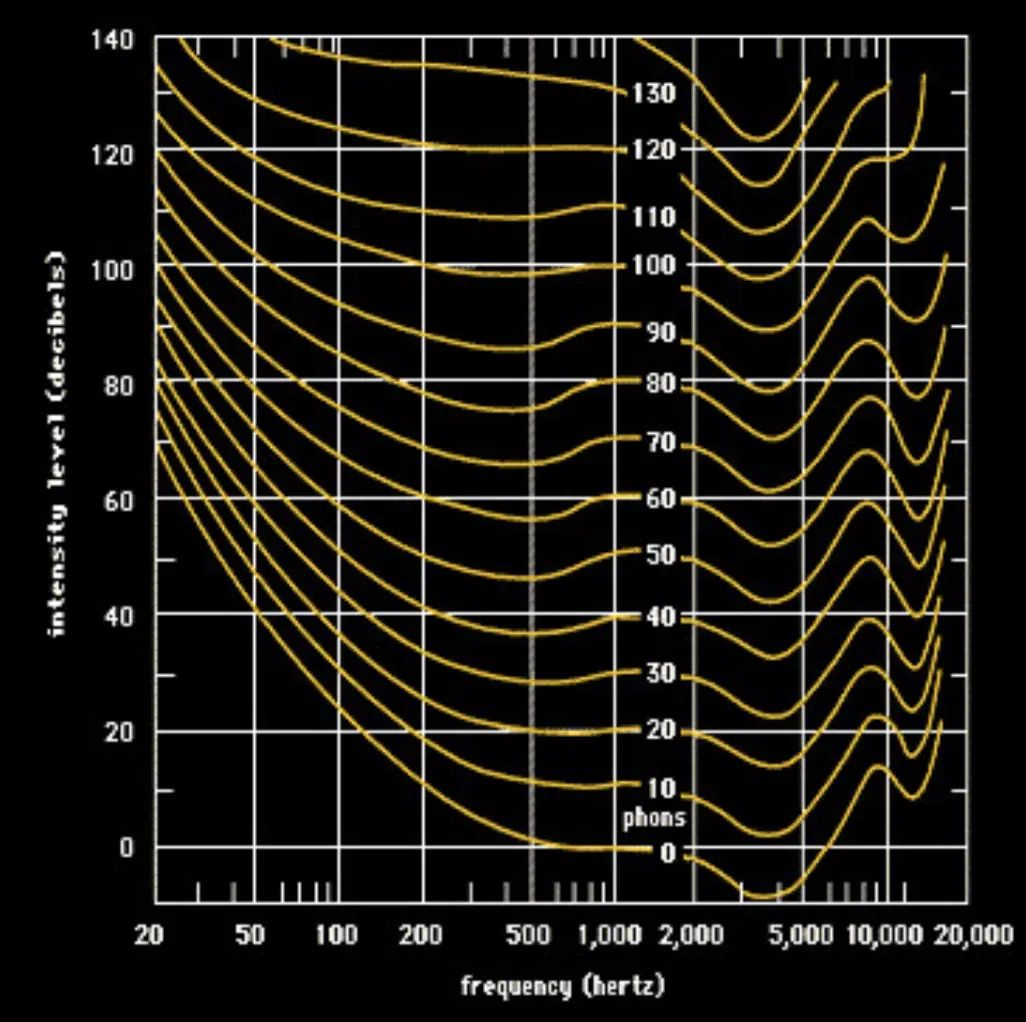
The human ear is a complex organ that is sensitive to a wide range of frequencies and volume levels.
Our perception of loudness is not linear, meaning that we perceive changes in the same volume level differently depending on the frequency and the level of the sound.
This non-linear perception of loudness is an important factor to consider when normalizing files, as it can influence how your music is perceived by listeners.
Fletcher-Munson curves, also known as equal-loudness contours, are a set of curves that represent how the human ear perceives loudness at different frequencies.
These curves show that the human hearing system is more sensitive to certain frequency ranges, particularly between 2 kHz and 5 kHz, and less sensitive to very low and very high (peak level) frequencies.
Understanding the Fletcher-Munson curves can help you make more informed decisions about human perception and when normalizing your files.
You should use it to help achieve a more consistent perceived loudness across different frequencies.
What Is Dynamic Range?
Dynamic range is the difference between the quietest and loudest parts of an audio file.
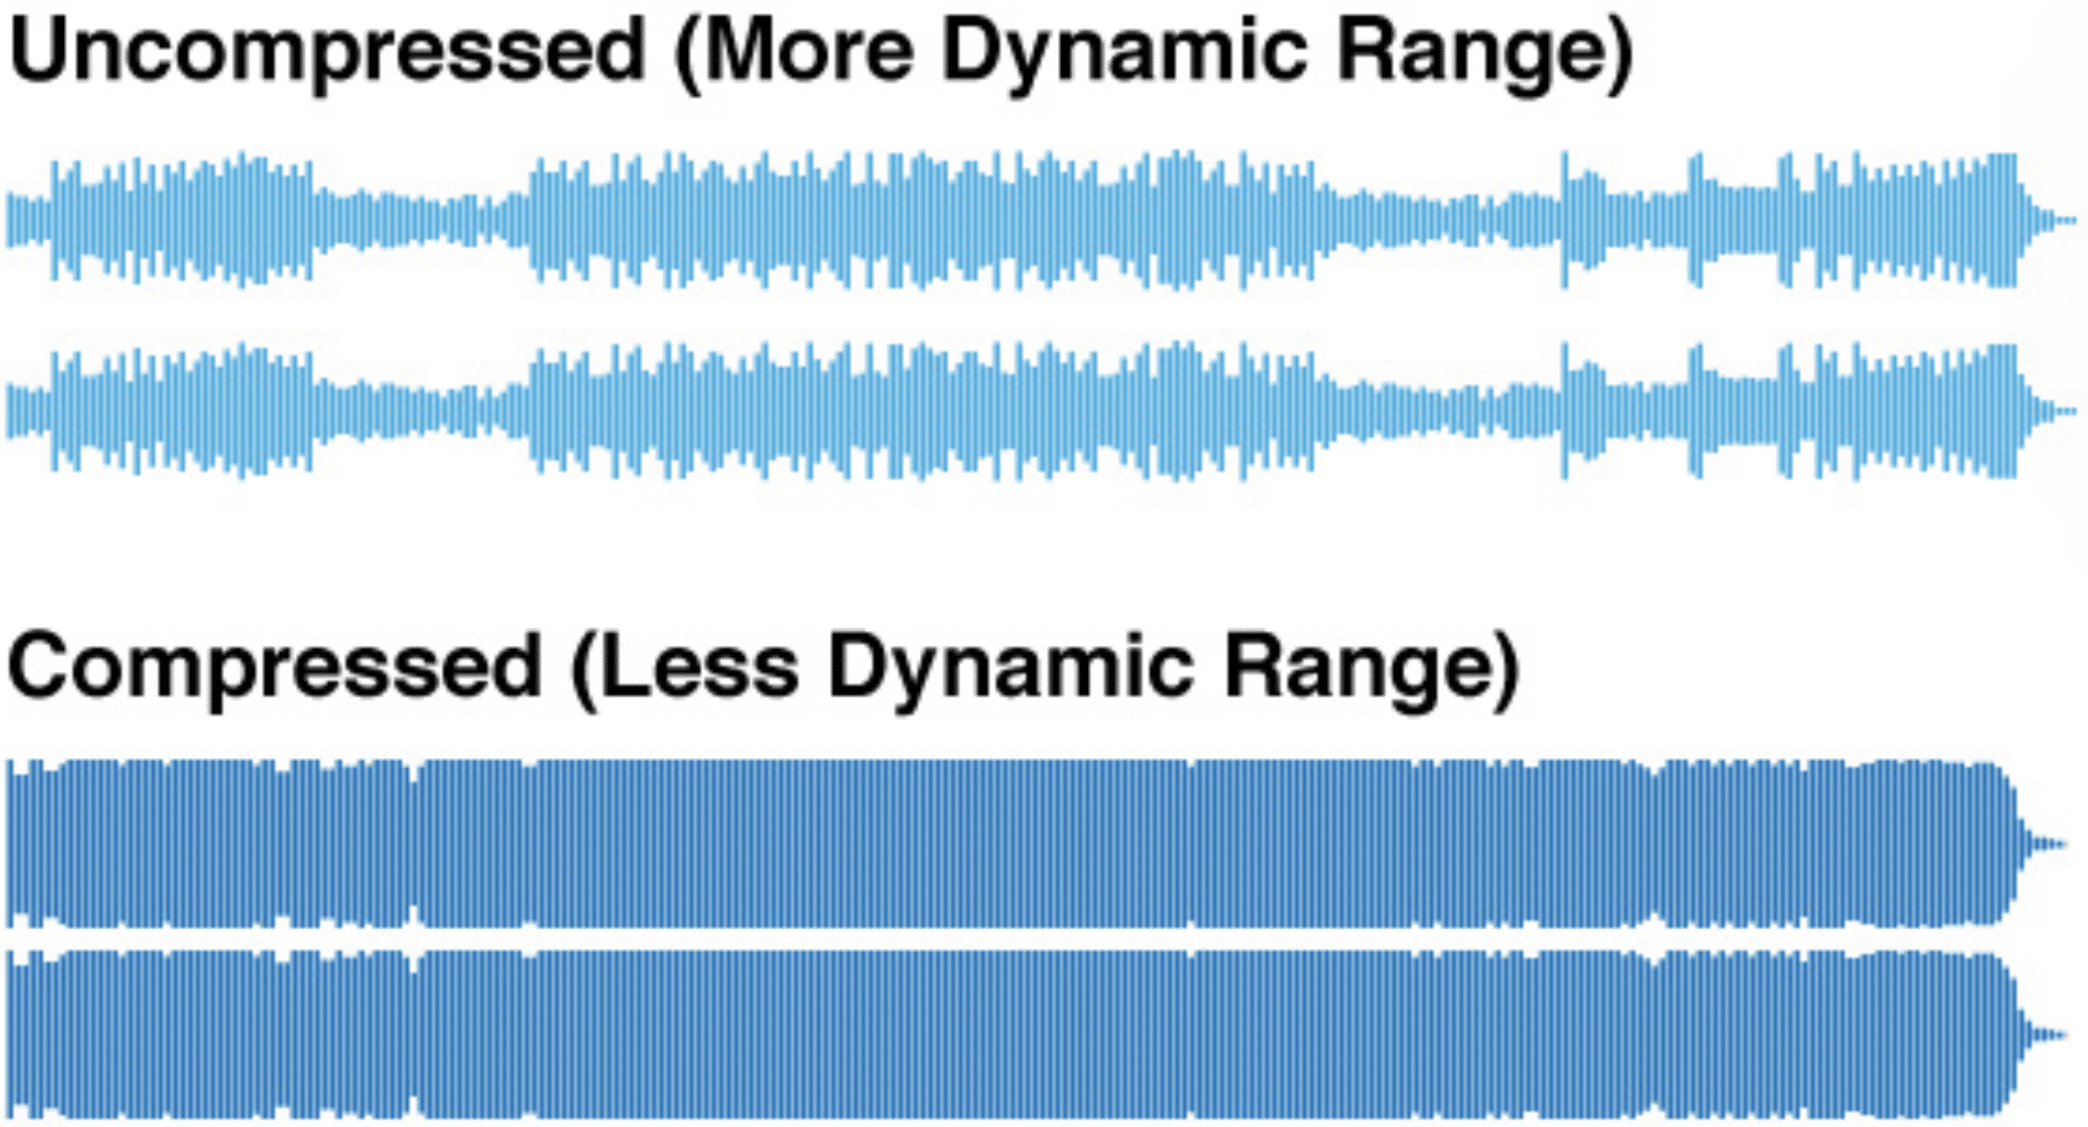
In music production, it is an important factor that contributes to the overall impact and emotion of a piece.
- A greater dynamic range 一 Can create a sense of space and depth within an entire recording.
- A smaller dynamic range 一 Can make an audio recording sound more intense and up-front.
It’s essential to strike a balance between achieving a consistent volume level and preserving the dynamics of your audio material.
Over-normalizing or using excessive compression can result in a loss of dynamic range, which can make your unique music sound flat or lifeless.
To preserve the dynamics, choose peak normalization methods and settings that respect the natural dynamics of your audio material while still achieving the desired loudness (peak amplitude).
The Loudness War
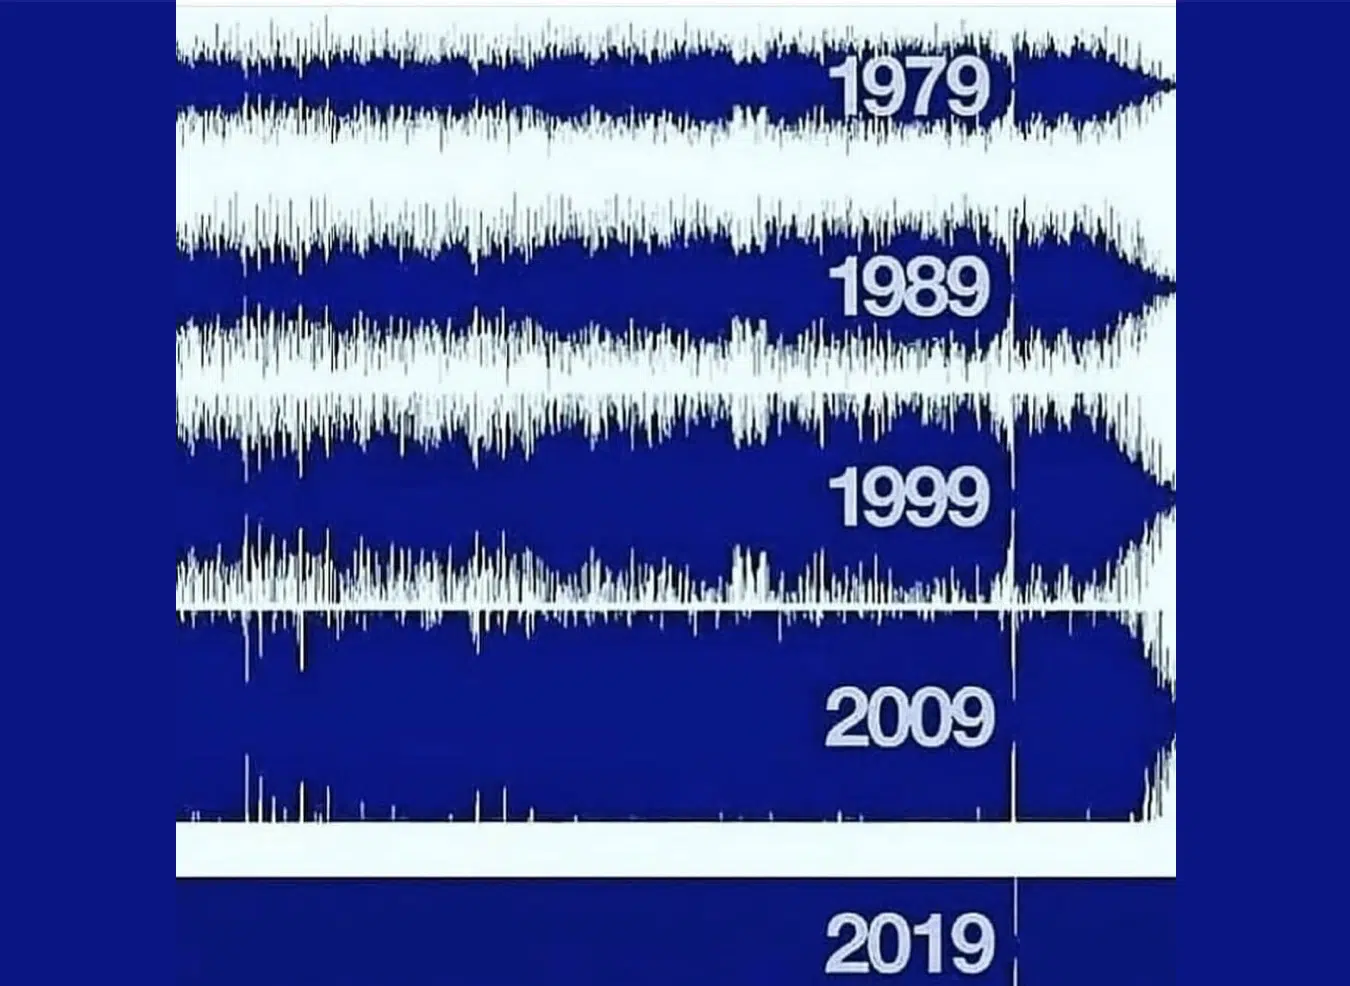
The Loudness War refers to the trend of increasing the overall volume level of music recordings over the past several decades.
This increase in the loudness of audio samples has been driven by the belief that louder recordings sound better or are more likely to catch the listener’s attention.
If you’re looking for the best audio samples to integrate into your music, we break down the best free sample packs of 2023.
It’s a proven phenomenon that we perceive louder as better, which is the main reason we must compensate for volume changes post-compression in order to truly understand the difference.
However, this push for increased loudness has come at the expense of dynamics and audio quality.
The Loudness War has had a significant impact on digital audio, leading to the widespread use of compression and limiting to achieve ever-louder recordings.
This approach can result in music that lacks depth and emotion, with distorted or clipped audio becoming more prevalent.
Many artists, mastering engineers, sound designers, and listeners have pushed back against the Loudness War, advocating for a more dynamic and natural-sounding digital recording.
However, in hip-hop, hip-hop subgenres, EDM, pop, and other modern genres, unfortunately, this war continues.
Many streaming services, such as Spotify and Apple Music, have implemented loudness normalization to combat the Loudness Wars.
These platforms automatically adjust the average volume level of songs to target loudness normalization.
This ensures a more consistent listening experience and reduces the incentive for excessive loudness in music production.
In turn, this shift has led to a renewed focus on preserving dynamic range and prioritizing normalizing audio over loudness.
Final Thoughts
Audio normalization is an essential technique for achieving consistent volume levels in music production.
By understanding the different audio normalization methods, plus their advantages and disadvantages, you can make more informed decisions when normalizing your files.
With the right approach, loudness normalization can help you create a more enjoyable and professional-sounding listening experience for your audience.
To further enhance your grasp on audio normalization and other important music production techniques, consider exploring these free professional templates.
This valuable resource provides you with expertly mixed and normalized templates that you can analyze and learn from.
It will give you an inside look at how professional producers create outstanding music.
Dive into the world of audio normalization and take your music production skills to the next level.
Until next time…


Leave a Reply
You must belogged in to post a comment.