Risers are all about building energy, creating tension, and setting the stage for epic transitions that people never forget.
They can seriously elevate your track’s dynamics, lead into drops with power, and make your listeners sit up and pay attention.
As producers (especially if you’re an EDM producer), knowing how to create risers can completely transform your production game.
Your tracks will be show-stopping and your drops will hit hard as hell, which is why I’m breaking down everything you need to know, like:
- How to create risers like a boss ✓
- Using pitch bend for seamless builds ✓
- Creative automation strategies for impact ✓
- Designing risers with white noise and synths ✓
- All the parameters you’ll need to know ✓
- Using rhythmic elements like snare rolls ✓
- Advanced sound design tips for unique risers ✓
- Using unconventional sounds & textures ✓
- Pitch-bending secrets to give your music character ✓
- Much more about how to create risers ✓
By knowing how to create risers from start to finish, you’ll be able to knock out transitions that captivate and make your listeners pretty much addicted.
Plus, you’ll be able to make your builds more dynamic, your drops way more impactful, and your mixes cleaner/more professional.
This way, your tracks will feel more polished, engaging, and exciting, and you’ll be able to create tension and movement like a true pro.
Table of Contents
- How to Create Risers (Step-by-Step)
- Step #1: Selecting the Right Sound Sources
- Step #2: Designing the Riser’s Structure
- Step #3: Layering Elements for Depth
- Step #4: Applying Effects Processing
- Step #5: Automating Parameters for Dynamic Movement
- Step #6: White Noise and Synthesized Sounds
- Step #7: Incorporating Rhythmic Elements
- Advanced Tips for Creating Impactful Risers
- Final Thoughts
How to Create Risers (Step-by-Step)
A riser is basically a sound that starts subtle and grows in intensity, often with elements like pitch bend, filter sweeps, and reverb to make it feel alive. These are the sounds that people (and probably you) absolutely love. That’s why it’s invaluable to learn how to create risers like a boss. Let’s kick things off with picking the right sounds.
Step #1: Selecting the Right Sound Sources

The first thing you need is a sound that fits the vibe of your track (I know it sounds basic, but let’s just quickly cover it).
For electronic music production, start with a synth patch and tweak the oscillator settings for a smooth rise.
Choose a basic saw wave or triangle wave patch in a synth like Serum, Massive, or Sylenth1.
Adjust the oscillator settings by increasing the unison voices to 5-7 and detuning slightly (around 10-15 cents) for a richer texture.
Apply a slow pitch bend automation, starting at -12 semitones and rising to 0 semitones over 8 bars.
For something more organic, you can try recording a string ensemble swell.
You’ll want to use a high-quality VST like Spitfire Audio’s Albion One and start with a soft dynamic level (pp or mp).
Then, increase the expression and modulation controls to build intensity over time.
If recording live, emphasize the crescendo with smooth bowing to avoid abrupt volume changes, which you certainly don’t want in this situation.
Personally, I like layering these with a bit of white noise to give the riser some airiness 一 it works great for building tension, which is kind of the whole point (below).
There’s also foley sounds (like a whoosh), of course, which you can simply grab from a reputable source, the best foley sounds can be found right here.
I suggest layering the whoosh with a high-pass filter starting at 150 Hz and automate the filter cutoff to open up to 10 kHz, which adds some brightness.
-
Pro Tip (Adding a White Noise Layer)

Like I said above, I suggest you layer whatever you choose to use with white noise, which you can generate in your DAW or synth, like Serum’s noise oscillator.
Apply a low-pass filter with resonance set at 15-20% and automate the cutoff frequency to rise at a steady pace.
Set the volume of the white noise layer around -6 dB 一 blending it subtly with the other elements to avoid overpowering the riser.
And yes, we’ll break down everything you need to know throughout the article so you get the full picture, plus learn how to create risers like a boss.
Step #2: Designing the Riser’s Structure
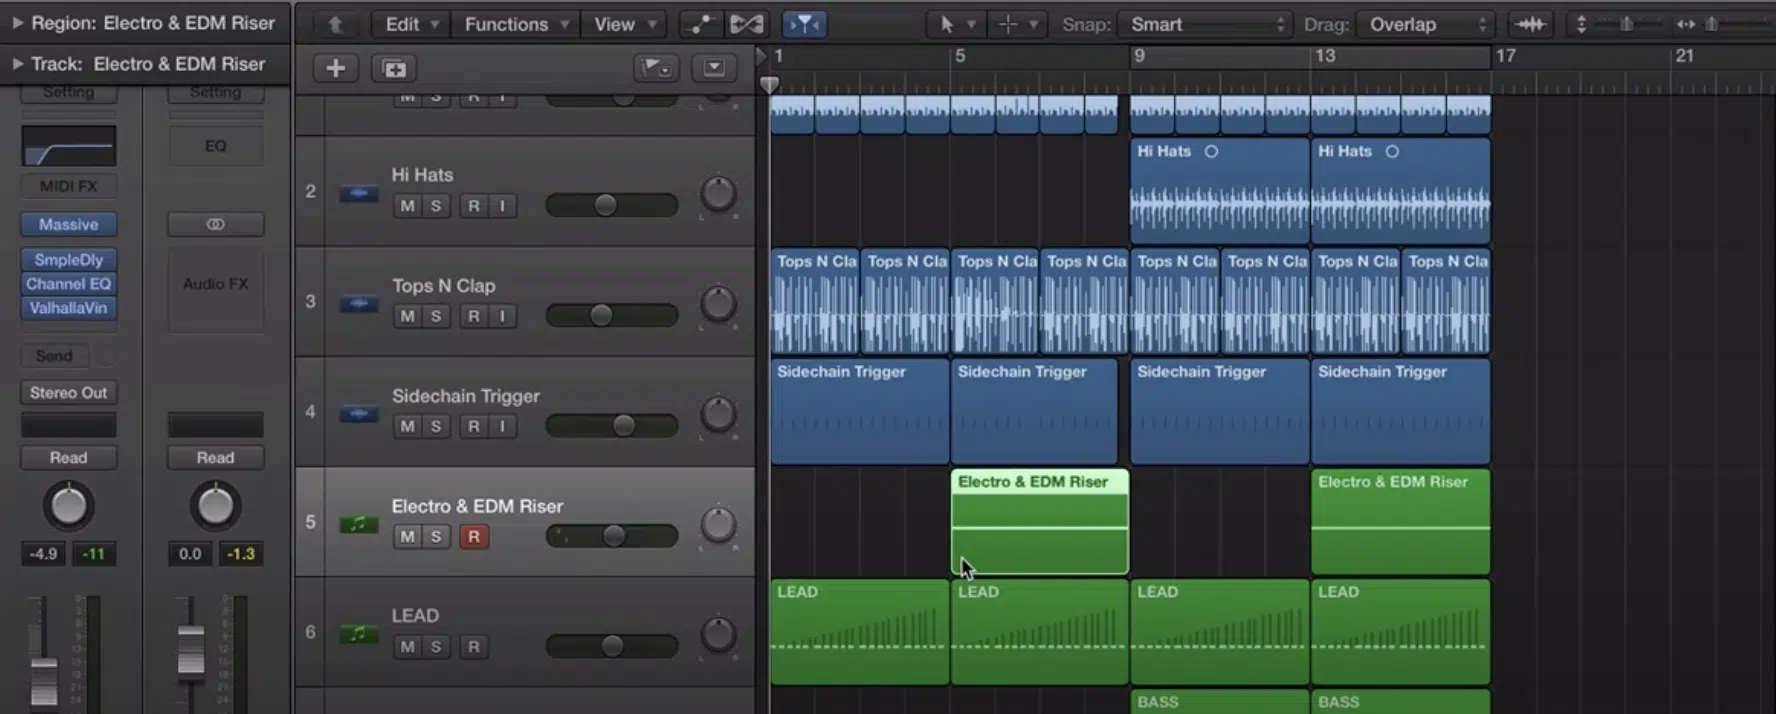
The structure of your riser is what sets the stage for its impact, so you certainly don’t want to take this step lightly.
You’re going to start by deciding the length (most risers are between 4 and 16 bars, depending on the build-up).
- For shorter transitions, 4 bars usually work.
- For a drop, go for 8 or even 16 bars to maximize tension.
Next, focus on the frequency range: risers often start in the lower frequencies (around 60-150 Hz) and gradually shift upward into the mid and high frequencies (3-10 kHz).
What I do is use a high-pass filter sweep starting around 100 Hz and automate it to cut out the lows as the riser progresses, but you can play around with it.
When it comes to timing, you’re going to sync your riser to the track’s BPM using the grid in your DAW to ensure it aligns perfectly.
For example, in a 128 BPM track, a riser spanning 8 bars will naturally grow in intensity as the beat builds.
If you’re using Shepard tones, keep the pitch moving across a full octave to create a sick sense of rising tension without ever sounding like it “resets.”
When you modify this subtle detail, it can make your riser feel infinite (no joke).
Side note, if you’re not familiar with the term ‘Shepard tones,’ it simply refers to a type of auditory illusion where multiple tones are separated by an octave rise/fall in pitch at the same time (creating that feeling of an endlessly rising/falling sound).
Step #3: Layering Elements for Depth
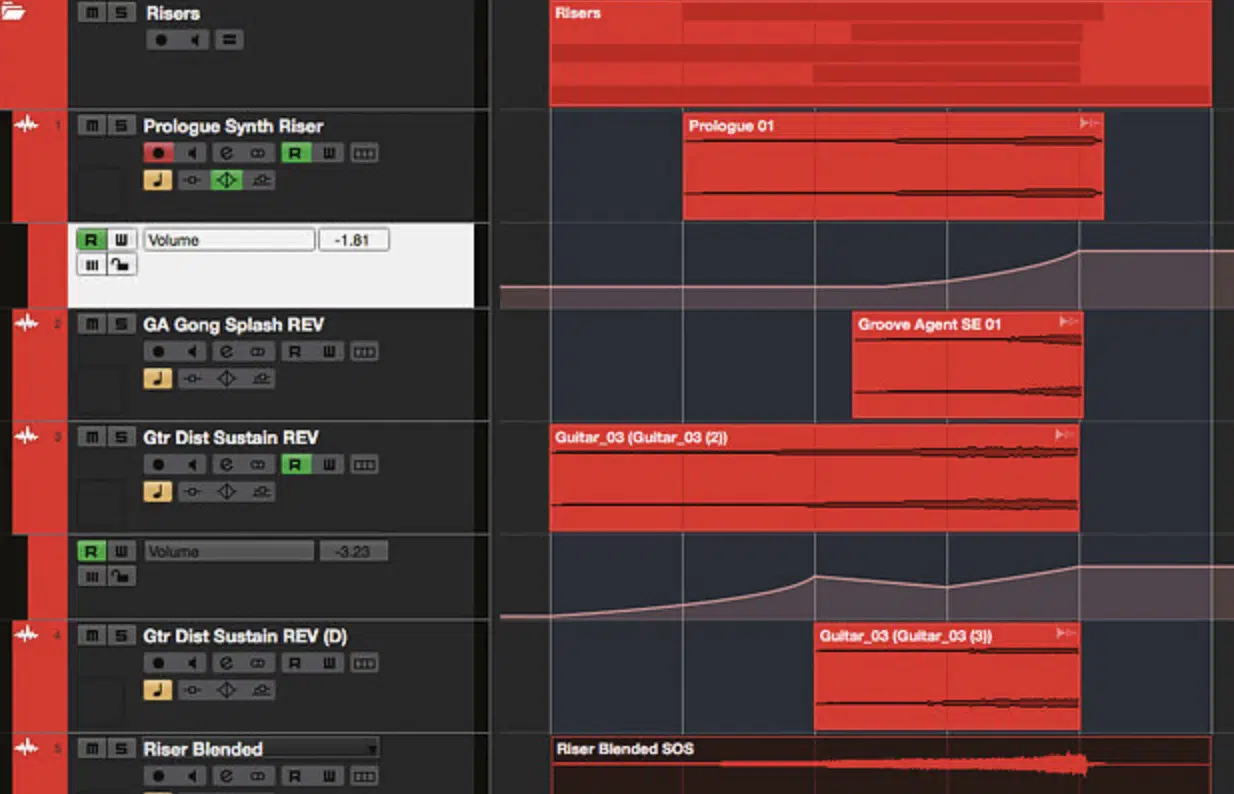
Layering is where risers go from flat to frikkin’ massive, which is kind of the whole point of risers in the first place.
You’ll want to start by combining multiple sounds to create texture, like:
- A synth tone
- White noise
- A foley effect
For example you can pair a rising pitch modulation from your synth with a recording of a string ensemble for a more cinematic touch.
Set the synth layer to start at -24 dB and increase to -6 dB as the string ensemble fades in from -18 dB to -12 dB for an epic blend.
Don’t forget to use your channel strip to adjust EQ and levels 一 making sure each layer has its very own frequency range.
For instance, set the synth layer to dominate the mids (400 Hz to 3 kHz) while the string ensemble fills the highs (3 kHz and above), that kind of thing.
I suggest cutting the lows on your white noise layer with a high-pass filter at 150 Hz to avoid any clashing with the bass.
Blending is key here, so use reverb on one layer with a decay time of 3-4 seconds and delay effects on another synced to your track’s BPM at a dotted eighth-note setting.
A personal favorite trick of mine is to add a rhythmic loop or arpeggiated sound subtly in the background to add movement to the riser.
You can use an arpeggiator in Serum playing 16th notes and automate its filter cutoff to rise from 400 Hz to 8 kHz.
If your layers feel muddy, simply draw automation curves for each element’s volume and pan them slightly left or right (e.g., synth at -20% left and white noise at +20% right).
This will fix the problem and make the mix feel wider, so win-win.
Just remember to keep playing around with different textures until you find a combo that feels powerful and fits your project perfectly.
Step #4: Applying Effects Processing

If you want to see true magic when learning how to create risers, then effects processing is where it’s at.
Start with reverb to give the riser a sense of space:
- For longer risers, set the decay time to 6 seconds and adjust the wet/dry mix to 40% for a lush tail.
- If you’re working on a shorter riser, reduce the decay down to 2-3 seconds and drop the mix to 20-30% to keep it super tight.
In Valhalla Room, for instance, you can use the “Large Hall” preset and adjust the size to 70% for a wide, cinematic feel.
For delay effects, sync them to your track’s BPM and set them to a dotted or triplet note value for extra rhythmic complexity.
If your track is at 128 BPM, set the delay time to a dotted eighth note (375 ms) for rhythmic complexity.
Use a plugin like EchoBoy with the “Studio Tape” preset and set the feedback to 35% for a subtle echo that evolves with the riser.
Using modulation effects like phaser or flanger can also add movement and make the riser feel alive.
For example, in Ableton’s Phaser-Flanger, set the rate to 0.2 Hz, depth to 50%, and mix to 30% for a gentle, swirling effect.
Automate the depth to increase gradually as the riser builds for extra dynamics.
I suggest that you apply a filter sweep using a low-pass filter at the beginning and automate it to gradually open as the riser progresses.
In Serum’s filter section, start the cutoff at 150 Hz and sweep it up to 10 kHz over 8 bars while adding 15% resonance for a more pronounced sweep.
This creates a satisfying crescendo that builds tension in all the right ways.
If you want a little bit of a sharper edge, add distortion or saturation to one of your layers (again, just keep it subtle so it doesn’t overpower the mix).
Lastly, use your DAW’s automation to control the parameters of these effects over time.
For example, ramp up the reverb’s size (30% to 70%) or the filter’s resonance (5% to 20%) as the riser reaches its peak.
Small tweaks like these can make your riser stand out.
Step #5: Automating Parameters for Dynamic Movement
Automation is what makes a riser feel alive and evolving (it will add movement all day). By automating key parameters like pitch, filters, and volume, you can keep things interesting from start to finish. This is key when learning how to create risers. So, let’s break down the most impactful ways to use automation.
-
Pitch Modulation
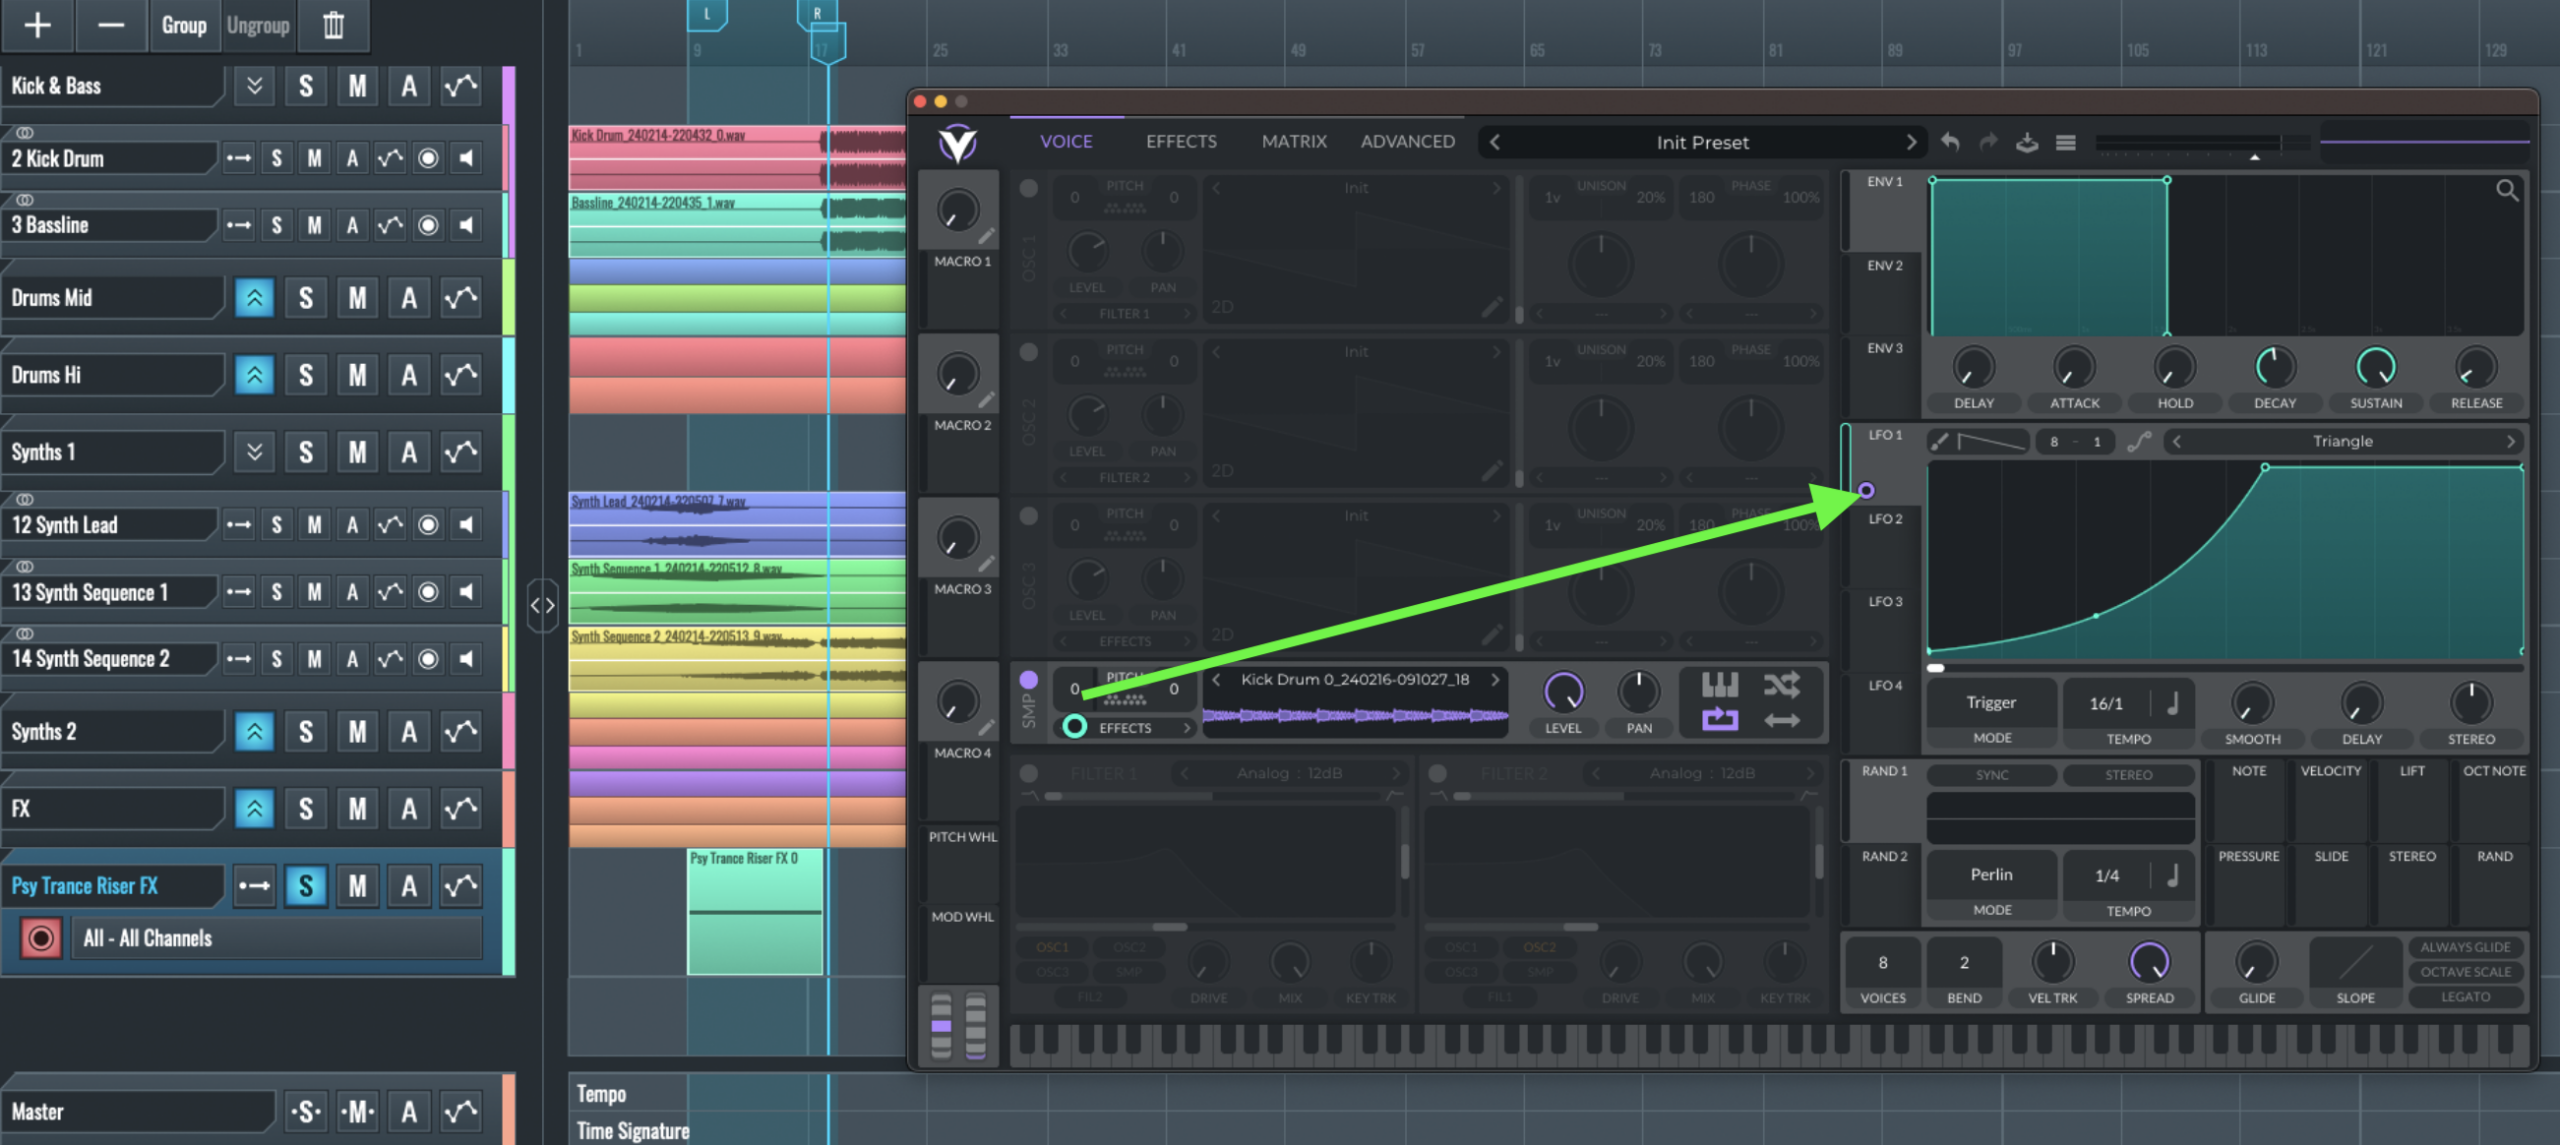
Pitch modulation is one of the easiest ways to create a sense of rise in your sound.
Start by setting a pitch bend range on your synth to a full octave (12 semitones) to ensure the pitch can smoothly transition over the riser’s length.
For example, automate the pitch to start at -12 semitones and rise to 0 over 8 bars.
In Logic or Ableton, you can use the MIDI region pitch automation lane to draw a smooth curve.
Personally, I like using a slightly exponential curve to make the pitch increase faster near the end because it creates more intensity.
PRO TIP: Layer a Shepard tone under your riser to make the pitch feel infinite.
This trick is perfect in electronic music production/dance music when building up to a drop that is meant to shut down the club.
-
Filter Sweeps
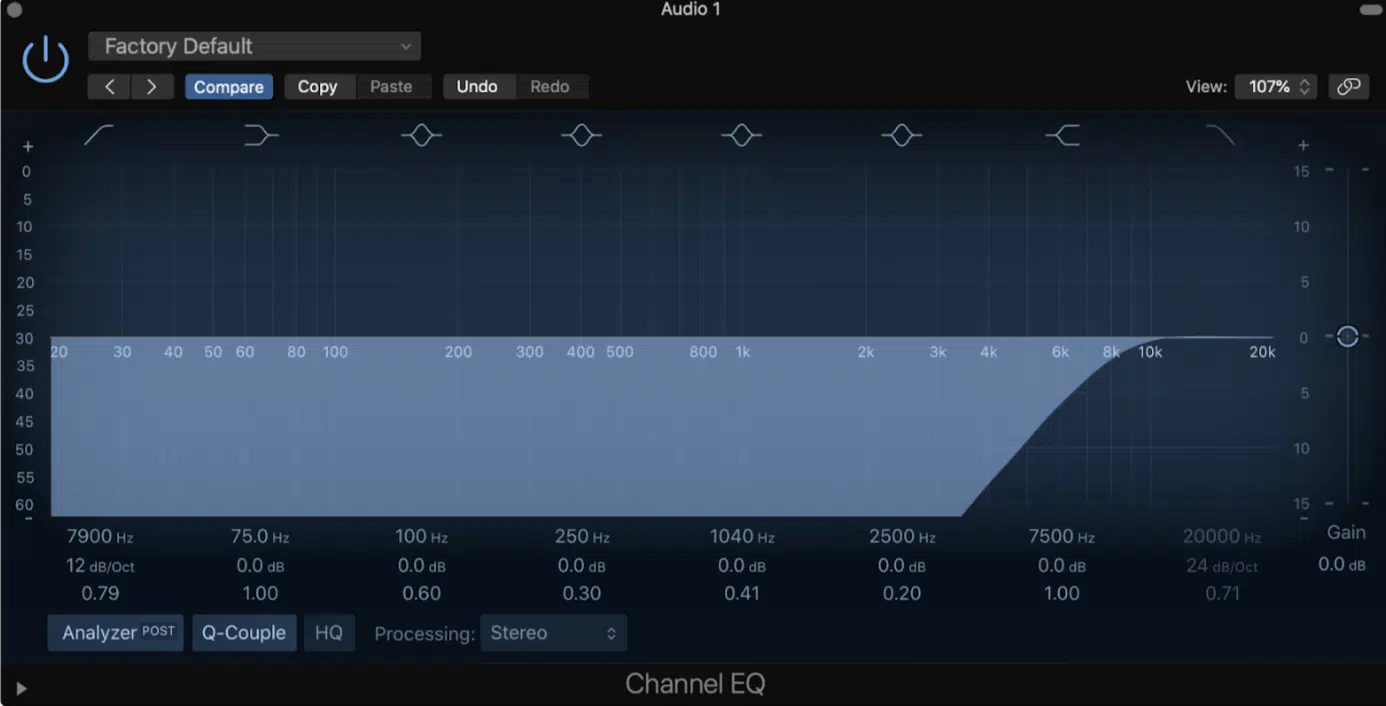
Filter sweeps are a classic way to shape the tonal evolution of your riser, and you’re going to use a low-pass filter cutoff to automate frequencies gradually.
The keyword here being gradually.
For example, set the cutoff frequency at 150 Hz at the start and sweep it up to 10 kHz by the end.
You can do this with the filter on your synth or as a separate plugin on your riser’s channel strip.
If you want a more aggressive effect, try automating the resonance as well.
A resonance peak around the cutoff frequency can add a sharp, almost “whistling” quality that cuts through the mix like butter.
Keep an ear out for muddiness, especially in the lower frequencies and use an EQ to clean up any problem areas.
One of my favorite tricks is to combine filter sweeps with delay effects that increase feedback as the riser progresses (this adds subtle layers of movement to the sound).
-
Volume Automation
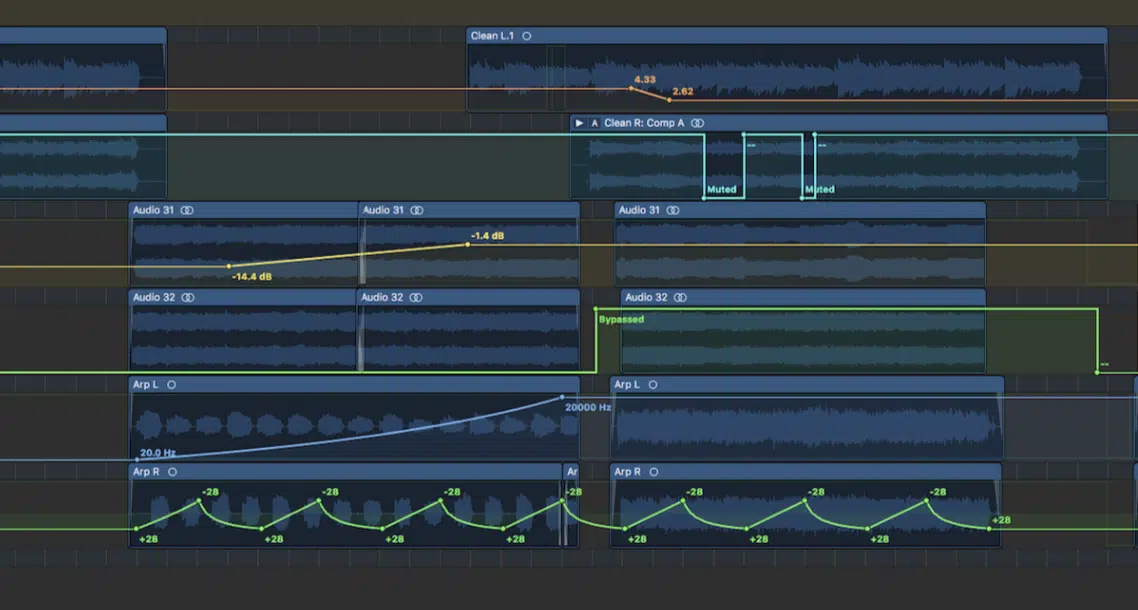
Volume automation is the final piece of the puzzle for dynamic risers.
Start with the volume low (around -20 dB) and bring it up slowly to 0 dB or slightly higher over the riser’s length.
For example, in an 8-bar riser, you can automate a linear volume increase across the timeline; pretty straightforward.
If you’re working with multiple layers, you always want to automate the volume of each layer individually, not all at the same time.
For example, have the white noise layer peak slightly earlier while the main synth layer continues to build because it’s all about staggered energy/hype.
It will keep your riser sounding fresh and unforgettable all the way through.
PRO TIP: Automate a sharp volume cut (like -3 to -6 dB) at the riser’s peak right before the drop 一 this creates an impactful contrast when the full track hits.
You can also use this trick to clean up clutter in your transition moments, just saying.
Step #6: White Noise and Synthesized Sounds
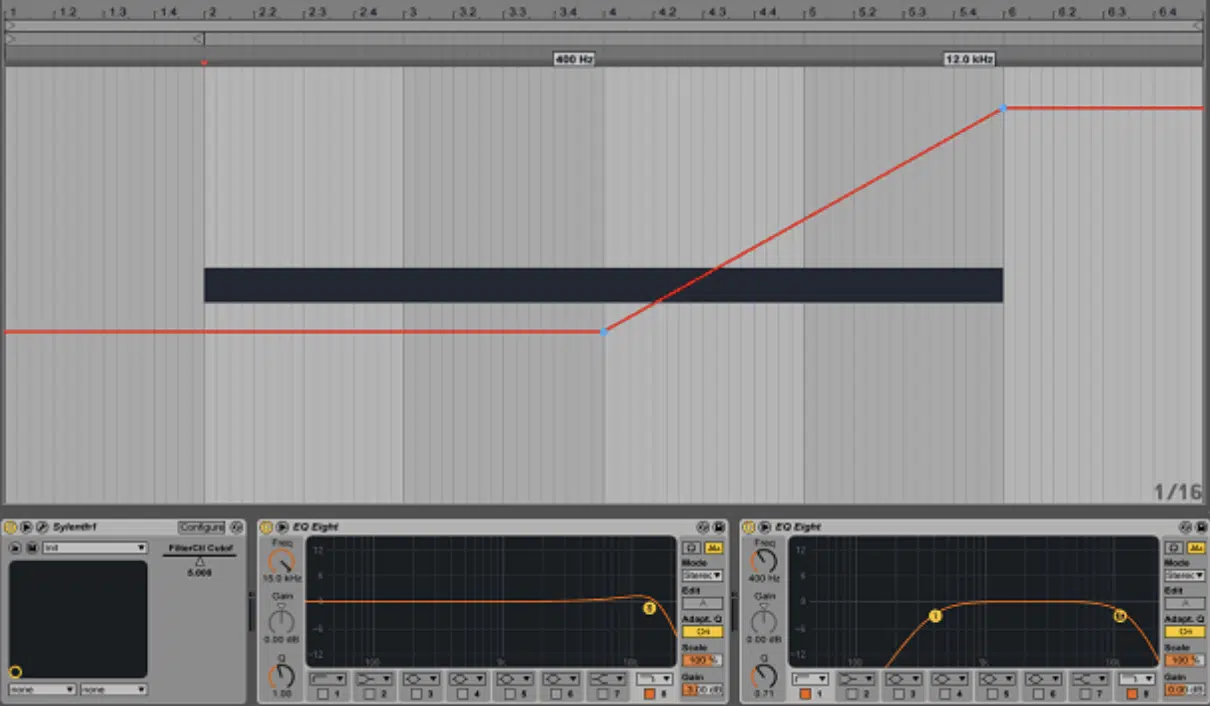
White noise risers and synth-based risers are OGs in electronic music production because they blend flawlessly into most tracks.
To create a white noise riser, start with a basic noise generator in your synth or DAW.
Use a filter cutoff automation to gradually shift the noise from low frequencies (150 Hz) to high frequencies (10 kHz) for a sweeping effect that builds anticipation.
For example, in Serum, set the filter to a 24 dB slope and automate the cutoff over 8 bars for a super smooth rise.
For synth-based risers, select a waveform like a sawtooth or classic sine wave and enable pitch bend.
Set the pitch bend range to a full octave or even two octaves (24 semitones) for a dramatic rise that can instantly captivate.
Layer the synth sound with a subtle reverb to add depth and movement as we talked about before.
When you’re learning how to create risers, combine white noise with a synth riser by panning each element slightly left or right to create a wider stereo image in the mix.
Step #7: Incorporating Rhythmic Elements
Rhythmic elements like snare rolls, drum builds, and arpeggiated patterns can make your risers feel more connected to the track and give you a bigger build-up.
Begin with a basic snare roll that increases in speed over time.
For example, in Ableton, load a snare sample and program 16th notes for the first 4 bars, gradually increasing to 32nd notes for the last 4 bars.
Use velocity automation to start softly (50-70%) and ramp up to full velocity (100%) by the end.
Then, add a touch of reverb to the snare roll, with a decay of 2-3 seconds, to give it more air and space.
Layer this with a drum build by adding kicks or toms that increase in velocity and intensity like placing a kick drum on every quarter note.
And, progressively shorten the note length in the final 2 bars for extra urgency.
Increase the velocity of the tom hits from 70% to 100% and pan them slightly left and right to widen the mix even more (this is an industry must).
Arpeggiated patterns are another great way to add movement to your riser.
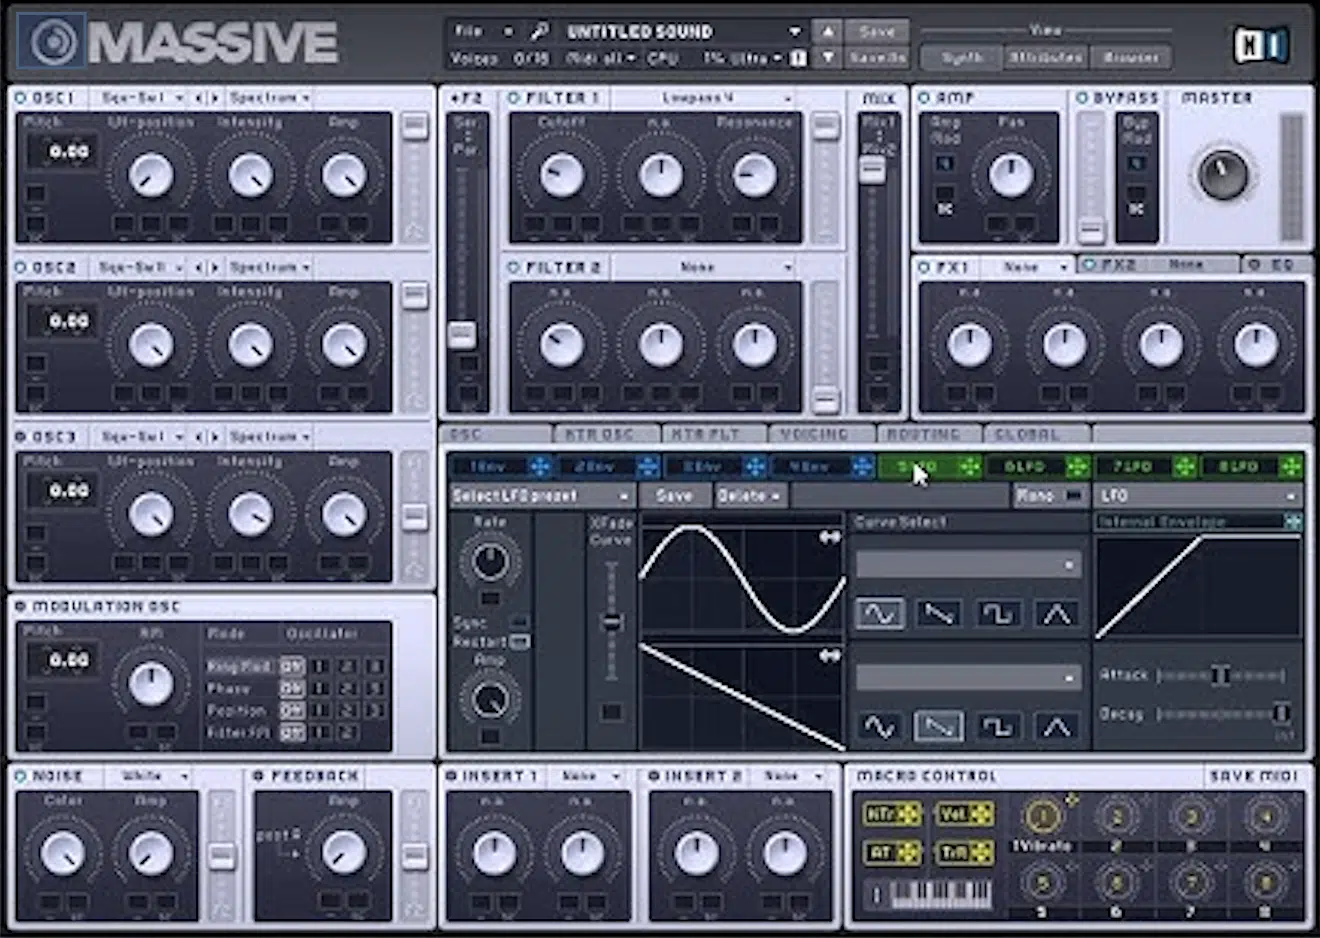
Use a synth with an arpeggiator, like Massive or Serum, and set the rate to sync with your project BPM.
Kick things off with quarter-note arpeggios for the first 4 bars, then transition to 8th or 16th notes in the final 4 bars.
Use a saw wave or pluck preset and apply a filter cutoff automation to gradually brighten the tone (e.g., from 200 Hz to 5 kHz).
A filter sweep can add even more tension to the arpeggio as it rises, and you can even combine these rhythmic elements with subtle delay effects as we talked about.
Advanced Tips for Creating Impactful Risers
Once you’ve mastered the basics, it’s time to step up your game. These advanced tips will help you not only learn how to create risers that will blow minds, but make sure they are super professional as well. So, for this last section, lets dive into the techniques that take your risers from good to jaw-dropping.
-
Advanced Sound Design Techniques
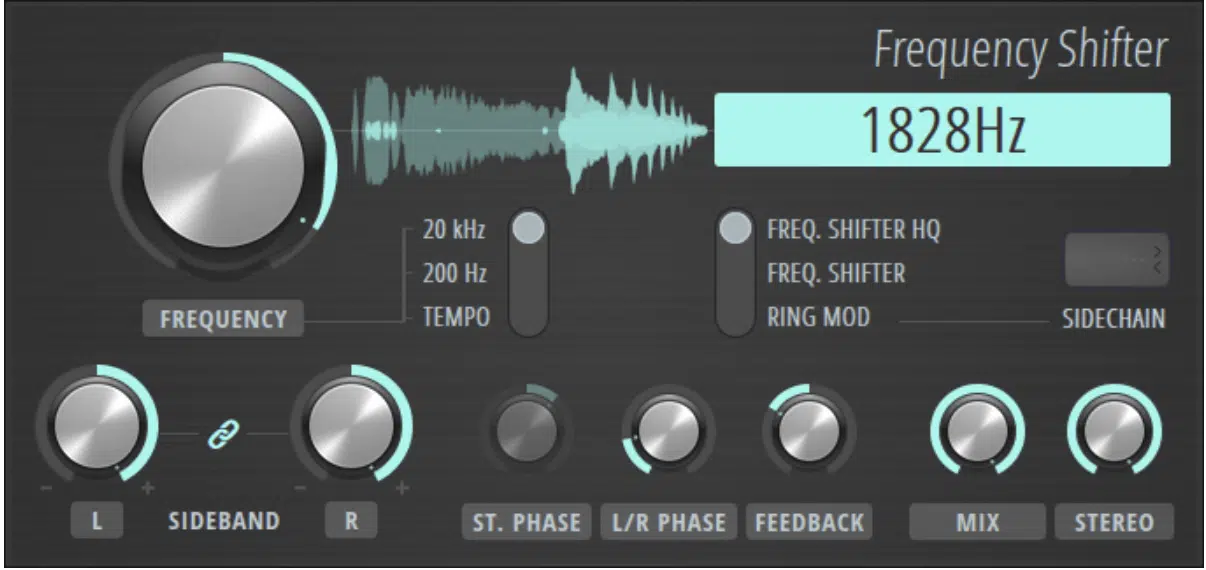
Advanced sound design (my favorite subject in the world) allows you to create risers that feel truly unique and show-stopping.
Try using frequency shifting instead of standard pitch modulation, which creates a more metallic and futuristic tone that is pretty impressive.
For example, using Ableton’s Frequency Shifter, set the fine control to 0 Hz at the start and automate it to rise to +200 Hz over 8 bars.
You’ll want to keep the feedback at around 30% to maintain clarity without introducing too much resonance, so keep that in mind
Another technique is to layer Shepard tones with harmonics that sweep through multiple octaves at the same time 一 giving the riser a cascading, endless effect.
In Serum, use three oscillators:
- Set one at 0 semitones
- Another at +12 semitones
- The third at -12 semitones
Modulate the pitch of all three with a slow LFO and automate the volume of each oscillator so that they fade in and out at different times (infinite riser alert).
Don’t forget to play around with dynamic distortion…
To do so, apply saturation at 20-30% wet to your riser in the early stages, then automate it to fade out as the riser peaks.
Use a multi-band channel strip to isolate different frequencies for separate processing, such as adding delay effects to the highs and reverb to the mids.
For example, apply delay effects to the high frequencies (above 6 kHz) with feedback set to 40% and reverb to the mids (1-6 kHz) with a decay time of 3 seconds.
Just remember to keep the lows clean by using a high-pass filter at 150 Hz.
PRO TIP: Combine granular synthesis with reverse processing by slicing and rearranging textures randomly from a sample pack, then reversing only select slices to build tension.
It’s a pretty solid technique that can add some extra edge, which is always good.
-
Pitch-bending Secrets
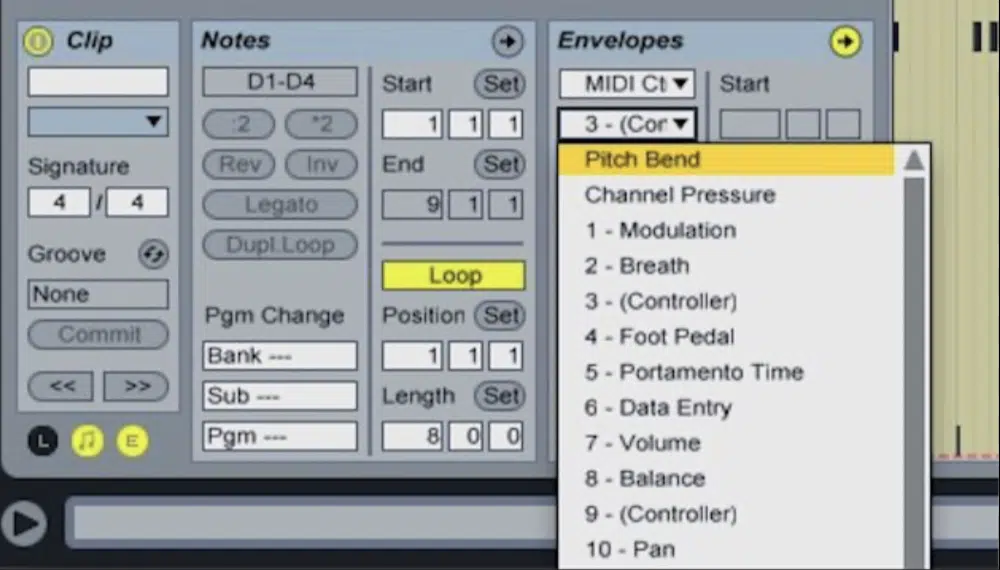
When it comes to pitch bend, layering techniques can take your own risers to new heights that you never even imagined.
Use a synth like Serum to create two layers:
- One bending a full octave
- Another bending only 5 semitones
Offset the pitch bend timings slightly to add complexity and movement.
For a different vibe, apply a sine-shaped pitch LFO to create a wobbly, sci-fi effect that rises consistently (and which people really seem to love).
In Serum, assign an LFO to modulate the pitch with a range of +/- 2 semitones and set the LFO rate to 1/8 sync.
Automate the LFO depth to increase from 10% to 50% by the riser’s peak.
You can also play around with overlapping octave bends like having one layer bend up two octaves (+24 semitones) while another bends down an octave (-12 semitones).
Then, merge them with a filter sweep, setting the cutoff to rise from 300 Hz to 10 kHz over the riser to blend the layers flawlessly.
For ultimate control, use fine-tuned pitch adjustments (+50 cents or -50 cents) on harmonic layers to create subtle dissonance.
I suggest that you automate your synth’s pitch bend range mid-rise 一 starting with a wide range (24 semitones) and narrowing it to 12 semitones near the peak.
This locks the tension right before the drop, making its impact even stronger.
-
LFO Modulation for Movement
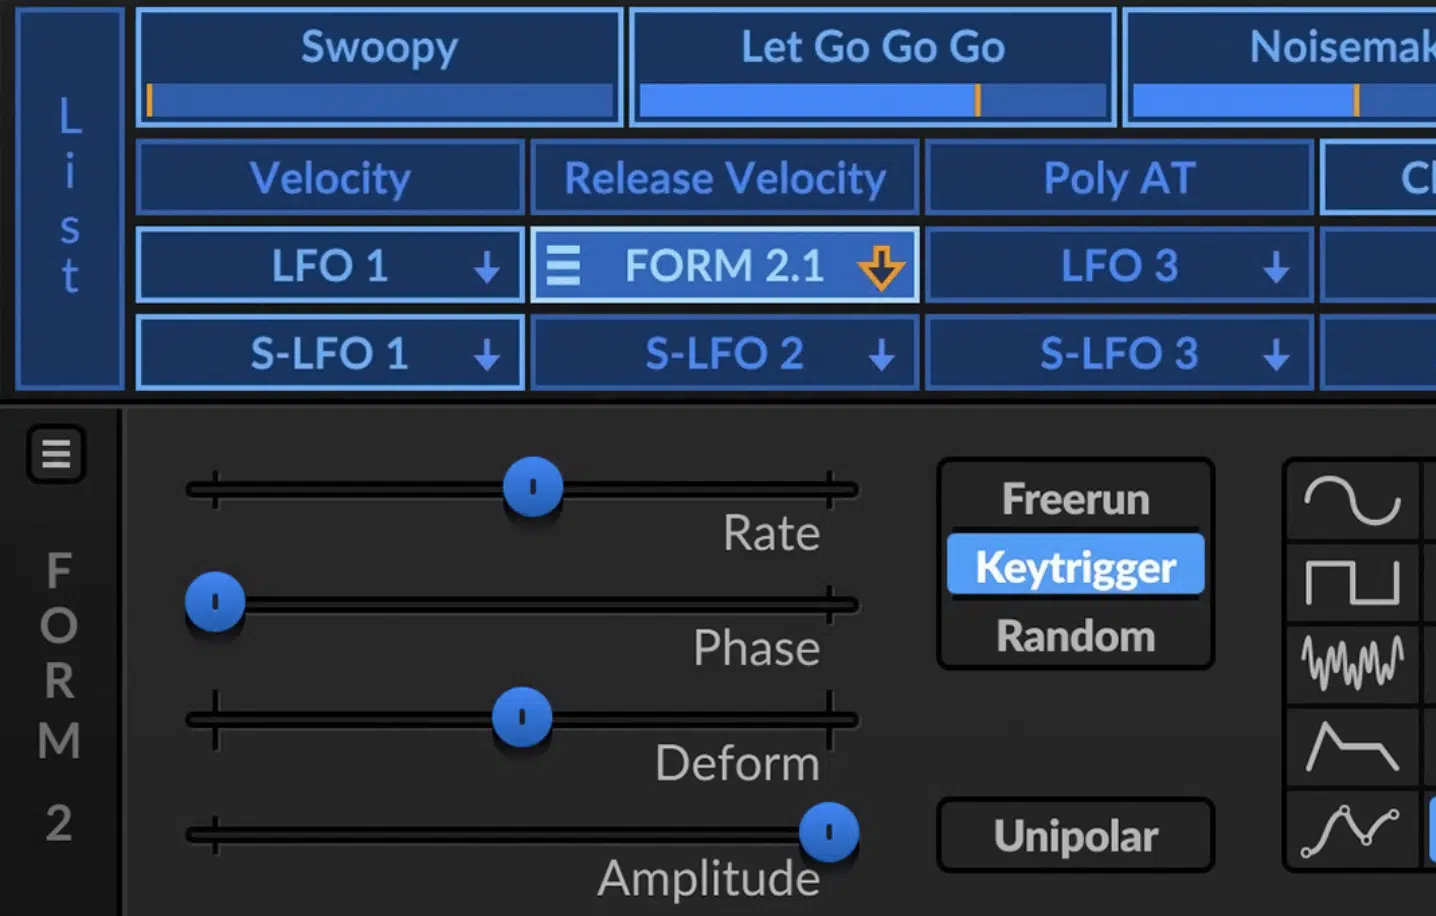
Using LFO (Low-Frequency Oscillator) modulation is an advanced way to introduce rhythmic movement and complexity into your risers.
Start by assigning an LFO to the filter cutoff of your synth.
For example, in Serum, choose a sine wave LFO and map it to the low-pass filter cutoff, then set the cutoff frequency to start at 200 Hz and modulate up to 10 kHz.
You’re going to use an LFO rate of:
- 1/4 sync for slower pulsation.
- 1/8 sync for a faster, more energetic rise.
Adjust the LFO depth to start at 10% and gradually automate it to 70% by the riser’s peak for an evolving effect.
Gradually increase the depth of the LFO modulation as the riser progresses, which will create a pulsating effect that feels alive and even mind-melding if done right.
To take it a step further, assign a second LFO to modulate pitch subtly, keeping the range small (no more than 2-3 semitones) so it adds texture without any detuning.
For example, use a sawtooth-shaped LFO at 1/16 sync to create a quick pitch wobble that adds texture and tension.
Automate the LFO depth from 5% to 25% over the riser to make it feel more dynamic.
PRO TIP: Use multiple LFO shapes (sine and saw, for instance) and layer them for a more intricate, evolving sound.
In Serum, you can assign LFO1 to the filter and LFO2 to the panning 一 creating a stereo effect that oscillates left and right as we touched upon.
Set the pan LFO to a slower rate, such as 1 bar, for a wide, sweeping feel.
Another trick is to automate the LFO speed itself, starting slower and increasing near the riser’s peak.
Start with the LFO rate at 1/2 sync for a gradual rise and increase it to 1/16 sync near the riser’s peak (in Ableton, map this to a macro knob for precise control).
Combine this with LFO modulation of resonance to add sharpness and intensity at key moments.
This keeps the audio unpredictable and engaging for even more tension before the drop.
Final Thoughts

When you’re learning how to create risers, it’s all about layering sounds, automating parameters, and keeping your listeners hooked with evolving movement.
You have to experiment with different textures and effects, and always push the boundaries with advanced techniques.
Plus, add your own personal edge, play around with unique sounds, and never, ever settle for something that doesn’t hit just right.
Luckily, by using the tips, tricks, and techniques we talked about today, you’ll be knocking out epic risers all day long.
This way, your tracks will always feel professional, engaging, and packed with energy.
And, as an added bonus, you’ve got to check out these 20 mind-blowing Free FX that will completely change the game.
They’re the best way to add ear candy and intrigue to your music so you can grab your listeners attention and keep them hyped up throughout.
You’ll be getting industry-renowned risers, impacts, downlifters, miscellaneous sounds, and so much more.
They’re not only versatile but insanely high-quality as well.
Plus, they’re created by the best sound designers in the game and are all 100% royalty-free, so you can use them however you want.
Trust me, you don’t want to miss out, especially when you’re first learning how to create risers because you’re getting the best examples in the world.
Remember, risers aren’t just transitional tools 一 they’re show-stopping moments that set the stage for your track’s biggest impacts.
So, keep exploring, experimenting, and refining, and your risers will not only impress but inspire (and hopefully blow some minds in the process).
Until next time…


Leave a Reply
You must belogged in to post a comment.