Learning how to set up your master bus properly is super important because it’s the key to a fluid, flawless, professional mix.
Plus, it will make your mix bus processing smoother, keep your tracks balanced, and make sure everything sounds great on any playback system.
As producers, you’ll have to know all the following techniques in order to achieve a polished sound.
And avoid common pitfalls as well of course, like clipping, muddiness, or harsh frequencies (because, let’s be honest, nobody has time for that).
That’s why I’m breaking down everything you need to know about how to set up your master bus, like:
- The basics of mix bus processing ✓
- How to properly manage your signal flow ✓
- Essential gain staging techniques ✓
- Adding subtle EQ adjustments for tonal balance ✓
- Using master bus compression the right way ✓
- Enhancing width with stereo bus processing ✓
- Tools like saturation for warmth ✓
- The importance of monitoring dynamic range ✓
- Avoiding common mix bus mistakes ✓
- Music production musts ✓
- Much more about how to set up your master bus ✓
By knowing all about how to set up your master bus like a pro, you’ll be able to add depth, clarity, and cohesion to your mixes.
Plus, your tracks will always sound polished, dynamic, and well-balanced.
This way, you can bet your bottom dollar your work will stand out and sound incredible on any platform or playback system.
Table of Contents
- What is My Master Bus?
- How to Set Up Your Master Bus: Step-by-Step
- #1. Signal Flow: Setting Up the Master Mix Bus
- #2. Gain Staging Basics
- #3. Applying Subtle Equalization
- #4. Using Compression for Glue
- #5. Adding Harmonic Saturation
- #6. Mid-Side (M/S) Processing
- #7. Stereo Imaging
- #8. Limiting and Dynamic Range
- #9. Parallel Processing on the Master Bus
- #10. Multiband Compression
- #11. Phase and Polarity Considerations
- #12. Analyzing Loudness and Frequency Balance
- #13. Automating the Master Bus
- Bonus: Common Mistakes to Avoid
- Final Thoughts
What is My Master Bus?
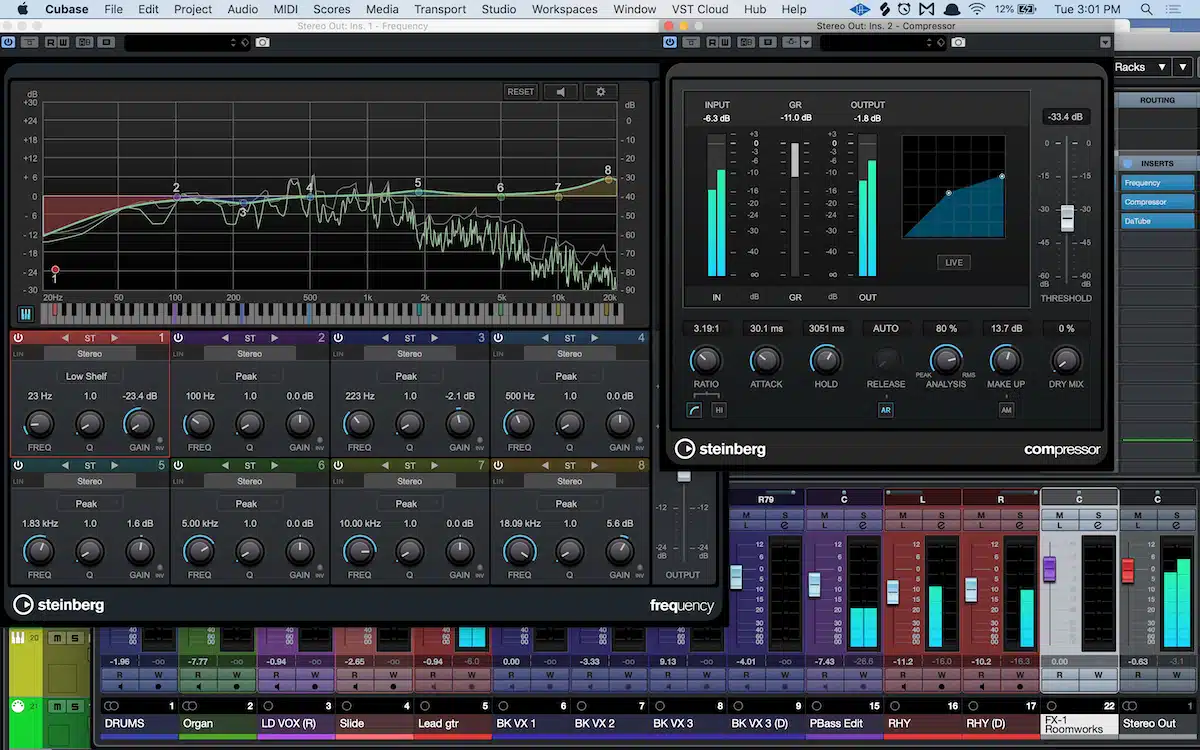
Your master bus is the final stereo channel where all the tracks in your session come together before being output to speakers or exported as a mix.
It’s like the control center for your entire mix that lets you process the overall sound with tools like EQ, compression, saturation, etc.
This way, everything feels cohesive and polished 一 getting your track ready for the next and final stage: the master.
Note: When discussing the master bus in relation to a mix, it’s confused with the master bus in the mastering stage a lot, but these are two very separate processes.
Just know, in this article, we will focus on processing your master bus in the mix session (the final stage of processing before moving on to your master session/bus).
Unlike individual tracks or buses, such as the drum bus, the master bus affects the whole mix.
This makes it a vital for achieving a professional sound that translates across different playback systems so it sounds on point no matter what.
Many professional engineers including myself consider the master bus a critical part of the mixing process, so don’t overlook it.
Small adjustments here can help your track sound balanced and glued together every single time so you don’t look like an amateur.
By understanding your master bus and how it works, you’re setting yourself up to make your mix really stand out.
Now, let’s dive into how to set up your master bus step-by-step so you can get a solid understanding and never have to second-guess yourself again.
How to Set Up Your Master Bus: Step-by-Step
Learning how to set up your master bus is all about creating a signal chain that enhances your entire mix without overpowering it. So, here’s a breakdown of the 13 essential steps you need to follow to master the art of mix bus processing like a boss.
#1. Signal Flow: Setting Up the Master Mix Bus
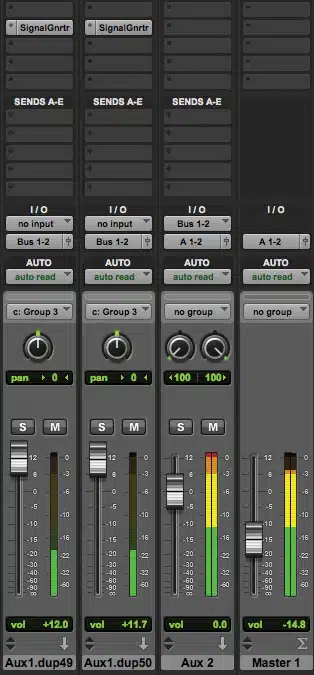
The signal flow of your master bus determines how your entire mix gets routed and processed, so getting it right from the jump is key.
First, you’re going to route all individual tracks (like vocals, drums, and instruments) to their respective sub-buses, such as a drum bus or a vocal bus.
All before sending those sub-buses to the master bus.
For example, in Logic Pro, you can assign the output of your drum bus to “Stereo Out” (your master bus/fader) through the routing options in your DAW’s mixer panel.
This makes sure every part of your mix hits the master bus cleanly, without overloading it, of course.
Understanding pre-fader vs. post-fader sends is also super important, so let’s talk about that for a minute.
- A pre-fader send routes audio to the master bus (or whatever its designated output is) before the track’s actual volume fader affects it.
- A post-fader send includes the volume adjustments.
Generally, you’re going to use post-fader routing for consistency in the final balance like most mix engineers do.
With that said, they both have a place, such as routing your reverb and delay sends pre-fader so you have full control of the levels of those signals going into the send processor without fader adjustments in the mix altering its effect.
Finally, always make sure your signal flow leaves at least around -6 to -12 dBFS of headroom on the master fader.
This gives you more control during master bus processing and ensures that no clipping is going on.
This level is just temporary and will be adjusted towards the final stage of your mix to bring it to optimum levels to meet the audio standards you’re aiming to achieve.
NOTE: Use a metering tool like iZotope Insight 2 or your DAW’s built-in meter to keep an eye on levels, not just when you’re learning how to set up your master bus, but always.
#2. Gain Staging Basics
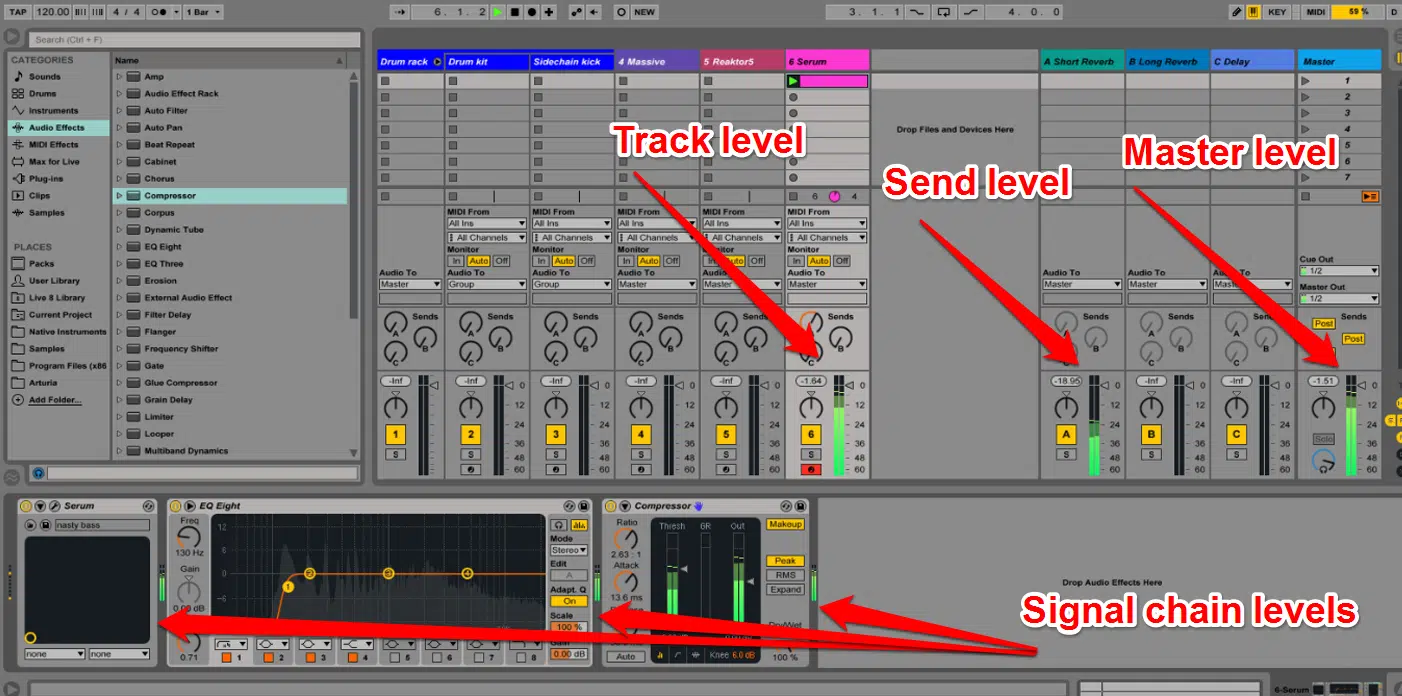
Proper gain staging is the foundation of a clean, dynamic, great mix and ensures your master bus processing is on point.
You’ll want to start by setting all track levels so they’re well below 0 dBFS 一 aim for peaks around -12 to -8 dBFS on the master fader.
This will give you enough headroom to add master bus effects like EQ and compression without introducing unwanted distortion.
Make sure to use tools like VU meters or peak/RMS analyzers to monitor levels as you adjust and avoid relying on a single track’s volume…
Instead, balance the individual tracks within their sub-buses so that all buses contribute evenly to the overall mix.
Don’t forget to always monitor your dynamic range to keep the mix punchy yet controlled, especially when you’re first learning how to set up your master bus properly.
This step alone can make the final mix sound balanced and professional, even before you start adding any other processing.
Remember that clip gain is also important, too… You don’t ever want to adjust your faders unnecessarily or too drastically.
When I’m gain staging, I like to make sure the tracks are at roughly the same levels with the faders zeroed out (at default).
I personally aim for around -12 dBFS myself, but it’s dealer’s choice really.
Then, I use the “faders up” method by bringing all the faders down to the lowest level (-inf) then play the track, and from there, I start bringing the faders up.
This way, I always get a good balance in real-time for all the signals.
NOTE: I use the faders more for leveling and rely on clip gain for the bulk of the true gain staging process, which I encourage you to try out, especially if you’re first learning how to set up your master bus.
-
Pro Tip: Starting with a Clean Slate
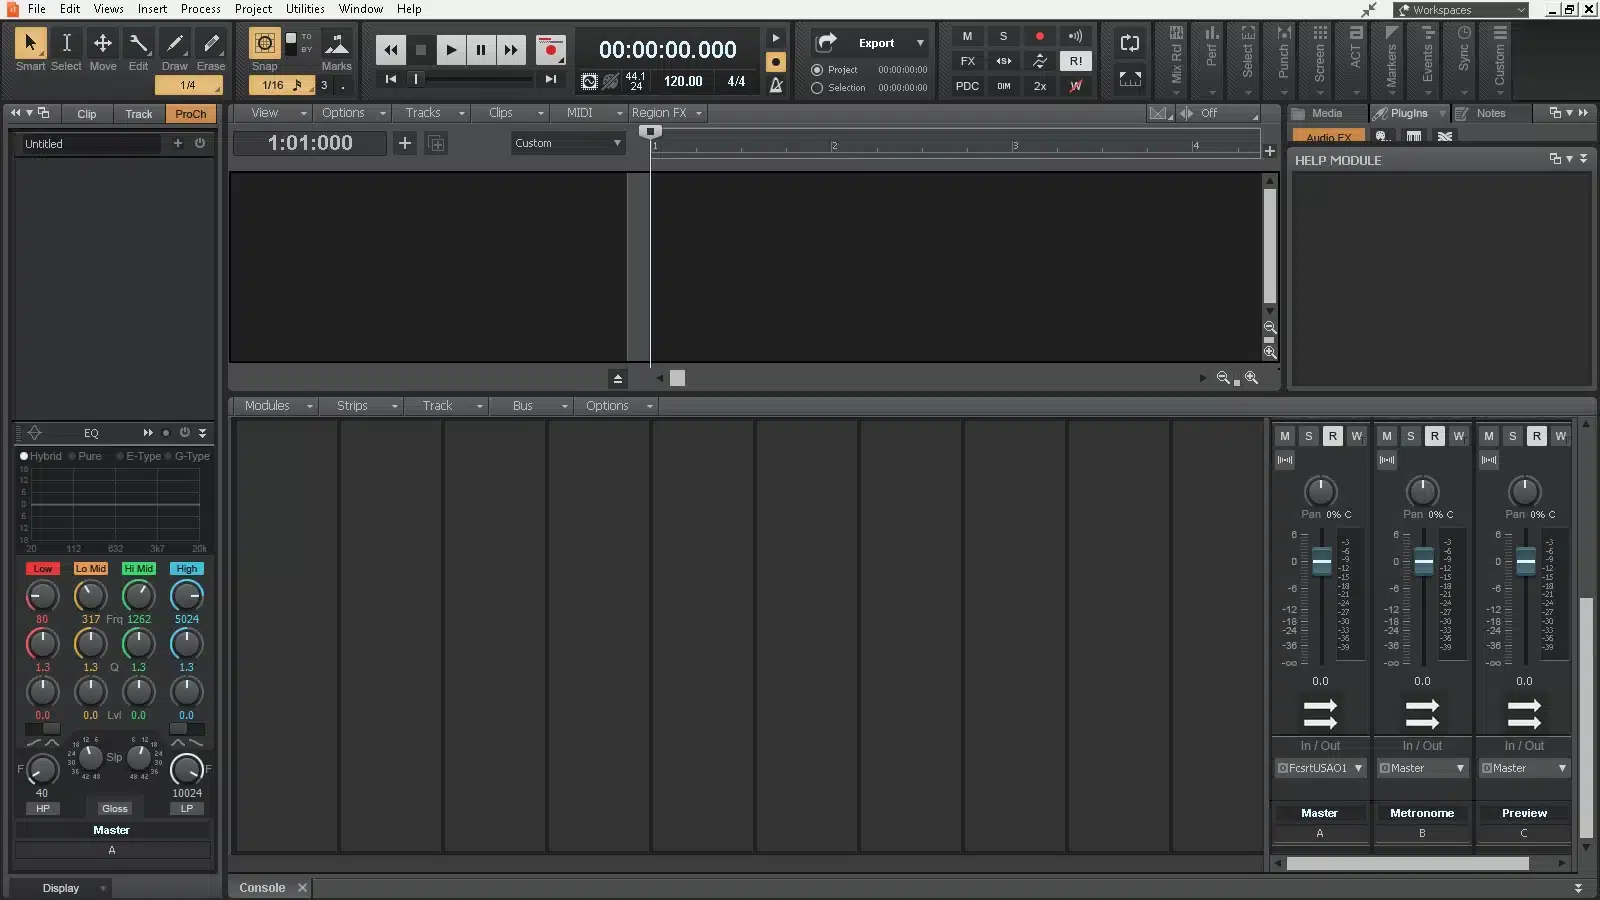
Before you dive into detailed processing, start with a clean slate by removing any default plug-ins or settings applied to your master bus by your DAW.
Many DAWs, like Ableton Live, load the master fader with EQ or limiters that may interfere with your workflow.
Strip these away to avoid unnecessary coloration and distortion, and then create a custom master bus template with your preferred starting chain…
This could include an analyzer, a subtle EQ, or even a gain plugin to monitor levels consistently.
This setup will save you some serious time and help you ensure that your master bus effects are intentional and tweaked to your mixing style.
#3. Applying Subtle Equalization

Equalization (EQ) on the master bus is all about subtlety, because even small tweaks can dramatically improve the overall mix.
Start with low-end cleanup by applying a gentle high-pass filter at around 20-30 Hz to remove inaudible sub-bass frequencies that can muddy your sound.
Don’t go much higher than that, as you will unintentionally impact the sub-bass, even if it’s something you may not be hearing on your playback system.
For example, using an EQ like FabFilter Pro-Q 4, set the filter slope to 12 dB/octave to preserve the integrity of the audible low end while eliminating unnecessary rumble.
Next, focus on polishing the high-end to add clarity without making your mix harsh, muddy, or unprofessional.
A slight boost of 1-2 dB at 12 kHz or above can bring out the shimmer in:
- Vocals
- Cymbals
- Other high-frequency elements
Be cautious not to overdo it though, I can’t stress this enough, and always A/B your adjustments using a reference track to ensure you’re enhancing, not exaggerating.
Finally, cut or tame resonant low-mids between 200-400 Hz if the mix feels a bit muddy.
Subtle EQ adjustments here can make the entire mix sound more open and balanced without affecting the individual tracks directly.
Even if you know exactly how to set up your master bus, you’d agree that keeping things subtle is the way to go, so for my newbies, please trust me on this.
#4. Using Compression for Glue
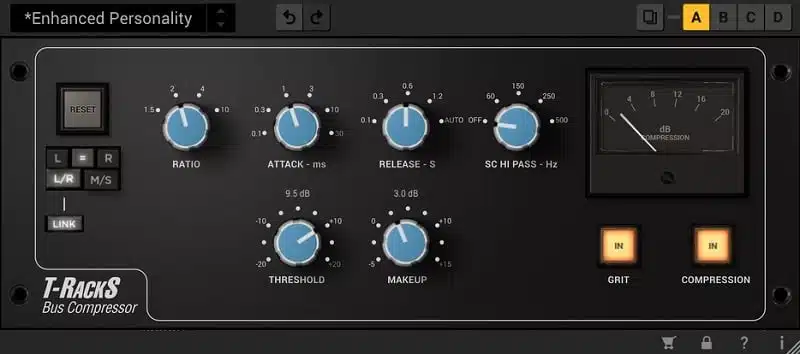
Compression on the master bus is another powerful technique that can glue the entire mix together, making it feel cohesive and professional.
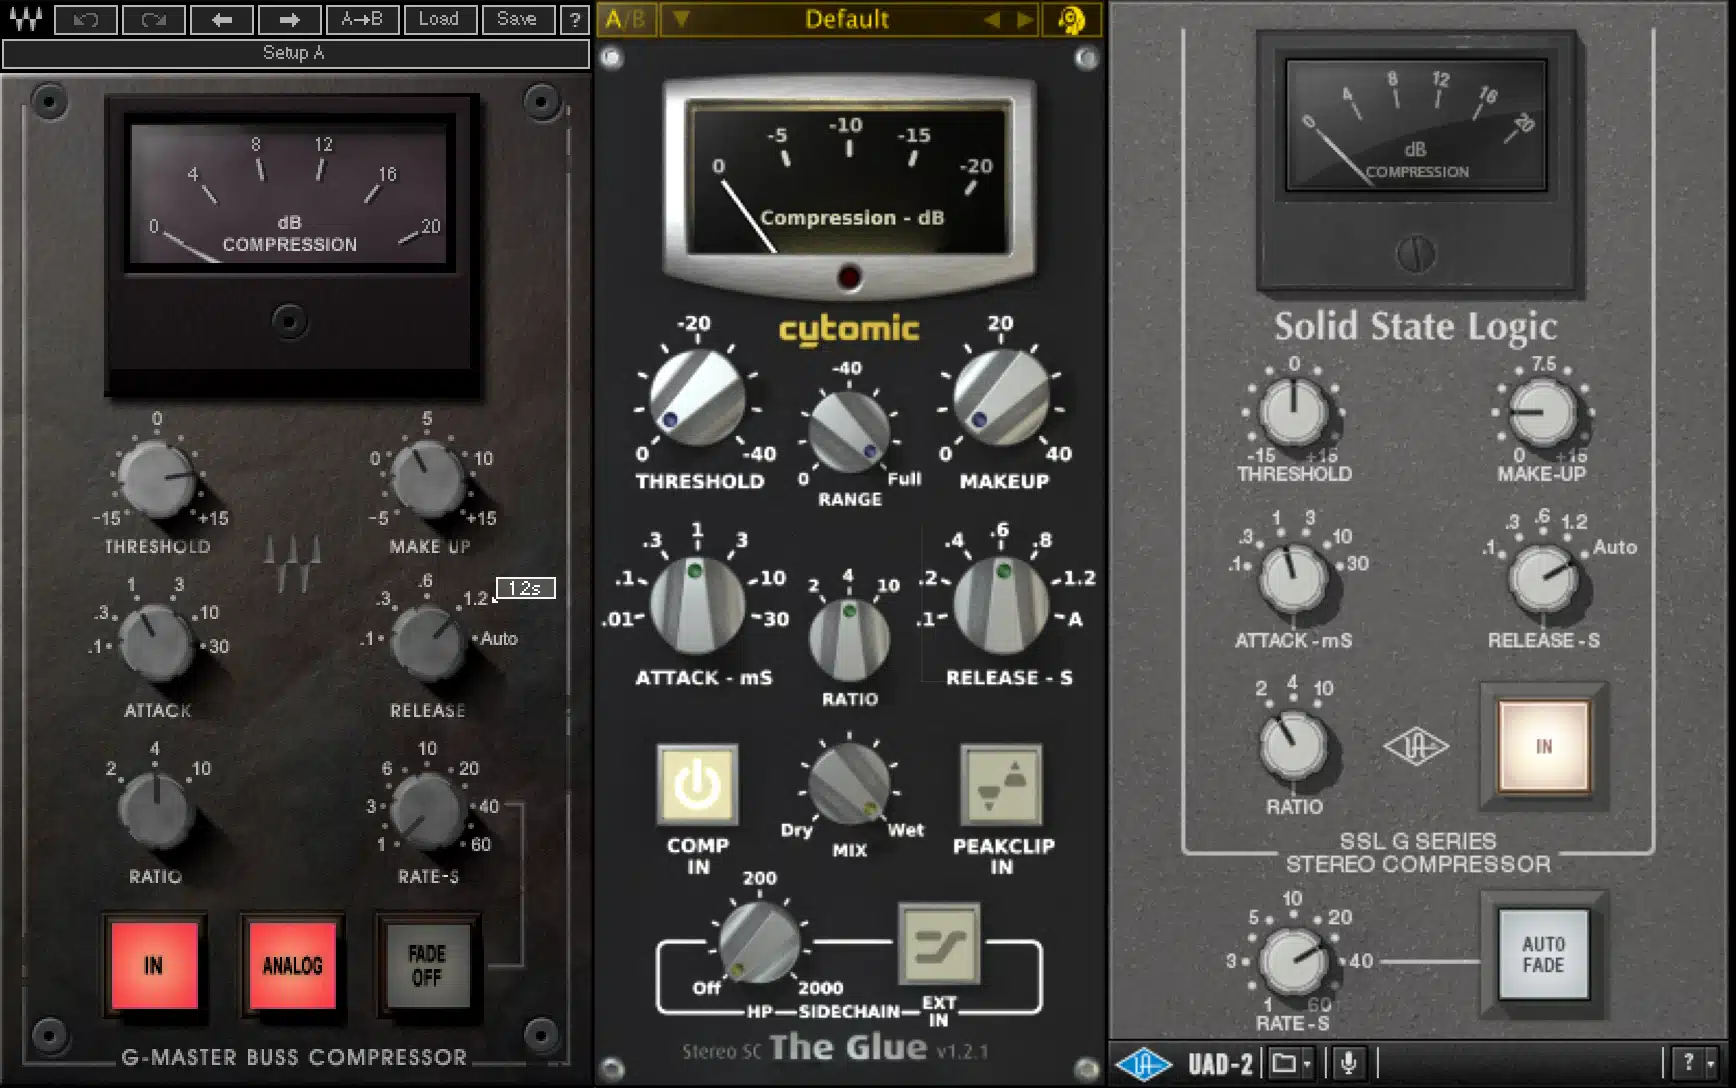
Start by setting up mix bus compression with a trusted compressor like the SSL G-Master Bus Compressor or Waves API 2500.
Use a ratio of 2:1 or even my preference, as low as 1:1.5, which is light enough to avoid squashing the dynamics while still controlling transients properly.
Set the attack time to a relatively fast setting, such as 20-30 ms, to allow transients like drum hits to pass through before compression kicks in.
For the release, a fast release of 50 ms works well to maintain a lively feel, but if your mix needs a smoother vibe, consider an auto-release option.
Aim for gain reduction of no more than 1-2 dB… Anything more than that can over-compress the mix and make it sound flat.
Always pay attention to the effect on the stereo image, as compression can inadvertently narrow the sound field.
When you’re learning how to set up your master bus, this is super important.
NOTE: Again, use a reference track to compare the pre- and post-compression dynamics to make sure you’re adding cohesion without losing punch.
This will help make your mix sound polished and glued together while keeping its dynamic range intact and solid.
#5. Adding Harmonic Saturation
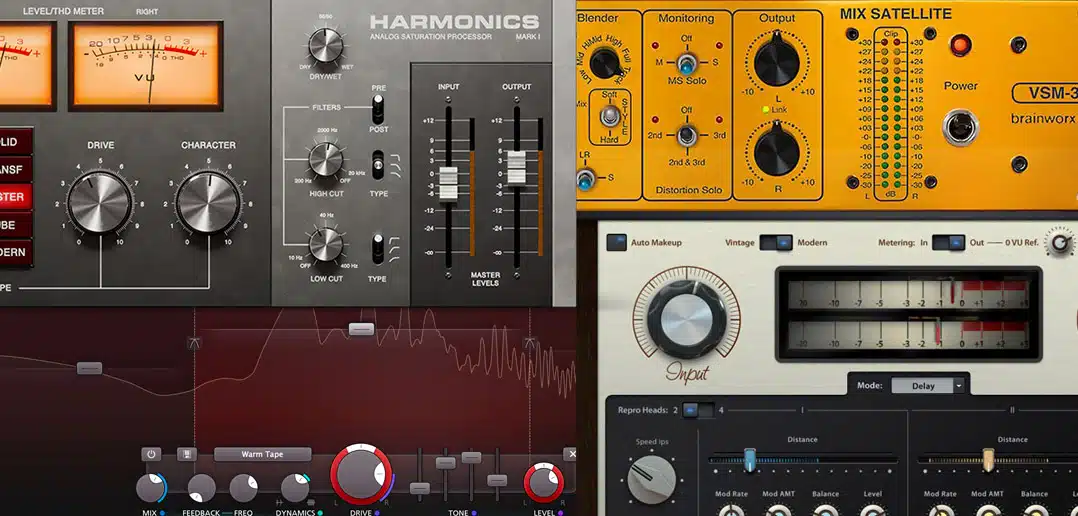
Adding harmonic saturation to the master bus is a great way to achieve a warmer sound and enhance the mix’s overall character.
Saturation adds subtle harmonic distortion, filling out the frequency ranges and giving the entire mix a rich, analog feel that is really awesome.
For example, a plugin like Softube Tape or Slate Digital Virtual Tape Machines can simulate tape saturation beautifully.
It adds that touch of warmth to the low end and sparkle to the highs.
For settings, keep the saturation level subtle—around 10-15% wet/dry mix—to avoid over-coloring the sound.
NOTE: If you’re going for tube saturation, plugins like UAD’s Tube-Tech CL 1B are excellent for gently enhancing the stereo image and creating a more dynamic mix.
Another tip is to use saturation as a layer…
To do so, apply it in parallel for more control, blending the processed signal back with the original to retain clarity.
Remember, the goal is not to distort but to enhance, and remember to always listen critically and A/B the effect (yes, I’m going to say it a million times).
Proper use of saturation can help make your mix really stand out with a polished sound, especially when paired with careful EQ and compression.
#6. Mid-Side (M/S) Processing
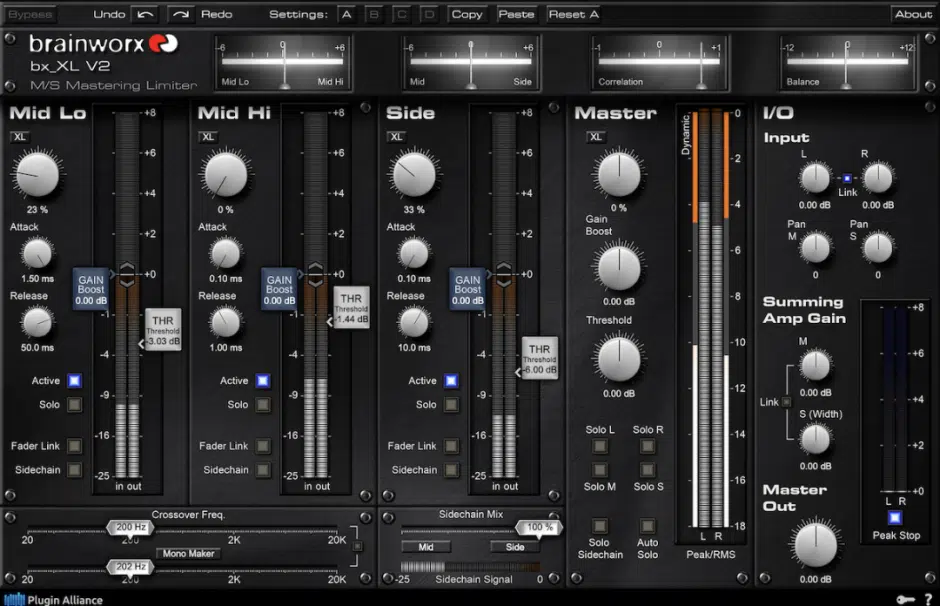
Mid-Side (M/S) processing is a game-changer for achieving precise control over the stereo image on your master bus.
If you’re learning how to set up your master bus, you certainly can’t overlook this one.
- The “mid” channel contains elements panned to the center, like vocals/kick/bass.
- The “side” channel handles the stereo width of instruments and effects.
Using an M/S-capable EQ like FabFilter Pro-Q 4, you can target specific frequency ranges to widen the sides or clean up the mid.
For example, a subtle cut at 250 Hz in the mid channel can remove muddiness without affecting stereo clarity, while a slight boost at 10 kHz on the sides adds airiness.
M/S compression is another great one for managing dynamics across the mix.
A slow attack on the mid channel helps preserve transient energy in the center, while a fast release on the side channel controls reverb tails and stereo effects.
Too much M/S processing can make the entire mix feel disjointed, so watch out.
Incorporating M/S processing into your master bus processing is an intricate yet essential step when learning how to set up your master bus the right way.
NOTE: This would not be in addition to the EQ and compression we discussed above, but rather an alternative.
It’s a more advanced method of achieving the same effect 一 letting you get more fine-tuned results which is always great.
#7. Stereo Imaging
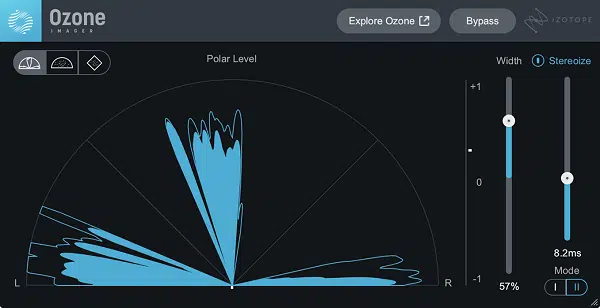
Stereo imaging is super important for making your mix bus sound wide and immersive without compromising mono compatibility.
Start with a stereo analyzer tool like iZotope’s free Ozone Imager to visualize the stereo field and, if your mix feels narrow, simply use a stereo widener.
You have a bunch of options to choose from, like iZotope’s free Imager 2 or Waves S1 Imager to enhance the width subtly.
For example, widening the high-frequency ranges by 10-15% while keeping the low end centered can maintain clarity and impact.
When applying stereo bus processing, just be careful because over-widening can cause phase issues and make the mix sound unbalanced on mono systems.
Use a phase correlation meter to ensure your adjustments stay within the safe range.
Always ensure to mix in mono, switching back and forth, especially when adding and adjusting stereo imaging and spatial effects.
Another tip is to widen specific elements rather than the whole mix… For example, boost the stereo width of reverb tails or high-frequency pads instead of vocals or bass.
Always compare with a reference track to see how your mix stacks up, and if you’re first learning how to set up your master bus, this is non-negotaible.
Proper stereo imaging can help your track sound professional and dynamic, locking down its place in the final stereo channel.
#8. Limiting and Dynamic Range
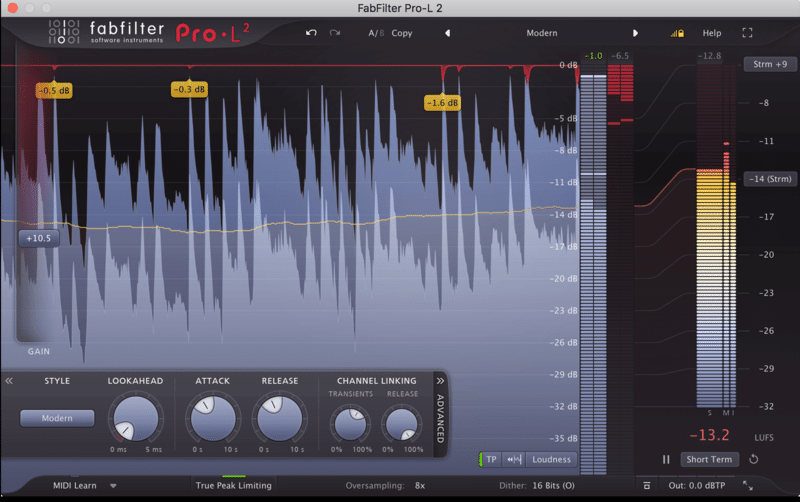
When you’re learning how to set up your master bus, you can’t forget about limiting because it’s essential for controlling peaks and making sure your final mix doesn’t clip.
Use a trusted limiter like FabFilter Pro-L 2 (my absolute fav) and set the ceiling to -0.3 dB for digital exports to avoid inter-sample peaks.
Start with a threshold that achieves 1-2 dB of gain reduction so you’re taming transients without squashing the dynamic range.
The release setting is crucial:
- A fast release of 30-50 ms works well for energetic mixes.
- An auto-release setting can adapt dynamically to slower tracks.
Always keep an eye on loudness meters to ensure your mix remains at an appropriate LUFS level for the genre you’re producing because it makes a big difference.
A common target is around -14 LUFS for most streaming platforms, but make sure to always look at the specifics.
Limiting is a key part of master bus processing, so you’ll want to compare the limited version with a reference track (seriously, do NOT overlook this).
This way, you’ll get a better sound without sacrificing any clarity, because otherwise things can sound a bit dull and… blah.
Knowing how to set up your master bus properly will guarantee that your limiter enhances the mix rather than completely destroys it.
#9. Parallel Processing on the Master Bus
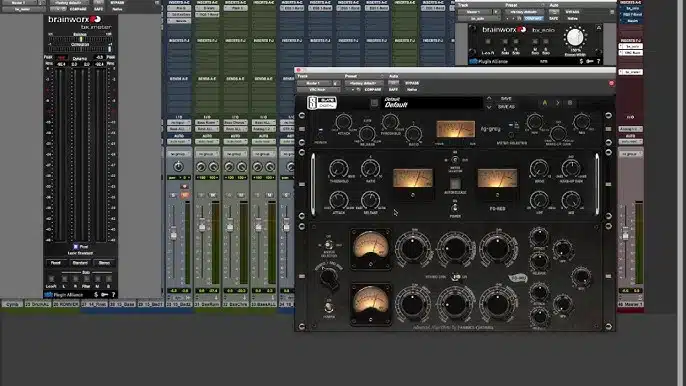
Parallel processing on the master bus is also a fantastic way to enhance your mix bus without killing its natural dynamics.
For parallel compression, start by duplicating the signal chain and applying a compressor like the Waves API 2500 on the parallel track.
Set the compression ratio to around 4:1, with a slow attack (10-20 ms) to let transients punch through and a fast release (50-60 ms) for quick recovery.
Remember, when you’re dealing with this type of compression, it’s okay to overdo or “squash” the signal you’re compressing.
Using a much higher ratio works well since you are blending it with an uncompressed version of the signal, but it all depends on the effect you’re looking for.
Blend this compressed signal back into the main mix bus at a low level, typically around -15 to -20 dB, to add punch and sustain without flattening the dynamics.
For parallel EQ, focus on enhancing specific frequency ranges.
For example, apply a boost of 2-3 dB at 100 Hz to thicken the low end or 8 kHz to add sparkle, then mix it subtly into the main signal.
Be sure to monitor for phase issues by using your:
- Ears
- Eyes (watch for unintended volume reduction)
- Phase correlation meter
All three are key because phase issues present themselves when using parallel EQ all the time no matter how versed you are.
On the same note, parallel saturation using plugins like Softube’s free Saturation Knob can add subtle saturation to create warmth and harmonic edge.
My advice is to automate the parallel track during drops or choruses to enhance impact 一 helping the entire mix sound polished and professional.
Incorporating these techniques into your mix bus processing is an advanced but essential skill when mastering how to set up your master bus.
PRO TIP: Using AUX channels is a great way to manage parallel effects like reverb or compression while keeping your master bus processing clean and organized.
When learning how to set up your master bus, route parallel effects through dedicated AUX channels to maintain control and prevent clutter on the main signal chain.
#10. Multiband Compression
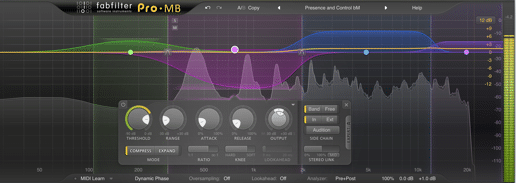
When you’re learning how to set up your master bus, multiband compression is another OG for controlling dynamics across different frequency ranges on your master bus.
Unlike standard compression, it allows you to isolate specific bands (e.g., low, mid, and high frequencies) and apply compression settings based on what works best.
For example, use a threshold of -24 dB on the low band to control sub-bass energy.
Set a ratio of 3:1 and a medium attack/release setting to keep the bass tight without overwhelming the entire mix.
For the midrange (where vocals and guitars often dominate), make sure to apply lighter settings 一 use a 2:1 ratio with a faster attack and release to maintain clarity.
On the high frequencies, a soft knee and a 1.5:1 ratio can help tame harshness while preserving brightness, so that’s always a good place to start.
Just don’t forget to balance the audio output gain of each band to maintain consistent levels across the stereo bus.
NOTE: Tools like iZotope Ozone’s multiband compressor or FabFilter’s MB-Pro are excellent for this kind of work.
By integrating multiband compression into your mix bus processing, you can shape the dynamics of your final mix with precision while avoiding muddiness/harshness.
#11. Phase and Polarity Considerations

Phase and polarity issues can freakin’ destroy the cohesiveness of your mix bus, especially on the low end where phase misalignment is most noticeable.
To shut that down, start by checking phase coherence between tracks using a plugin like Voxengo PHA-979 or your DAW’s phase correlation meter.
If you do happen to notice phase cancellation (e.g., a drop in low-end energy or volume levels), invert the polarity on problematic tracks.
Then, adjust their timing until the issue resolves by introducing a very small delay by shifting or nudging the position of the said track on the timeline.
In DAWs, these units of measurement are referred to as “ticks,” which are tiny fractions of the highest time division value you can find in your DAW.
Low-frequency elements like kick and bass are the most common culprits for phase issues, so focus your corrections there.
Using a linear phase EQ on the master bus can also help avoid introducing additional phase shifts during EQ adjustments.
Always compare the corrected mix to a reference track to ensure you’re not overcompensating and making the mix sound unnatural.
Fixing phase issues early in the master bus processing ensures that the entire mix translates well across various playback systems.
It gives it a more cohesive and better sound.
Bottom line, when learning how to set up your master bus, it certainly includes understanding these technical yet key adjustments (don’t overlook the little things).
#12. Analyzing Loudness and Frequency Balance
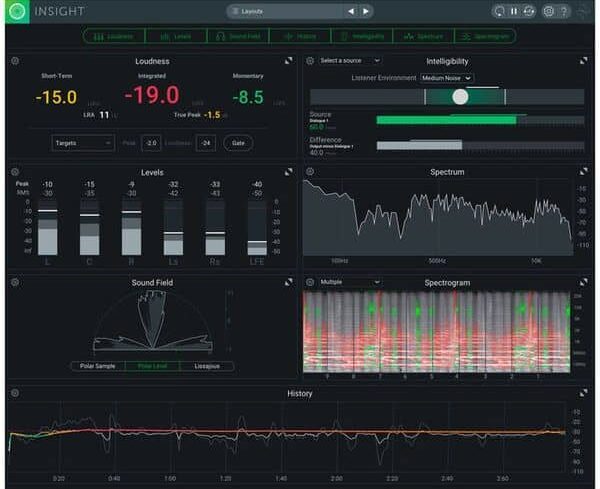
Monitoring loudness and frequency balance is a also a key part of mix bus processing to ensure your entire mix translates well across playback systems.
When you’re first learning how to set up your master bus, you’re going to start with a spectrum analyzer like iZotope Insight or Voxengo SPAN.
This way, you can visualize your mix’s frequency content in real time and look for an even distribution across the spectrum.
Too much energy in the low-mids (around 200-400 Hz) can make the mix muddy, and excessive highs above 10 kHz can lead to harshness.
Loudness normalization tools like LUFS meters are essential for hitting the right targets.
For most streaming platforms, aim for a loudness level of -14 LUFS integrated, with peaks no higher than -1 dBFS to preserve the mix’s dynamic range.
You can use a pink noise reference to compare the overall tonal balance of your mix with a flat EQ curve.
When adjusting, keep changes subtle 一 boosting or cutting by 1-2 dB is often enough to correct imbalances all by itself, so try that before anything else.
Bottom line, a perfectly balanced mix not only helps your track sound great but also ensures consistency across different systems, which is what you’ll always want.
#13. Automating the Master Bus
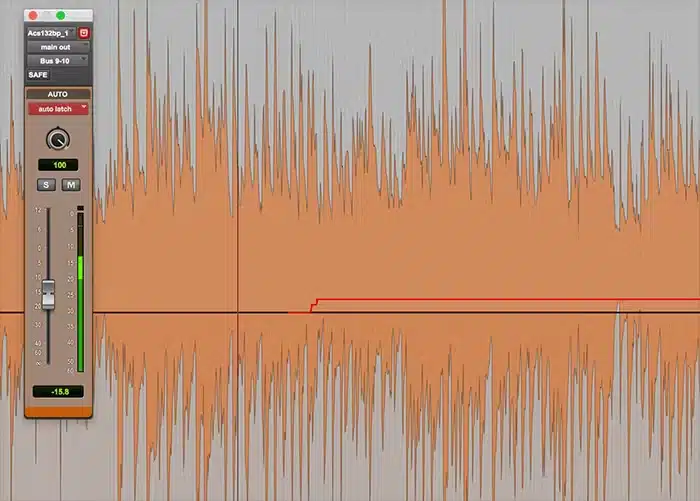
And last on our list of learning how to set up your master bus is Automation.
Automation on the master bus is a subtle yet epic way to add dynamics and creative flair to your mix bus processing, and you’ll start with volume automation (for dynamics).
This can involve creating a slight volume boost (e.g., +1 dB) during a chorus to make it feel more impactful or a gentle fade-out during the outro.
This is a classic trick famous mixing engineers consider non-negotiable on all mixes.
Use your DAW’s automation tools, like Logic Pro’s Master Fader automation, to create precise transitions without affecting individual track levels, just the mix as a whole.
For effect automation, try bypassing reverb or stereo widening during verses to make choruses feel wider and fuller when the effects are re-engaged.
SIDE NOTE: Stereo widening is a technique that expands the stereo image by spreading elements across the left and right channels to give your mix a sense of width and space.
For example, automating a tape saturation plugin and/or its parameters to add warmth or even its “Flux” for a more vintage vibe only during the bridge.
It can bring a unique tonal shift to the entire mix, which is great.
Remember to keep any adjustments subtle because dramatic changes on the master bus can disrupt the overall balance, which will ruin everything.
Understanding how to set up your master bus with automation ensures your mix evolves dynamically while staying cohesive and on point.
Bonus: Common Mistakes to Avoid
To really master how to set up your master bus, there are a few things to avoid at all costs, otherwise things will go south, quickly.
#1. One of the biggest mistakes when working on the mix bus is over-processing (loading too many plug-ins can quickly lead to a muddy or overly compressed sound). Always keep master bus effects minimal and intentional 一 focusing on small, targeted adjustments that enhance the entire mix.
#2. Another common issue I see a lot is neglecting gain staging, which can cause clipping and limit the headroom for proper master bus processing.
#3. Avoid relying on the master bus to fix mix issues… Problems like harsh highs or muddy lows should be addressed at the track level before they reach the stereo bus.
#4. Never skip A/B comparisons with a reference track, as this ensures your mix maintains tonal balance and stays competitive in terms of loudness and clarity.
By avoiding these pitfalls, you’ll better understand how to set up your master bus for success, and you don’t even have to be a certified mastering engineer to do it.
Side note, if you want to learn all about the mastering stage as opposed to the master bus, we got you covered with these mastering musts.
Final Thoughts
And there you have it: everything you need to know about how to set up your master bus like an absolute pro.
Just remember, it’s all about staying intentional with your master bus processing, keeping your levels balanced, and making sure your mix bus remains dynamic.
Plus, making sure to fine-tune details like EQ, compression, and stereo imaging will make sure your entire mix translates beautifully across any playback system.
This way, your tracks will always stand out with clarity, warmth, and punch 一 setting you apart as a producer and dominating your competition.
And you can confidently take on any project knowing your master bus is ready to deliver!
With the tips and tricks you’ve learned today, you’ll definitely be able to create mixes that sound polished and professional every single time.
And, as a special bonus, you’ve got to check out these Free Project Files.
They include 3 project files that break down how to make a professional beat from start to finish (step-by-step).
And yes, that includes how to set up your master bus and anything else you’d like to see as well whether it’s EQ, compression, or even advanced sound design.
It’s like having the cheat codes on how to create killer beats every single time by the world’s top producer (can you say invaluable?).
Plus, they’re all 100% royalty-free so you can use them however you’d like without worrying about a thing.
Bottom line, understanding how to set up your master bus is more than just a technical skill; it’s the key to unlocking your full potential as a producer.
And with these strategies you’ve learned about today, you’ll be able to create mixes that not only sound incredible but also resonate with listeners every time.
Just remember to keep hustling, learning, and never let anybody tell you you can’t achieve your goals.
Until next time…


Leave a Reply
You must belogged in to post a comment.