Mastering is all about taking your final mix and polishing it up so it sounds loud, clear, and professional on every playback system.
But, in order to have a killer master, you need to know how to set up your mastering signal chain the right way.
Each step in the chain builds on the last one, and if you don’t process things in the right order, you could end up with a muddy, lifeless, or overly squashed master.
And, let’s be honest, nobody has time for that.
If you don’t use the right settings, gain staging, and processing techniques, your own tracks won’t hit competitive loudness levels or translate well at all.
That’s why I’m breaking down everything you need to know about mastering signal chains, like:
- The correct order of a mastering chain ✓
- How to properly set gain staging ✓
- Using corrective EQ to fix frequency response issues ✓
- How compression controls dynamics without killing transients ✓
- Why multiband compression is a game-changer ✓
- How harmonic distortion and saturation is implemented ✓
- Using stereo imaging for width without phasing issues ✓
- The importance of metering and loudness targets ✓
- How to apply limiting without any distortion ✓
- How mastering engineers typically do things ✓
- Advanced music production tips and tricks ✓
- Much more about basic mastering chain essentials ✓
By knowing how to set up your mastering signal chain, you’ll be able to create super polished, professional masters that sound great everywhere like a boss.
Plus, you’ll understand how each processor interacts, avoid common mastering mistakes, and achieve a loud, clear, and dynamic final track.
This way, your masters will always sound clean, balanced, and professional, and you’ll enhance your mastering process/skills too (win-win).
Table of Contents
- What’s the Importance of a Mastering Signal Chain?
- Preparation and Session Setup
- Mastering Chain Basics: Breaking It Down (Step-by-Step)
- Bonus: Advanced Tips and Tricks for Your Mastering Signal Chain
- Using Mid/Side EQ for Better Stereo Control
- Parallel Compression for Extra Loudness
- Dynamic EQ Instead of Static EQ for Smarter Tone Control
- Subtle Clipping for Louder Masters Without Over-Limiting
- Multiband Transient Shaping for Extra Punch
- Tape Saturation for Natural Harmonics and Glue
- Psychoacoustic Bass Enhancement for Fuller Low-End
- Low-Level Compression for More Detail Without Overpowering
- Auto-Gain Matching to Avoid Volume Bias
- Final Thoughts
What’s the Importance of a Mastering Signal Chain?
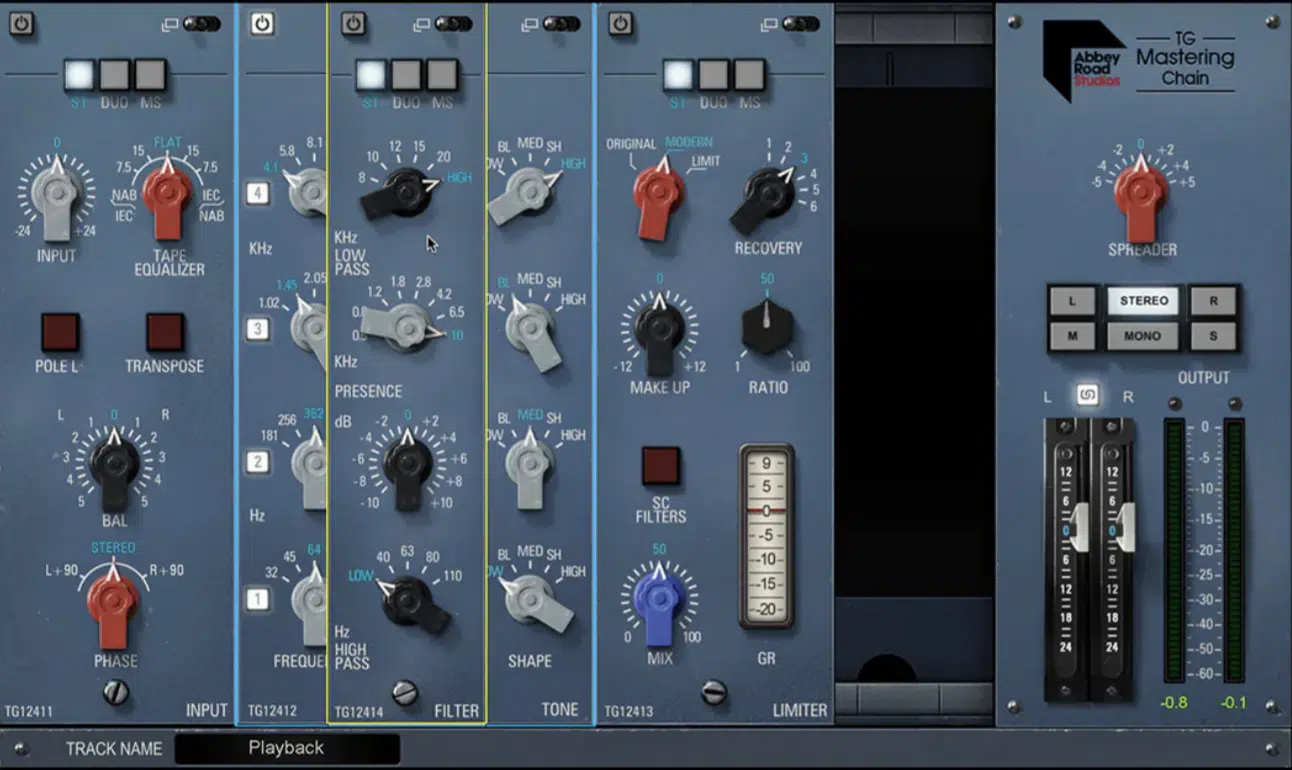
A mastering signal chain is the final stage of audio processing 一 shaping the overall balance, loudness, and clarity of a mix before distribution.
Without a structured technique, your track can end up too quiet, too harsh, or inconsistent across different playback systems.
It won’t only make things sound sloppy and full of disarray, but people won’t take you seriously, and that’s the last thing you want.
Each processor in the mastering signal chain has a specific purpose, whether it’s:
- Correcting frequency imbalances
- Controlling dynamics
- Maximizing perceived loudness without distortion
- Etc.
For example, compression helps glue the mix together, while EQ ensures a balanced frequency spectrum by removing harsh high frequencies and cleaning up the low end.
A poorly executed mastering process can result in an unprofessional, muddy mix, whereas a proper signal chain makes everything sound polished/cohesive.
Today, we’re specifically talking about setting up your own mastering chain, and don’t worry, I’ll be breaking it all down so you have a super solid understanding.
Preparation and Session Setup

Before we dive into the actual steps, let’s break down the importance of preparation and setting up your session.
It’s one of the most important steps in this specific music production process, so you definitely don’t want to overlook it.
A clean, organized workspace makes a huge difference in how efficiently you work, so always make sure to calibrate your monitors.
I know it sounds obvious and basic, but if your speakers aren’t calibrated correctly, you won’t hear an accurate representation of your mix.
This will mean your mastering decisions could end up being way off.
It ensures proper room acoustics, which is huge when it comes to accurately judging stereo imaging and frequency balance.
If you’re working in an untreated room, your low-end might sound too big or your highs might feel too harsh, which can lead to poor mastering choices.
Eliminating distractions should be the very first step (if your session is cluttered or noisy, you won’t be able to focus on subtle details that really matter in mastering).
Also, importing and analyzing the mix is key, so make sure to:
- Listen carefully to the balance — Does the low end feel controlled? Are the vocals sitting in the right place?
- Check for clipping — Are there any peaks hitting 0dB before you even start processing?
- Reference professional masters in the same genre — This helps you set a clear sonic goal for your track.
This way you can successfully identify what needs improvement and what’s on point before even touching any plugins at all.
Also, a high-resolution WAV file (at least 24-bit, 48kHz) should be used for mastering to preserve audio quality.
If you’re mastering a mix that was bounced at 16-bit, 44.1kHz, you’re already working with a lower-quality file, which can limit how much detail you can enhance.
And keep in mind that checking stereo width, dynamic range, and peak levels using a LUFS meter and a true peak meter helps lock down a starting point before applying any processing as well.
For example, if your mix is too loud before mastering, you might have to adjust gain staging before even touching EQ or compression, that kind of thing.
Bottom line, a proper mastering session setup makes sure every adjustment is intentional and improves the mix without introducing unnecessary coloration.
Mastering Chain Basics: Breaking It Down (Step-by-Step)
A mastering signal chain follows a sequence of processing steps so each element of your mix is enhanced properly without introducing unwanted distortion or artifacts. So, let’s kick things off by going through the essential steps in a mastering chain 一 from preparation and gain staging to final limiting and export settings.
#1. Gain Staging
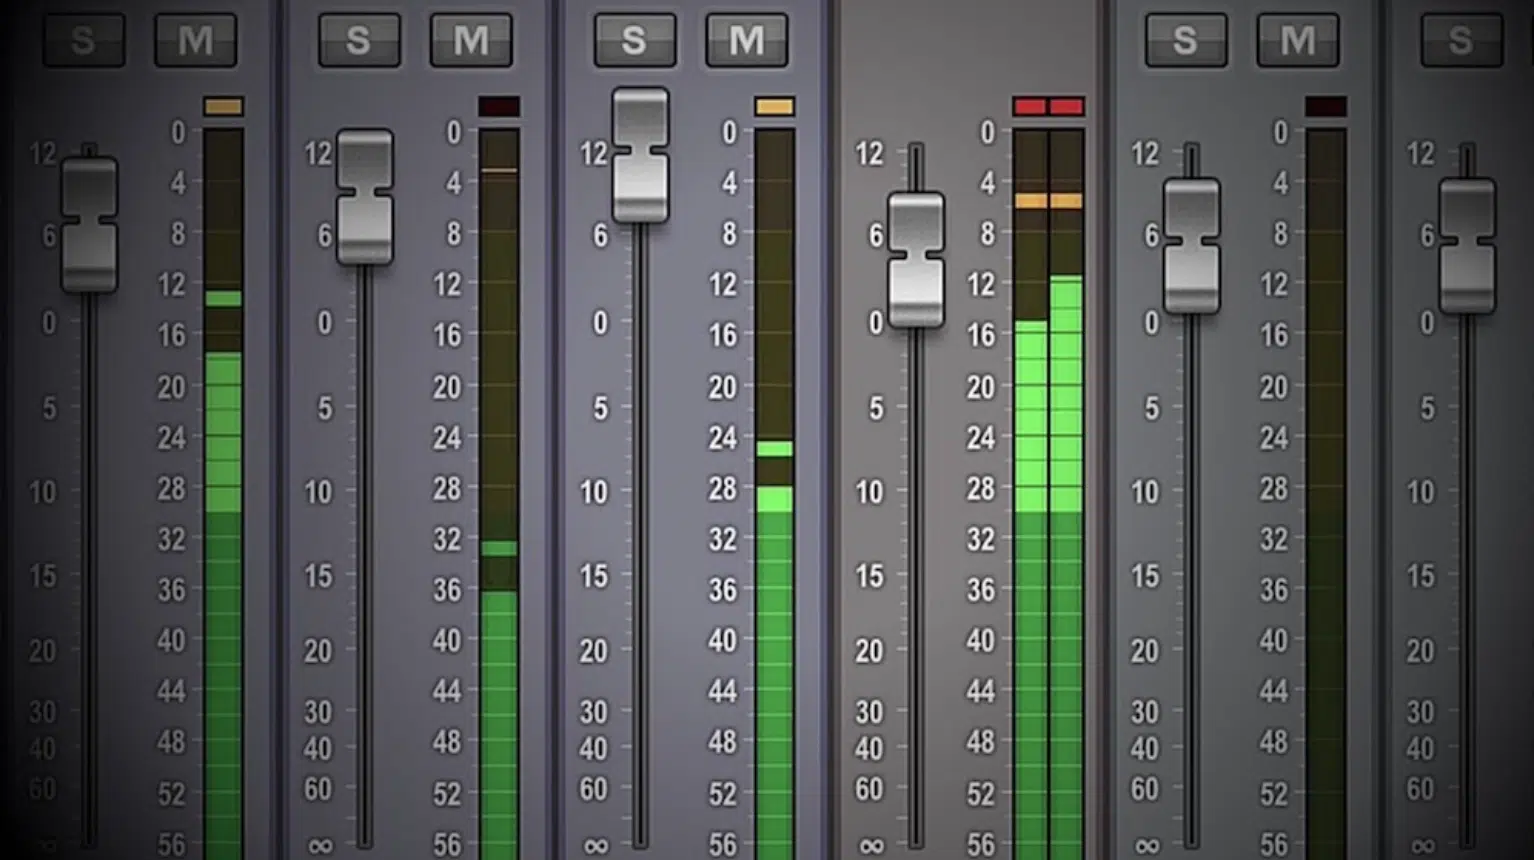
Proper gain staging is the foundation of a clean mastering signal chain and prevents unwanted distortion, noise buildup, and poor plugin performance.
Before touching any processing, your mix should have plenty of headroom, with peaks sitting around -6dB to -3dB.
And, an average LUFS reading between -18 LUFS and -14 LUFS.
This ensures that all of your mastering plugins in your mastering signal chain operate at optimal levels without introducing unnecessary compression or digital clipping.
If your mix is peaking too high, adjusting the input gain on your first plugin (typically an EQ or compressor) can prevent downstream processors from overworking and distorting the audio.
Using a gain-trim plugin before any processing helps maintain consistency and allows each stage in the mastering signal chain to interact properly with the next.
For example, a brickwall limiter at the end of your mastering signal chain will behave very differently if your mix is too hot going in versus well-balanced with proper gain staging.
NOTE: Never rely on your limiter to fix poor gain structure 一 starting with the right levels ensures your track reaches professional loudness without sacrificing clarity.
#2. Corrective Equalization (EQ)
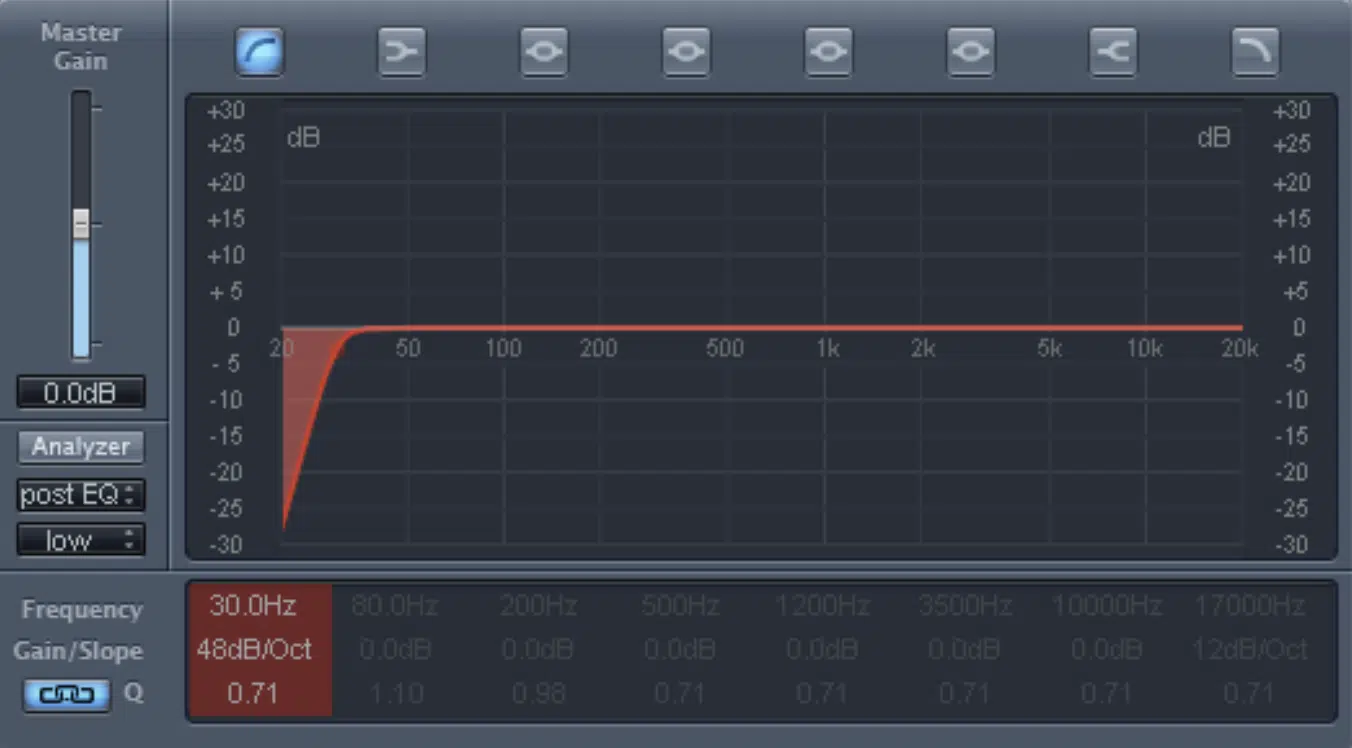
Corrective EQ is technically the first real processing step in a mastering chain 一 focusing on fixing frequency imbalances before enhancing the overall mix.
A parametric EQ is usually the best choice for this stage because it allows precise control over problematic frequencies without affecting the entire mix.
For example, if the low end feels muddy, a high-pass filter cutting around 30-40 Hz can remove unnecessary sub-rumble that eats up headroom.
All without contributing anything useful.
If there’s boxiness in the mids, try to cut around 300 Hz to 500Hz by -2dB to -3dB to clean things up without thinning out the mix.
Also, keep in mind that resonant peaks in the high mids (2kHz – 5kHz) can cause ear fatigue, so a dynamic EQ cutting those peaks by 1-2dB when triggered can smooth things out without dulling transients.
One of the best mastering tips is to use small, precise mastering EQ cuts rather than drastic changes 一 most corrective EQ moves should be under 3dB.
Once the track is balanced, the next step in your mastering signal chain is controlling the dynamic range with compression.
#3. Compression
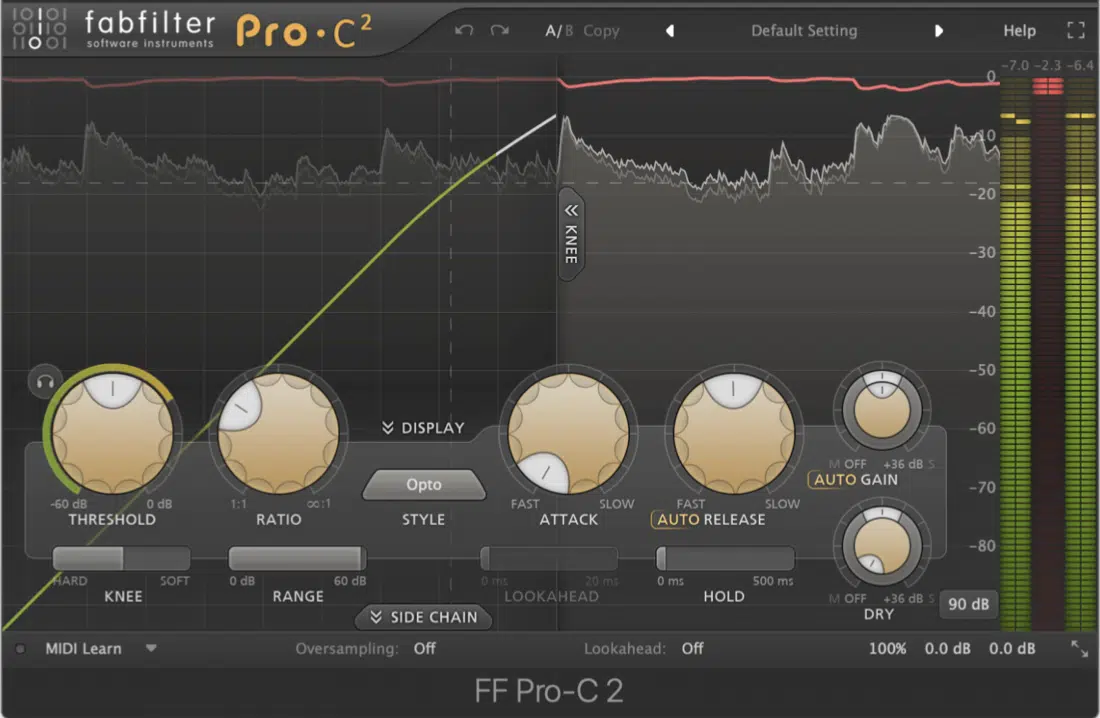
In the mastering signal chain, compression is super important because it helps you control the track’s dynamic range for a more cohesive and polished sound.
When dealing with compression settings, the rule of thumb is to set the threshold so that compression engages only on the loudest parts.
You’ll want to use a gentle ratio between 1.5:1 and 2:1 to avoid over-compression.
For example, if your mix peaks at -3dB, setting the threshold at -6dB allows only signals exceeding this level to be compressed.
This subtly tames peaks without squashing the overall dynamics.
Adjusting the attack time to around 20ms lets transients pass through, preserving the track’s punch, while a release time of 100ms helps maintain natural decay.
It’s also super important to monitor gain reduction, so make sure to aim for 1-2dB of reduction to keep the compression transparent.
After compression, use make-up gain to match the output level to the input and make sure there is consistent loudness throughout the mastering signal chain.
My last piece of advice here is that subtlety is key…
Over-compression can lead to a lifeless track, so apply just enough to control dynamics without sacrificing any musicality factors.
#4. Multiband Compression
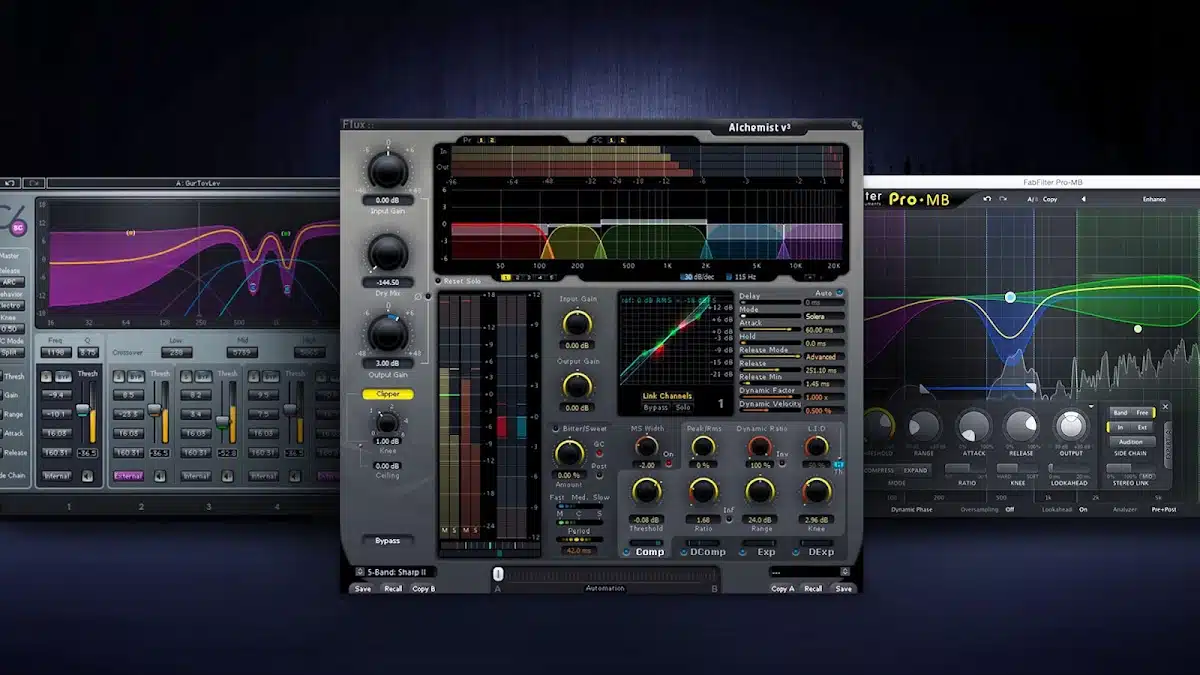
Next up we have multiband compression, which divides the audio spectrum into different frequency bands.
This lets you get super precise when it comes to controlling different parts of the mix in the mastering chain.
This technique is super useful for fixing problem areas (like a boomy low end or harsh highs) without affecting the rest of the mix.
For example, if the bass frequencies between 20Hz and 80Hz are overpowering, applying a ratio of 2.5:1 with a threshold set at -5dB specifically to that band can tighten up the low end without muddying the mids.
On the same note, if the high mids between 5kHz and 8kHz feel too sharp or sibilant, a gentle ratio of 1.8:1 can smooth out the harshness.
All while keeping the clarity of vocals and cymbals intact, of course.
It’s important to set attack and release times carefully when you’re working with a multiband compressor:
- Higher frequencies need faster attack and release settings(e.g., 2ms attack, 50ms release) to avoid excessive pumping.
- Lower frequencies benefit from slower settings(e.g., 10ms attack, 150ms release) for a more natural response.
Be aware of crossover points to avoid phase issues 一 normal settings are around 120Hz, 1kHz, and 5kHz, but these should be adjusted based on the specific mix.
Just keep in mind that while multi-band compression is powerful, overuse can make an entire track sound unnatural.
So, make sure to apply it carefully to enhance clarity and control dynamics without introducing any unwanted artifacts.
#5. Harmonic Excitement and Saturation
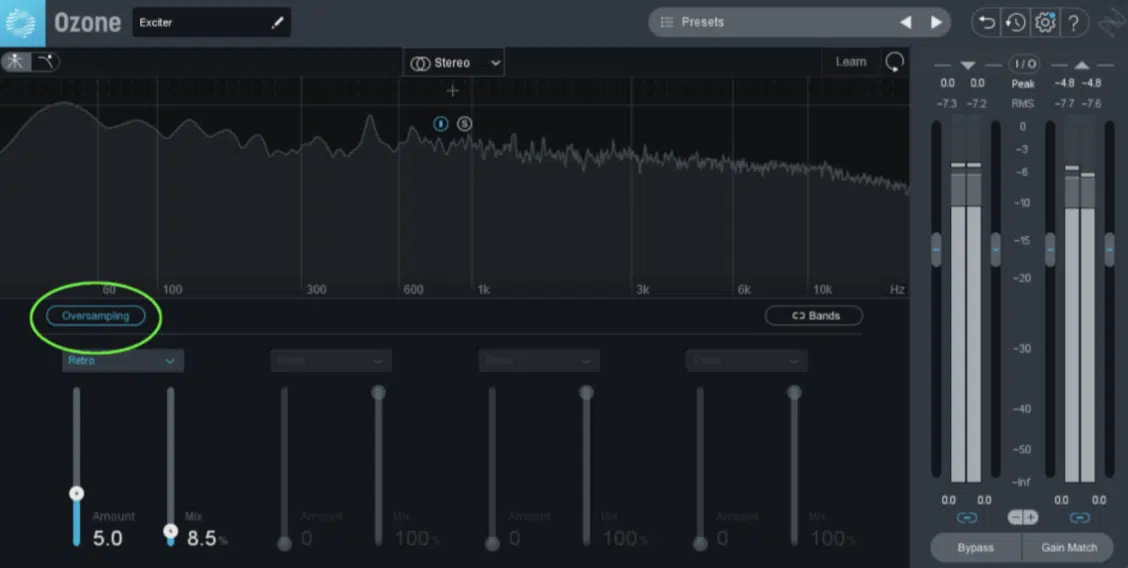
Adding harmonic excitement and saturation to your mastering signal chain can enhance perceived loudness, add warmth, and make your track feel fuller and more alive.
Saturation introduces subtle harmonic distortion, which smoothes out harsh frequencies while giving the mix an analog warmth that digital recordings can’t touch
For example, applying tape saturation with a drive setting of 25% on the master bus can glue the mix together and enhance the low mids.
Harmonic distortion like this makes it feel more cohesive/fluid.
If vocals feel too sterile, adding tube saturation with a drive level of 15% can bring out edge and presence 一 making them stand out without sounding harsh.
It’s important to blend the wet/dry mix carefully, and starting with a 30% wet setting allows for a subtle enhancement without overpowering the original sound.
To prevent muddiness, apply a high-pass filter at 40Hz before saturation so that low-end energy remains tight and controlled all day.
Since too much saturation can lead to unwanted/nasty distortion, it’s best to apply it carefully and listen critically to how it affects the overall balance of the mix.
If done right, harmonic excitement and saturation can elevate your track in a major way, giving it a polished, professional finish while keeping everything warm and punchy.
#6. Stereo Imaging
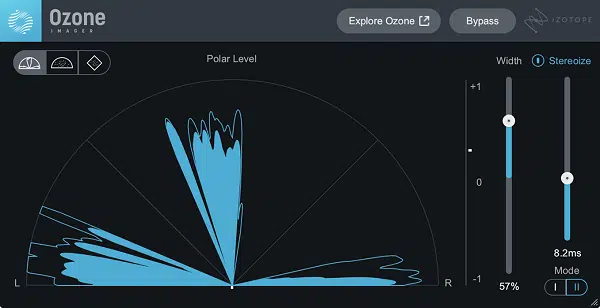
Stereo imaging determines how wide, immersive, and well-balanced a track feels.
A good stereo image makes a mix sound expansive, but going too wide can cause phase issues and make the entire track collapse when played in mono.
This is something you never, ever want.
A great trick is widening frequencies above 8kHz to make vocals, synths, and cymbals feel airy, while keeping everything below 150 Hz in mono.
This way, you can keep the low end focused and avoid muddiness like a boss.
If the mix feels too narrow, make sure to use a stereo widening tool with a width setting of 115-125% on the mid and high frequencies to add width without losing the essence.
On the flip side, if things already sound too wide, slightly reducing the stereo width in the 300Hz-800Hz range can help glue everything together.
As well as prevent the mix from feeling disconnected.
Also, make sure to use stereo field visualization tools like correlation meters and goniometers (they show you real-time feedback on your stereo width).
They will help you spot phase issues before they become a massive problem.
A correlation meter, like the one found in Insight 2 or Pro-Q 4, shows the relationship between the left and right channels.
If your mix leans too far toward -1, certain elements may be phasing out, which means they’ll completely disappear in mono playback.
Keeping the correlation value closer to +1 makes solid mono compatibility while still allowing for an expansive stereo field.
A goniometer, like the one in Waves PAZ Analyzer or Voxengo Span, visually represents how your mix spreads across the stereo field.
Keep in mind that a healthy mix should show a controlled, even spread rather than a chaotic, overly wide shape that could lead to phase cancellation.
With these mastering plugins, you can make the best decisions when it comes to spatial placement and mono compatibility.
Instead of blindly adding width, you can see exactly how your track behaves in the stereo field and tweak to taste.
Remember, the goal isn’t just to make a track sound wider, but to ensure it translates well on all systems (from earbuds to club speakers) without losing clarity and focus.
Pro Tip: When adding stereo expansion, always compare your mix to reference tracks to make sure you’re achieving a consistent sound without over-widening.
Generally speaking, keeping mid-frequencies more centered helps avoid phase issues, while subtle stereo expansion in the highs (above 10kHz) can create a more open and airy desired sound without making your well-balanced mix collapse in mono.
Side note, if you want to learn all about reference tracks, I got you.
#7. Final Equalization (Sweetening EQ)
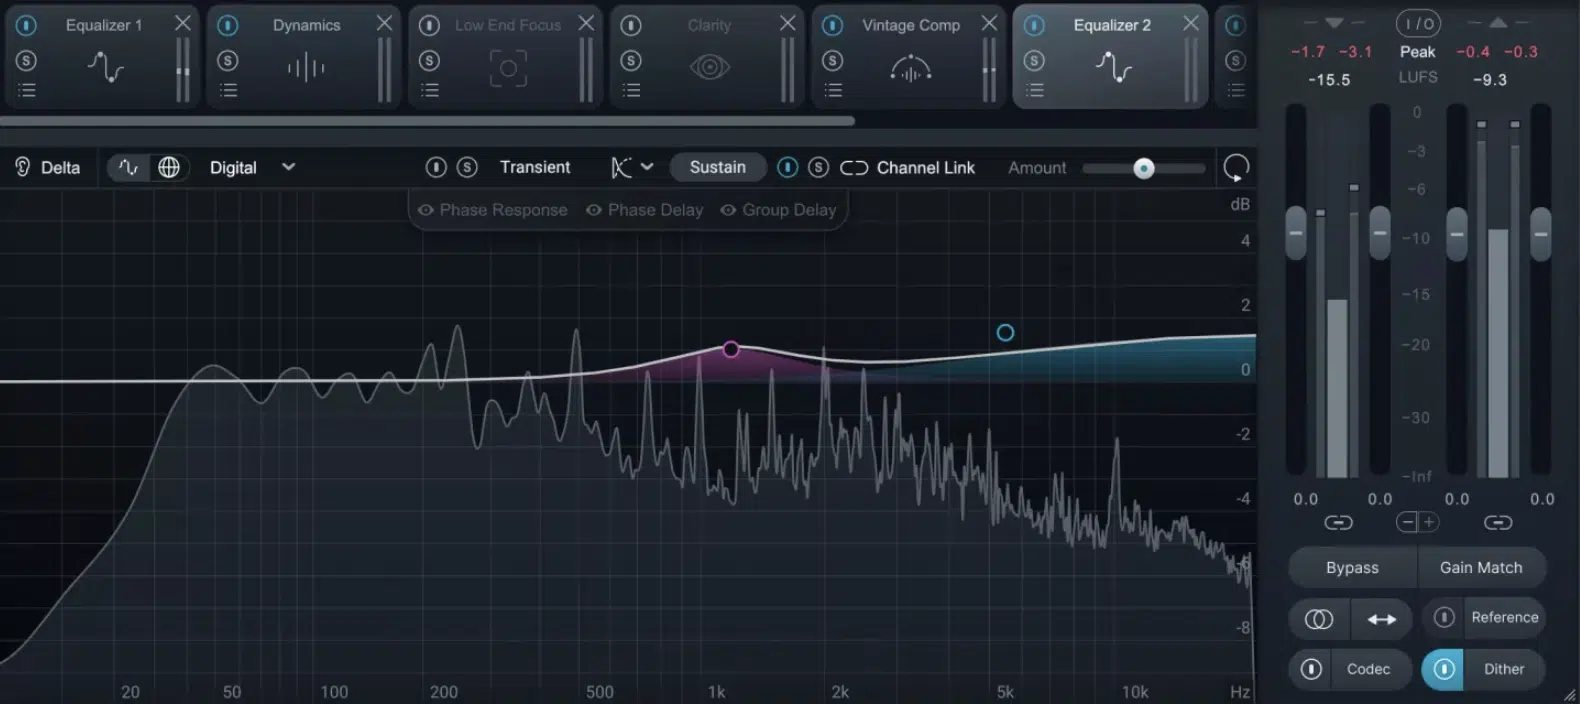
The final EQ stage in your mastering chain is all about small, strategic EQ moves to refine the overall tonal balance and give everything a final polish.
By this point, the mix should already be well-balanced, so this step is really just about fine-tuning the top-end clarity and bottom-end weight.
A high-shelf boost of 0.5-1dB at 12-14kHz can open up the mix 一 making vocals, cymbals, and acoustic instruments feel brighter and more present.
If the upper mids feel too harsh, a gentle cut of 1-2dB around 2.5-5kHz can smooth out any ear-piercing frequencies without dulling the mix.
To tighten the low end, try applying a slight boost around 80-100 Hz adds weight, while using a gentle high-pass filter at 30-40 Hz.
This will remove that unwanted sub-rumble that eats up headroom.
And don’t forget to always A/B test your changes to make sure you’re actually improving the mix and not just making it louder (which does absolutely nothing).
If final EQ is done right, the mix should feel like it “clicks” into place and sound super polished, full, and natural without introducing artificial coloration.
#8. Limiting
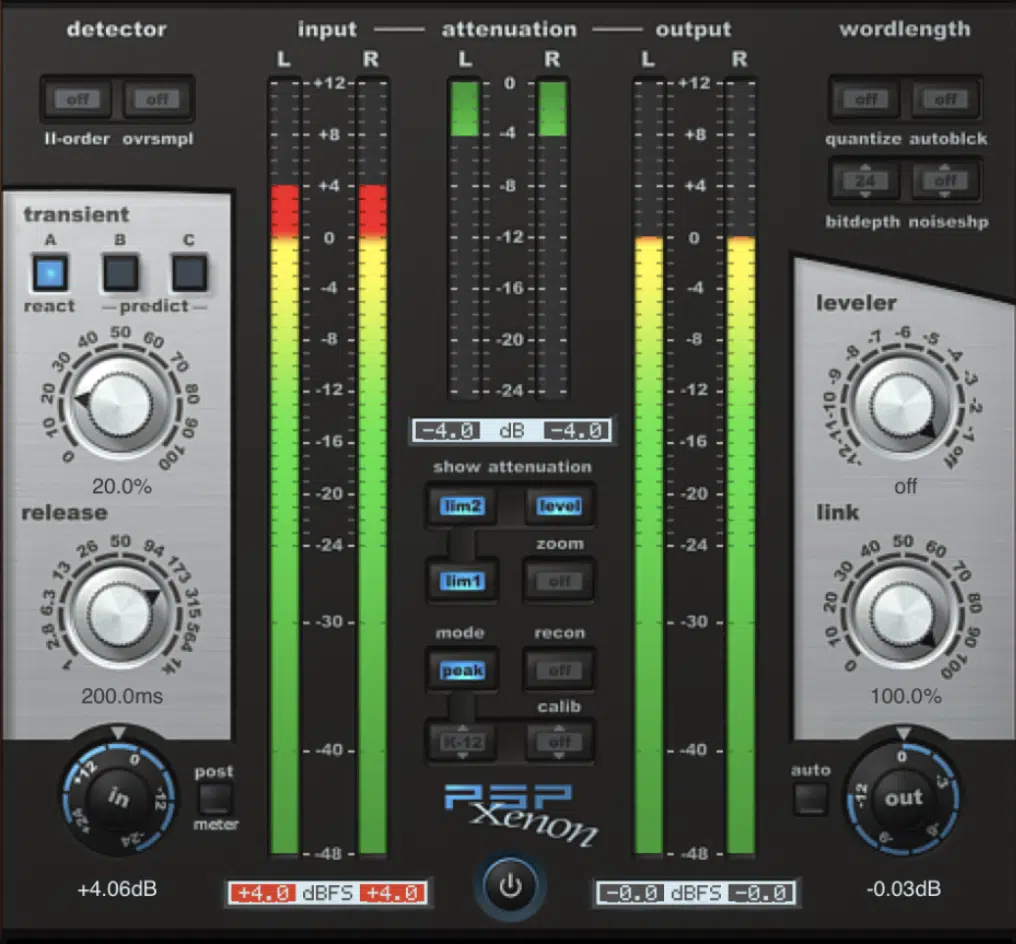
And finally we’ve come to the last piece of the puzzle: limiting.
Limiting is the final stage in the mastering chain, and it’s what determines how loud and competitive your track will be.
You’ll want to use a true peak limiter which helps you make sure the mix doesn’t clip when converted to different formats.
Make sure to set the output ceiling to around -0.1dB to -0.3dB is standard to prevent any nasty distortion or other issues of the sort.
The threshold setting controls how much the limiter reduces peaks, and you’ll want to aim for 1-3dB of gain reduction (anymore and you risk crushing the dynamics).
A good rule of thumb is to check your track’s LUFS reading…
For streaming platforms like Spotify and Apple Music, targeting -14 LUFS is a safe bet, while club tracks might need to hit closer to -9 LUFS.
If your limiter is pumping or making the track feel lifeless, adjust the attack and release settings:
- A slower release (100ms-250ms) can help keep things smooth.
- A faster attack (5-10ms) can help tame transients.
And don’t just slap a limiter on and call it done…
A/B test the master with and without it to make sure you’re getting clean, controlled loudness without sacrificing the punch and clarity of the track.
Remember, a great limiter setting should make the track feel louder and more powerful without you even realizing it’s there.
#9. Dithering
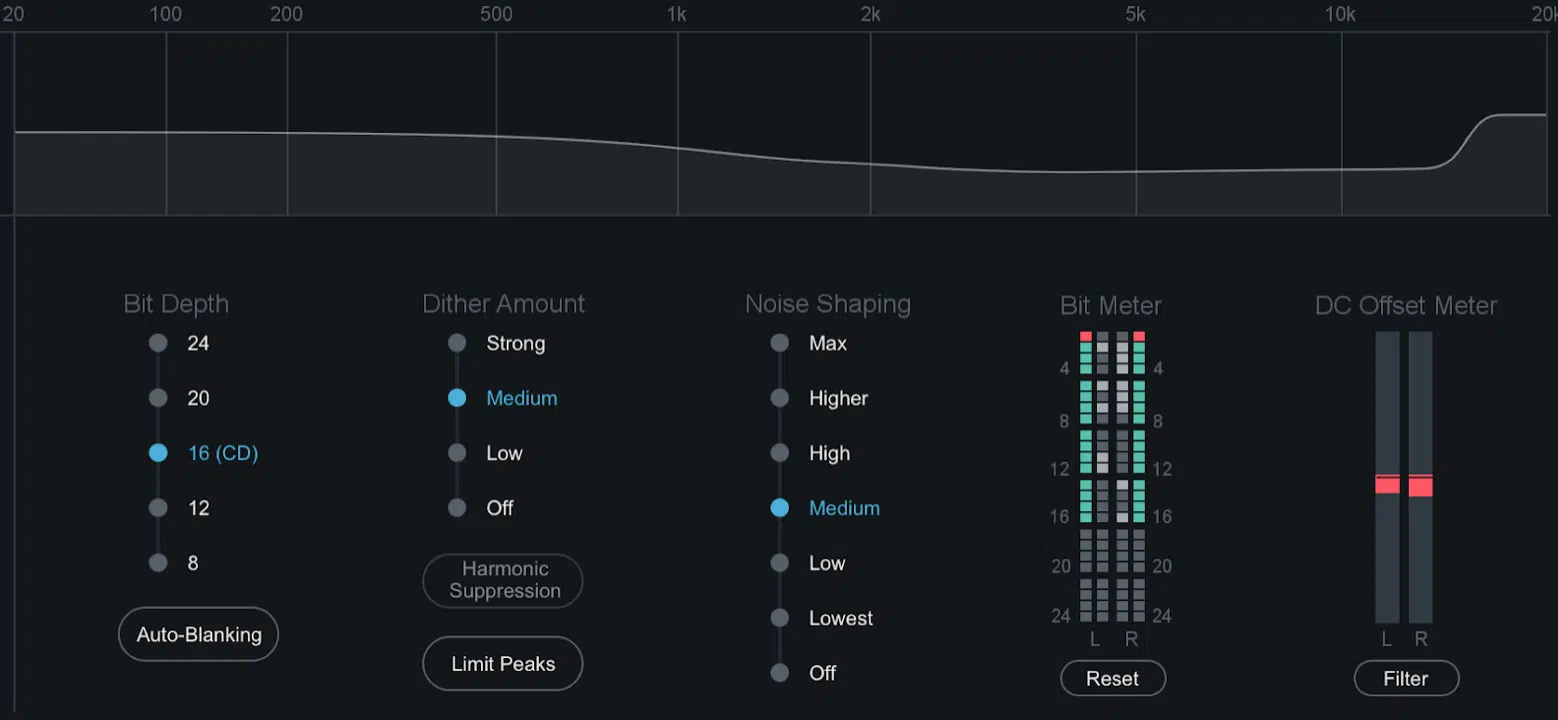
Dithering is one of those final steps in the mastering signal chain that a lot of producers and even mastering engineers overlook.
But, make sure not to be one of those people because it’s actually super important when reducing bit depth (like going from 24-bit to 16-bit for CD or streaming).
Without it, your track can end up with quantization distortion, which sounds like weird, unnatural static in quiet sections and you definitely don’t want that.
There are different dithering algorithms you can use for this…
For example, POW-R #1 works well for simple audio like spoken word, while POW-R #3 is better for dynamic music like orchestral tracks because it keeps quiet details intact.
If you’re mastering for streaming services in particular, using MBIT+ dithering with noise shaping can help retain clarity (especially in high frequencies).
The key is to only apply dithering once and at the very end of your mastering chain — doing it twice can add unnecessary noise.
NOTE: If you’re exporting at 24-bit or higher, you actually don’t need dithering at all because it’s only needed when dropping down to 16-bit.
-
Pro Tip: Metering and Analysis
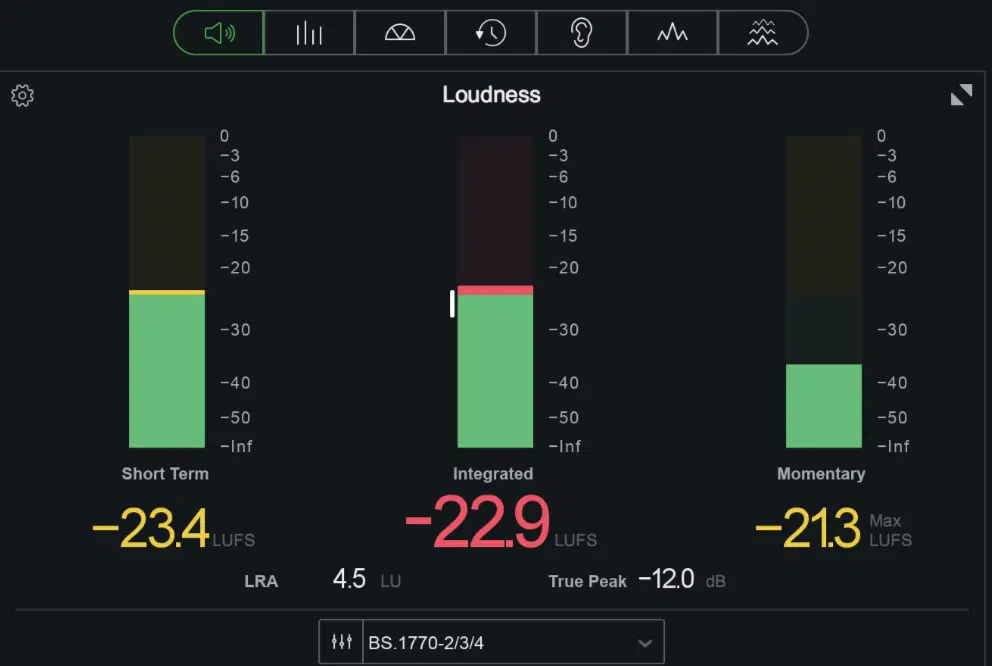
Mastering isn’t just about using your ears…
It’s also about making sure your track is hitting the right levels across the board, and that’s where metering and analysis tools come in.
So, I’m just going to quickly recap some of the most important things you’ll need to invest in.
#1. A true peak meter helps detect inter-sample peaks (the kind that don’t show up in your DAW but can cause clipping when converted to MP3 or streamed on Spotify).
If you’re aiming for streaming platforms, keeping your loudness levels around -14 LUFS ensures your track isn’t turned down automatically.
#2. A spectrum analyzer is another must-have in your mastering signal chain.
It shows you exactly where your frequencies are sitting so you can spot imbalances like too much sub-bass or harsh mids.
#3. A stereo imager helps check the stereo width, making sure your mix isn’t too narrow or too wide (wide mixes can sometimes have phase issues in mono playback).
#4. A dynamics meter helps avoid over-compression 一 if your dynamic range is below 6dB, your master is probably too squashed.
And here’s the big one: always reference pro masters while metering to make sure your track is sitting at the right loudness and balance (don’t overlook this!).
Bonus: Advanced Tips and Tricks for Your Mastering Signal Chain
Now that we’ve covered the basics of a mastering signal chain, let’s talk about some advanced techniques that can make a huge difference in the final sound. These are the kinds of pro-level tricks that help make a mix feel polished and radio-ready without sounding over-processed. Even small tweaks in the right places can take your master from good to pro-level. Let’s get into it.
-
Using Mid/Side EQ for Better Stereo Control
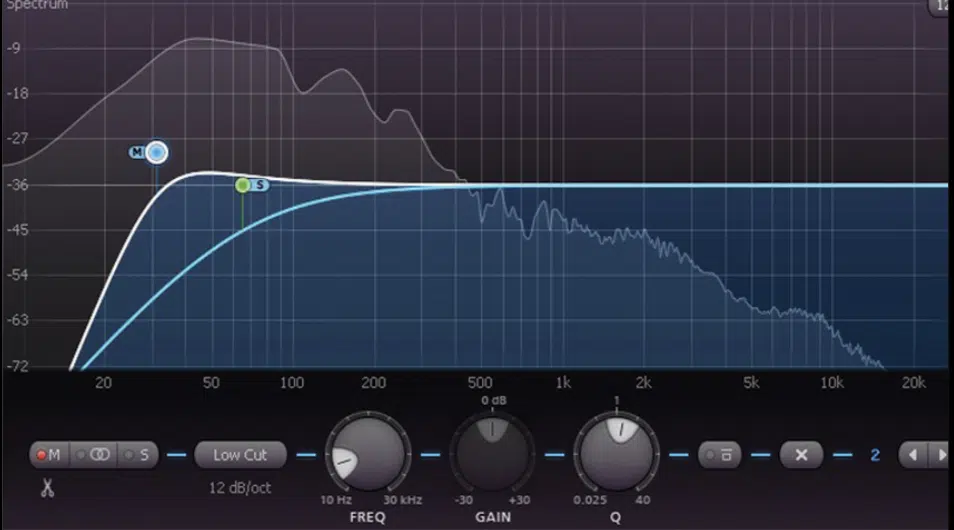
Mid/Side EQ lets you separate and control the center (mid) and side (stereo) frequencies in your mastering signal chain.
This is an absolute game-changer for stereo width and clarity.
For example, boosting 12kHz on the side channel by +1dB can add airiness to vocals and cymbals, while cutting 200Hz on the sides keeps the low end tight and prevents muddiness in the stereo field.
-
Parallel Compression for Extra Loudness
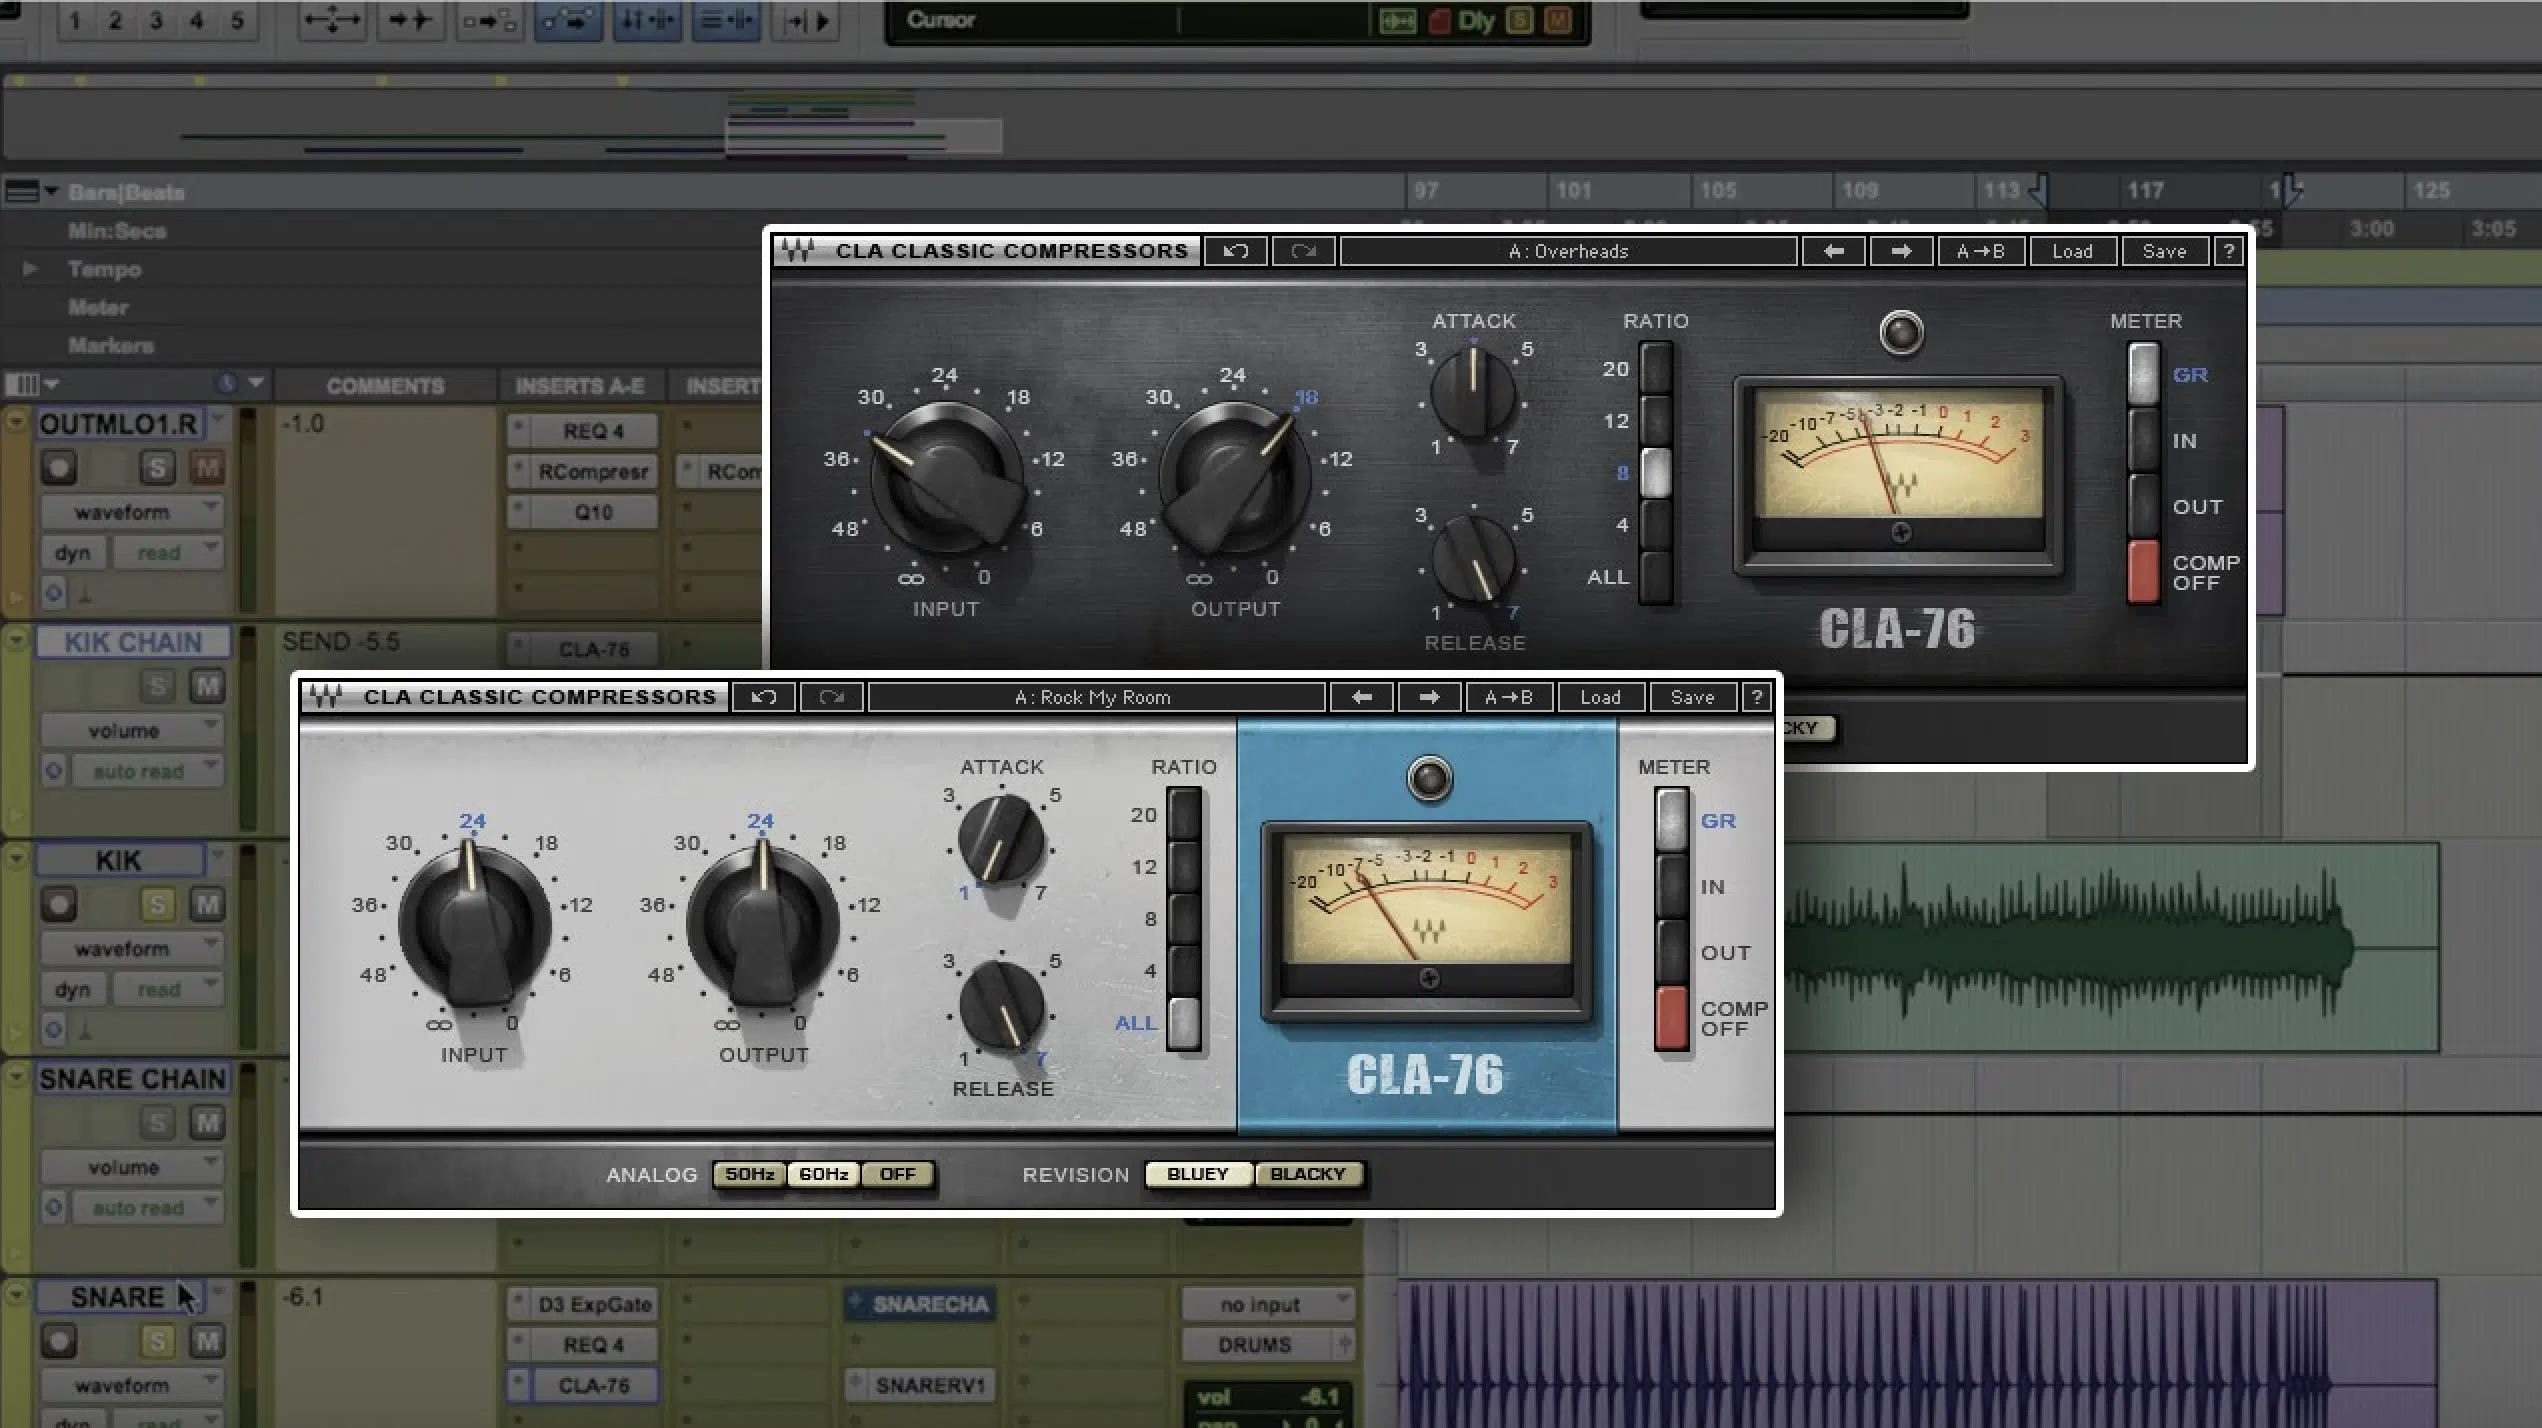
Instead of crushing the entire mix, parallel compression blends a heavily compressed version of the track with the unprocessed signal.
This way, you can successfully maintain punch while increasing loudness.
A great setting for this is a high ratio (6:1), fast attack (5ms), and slow release (150ms), mixed in at 30-40% wet, which helps bass, drums, and vocals feel more upfront without killing dynamics.
-
Dynamic EQ Instead of Static EQ for Smarter Tone Control
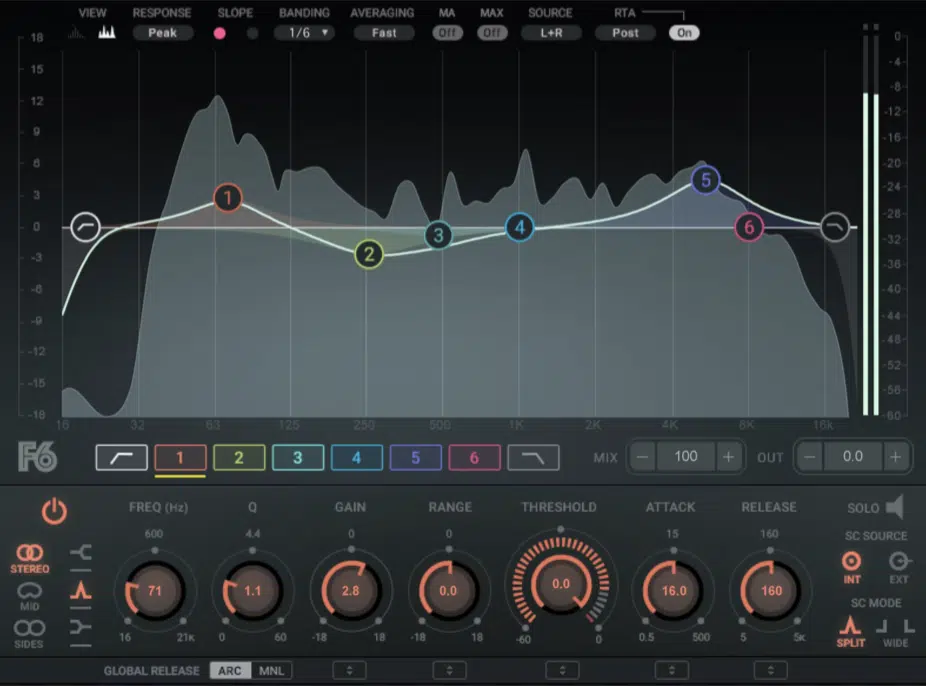
Unlike a regular EQ, which applies constant boosts or cuts, dynamic EQ only engages when needed to keep the mastering signal chain transparent.
For example, setting a dynamic cut of -2dB at 3.5kHz with a fast attack (10ms) can smooth out harshness in vocals or guitars.
But, only when those frequencies get too aggressive, of course.
-
Subtle Clipping for Louder Masters Without Over-Limiting
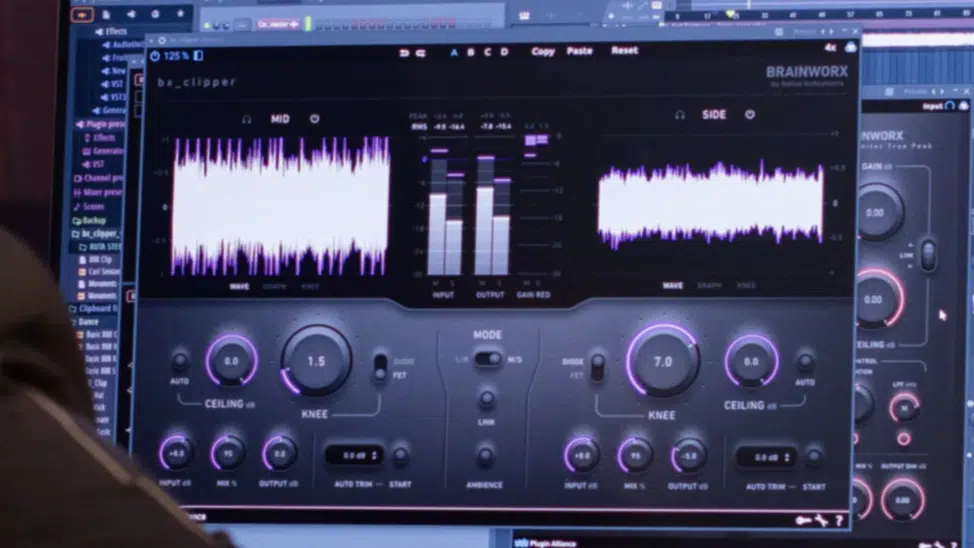
A soft clipper trims transients before hitting the limiter, which lets you push loudness further without any unwanted distortion.
Try setting a clipping threshold around -1dB with 10-15% drive to shave off peaks on drums and synths so they hit harder and keep your master punchy/clean.
Remember, you don’t want all that overly-aggressive limiting because it can really squash things and make your mastering signal chain sound super sloppy.
-
Multiband Transient Shaping for Extra Punch
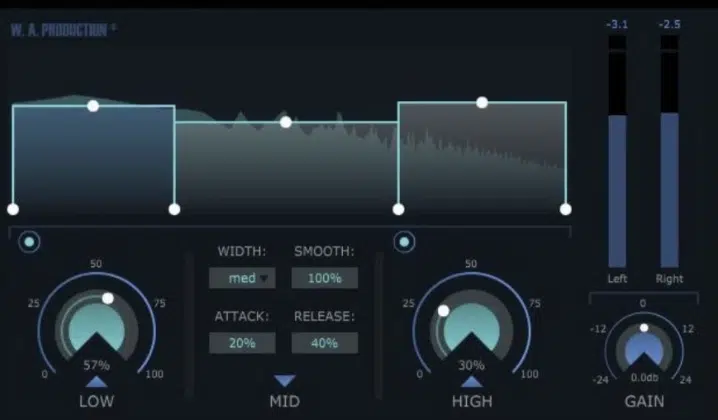
Multiband transient shaping lets you control the attack and sustain of specific frequency ranges, which is perfect for giving your master extra energy.
For example, increasing the attack in the 2-5kHz range by +3dB can make snares and percussion pop.
Reducing sustain below 100Hz, on the other hand, tightens up muddy bass frequencies.
-
Tape Saturation for Natural Harmonics and Glue
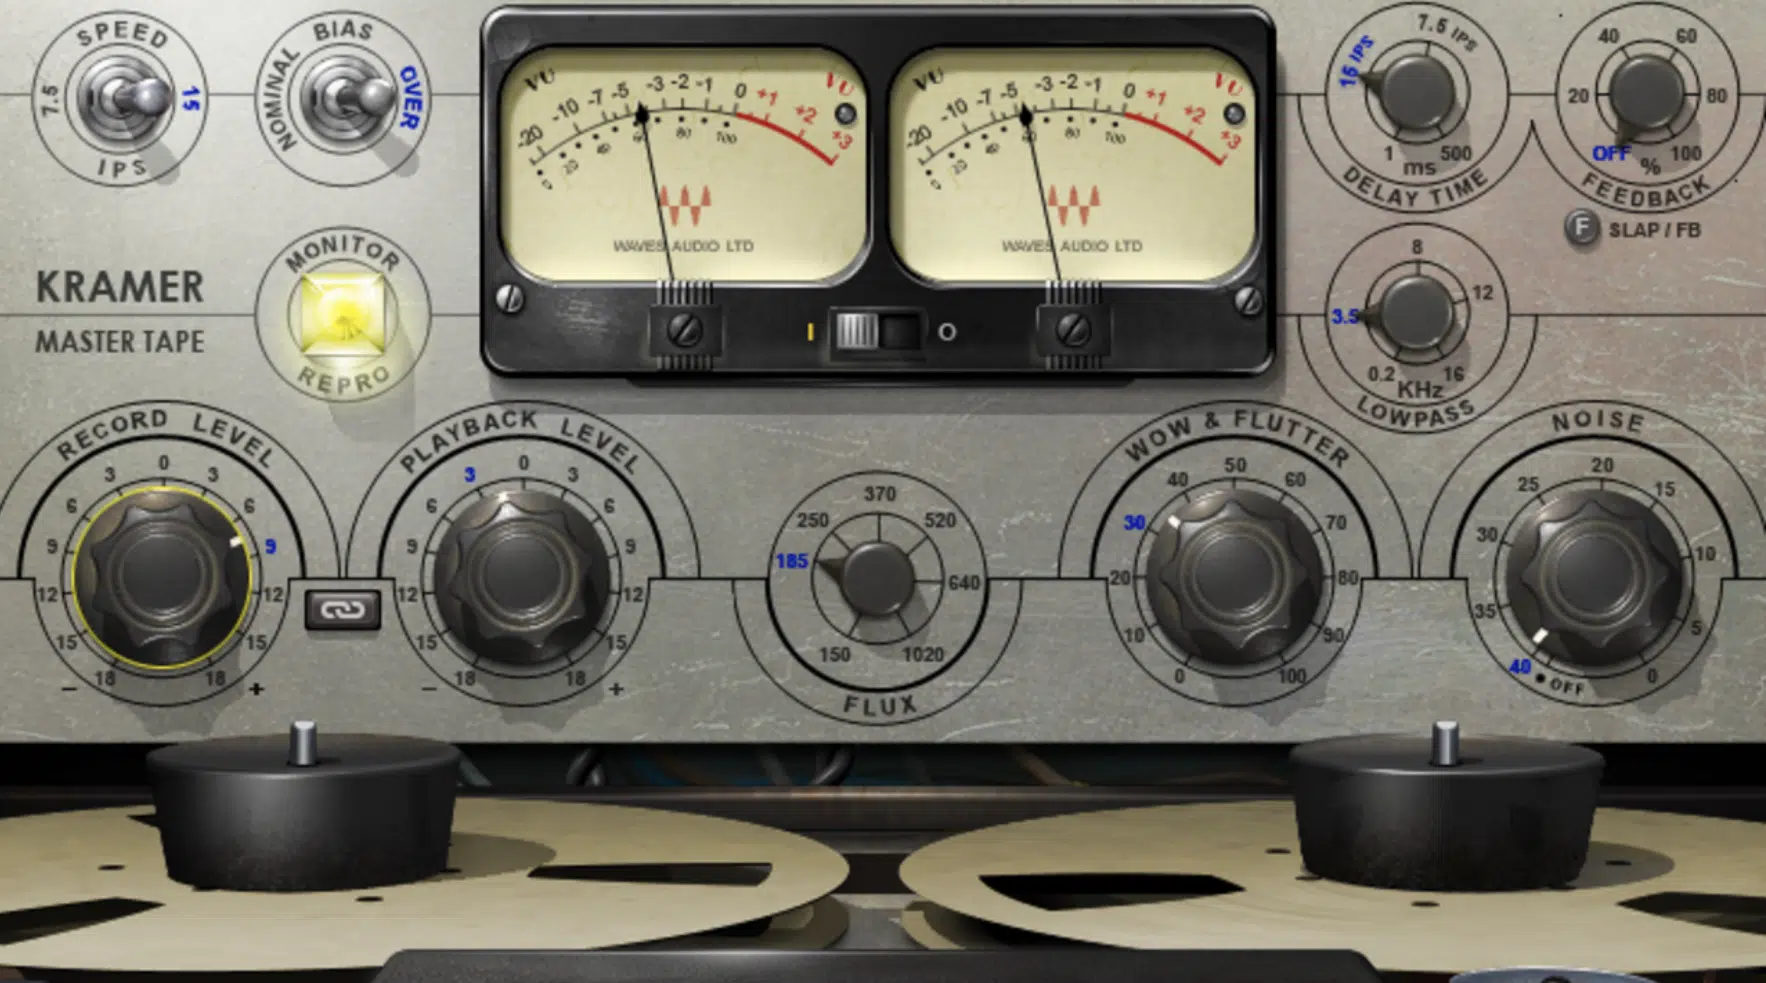
Tape saturation introduces subtle harmonic distortion that smooths out harsh frequencies and glues elements together in your mastering chain.
A great setting to try is driving the input by +3dB while keeping the saturation at 25%, which can add warmth to vocals, smooth out digital harshness.
As well as enhance low mids without over-coloring the mix (big plus).
-
Psychoacoustic Bass Enhancement for Fuller Low-End
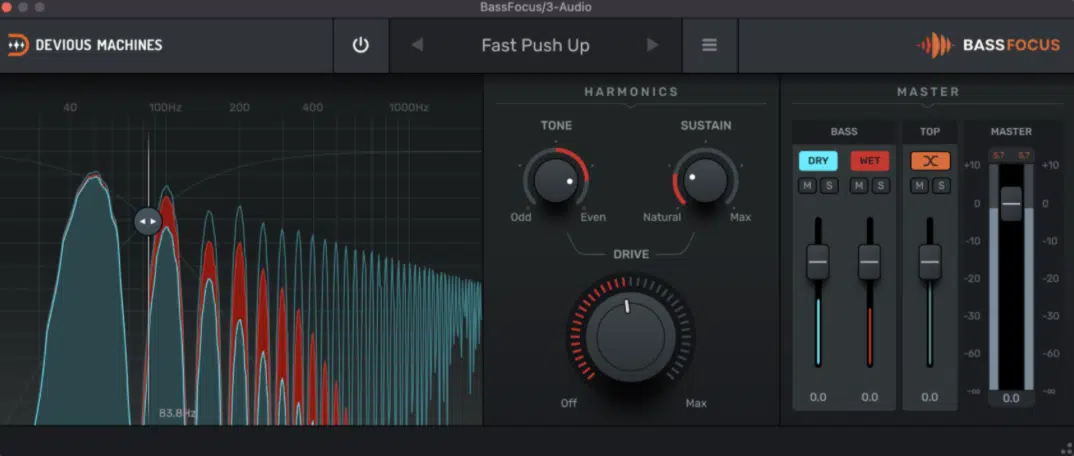
Instead of simply boosting sub frequencies, psychoacoustic bass enhancement adds harmonic overtones that make low-end more present on small speakers.
For example, applying a bass enhancer around 60-80 Hz at 20-30% mix can help kicks and basslines translate better on earbuds, phone speakers, and laptop playback without overpowering the mix.
-
Low-Level Compression for More Detail Without Overpowering
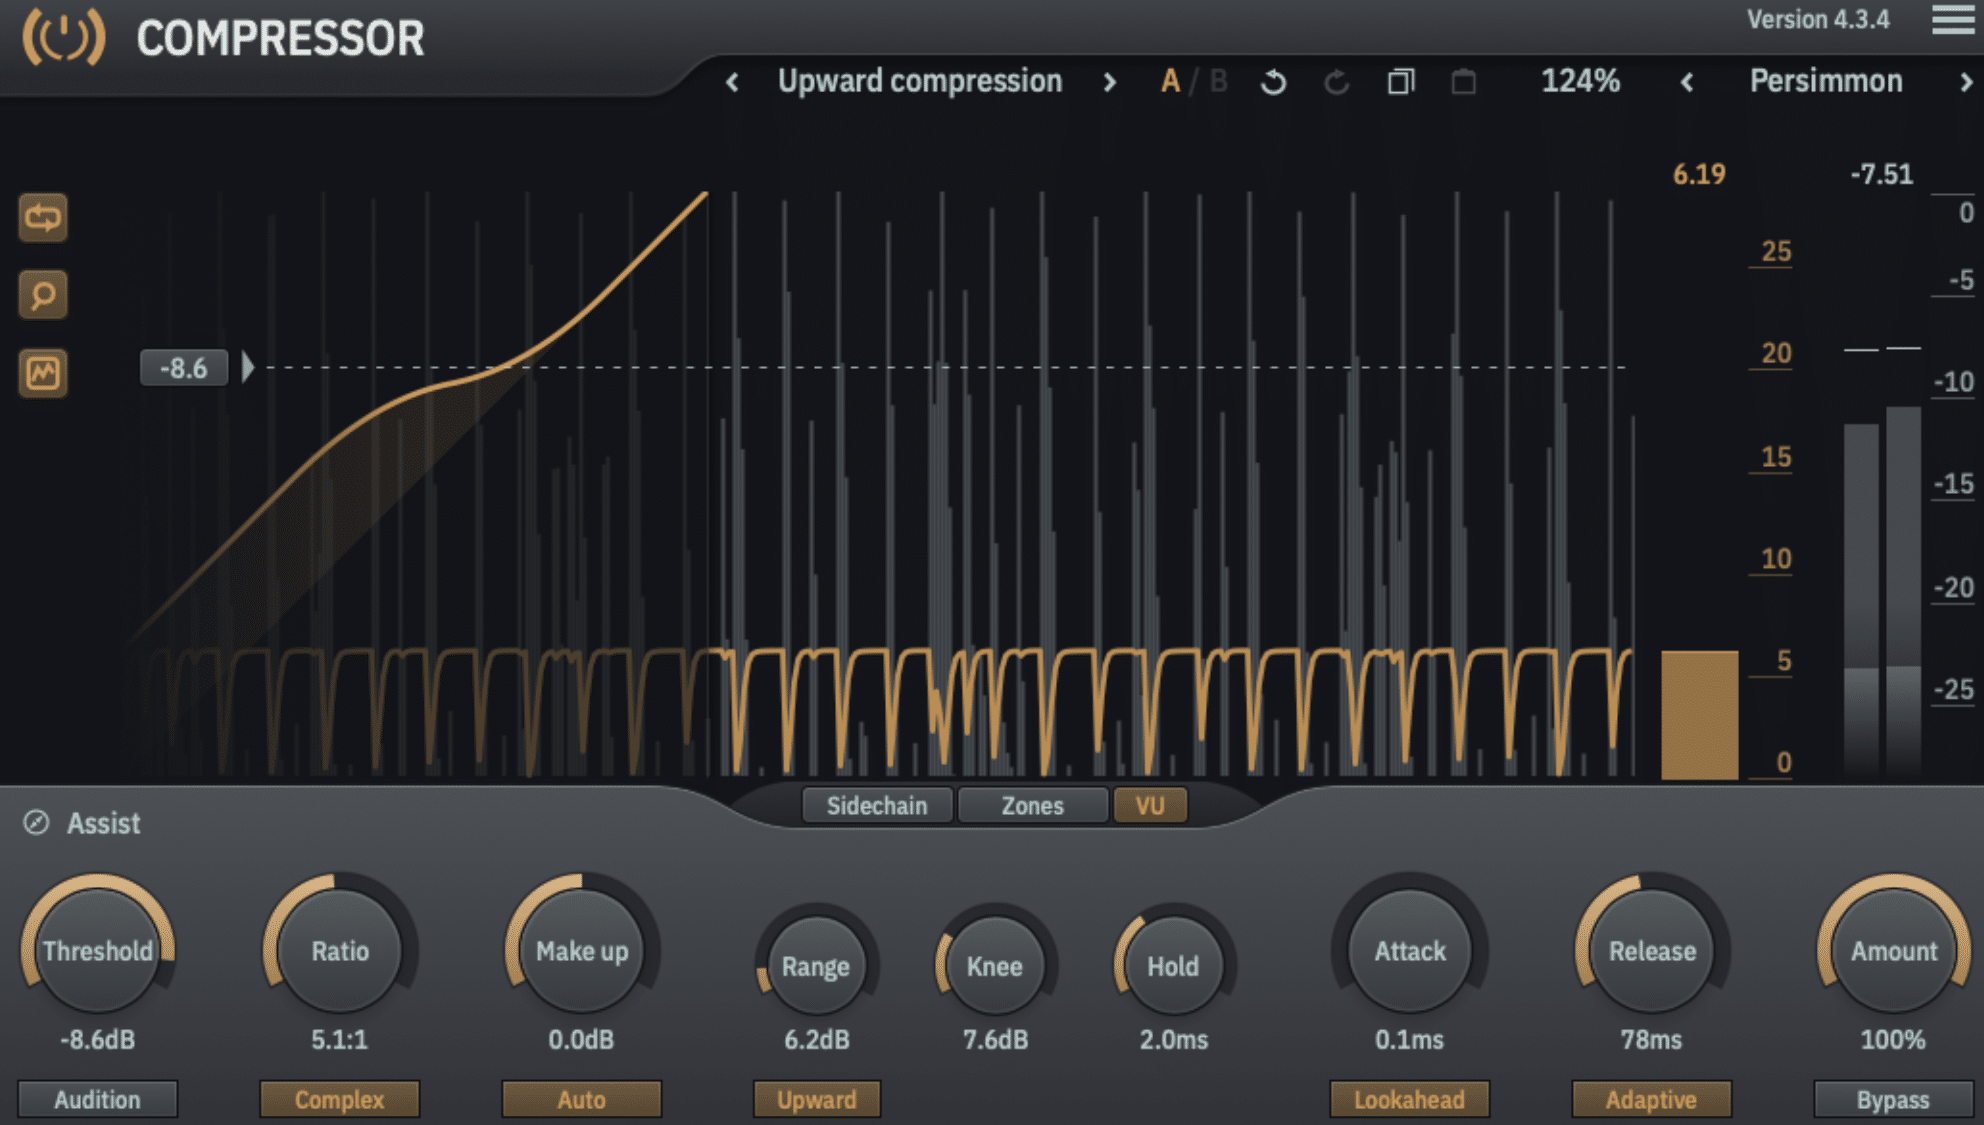
Low-level compression (aka upward compression), raises quieter details without affecting transients in any way.
This makes it great for bringing out reverb tails, background textures, and room sounds.
A great starting setting for this is a low threshold (-30dB), a low ratio (1.2:1 to 1.5:1), and a slow release (150ms).
It will help lift subtle details without making the mix feel over-compressed.
-
Auto-Gain Matching to Avoid Volume Bias
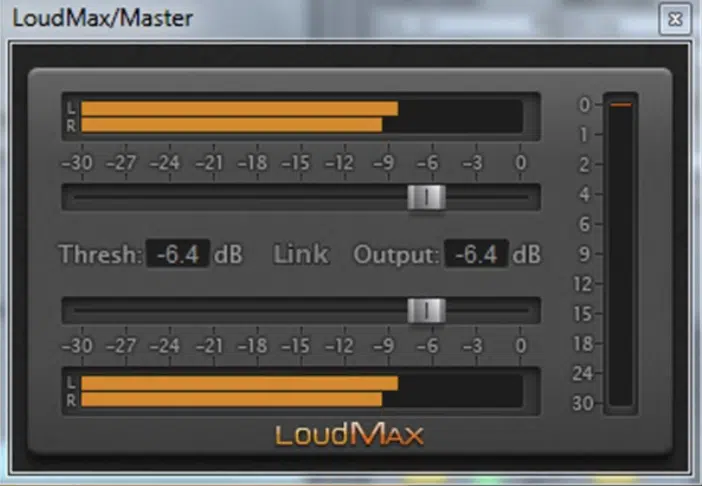
Many mastering processors make things sound better just by making them louder, so using auto-gain matching ensures you’re actually improving the track.
If your compressor or EQ is adding 3dB of gain, manually reduce the output by 3dB so you can accurately A/B test whether your adjustments are improving the mix or just making it louder.
Final Thoughts
And there you have it: everything you need to know about setting up your mastering signal chain like a true professional.
Remember, it’s all about getting the right balance of dynamics, EQ, stereo width, and loudness while making sure your track translates well across all playback systems.
Plus, making sure that you’re not over-compressing, introducing phase issues, or pushing your limiter too hard is key.
Otherwise, you’ll end up with a distorted, lifeless, or unbalanced master that doesn’t hold up against professionally mastered tracks.
But don’t worry 一 as long as you follow the proper steps, use metering tools to guide your decisions, and trust your ears, you’ll be okay.
And, as a special bonus, you’ve got to check out these 3 invaluable Free Project Files.
They show you exactly how to create a professional beat from start to finish, including the mastering chain so you can see it all in action.
I mean, you’re basically getting the cheat codes to any effect or process you could possibly imagine.
And they were all created by the best producers in the game, so you know you’re getting priceless breakdowns that would normally take years to learn.
You’ll really be able to knock out mind-blowing beats all day and blow the competition out of the water.
Bottom line, your mastering signal chain is super important, and you really have to take the time to set it up properly.
Just make sure to gain stage correctly, control dynamics with precision, and apply EQ and stereo imaging in a way that enhances the mix rather than muddies it.
This way, your tracks (and masters) will always sound polished, loud, and professional, and you’ll keep elevating your skills with every project.
Until next time…


Leave a Reply
You must belogged in to post a comment.