If you’re looking to take your music production to the next level, you’re in the right place.
Parallel compression is one of the most powerful and versatile tools in a producer’s arsenal, and mastering this technique can be a game-changer.
In this comprehensive guide, we’ll explore what parallel compression is, why it’s crucial in music production, and how to apply it effectively.
Get ready to unlock new sonic possibilities and elevate your mixes to new heights!
Table of Contents
- Breaking It Down
- How To Apply Parallel Compression
- Enhance Your Mixes
- Add Parallel Compression To Your Tracks
- Downward Compression vs. Upward Compression
- Gain Reduction
- Parallel Compression vs Classic Compression
- Parallel Compressors and Parallel Setup
- Popular Compressor Plugins
- What Is a Compressed Signal?
- Advanced Parallel Compression Techniques
- The Mix Knob and Balancing Levels
- Production Tips & Tricks
- Mistakes to Avoid
- Mixing Vocals
- Transforming a Drum Kit Sound
- Know Your Compressor & Start With Moderate Settings
- The Benefits vs. The Risks
- When to Use Parallel Compression
- BONUS: 5 Creative Parallel Compression Techniques
- Final Thoughts
Breaking It Down
Parallel compression, also known as New York compression, is a mixing technique that involves blending an unprocessed (dry) audio signal with a heavily compressed version of the same signal.
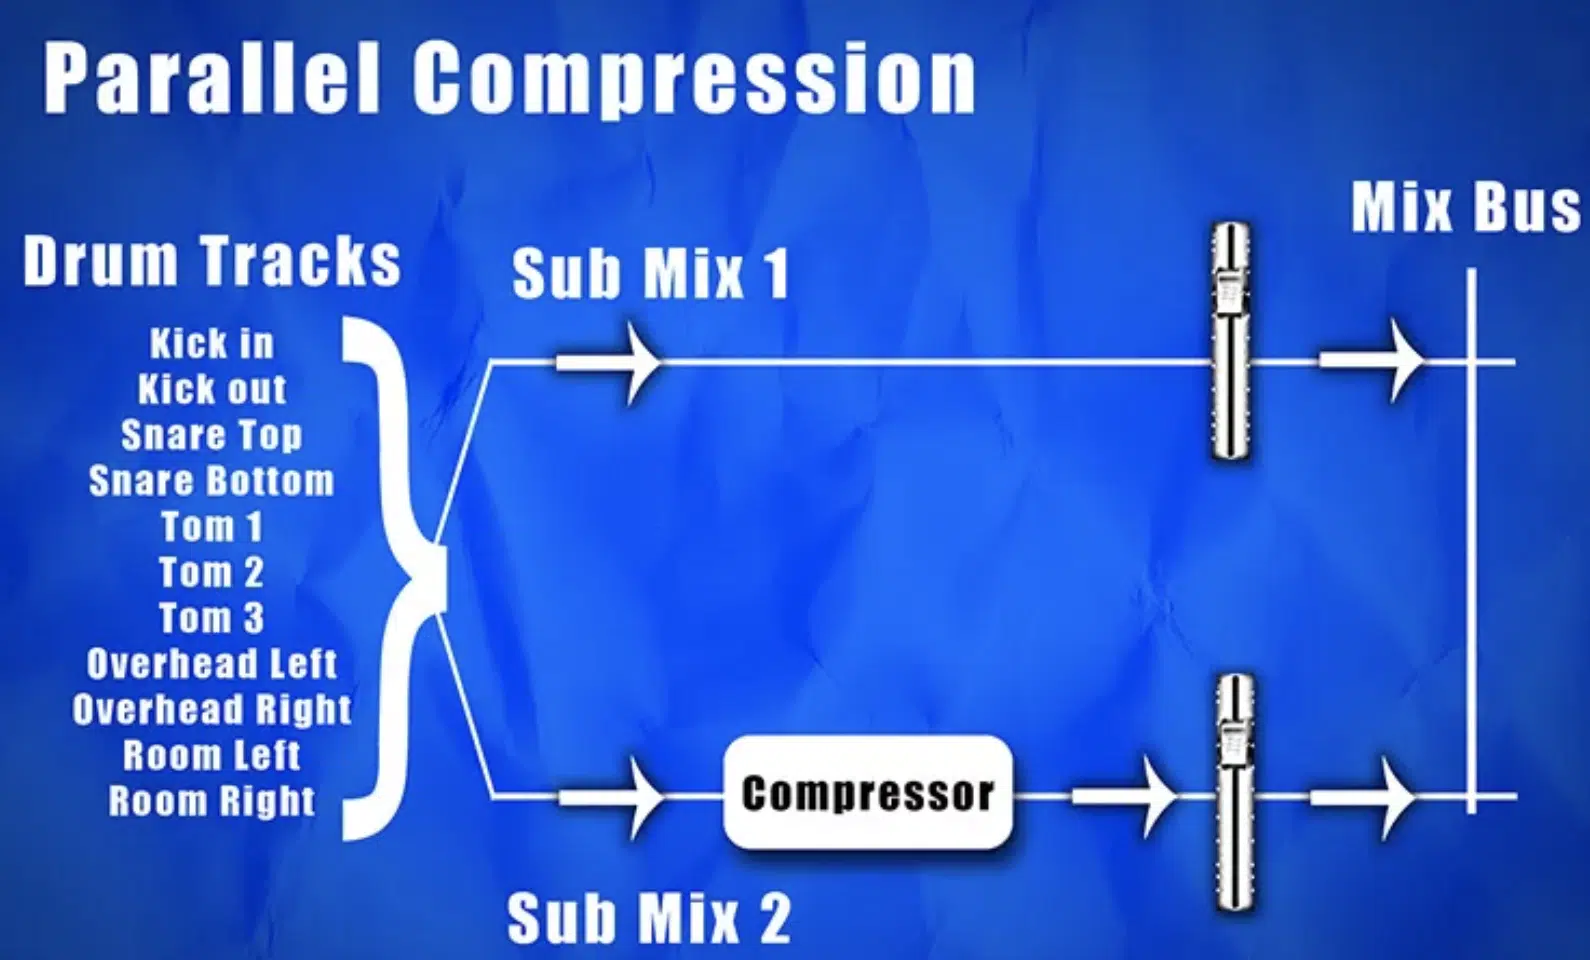
By combining the two signals, you can achieve a fuller, more polished sound while preserving the natural dynamics of the original audio.
Parallel compression is a form of parallel processing, a technique used in audio production to apply effects or processing to a copy of a signal instead of the original.
This approach allows you to maintain the integrity of the original audio while adding depth, texture, and character through various processing techniques.
In music production, parallel compression is crucial for several reasons, including:
- Increase the perceived loudness of your mix without adding distortion or clipping ✓
- Enhance clarity and detail ✓
- Preserve the dynamic range of your tracks ✓
By mastering this technique, you can create professional-sounding mixes that stand out in a competitive industry.
How To Apply Parallel Compression
Parallel compression is widely used in various aspects of music production, from enhancing drums and vocals to adding depth to guitars and bass.
By understanding when and how to apply parallel compression, you can elevate the quality of your mixes and achieve a polished, professional sound.
-
Drums

Parallel compression is particularly effective on drums, where it can add punch and power without squashing the dynamic range.
By blending the original drum kit sound with a compressed one, you’ll achieve a larger-than-life drum sound that cuts through the mix.
When applying parallel compression to drums, try using a fast attack and release setting on the compressor to emphasize the transient energy and create a punchier sound.
Pro Tip: Alternatively, if you really want to “smash” the drums, and incorporate more of the DRY signal, use a medium-long attack & release time. This creates ideal “smearing.”
-
Vocals
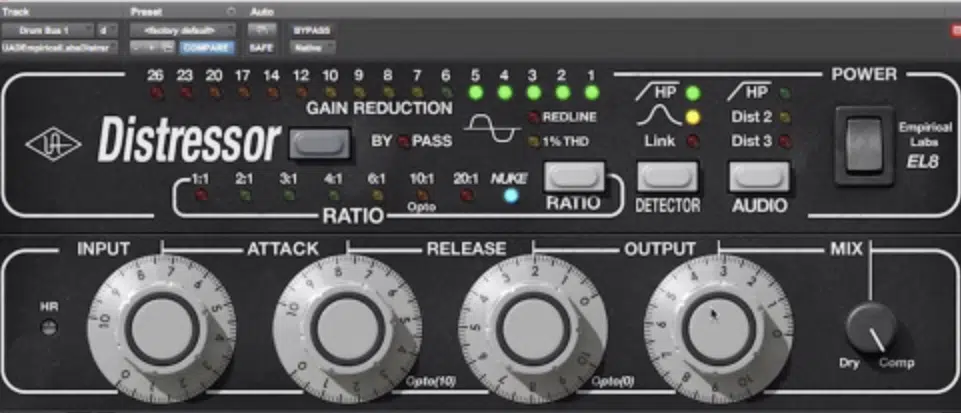
When mixing vocals, parallel compression can help you achieve a more consistent and powerful performance.
By combining the dry vocal signal with a compressed version, you can bring out the details and nuances of the performance while maintaining the natural dynamics.
When working with vocals, try using a medium attack and release setting on the compressor to allow the transients to pass through while still controlling the overall level.
Enhance Your Mixes
Using parallel compression in your mixes can offer several advantages, such as:
- Increased loudness and presence without overcompressing the audio
- Preserved dynamic range while adding thickness and power
- Improved clarity and detail in your mix
- Enhanced control over the balance between compressed & uncompressed signals
By applying parallel compression, you can achieve a thicker, more polished sound without sacrificing the natural dynamics of your mix.
This powerful technique allows you to maintain the clarity and punch of your original audio while adding depth and presence to your tracks.
As a result, parallel compression can enhance the listening experience and create a more professional, radio-ready sound for your music.
Add Parallel Compression To Your Tracks
By adhering to the following steps, you’ll be able to optimize the impact of parallel compression on your tracks and produce mixes that truly stand out in the competitive world of music production.
- Create an auxiliary (aux) track or bus in your DAW and route the audio track you want to process to this aux track.
- Insert a compressor plugin (or, plug ins) on the aux track, and adjust the settings for a heavy compression (e.g., a high ratio, low threshold, and appropriate attack and release times).
- Blend the compressed signal from the aux track with the original, dry signal on your source track.
Use the aux track’s fader or a mix knob (if available) to find the perfect balance that enhances your mix without overpowering the original sound.
Downward Compression vs. Upward Compression
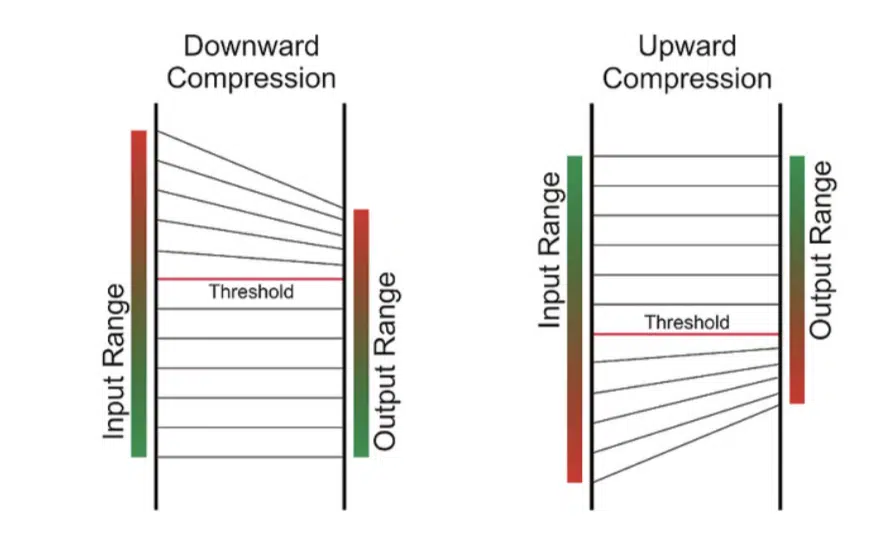
Parallel compression typically uses downward compression, but it’s essential to know the key differences between these techniques to select the best approach for your mix.
- Downward Compression 一 Reduces the dynamic range of a signal by attenuating the loudest parts
- Upward Compression 一 Increases the level of quieter parts, effectively making the quiet parts louder
The key difference between upward and downward compression lies in how they affect the audio signal.
For a vocal track with a wide dynamic range, downward compression can help you tame the loudest parts.
Upward compression, on the other hand, can bring up the level of softer phrases, ensuring a more consistent performance.
Gain Reduction
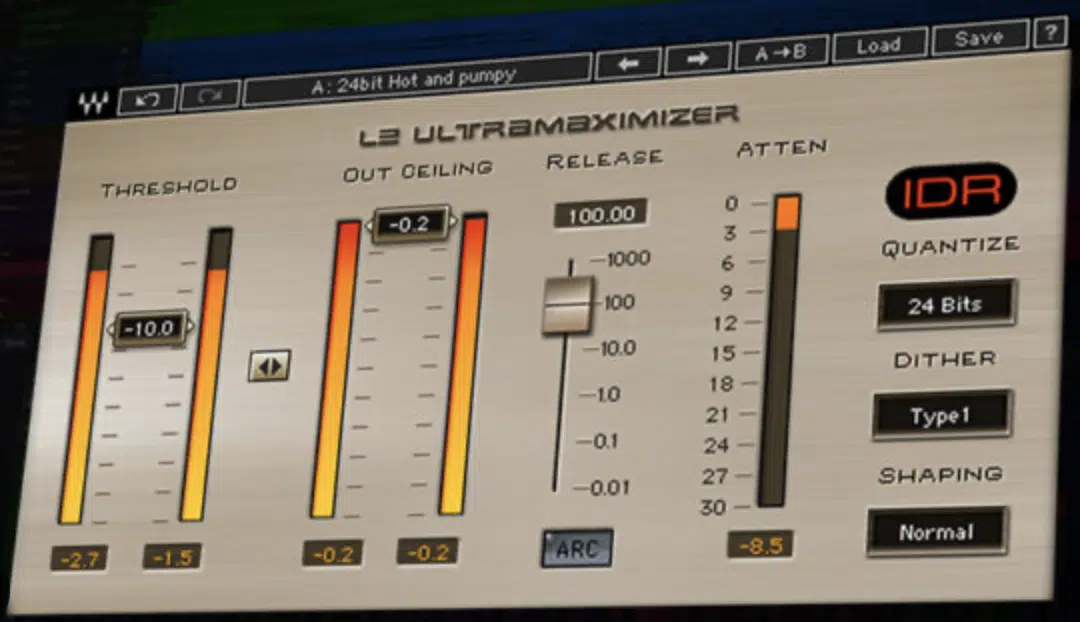
Gain reduction refers to the amount by which a compressor reduces the level of a signal when the signal exceeds the set threshold.
Understanding gain reduction is crucial when using parallel compression.
It determines the balance between preserving dynamic range and adds power to your mix, making it seem pristine and refined.
Gain reduction helps to tame peaks and transients in your audio, allowing for a smoother and more polished sound.
By adjusting the gain settings on a compressor, you can control the amount of compression applied to the audio signal and fine-tune the balance between loud and quiet parts.
Tip: Start with a moderate amount of gain (around 6-10 dB) reduction and adjust as needed to find the sweet spot that enhances your track without squashing the dynamics.
Make up gain is an essential parameter in the reduction of gain process, as it compensates for the volume lost due to compression.
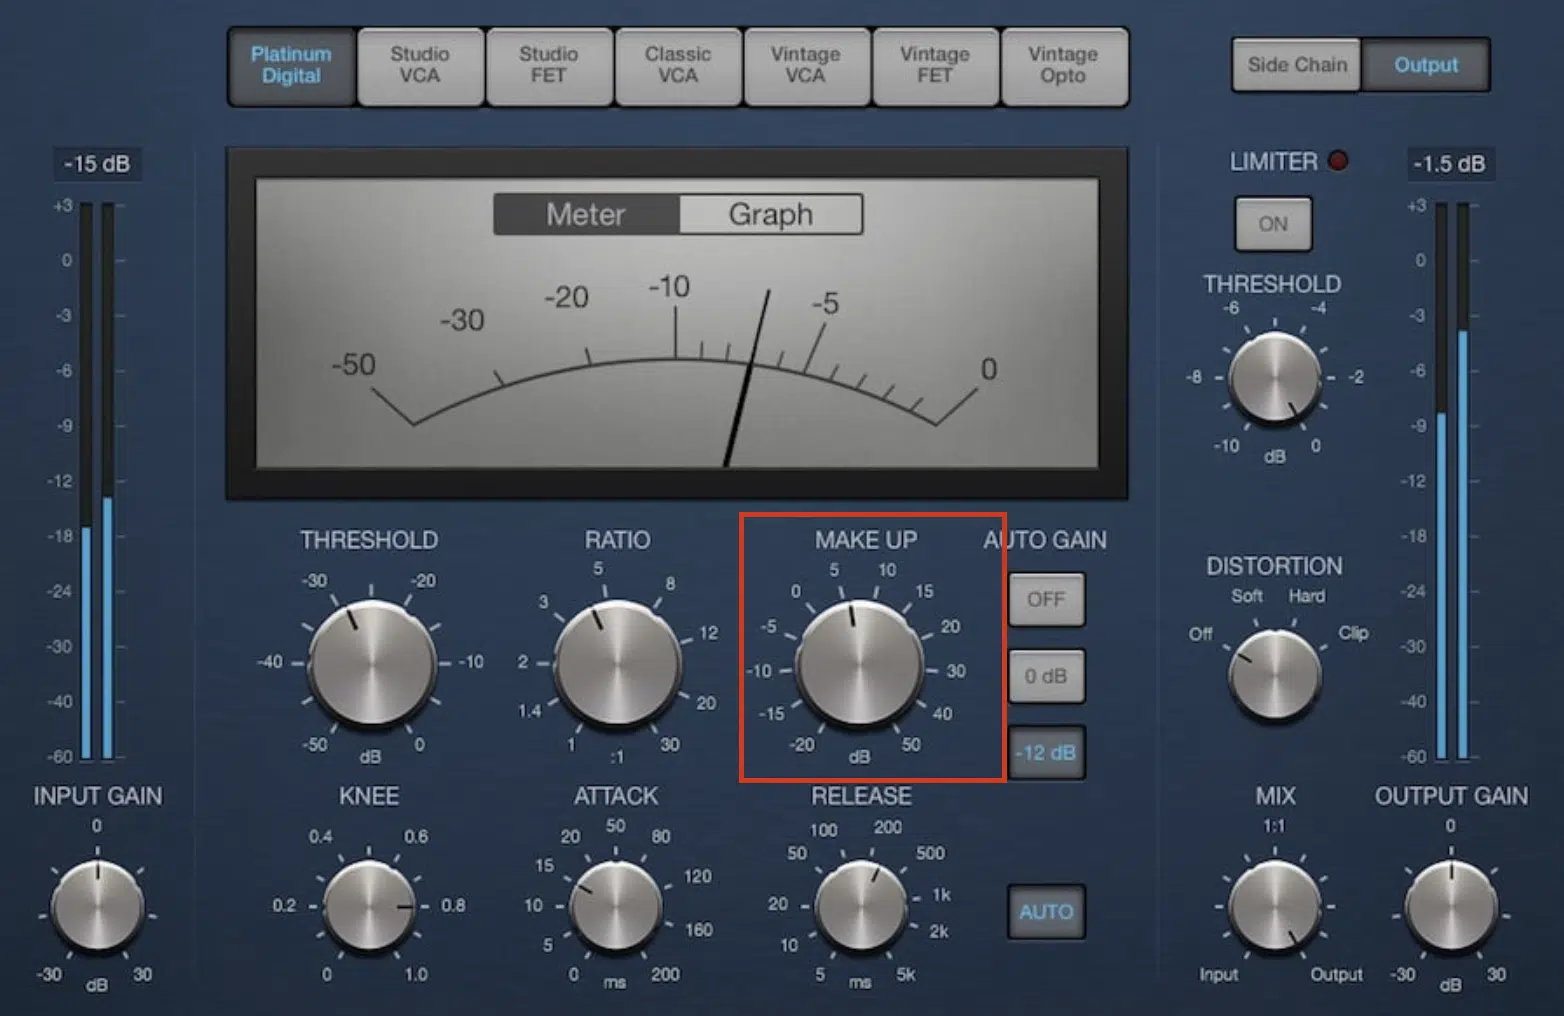
By applying makeup gain after compression, you can bring the overall level of the audio signal back up.
This will help to ensure you produce a balanced and consistent output without sacrificing the dynamic control achieved through gain reduction.
Parallel Compression vs Classic Compression
Parallel compression differs from traditional compression in that it blends a compressed signal with the original, dry signal.
This approach allows for more control over the balance between preserving dynamics and achieving a fuller, more powerful sound.
When using traditional compression, consider using lower ratios and higher thresholds to maintain a more natural sound.
For parallel compression, don’t be afraid to use higher ratios and lower thresholds to create a heavily compressed signal that you can blend with the original audio.
Parallel Compressors and Parallel Setup
Parallel compressors play a crucial role in achieving a consistent output level for your processed signal.
By carefully setting up parallel compressors, you can ensure that the vast majority of your audio sources receive the same amount of compression.
This will give any modern mixes a balanced and cohesive sound.
The Importance of a Parallel Setup

Setting up a parallel compression chain correctly is crucial to achieving the desired results.
By using an aux track or bus, you can maintain separate control over the dry and compressed signals.
This allows you to fine-tune the blend and find the perfect balance for your mix.
-
Wet/Dry Signals
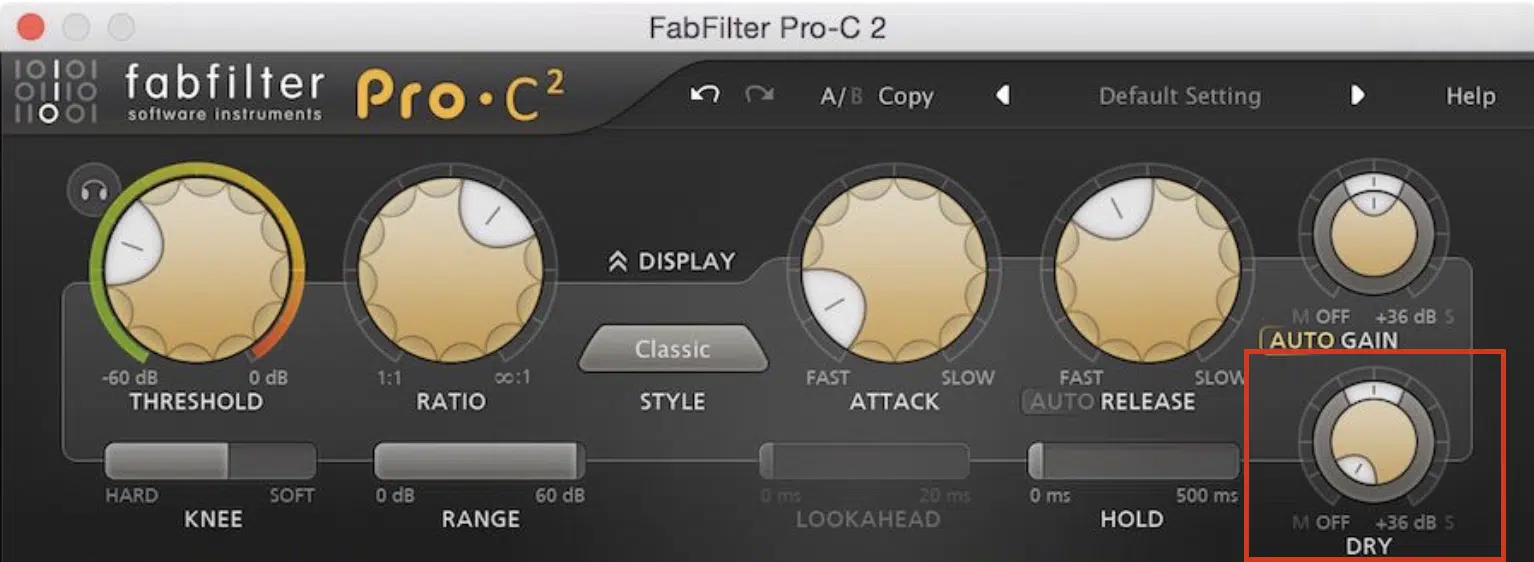
In parallel compression, the “wet” signal refers to the compressed version of the audio, while the “dry” signal is the original, uncompressed audio.
Balancing the wet/dry signals is essential to achieving the desired effect.
It allows you to maintain the natural dynamics of the source material while adding the benefits of compression.
Tip: Start with a lower wet/dry ratio (e.g., 25% wet, 75% dry) and gradually increase the wet signal until you find the ideal balance for your mix.
Keep in mind that the perfect ratio may vary depending on the material and your desired outcome.
Popular Compressor Plugins
Some popular parallel compressor plug ins that work well for parallel compression include:
-
The Api 2500 Compressor Plugin by Waves
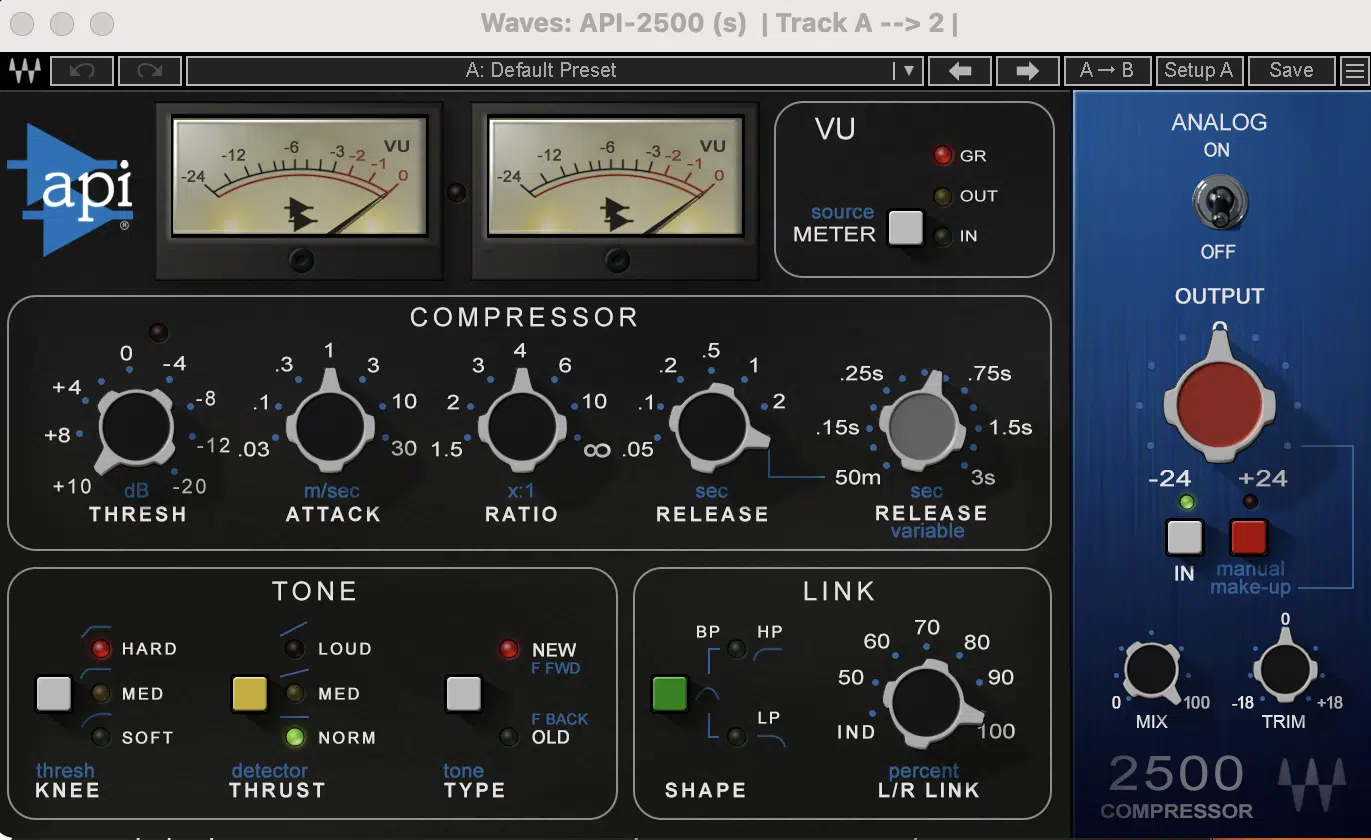
The API 2500 Compressor Plugin by Waves is a versatile and powerful option for parallel compression.
Renowned for its unique tone and character, the API 2500 delivers exceptional control over dynamics, making it a favorite among producers looking to add warmth and presence to their mixes.
-
FabFilter’s Pro-C 2
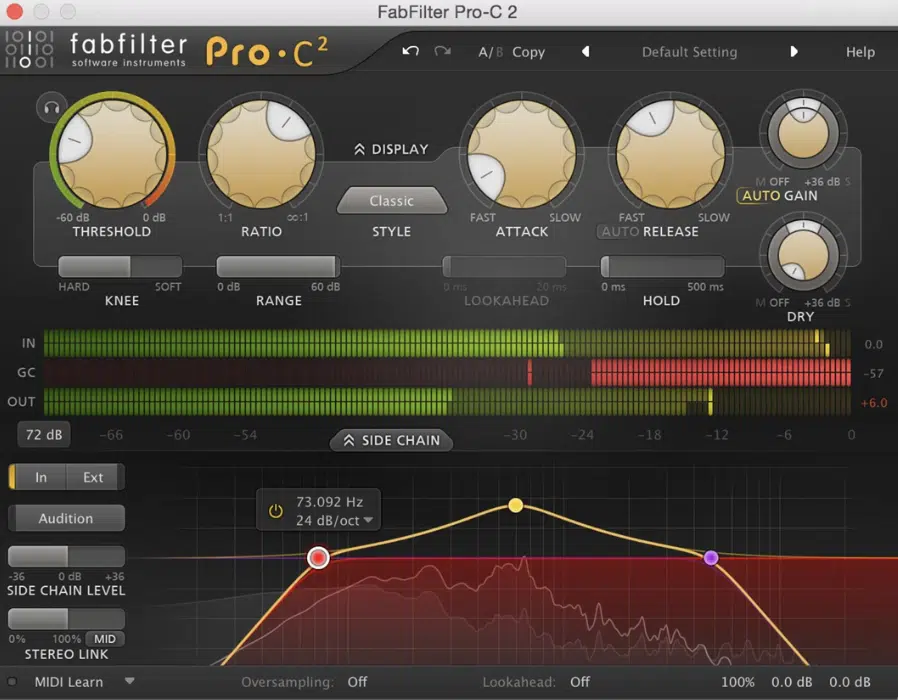
FabFilter’s Pro-C 2 is another outstanding choice for parallel compression.
With its intuitive interface and advanced features like sidechain EQ, lookahead, and mid/side processing, the Pro-C 2 provides a comprehensive solution for sculpting your sound
With it, you’ll be able to create the perfect balance between compressed and uncompressed signals.
-
Cytomic’s The Glue
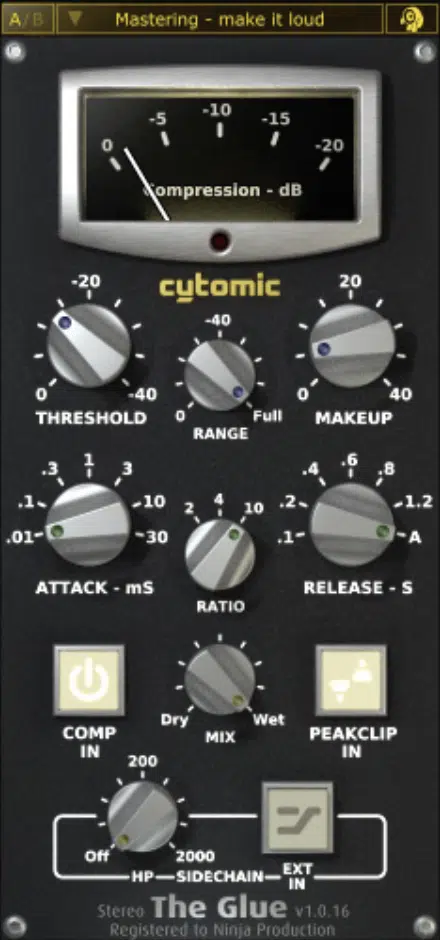
Cytomic’s The Glue is a highly regarded plugin inspired by classic analog bus compressors, making it an excellent choice for parallel compression tasks.
The Glue is known for its ability to add cohesion and punch to your mix while preserving the dynamics and transient details, resulting in a professional and polished sound.
These compressors offer various settings and features that allow you to tailor your compressed track and add dynamic range compression on your parallel busses.
What Is a Compressed Signal?
The dry signal represents the original, unprocessed audio in your mix, while the compressed signal is the version that has been processed with a compressor.
When using parallel compression, it’s essential to find the right balance between these two signals to achieve the desired sound without compromising the integrity of your mix.
Parallel processing extends beyond compression and includes other techniques like
1. Parallel EQ
2. Parallel distortion
3. Parallel reverb
These methods involve blending the original, dry signal with a processed version to achieve a desired effect while preserving the natural characteristics of the source material.
Advanced Parallel Compression Techniques
Once you’ve mastered basic parallel compression methods, it’s time to move on to some more advanced techniques.
-
Aux Track and Rear Bus Compression
Aux tracks and rear bus compression are advanced techniques that can further enhance your use of parallel compression.
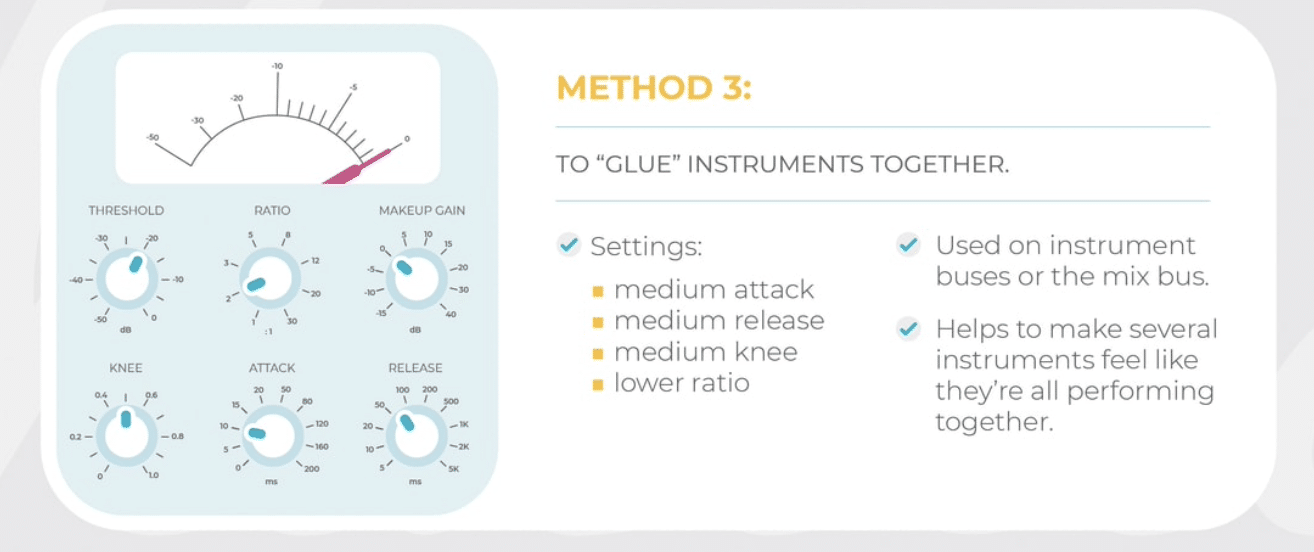
Rear bus compression, in particular, is a variation of parallel compression that treats the stereo bus with a compressor instead of individual elements within the mix.
This technique can help glue the mix together and create a cohesive sound.
-
Rear Bus, Plugins, and Lead Vocal Processing
Using rear bus compression, built-in parallel processing features in plugins, and applying parallel compression to lead vocals can create unique and powerful results.
By experimenting with different plugin settings and techniques, you can achieve a rich, full sound that adds depth and dimension to your audio tracks.
Example: Try using parallel compression on a lead vocal, followed by a touch of saturation or harmonic distortion on the compressed signal to create a warm, full-bodied vocal that cuts through the mix.
-
NY Compression Technique
The New York compression technique, another name for parallel compression, is a popular method for adding punch and power to drums, bass, and other elements in a mix.
The technique involves blending a heavily compressed signal with the original audio, allowing you to maintain the natural dynamics of the source material while adding the benefits of compression.
The Mix Knob and Balancing Levels
The mix knob, found on many compressor plugins, allows you to balance the wet and dry signals (above) in parallel compression directly within the plugin.
This feature streamlines the process and makes it easier to find the perfect balance between the compressed and uncompressed signals.
Attack & Release Controls
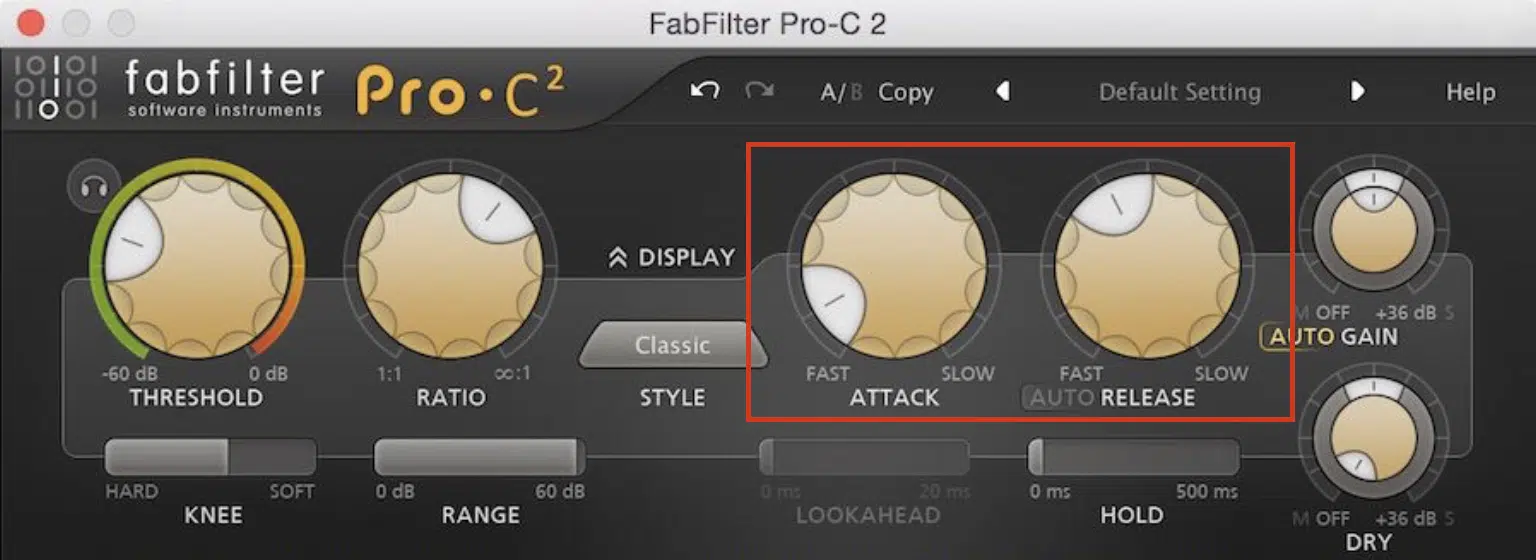
The attack and release controls on a compressor determine how quickly the compressor responds to the input signal and how long it takes to return to its initial state.
- For drums 一 Use a fast attack and release to emphasize the transient energy and create a punchier sound.
- For vocals 一 Use medium attack and release setting to help maintain the natural dynamics while controlling the overall level.
These controls are crucial in shaping the sound of parallel compression, as they can impact the transient response and the overall character of the compressed signal.
Output Level and Source Material Considerations
When using parallel compression, it’s essential to consider the output level of the compressed signal and the characteristics of the source material.
Ensure that the compressed signal doesn’t overpower the original audio or introduce unwanted distortion or artifacts.
Production Tips & Tricks
The following production tips and tricks will help you achieve the best out of your Parallel Compression ventures.
- Start with moderate compression settings and adjust as needed to find the sweet spot for your mix.
- Use an aux track or bus to maintain separate control over the dry and compressed signals.
- Experiment with different compressor plugins and settings to find the perfect combination for your mix.
Remember, like all other aspects in production, experimentation is key.
Don’t forget to play around with different parameters and techniques in order to evolve and grow.
Mistakes to Avoid
- Over-compressing the signal, which can lead to a lifeless or distorted sound… but remember, aggressive compression is encouraged, just don’t overdo it.
- Applying parallel compression to every element in the mix, resulting in an overly dense and cluttered mix.
- Neglecting to fine-tune the balance between the wet and dry signals, which can diminish the natural dynamics of the source material.
Mixing Vocals
Use parallel compression to enhance a vocal track by adding presence, consistency, and power.
- Use a medium attack and release setting to maintain the natural dynamics of the vocal performance.
- Experiment with different compressor plugins to find the one that best suits the character of the vocals.
- Balance the wet signals and dry signals to achieve a consistent and powerful vocal sound without sacrificing the natural dynamics.
By blending the dry vocal signal with a heavily compressed version, you can bring out the subtleties and nuances of the performance while maintaining the natural dynamics.
Example: To enhance your lead vocal track, try using a medium attack and release setting on the compressor to allow the transients to pass through while still controlling the overall level.
Play around with different wet/dry ratios to find the perfect balance for your mix.
Transforming a Drum Kit Sound
By applying parallel compression to a drum kit, you can achieve a punchy, powerful sound that cuts through the mix.
Experiment with different compressor settings and wet/dry balances to find the perfect combination that brings your drums to life.
Remember to always listen to your parallel compression adjustments in the context of the full mix.
Soloing a track during parallel compression adjustments can be misleading, as the final result may sound different when all elements are playing together.
Know Your Compressor & Start With Moderate Settings
Familiarize yourself with the various compressor plugins and hardware units available to find the best fit for your mix.
Each compressor has its unique character and response, which can significantly impact the results of parallel compression.
When you’re learning how to use parallel compression, start with moderate settings, and adjust as needed.
It’s easier to increase the compression amount than to undo overcompression.
The Benefits vs. The Risks
Like all other music production techniques, there are both benefits and risks, and parallel compression is no exception.
-
Benefits
- Increased Loudness 一 Parallel compression can help increase the perceived loudness of your mix without adding distortion or clipping.
- Enhanced Clarity and Detail 一 By blending the compressed signal with the original audio, you can bring out subtle nuances and details in your tracks.
- Preservation of Dynamic Range 一 Parallel compression allows you to maintain the natural dynamics of your tracks while adding power and thickness.
-
Risks
- Over-Compression 一 Applying too much compression can result in a lifeless or distorted sound.
- Phase Issues 一 If not carefully managed, phase issues can arise when blending the compressed and uncompressed signals.
- Overcomplicating the Mix 一 Excessive use of parallel compression on multiple elements in the mix can lead to a cluttered and dense sound.
When to Use Parallel Compression
Enhancing Drums ✓
Parallel compression is often used on drum tracks to add punch, power, and sustain. Use it to emphasize the transient energy in your drums and help them cut through the mix.
Thickening Vocals ✓
Applying parallel compression to vocals can help achieve a more consistent, present sound without sacrificing the natural dynamics of the performance. It can also add warmth and character to the vocal track.
Adding Depth to Guitars and Bass ✓
Parallel compression can be used to add depth and sustain to guitars and bass tracks. Experiment with different compressor settings and wet/dry ratios to achieve a fuller, more polished sound.
Gluing the Mix Together ✓
Using parallel compression on a mix bus or submix can help glue the various elements together and create a cohesive, professional-sounding mix.
BONUS: 5 Creative Parallel Compression Techniques
In order to use parallel compression to its fullest potential, here are 5 bonus techniques:
- Experiment with Sidechain Compression
Combine parallel compression with sidechain compression to create unique pumping effects and rhythmic movement in your mix.
- Process Multiple Elements Together
Try applying parallel compression to a group of similar elements, such as backing vocals or layered synths, to achieve a more cohesive sound and a sense of unity.
- Use Different Compressors on Different Busses
Experiment with using different compressors for parallel compression on various busses within your mix. This approach can add character and complexity to your mix, setting it apart from the competition.
- Automate Parallel Compression Parameters
Automating the wet/dry mix or other parameters when you use parallel compression throughout your track can create dynamic effects and keep your mix engaging from start to finish. For example, try increasing the wet/dry ratio during the chorus to add intensity and excitement.
- Combine Parallel Compression with Other Effects
Blend parallel compression with other effects like saturation, reverb, or delay to create unique soundscapes and textures in your mix. The possibilities are endless, so don’t be afraid to get creative.
Don’t be afraid to try new approaches and unconventional methods when using parallel compression.
By thinking outside the box and pushing your creative boundaries, you can set yourself apart from the competition and develop your unique sound.
Final Thoughts
Parallel compression is a powerful mixing technique that allows you to maintain the natural dynamics of your tracks while adding power and thickness.
By blending a dry, unprocessed signal with a heavily compressed version of the same signal, you can achieve a fuller, more polished sound in various genres and applications.
Using parallel compression in your music production can elevate your mixes to a professional level by increasing loudness and presence, preserving dynamic range, and improving clarity and detail.
Don’t be afraid to experiment with different compressor settings, wet/dry ratios, and applications to find the perfect parallel compression approach for your mix.
With practice and patience, you’ll master this game-changing technique and take your music production to new heights.
In order to help you skyrocket your workflow, check out our FREE Unison Essential Drum Loops packs.
They’re perfect to practice the aforementioned techniques, as you’ll have access to some of the hottest drum loops on the planet.
Play around with different methods and see what you can stir up!
In fact, by analyzing our drum loops, you will actually find that most of them already incorporated these techniques (and they’re made by superstar sound designers).
Until next time…


Leave a Reply
You must belogged in to post a comment.