Resampling can have 2 different meanings, depending on your specialty (audio engineer vs producer).
It’s a super versatile tool in the digital domain that can transform basic audio clips into sonic masterpieces.
As well as ensure they meet the specific standards of today’s digital platforms.
Plus, it can help breathe new life into old samples, introduce unparalleled depth and texture to your mixes, and allow for seamless compatibility across all listening environments.
Today, we’re breaking down the importance and creative possibilities for both audio engineers (in the first half) and music producers (in the second half).
We’ll cover everything about resampling and how it can elevate your audio projects to new heights.
In today’s article, we’ll break down:
- Resampling audio essentials ✓
- Key concepts like sample rates and bit depth ✓
- CPU optimization strategies ✓
- Advanced DAW/plugin settings ✓
- Creative effects with resampling ✓
- Fine-tuning audio fidelity, frequency, signal, input manipulation ✓
- MIDI integration for dynamic samples ✓
- Synth utilization for unique textures ✓
- Artifact manipulation for character ✓
- Step-by-step resampling processes ✓
- Advanced manipulation of reverb and effects ✓
- Much more ✓
You’ll be equipped with the knowledge to master the resampling process with ease so you can unleash your creative potential.
Plus, understand how to optimize your future hit record for any platform, create unique soundscapes, and resample like a boss.
So, let’s dive in…
Table of Contents
What is Resampling Audio? (For Audio Engineers)
Resampling audio, in the context of audio engineering, is a sequence process that involves changing the sample rate or bit depth of an audio file.
This is done to ensure compatibility across various playback systems or to meet specific quality standards required by different media formats.
For an audio engineer, resampling audio is a tool used to optimize audio content for its final distribution audio channel, like streaming platforms, physical media, or broadcast.
It’s commonly referred to as sample rate conversion (to avoid any matter of clashing definitions).
The resampling process demands a deep understanding of digital audio principles, as it directly affects the:
- Clarity
- Depth
- Overall fidelity of the sound
Engineers must make informed decisions about when and how to resample 一 considering the listener’s experience and the technical limitations of the playback environment.
The technical process of audio resampling involves algorithms that can either interpolate additional samples to increase the sample rate (upsampling) or remove samples to decrease the sample rate (downsampling).
Each approach has its challenges and requires careful consideration of factors such as aliasing, which can introduce unwanted artifacts into the audio.
High-quality audio resampling algorithms are designed to minimize such issues.
They incorporate techniques like low-pass filtering to preserve the integrity of the audio signal during the process.
For audio engineers, the choice of algorithm and the decision to resample are guided by the project’s needs, the target playback systems, and the desire to maintain the highest possible audio quality.
NOTE: When loading your audio input into the interpolator for upsampling, ensure that the interpolation process is finely tuned to preserve the signal’s integrity.
Following this, carefully manage the decimation stage to reduce the sample rate without losing quality, effectively balancing input clarity and reducing computational load.
-
Sample Rates & Bit Depth: Breaking it Down
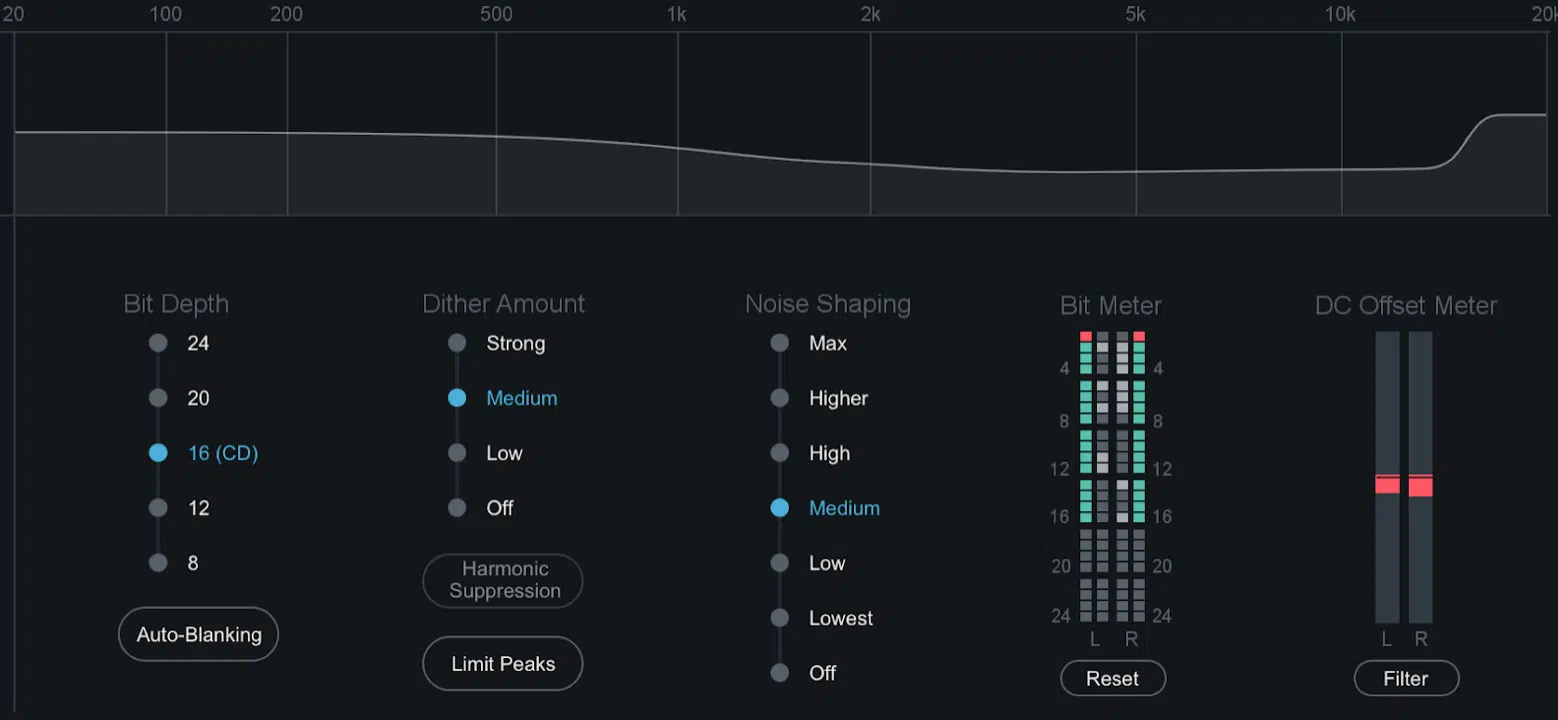
Sample rates and bit depth are foundational concepts in digital audio, determining the resolution and depth of sound recordings.
The sample rate, measured in hertz (Hz), refers to the number of samples of audio carried per second.
A higher sample rate captures more detail and sampling frequency content.
Common standards like 44.1kHz for CDs have given way to higher rates like 48kHz (for broadcast media) or even 96kHz for “Hi-Fi” streaming and professional audio work.
They accommodate the broader frequency range (frequencies) human ears can perceive and ensure recordings are future-proofed for advancements in audio playback technology.
Bit depth, on the other hand, defines the dynamic range of a recording 一 with higher bit depths allowing for a more detailed representation of sound volume and subtleties.
While 16-bit depth was the frequency norm for CDs, modern audio engineering frequently employs 24-bit depth or higher.
It significantly enhances the audio’s dynamic range and reduces quantization noise.
This increased resolution is particularly beneficial when mixing and mastering, where precision in sound representation is paramount.
-
Resampling Audio: Pro Tip
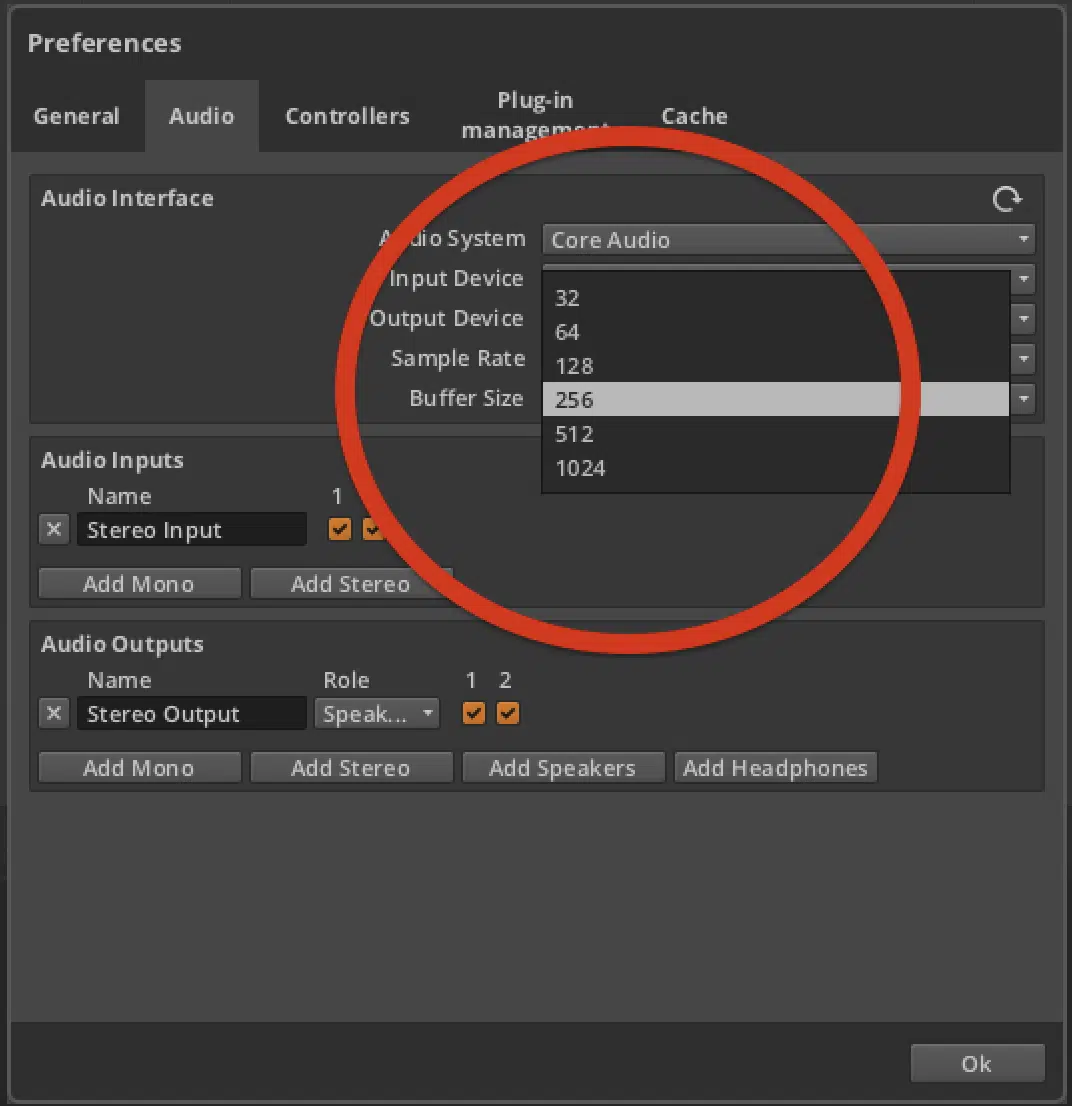
CPU load and buffer size are critical DAW considerations when resampling audio.
High-quality audio resampling algorithms, while ensuring optimal sound fidelity, can be CPU-intensive, especially when working with a whole lot of tracks or high sample rates.
You must carefully manage DAW settings (like in Ableton) 一 balancing CPU load with buffer size to minimize latency without compromising playback or recording quality.
Advanced plugin settings also play a crucial role, offering options like offline rendering or high-quality interpolation methods.
This can optimize the audio resampling process while managing default system resources efficiently.
-
When is (DSP) Resampling Desired & When To Ignore It?
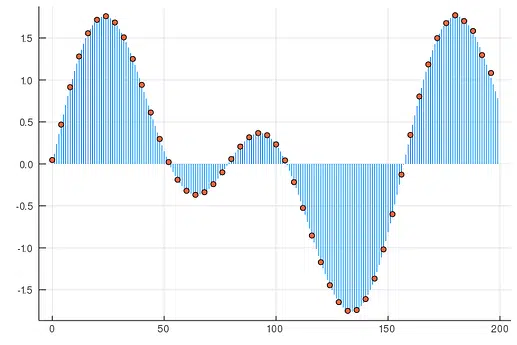
Digital Signal Processing (DSP) resampling, also known as Oversampling, is a powerful tool for audio engineers and DSP programmers.
It’s ideal for optimizing files for specific formats or enhancing sound quality, however, it’s not always necessary.
In fact, more often than not, it’s employed on the back end of our plugins processing and works without any additional inputs or thought (you can watch a tutorial if you’re unfamiliar).
Strategic use of DSP resampling is advised when converting audio for high-resolution formats or ensuring compatibility across various playback systems.
Conversely, unnecessary resampling can degrade audio quality through re-quantization errors or introduce unwanted artifacts.
It’s crucial to assess the project’s needs carefully, utilizing DSP resampling to enhance rather than diminish audio quality.
-
Bouncing Existing Resampling Processing
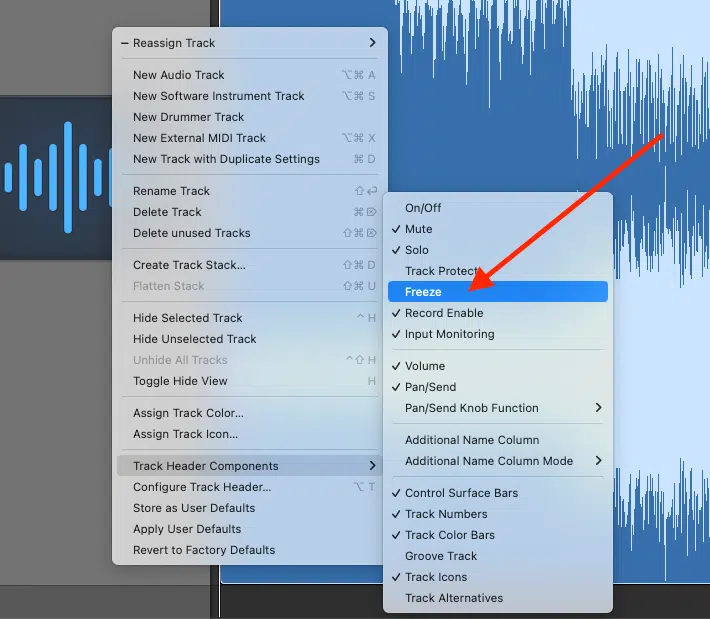
Bouncing, or printing, tracks with applied audio resampling processing is a critical step for conserving CPU resources and ensuring phase coherence in a mix.
This resampling audio technique involves rendering tracks with resampling and other effects into a fixed audio file (like WAV).
This fixed audio file reduces the computational load on your DAW (like Ableton) and solidifies the audio’s temporal characteristics.
It’s particularly useful in signal complex projects with extensive resampling.
It allows engineers to maintain a stable and responsive project environment while locking in the desired sound characteristics.
-
Pro Tip
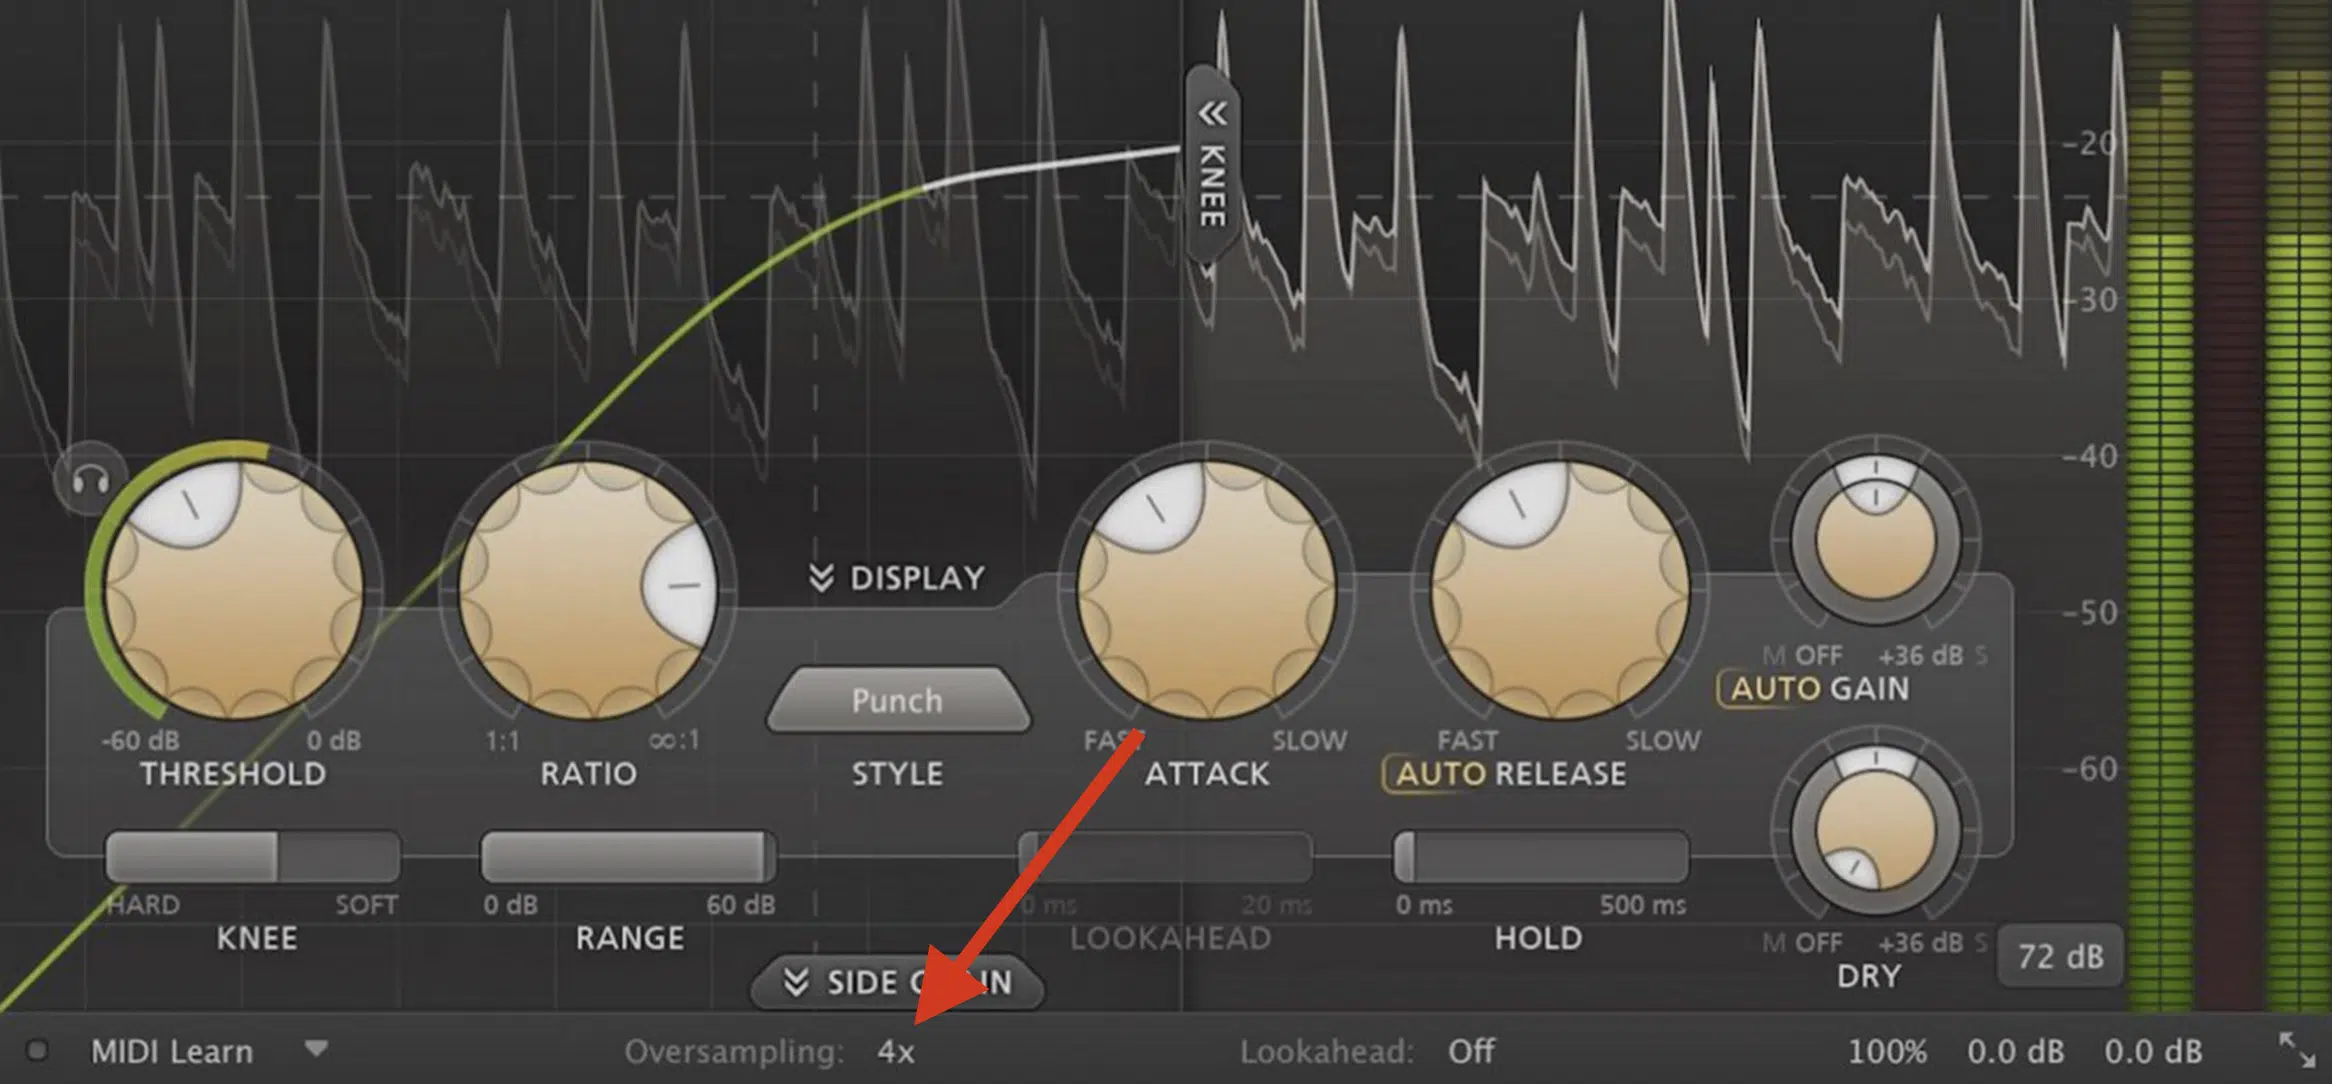
When making music and resampling audio, you’ll notice high-end plugins offer multiple resampling variables (2x, 4x, etc.).
As you enable this, your CPU load will increase, which can cause some problems, while simultaneously eliminating other issues.
How do you get the best of both worlds?… Simply enable the sampling on your desired plugin and bounce the results.
Now the audio is in that resampling mode forever.
What is Resampling Audio? (Music Production)
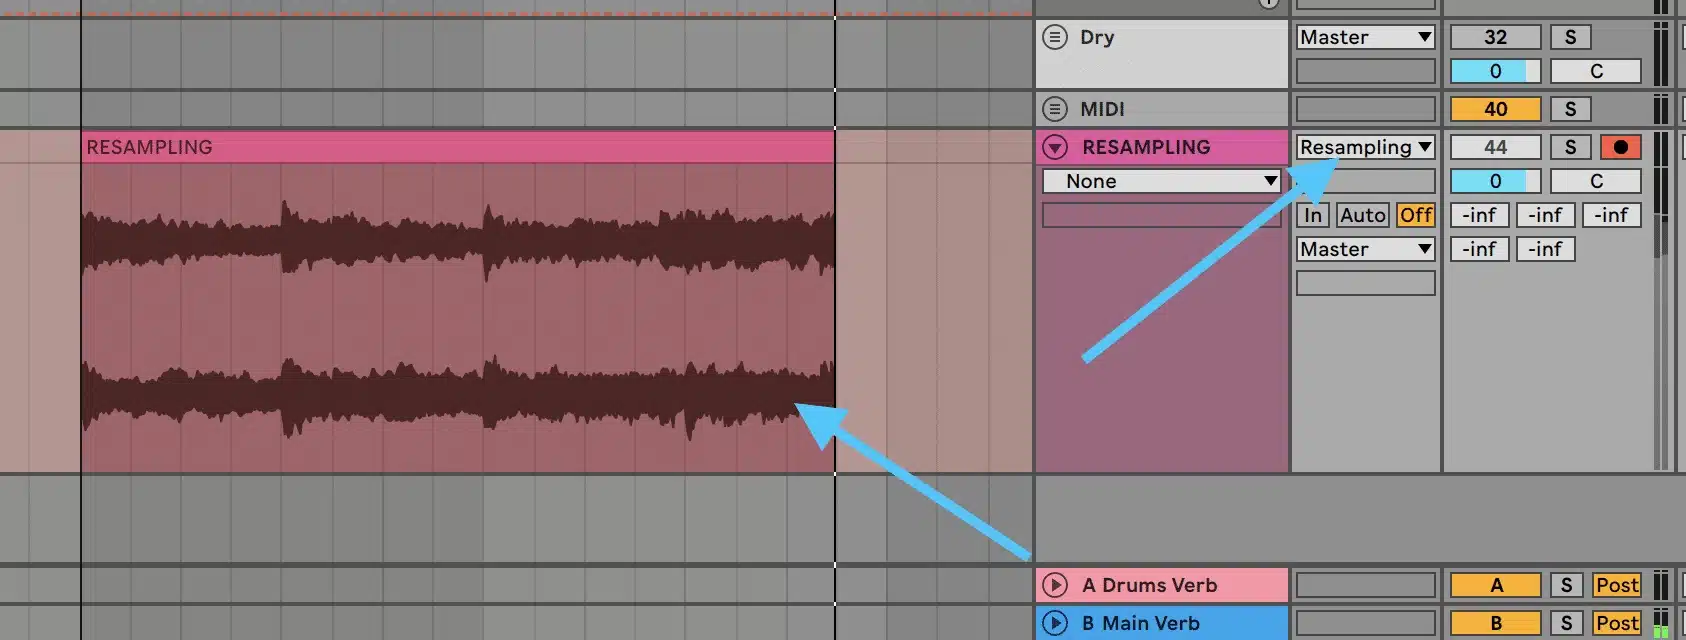
When it comes to music production, resampling audio is not just about adjusting sample rates or bit depths.
It’s an art form that opens up new dimensions in sound design, frequency manipulation, MIDI, sampler tricks, music-making creation, etc.
Resampling audio can:
- Breathe new life into stale sounds
- Transform simple samples into complex textures
- Create sonic landscapes that defy traditional boundaries
By capturing (recording/bouncing) the output of synths, sampler, drum machines, or entire tracks and then processing these recordings with various audio effects, you can hear/create unique sounds that shine.
The resampling audio process begins with choosing an intriguing source sound, which could be anything input from a looped drum beat to a synth line or another instrument.
You would then resample this audio, manipulating it with effects like pitch shifting, time stretching, or modulation, and then reintegrate it into your project.
This technique not only generates novel sonic elements but also gives producers a deeper level of control over the timbre and texture of their music.
It allows for a more captivating and expressive sound combination.
-
Creative Ways to Manipulate & Morph Reverb (+ Other Effects) Through Resampling

Creative manipulation of reverb through audio resampling can lead to ethereal and expansive soundscapes that are both captivating and immersive.
In fact, for the record, anytime you’ve heard a reverse reverb or the increasingly popular “frozen reverb” technique, re-sampling is always employed.
For example, when you’re resampling audio, try:
- Applying a generous amount of reverb to a simple piano note
- Resampling
- Playing the resampled audio in reverse
This creates an atmospheric effect that can serve as a hauntingly beautiful introduction or layer in a project.
This resampling audio method, when combined with other effects like granular synthesis or delay, can produce sounds that are rich in texture and depth.
It offers a variety of sonic colors that enhance the emotional impact of music.
But that’s just the beginning from there you can stretch warp and add modulation to the existing audio file and re-sample it multiple times over to get something very different than you’re starting point.
This is very popular in certain genres like lo-fi, dark hip-hop, etc.
-
Pro Tip: Resampling Audio
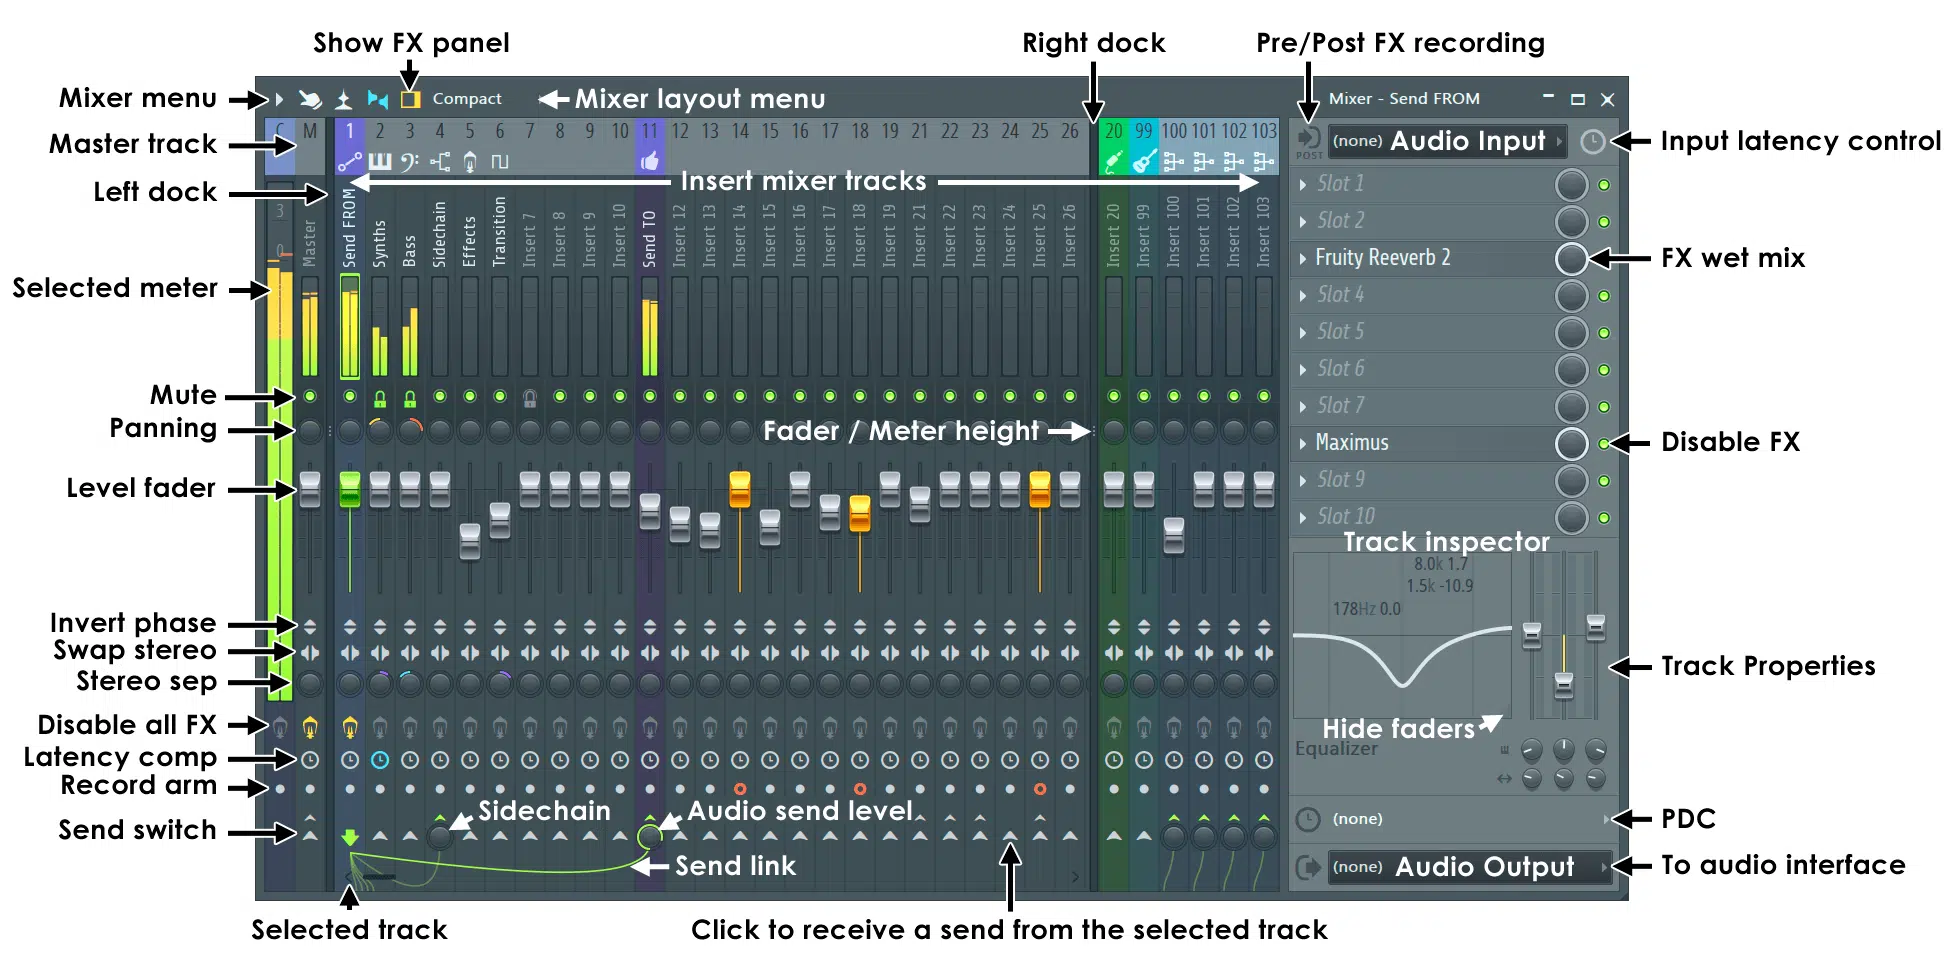
FL’s Mixer
Aside from the obvious CPU benefits, resampling audio after applying a chain of effects allows producers like yourself to create mind-blowing sonic signatures.
This could include:
- Distortion 一 For added grit.
- A flanger 一 For swirling texture.
- High-pass filter 一 To maintain clairty.
By continuously experimenting with the order and settings of these effects before resampling, you can discover unconventional sounds that defy traditional musical structures.
These resampled effects can then be integrated into music projects as lead elements, atmospheric backgrounds, or rhythmic components.
It can push the boundaries of what is possible in music production.
In fact, sometimes you may want to employ more effects than your computer can even handle…
That’s when you can creatively use workarounds such as audio sampling to add as much processing as you’d like regardless of what your computer is capable of.
-
Introducing (Desired) Artifacts Through Resampling Audio
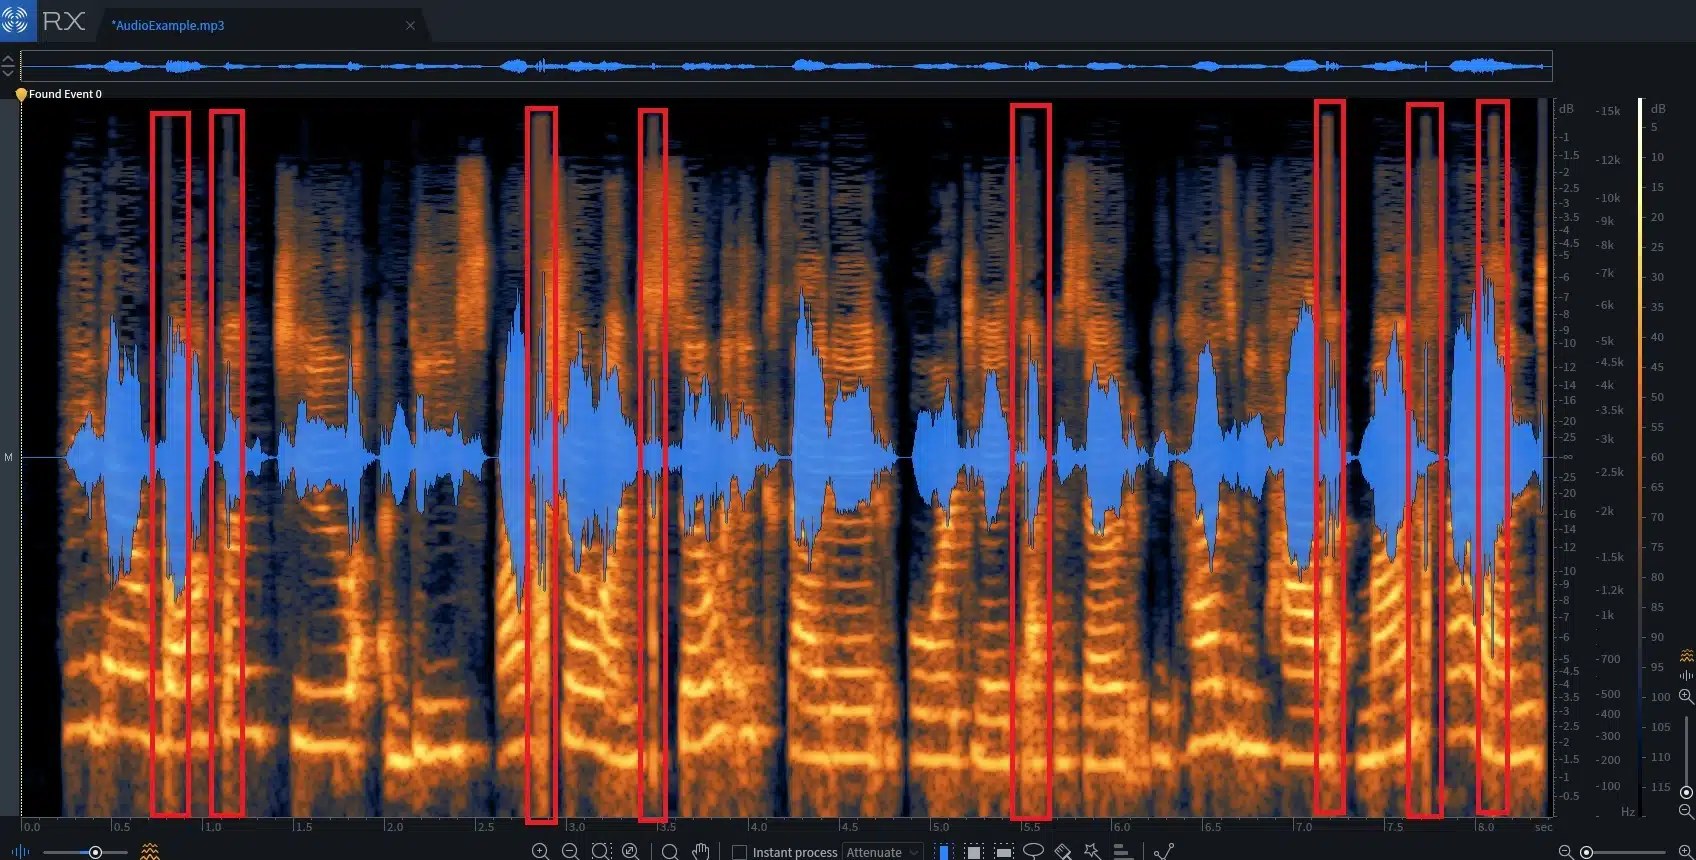
Introducing artifacts deliberately through audio resampling is a technique embraced by producers seeking to inject character and vintage vibes into their project.
A technique such as bit-crushing, applied to a resampled drum loop, can emulate the gritty texture of vintage drum machines.
When this resampled, bit-crushed loop is layered with clean, high-fidelity drums, the result is a compelling contrast that enriches the rhythmic foundation of an audio track.
Similarly, introducing aliasing artifacts by resampling audio at a lower sample rate and then back up can create a unique timbral quality.
One that makes synth parts or basslines stand out in a mix/track.
-
Print, Warp, Print, Warp…
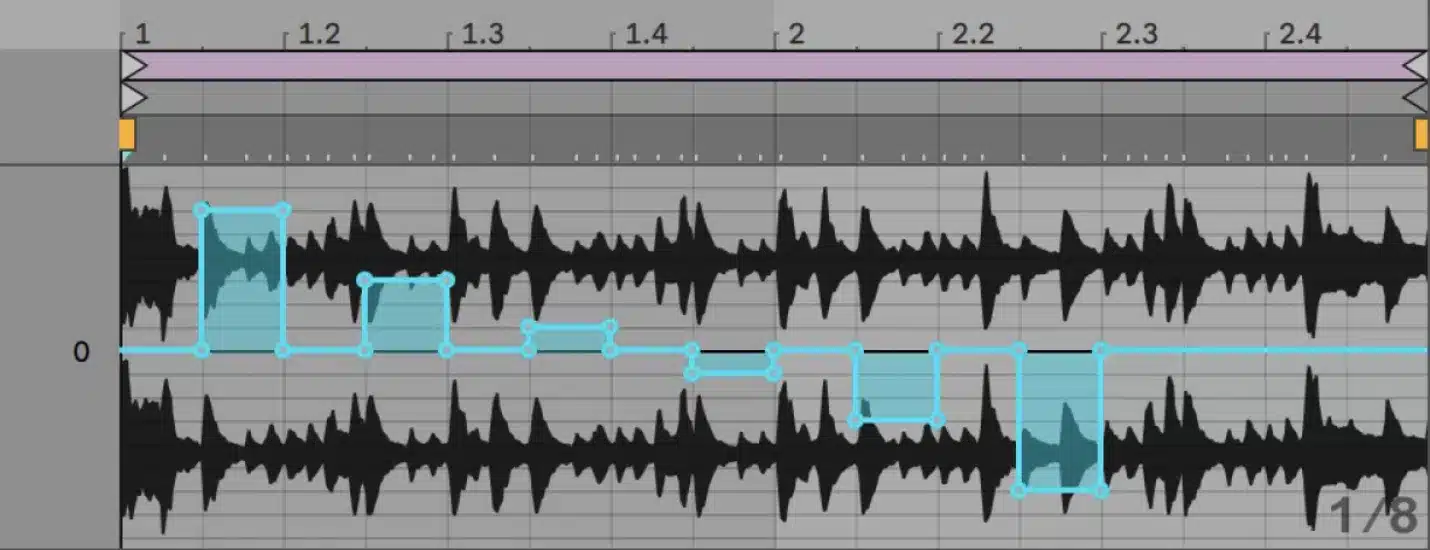
The repetitive resampling audio process of “print, warp, print, warp” is like sculpting with sound through your keyboard, where each layer adds more detail and complexity.
This approach is not just about altering the audio but about reimagining its potential.
For example, a simple vocals sample can evolve into a complex, rhythmic texture through multiple rounds of resampling.
The key is, that each time you introduce new and creative processing like pitch correction, time-stretching, or modulation, as we touched upon earlier.
This method not only showcases your creativity when people end up playing your audio track but also highlights the versatility of audio resampling as a technique.
-
Pro Tip
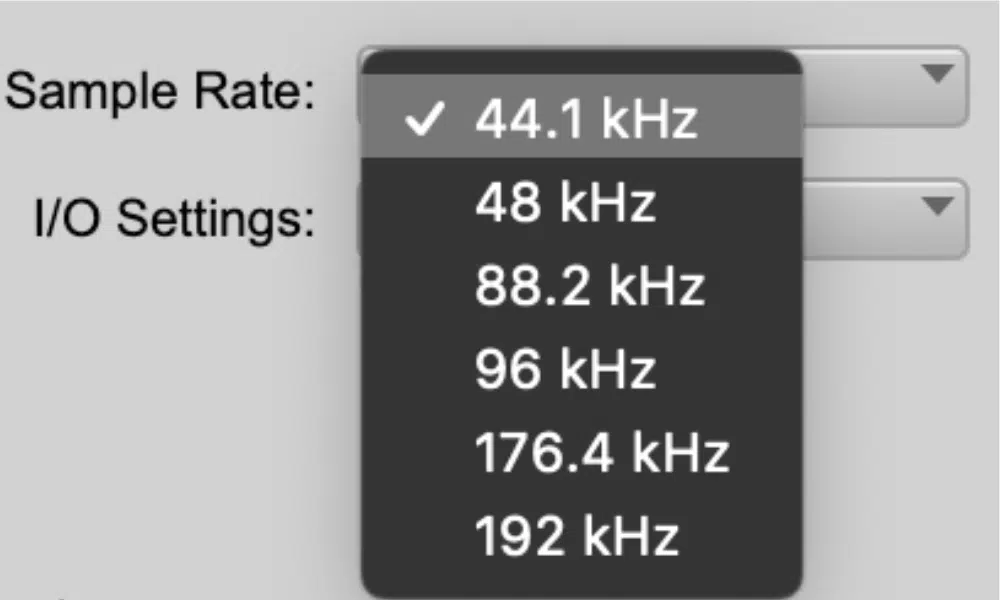
To fully harness the clarity and detail that 48kHz sample rate offers, consider upsampling your audio tracks before processing or mixing (particularly if your track/project is going to be in 44.1kHz).
This preemptive step ensures that any subsequent effects or manipulations are applied with the highest possible fidelity through any audio channel.
It results in a cleaner, more pristine final output.
Resampling Audio: Final Thoughts
Resampling audio is a process that requires precision and creativity.
It opens you up to an expansive range of possibilities from enhancing audio fidelity to creating entirely new sounds.
With it, you can elevate simple recordings to professional-quality tracks and infuse your projects with unparalleled depth and texture.
Plus, as you now know, it can be used in super creative ways like transforming a straightforward guitar pluck into a lush, expansive pad, or converting a drum loop into a glitchy, complex rhythm section.
To truly harness its power, try taking one-shots and pairing them with your favorite plugins to practice resampling.
For example, you could add some reverb to a one-shot and bounce it…
Then, reverse it and apply some Warp envelopes to completely mangle the tail.
This technique allows you to create a specialized effect that is distinctly yours.
Such experimentation can be applied with any effect, synth, or sample 一 proving that resampling is arguably one of the most useful tools to have in your arsenal.
To do so, you’re going to need the dopest one shots around, which you can find in this legendary Free One Shot Essentials.
This collection features 33 exclusive one-shots that have not only garnered over 3 million plays but are also modeled off chart-topping tracks, ensuring their quality and impact.
So, go ahead and leverage these One-Shot Essentials to make your music stand out, experimenting with resampling to discover sounds that truly set your work apart.
Until next time…


Leave a Reply
You must belogged in to post a comment.