The concept of upward compression stands as a powerful tool that can transform your mix.
It can provide it with depth, balance, and that much sought-after professional edge.
Whether you’re crafting a moody hip-hop beat or mixing a vocal track, mastering the technique of upward compression can be a game-changer.
In this comprehensive guide, I’ll walk you through everything you need to know about upward compression, such as:
- What upward compression is ✓
- It’s unique applications ✓
- How it can completely transform your tracks ✓
- How it compares to other types of compression ✓
- The importance of setting the threshold & ratio ✓
- The intricate relationship between gain & volume ✓
- Examples, tips, and tricks to help you master upward compression ✓
After this article, you’ll never have to wonder what upward compression is, because you’ll have the knowledge to become a true compression master in no time.
So, let’s dive in…
Table of Contents
What is Upward Compression?
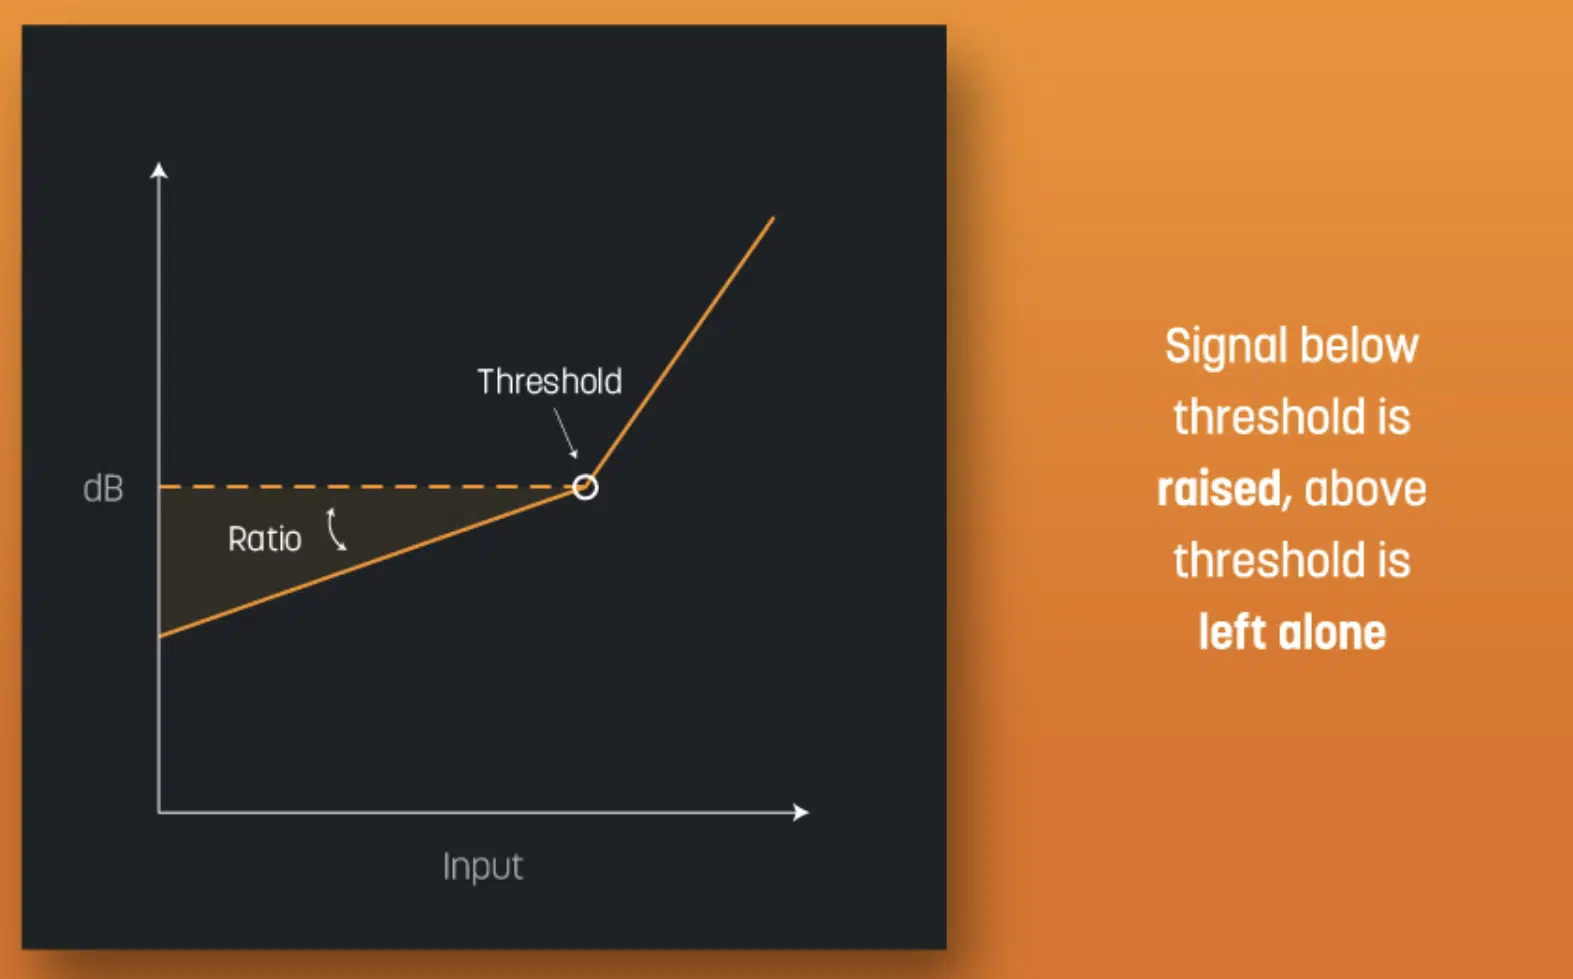
Upward compression is a critical technique used to manipulate the dynamic range of a track.
Often overshadowed by its more common counterpart (downward compression), upward compression offers unique capabilities in shaping the sonic texture of your music.
Unlike downward compression, which aims to reduce the volume of louder sounds, upward compression works in the opposite direction.
It focuses on amplifying quieter sounds that fall below a certain threshold.
The result is a track where subtle details and softer parts are no longer overshadowed by the loud parts.
For instance, if your track features a delicate guitar plucking pattern alongside powerful drums 一 upward compression can help bring that guitar part forward.
This ensures it isn’t lost in the mix.
It’s a powerful tool that can breathe new life into quieter sections of your music and offers supreme balance and depth to the overall sound.
Why Upward Compression is Essential to Music Production
Now you might be thinking, why would I want to use upward compression when I’m already using standard downward compression, isn’t that enough?…
To answer that question, let’s delve into the world of dynamic range.
Dynamic range, in music production, is the difference between the loudest and the quietest parts of an audio signal.
It’s what gives your track depth, contrast, and life.
But sometimes, in the world of hip-hop production, where punchy beats and enchanting vocals reign supreme, these quieter parts can get lost in the mix.
That’s where upward compression steps in.
By boosting these quieter sounds, upward compression not only makes your mix fuller but also adds a whole new layer of depth to your overall sound.
It can:
- Bring out the subtleties of your vocals
- Add definition to your beats
- Make your track more engaging and captivating to the listener
So, overall, it should be a welcomed addition to your production toolkit.
The Anatomy of Compression
Just before we delve into the diverse forms of compression (dynamic range compression), let’s first take a moment to dissect the anatomy of compression itself.
-
Upward & Downward Compression: The Fundamental Difference
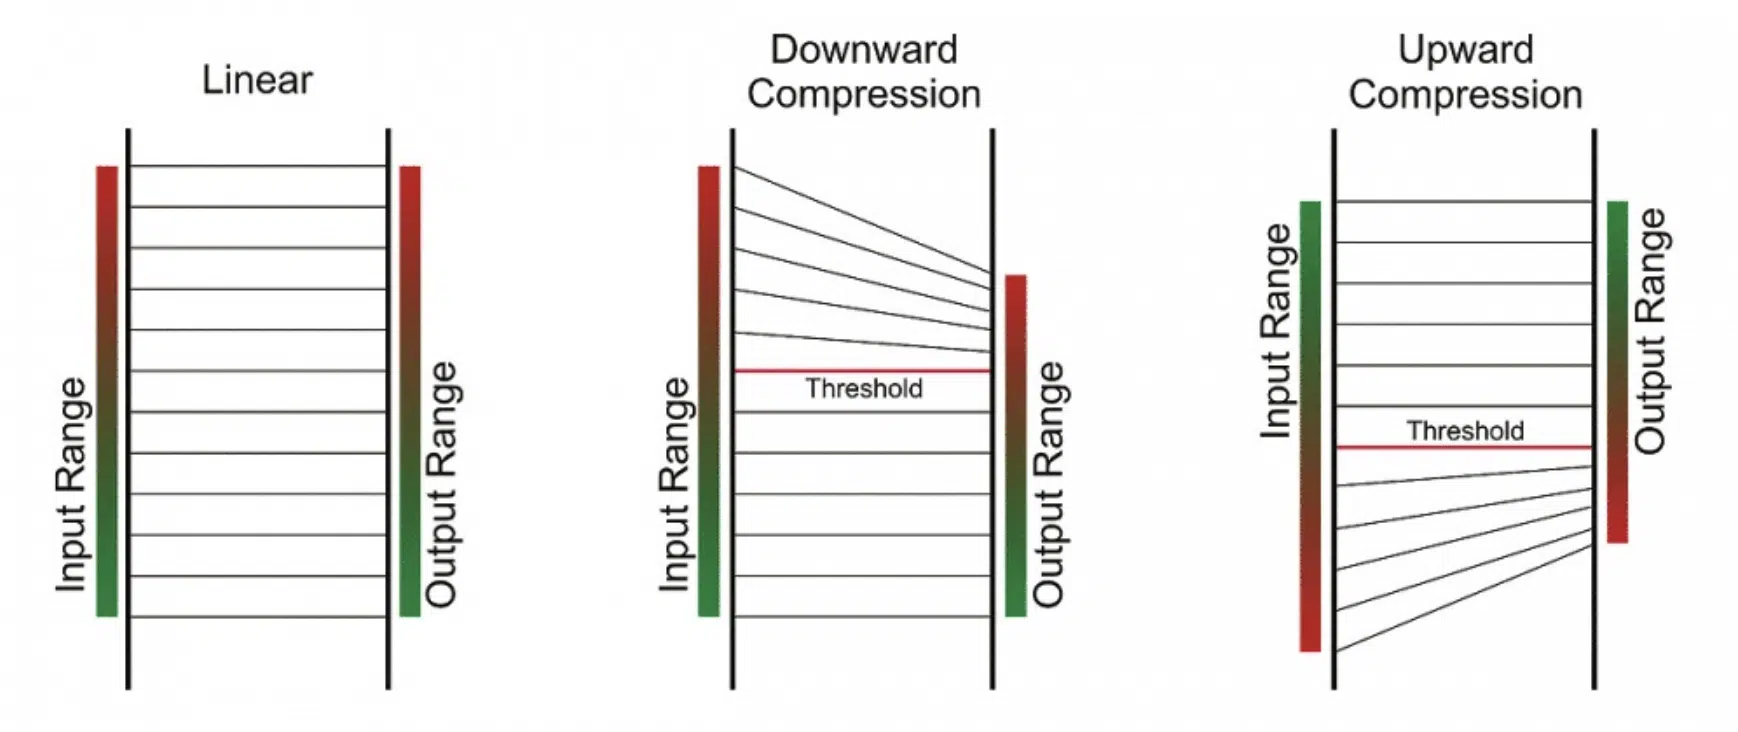
Let’s delve deeper into the yin and yang of compression: upward compression and downward compression.
- Upward compression works by bringing up the quieter sounds in your mix.
- Downward compression attenuates the level of the louder sounds.
When you set a threshold in your downward compressor, anything above this level gets turned down.
Essentially, the dynamic range gets reduced.
The ratio you set determines how much the loud sounds get turned down (a higher ratio means more compression).
On the flip side, with upward compression, you’re again setting a threshold and a ratio.
But this time, anything below the threshold gets boosted.
By understanding and correctly using both upward and downward compression in your music production 一 you can gain full control over your audio signal.
It makes sure that every element in your mix is heard precisely as you intend, with the same effect you pictured.
It’s all about achieving the perfect balance in your sound, after all.
-
Dynamic Range: The Pulse of Music Production
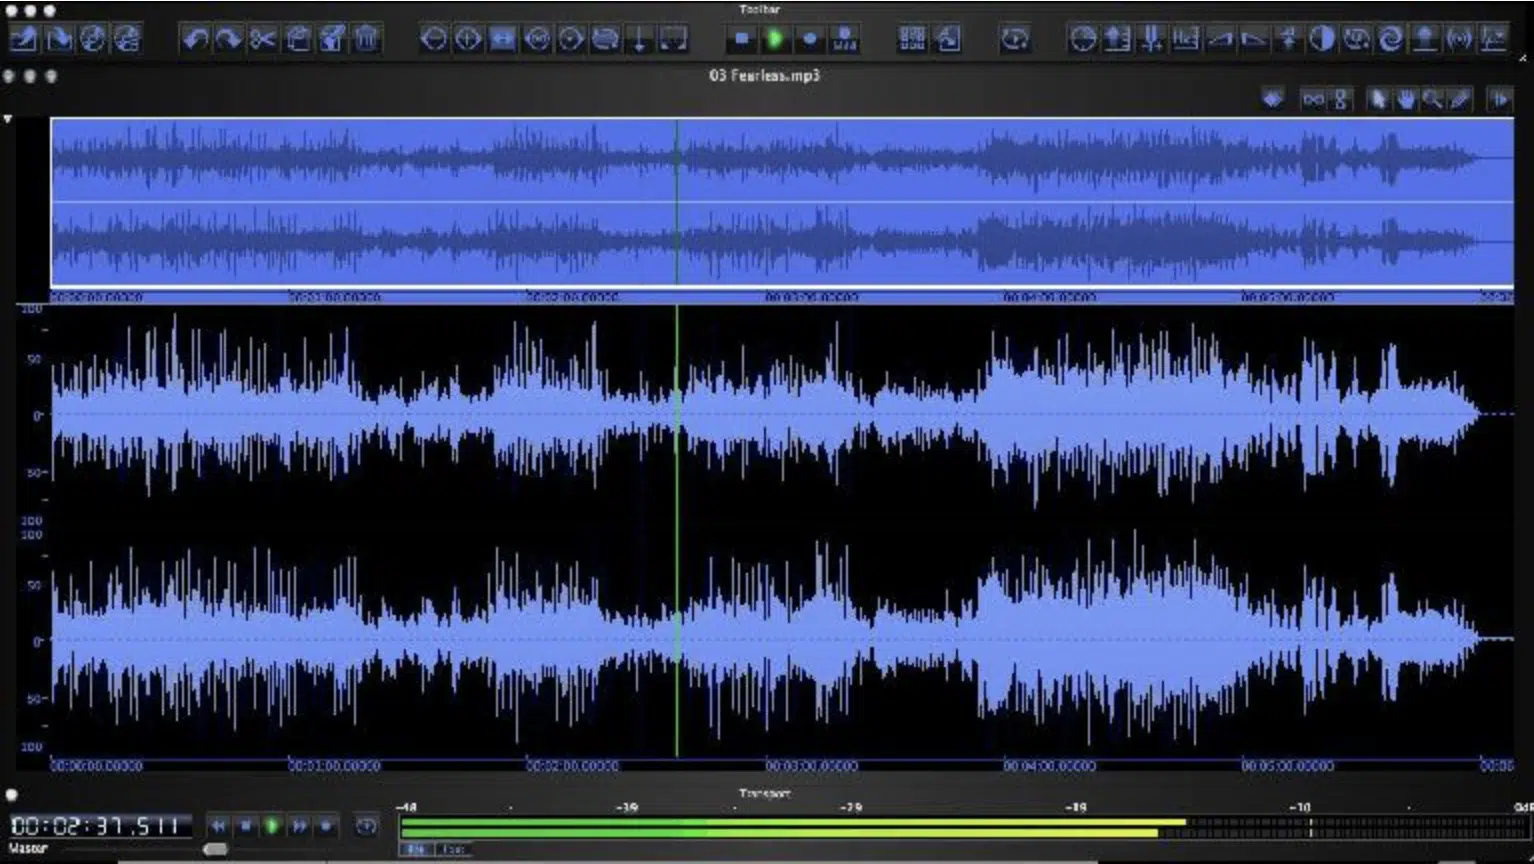
Now, let’s talk about dynamic range, the heartbeat of your track.
It’s the contrast between:
- The quietest parts of your audio signal.
- The loudest parts of your audio signal.
This contrast gives your mix life and depth… but why exactly does it matter?
Well, without a dynamic range, your mix would be monotonous and flat.
Every sound would be at the same level, and it would feel lifeless, disengaged, and unappealing.
Using upward and downward compression effectively allows you to manipulate this dynamic range (reduce dynamic range, etc.) to your advantage.
It creates a mix that is rich, balanced, and full of life.
Speaking of lifeless beats, if you want to learn all about mixing mistakes to avoid in order to create the exact opposite of lifeless tracks, we’ve got you covered.
An In-Depth Look at Upward Compression
Now let’s take an in-depth look at upward compression in all its glory.
-
How Does Upward Compression Work?
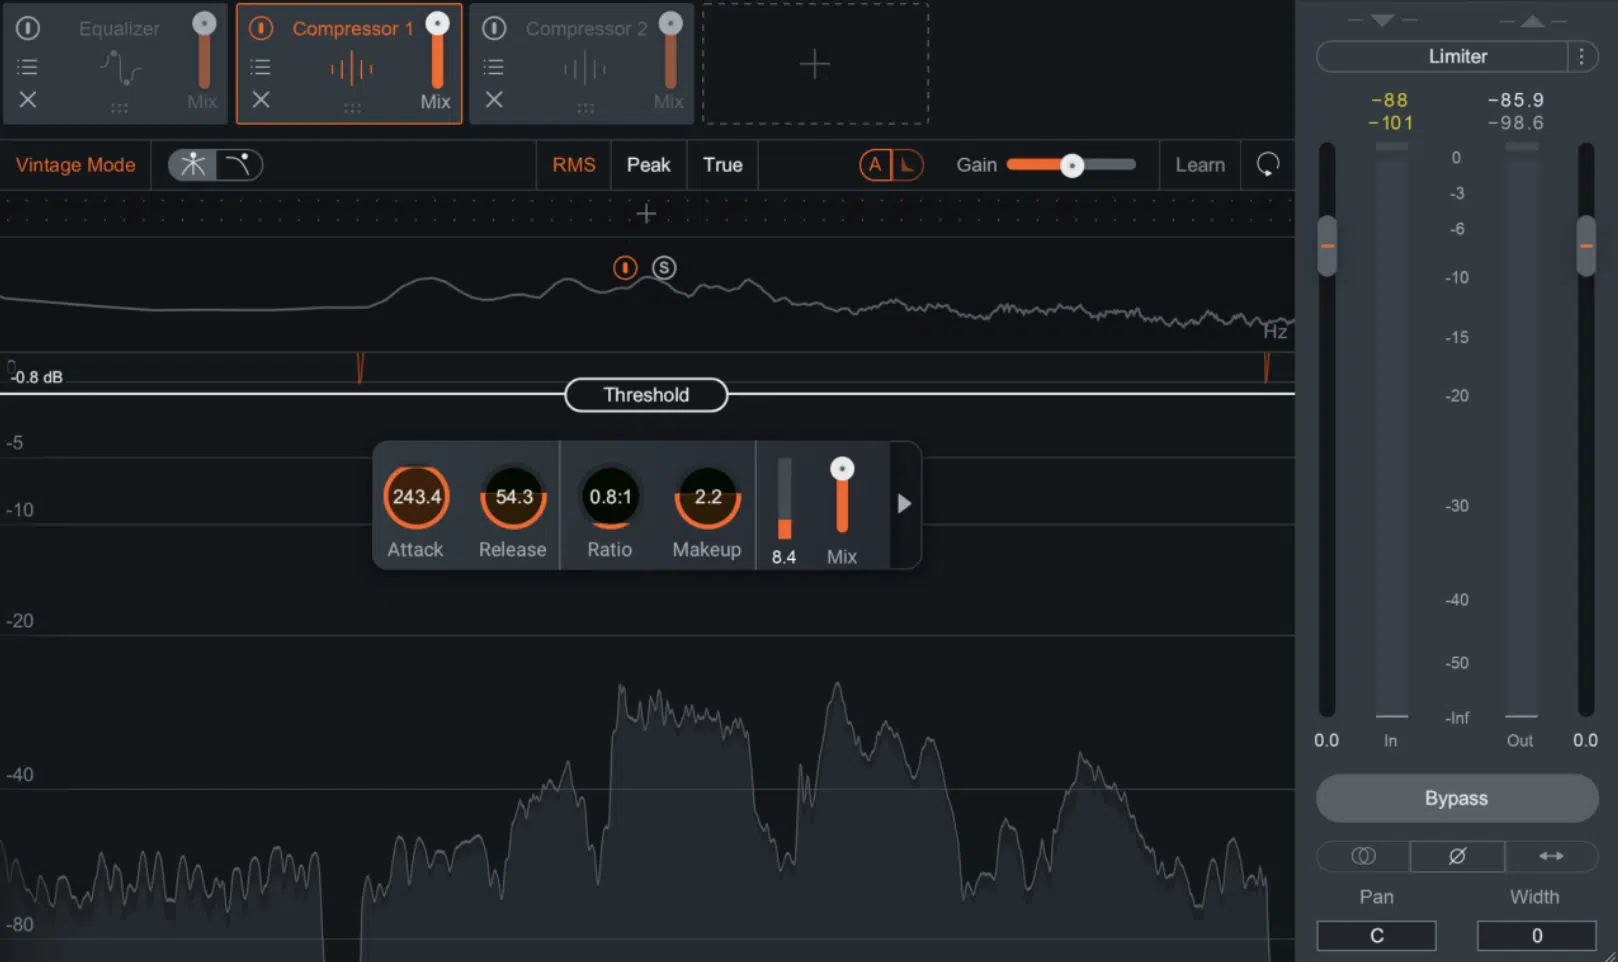
Let’s get under the hood of an upward compressor.
Like most compressors, it works by affecting the dynamic range of your audio signal.
But the way it goes about this is where the magic happens.
Once you set a threshold, anything below this level gets a volume boost 一 you’re lifting the quiet parts of your signal up.
The ratio you set determines how much of a boost these parts get.
A higher ratio equals more boost.
And don’t forget the attack and release settings on your compressor.
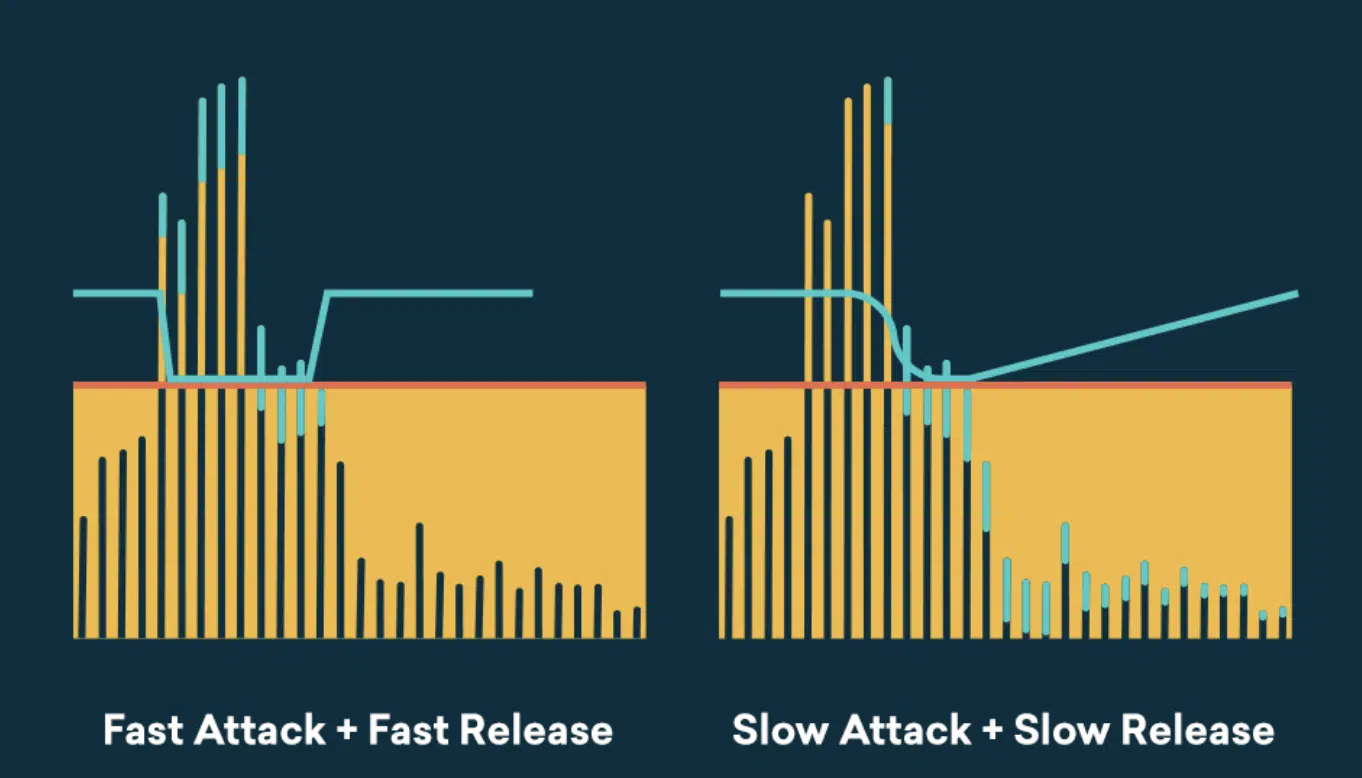
They control how quickly the compressor reacts to the incoming signal and how long it takes to stop compressing after the signal drops below the threshold.
Understanding these settings is essential to mastering upward compression.
It’s all about finding that sweet spot that brings out the subtleties in your mix without overdoing it.
-
The Role of Upwards Compression in Sound Design

If you’re wondering where upward compression fits into your sound design, let’s break it down.
Upward compression can be a game-changer (especially in genres like Hip-Hop, Trap, and LoFi), where you want every element of your beat to hit just right.
Use upward compression to:
- Add punch to your drums
- Bring out the intricacies in your synth patterns
- Make your vocals cut through the mix
It can add life to quieter passages and ensure that your mix maintains its energy throughout.
Remember, upward compression isn’t about making everything louder 一 it’s about making everything heard.
-
The Relationship Between Upward Expansion & Compression
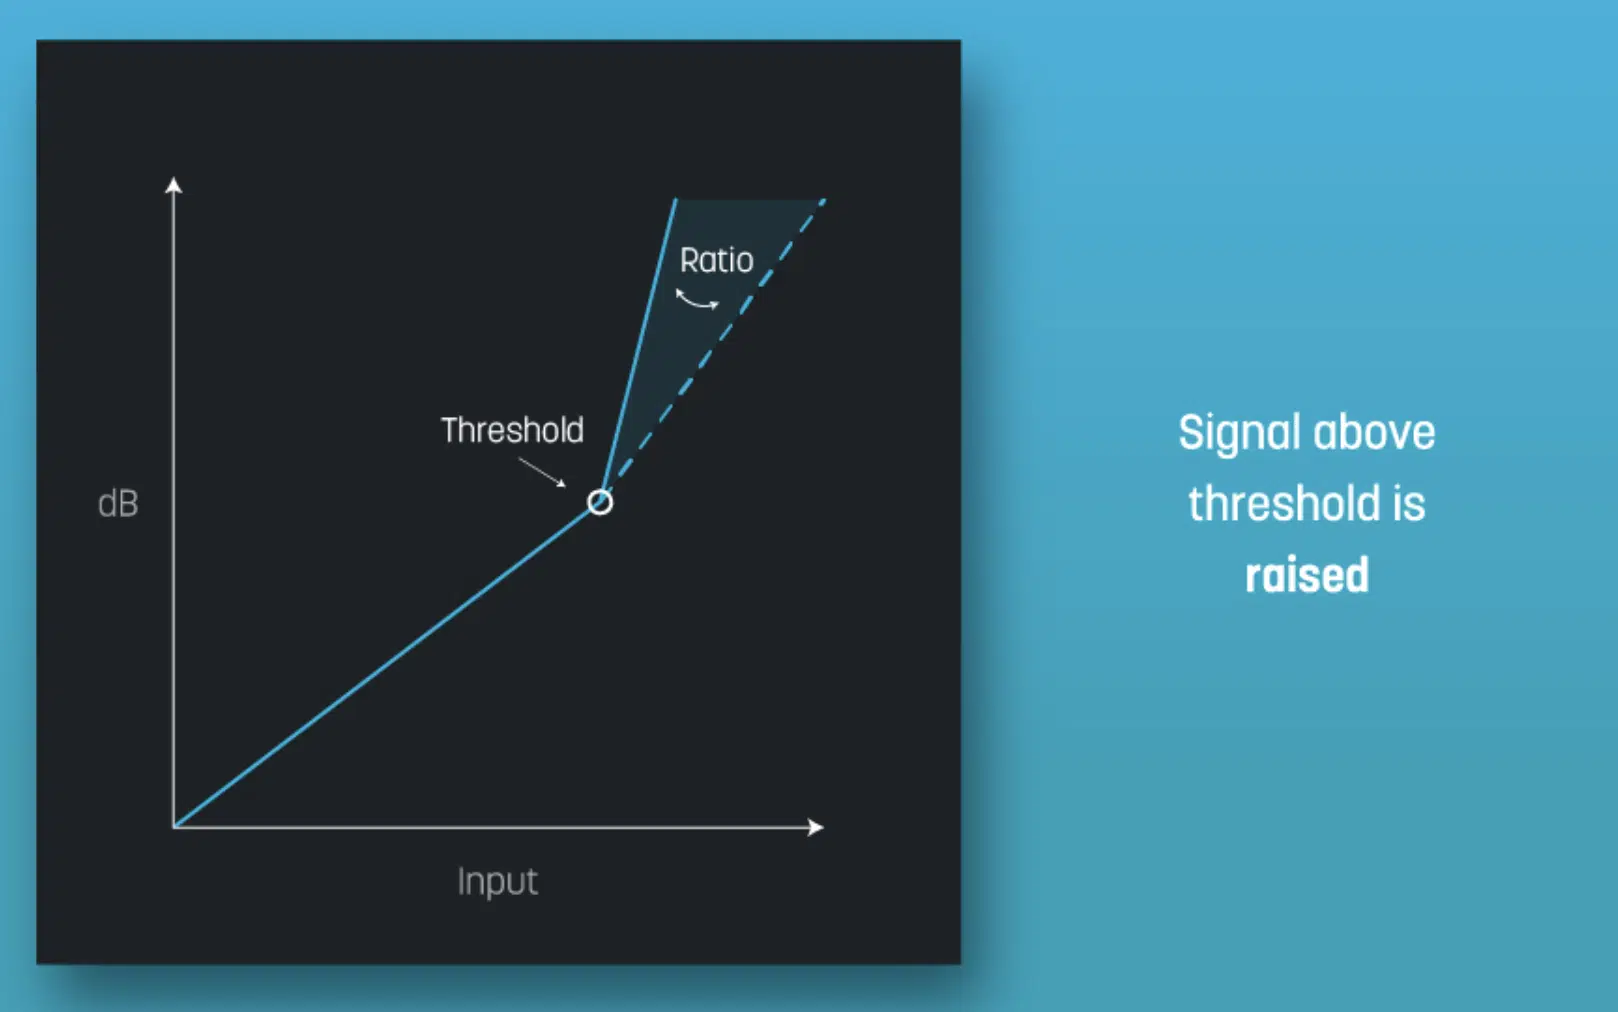
Now, let’s not forget about upward expansion, the sibling of upward compression.
While compression deals with reducing dynamic range, expansion does the opposite 一 it increases the dynamic range.
Just as an upward compressor boosts the level of quiet sounds, an upward expander boosts the loud sounds while leaving the quiet ones untouched.
It’s another tool in your arsenal for manipulating dynamic range and shaping your sound.
NOTE: Use them in tandem, and you can create a soundscape that is dynamic, balanced, and engaging to your listeners.
Comparison With Other Forms of Compression
If you’re wondering how upward compression compares to other forms of compression, we’re here to give you all the details.
-
Downward Compression: The Flip Side of Upwards Compression
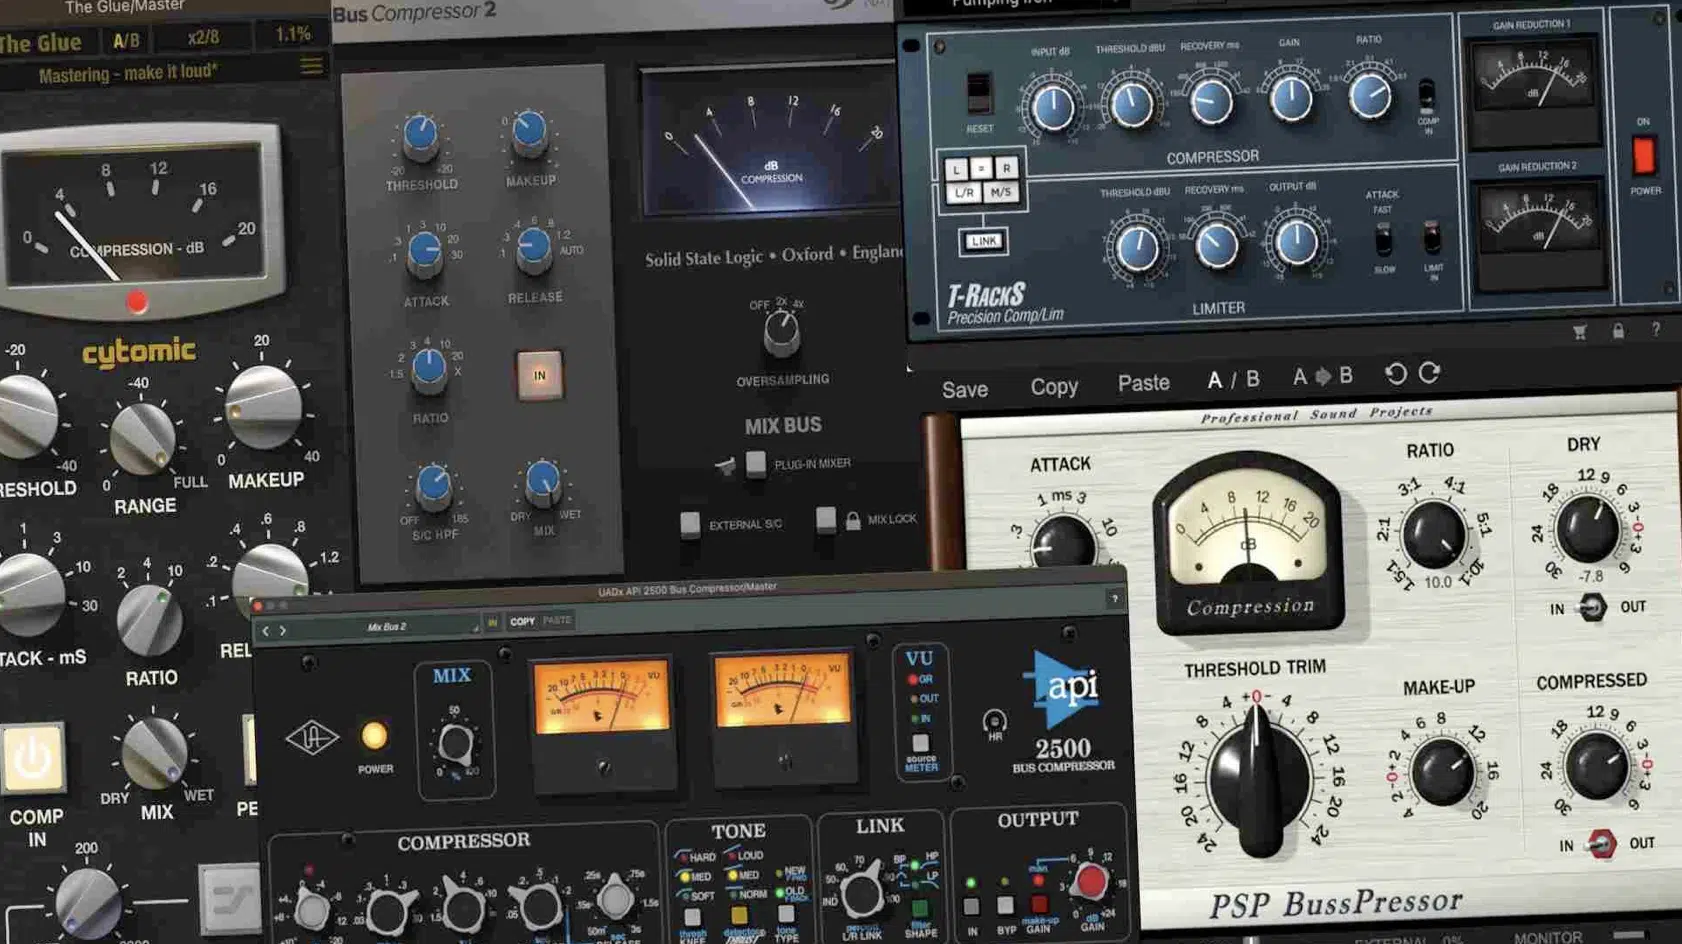
Now, let’s revisit the other side of the coin, downwards compression.
NOTE: 90% of compression plugins that are labeled as ‘compressor’ plugins, are talking about downward compression.
Remember when I mentioned the yin and yang of compression?…
Well, downward compression is the balancing force to upward compression.
While upward compression boosts the quieter parts 一 downward compression turns down the louder parts.
Setting your threshold and ratio is just as important here.
Any sound that crosses the threshold is reduced according to the ratio you set.
Used correctly, downward compression can:
- Prevent distortion
- Manage peaks
- Help your track sit nicely in the mix
It’s a tool to tame those loud sounds that can sometimes stick out like a sore thumb.
Speaking of plugins (above), if you’re looking for the absolute best FREE VST plugins of 2023, we’ve got you covered.
-
Understanding the Use of Downward Expansion in Music Production
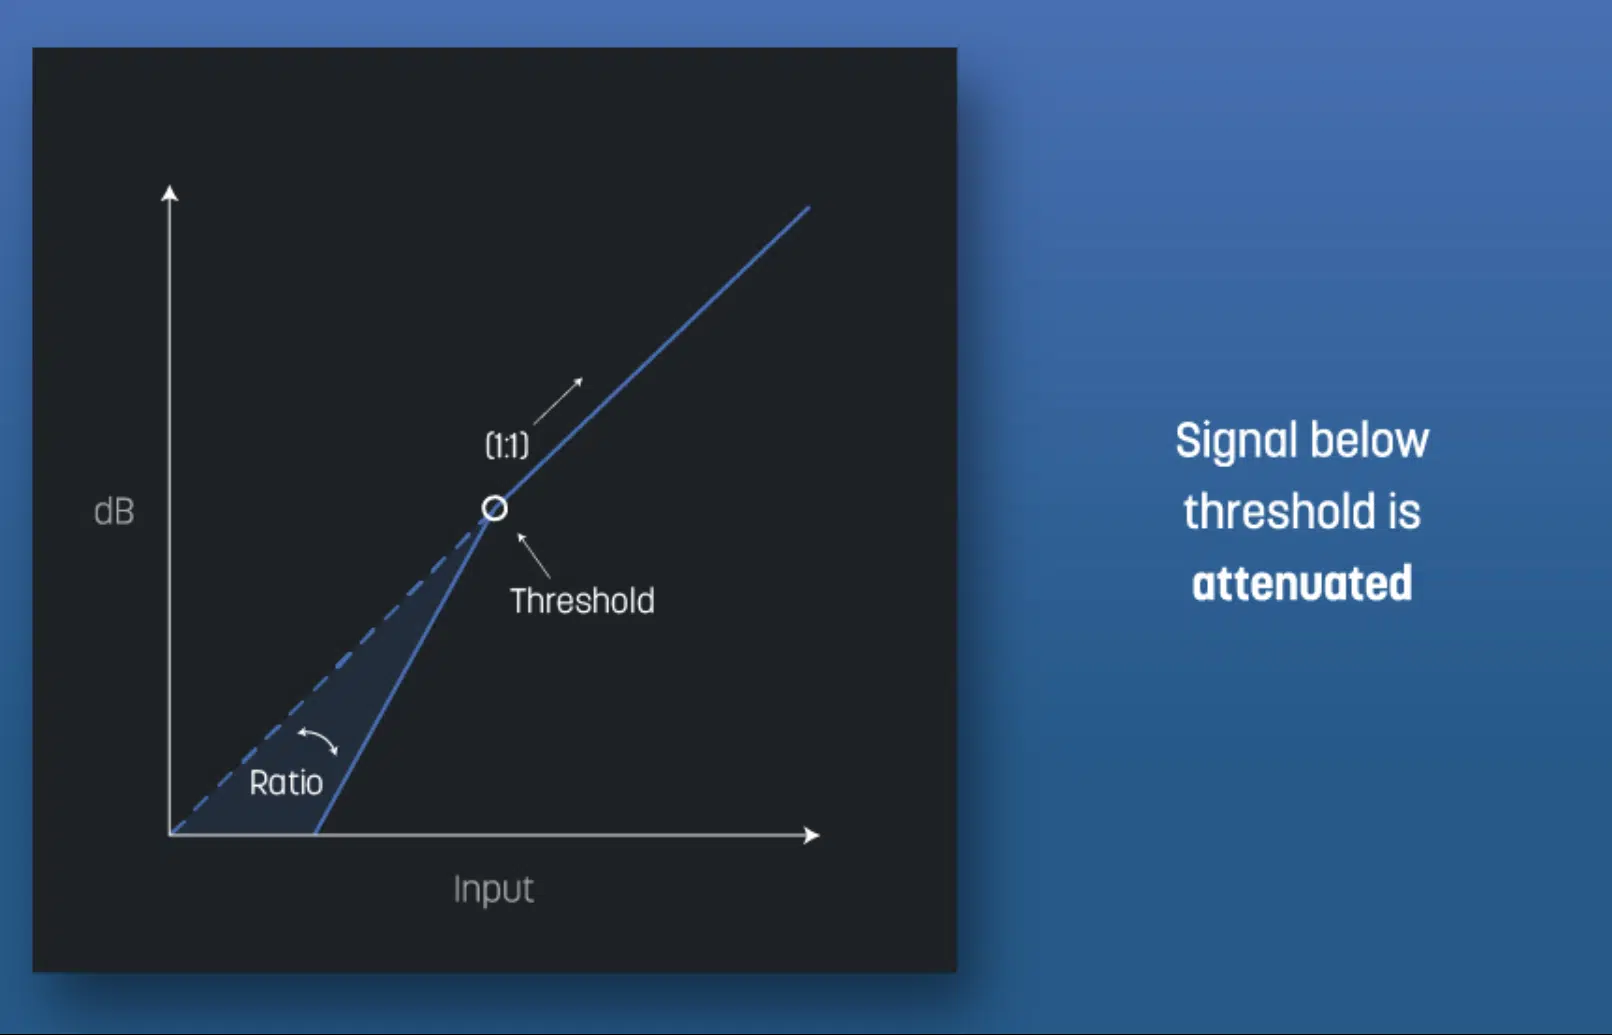
Much like its upward counterpart, downward expansion (normally labeled as just ‘expansion’) increases the dynamic range of your audio signal.
However, instead of boosting the loud sounds, it reduces the volume of the quiet sounds 一 making the loud sounds seem louder by comparison.
This technique can be particularly useful in situations where you want to reduce background noise or unwanted sounds that are creeping into your mix.
By setting the appropriate threshold and ratio, a downward expander will only affect the quieter sounds.
Therefore, leaving the louder ones untouched.
-
The Unique Approach of Parallel Compression
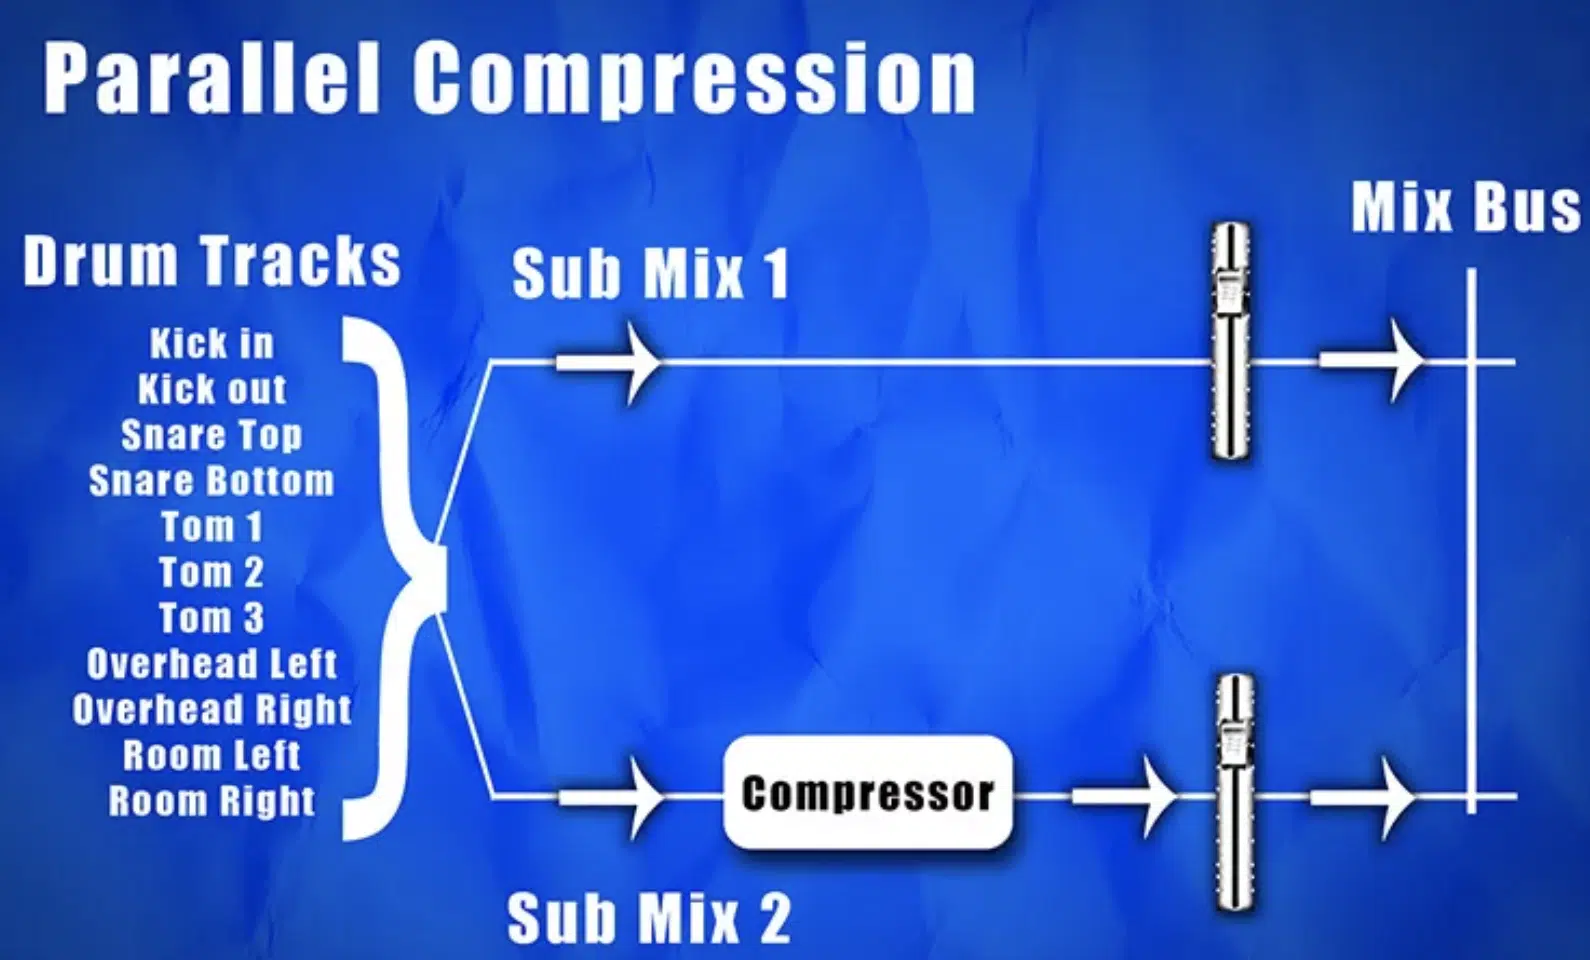
Parallel compression is a different, but equally powerful technique in music production.
Unlike upward or downward compression, parallel compression involves running two signals simultaneously:
- Signal 1 一 Is compressed.
- Signal 2 一 Is not compressed (unprocessed signal).
The compressed and unprocessed signals are then mixed together.
The result?… You get the best of both worlds!
- The compressed signal 一 Maintains the energy and punch.
- The uncompressed signal 一 Retains the natural dynamics and transients of your mix.
In hip-hop production, this technique can make your drums smack and make your vocals shine.
Parallel compression gives you the power to control the amount of compression applied by adjusting the levels of the compressed and uncompressed signals.
It’s like having your cake and eating it too.
The Nuts & Bolts of Compression
Now let’s get into the nuts & bolts of compression: all its different parameters.
-
Setting the Threshold: How & Why?
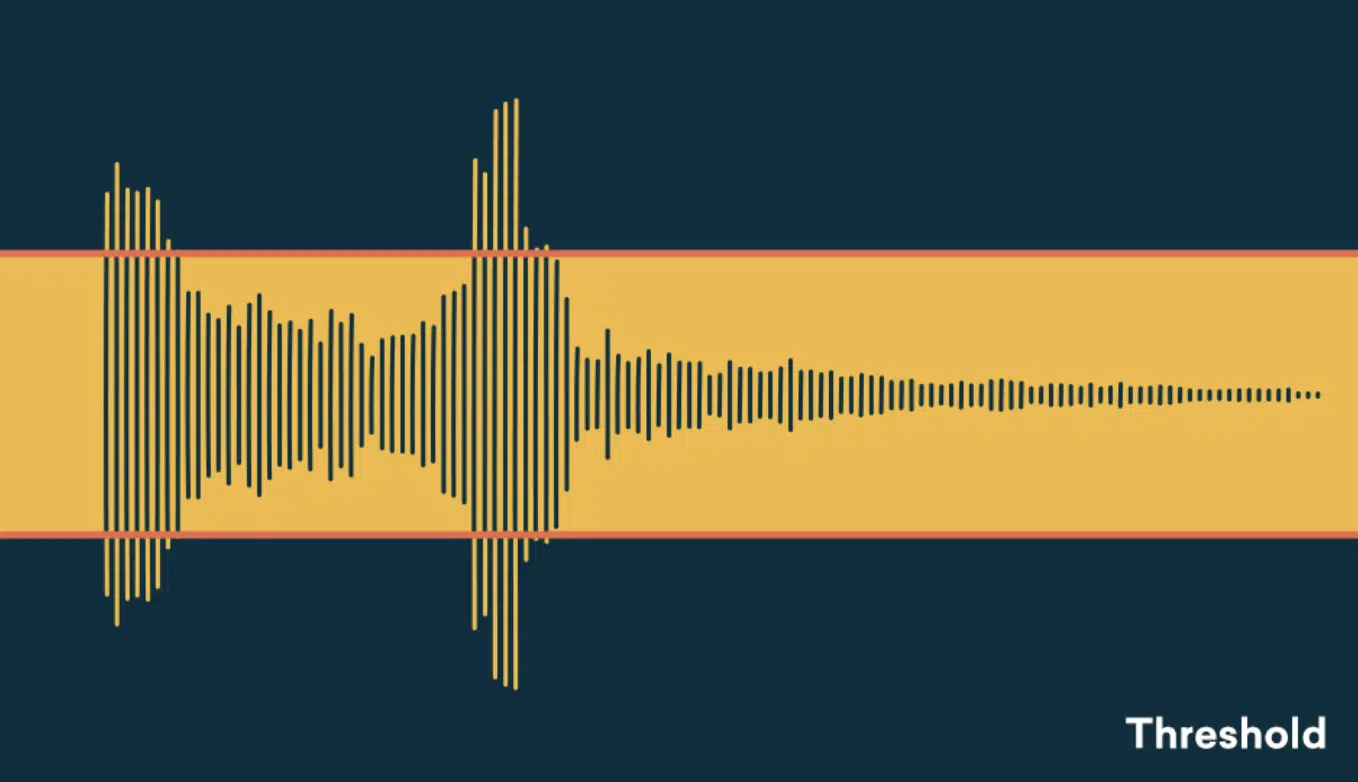
Making sure to set threshold in your compressor, whether upward or downward, is crucial.
This is beacuse the threshold is what tells your compressor when to kick in.
- In downward compression 一 When the level of the audio signal surpasses the threshold, the compressor starts to reduce the volume of the loud passages.
- In upward compression 一 When the level of the signal falls below the threshold, the compressor starts to boost the volume.
In both cases, the threshold sets the point of action.
Therefore, setting the right threshold with upward compressors, upward expanders, etc., is critical.
It’s about finding that balance where your compression is effective but not overbearing.
It’s about making sure your compressor is working when you need it, without unnecessarily affecting parts of your signal that don’t need it.
-
Setting the Ratio: Balancing Your Audio Signal
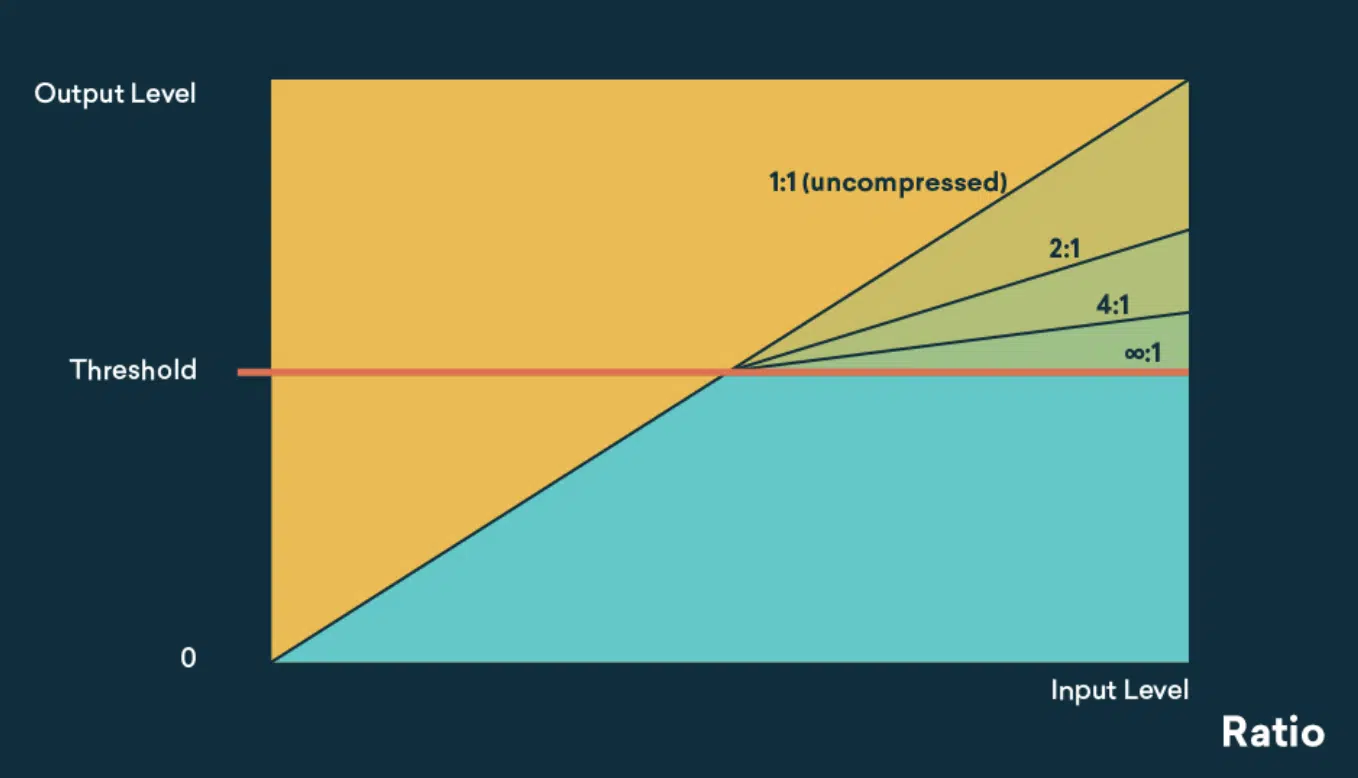
Once you’ve set your threshold, it’s time to set ratio.
This determines the degree of compression that’s applied once your audio signal crosses the threshold.
- In downward compression 一 A high ratio will significantly reduce the volume of sounds that cross the threshold.
- In upward compression 一 A high ratio will give a substantial boost to the sounds below the threshold.
The ratio is your control dial for how hard your compression works.
Finding the right setting can be the difference between a great mix and a distorted disaster.
NOTE: Manipulating the input signal with compression can dramatically affect the balance and overall texture of your mix.
-
Gain & Volume: The Fine Art of Control

Now let’s talk about gain and volume; two concepts often misunderstood in the world of music production.
- Gain 一 Refers to the input level of your audio signal.
- Volume 一 All about the output level.
Both are key players in the compression game.
When we compress, we’re essentially manipulating the gain to control our audio signal’s dynamic range.
Upward compression increases the gain of the quieter sounds, while downward compression reduces the gain of the louder sounds (gain reduction).
This in turn affects the overall volume of your mix (can you say makeup gain).
Controlling your gain and volume effectively can result in a well-balanced mix where every element can shine.
It’s about ensuring that your beats, vocals, and melodies are all working harmoniously together.
This will create that captivating sound that hooks your listeners in.
Once compression is applied, adjusting the make up gain can help to restore any loss in volume, creating a more balanced mix.
Your Next Steps: Mastering Upward Compression
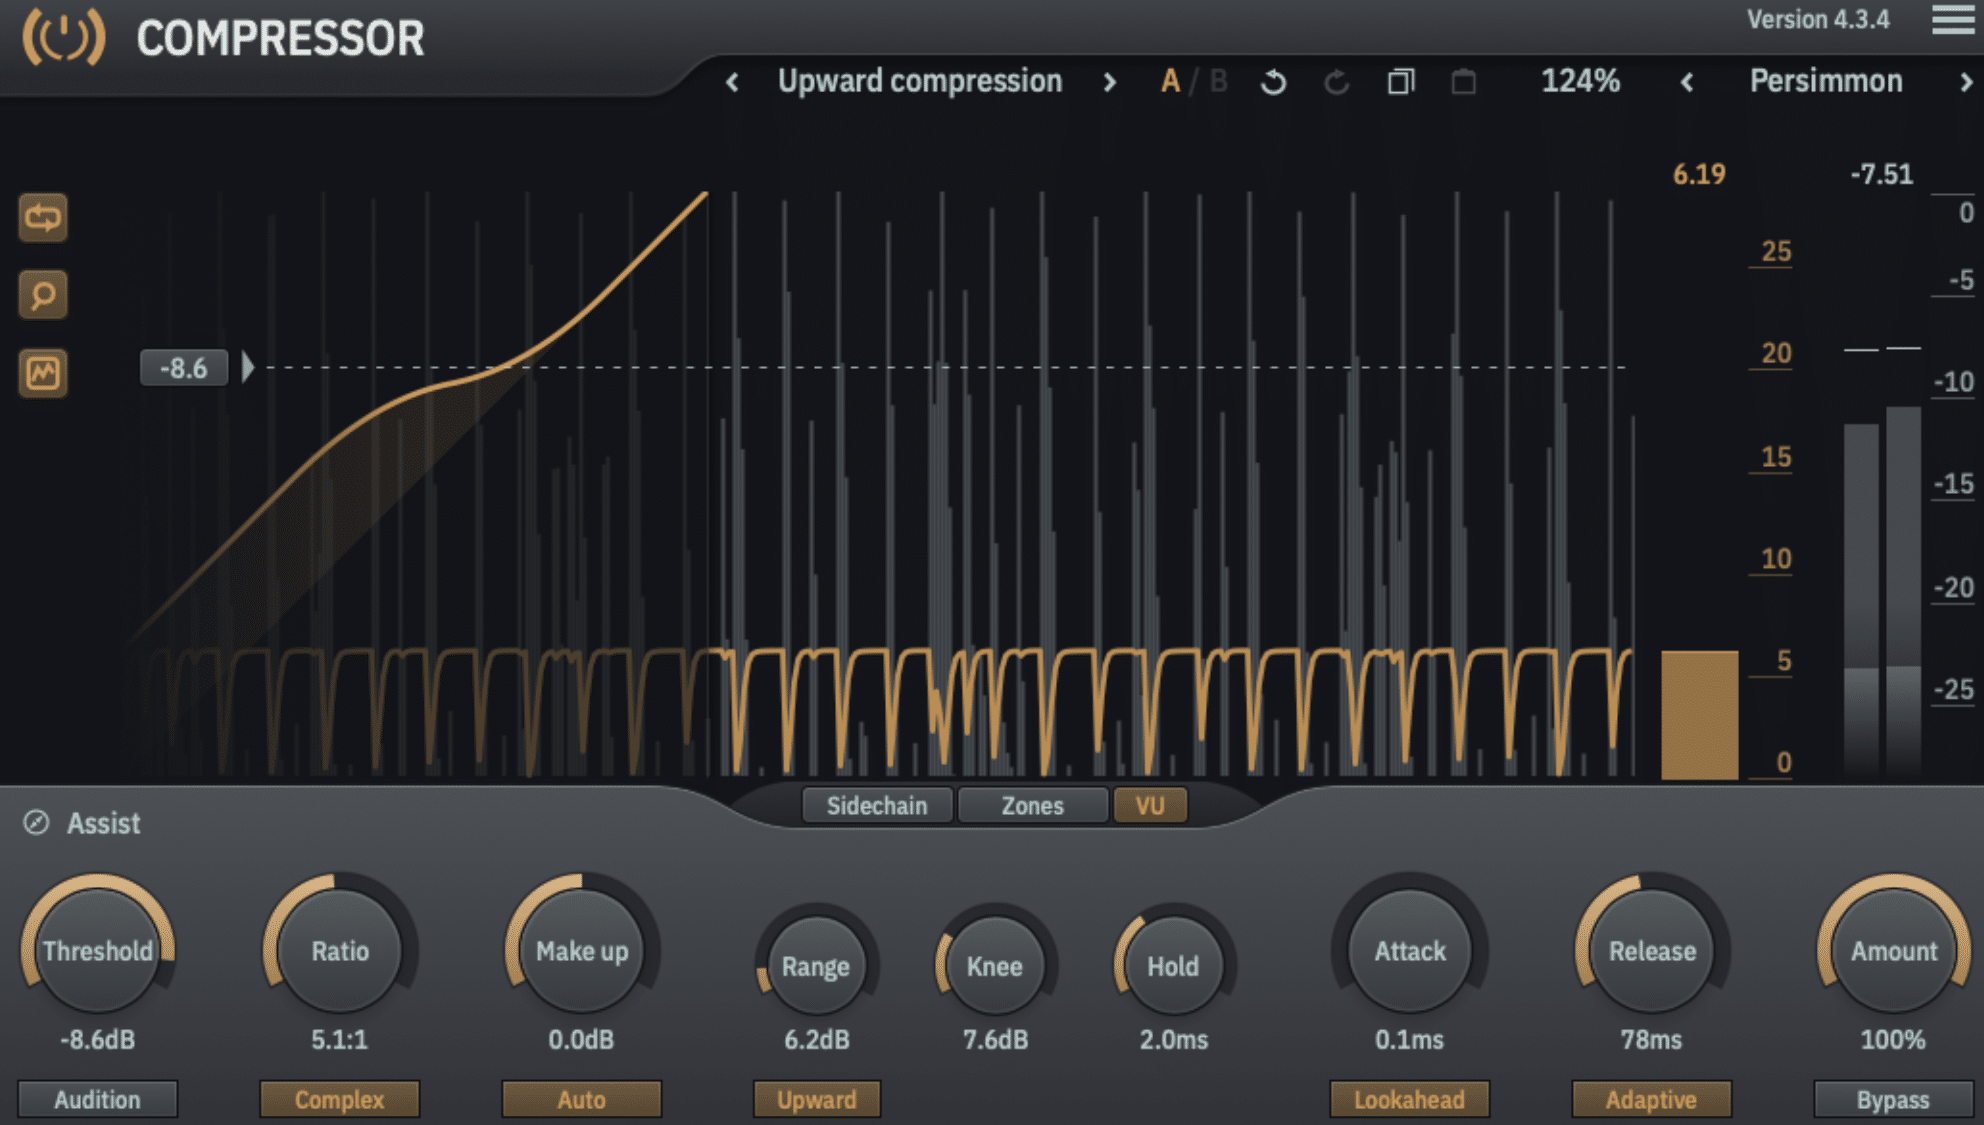
Let’s say you’ve got a hip-hop beat where the hi-hats are getting lost in the mix…
You want them to cut through, but not overpower the rest of the elements, this is a perfect job for upward compression.
STEP 1 一 Set your threshold just above the level of the hi-hats.
STEP 2 一 Adjust the ratio to control how much boost you’re giving them.
STEP 3 一 Play around with the attack and release to get the timing just right.
Remember, the goal is not to make the hi-hats louder, but to bring out their presence in the mix.
Upward compression allows you to achieve this without affecting the louder parts of your mix.
Additionally, make sure to start with a light touch.
It’s easy to overdo it with compression, so start with a low ratio and gradually increase it until you find the sweet spot.
Also, always trust your ears.
No matter what the numbers say, if it sounds good, it is good; let your ears lead you.
Every track is unique, so there are no one-size-fits-all settings.
Don’t be afraid to experiment and find what works for your unique mix.
After all, you never know what magic you might stumble upon.
Upward Compression: Final Thoughts
Well, there you have it, the ultimate guide to upward compression.
From the theory to the practice, we’ve dissected the techniques and tips that can elevate your music production game to new heights.
But, as they say, practice makes perfect…
So, it’s time to step out of theory and get your hands dirty with some real-world application.
To help you along the journey, you can download these immaculate, professional, free Serum presets.
This epic pack contains high-quality presets that you can use directly within Serum.
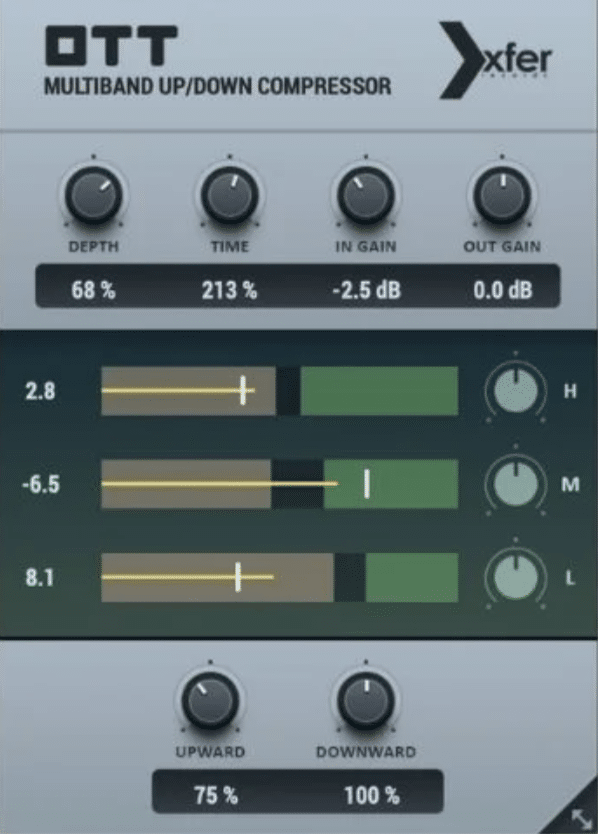
Serum boasts a built-in upward compressor (OTT) within its effect rack.
Meaning, you can harness the power of upward compression on absolutely any track within your mix, not just when you’re using Serum’s synthesis capabilities.
With Serum FX, the OTT compressor and these free presets, you’ll be well-equipped to put your newfound upward compression knowledge into practice.
This way, you can really see how upward compression can help you achieve a balanced, cohesive, expert mix every time.
So, go forth, experiment, and see how upward compression can transform your mixes.
And remember, the magic of music production lies not just in the notes you play but also in the silence between them.
Until next time…


Leave a Reply
You must belogged in to post a comment.