Volume automation is all about taking control of your mix and shaping the dynamics of your tracks to create a polished, professional sound.
It can help you balance elements, emphasize key moments, and add edge that make your music stand out.
Plus, it allows you to sculpt transitions, manage levels, and fine-tune details in ways that static mixing simply can’t achieve.
As producers, learning all about volume automation is key to creating mixes that feel dynamic and engaging, and dominate the competition.
It helps you get the most out of your DAW, your plugins, and your creativity… Luckily, that’s exactly what we’re breaking down today, like:
- The basics of volume automation ✓
- What is means to automate volume ✓
- How to automate vocal levels ✓
- Fader automation vs. clip gain ✓
- Using automation modes ✓
- Dynamic mix automation techniques ✓
- Tools like automation lanes and gain plugins ✓
- Volume swells and creative effects ✓
- More parameters/parameter changes ✓
- Layering automation with other parameters ✓
- Much more about volume automation ✓
By knowing all about automation volume, its various techniques, and its creative potential, it’ll change the game for you, for sure.
You’ll create mixes that sound natural, polished, and professional, plus, never have to mess around with unbalanced tracks or lost dynamics again.
Your tracks will sound more dynamic, your mix will be smooth as hell, and your skills as a producer will seriously be enhanced.
Table of Contents
What is Volume Automation & Why Does it Matter?
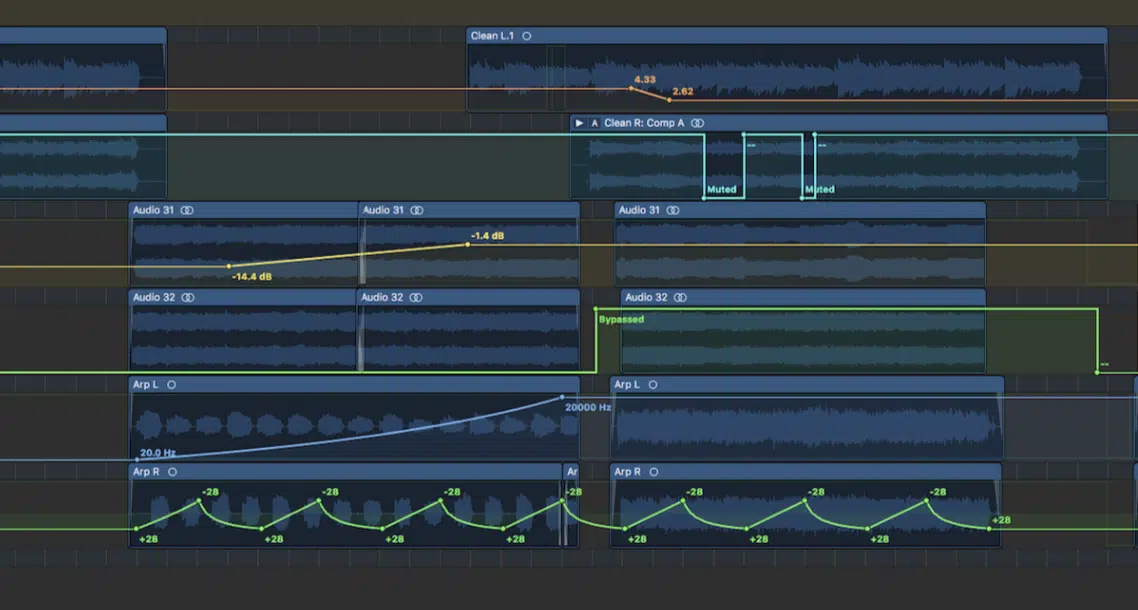
Volume automation lets you control the level of audio over time so you can shape the dynamics of your mix, plain and simple.
Think of it as a way to breathe life into your tracks by making them more dynamic, controlled, and engaging.
Whether it’s making subtle changes to a vocal volume fader during a verse or creating a dramatic drop before a chorus, volume automation makes every element shine.
It’s not just for loudness either…
Volume automation can help you balance dynamic range, emphasize important moments, and even add creative effects like swells or fades.
For example, automating the volume fader on a synth pad can add movement to what would otherwise feel static.
If you’re just getting started, don’t stress.
We’ll break everything down, including fader automation, automation modes, and advanced automation tricks, so you’ll create pro-level mixes all day.
Types of Volume Automation
Volume automation comes in many forms, from the OG fader automation to the precision of clip gain adjustments. Each one has its own strengths, so let’s kick things off by exploring the different types and when exactly to use them.
-
Fader Automation
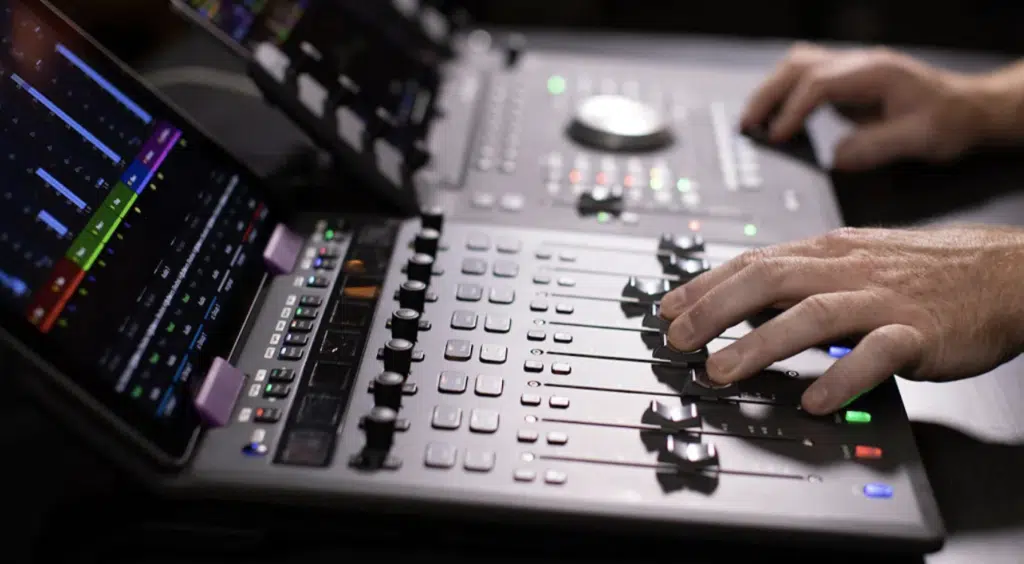
Using fader automation plugins or gain plugins can simplify volume adjustments while giving you the ability to get super creative.
Plugins like Waves Vocal Rider or even a stock gain plugin in your DAW are perfect for balancing uneven tracks before automating finer details.
For example, applying a gain plugin earlier in the signal chain lets you bring up a soft vocal phrase by 2-3 dB.
All without affecting the overall dynamics or overloading compressors downstream.
When automating volume swells, combining a gain plugin with the fader’s volume automation gives you razor-sharp control.
For example:
- Automate the gain plugin 一 For handling larger, gradual changes.
- The volume fader 一 For small, more nuanced tweaks.
This dual-layered technique is especially useful for building tension in breakdowns or transitions by raising levels smoothly over several bars.
Gain plugins are also super important when it comes to sidechain effects.
By automating the plugin’s gain alongside a ducking compressor, you can control the exact volume reduction for the exactly kind of effect you’re shooting for.
For example, automating the gain on a bassline while sidechaining to a kick drum can create a rhythmic yet controlled pulse without muddying the low end.
Use your DAW’s metering tools to monitor levels before and after the gain plugin.
Aim for consistent input levels across tracks to make sure all your recorded automation interacts cleanly with compressors, EQs, and other processors in the mix.
-
Clip Gain vs. Volume Automation
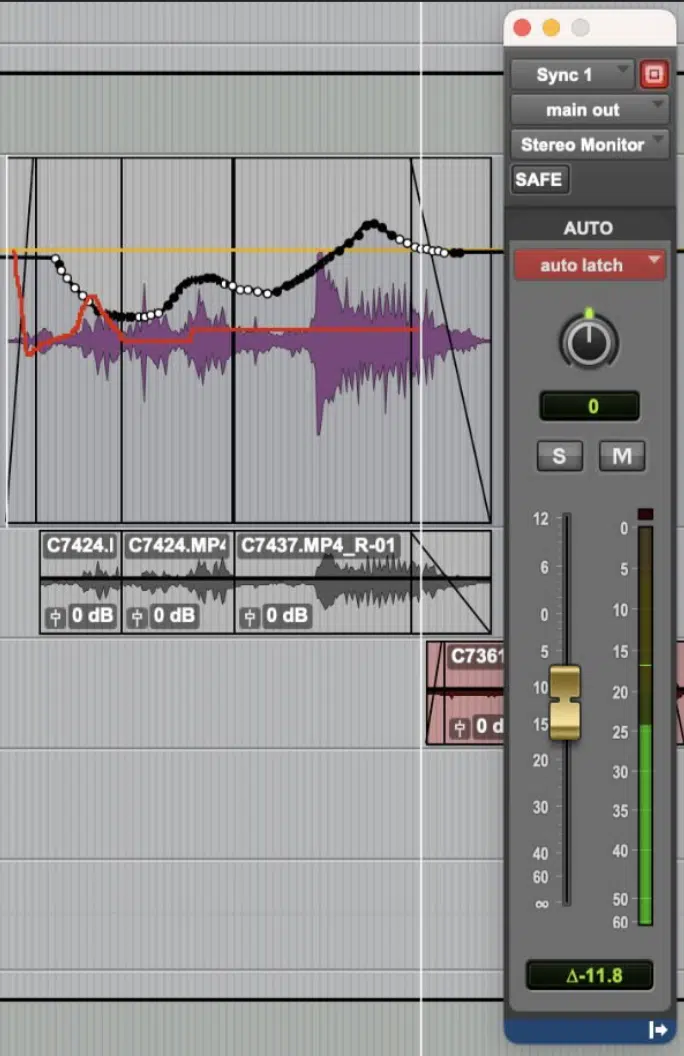
Clip gain and volume automation both have different, yet complementary roles when it comes to mixing, so let’s break it down.
Clip gain is used to adjust the volume level of individual audio clips before they pass through the channel strip, while volume automation happens post-fader.
For example, if a vocal recording automation has uneven levels, I’ll use clip gain to level out peaks and quiet sections before adding volume automation for finer details.
One huge benefit of clip gain is that it doesn’t affect the plugins in your signal chain, which makes it great for prepping audio before applying compression or reverb.
Volume automation, on the other hand, adjusts the output level after processing 一 giving you the ability to automate dynamic changes that respond to the mix as a whole.
When deciding between the two, ask yourself: “Am I fixing a problem or enhancing the mix?” Clip gain is great for fixes, while volume automation is all about creative control.
Most DAWs, including Pro Tools and Logic Pro, allow you to combine both techniques to get as flexible as possible.
Side note, if you find yourself constantly tweaking a plugin to compensate for level differences, try handling the problem with clip gain first.
It’ll save you time and keep your recorded automation much cleaner.
-
Automation Modes in DAWs
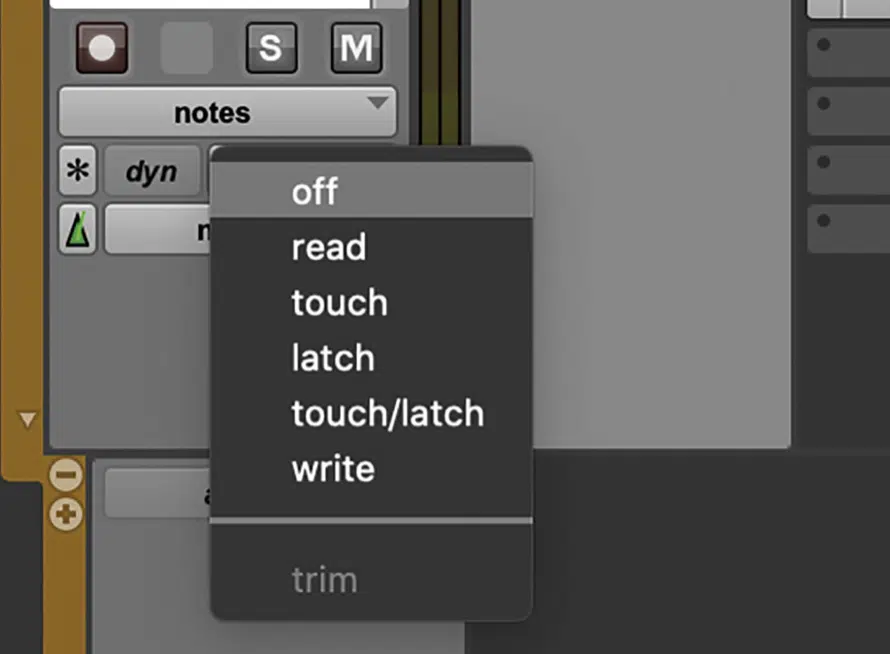
Automation modes determine how your DAW captures and edits automation data, so of course understanding them is key for professional mixing.
The most common automation mode types include:
- Touch mode
- Latch mode
- Write mode
To kick things off, we have touch mode which records automation changes only while you’re actively moving the fader.
This automation mode is perfect for precise tweaks, like raising a vocal by 1-2 dB on key phrases that you feel need to really shine.
Latch mode is great for longer, continuous adjustments, as it holds the fader’s position until you stop playback.
It’s ideal for sweeping adjustments, like gradually increasing a pad’s volume over a breakdown and the like.
Write mode, on the other hand, overwrites all existing automation on a track.
Just keep in mind that this automation mode can be a little risky but useful when starting fresh, so use it with caution.
When automating a lead vocal, I like to start in touch mode to capture subtle movements, then switch to latch mode for more big adjustments like lifting the chorus.
If you’re working on something like a bassline, latch mode might be better for automating consistent volume increases or decreases.
Pro Tools, Ableton Live, and Logic Pro all offer these modes, and you can easily toggle between them based on what you need.
You can toggle modes from the track header or automation menu, paired with the track view selector to focus only on the automation lanes you’re editing.
This keeps your workspace extra clean and makes it easier to adjust parameters like volume, panning, or even delay sends.
PRO TIP: Use touch mode for precise moves, latch mode for gradual adjustments, and write mode when reworking an entire track. Pair these modes with automation rehearsals during playback to refine your changes before locking them in.
Automation Lanes: Breaking it Down
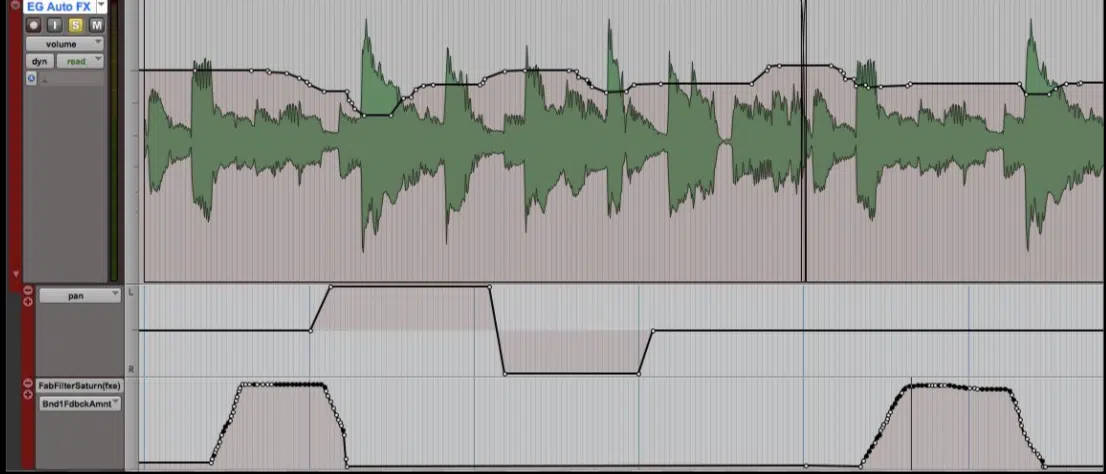
Automation lanes are where all the precise adjustments to your mix come together, giving you a dedicated workspace for creating and editing automation data.
To access these lanes, simply:
- Enable the track view selector in your DAW (e.g., Pro Tools or Logic Pro) by right-clicking the track header and selecting “Show Automation Lanes.”
- Choose the parameter you want to automate (most commonly, volume, but also reverb sends, panning, or delay feedback).
Once the automation lane is open, you’ll see a timeline where you can plot control points to shape the automation curve however you want.
For example, creating gradual fades or sudden volume drops becomes super easy by simply clicking and dragging points.
To automate a vocal fade-out over 8 bars, set a point at the starting volume, then another point at the desired lower volume, and simply drag the curve to connect them.
If you need a sudden drop, such as silencing a reverb tail before the next phrase, add a steep curve between two close points.
When working on a lead vocal, try setting control points at the start and end of each phrase to fine-tune levels with high precision.
For instance, you might boost the vocal by 1 dB during a softer phrase, then drop it by 0.5 dB during louder moments to balance dynamics.
If you’re automating a synth pad, try plotting points every 2-4 beats to create subtle swells that align with the song’s rhythm.
If you’re automating a synth pad, try plotting points every 2-4 beats to create subtle swells that align with your song’s rhythm.
For example, you can raise the volume by 2 dB during the first beat of each bar to emphasize the chord changes without overpowering the mix.
For smoother transitions, use your DAW’s pencil tool to manually draw curves between points 一 ensuring there are no abrupt volume jumps during playback.
PRO TIP: Zoom in on the timeline when making small adjustments to avoid unintentional changes to nearby points.
For example, if you’re working on micro-level automation, like a 0.5 dB boost over milliseconds, zooming in makes sure you’re on point/won’t affect surrounding points.
Also, make sure to color-code your automation lanes…
Assigning one color for volume and another for reverb or panning automation can help maintain an organized workflow, especially when working with dense sessions.
Believe me, I used to think it wouldn’t make that big of a difference, but it truly does.
In large sessions with over 50 tracks, knowing exactly which automation lane controls what saves hours of editing and avoids accidental changes.
Volume Automation Tricks
Volume automation isn’t just about making things louder or softer 一 it’s also a creative tool that can transform your mixes. Let’s explore some pro-level tricks, from automating vocal clarity to laying down dynamic effects like swells and fades, to give your music more energy and impact.
-
Automating Vocal Levels for Clarity
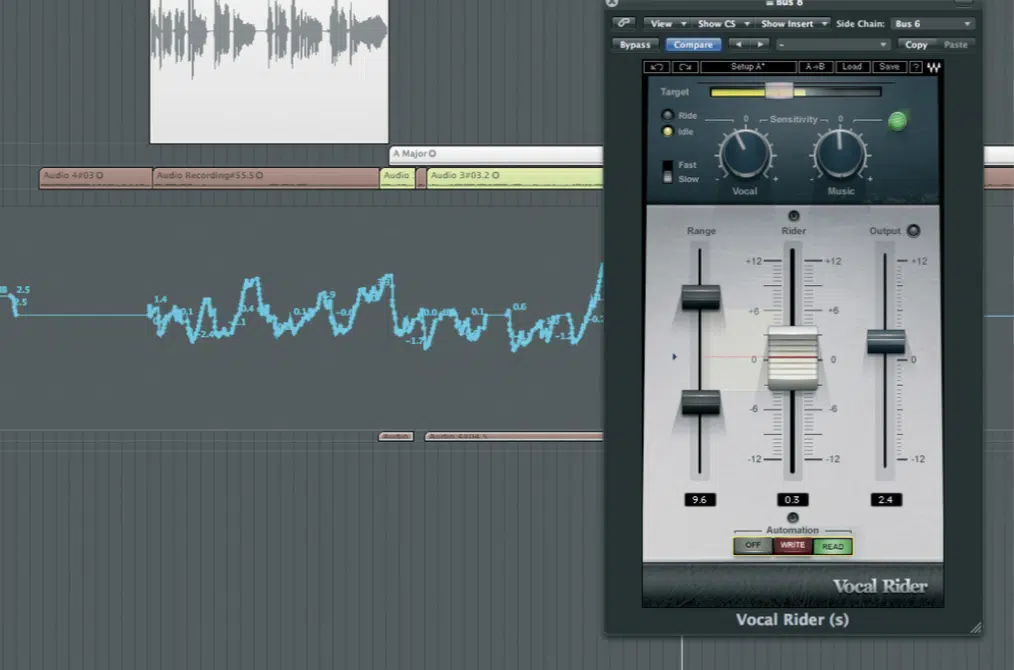
Automating vocal levels is key to keeping the lead vocal clear and present throughout the mix, no matter how dense your arrangement gets.
You’re going to want to start by isolating the lead vocal track and enabling the volume automation lane in your DAW.
Using touch mode, you can ride the volume fader during playback to create natural yet extremely dynamic adjustments.
A super common way of doing this is to gently boost softer phrases (typically by 2-3 dB) to make sure they don’t get lost behind instruments.
For vocals with varying intensity, a gain plugin earlier in the signal chain can help even out extreme peaks and troughs before automating finer details.
For example, when balancing doubled vocals, slightly lower the harmonies (around 1-2 dB) with automation to let the lead shine while maintaining depth.
To enhance clarity during busier sections, try automating subtle dips (1 dB) in the vocal’s volume during moments with heavy instrumentation, like choruses.
This creates space for other elements without sacrificing vocal presence.
Once the automation is complete, smooth out transitions by editing the automation curves with the pencil tool to avoid abrupt changes.
PRO TIP: Solo the vocal during playback to catch and correct unnatural jumps in the recorded automation. Then listen in context with the full mix to guarantee the changes sound cohesive and balanced.
-
Dynamic Mix Automation
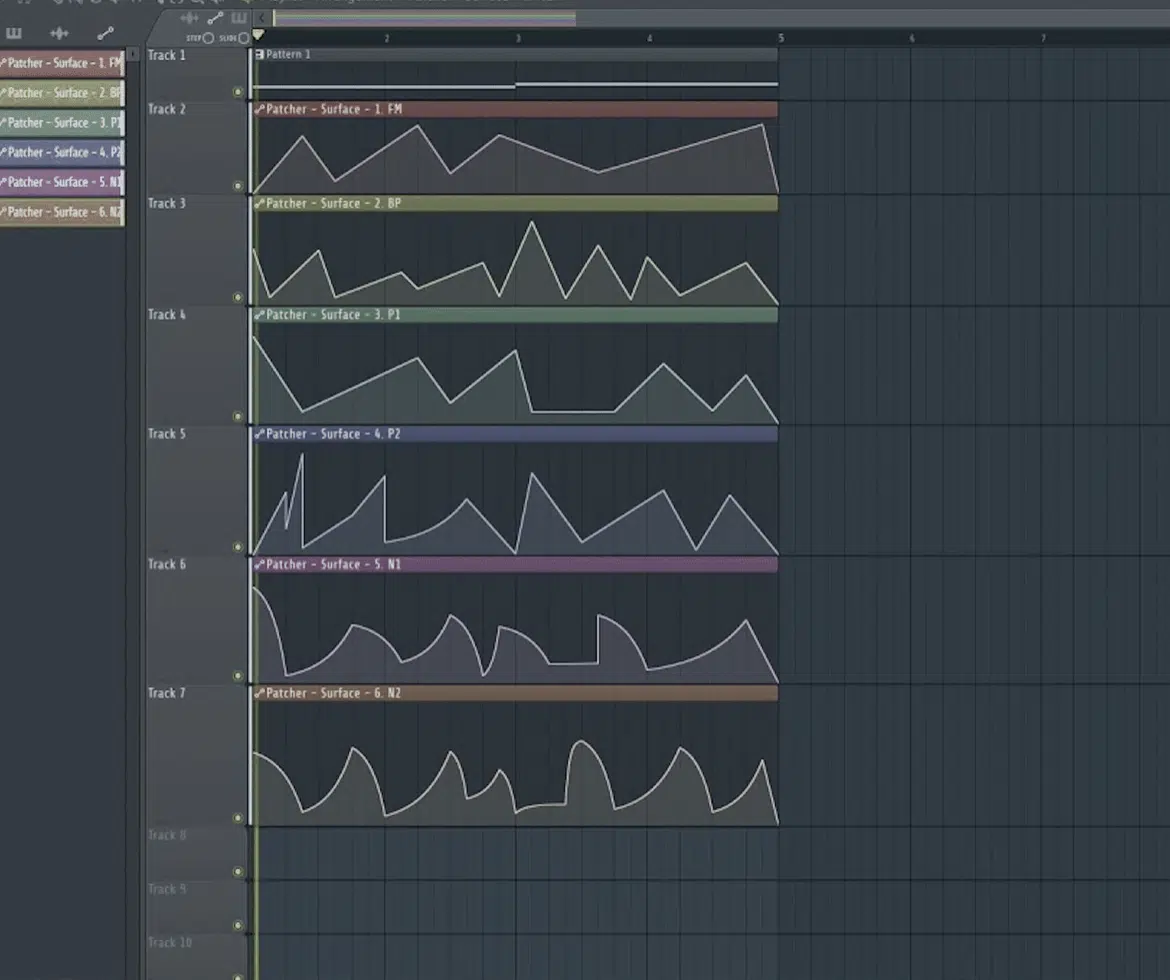
Dynamic mix automation involves balancing multiple elements across a track to maintain energy and clarity throughout the song.
Start by identifying key moments where dynamics shift, such as transitions between verses and choruses or breakdowns and drops.
Using automation, you can subtly adjust the volume of supporting elements to highlight the lead parts so they pop.
For example, automating a 2-3 dB dip in the rhythm guitar during the chorus can allow vocals and lead instruments to take center stage.
When working with a dense mix, automate the volume fader on percussion or background layers to pull them back during quieter moments (letting lead elements breathe).
Using automation modes, like latch mode in Pro Tools, can make the process of recording larger, continuous adjustments during playback.
To add depth, try automating delay and reverb levels alongside volume changes.
For example, fading up a reverb send during a bridge can add atmosphere, while automating delay feedback during a breakdown can create a hypnotic effect.
Another automation trick is to automate bus channels instead of individual tracks, allowing for uniform adjustments across grouped elements.
This can be drums or backing vocals, that kind of thing.
Pro Tip: Use your DAW’s track view selector to focus only on automation lanes while editing. This keeps things clean and lets you fine-tune automation data without distractions or any hassle.
Regularly listen in context to ensure the dynamic changes serve the overall mix and don’t sound disjointed, basic, or amateurish.
Final Thoughts
Volume automation, as you now know, is about having precise control over your mix to create polished, dynamic, and engaging tracks that really sound on point.
It lets you balance levels, hype up key moments, and bring movement to your music in ways static mixing simply can’t achieve.
By applying the techniques we’ve covered, you’ll be able to refine your tracks and elevate your production skills like never before.
And, as a special bonus, you’ve got to check out the legendary Free Project Files, which is the perfect way to deepen your understanding of these concepts.
With 3 project files for Ableton, FL Studio, and Logic Pro, you’ll see (firsthand) real-world examples of volume automation, dynamic processing, and arrangement techniques.
These files let you see, step-by-step, exactly how to create epic beats from start to finish including, you guessed it, volume automation.
Remember, whether it’s automation or any other aspect of music production, it’s all about attention to detail, experimentation, and constant learning.
So, make sure to stay curious, focused, and think outside the box every single day.
Until next time…


Leave a Reply
You must belogged in to post a comment.