Audio compression is about controlling dynamics, enhancing clarity, and bringing out the best in every sound in your mix.
It can help smooth out vocals, tighten up drums, and make your entire track sound more powerful and mind-blowing.
Plus, you’ll know how to successfully apply the right compression settings, choose the right type of compression, and know when/what not to compress (which is key).
It can make all the difference between an amateur mix and a chart-topper.
As producers, knowing all about audio compression and the most creative techniques can completely enhance your skills.
That’s why I’m breaking down everything you need to know, like:
- How audio compression works and why it’s essential ✓
- Key parameters like threshold, ratio, attack, and release ✓
- The different types of compression and when to use them ✓
- How to use compression on vocals, drums, bass, and full mixes ✓
- The biggest mistakes to avoid when applying compression ✓
- Advanced techniques to help change the game ✓
- How to stack multiple compressors for ultimate control ✓
- How to avoid excessive compression ✓
- Creative compression tricks for unique sound design ✓
- Much more about audio compression ✓
By knowing all about audio compression and how to use it the right way, you’ll be able to mix like a true boss, hands down.
As well as make your tracks sound smoother and more polished, plus enhance punch and presence (and avoid over-compression and other issues).
This way, your tracks will always hit hard, stay balanced, and sound on point every time.
NOTE: We’re not talking about hardware compressors or like a FET compressor today, but stay tuned because we’ll talk about that very soon in another article.
Table of Contents
Audio Compression: How it Works
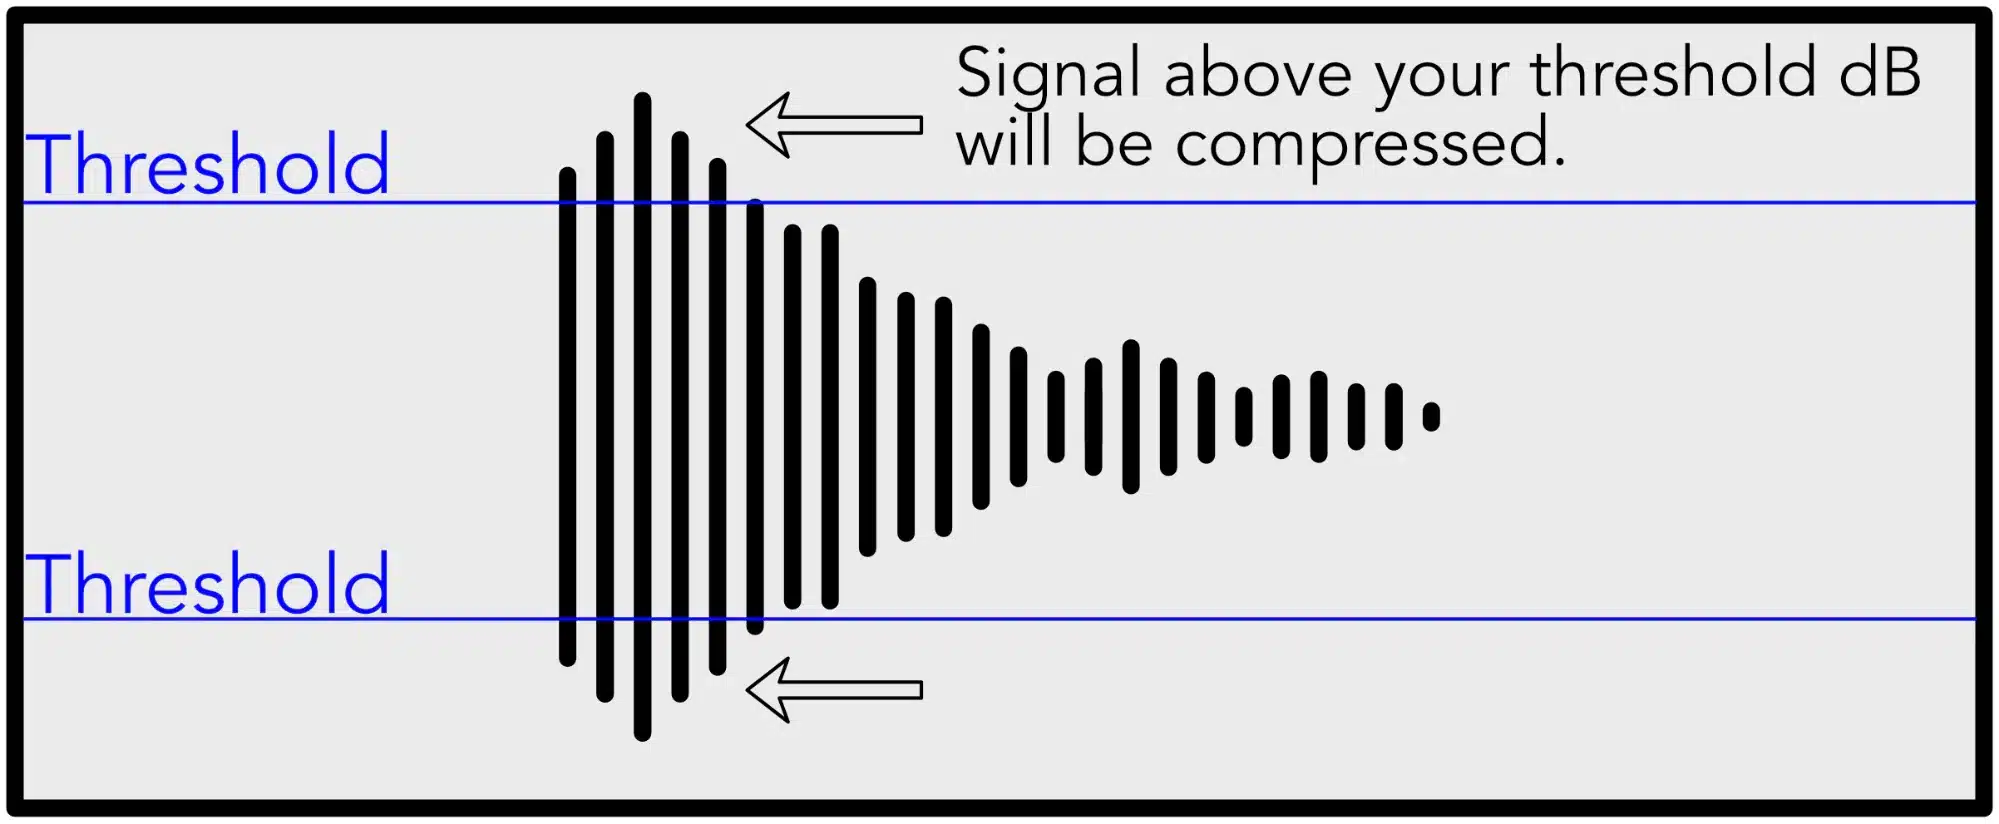
Audio compression is all about controlling dynamic range, making loud parts quieter and quiet parts louder to create a more balanced sound.
When a compressor processes an input signal, it listens for volume peaks and reduces them based on the set parameters.
This creates a smoother, more controlled performance.
The output signal is then adjusted using output gain to match the original volume so that compression enhances the sound without making it too quiet.
For example, if a vocal track has inconsistent loudness, compression will reduce the peaks while bringing up softer sections 一 keeping the same signal more even.
This is key for keeping instruments, vocals, and full mixes sitting naturally in a track without sudden volume jumps.
Without compression, a mix might feel too unpredictable, but with the right settings, it maintains power, consistency, and clarity while still feeling dynamic.
Don’t worry, we’ll break down everything you need to know so you get a solid understanding.
Key Compression Parameters
When dialing in audio compression, understanding the main controls is key to getting the sound you want. Each setting affects how the compressor reacts to the incoming audio, shaping the overall dynamics in different ways, so let’s get into it.
-
Threshold
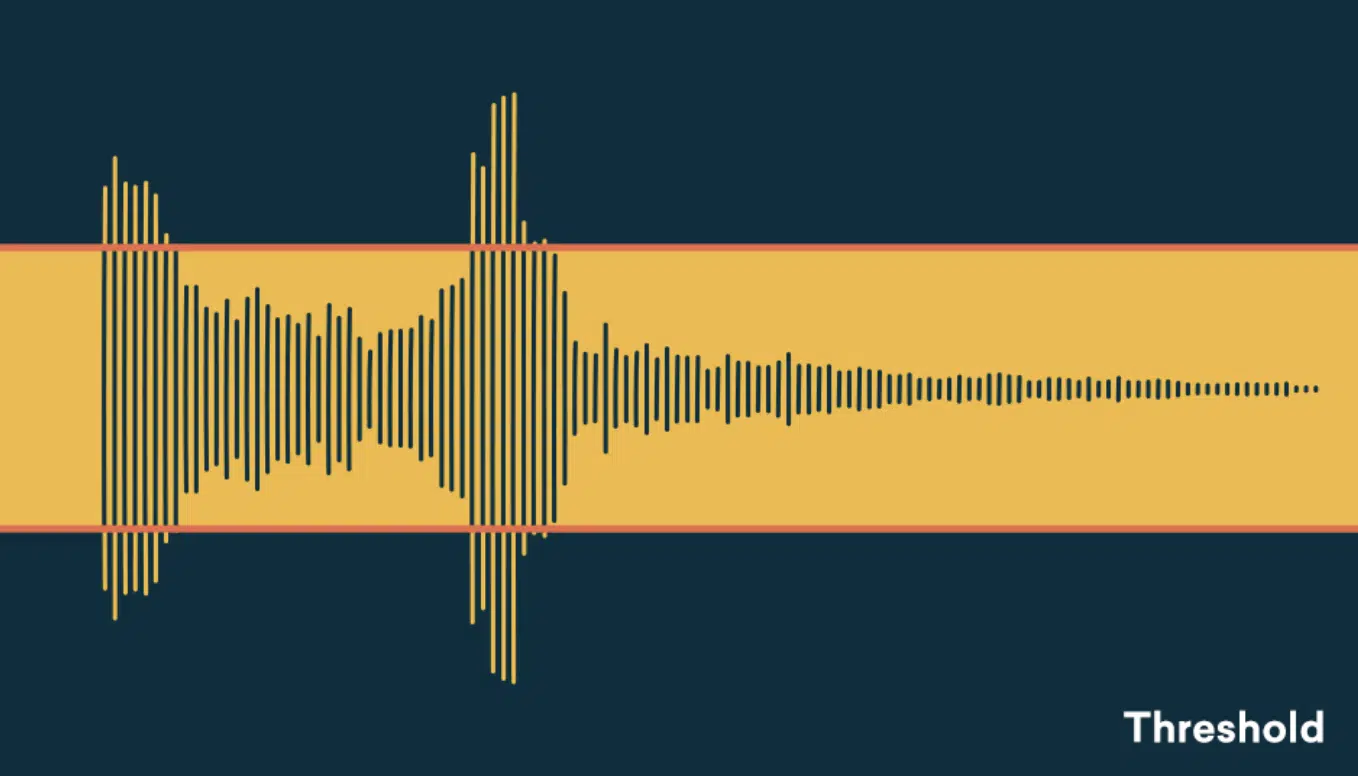
The threshold level sets the point where the compressor starts working, and if a sound’s volume stays below this level, the compressor does nothing.
But once the sound crosses that threshold, the compressor kicks in and starts reducing the volume just like it should.
Think of the threshold level like setting a speed limit… Anything under the limit is fine, but as soon as you go over, the compressor steps in to “slow it down.”
For example, if you set the threshold at -10 dB, any audio that goes above that gets compressed, while everything quieter remains untouched.
A lower threshold results in more compression across the entire sound, while a higher threshold only tames the loudest peaks.
-
Ratio
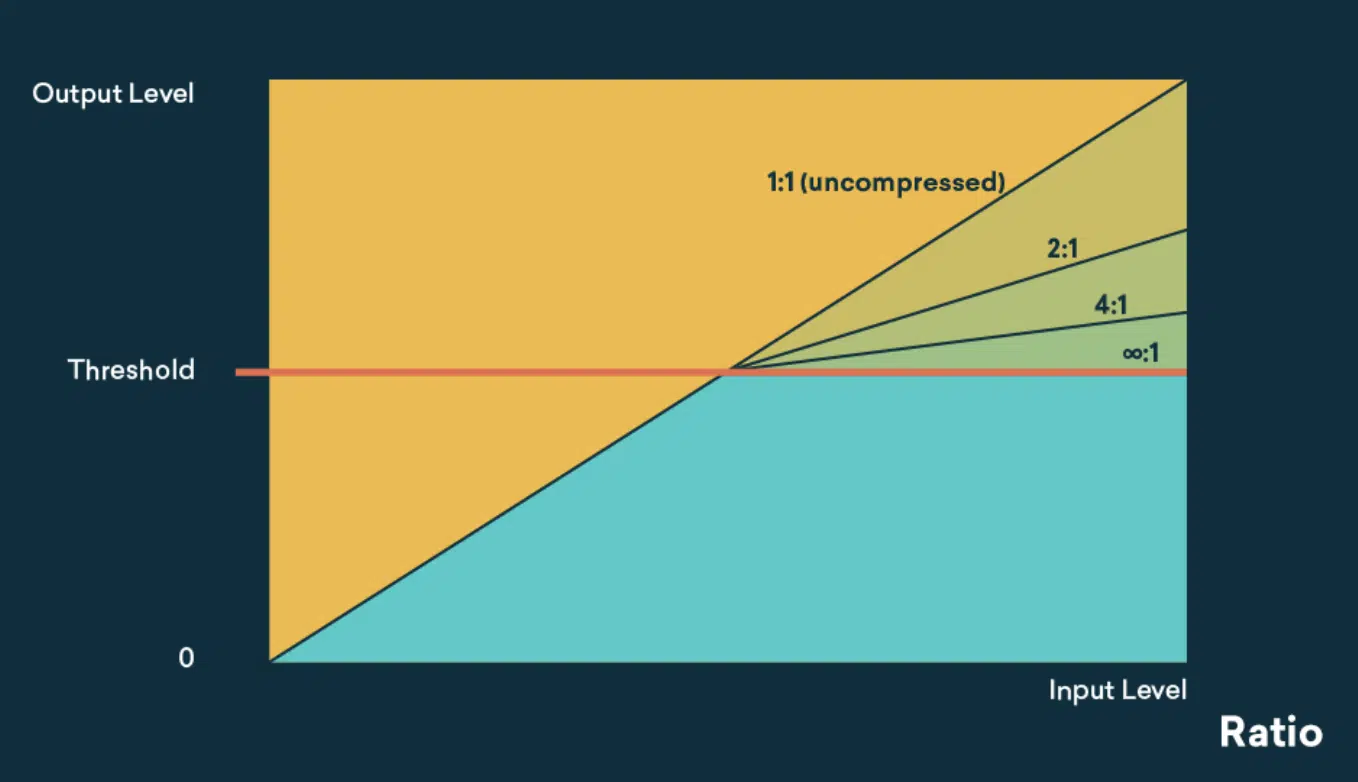
The compression ratio controls how much compression is applied after the sound crosses the threshold.
A 2:1 ratio means that for every 2 dB the sound exceeds the threshold, only 1 dB actually makes it through, gently reducing the peaks.
A 4:1 ratio applies even more control, while an 8:1 ratio or higher starts acting like a limiter 一 heavily clamping down on loud transients.
For example, if a vocal recording has occasional peaks that are too loud, a 3:1 or 4:1 ratio can smooth it out while keeping the dynamics natural.
On drums, a higher compression ratio like 6:1 or 8:1 can add punch and control, especially on snares and kicks that might jump out too much.
-
Attack
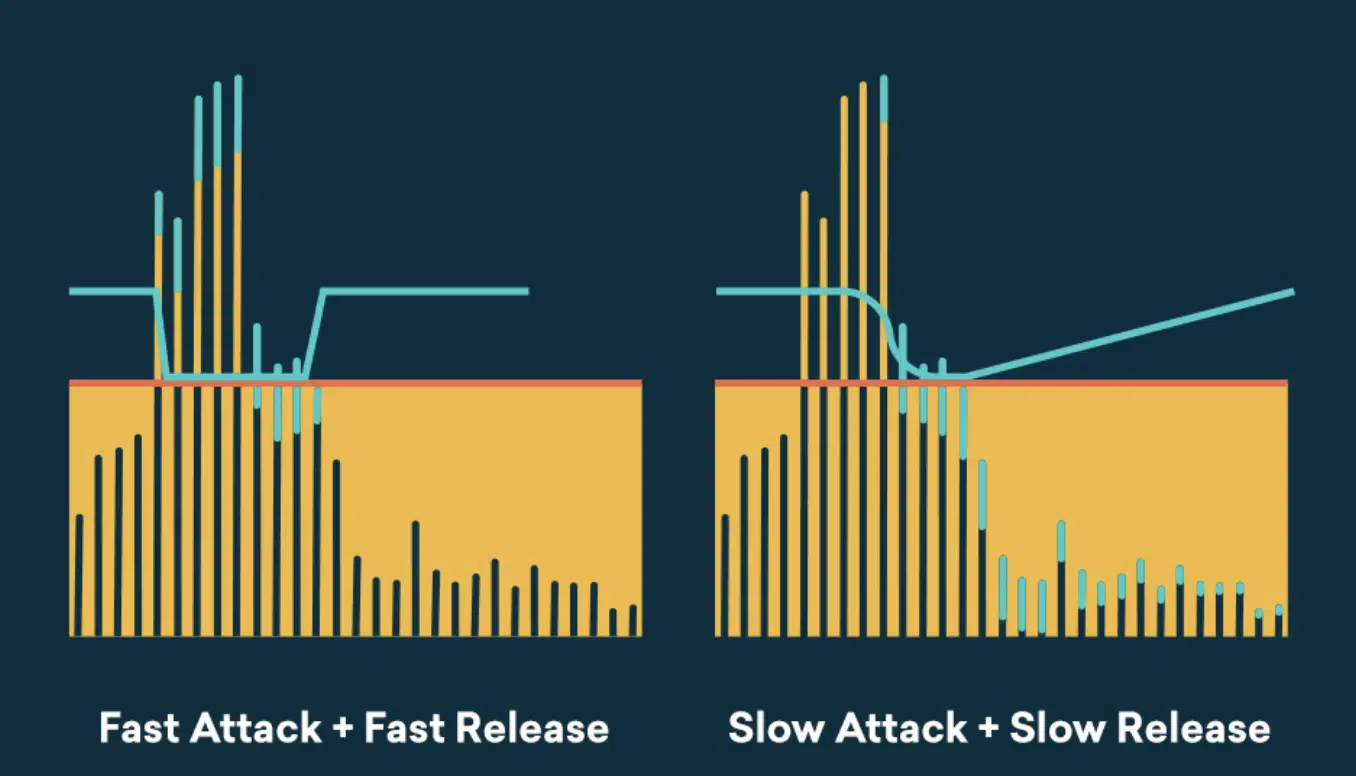
The attack time determines how fast the compressor reacts when the audio signal crosses the threshold.
A fast attack (1-5 ms) clamps down almost instantly, great for taming sharp transients like snappy snares or plucky bass notes.
A slow attack (20-50 ms) allows more of the initial punch to come through before compression kicks in.
This is useful for making drums feel punchy rather than squashed.
For vocals, a medium attack setting (5-15 ms) keeps the words clear while still controlling peaks naturally.
A common mistake is setting the attack too fast on drums, which can kill the energy and make them sound weak instead of punchy.
-
Release

Release time controls how long it takes for the compressor to let go once the audio signal falls back below the threshold.
A short release (30-50 ms) allows the compressor to reset quickly, which can make a track feel lively and energetic.
A long release (100-300 ms) keeps compression going for longer, useful for smoothing out vocals or basslines that need steady control.
For example, if a vocal has a short release, it might sound choppy and unnatural as the compressor quickly resets after every word.
A longer release (150-200 ms) keeps the compression more transparent, blending each phrase together smoothly.
-
Knee (Hard vs. Soft)
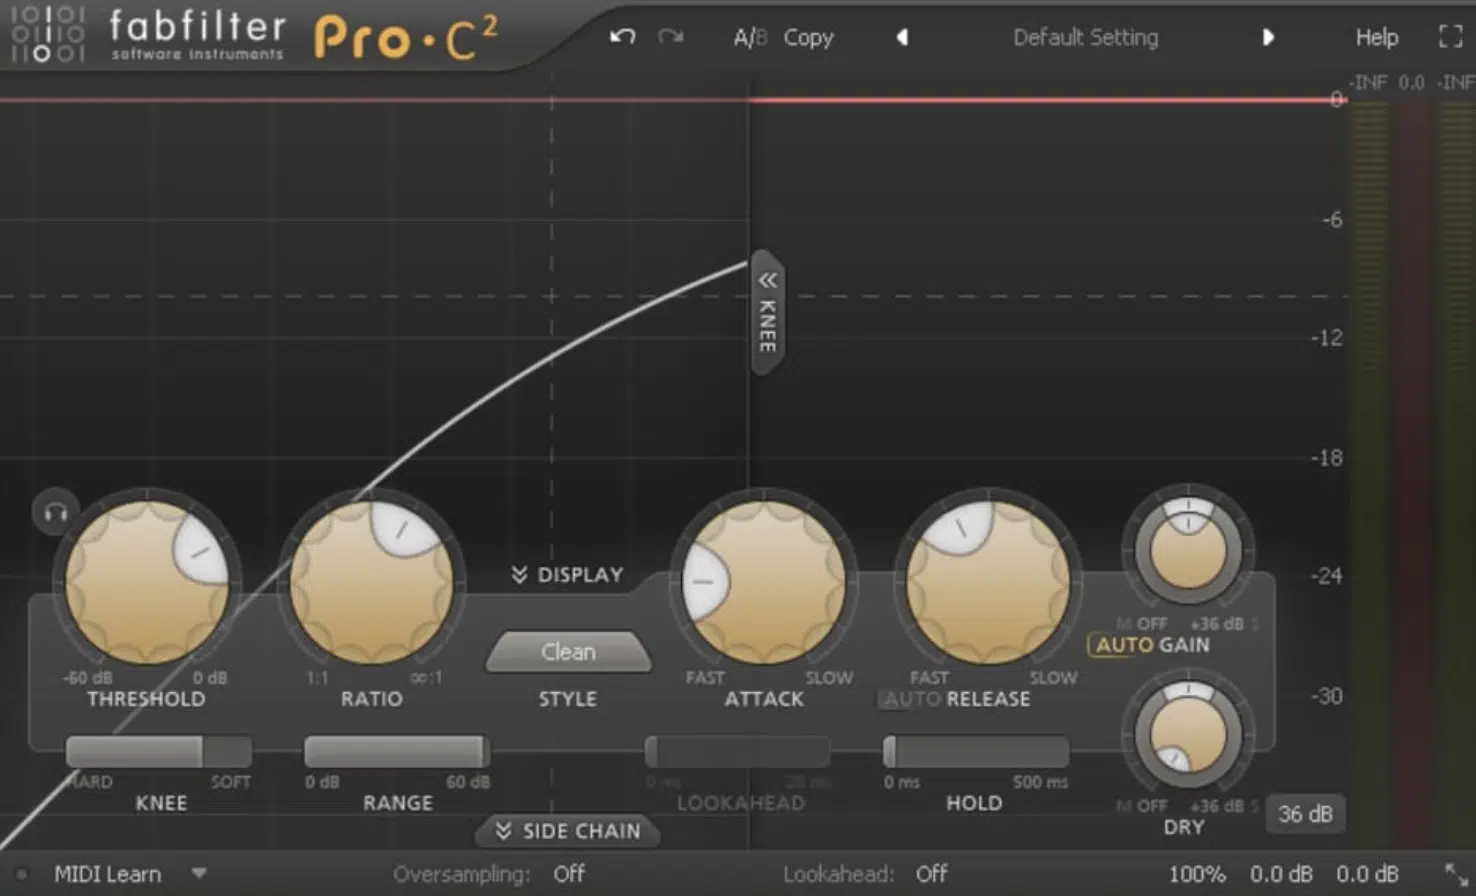
Soft Knee Compression
The knee setting changes how gradually the compression kicks in.
A hard knee applies compression instantly when the threshold is crossed 一 giving a more aggressive, noticeable effect.
This is great for drums and percussive sounds where you want a clear, defined response over anything else.
A soft knee eases into compression more smoothly, making it less noticeable and more natural, which works well for vocals or acoustic instruments.
Think of it like a dimmer switch 一 soft knee gradually fades into compression, while hard knee is more like an on/off switch.
-
Make-Up Gain
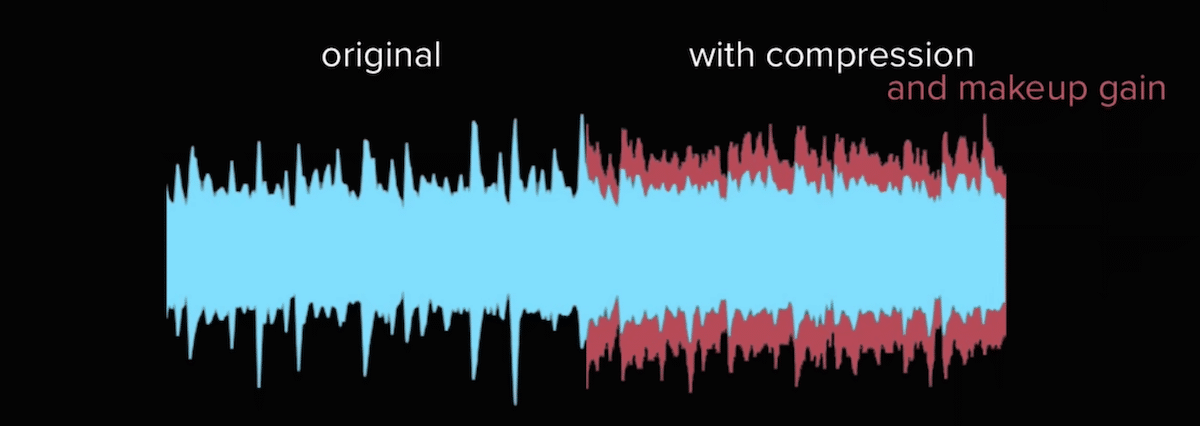
Audio compression naturally lowers the volume of a sound, so make-up gain is used to bring it back up to the right level.
If you compress a vocal and it ends up sounding quieter, increasing the make-up gain restores its presence in the mix.
It’s important to match the compressed and uncompressed levels to avoid tricking your ears into thinking that sometimes a track sounds better just because it’s louder.
Remember loudness wars?… Yeah, let’s not do that again.
A good way to check is to bypass the compressor and compare the volume levels to make sure the compression is actually improving the sound rather than simply making it louder.
-
Peak vs. RMS Detection
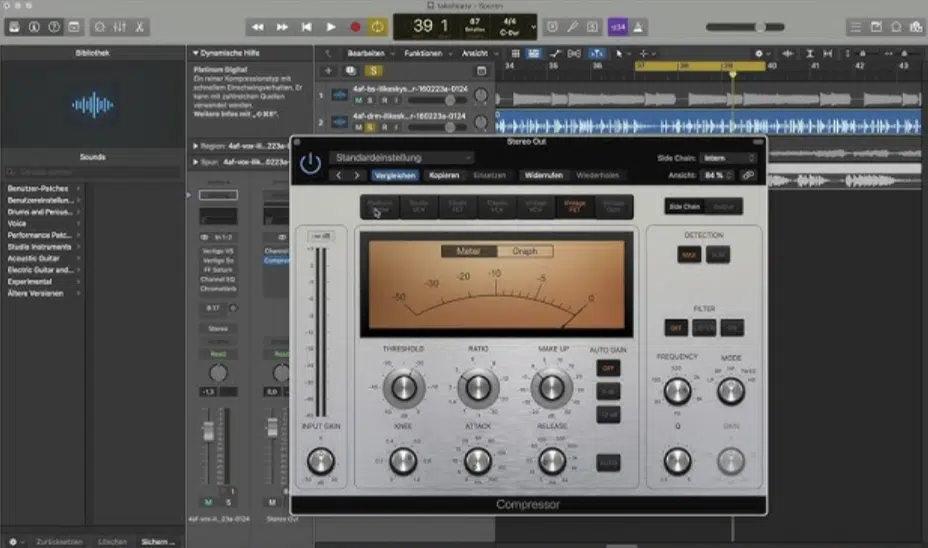
Compressors analyze audio using either Peak or RMS detection.
Peak mode responds to sudden spikes in volume, which is useful for controlling quick transients like drum hits or plucky bass notes.
For example, if a kick drum has an overly aggressive transient, using Peak detection with a fast attack (1-3 ms) and a 4:1 ratio can tame the initial hit without affecting the body of the sound.
Peak mode is useful in percussive or rhythmic elements where you want to keep transients in check while preserving their energy.
RMS mode works more like the human ear, reacting to the overall loudness rather than just peaks.
This is super useful for things like vocals or full mixes, where you want smooth compression without crushing every little transient.
For instance, on a lead vocal, RMS mode with a medium attack (5-10 ms) and a 3:1 ratio can help maintain an even performance without cutting off every little dynamic change.
For mastering, RMS compression is often used at a low ratio (1.5:1 to 2:1) with a long release (200+ ms) to subtly smooth out volume inconsistencies across an entire track.
All without making it feel lifeless, of course.
NOTE: Many compressors let you switch between Peak and RMS, which let you fine-tune how the compression responds based on the type of sound you’re working with.
Some even offer a blend control between the two for hybrid compression, which is awesome in my opinion.
If you’re working with punchy instruments, Peak mode keeps transients in check, while RMS mode is better for transparent leveling on elements like vocals, pads, or entire bus groups.
The key is understanding how each mode interacts with your dynamic range and choosing the right one for the job.
Different Types of Compression
There are several types of audio compression. Each one serves a different purpose in your mix. Some focus on controlling peaks, while others shape the overall dynamic range balance or target specific frequency ranges. Choosing the right type of compression depends on the sound you’re working with and the effect you want to achieve, so let’s break it down.
-
Downward Compression
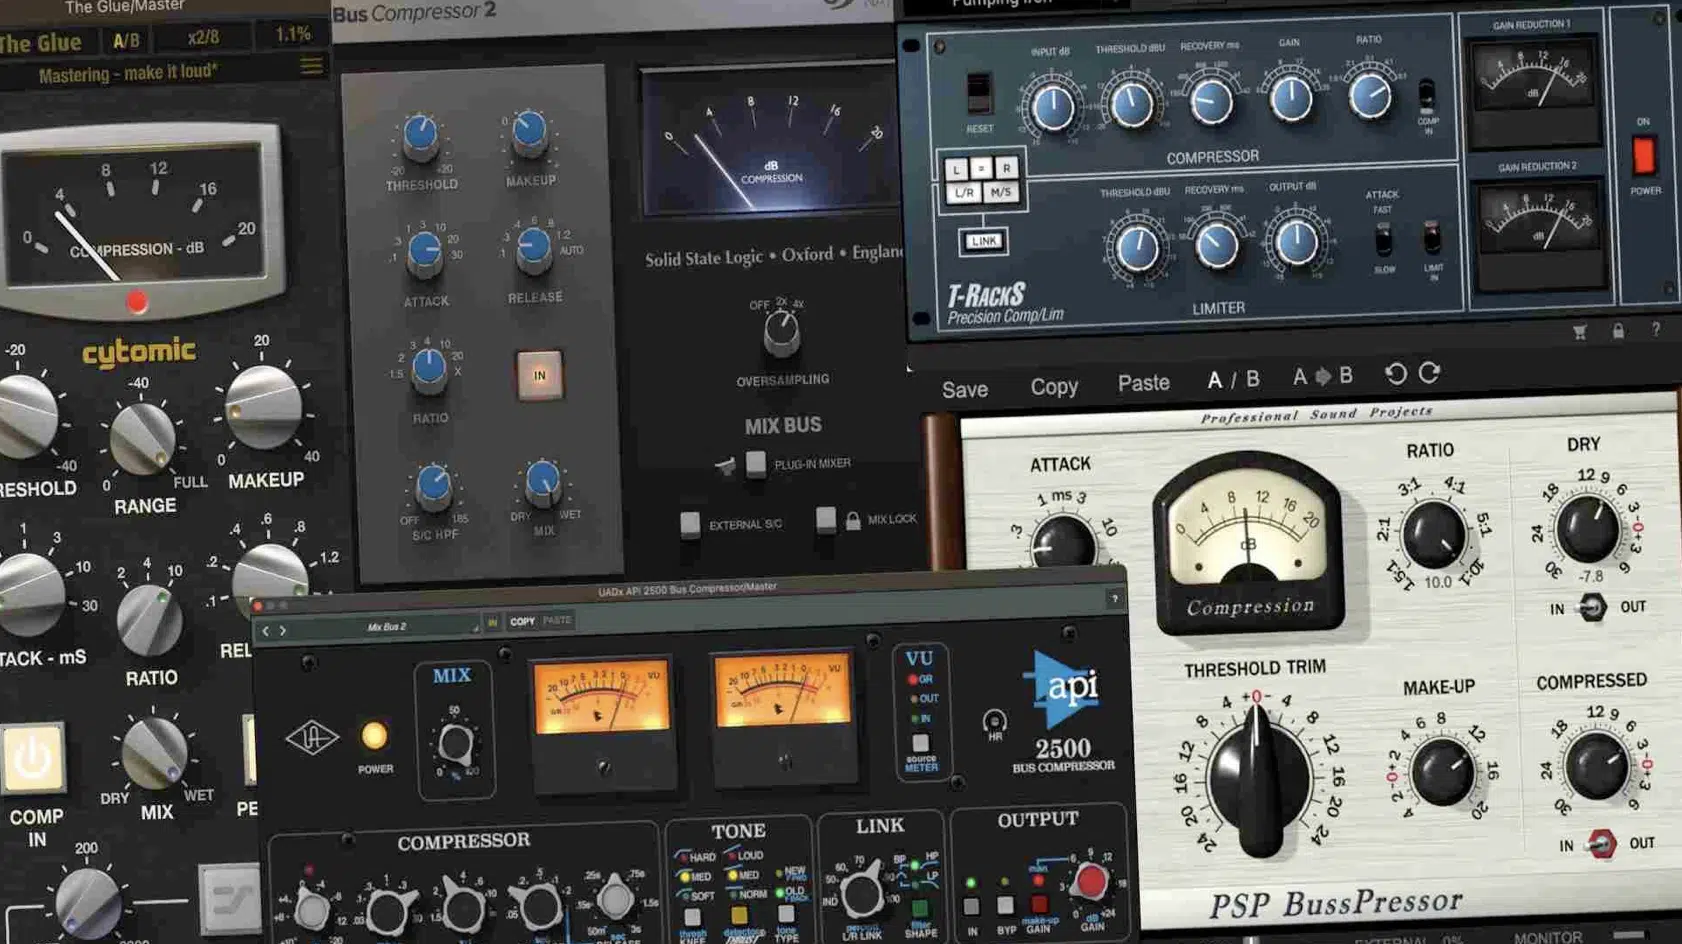
Downward compression is the most common type 一 it reduces the volume of sounds that exceed the threshold while leaving quieter sounds untouched (like we spoke about).
This helps control peaks and will make your performances sound more consistent without sacrificing natural dynamics.
For example, if a vocal has a few words that jump out too much, downward compression can smooth them out so the volume stays even.
Drums benefit from this too…
A snare might hit too hard in some spots, but with downward compression set at a 4:1 ratio, -12 dB threshold, and 10 ms attack, it can be tamed without losing impact.
Just keep in mind that when you’re using downward compression, it’s super important not to overdo it because that can destroy everything.
Too much can make a track sound lifeless, especially if the attack and release settings are too aggressive.
-
Upward Compression
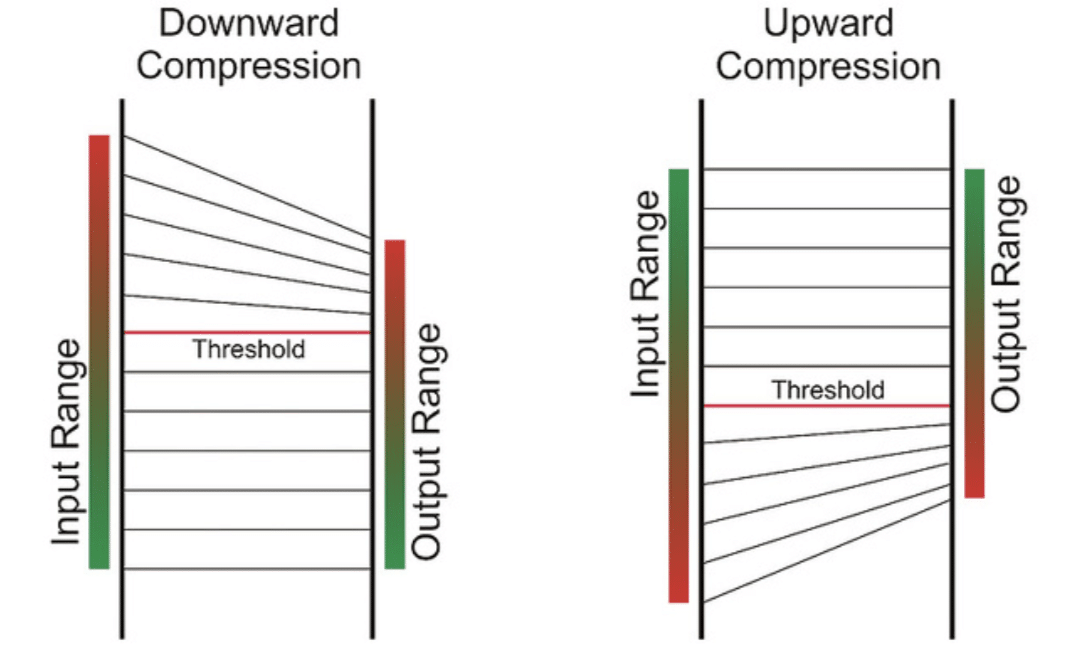
Upward compression works in the opposite way. It brings up the quieter parts of a sound while leaving the louder parts unchanged.
When it comes to making performances feel more intimate and full without squashing transients, this one is perfect.
For example, in a vocal recording, whispered or softly sung words might get lost in the mix, right?…
But, by applying upward compression with a low threshold (-30 dB) and a gentle ratio (2:1) can bring them forward while keeping the louder parts natural.
A great way to use this is on room mics for drums because it can lift the quiet ambience 一 making the space feel bigger and more present in the mix.
Unlike downward compression, which can sometimes make a mix feel flat, upward compression retains more natural movement while still controlling dynamics.
-
Multiband Compression
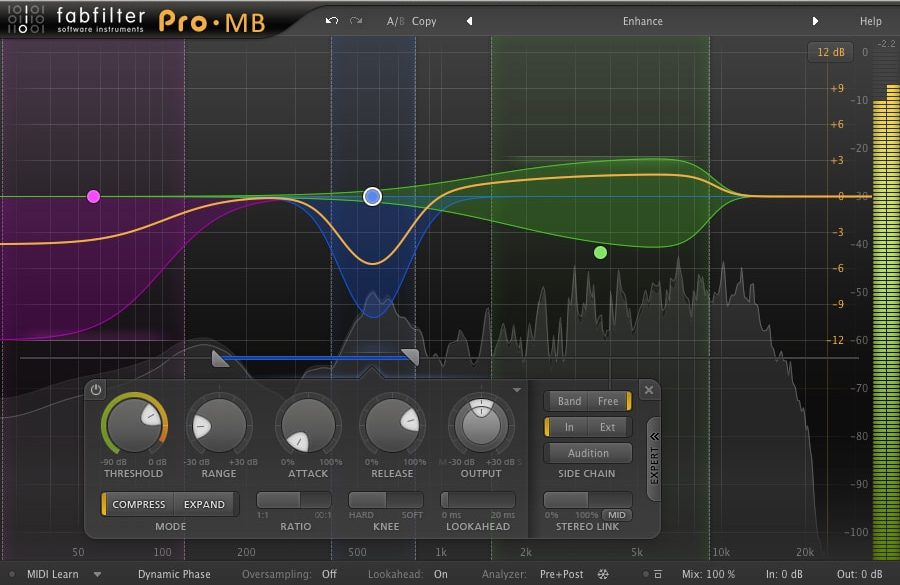
Multiband compression splits a sound into different frequency ranges and applies separate compression settings to each band.
Multiband compressors are all about controlling specific problem areas without affecting the entire sound.
For example, a bass-heavy vocal might sound too boomy in the low end, but if you apply multiband compression from 80 Hz to 250 Hz with a 3:1 ratio and slow release, you can tame just the muddy frequencies without losing clarity in the highs.
On the same note, on a full mix, multiband compression can:
- Tighten up the low-end
- Control harsh mids
- Smooth out high frequencies independently
So, when it comes to mastering, this one is essential.
A common mistake is over-compressing all bands equally, and you certainly don’t want to do that.
This can make a track sound unnatural, so it’s best to compress only the problem areas while leaving the rest completely untouched.
-
Parallel Compression (New York Compression)
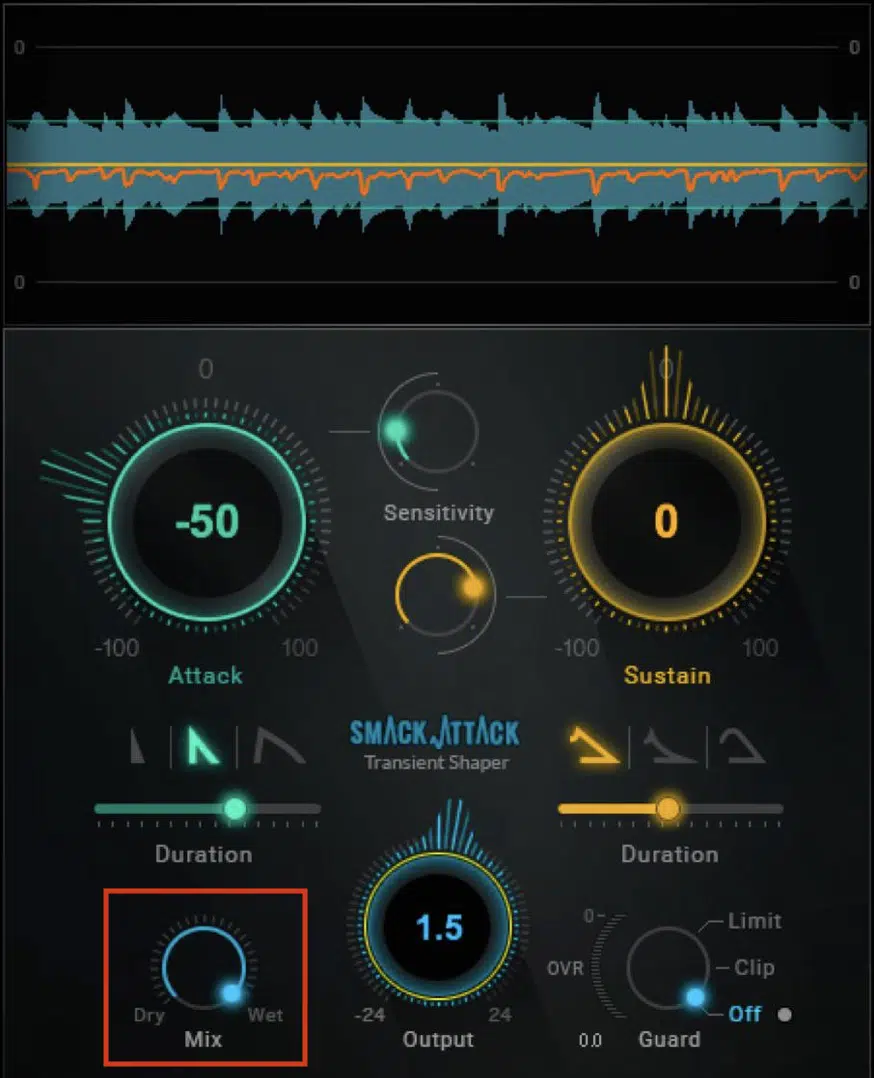
Parallel compression (aka New York compression) blends a heavily compressed signal with the original uncompressed track to maintain both power and dynamics.
This technique is perfect for adding thickness and energy to a sound without losing its natural/organic feel.
For example, if a drum bus lacks punch, you can duplicate the track, apply heavy compression (10:1 ratio, fast attack around 5 ms, and medium release around 150 ms).
Then, mix it back in at a lower level, which keeps the transients on point while filling out the body of your sound.
PRO TIP: Use parallel compression on vocals. Compressing a duplicate track aggressively (8:1 ratio, -20 dB threshold, with makeup gain added) and blending it underneath the main vocal can make everything sound better and more consistent.
A common mistake is setting the compressed track too loud in the mix, which can overpower the original dynamics.
So you’ll want to slowly bring it in until you feel the thickness without muddying the clarity instead (don’t forget that).
-
Sidechain Compression
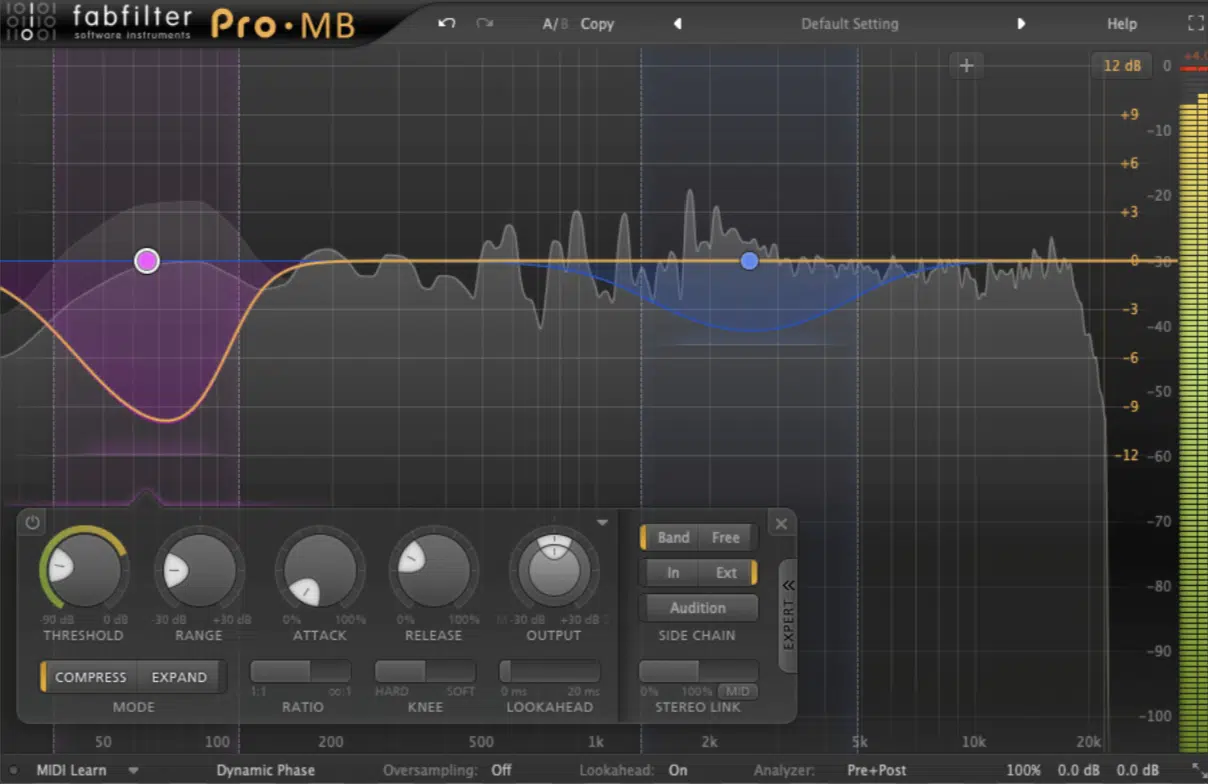
Multiband Sidechain Compression
Sidechain compression is when one sound triggers the compressor on another sound to create a dynamic relationship between the elements in your mix.
The most well-known example of side chain compression is the pumping sound effect in EDM, where the kick drum ducks the volume of a synth pad or bassline.
This creates that sick rhythmic movement people love.
To achieve this, set the kick drum as the sidechain input signal, then adjust the compressor on the synth or bass with a:
- 4:1 ratio
- Fast attack (1-3 ms)
- Medium release (50-100 ms)
This will let the kick cut through while making the music breathe around it.
Beyond EDM, sidechain compression is also useful in hip-hop and pop as well.
For example, using it on a bassline so that it lowers in volume when the kick hits prevents frequency clashing and keeps the low end tight.
PRO TIP: Use sidechain compression subtly on vocals against a reverb or delay send so the vocal remains upfront while the effects only swell in the gaps.
The key is fine-tuning the attack and release to make the ducking feel smooth rather than obvious unless you want that signature pumping effect.
Most Common Uses of Audio Compression
Audio compression plays a huge role in shaping the dynamics of a mix. Whether it’s making vocals more consistent, controlling transient peaks on instruments, or enhancing the overall energy of a track, compression is everything. Used properly, it smooths out volume inconsistencies, tightens performances, and adds weight without making a mix feel lifeless.
-
Vocal Compression
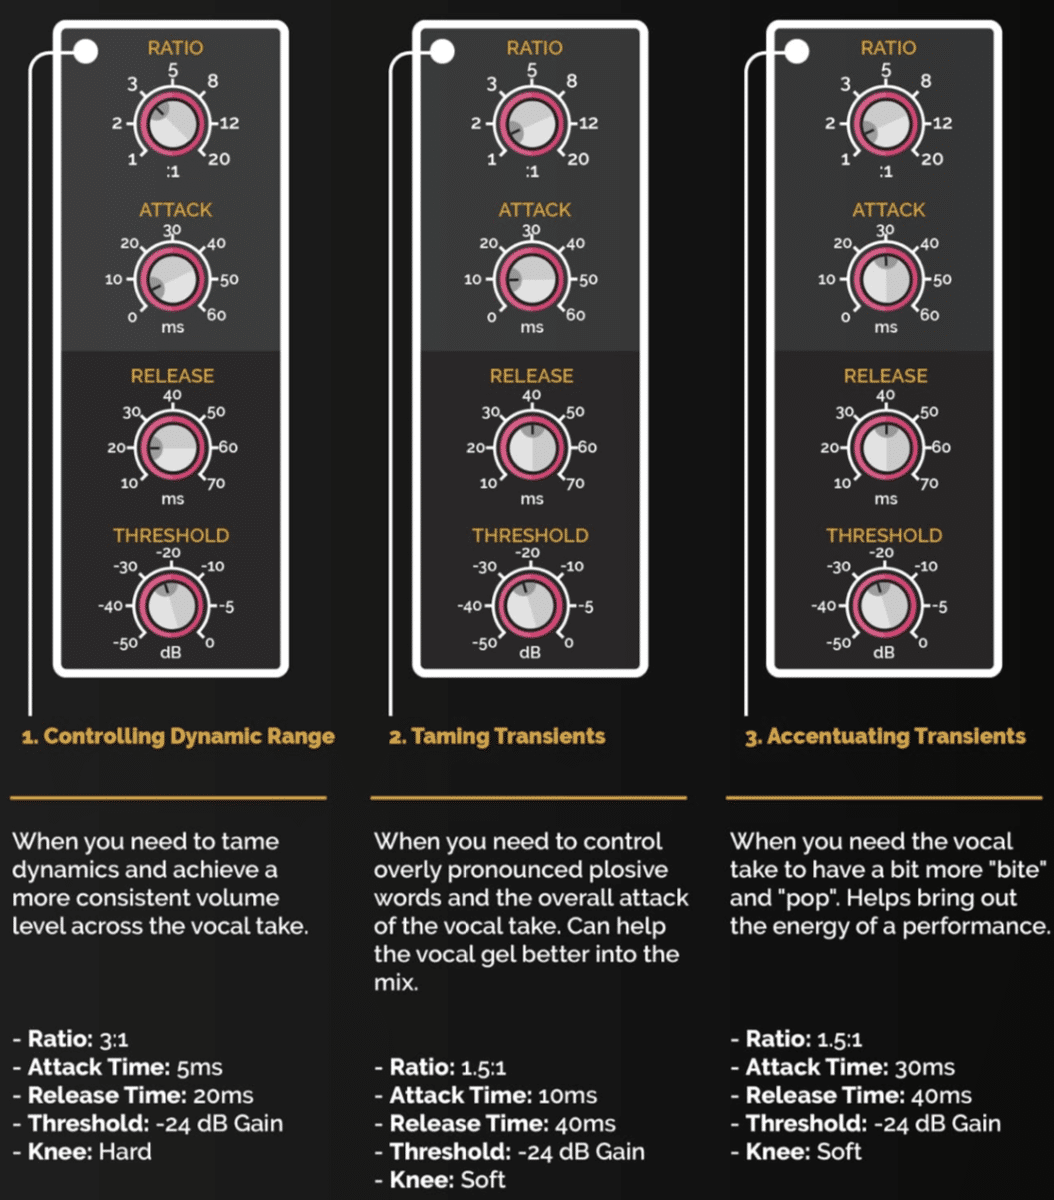
Vocals are one of the most common elements that benefit from audio compression since they naturally have wide dynamic ranges.
A singer might whisper one phrase and belt the next 一 making it tough to sit evenly in a mix without constant volume adjustments.
A good starting point for vocal compression is a 3:1 to 4:1 ratio, a threshold around -15 dB, and a medium attack (5-10 ms) with a release of 100-150 ms.
This way, the louder parts are tamed while softer phrases remain audible.
For rap vocals, where clarity and presence are key, you might use a slightly higher ratio (5:1 to 6:1) and a faster attack (1-3 ms) to keep every word tight.
On the flip side, for softer, more dynamic singing, a lower ratio (2:1 to 3:1) with a slower attack (10-20 ms) preserves more natural movement.
A common trick is stacking two compressors 一 one with a fast attack for peak control and another with a slower attack for overall smoothness.
Adding parallel compression can also help thicken up thin vocals while maintaining a dynamic, natural feel.
-
Instrument Compression
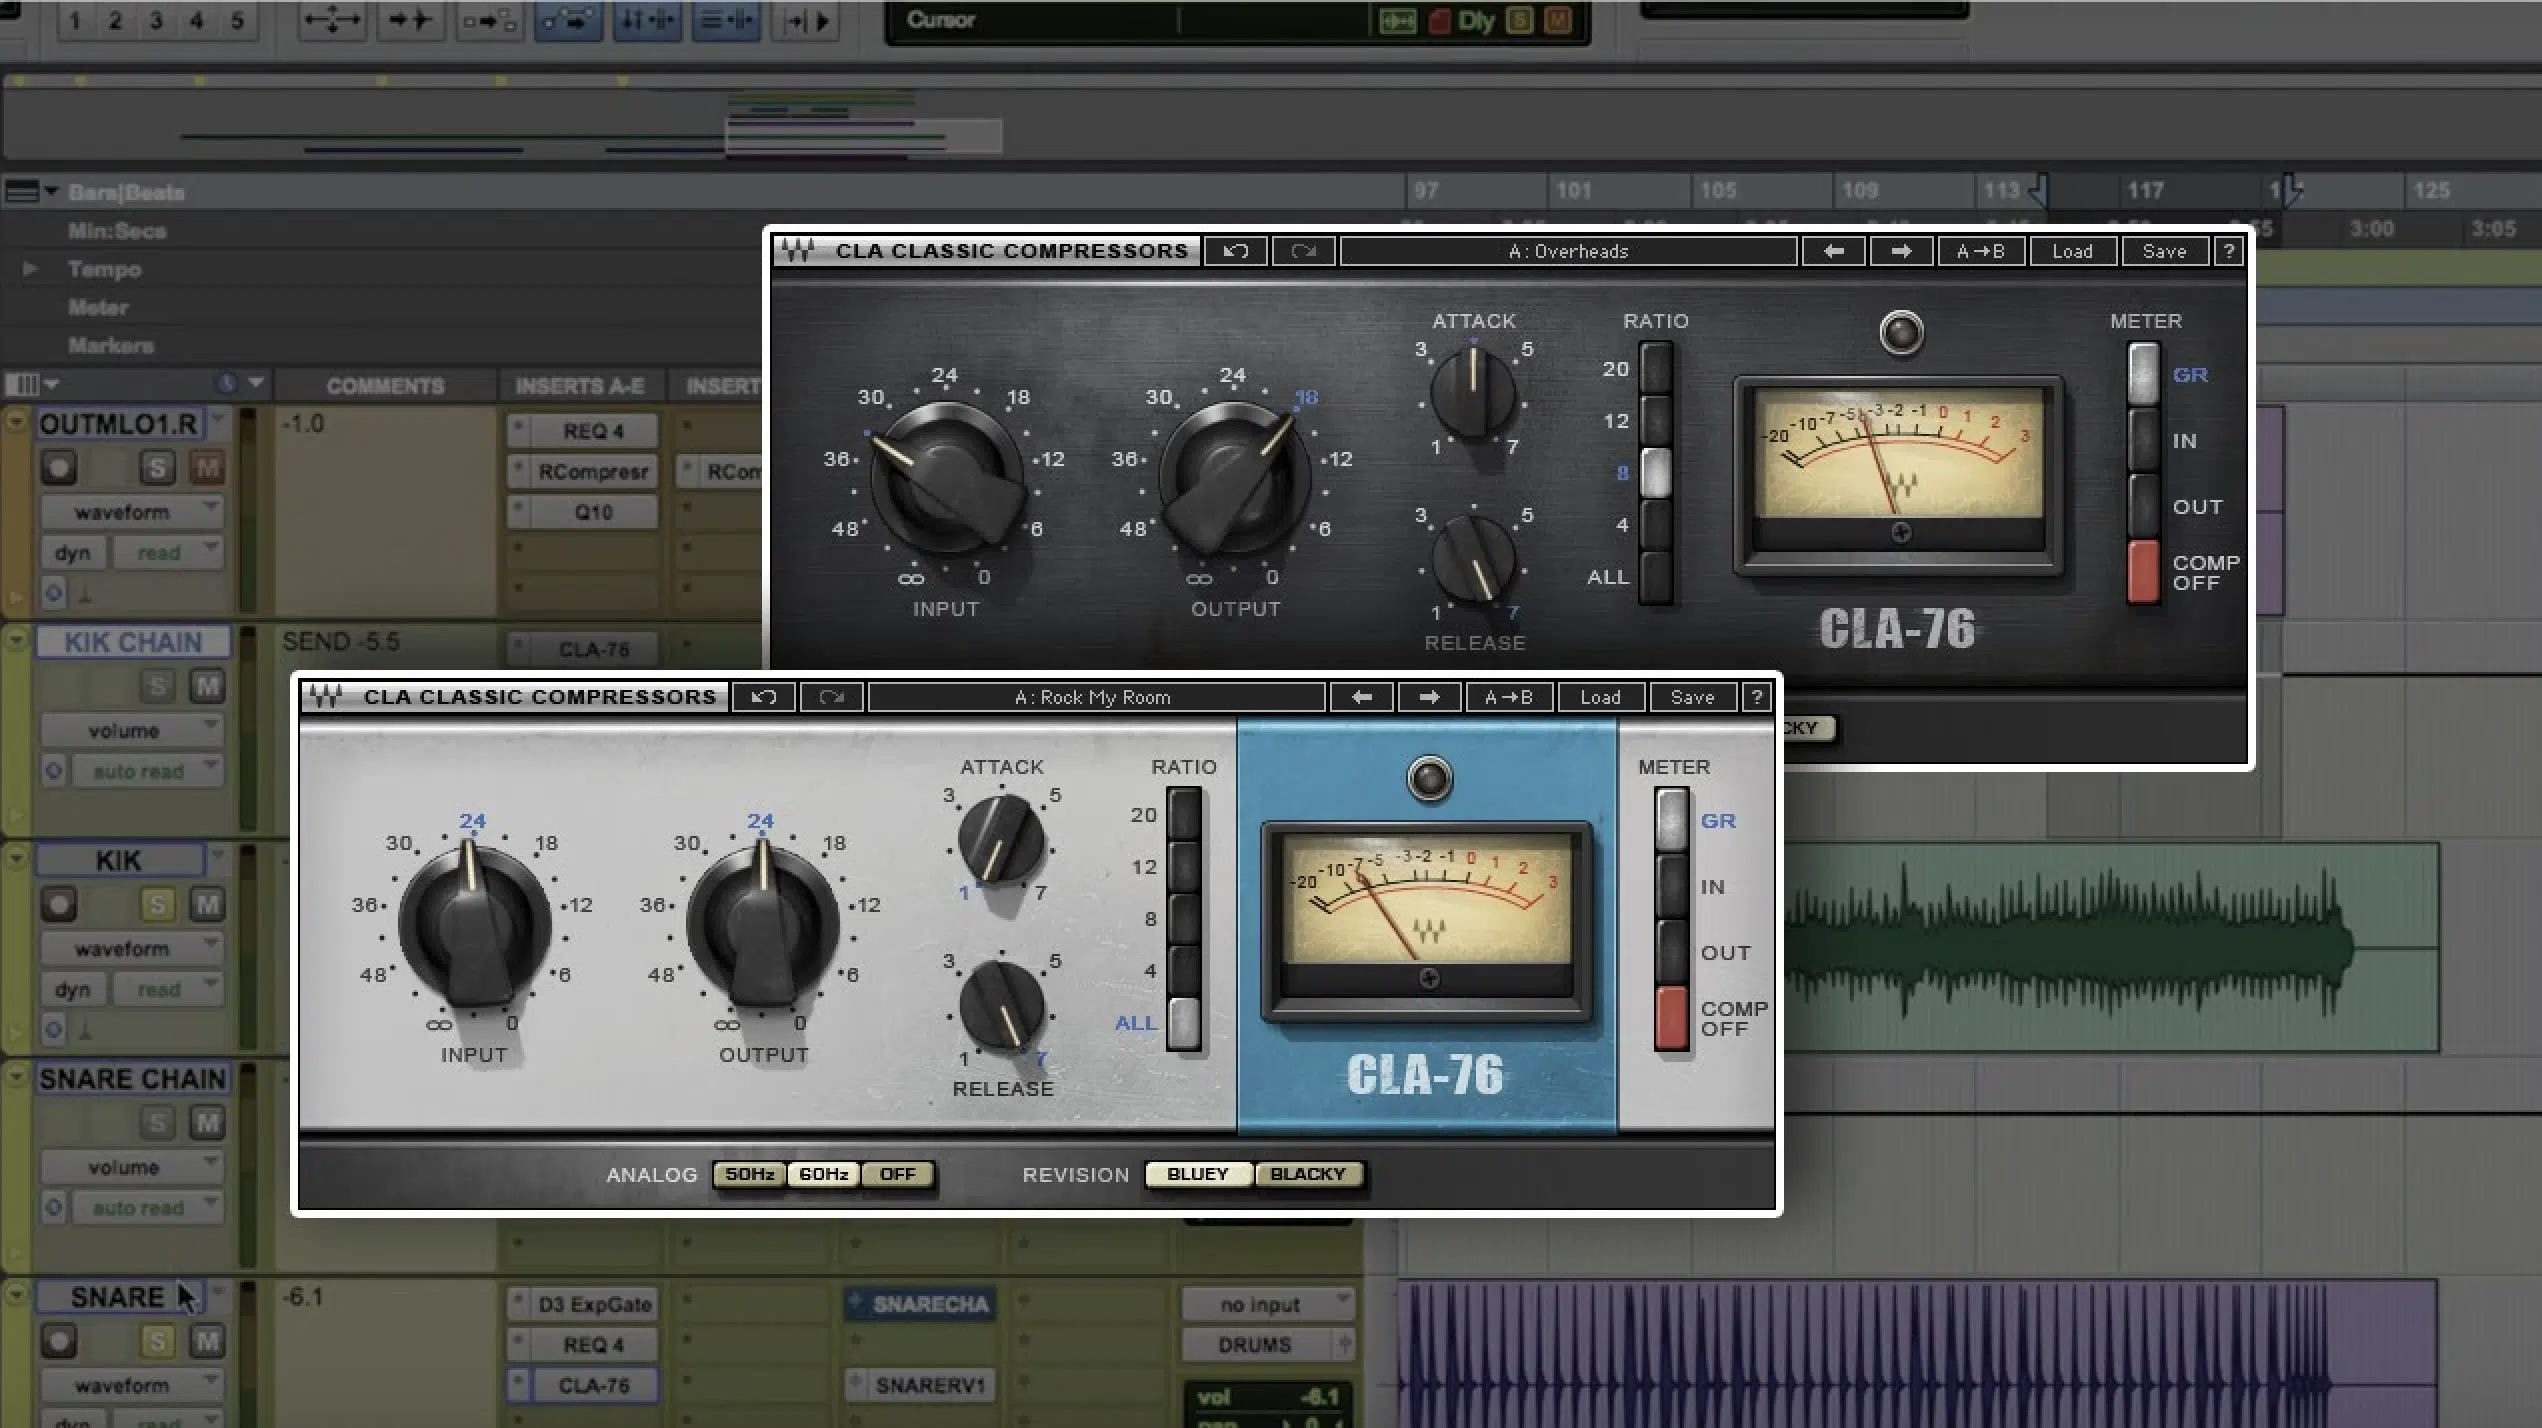
When you’re working with different instruments, audio compression can help things stay punchy, controlled, and better than ever.
For drums, a compressor can shape transients, like on a snare drum for example:
- Setting a fast attack (3-5 ms) with a 6:1 ratio can add weight.
- Setting a slower attack (20-30 ms) lets the transient hit harder before clamping down for more impact.
Kick drums often benefit from a 4:1 ratio with a medium attack (10 ms) and a short release (50-80 ms) to keep them punchy without losing their power.
For bass guitars and synth basses, using a 4:1 ratio, slow attack (20-30 ms), and a longer release (150-250 ms) helps maintain a steady low-end presence without unwanted volume fluctuations.
On guitars, audio compression can add sustain and balance…
Try a 3:1 ratio on a clean guitar with a slow attack (25 ms) and a medium release (100 ms) to keep notes ringing longer without sounding squashed.
A common mistake with instrument compression is overdoing it, which can choke the natural dynamics (yes, I’m saying it again because you need to know).
Make sure to always adjust the makeup gain to match the original level and avoid losing energy, because you certainly don’t want that.
-
Compression for Mixing and Mastering
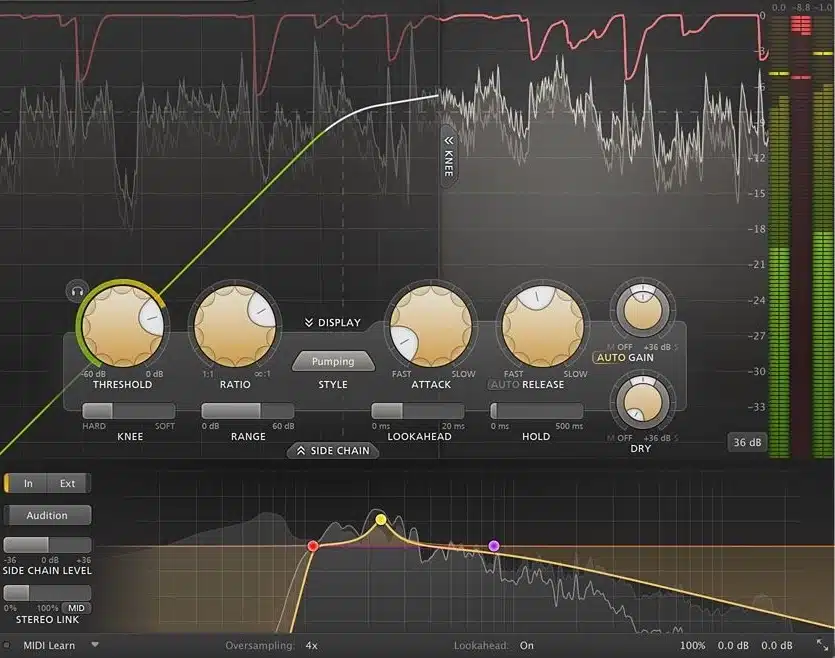
When you’re mixing, audio compression will help you glue elements together and make sure everything is consistent and on point.
A mix bus compressor on drums, vocals, or the entire mix with a 2:1 ratio, slow attack (20-30 ms), and medium release (100-200 ms) can add a cohesive sound without killing transients.
Mastering compression, on the other hand, is much more subtle (typically 1.5:1 to 2:1 ratio with 0.5-2 dB of gain reduction).
It’s all about smoothing out any volume inconsistencies without sacrificing punch.
A slow attack (30+ ms) and long release (200+ ms) allow the track to breathe naturally while keeping dynamics intact.
If you were to over-compress right here, it will completely flatten the mix and remove its energy, so always compare before and after at matched loudness.
NOTE: If your mix already has strong dynamics, a soft knee setting on a transparent compressor like the FabFilter Pro-C2 can provide a musical, natural glue rather than a forced, artificial feel.
Remember, the goal isn’t to reshape the track but to enhance cohesion and make sure everything is balanced.
Common Compression Techniques
Beyond basic audio compression, there are specific techniques that help shape a mix in more expert ways. Whether it’s controlling peaks with multiple compressors, taming harsh frequencies, or making space between competing elements, these are what’s going to help things be even more polished and professional.
-
Serial Compression
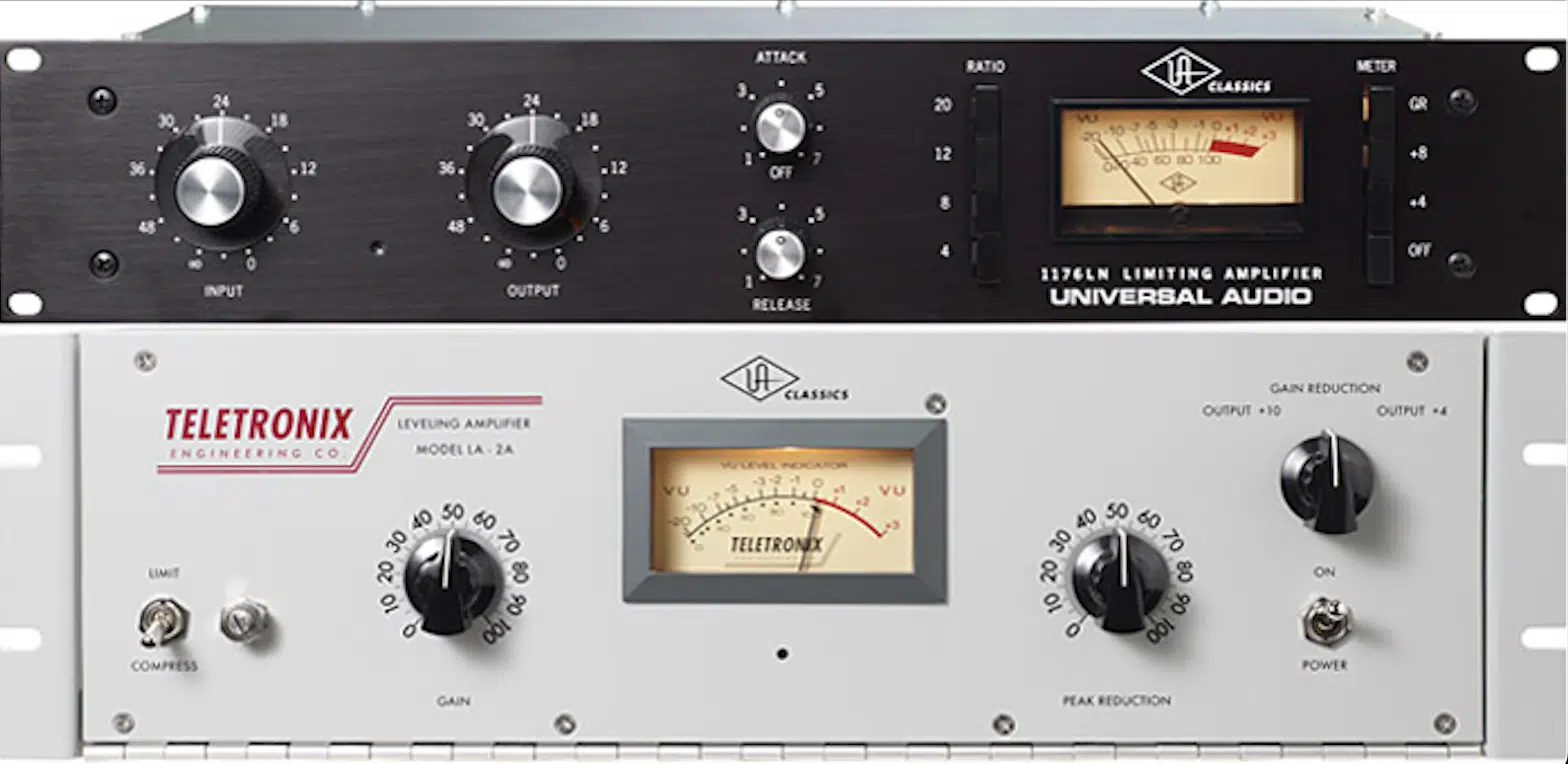
Serial compression is when you use multiple compressors in a row, each handling a different aspect of the dynamics instead of relying on a single compressor.
This keeps things smooth and natural, avoiding the squashed sound that can come from over-compressing with just one plugin.
A big one is using them on vocals:
- The first audio compressor might have a very fast attack time (3-5 ms), 4:1 ratio, and medium release (100 ms) to tame sharp peaks.
- The second compressor uses a slower attack (10-15 ms), lower ratio (2:1), and longer release (150-200 ms) to gently even out everything.
Another great place for serial compression is bass guitar.
The first audio compressor controls transients, while the second smooths the sustain, keeping the low end powerful but consistent.
Make sure to always compare before and after to make sure you’re enhancing, not flattening, the track (balance is everything!).
Pro Tip: The Difference Between Parallel Compression & Serial Compression
Use serial compression when you need precise, step-by-step control over dynamics, like smoothing out vocals or basslines with different attack and release settings.
Use parallel compression when you want to add weight and thickness without squashing transients.
This could be like making a snare punch harder while keeping its natural snap, that kind of thing.
-
De-Essing
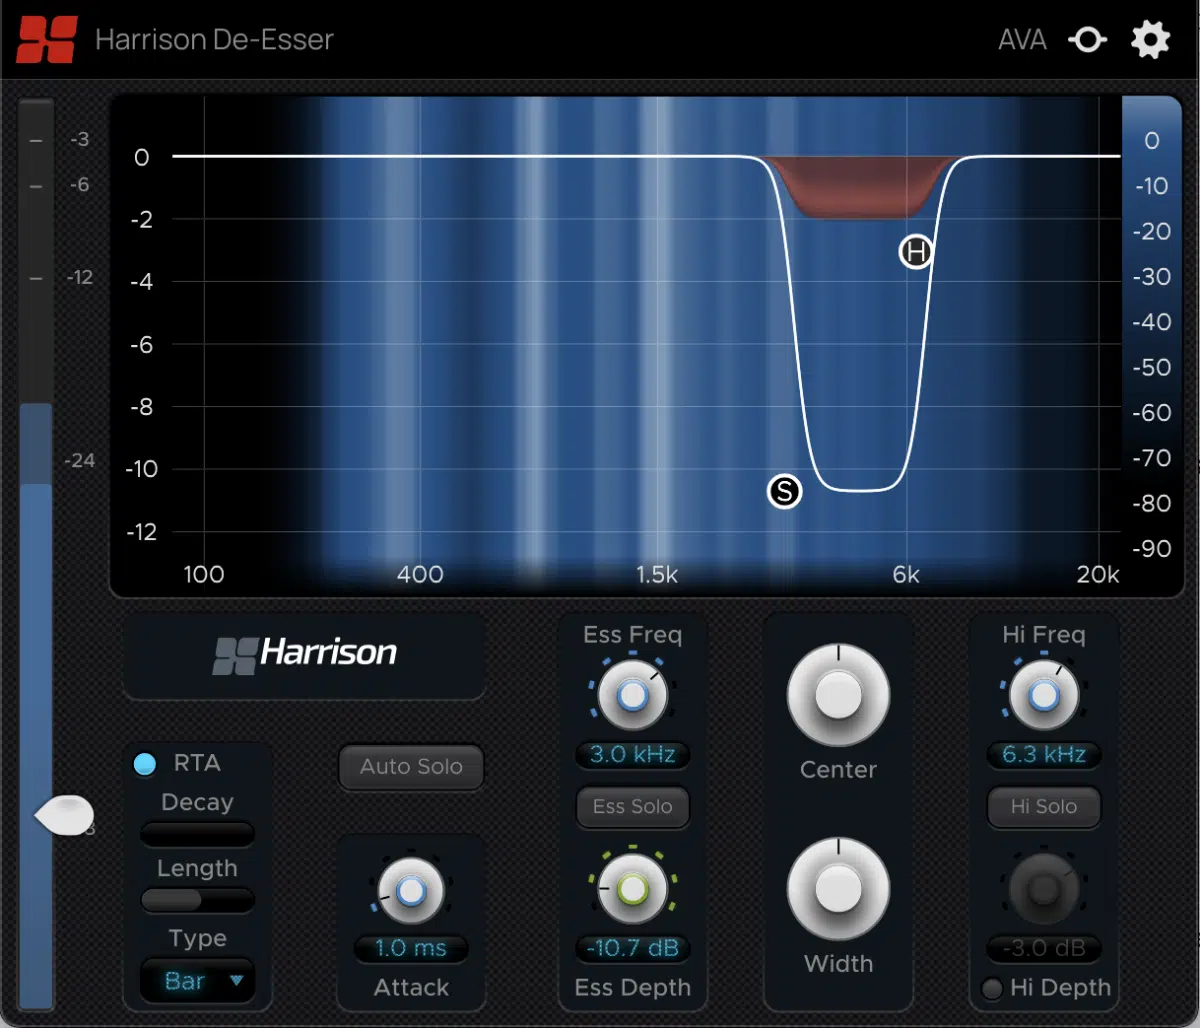
De-essing is a specialized form of audio compression that targets harsh “S” and “T” sounds in vocals, preventing them from cutting through too aggressively in a mix.
These sharp frequencies usually sit between 4 kHz and 8 kHz, so a de-esser acts like a frequency-specific compressor.
It reduces those sounds without affecting the rest of the vocal.
A good starting point is setting the threshold to catch harsh peaks while using a medium-fast attack (5-10 ms) and a soft knee for a natural sound.
De-essing isn’t just for vocals, though, it can also be useful for taming harsh cymbals in drum recordings or overly bright acoustic guitars.
PRO TIP: Use dynamic EQ instead of a traditional de-esser for more precise control, reducing sibilance only when needed instead of affecting the whole vocal all the time.
If a vocal starts sounding lisp-y, you’ve likely gone too far, so make sure to back off the threshold or adjust the frequency range to avoid dulling the clarity.
-
Ducking
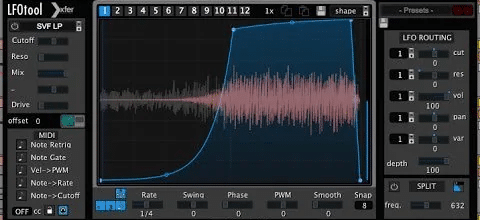
Ducking is a compression technique that automatically lowers the volume of one sound whenever another sound plays, which creates ample space in the mix.
The most common use is in podcasts and radio; when a host speaks, the background music ducks down, then comes back up when they stop talking.
In music production however, ducking is often used between a kick drum and bassline to prevent low-end frequencies from clashing.
Setting up sidechain compression on the bass with a 4:1 ratio, fast attack (1-3 ms), and medium release (50-100 ms) allows the kick to punch through clearly and the bass smoothly recovers after.
Another trick is using ducking on reverb and delay effects…
By sidechaining the effects to the vocal, the reverb and delay stay out of the way while the singer is performing but swell up naturally in the gaps.
This keeps things clean yet spacious for the win.
One mistake producers make is setting the release time too fast, which can cause unnatural pumping, so it’s best to fine-tune until it feels transparent and musical.
Bonus: Advanced Audio Compression Techniques
While standard audio compression techniques help with balance and consistency, more advanced methods allow for even greater control over dynamics, stereo width, and creative sound shaping. These techniques are great for mixing, mastering, and sound design, giving you new ways to enhance a track without sacrificing energy/impact.
-
Mid/Side Compression for Enhanced Stereo Control
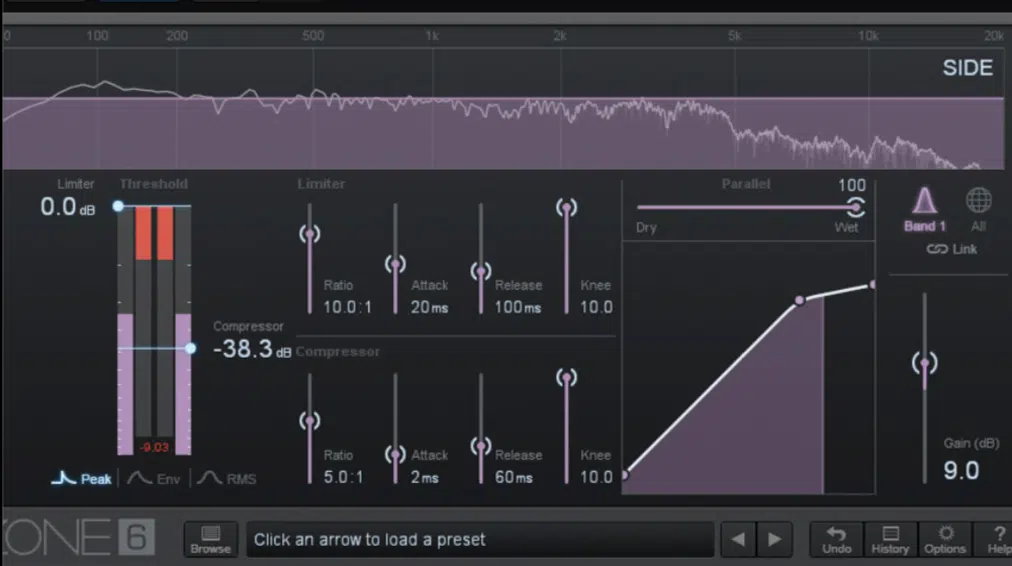
Mid/Side compression lets you control the center (mid) and sides (stereo width) of a mix separately, which is extremely useful for:
- Mastering
- Bus processing
- Stereo imaging
For example, if your track has a solid low end but the stereo width feels uneven, you can apply audio compression only to the mid audio signal.
My advice is to use a 4:1 ratio, slow attack (15-30 ms), and medium release (100-200 ms), and then tweak things from there to taste.
This will stabilize the bass without affecting the stereo space.
On the other hand, applying gentle compression (2:1 ratio, fast attack (5-10 ms), and quick release (50-100 ms)) to the side channel can glue reverb tails, synth pads, and background vocals together while keeping them dynamic.
One pro trick is using mid/side compression on a mix bus to tighten the low end while letting high-end stereo elements breathe.
It will prevent an overly narrow or collapsed-sounding master.
-
Multistage Compression for Ultimate Control
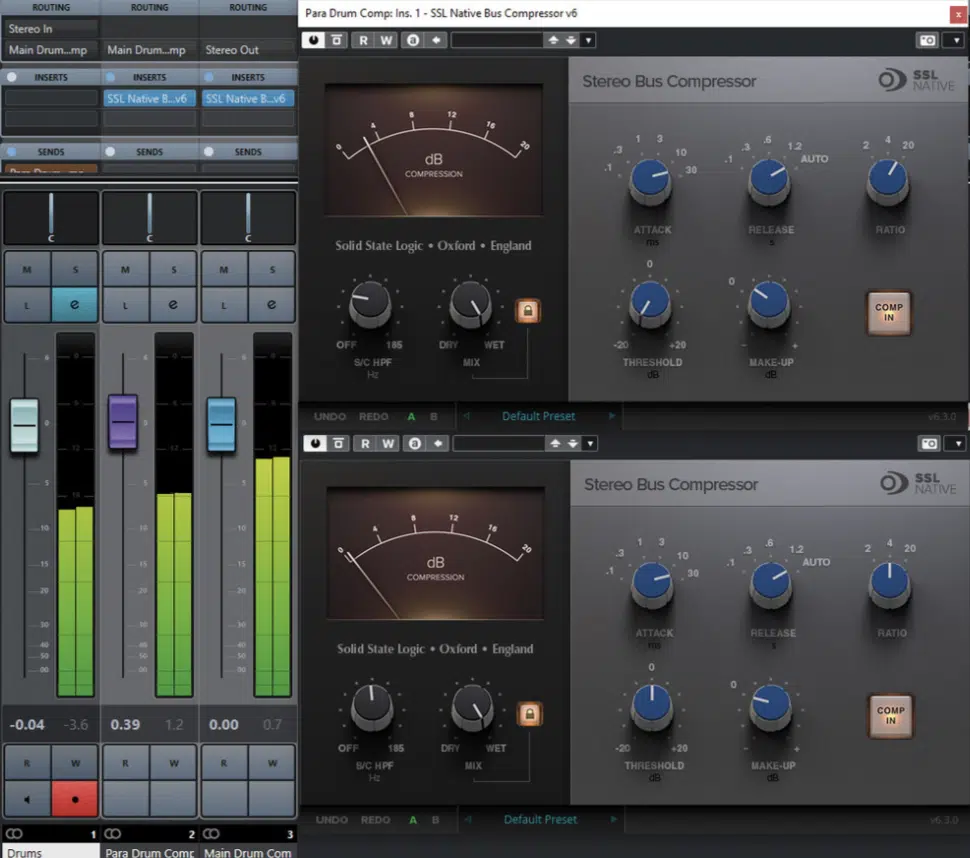
Multistage compression takes serial compression a step further by applying multiple compressors at different stages of a mix to achieve precise dynamic range control.
This is common in high-end vocal processing, where different compressors handle different aspects of the vocal dynamics.
For example, an optical compressor (like an LA-2A emulation) with a slow attack (10 ms) and 3:1 ratio can smooth out overall volume, followed by an 1176-style audio compressor with a fast attack (1 ms) and 4:1 ratio to tame transients.
The same technique can be used on drums, guitars, and synths 一 applying gentle compression in multiple stages instead of one heavy-handed setting.
This will keep everything natural, professional, and on point.
PRO TIP: Use a slower, gentler audio compressor first to shape the overall dynamics, followed by a faster audio compressor later in the chain to control peaks.
-
Creative Compression for Sound Design and Effects
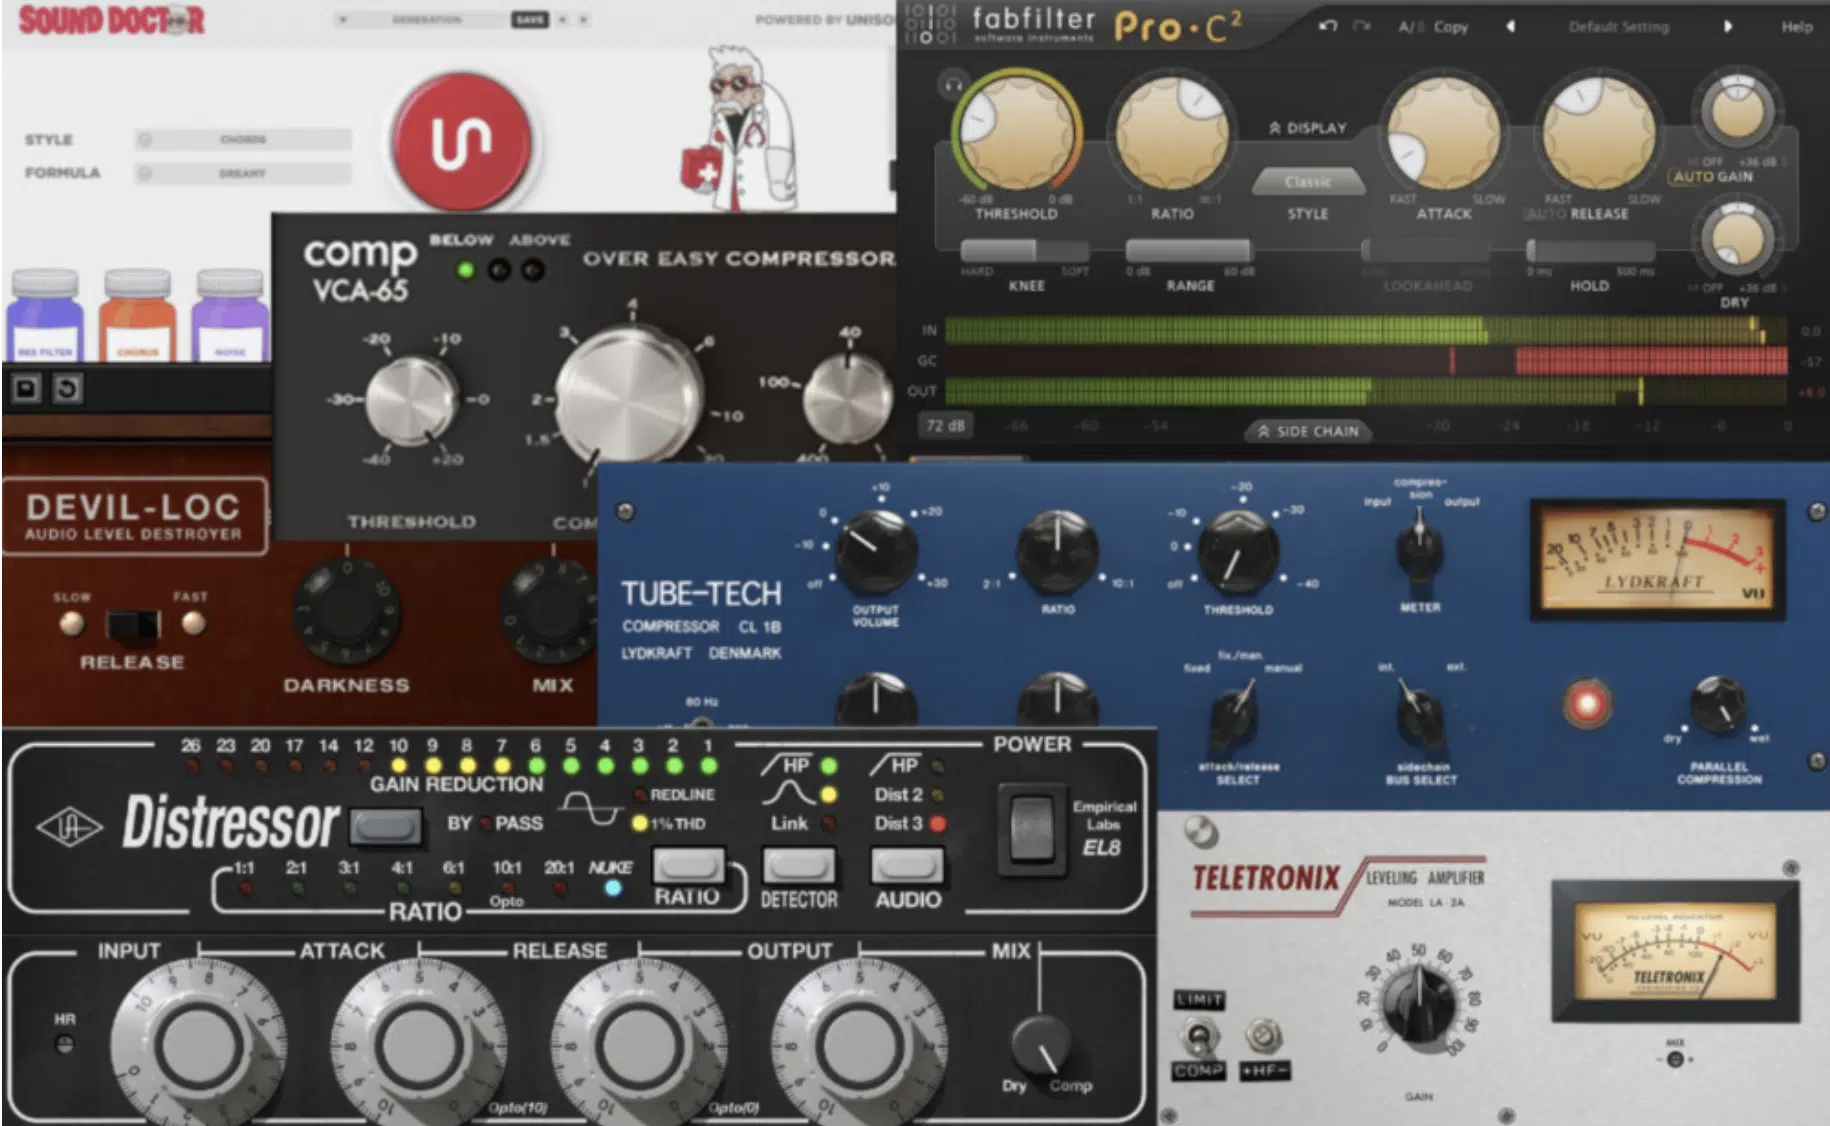
Audio compression isn’t just for mixing; it’s powerful when it comes to sound design and creative effects as well (when used correctly).
Over-compressing a sound can create unique textures, such as pumping synth pads with extreme sidechain compression or using a brick-wall limiter on a snare drum to create an explosive, in-your-face hit.
Another fun technique is reverse compression, where you apply compression to a reversed sound before flipping it back.
This creates a swelling, sucking effect that works great on risers and compression transitions/effects.
On lo-fi beats, crushing transients with a 10:1 ratio, hard knee, and fast release can give drums a squashed, vintage feel.
Playing around with extreme attack and release settings can lead to unexpected and exciting results.
Remember, sometimes, breaking the “rules” of compression leads to the most unique and creative sounds (that goes for anything in production!).
Final Thoughts
And there you have it: everything you need to know about the basics of audio compression.
Remember, it’s all about controlling dynamics, enhancing clarity, and making sure every element single in your mix sits right where it should.
By using these tips, tricks, and techniques, you can successfully tighten up your mix, add power to your drums, and make your vocals sit perfectly in the pocket.
Plus, you’ll be able to glue your mix together, shape transients, and avoid over-compressing your tracks like a boss.
Just remember to never overdo compression to the point where it kills the energy and never apply compression just for the sake of it.
Always have a reason behind your settings, basically.
And, as a special bonus, you’ve got to check out these legendary Free Sample Packs.
Whether you’re producing lofi, trap, reggaeton, hip-hop, EDM, or even hybrid genres, there’s something here for you.
The basslines are legendary, the melodies will instantly captivate, and the project files show you exactly how to make a fire beat from start to finish.
They’re all created by professional producers and sound designers, so you’re getting the best sounds in the game (all for free).
Believe me, you do not want to miss out on these epic sample packs because they will take your beats to the next level every single time.
Bottom line, when it comes to audio compression, it’s all about balance, precision, and knowing when to step in and when to step back.
Plus, by understanding how different compression techniques affect your sound, you can control dynamics, enhance punch, and shape your mix like a pro.
This way, your tracks will always sound clean, polished, and professional, ready to compete with the best in the industry.
Until next time…


Leave a Reply
You must belogged in to post a comment.