The flanger effect is all about creating movement, depth, and exciting textures in your music 一 it can bring some serious energy, character, and dynamics to the table.
As producers, knowing all about the flanger effect and how to use it super creatively can help you enhance your tracks and stand out in your productions.
That’s why we’re breaking everything you need to know, like:
- How the flanger effect works ✓
- Key components of digital flangers ✓
- The difference between flangers, chorus, and phasers ✓
- How to shape your sound with filters ✓
- Adding dynamic modulation with automation ✓
- Creative ways to use flangers on synths, guitars, and vocals ✓
- Techniques for drums and percussion ✓
- Layering flangers with other modulation effects ✓
- Building rhythmic patterns with flanging ✓
- How a comb filter shapes the flanger’s sound ✓
- Advanced tips, tricks, and techniques ✓
- Much more about the flanger effect ✓
By knowing all about the flanger effect and how to manipulate it with precision, you’ll be able to push your creativity to the next level and blow the competition away.
Plus, experiment with its endless settings, combinations, and techniques to get the flanger effect you’re looking for.
Add some dope stereo imaging tricks and automate the parameters dynamically will also be possible.
This way, your tracks will always sound polished, exciting, and professional 一 you’ll be knocking out tracks like the pros in no time.
Table of Contents
- What is a Flanger Effect?
- Key Components of Flangers
- 8 Professional Flanger Effect Techniques
- #1. Adding Depth to Synthesizers and Pads
- #2. Enhancing Guitar Tracks with Flanging
- #3. Creative Vocal Processing Using Flangers
- #4. Automating Flanger Parameters for Dynamic Effects
- #5. Combining Flangers with Other Time-Based Effects
- #6. Applying Flangers to Drums and Percussion
- #7. Exploring Stereo Imaging with Flangers
- #8. Creating Rhythmic Patterns Using Flanger Modulation
- Bonus: Using a Flanger Pedal
- Final Thoughts
What is a Flanger Effect?
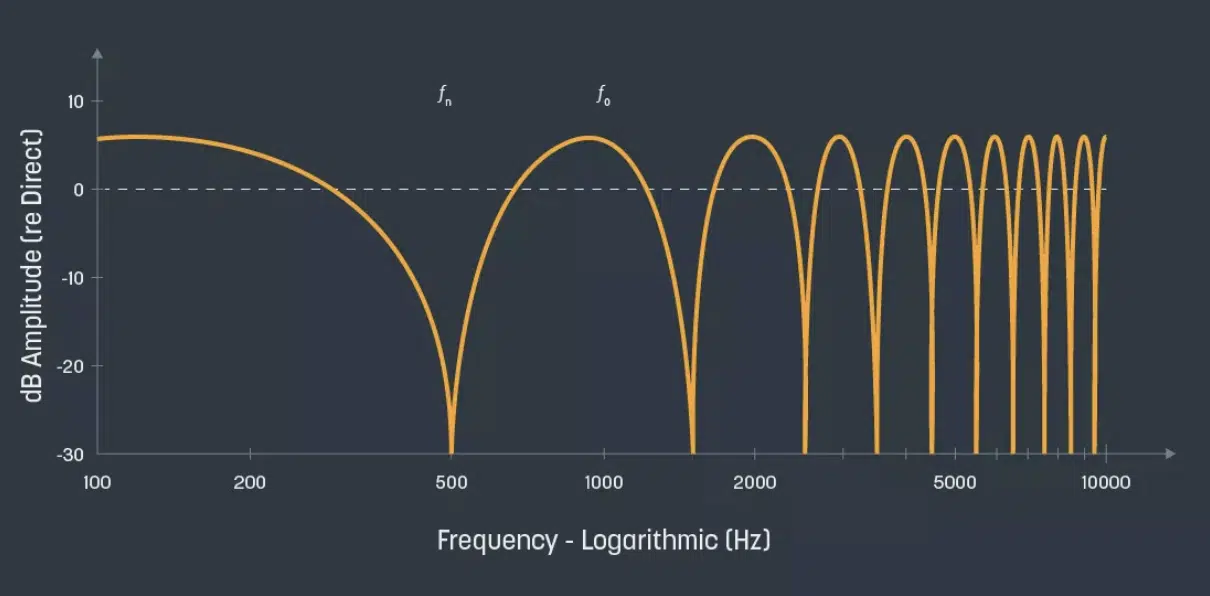
The flanger effect is a timeless audio effect/modulation effect known for its ability to produce a jet-plane-like sound by blending two identical waveforms.
One is, of course, slightly delayed.
This creates a sweeping motion by altering the frequency response of the signal 一 introducing peaks and dips through a comb filter effect.
As the delayed signal combines with the original, phase interactions amplify and cancel certain frequencies, sometimes producing negative amplitude for a metallic tone.
These sweeping phase shifts create a dynamic, evolving texture that can be subtle or intensely dramatic, depending on what you’re going for.
The flanger effect is commonly used to:
- Enhance synth pads
- Create unique tonalities in guitar riffs
- Add depth to vocals
You can play around with its parameters to find the perfect balance between subtle movement and bold, attention-grabbing modulation.
Thanks to its versatility and iconic sound, the flanger remains an OG of music production, capable of transforming even the simplest sounds into something mind-blowing.
Don’t worry, we’ll break it all down throughout the article so you get the full picture and a solid understanding.
Key Components of Flangers
Flangers rely on several key parameters to shape their sound and functionality. Understanding these components will help you create whatever flanging effect you’re shooting for and enhance your music production skills. Let’s kick things off…
-
Delay Time and Its Impact on Sound
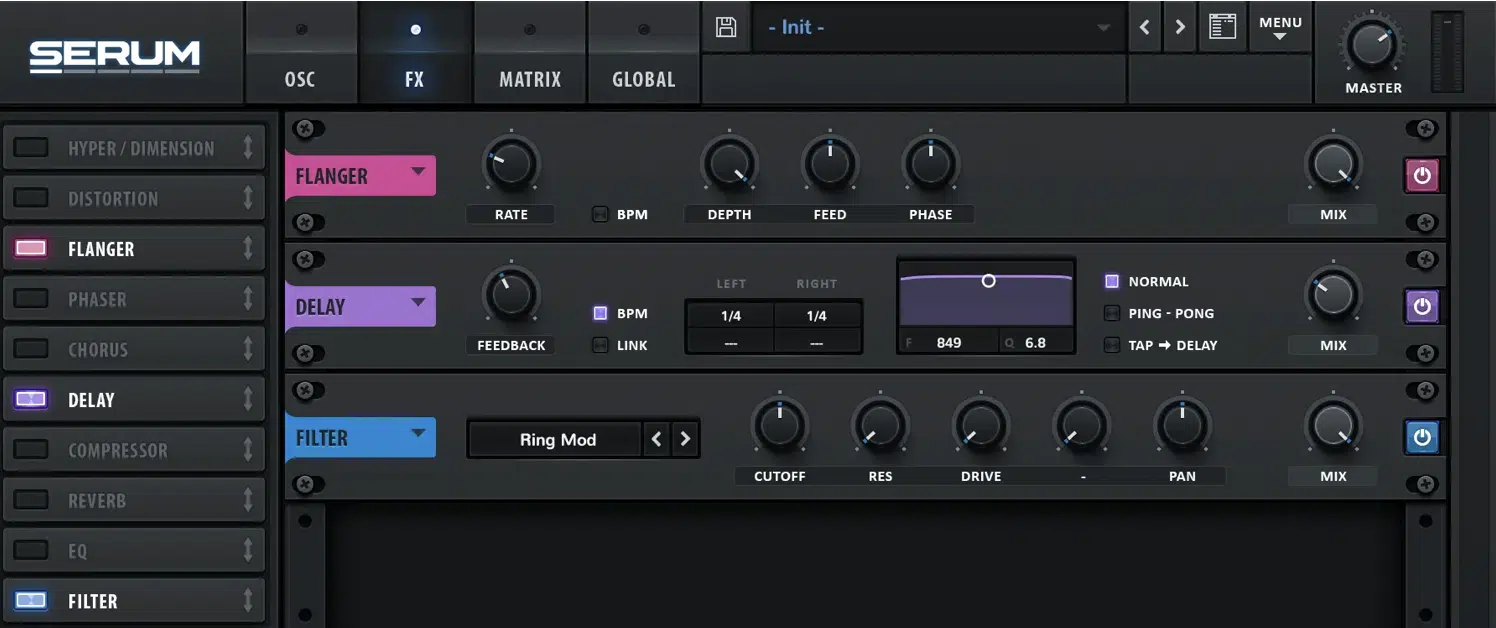
Delay time is the core element of the flanger effect and plays a huge role in shaping its sound… The shorter the delay, the more intense and metallic the sound will be.
For example, if you set the delay time to 5 ms, you’ll notice a rapid, almost choppy modulation that’s great for percussive elements like snare drums or claps.
On the other hand, if you go for a delay time of 15 ms, you’ll get a smoother, more atmospheric effect that works wonders for synth pads or ambient sounds.
If you’re looking to create that classic “jet plane” sound, you could try experimenting with delay times between 8 ms and 12 ms.
This range is where the flanger really shines because it brings a noticeable, swirly movement to your sounds (which I personally find epic).
PRO TIP: When working with vocals, setting the delay to 12 ms on background layers while leaving the lead vocals untouched can add a subtle, spacey texture.
All without overshadowing the main performance, which is great.
-
Modulation Rate and Depth
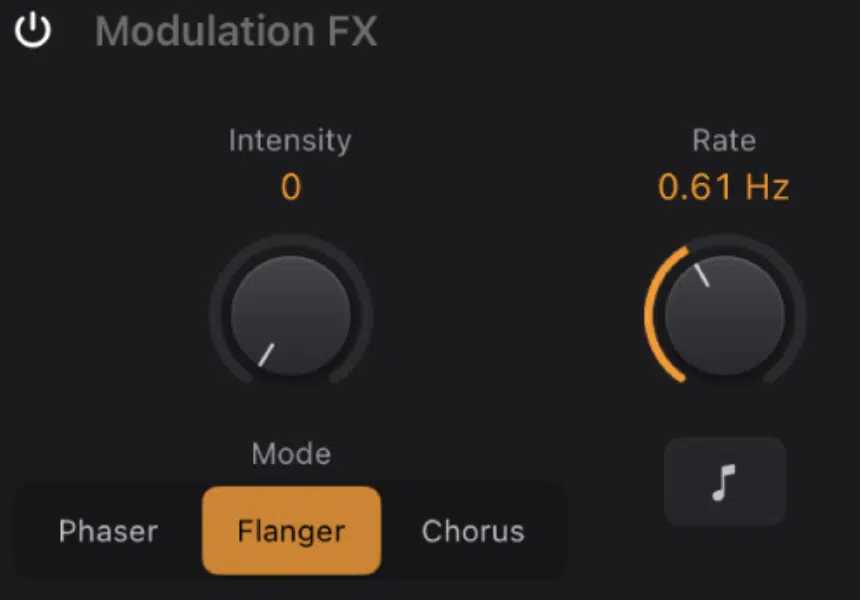
The modulation rate controls just how fast the delay time changes, and the depth controls how much of that change you’ll hear.
If you set the modulation rate to a low value, like 0.2 Hz, the effect will feel slow and fluid, perfect for creating a subtle sense of movement on pads/background vocals.
Increase that rate to 1 Hz, and the movement becomes more pronounced, almost like the sound is “breathing.”
This works great for guitar solos or synth leads that you want to really stand out.
For added depth, a setting of around 50% gives you a balanced effect (enough to hear the modulating phases without it feeling too intense).
If you crank the depth to 100%, you’re going to get a very pronounced flanging that can create dramatic sweeps and intense jet-like sounds.
A good rule of thumb is that for more subtle effects, keep both the rate knob and depth lower, around 0.5 Hz and 30-40% depth.
But, if you want to go wild and have the flanger really jump out and blow some minds, push it to 1 Hz and 70% or higher… just make sure it fits the vibe you’re going for.
Don’t forget to use automation on both rate and depth during a track’s breakdowns to create a dynamic build-up and release that takes the listener to frikkin’ space.
-
Feedback Control

Feedback control in a flanger determines how much of the processed audio signal is fed back into the input 一 amplifying the peaks and dips in the frequency spectrum.
A low feedback setting (around 10-20%) will give you a subtle, smooth effect, perfect for adding a hint of motion to a guitar riff or drum loop.
As you increase feedback to 50%, the resonance intensifies, creating a more dramatic, swirling effect that’s ideal for synth risers or ambient layers.
For a truly aggressive, almost metallic tone, crank the feedback to 70% or higher.
Just be careful because too much feedback can easily overwhelm your mix and create unpleasant distortion (not the good kind; the ear-piercing kind).
If you’re looking to add depth to a vocal layer, start with feedback at 30%, as it creates enough texture without overpowering the clarity of the vocal.
One advanced trick that I love is to automate the feedback during a build-up, starting at 10% and gradually increasing it to 60% for some epic tension and release.
Always keep an ear out for how feedback interacts with other elements, as too much can clutter your mix, and nobody has time for that.
-
Mix Balance: Blending Wet and Dry Signals
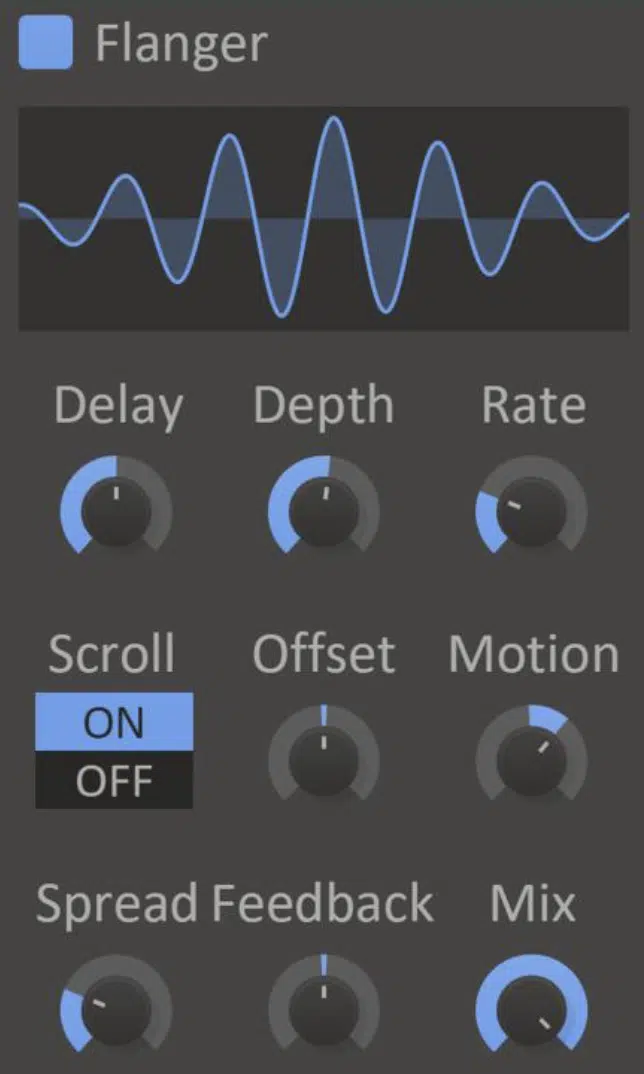
The mix balance between the original signal (dry) and the processed signal (wet) is super important when it comes to the overall intensity of the flanger effect.
For subtle effects, such as adding depth to vocals, keep the wet signal around 30-40%, letting the original signal remain dominant.
If you want the flanger to be a focal point, like in a synth lead, push the wet mix closer to 70-80%.
If you’re going for a more extreme effect, like creating a sci-fi-inspired jet engine sound, you can even go full wet at 100% (removing the dry signal entirely).
When layering flanged tracks, you’ll want to try setting one layer to 60% wet and another to 20% wet, which creates a fuller, more textured sound.
Also, play around with panning 一 keep the dry signal centered and pan the wet signal slightly left or right to achieve a wider stereo image.
Just keep in mind that the mix balance directly impacts clarity, so always check how the flanged signal interacts with the rest of your track to avoid any muddiness.
-
Flanger Effect vs Chorus Effect vs Phaser Effect: Breaking it Down
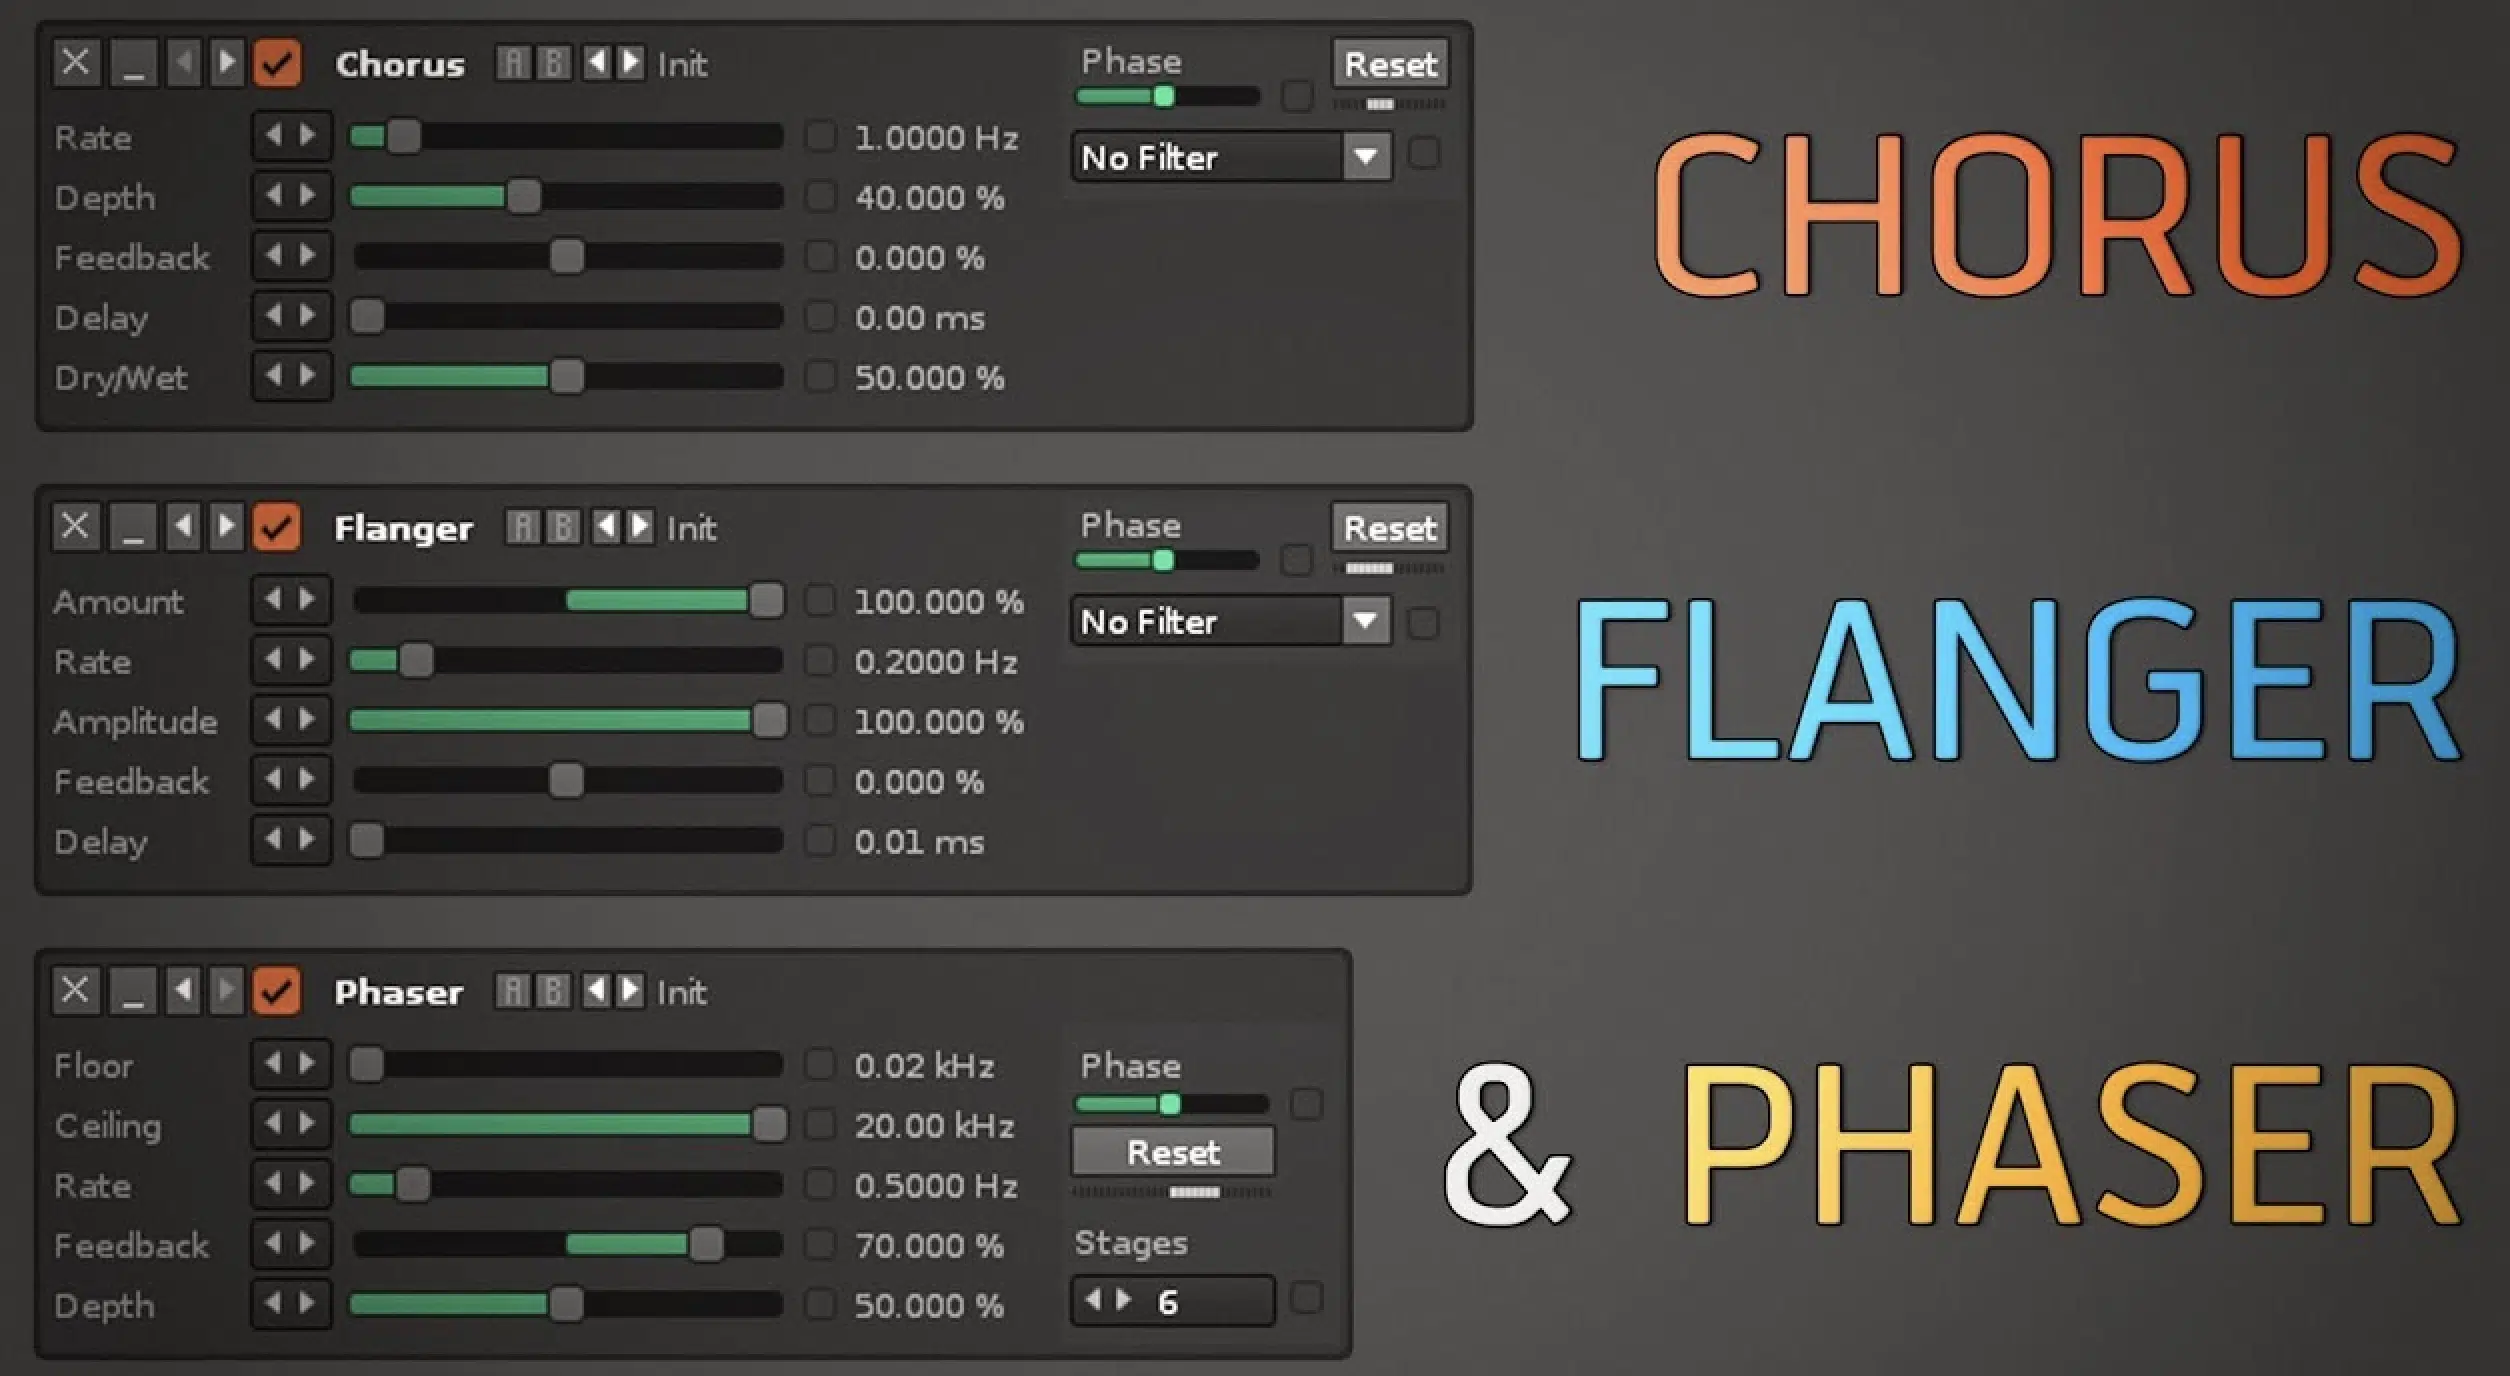
The flanger effect, chorus effect, and phaser effect are all modulation effects, but each has unique characteristics that are for different purposes…
A flanger uses short delay times (usually under 20 ms) combined with feedback and phase shifting.
It produces that swirling, jet-plane-like sound with comb filter characteristics in the frequency spectrum like we talked about.
A chorus effect uses slightly longer delay times (usually 20-50 ms) to create a more immersive, wider sound like multiple instruments playing together.
For example, applying a chorus to guitar tracks will make them sound fuller and more harmonious, while flanging adds movement and metallic textures.
A phaser effect, on the other hand, relies on all-pass filters to shift the phase of the signal, creating peaks and dips at specific frequencies without the comb-filtering artifacts of a flanger.
To achieve a subtle, dreamy tone, use a chorus effect with a wet mix around 40%.
On the flip side, or an aggressive, swooping tone, a flanger with feedback at 60% and delay time at 10 ms is the way to go in my experience.
A technique I personally use is to stack a phaser and flanger together on a pad or vocal layer to create a more complex modulation that combines the best of both worlds.
The key differences between these effects lie in their delay times, the use of all-pass filters, and how they manipulate the phase relationship of the signal.
So, as long as you remember that, you’ll be fine moving forward.
-
High-Pass, Low-Pass, and All-Pass Filters
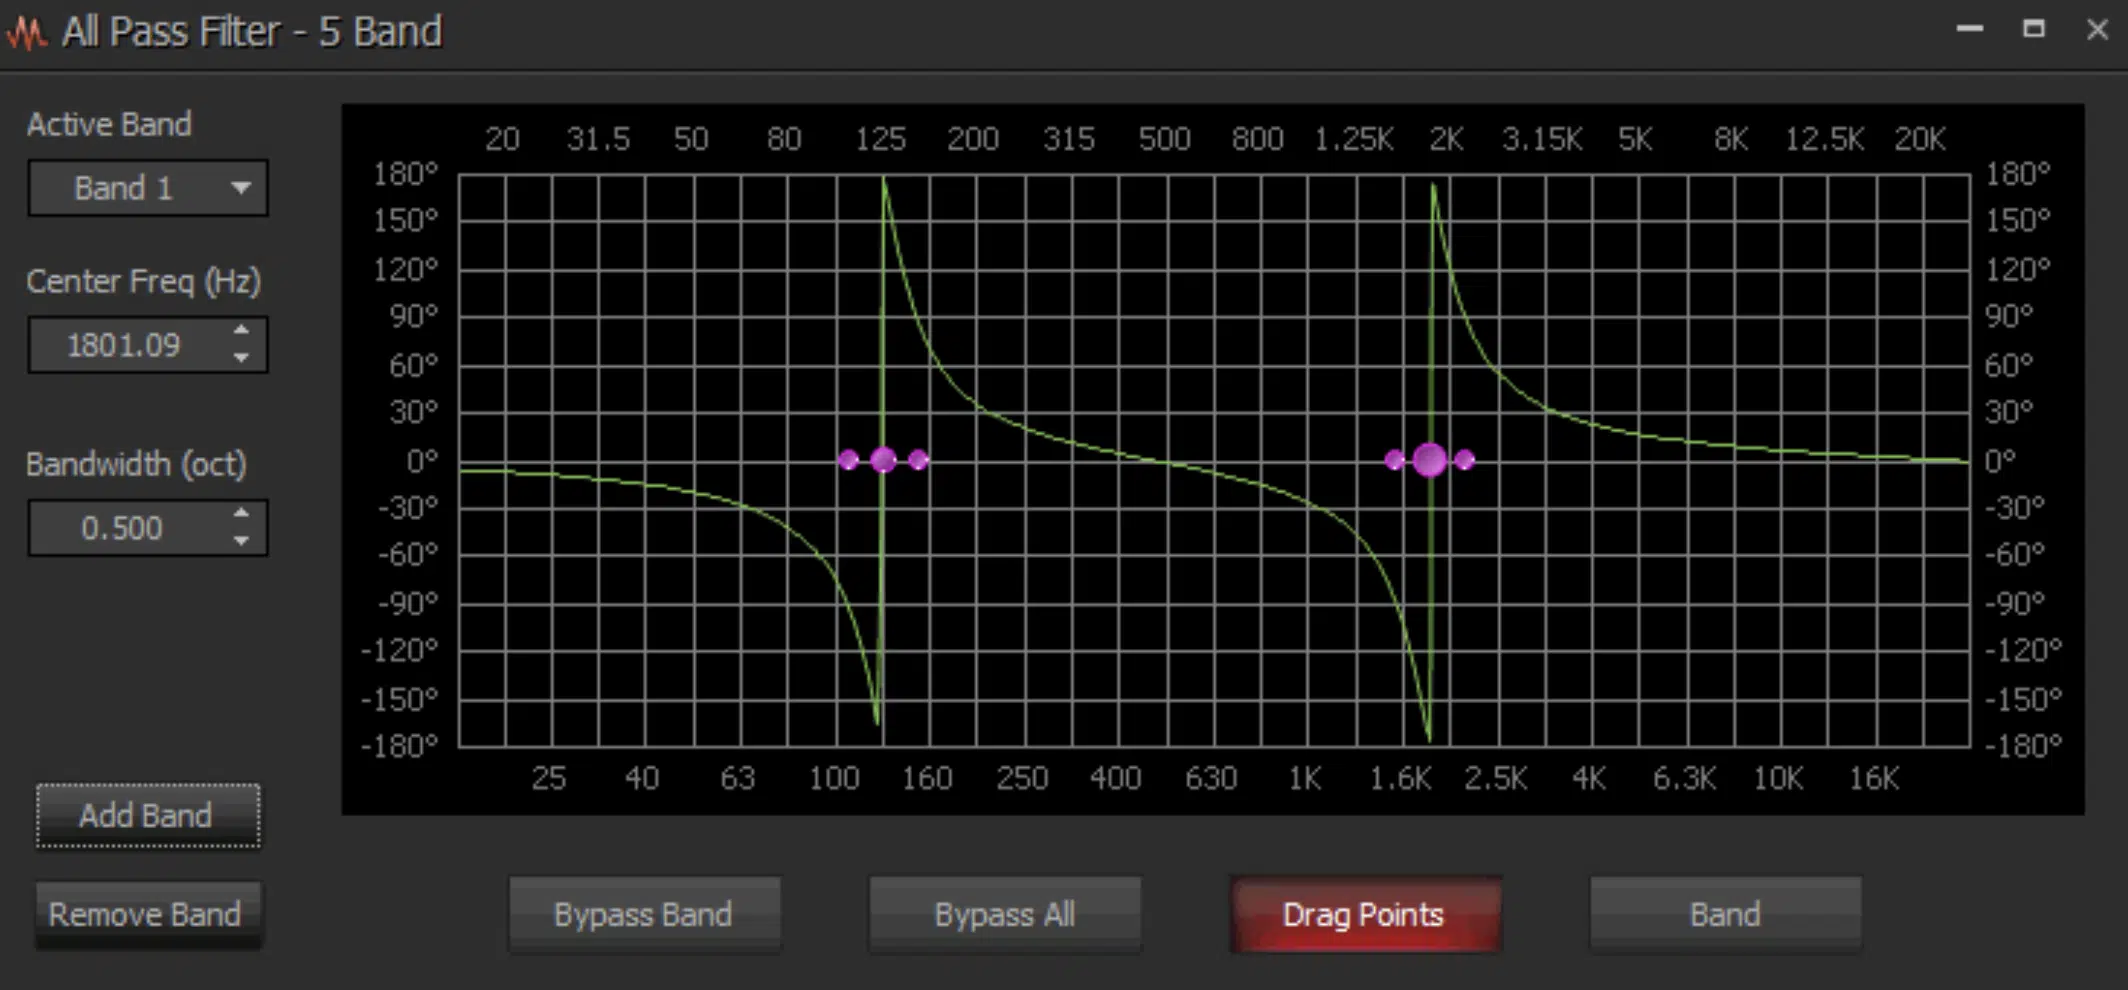
All-pass filter
Filters play a key role in shaping the tonal characteristics of the flanger effect because they let you target specific areas of the frequency spectrum.
A high-pass filter removes low frequencies, which can help clean up mud when flanging bass-heavy instruments like kick drums or basslines.
For example, setting the cutoff at 120 Hz makes sure that the low-end remains tight, clean and unaffected while the flanger focuses on the mids and highs.
A low-pass filter, on the other hand, is perfect for taming harsh high-end frequencies, especially when flanging aggressive synths or percussion.
Try setting the cutoff around 4-5 kHz to smooth out the overall sound.
Now, all-pass filters are pretty unique, as they only affect the phase relationship of the signal without altering its amplitude.
They’re essential when it comes to phasers but also useful in certain flanger designs to add subtle phase shifts, so remember that.
For more creative control, automate the filter cutoff to shift between frequency ranges, creating dynamic sweeps that evolve throughout the track.
Don’t forget to experiment with combining a high-pass filter on a wet signal and a low-pass filter on a dry signal to create a contrasting effect for sick texture.
These filters not only clean up the mix but also add opportunities for creative sound design, so get as crazy as you want.
Pro Tip
When working with multiple delay lines, make sure the audio signal is processed in a way that maintains balance and clarity.
For a clean and dramatic flanging effect, start by duplicating your track to create a copied signal and offset it slightly to introduce the necessary phase interaction.
If the two signals are perfectly aligned, the flanger won’t work the right way, so adjust the delay time until you hear the desired sweep.
Play around with different feature flanging settings to add depth and width to synths, vocals, or percussion without overpowering the mix.
8 Professional Flanger Effect Techniques
The flanger effect is super versatile and can be used in so many ways to enhance your music production value. So, for this next part, let’s break down 8 professional techniques to help you with flanging and bringing your tracks to life.
#1. Adding Depth to Synthesizers and Pads
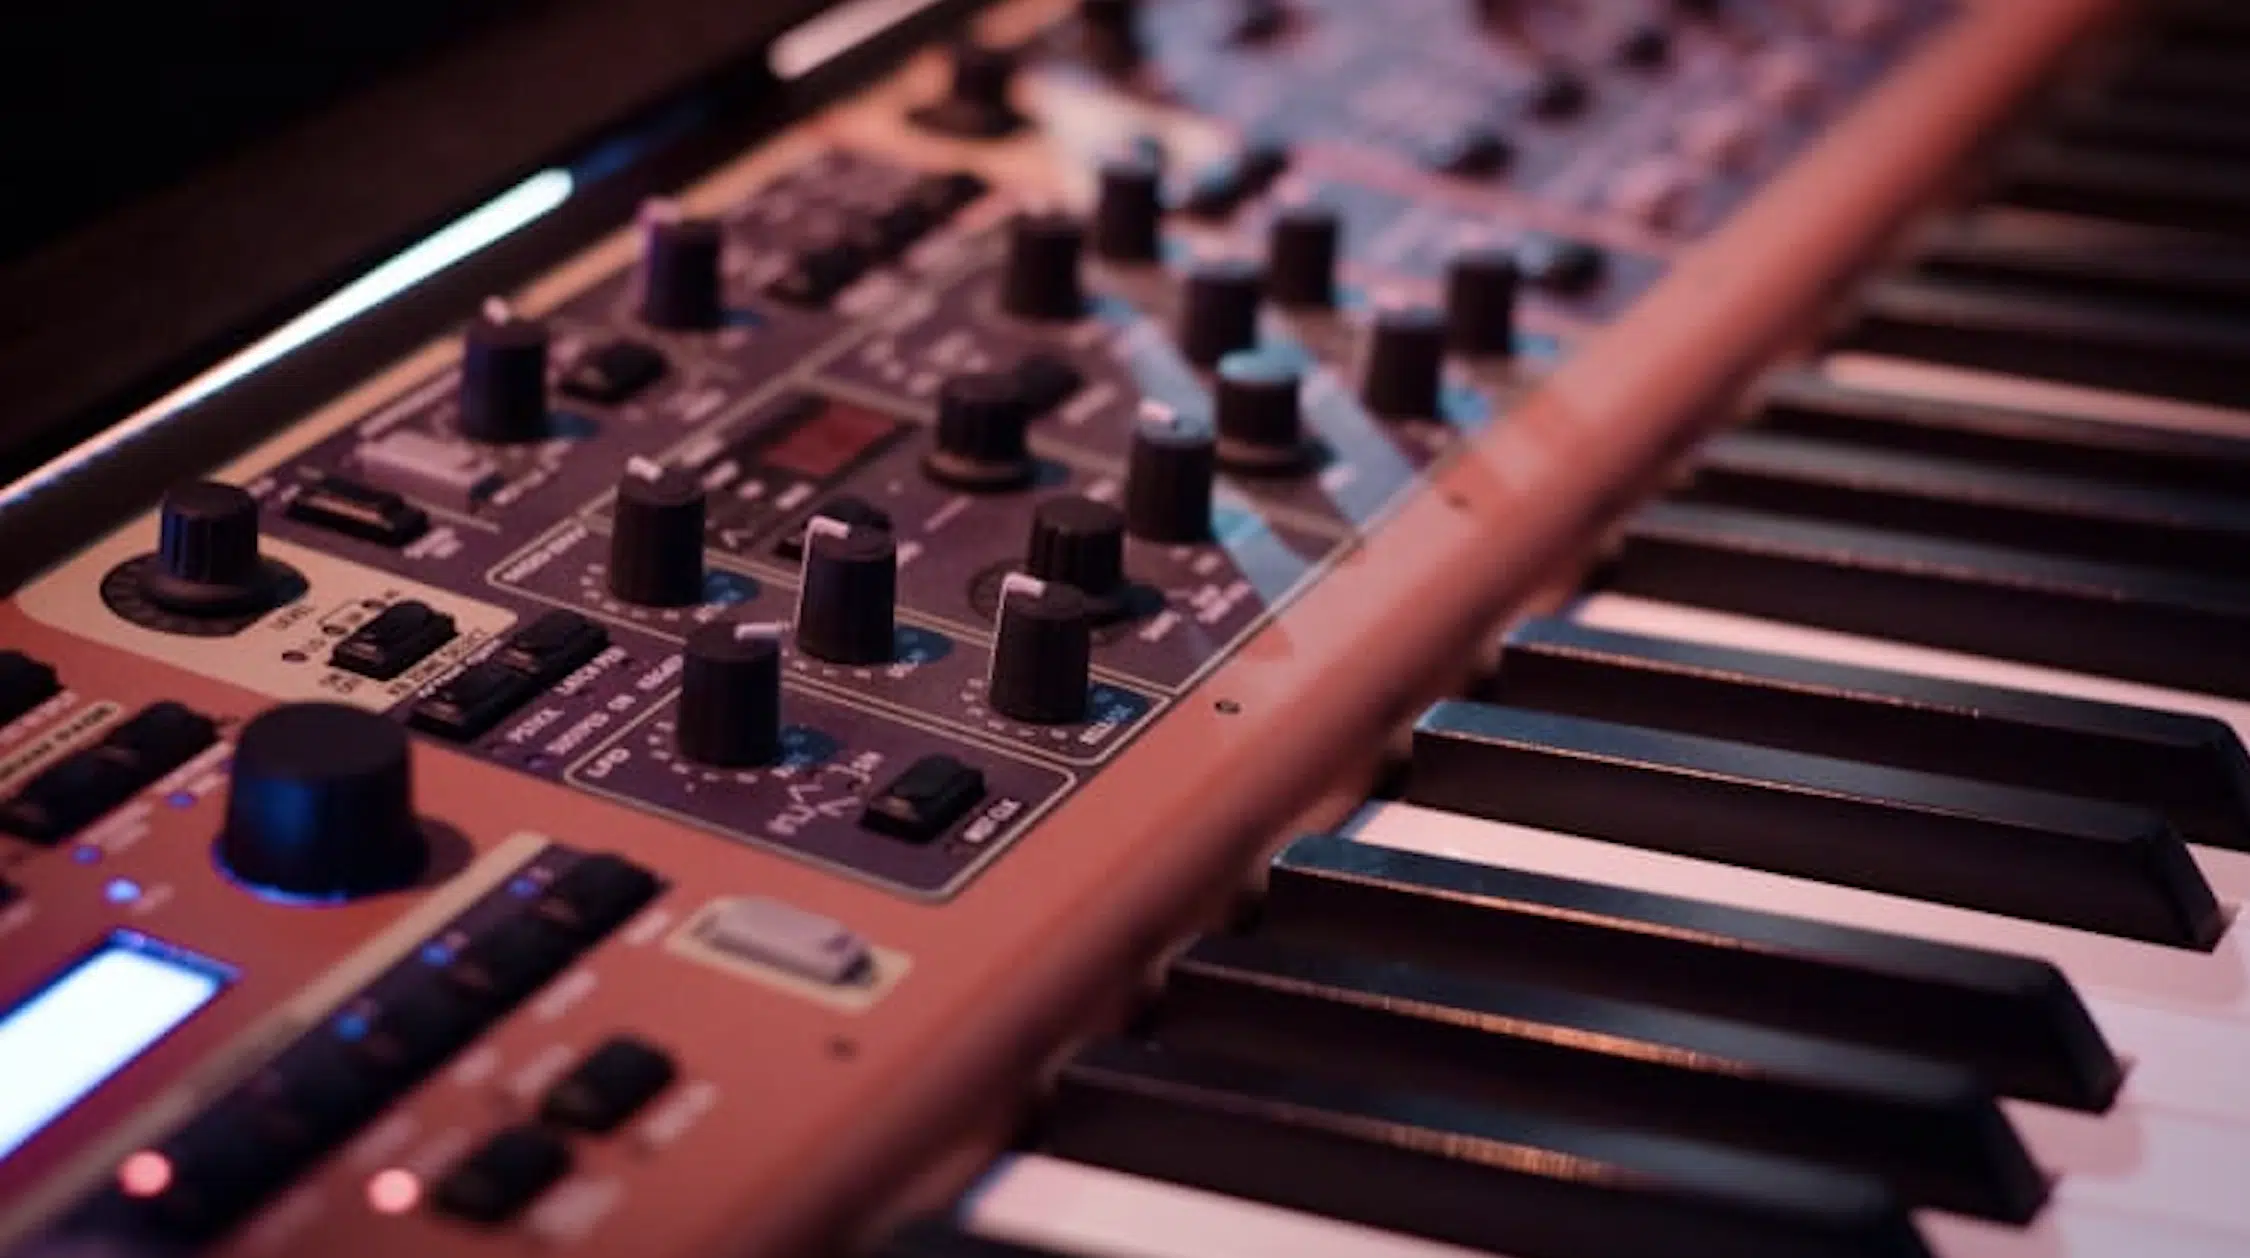
When working with synths and pads, the flanger effect can add subtle movement or dramatic motion, depending on your settings.
For a lush pad, set the delay time to 10-12 ms and the wet/dry mix to 40% so the modulation is noticeable but not too overpowering (it’s all about balance).
Adding a slow modulation rate of around 0.2 Hz and keeping the depth controls at about 30% creates a gentle undulating effect, perfect for ambient tracks or breakdowns.
Don’t forget to use automation to gradually increase the depth and feedback during a build-up to create tension that peaks before a drop.
Also, layering two flangers with slightly different settings on separate tracks can produce epic, textured modulation that fills out the stereo field.
#2. Enhancing Guitar Tracks with Flanging

For guitar tracks, the flanger can bring a modern, edgy vibe or a nostalgic, psychedelic feel that people find super intriguing (and for good reason).
To add a subtle texture, set the feedback to around 20%, the modulation rate to 0.5 Hz, and the delay time to 5-7 ms.
This will create a shimmering effect that complements clean guitar tones perfectly.
To kick things up a notch and get more dramatic, increase the feedback to 50-60%, set the modulation depth to around 70%, and dial in a wet mix of 60-70%.
This is super effective for lead lines or solos.
PRO TIP: If you’re processing rhythm guitars, pan a dry guitar hard left and a flanged guitar hard right for a wide, immersive stereo effect.
Also, experiment with automating the delay time to sync with tempo changes for added rhythmic interest.
#3. Creative Vocal Processing Using Flangers
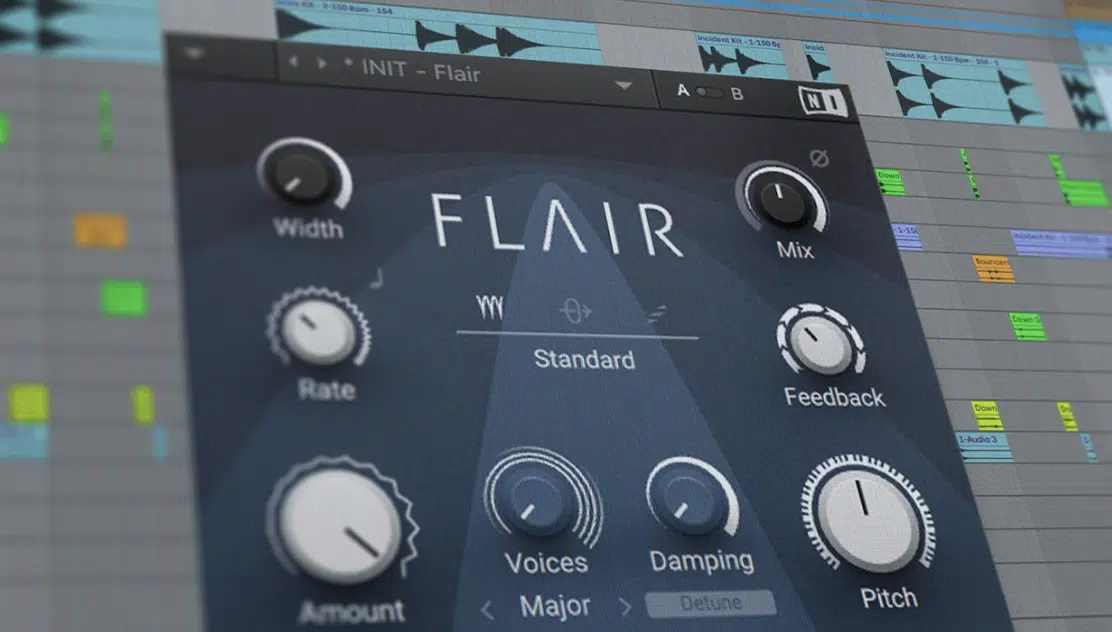
Using the flanger effect on vocals can add unique textures that range from subtle ambiance to experimental, otherworldly sounds.
For a delicate enhancement, set the delay time to 8-10 ms, the modulation rate to 0.3 Hz, and the wet/dry mix to 30%.
This works super well on background harmonies or ad-libs.
If you’re aiming for a bold, robotic texture, increase the depth controls to 70% and boost the feedback to around 40% (dramatic sweeping motions in the frequency spectrum).
For lead vocals, keep it tasteful… Use a high-pass filter to clean up the low end of the flanged audio signal and make sure everything is clear and on point.
Automate the flanger’s mix balance during a verse-to-chorus transition to create a sense of lift and excitement.
A great example of this can be heard in experimental dry vocal sections of popular music where producers emphasize creative modulation.
#4. Automating Flanger Parameters for Dynamic Effects
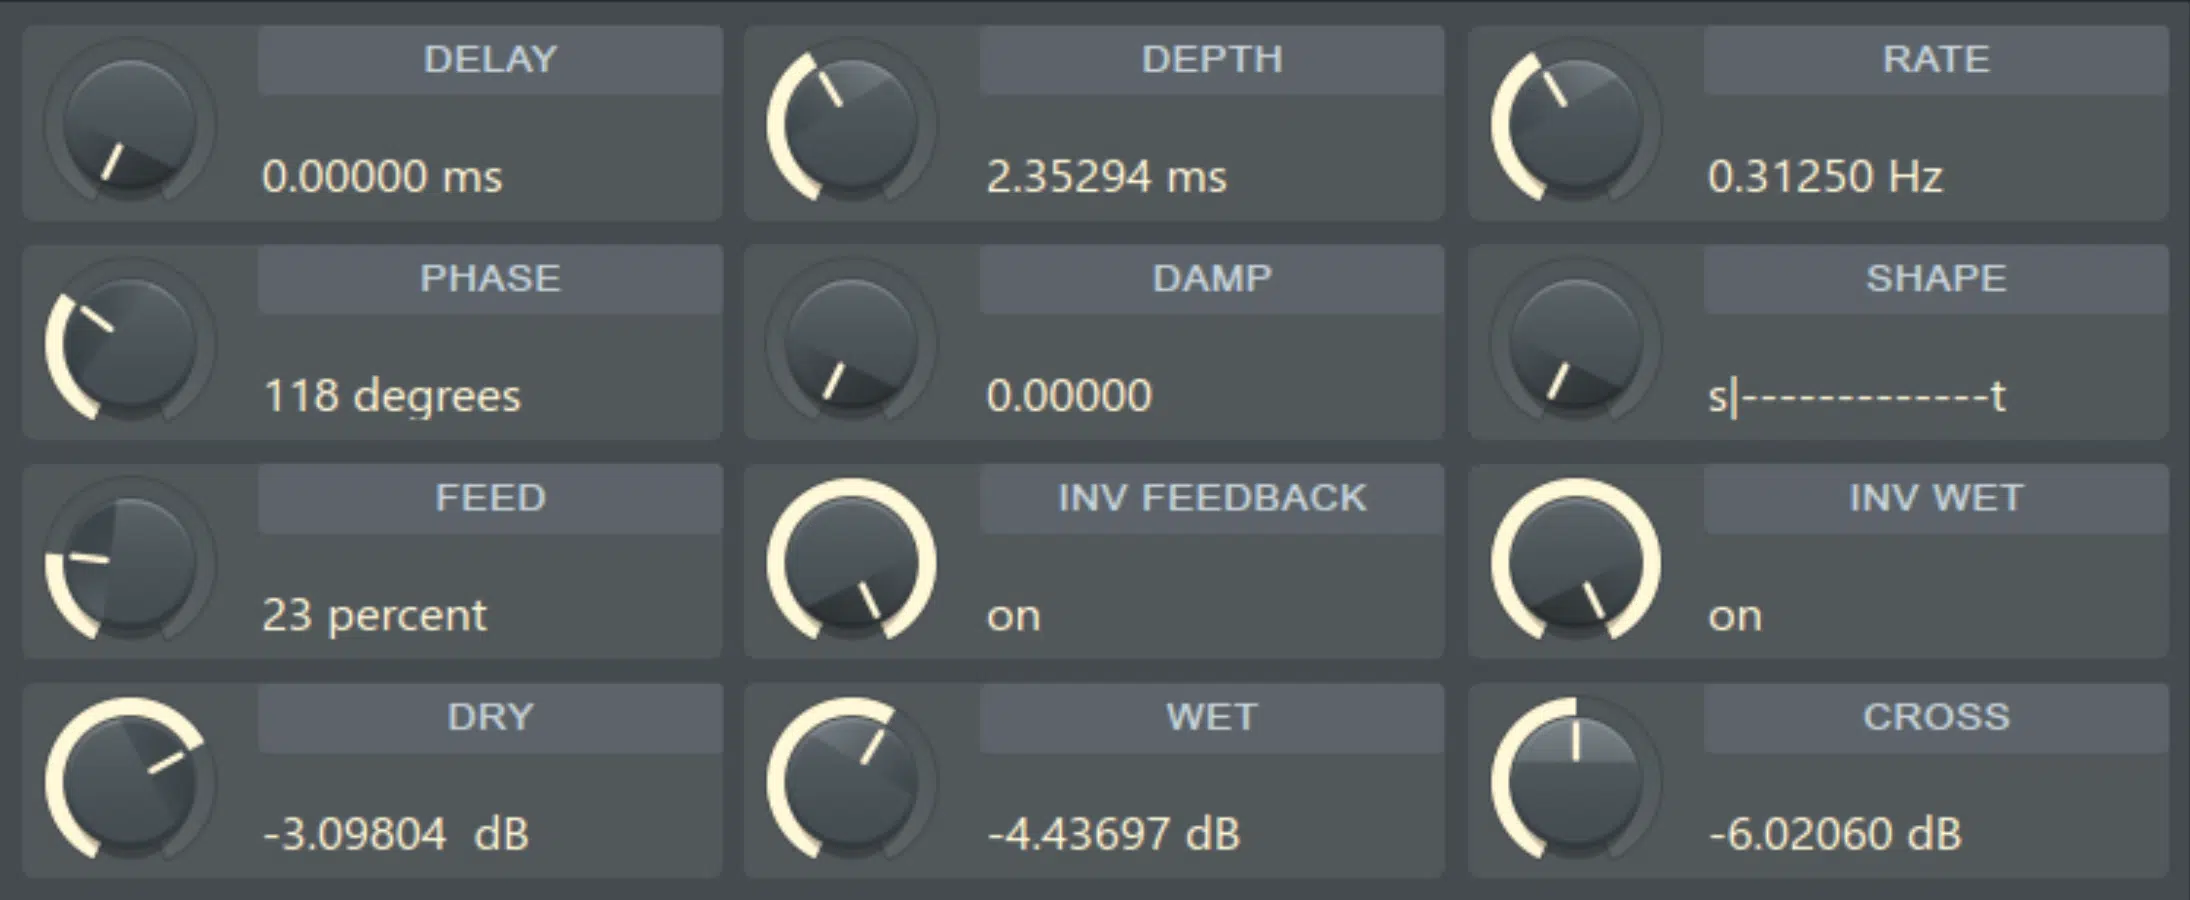
Automation is a game-changer when using the flanger effect as we talked about, allowing you to dynamically shape its presence over time.
Automate the modulation rate to start at 0.2 Hz for a slow, dreamy vibe, then gradually increase it to 1 Hz during a build-up for some sick intensity.
On the same note, you can automate the feedback from 10% to 50% to create a rising resonance that amplifies the tension in breakdowns.
Automating the mix balance is another powerful trick…
Begin with a subtle 20% wet mix during verses and increase to 70% in the chorus to make the audio effect more pronounced.
PRO TIP: For a creative twist when it comes to the flanger effect, link the delay time automation to your track’s tempo 一 making the flanger pulse rhythmically with the beat.
This technique is great if you’re producing EDM or trap where dynamic modulation effects enhance the energy of the track.
#5. Combining Flangers with Other Time-Based Effects
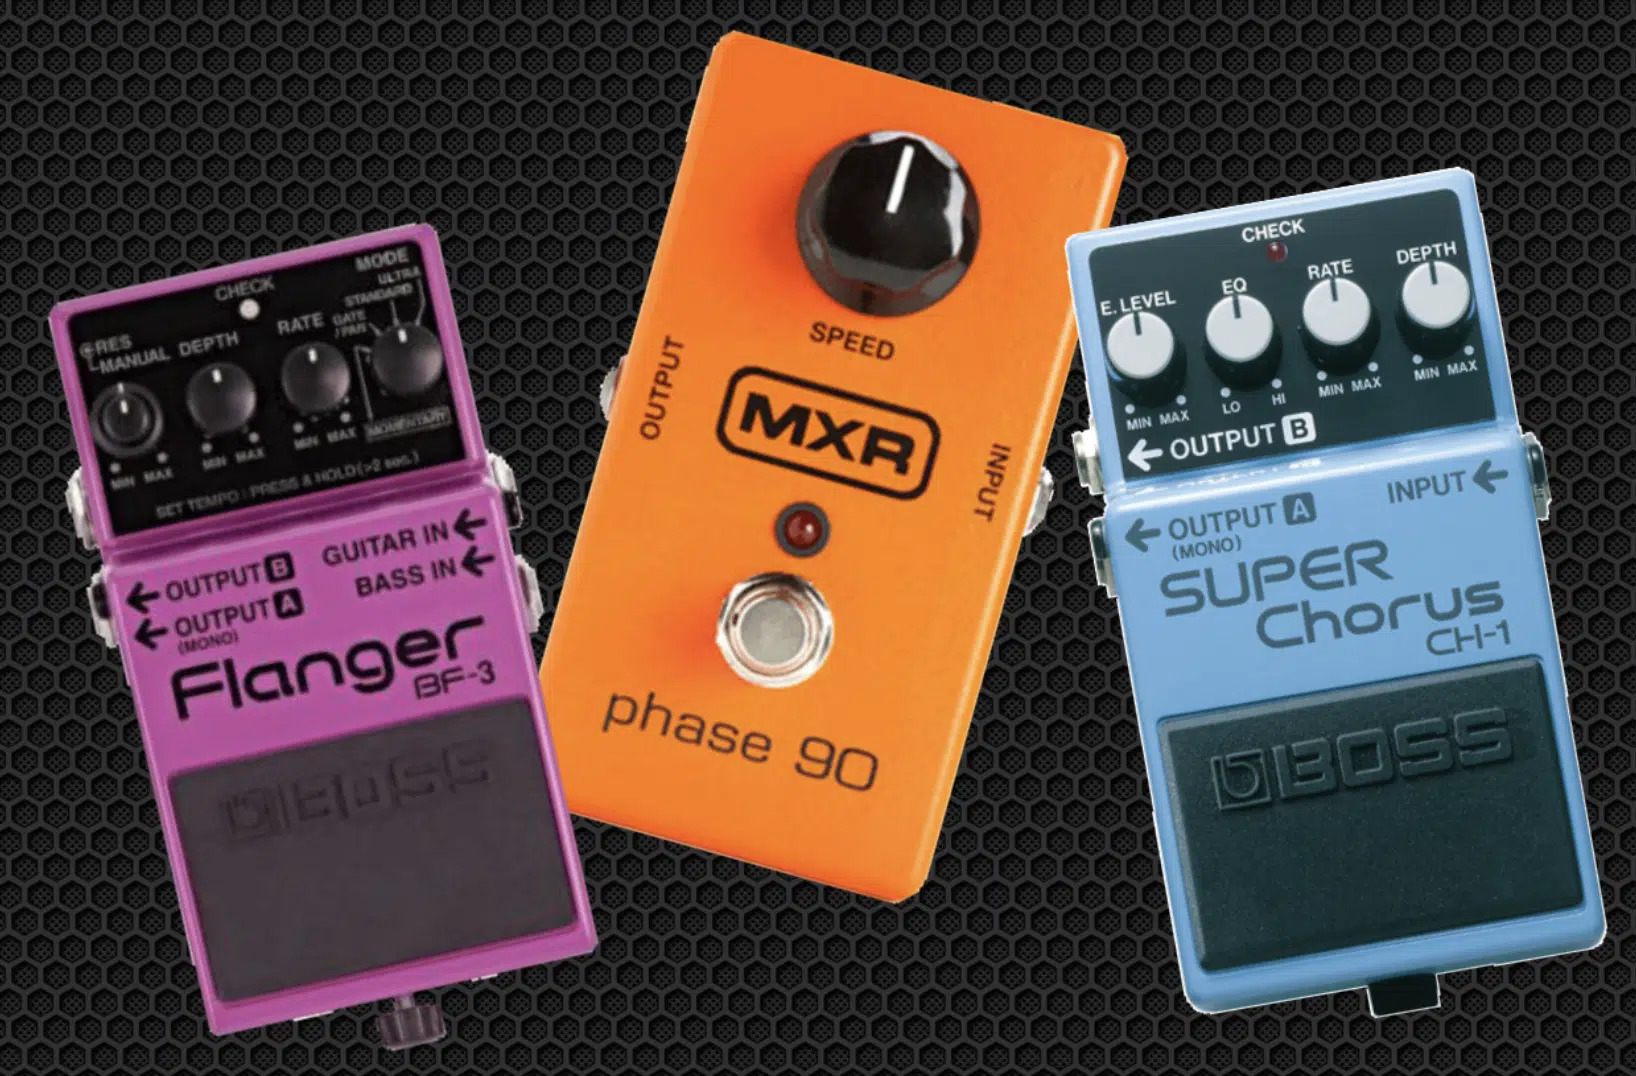
Pairing the flanger effect with other time-based effects like chorus and phaser can create some complex, show-stopping sounds that are awesome.
Start with the flanger set to a:
- Delay time of 10 ms
- Modulation depth of 50%
- Feedback at 30%
Then, add a chorus effect with a wet mix of 60% to create a great layered texture.
On the flip side, you can combine a flanger with a phaser effect by setting the phaser’s all-pass filters to sweep slowly across the frequency spectrum.
It will complement the flanger’s more rhythmic motion perfectly.
This combination is especially great when applied on pads because it gives them a spacious, otherworldly quality that just works.
PRO TIP: Use a separate EQ on each effect (boost the mids on the phaser and the highs on the flanger). This will make sure they vibe perfectly rather than clash.
Experiment with panning each effect slightly left or right to create an ultra-wide stereo image that envelopes the listener.
#6. Applying Flangers to Drums and Percussion

Flanging can breathe life into static, boring, basic drum and percussion loops 一 adding much-needed movement and depth.
For that classic “swooshing” effect on hi-hats, set the delay time to 5-7 ms, the modulation rate to 0.4 Hz, and a wet mix of around 50%.
On kick drums, keep it subtle with a high-pass filter at 150 Hz to prevent the flanger from muddying the low end while adding a shimmering effect to the higher frequencies.
For snares, a wet/dry balance of 40%, combined with a moderate feedback setting of 30%, can create a dynamic, resonant feel that’s pretty cool.
Use flanging on drum fills, automating the depth and feedback to build tension leading into a drop, which can also be very intriguing.
Another trick is to apply a flanger to hand percussion, like bongos or tambourines, to give them a unique, swirling character that fills the stereo field.
This isn’t for everybody, but if it matches the vibe you’re going for, try it out.
#7. Exploring Stereo Imaging with Flangers
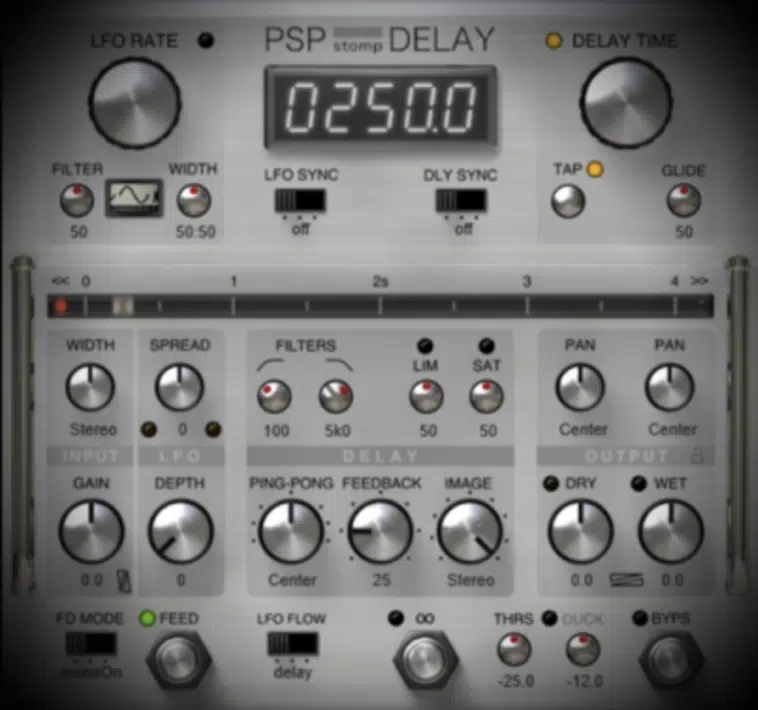
The flanger effect is perfect for enhancing stereo width 一 creating a sense of space and depth in your mix, so let’s break it down further.
Start by applying the flanger to a stereo track, setting the delay time to 5 ms for a tight, focused audio effect.
For example, on a synth pad, use a wet/dry mix of 40% to make sure the flanging adds motion without killing the natural sound.
When panning, send the wet signal to the left and the dry signal to the right for a subtle stereo widening effect that keeps the original tone on point.
For a more aggressive, in-your-fact effect, increase the feedback to 30% and add automation to the modulation rate so the width evolves dynamically through the track.
To crank things up a notch, use two flangers with slightly different modulation rates (e.g., 0.3 Hz and 0.5 Hz) on separate channels.
For example, set one flanger’s depth to 50% for subtle motion and the other to 70% for more pronounced sweeps, then pan them opposite each other to use the stereo field.
This technique works wonders on guitar tracks or layered synth leads to give them a larger-than-life feel/vibe.
You should use a mid-side processing plugin with the flanger to enhance the width while preserving the clarity of the mono center.
Simply adjust the mid signal to maintain clarity in the mix while boosting the side signals for some extra width.
Again, it’s perfect for trap or EDM drops where a wide stereo image can elevate the mix.
#8. Creating Rhythmic Patterns Using Flanger Modulation
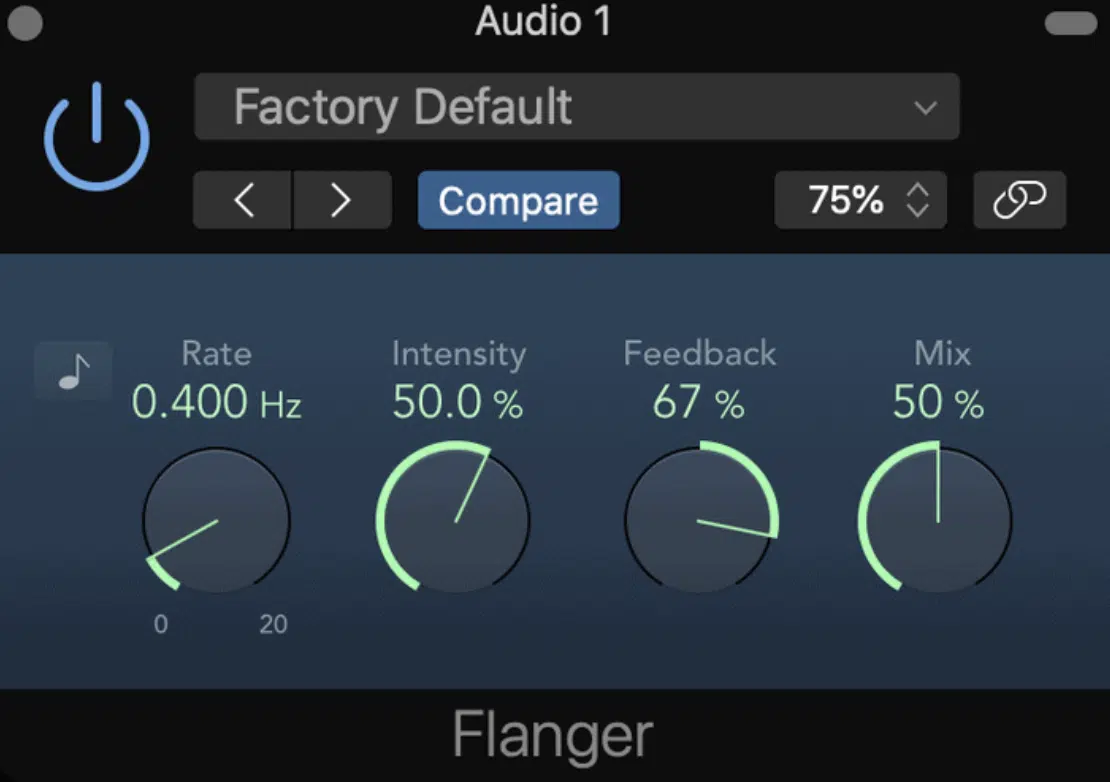
Flangers can be used to generate rhythmic motion by syncing the modulation rate to your track’s tempo.
For example, set the flanger to 0.5 Hz for a quarter-note modulation or 0.25 Hz for a half-note pattern that complements the rhythm.
For percussion loops, increase the modulation depth to 70% and automate the delay time to pulse in time with the beat to create a hypnotic groove.
This is great when flanging hi-hats or shakers that need some dynamic movement because the pattern is too repetitive.
PRO TIP: Combine a flanger with a rhythmic sidechain compressor to create a pumping effect that’s perfectly in sync with the kick drum.
For even more complexity, layer a phaser effect on top, using a triplet modulation rate to create intricate interlocking rhythms.
Bonus: Using a Flanger Pedal
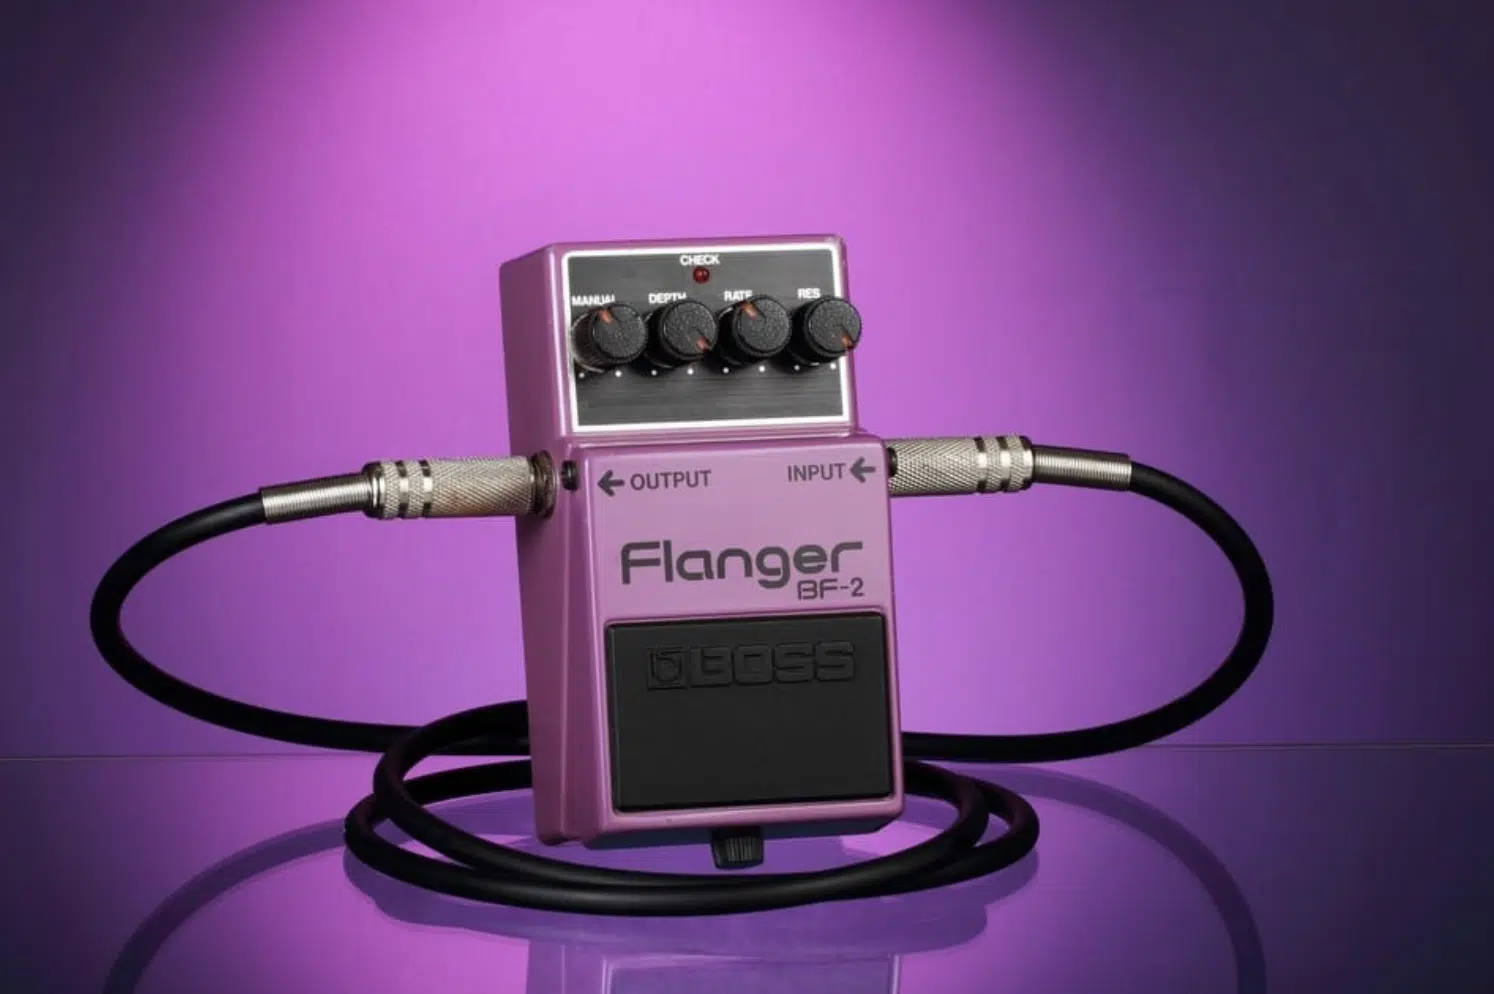
While most of the sick flanger effect possibilities happen in the digital world, using a flanger pedal can unlock hands-on creativity and unique characteristics for:
- Guitarists
- Vocalists
- Even synth players
A flanger pedal like the Electro-Harmonix Electric Mistress or the Boss BF-3 provides direct control over essential parameters.
This includes things like delay time, feedback, and modulation rate (as we talked about earlier); making it easy to dial in real-time adjustments.
For little effects, set the pedal’s rate knob to a slow sweep (around 0.3 Hz) and the depth controls to about 30%, perfect for creating texture on a clean guitar tone.
Crank the feedback up to 70%, and increase the depth to maximum for that iconic jet engine sound 一 ideal for bold, experimental passages.
Combine a flanger pedal with a chorus pedal, using the flanger to create a metallic edge and the chorus to smooth it out.
This will give you a sick, layered tone that’s hard to replicate digitally.
For even more versatility, place a pass filter before the flanger pedal to isolate specific frequency ranges, allowing you to tweak the sound to fit perfectly in your mix.
Whether you’re adding a swirling ambiance to vocals or pushing a guitar riff into psychedelic territory, a flanger pedal is a tactile and inspiring tool for music production.
Final Thoughts
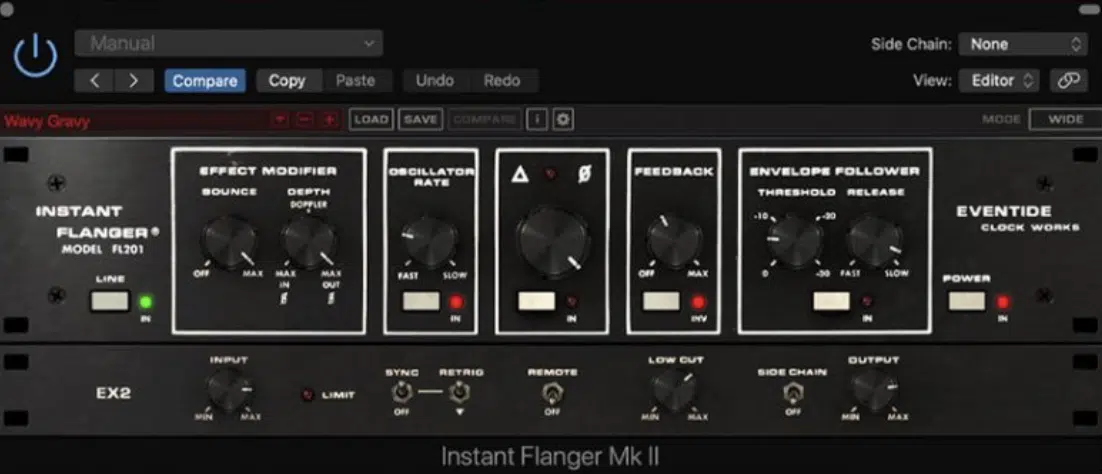
A flanger effect, as you now know, is all about creating movement and depth by blending two identical waveforms with slight delays.
It can create some sick sweeping textures, dynamic modulations, and even metallic tones that add unique character to your tracks.
By using the flanger effect techniques and tricks we discussed today, you’ll be able to apply the flanger effect like a true boss.
This way, you can enhance stereo width, create engaging rhythmic patterns, and infuse your tracks with captivating soundscapes that are out of this world.
And, as a special bonus, you’ve got to check out these 100% FREE Legendary Sample Packs that are taking the industry by storm.
It’s over 50 show-stopping free packs(including samples, MIDI files, loops, presets, and more) all designed to elevate your music production skills.
These invaluable packs are 100% royalty-free and cater to various genres, providing high-quality sounds that can seamlessly integrate with your use of the flanger effect.
Using these samples can inspire creativity and add an unmatched polish to your tracks, instantly capturing the ears of your listeners and eyes of professionals.
Bottom line, by mastering the flanger effect and using high-quality resources like these free packs, you’ll be knocking out chart-topping music in no time.
So, keep experimenting with the flanger effect and pushing the boundaries of your sound every single day.
Until next time…


Leave a Reply
You must belogged in to post a comment.