FL Studio is a powerful tool that can help you make music faster and more efficiently.
It’s packed with features that allow you to do almost anything in music production.
Regardless of what you’ve heard, FL Studio is not just for beginners 一 it’s used by professionals worldwide to create hits.
So, as a music producer, knowing the most time-saving, beneficial FL Studio shortcuts is invaluable.
This way, you can get your ideas down quickly, keep the creative juices flowing, and make your tracks sound amazing.
In this article, you’ll learn about:
- Quick access shortcuts ✓
- The magic of Slip, Delete, and Slice tools ✓
- Using Paint and Draw tools for creativity ✓
- Mastering the Piano Roll ✓
- Mixer track workflow tips ✓
- Efficient mixing and mastering shortcuts ✓
- Sequencer tricks for beats ✓
- Arranging songs smoothly ✓
- MIDI and audio editing shortcuts ✓
- Bonus shortcuts you rarely hear about ✓
- Much more about FL Studio keyboard shortcuts ✓
After this article, you’ll be able to master one of the most popular digital audio workstations’ shortcuts and tweak your tracks like a professional.
You’ll find yourself working faster, experimenting easier, and knocking out music more efficiently.
So, let’s dive in…
Table of Contents
How FL Studio Shortcuts Can Transform Your Workflow
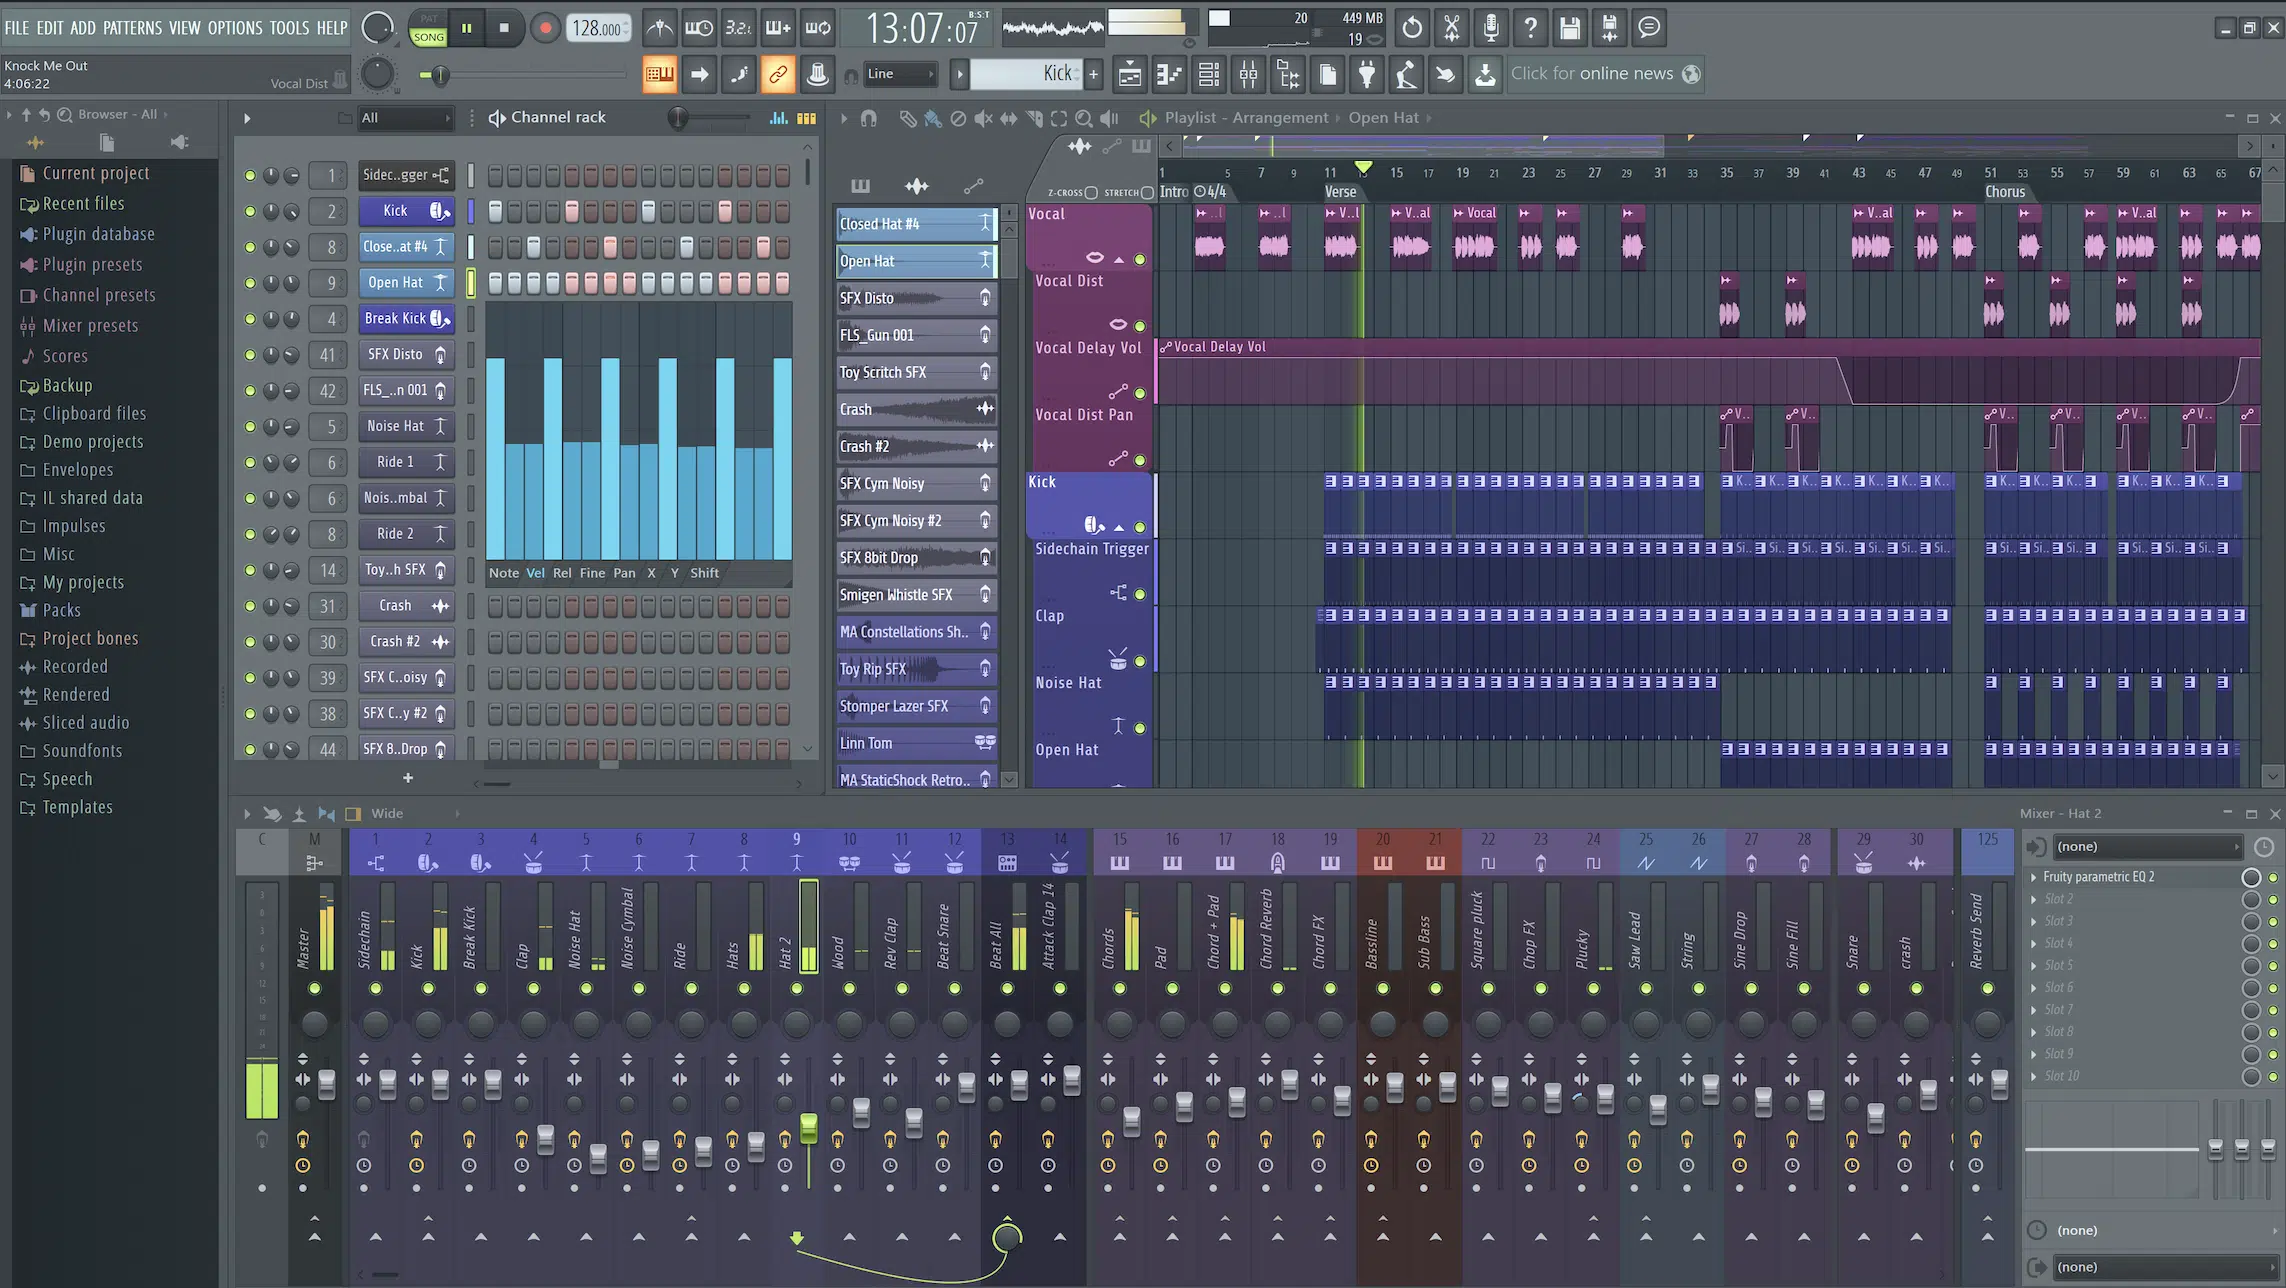
Creating music in FL Studio becomes a whole different experience when you know, and constantly utilize the shortcuts.
They can drastically reduce the time needed to do certain repetitive tasks and enhance your entire workflow.
For example, quickly toggling between the Playlist, Channel Rack, Piano Roll, and Mixer (F5, F6, F7, and F9) is a basic yet powerful way to save time.
Similarly, CTRL+SHIFT+M (mute tool) to mute and unmute selected channels instantly streamlines your process.
This allows you to focus more on creativity and less on manual, repetitive tasks.
Utilizing FL Studio keyboard shortcuts for navigation and command execution is not just about speed, but about maintaining an uninterrupted creative flow.
It will ensure that you can translate your musical ideas into reality with minimal distraction or time wasted 一 making FL Studio shortcuts invaluable.
And yes, we’ll be describing everything we just mentioned plus more within the article, so stay tuned.
Advanced Editing with FL Studio Shortcuts
Let’s start by breaking down a few of the most simple yet game-changing FL Studio shortcuts. Side note, if you want to learn all about using FL Studio or FL Studio plugins, we’ve got you covered.
-
Slip Edit Tool
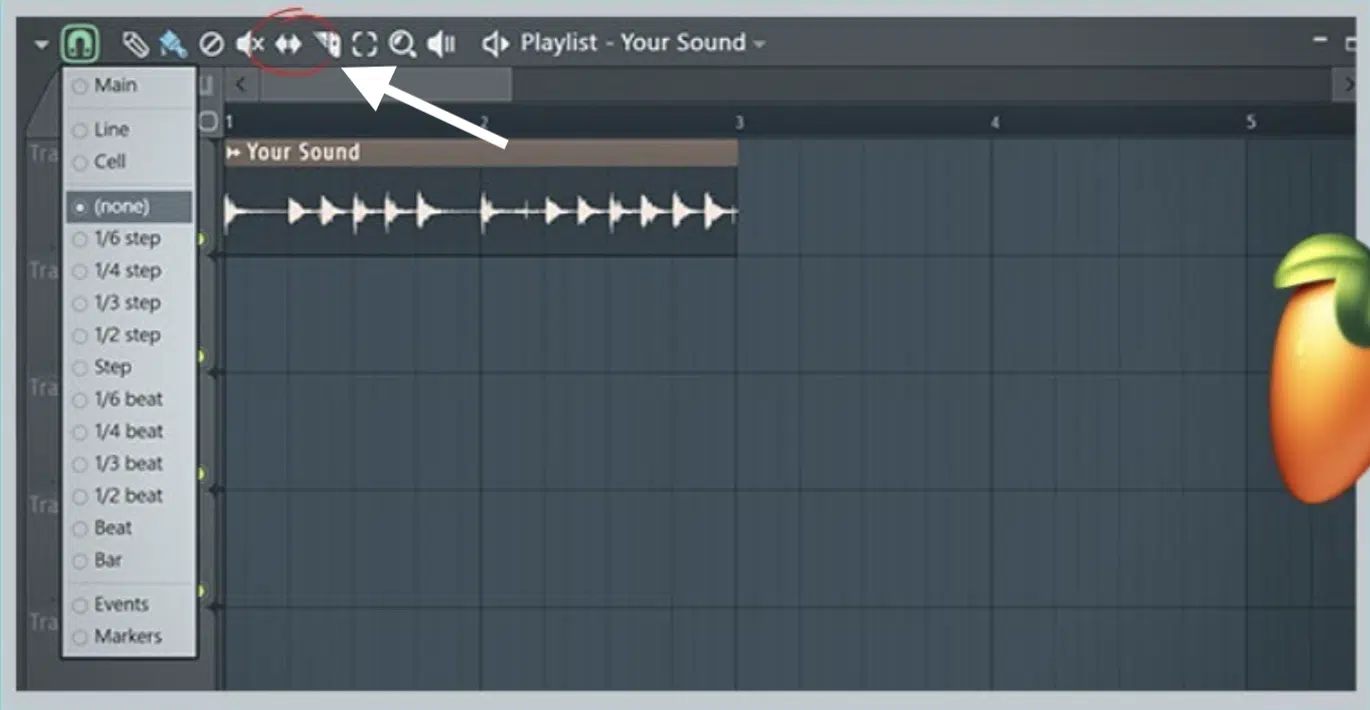
The Slip Edit tool in FL Studio is a powerful feature for audio editing.
It lets you adjust your audio clip’s content without altering its position in the Playlist.
To access it, simply select the Slip tool from the toolbar or press the FL Studio shortcut key S until the Slip tool is highlighted.
Then, click and drag horizontally on an audio clip.
This action shifts the audio within the clip 一 making it an awesome tool for fine-tuning the timing of your loops and samples.
Pro Tip: Combine the Slip Edit tool with the Snap-to-Grid feature.
By pressing ‘ALT’ while dragging, you can temporarily bypass the grid snap, which gives you the ultimate precision for your edits.
This method is very useful in post-production where aligning audio to specific video cues or adjusting for phase issues between tracks is necessary.
The ability to make these adjustments (without shifting the clip’s position in the Playlist) keeps the overall arrangement while ensuring the audio content is perfectly placed.
-
Mastering the Delete and Slice Tools
The Delete Tool and Slice tool are fundamental if you’re going to truly master FL Studio. They’ll help you remove unwanted parts of a clip or to split a clip into sections.
#1. Delete Tool
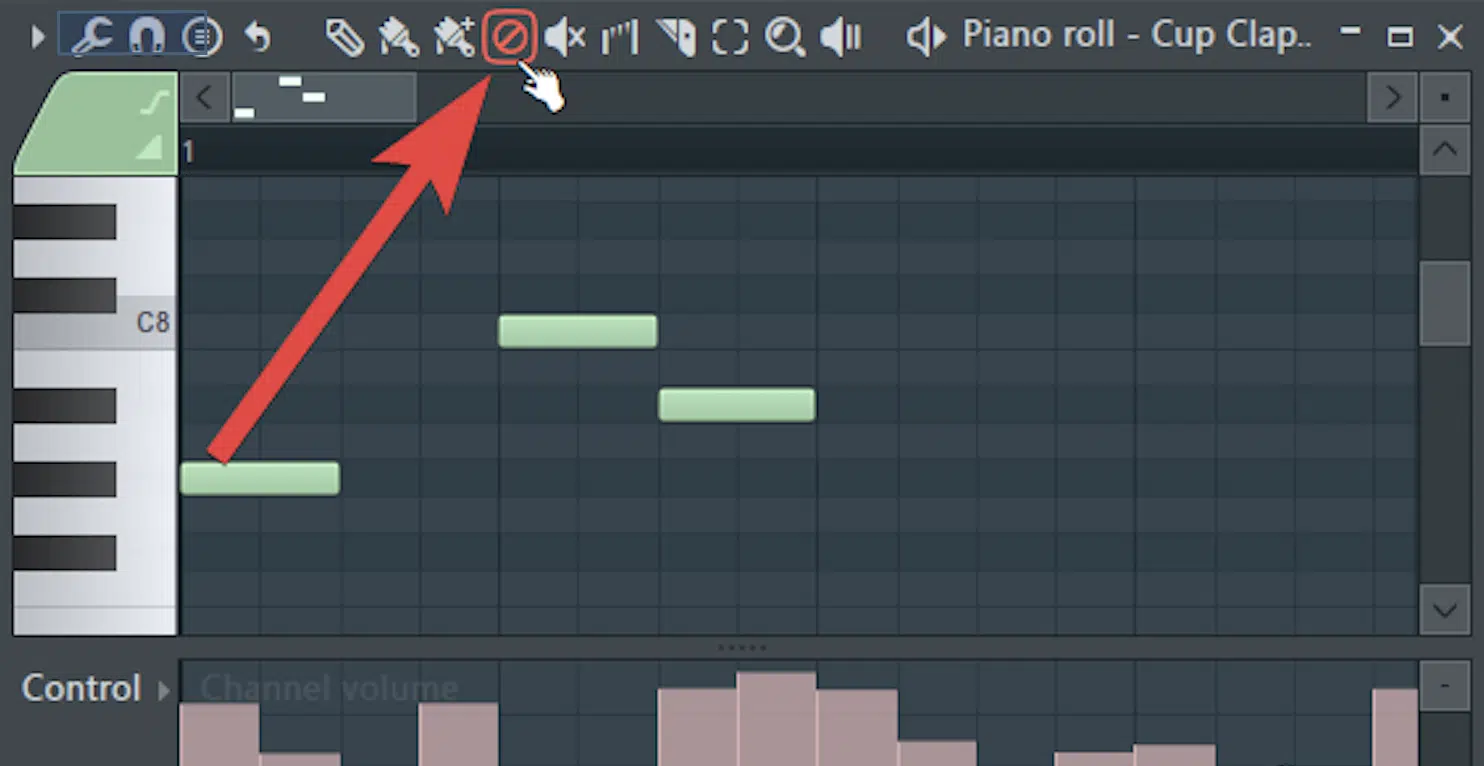
Accessed by pressing D or selecting it from the toolbar, the Delete tool allows you to remove (from the Playlist) selected:
- Notes
- Clips
- Time segments
To utilize the Delete tool more efficiently, try combining it with the right-click functionality which provides quick deletion without having to select the tool each time.
For instance, right-click while in the Piano Roll, and it will delete notes under the cursor, which makes the editing process a lot smoother.
#2. Slice Tool
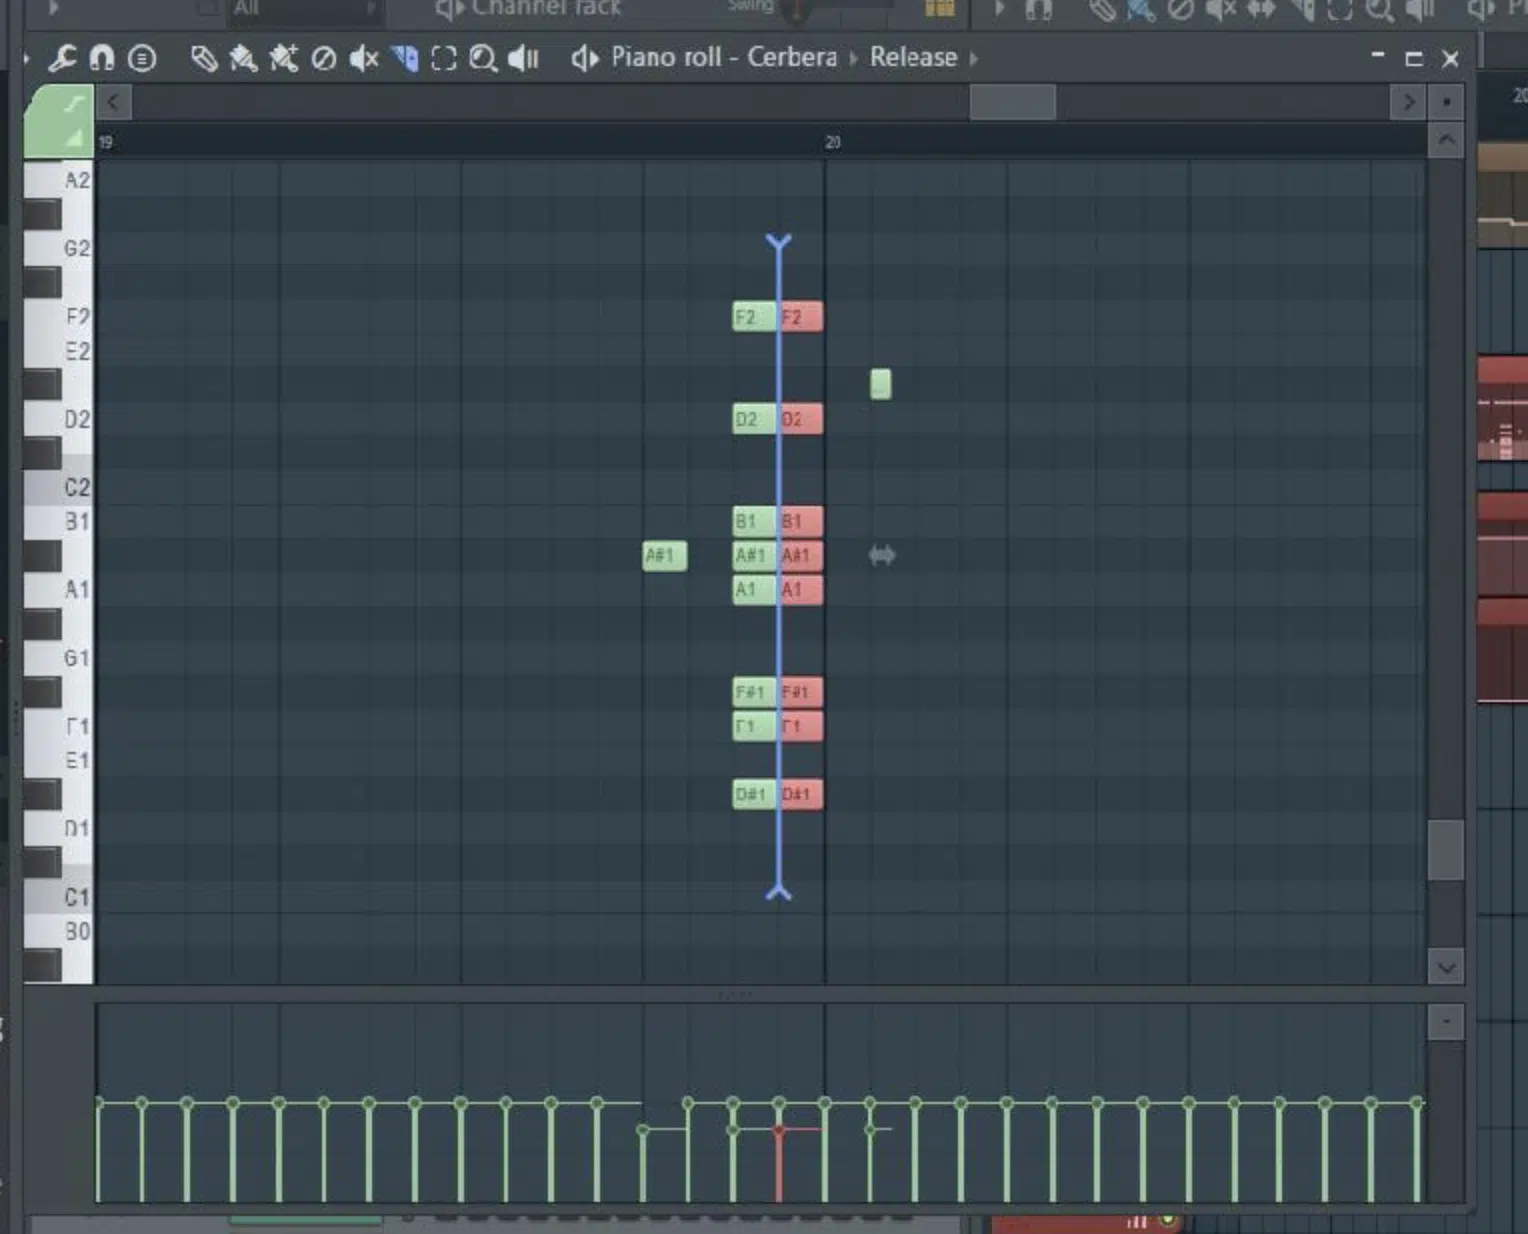
By pressing ‘C’ or selecting the Slice tool from the toolbar, you can cut clips and notes at precise locations.
For more advanced slicing, hold ‘shift’ while dragging across multiple clips to slice them at the same position.
This is particularly useful for creating edits or breakdowns in your arrangement.
Also, using the ALT key while slicing allows for freeform cuts that aren’t limited by the grid, which lets you get super creative when it comes to audio and MIDI editing.
Enhancing Creativity with FL Studio Tools
When you use FL Studio shortcuts, you’ll be saving endless amounts of time 一 making it possible for your creativity to really shine.
-
The Power of the Paint Tool and Draw Tool
The Paint tool and Draw tool are also essential for creativity when you’re banging out beats in FL Studio. It will help you sketch out ideas and patterns like a pro.
#1. Paint Tool
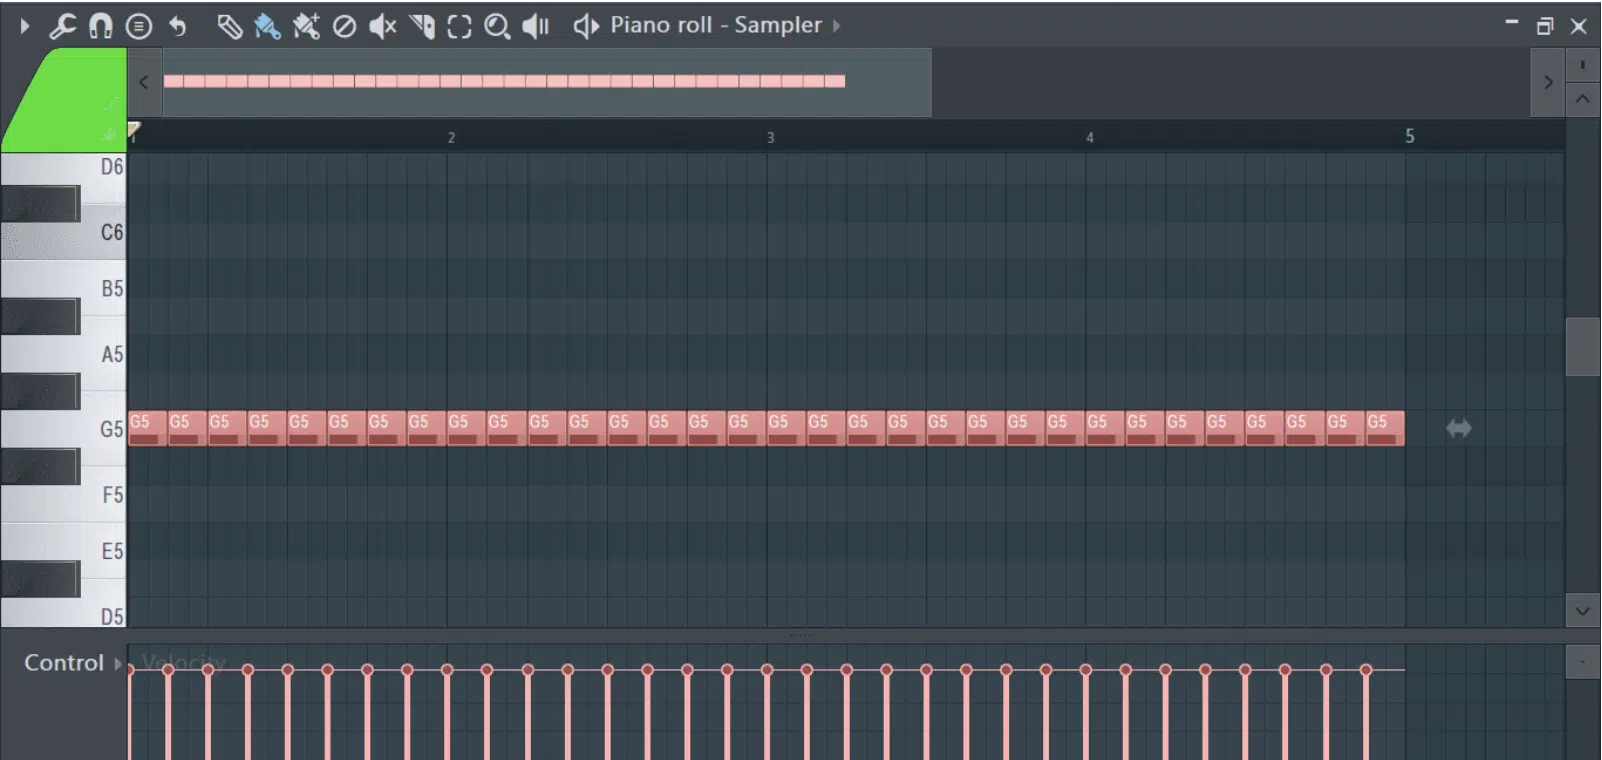
Activated by pressing ‘P’ the Paint tool lets you draw continuous notes or patterns in the Piano Roll or Playlist.
You can use the CTRL modifier while painting to automatically duplicate the last painted note or previous pattern.
This makes it ideal for creating repetitive motifs or drum patterns with minimal effort.
The Paint tool combined with the snap-to-grid feature is invaluable in terms of structure and rhythmic accuracy.
#2. Draw Tool
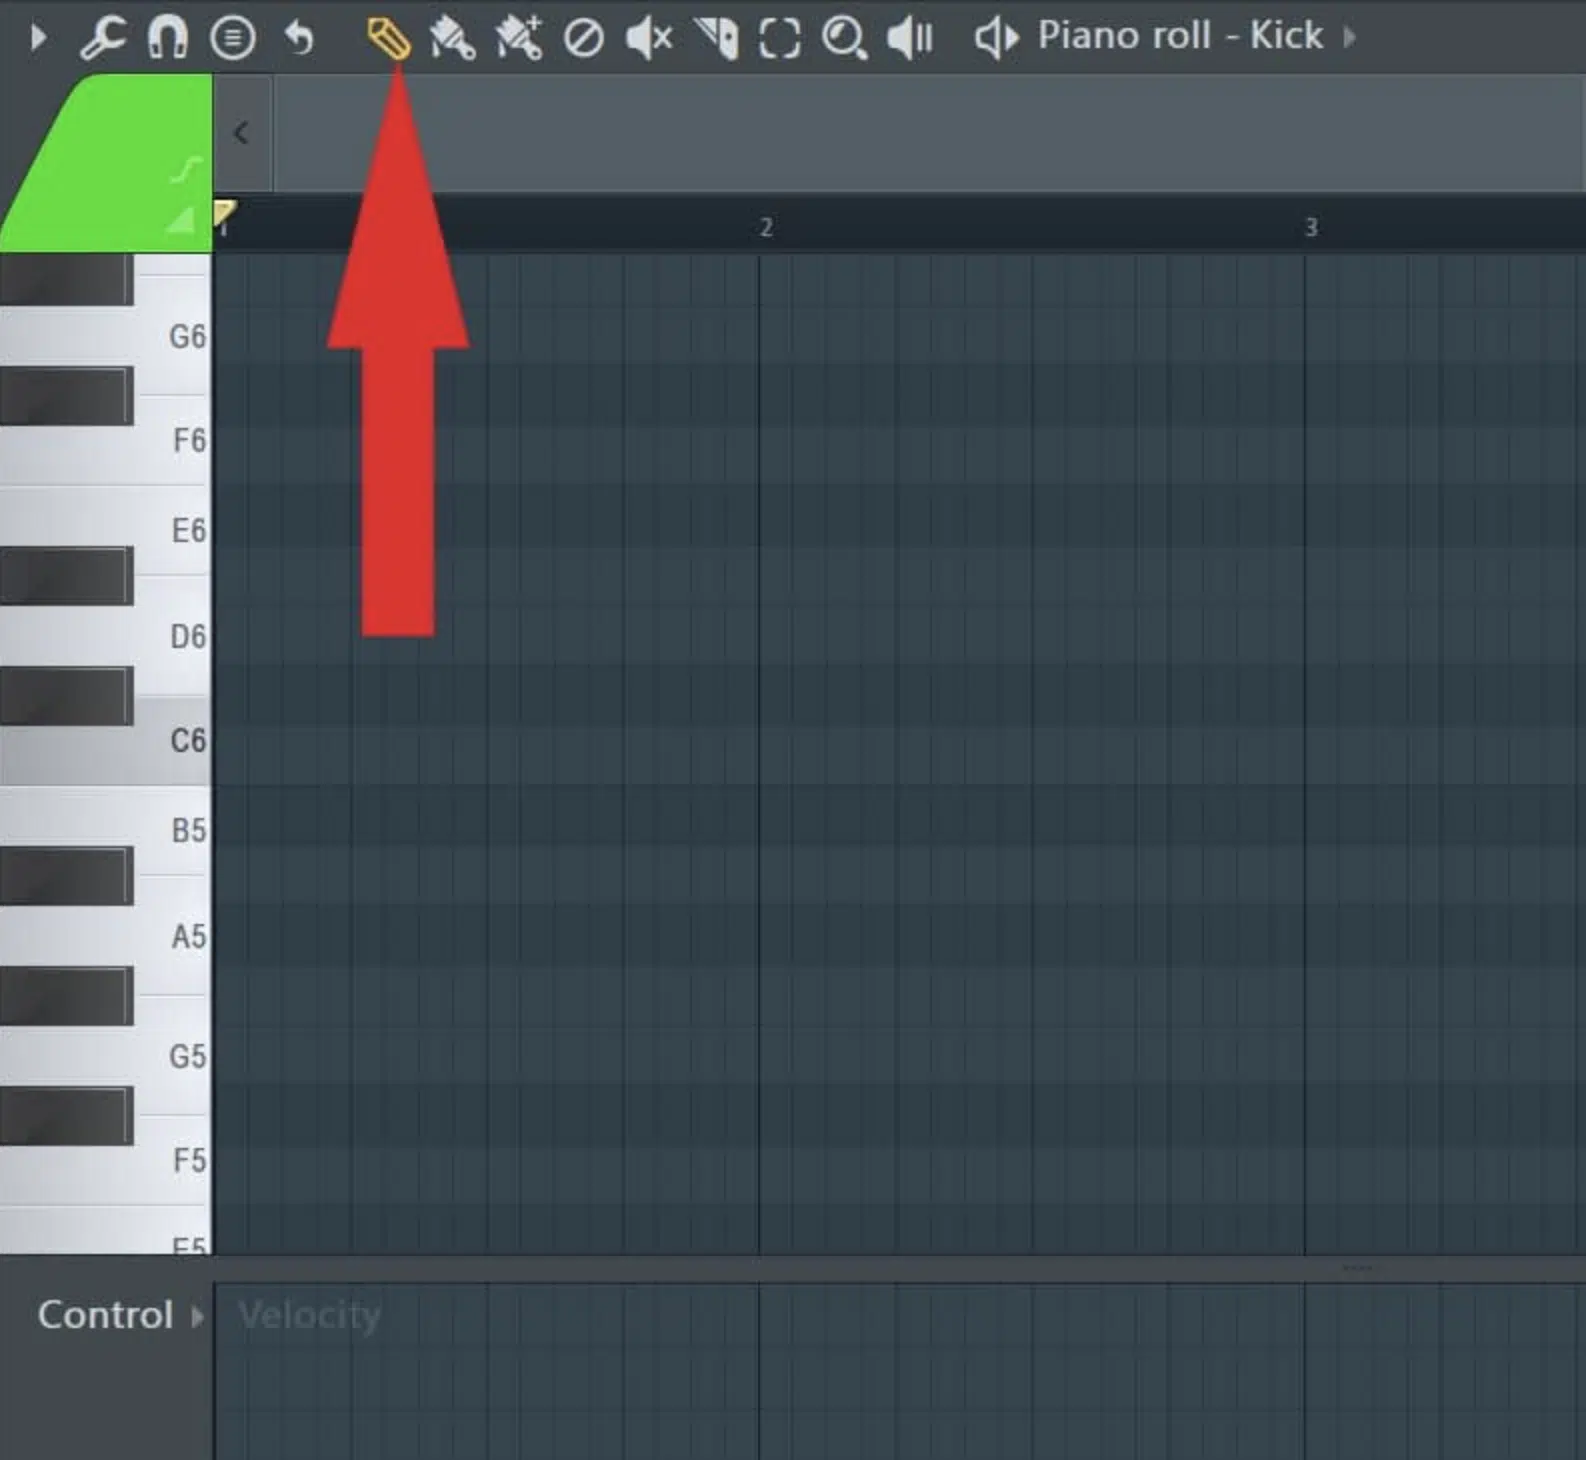
Press ‘B’ to switch to the Draw tool, which allows for precise placement of individual notes or patterns.
When working in the Piano Roll, combining the Draw tool with the ‘ALT’ key lets you make micro-adjustments to the note start and end times, free from the grid.
This technique is perfect for adding subtle timing variations that can make a programmed part feel more human and less mechanical.
Pro Tip: The Paint tool and Draw tool each benefit from the use of shortcuts like CTRL + Z (for undoing actions) and press CTRL + Y (for redoing them).
-
Using the Select Tool and Zoom Tool for Precision
Precision in music production is non-negotiable my friends and FL Studio’s select (press CTRL) and zoom (Z) tools will help you edit like a razor.
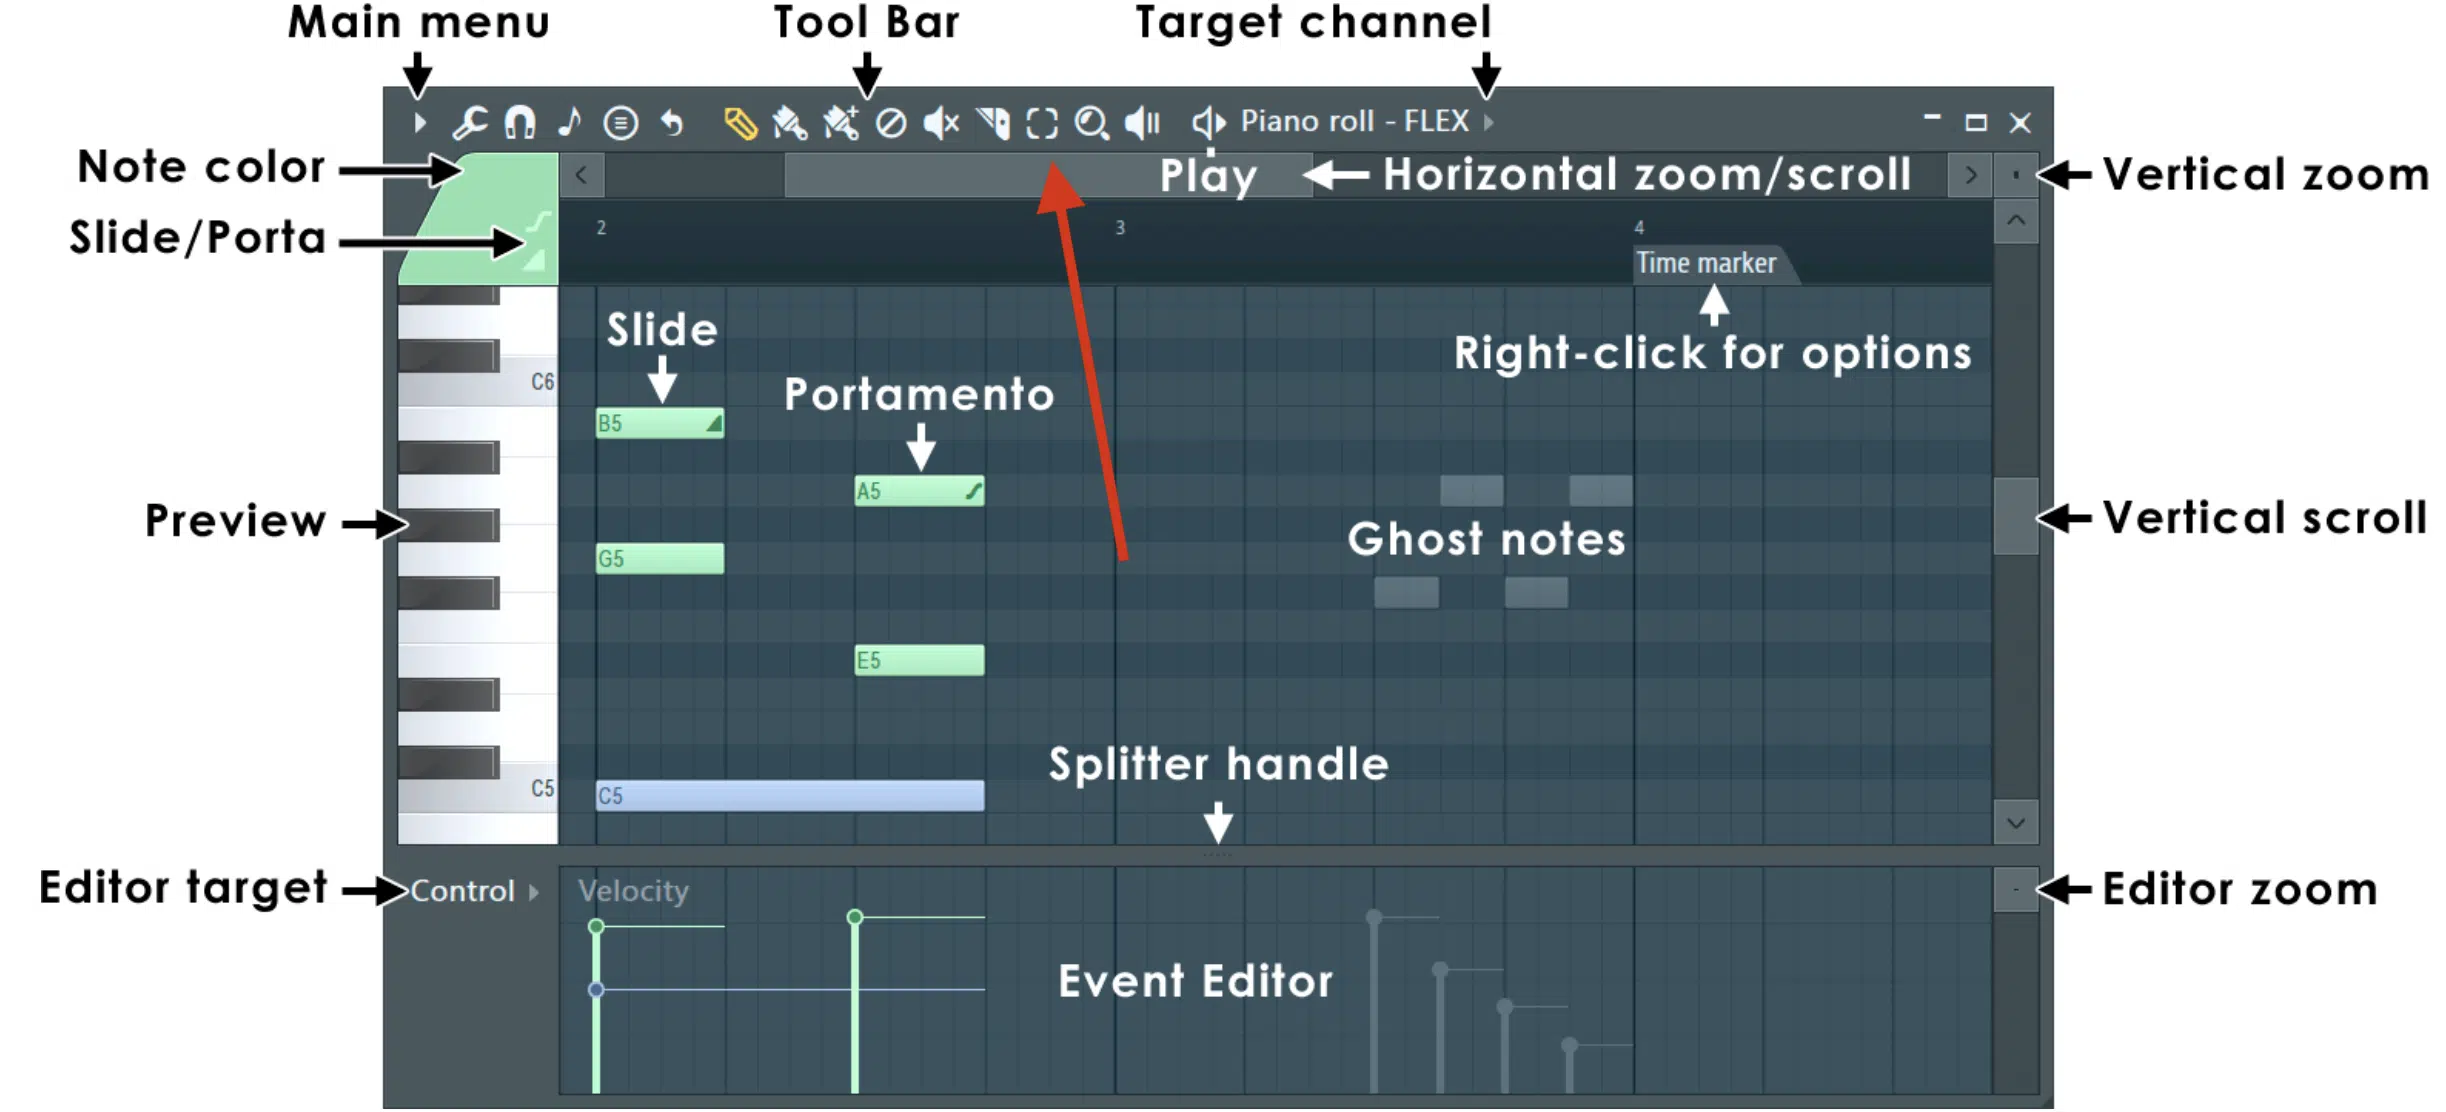
The Select tool (above) enables precise selection of clips or notes, which allows you to make specific adjustments or movements however you’d like.
The Zoom tool allows for detailed viewing of segments within your project.

This is essential for fine-tuning and intricate editing.
These tools, enhanced by typing keyboard shortcuts, ensure that every detail in your track can be accessed and modified whenever and however (with precision, of course).
This level of control is key for creating polished, professional tracks.
-
Piano Roll Shortcuts: A Game-changer
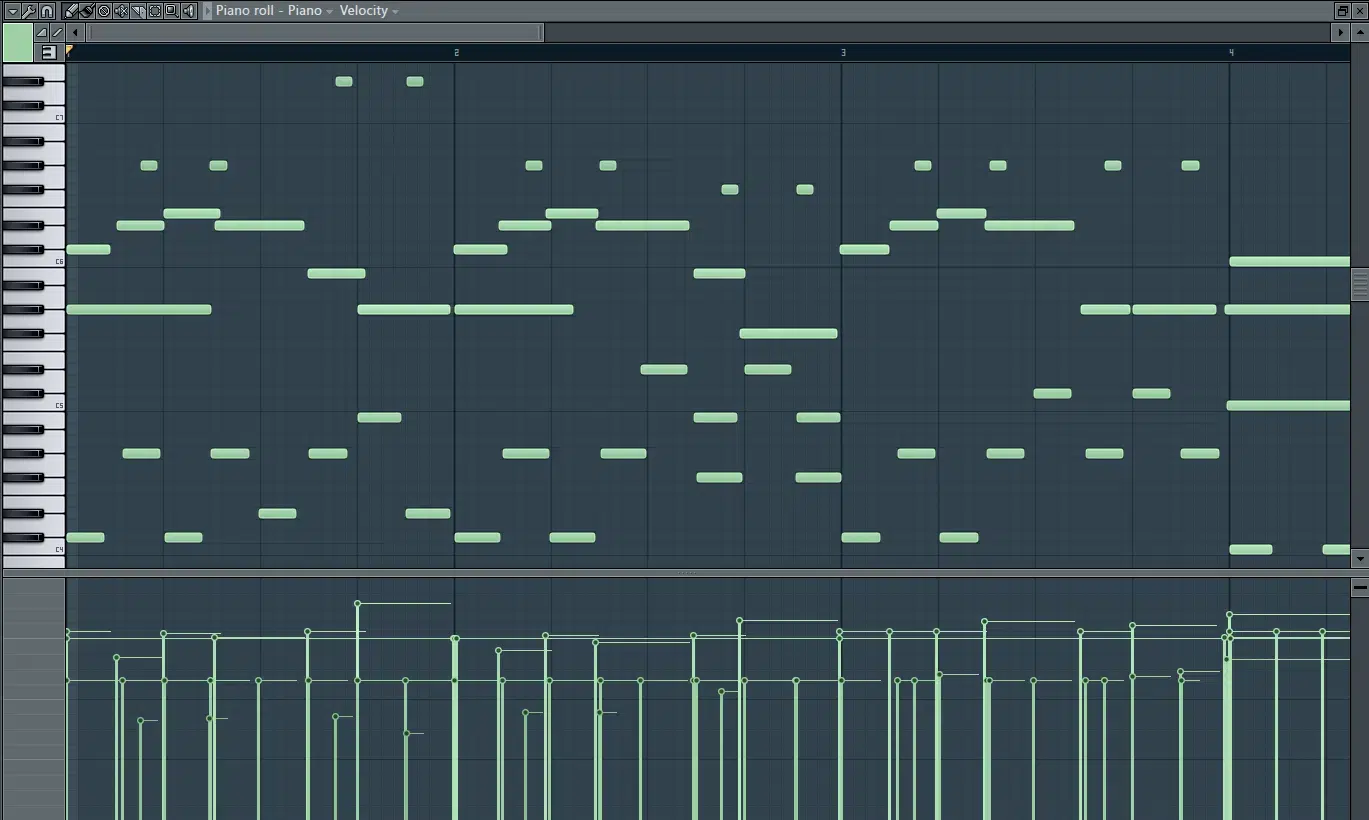
The Piano Roll in FL Studio is one of the most legendary features it has to offer, where melodies take shape and harmonies are created with precision.
For example, quickly accessing the Piano Roll from any window can be done by pressing F7, a simple yet effective FL Studio shortcut that saves valuable time.
Additionally, you can press CTRL+Q for quantization (which aligns notes to the nearest grid point) to guarantee rhythmic accuracy without manual adjustments.
This function is particularly useful when working with MIDI recordings that might have slight timing variations.
Another advanced technique is the CTRL+L shortcut, which automatically legatos notes 一 extending them to meet the start points of subsequent notes.
This removes any gaps between notes and creates a smooth, connected melodic line.
Pair this with the ALT+S shortcut to strum notes, and you can instantly add a more natural, human feel to chord progressions or melodic runs.
This combination of shortcuts not only streamlines the note editing process but also opens up creative possibilities that might not be obvious when manually placing notes.
Also, integrating the Paint tool (P) within the Piano Roll allows for rapid note placement.
When combined with the mouse wheel shift for vertical zooming (CTRL+SHIFT+Mouse Wheel) and horizontal scrolling (SHIFT+Mouse Wheel), mastering the Piano Roll becomes a breeze.
NOTE: Mouse wheel shift is perfect for an uninterrupted creative flow.
Remember, proper utilization of shortcuts can significantly enhance both your creative process and final output, so don’t underestimate their value.
Side note, If you want some awesome piano roll tips and tricks, look no further.
-
Optimizing the Mixer Track Workflow
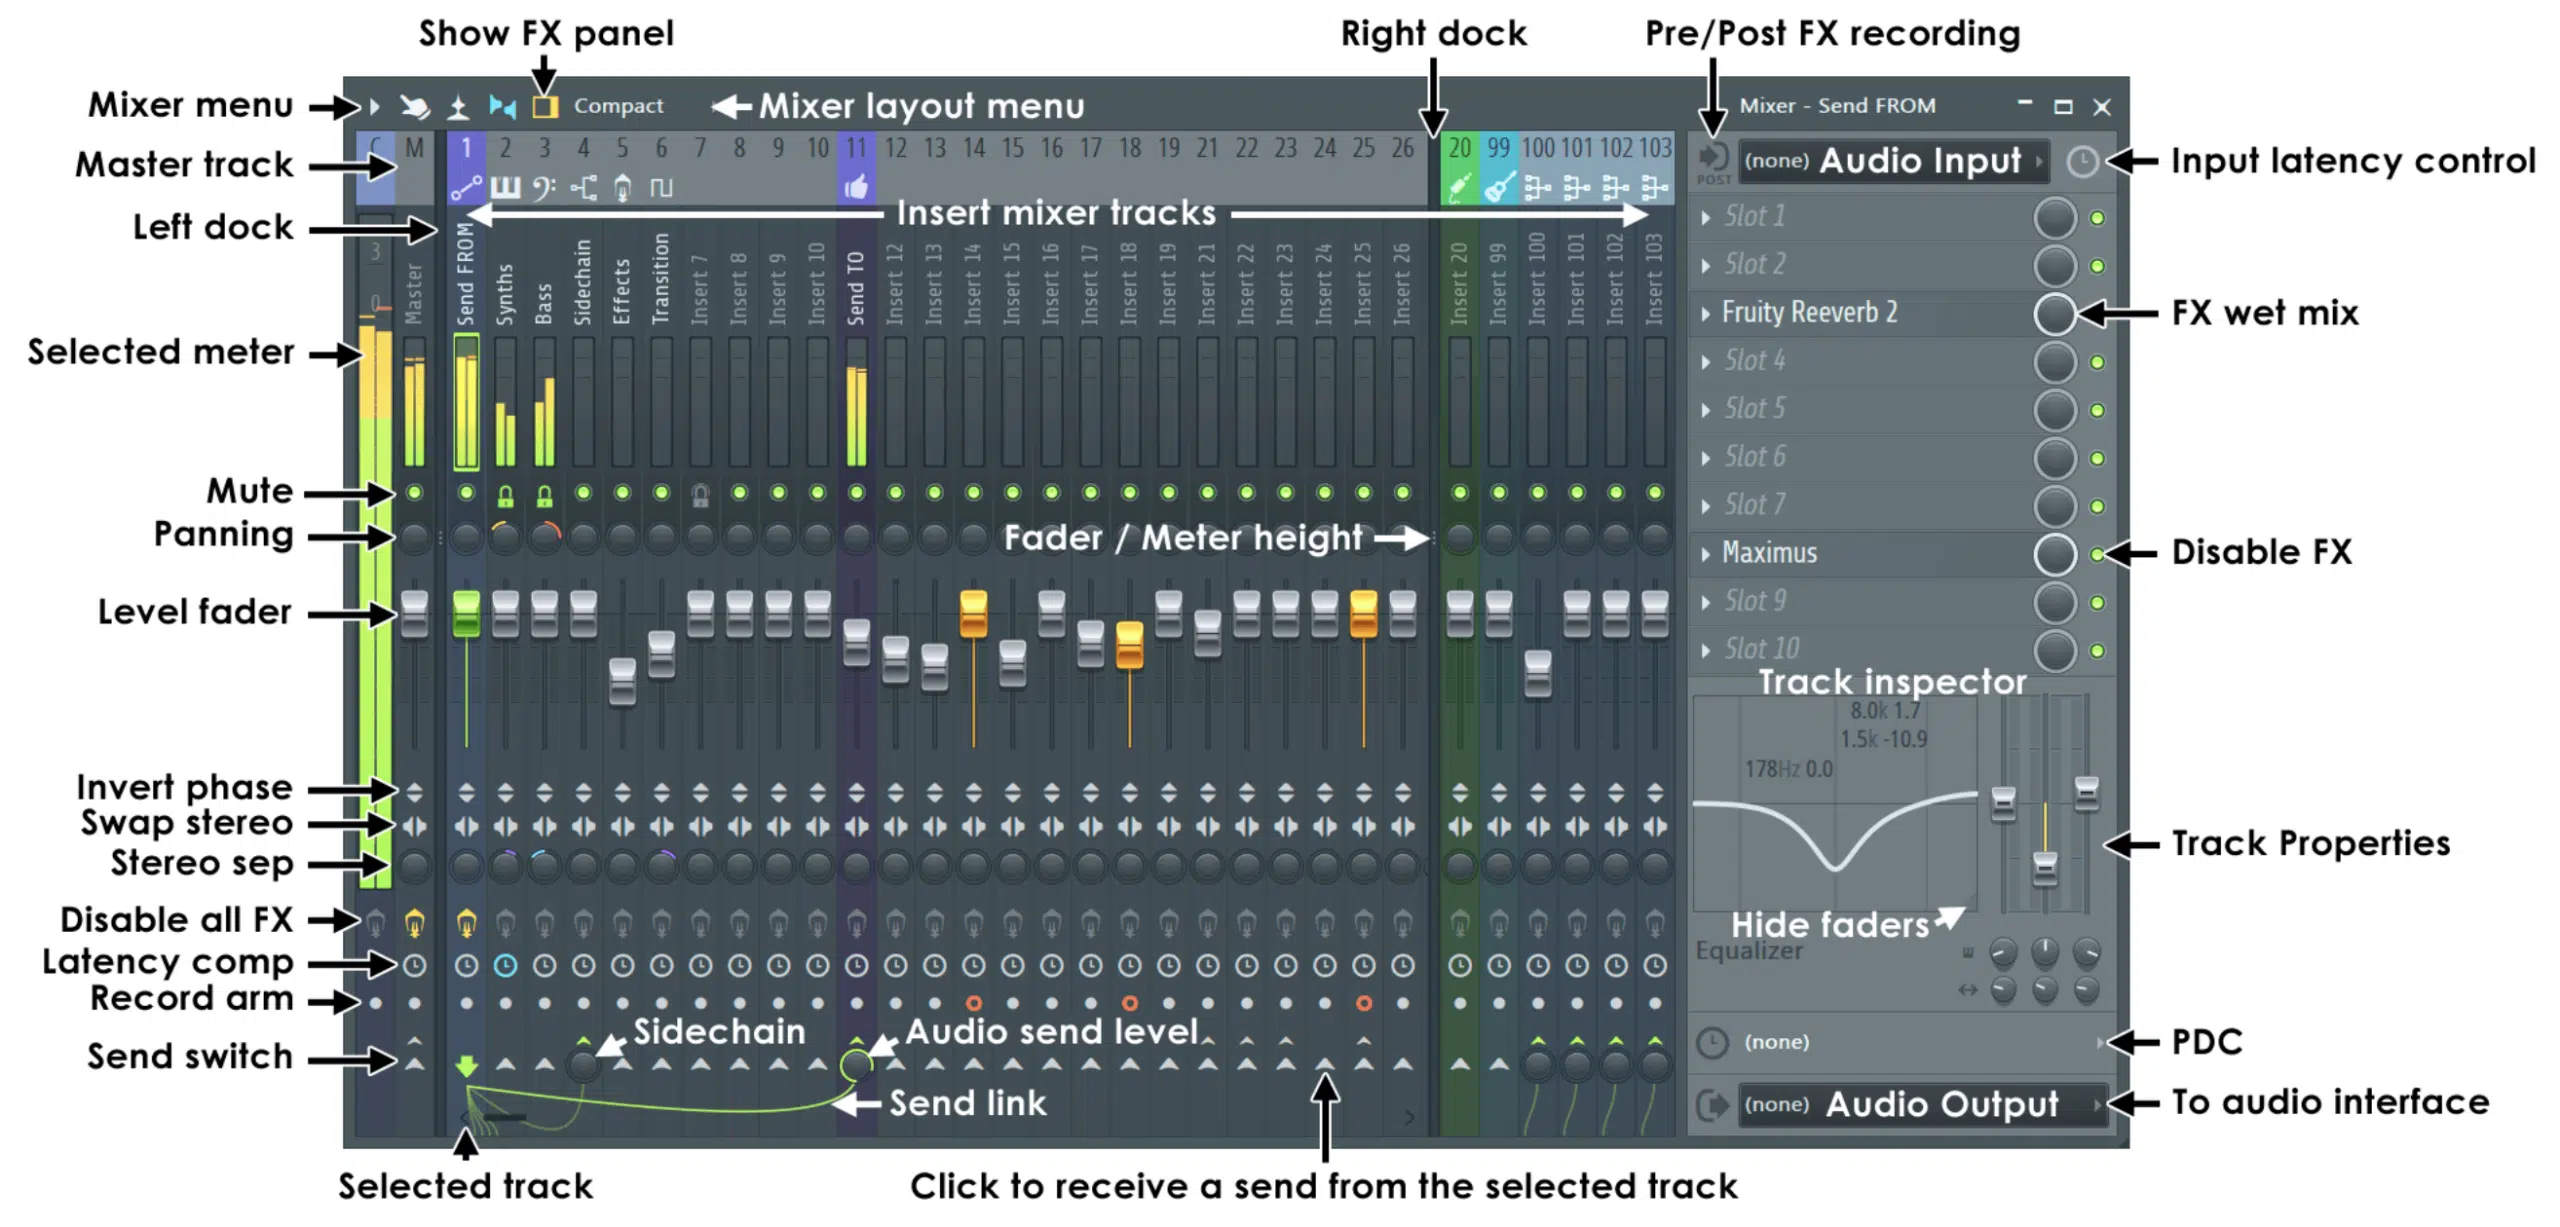
Efficiently managing the mixer track workflow is crucial for achieving a polished mix.
FL Studio provides several FL Studio shortcuts to streamline this process, which makes it easier to focus on the creative aspects of mixing and refining.
For instance, selecting a mixer track can be quickly done by typing its number while the mixer has focus 一 allowing for fast navigation between tracks.
Additionally, using the selected mixer track shift (CTRL+Left/Right Arrow) moves the selected track’s focus without needing to drag and drop.
This FL Studio shortcut will give you a much smoother mixing process.
Linking channels (link selected channels) or effects to a selected mixer track is another area where shortcuts come into play to enhance efficiency and save time.
By pressing CTRL+L, channels linked can be quickly routed to the next available mixer track, which seriously helps with organization.
This is super useful when you’re adding new elements to a mix and need to assign them to their own space.
Mixing and Mastering: FL Studio Shortcuts
If you’re looking to finalize your tracks with a professional touch, FL Studio shortcuts are the key to working smoothly in the mixer.
It will ensure that your tracks sound cohesive and well-balanced.
-
Selected Mixer Track Shift for Efficient Mixing
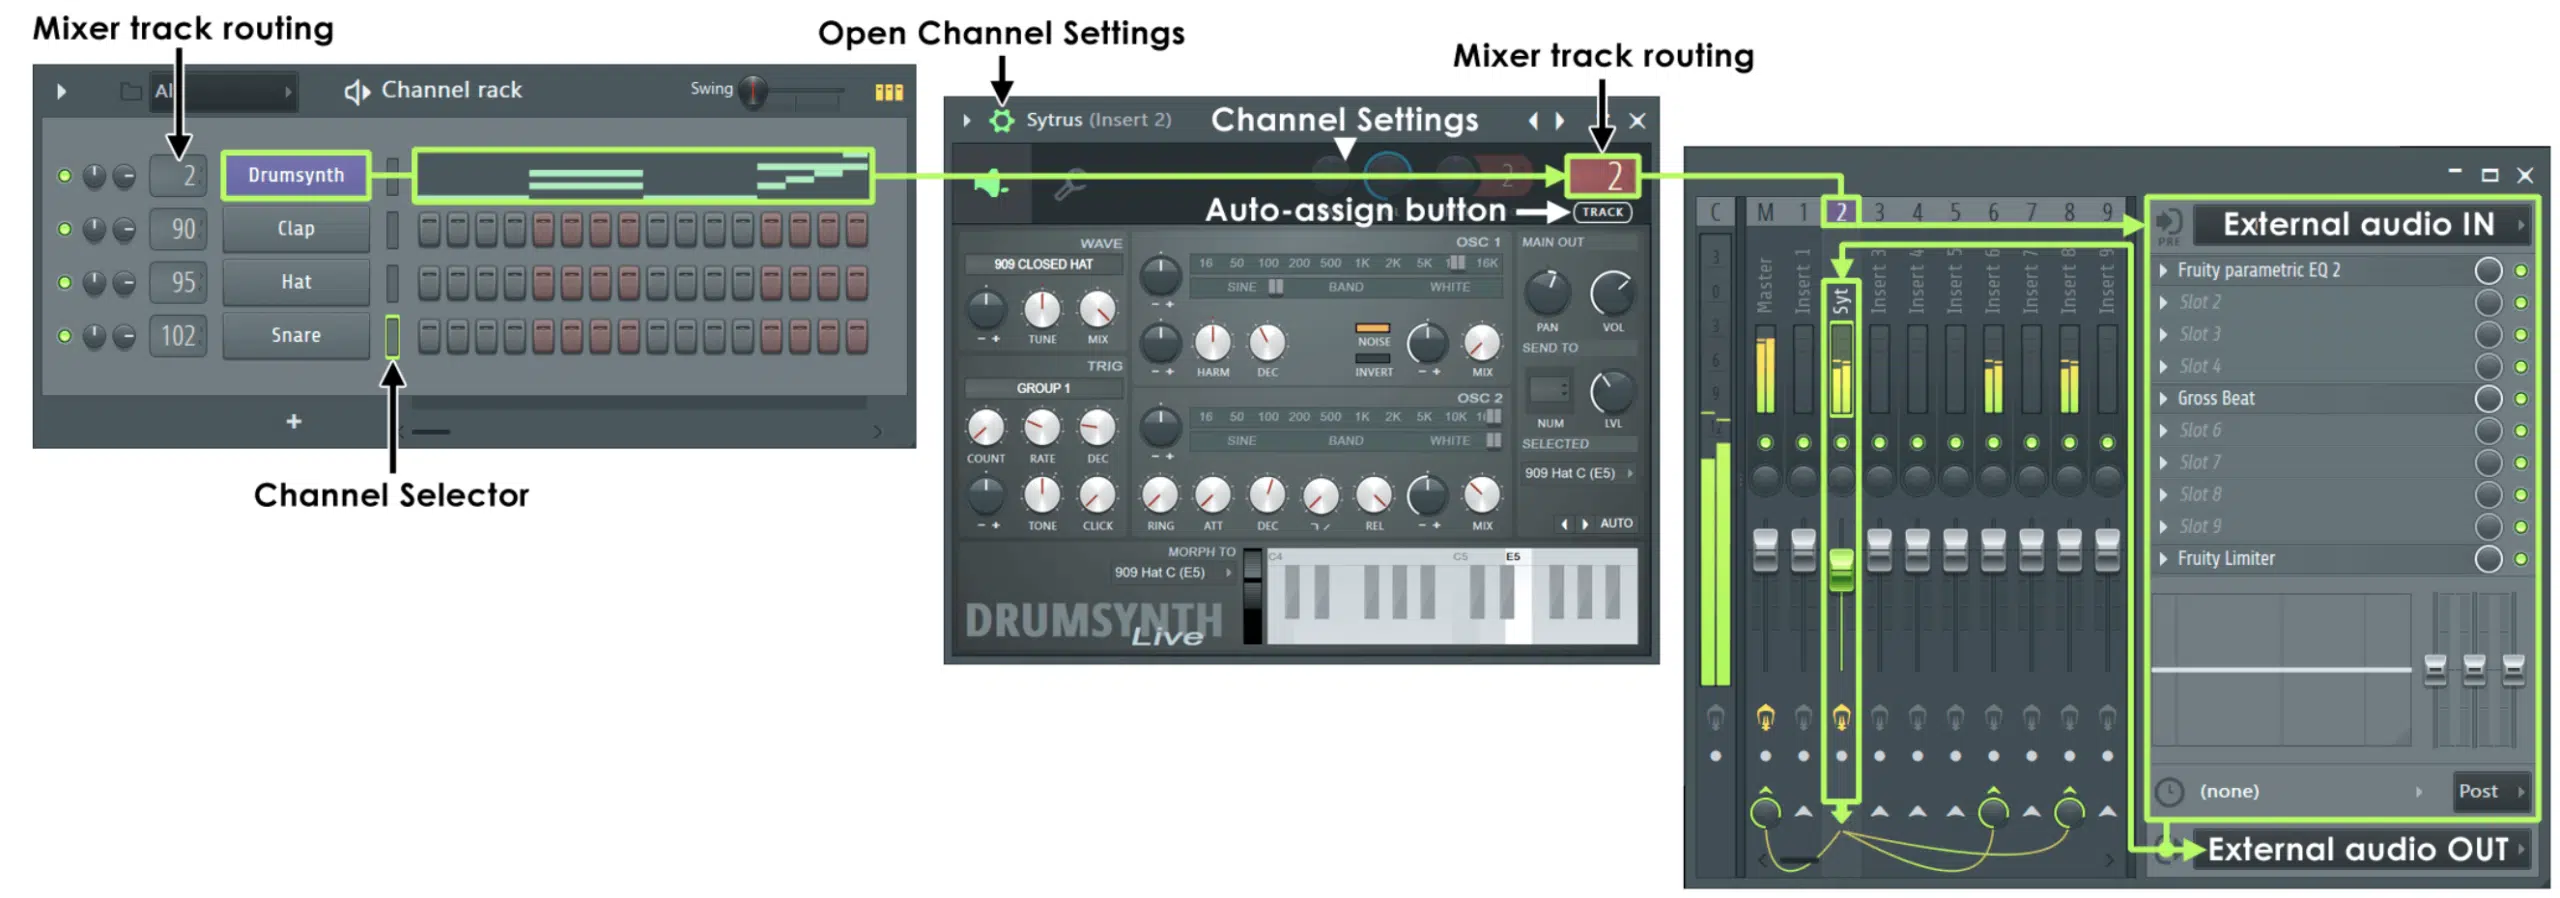
One invaluable FL Studio shortcut for mixing is using selected mixer track shift (CTRL+Left/Right Arrow) to move through the mixer tracks without missing a beat.
This allows you to:
- Adjust levels quickly
- Apply effects
- Tweak the pan on different tracks
All without having to go through the mixer with your mouse.
It’s about keeping your workflow streamlined so that your creative process remains uninterrupted by ridiculous technical slowdowns.
-
Utilizing Mixer Track and Selected Mixer Track for Mastering
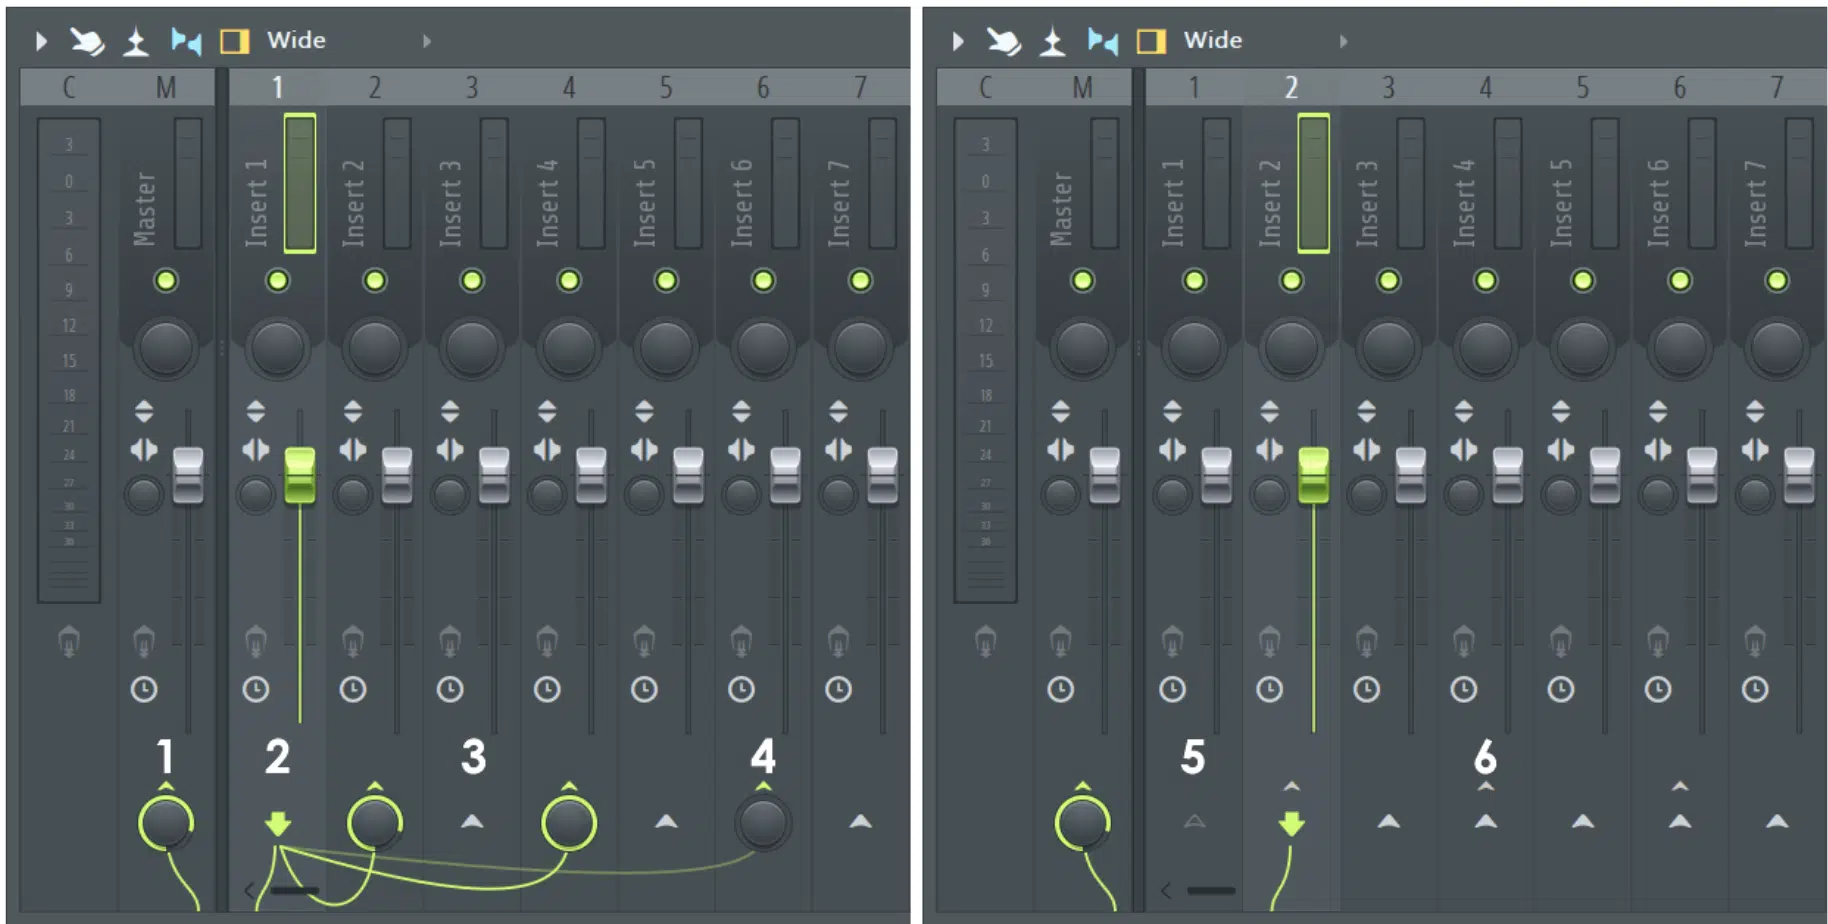
Mastering in FL Studio becomes significantly more manageable with when you can geet the mixer shortcuts down.
For instance, toggling between the mixer tracks using the number keys or CTRL+Shift+Arrow keys provides quick access to different channels.
This way you can easily apply mastering effects like:
When you’re in the final stages of production and need to make precise adjustments across multiple tracks, this really comes in handy.
Additionally, linking channels to specific mixer tracks for mastering purposes is much easier with shortcuts such as CTRL+L.
NOTE: This instantly routes the selected channel group to the next available mixer track, which is a fundamental step in organizing your session for the mastering process.
Bottom line, by using these shortcuts, you ensure that every element of your mix is given the attention it needs.
-
Step Sequencer Magic
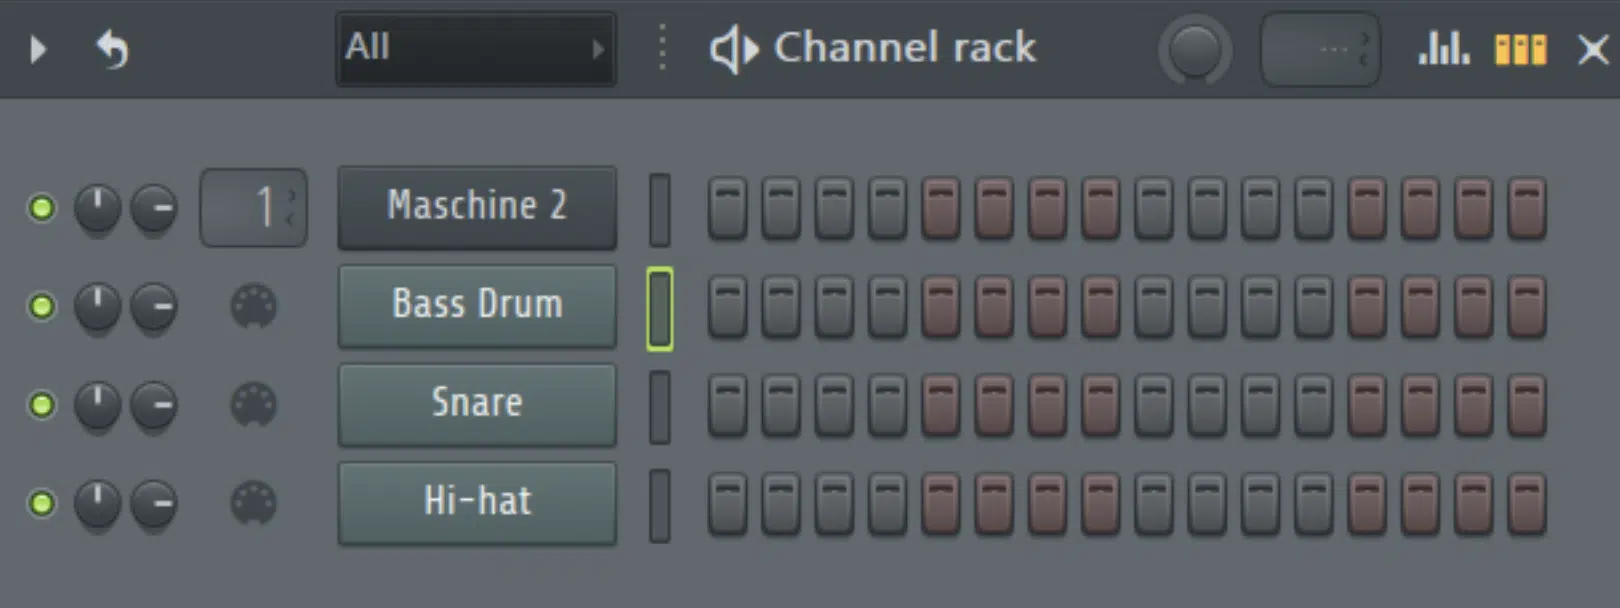
The Step Sequencer is another area where FL Studio really shines.
It offers a straightforward (yet super powerful) approach to drum programming and your next empty pattern creation.
By using shortcuts like SHIFT+Click to clone steps or CTRL+Click to mute steps, you can endlessly experiment with rhythms and grooves.
These actions enable quick iterations and variations 一 allowing you to find the perfect beat without disrupting your creative flow.
Moreover, with the CTRL+Shift+Drag shortcut, you can select multiple steps and move them simultaneously.
It’s perfect for rearranging patterns or creating dynamic shifts in your rhythm sections.
This level of control and flexibility in the Step Sequencer underscores how FL Studio’s shortcuts not only speed up your workflow but also enhance your creative expression.
-
Song Mode Shortcuts for Smooth Arrangement
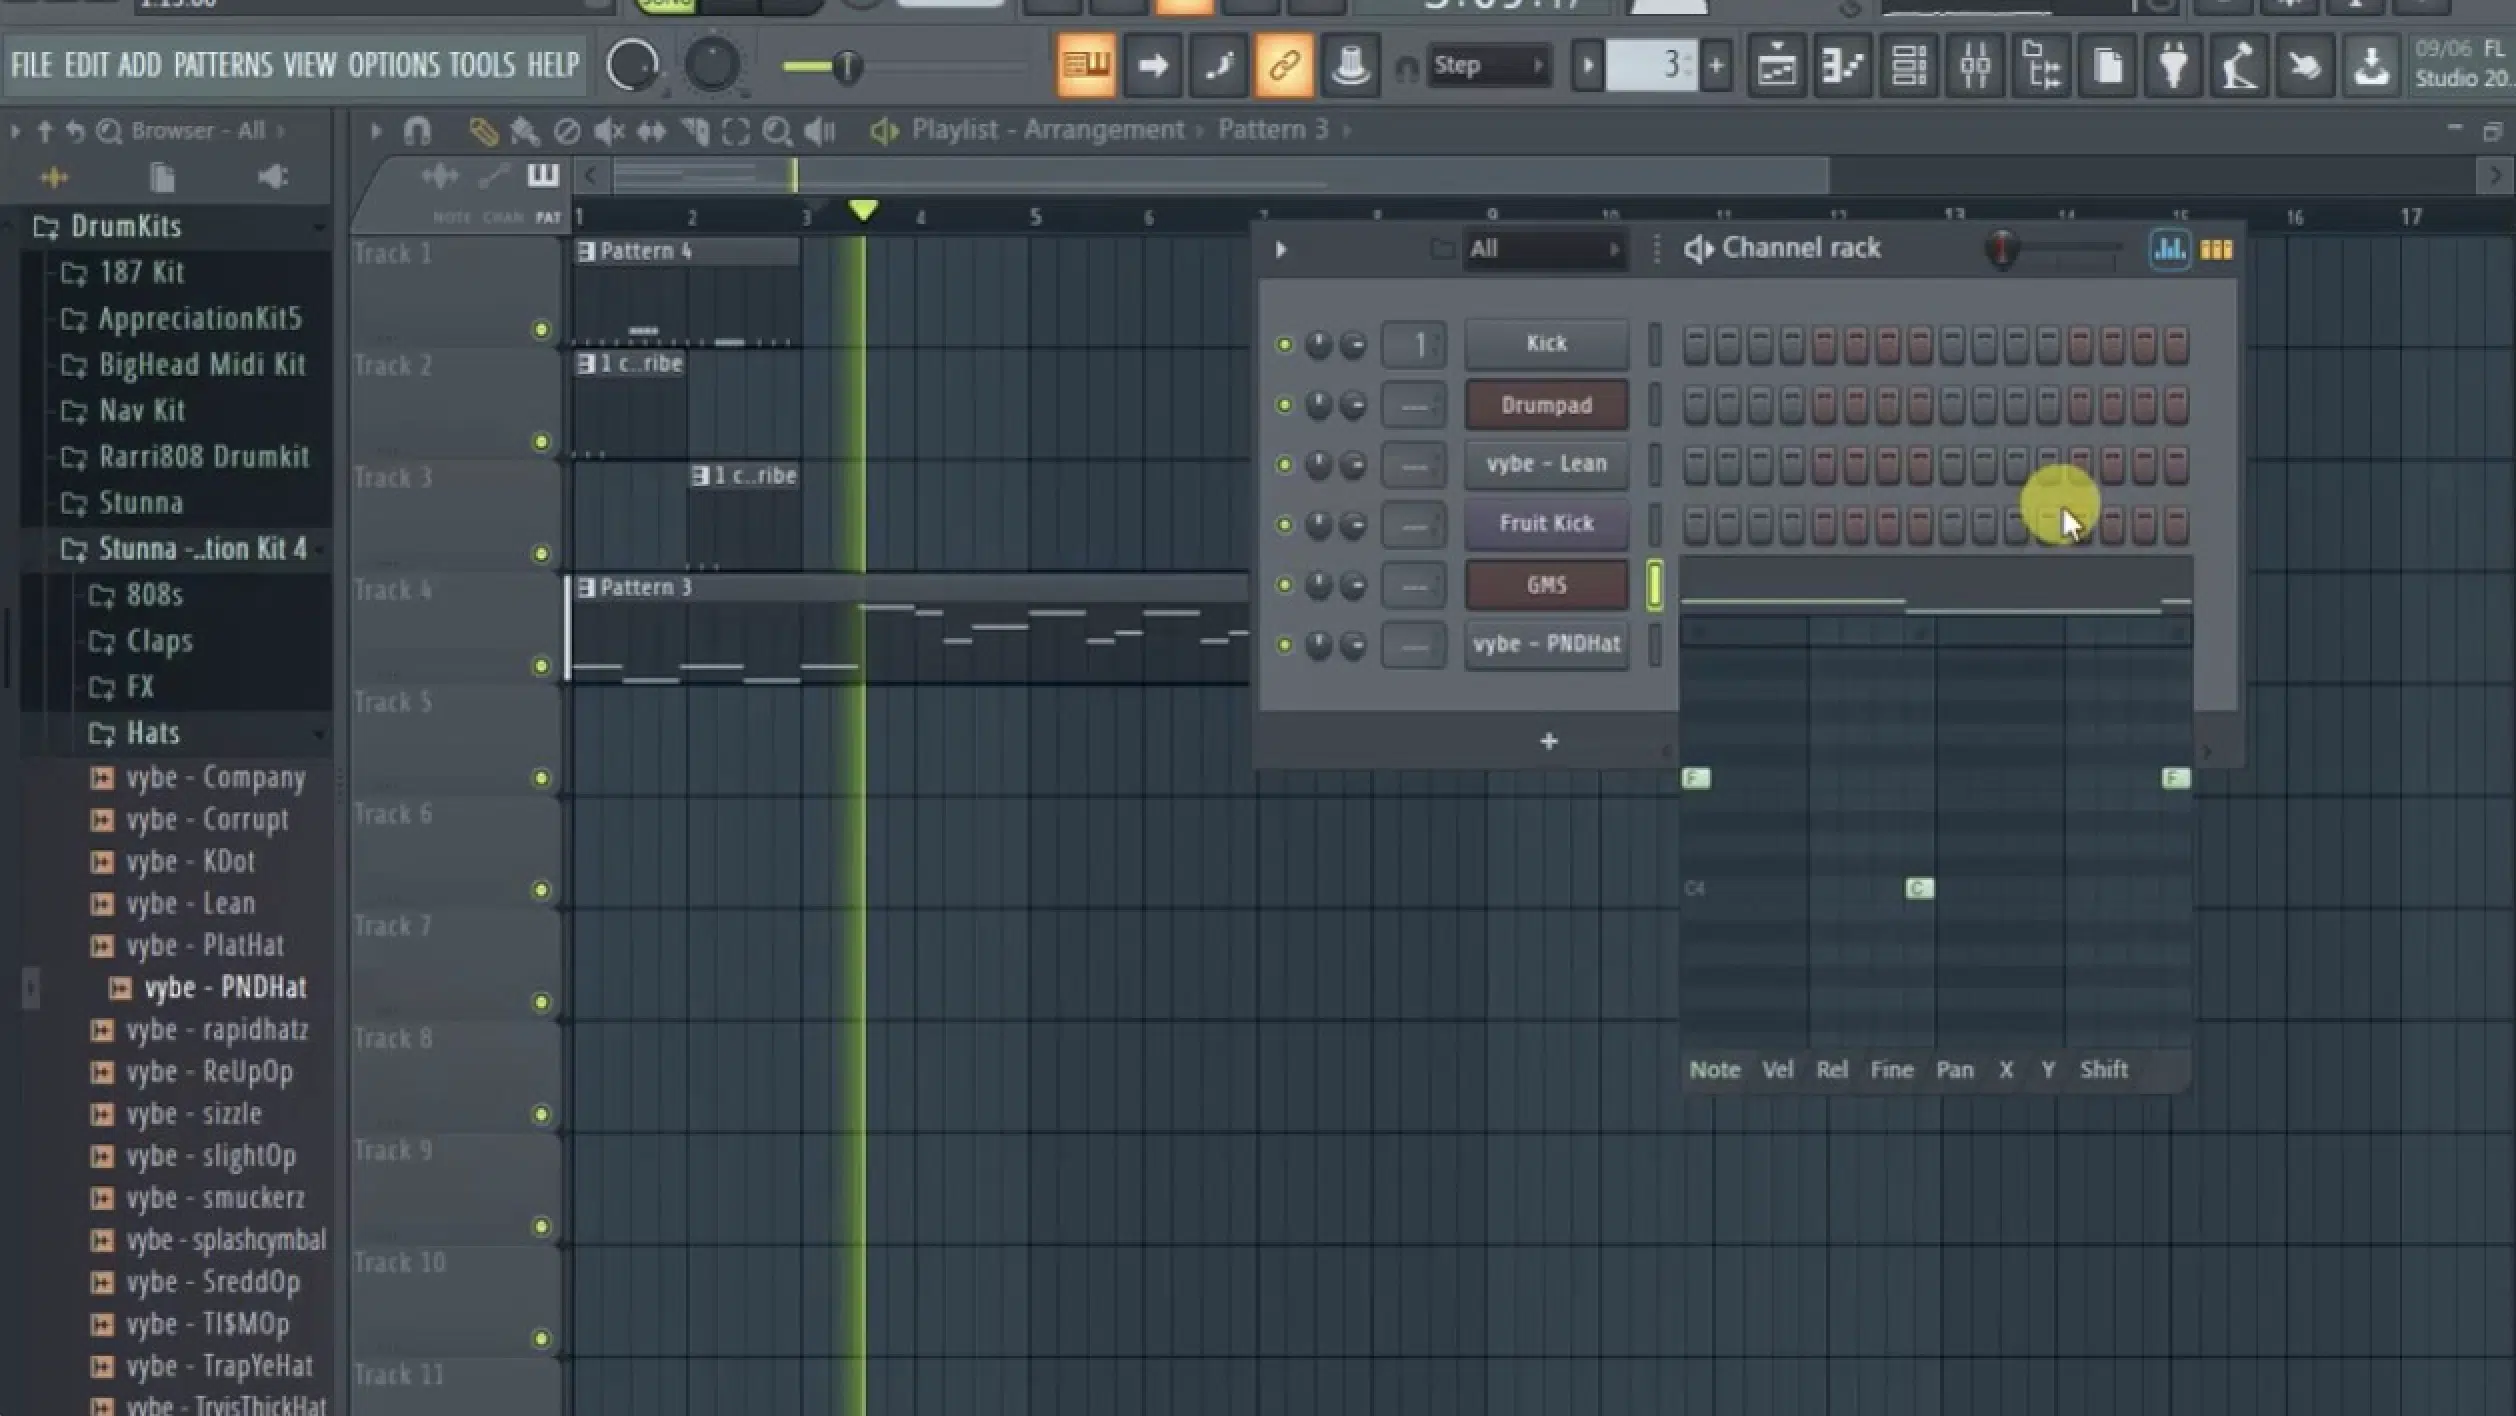
Arranging your tracks in Song Mode with the help of FL Studio shortcuts will make manipulating and moving around the playlist easier than ever.
For instance, pressing the Enter key toggles between:
- Song Mode
- Pattern Mode
Meaning, you’ll be able to place patterns into the playlist wherever you want with ease.
This simplicity in switching modes encourages a more fluid arrangement process and lets you build up your song’s structure like a boss.
The Ultimate Shortcuts for MIDI and Audio Editing
MIDI and audio editing is something you’re going to have to master as a music producer or sound designer. FL Studio shortcuts will help you do so much, much quicker.
-
MIDI Notes and MIDI Settings for Creatives
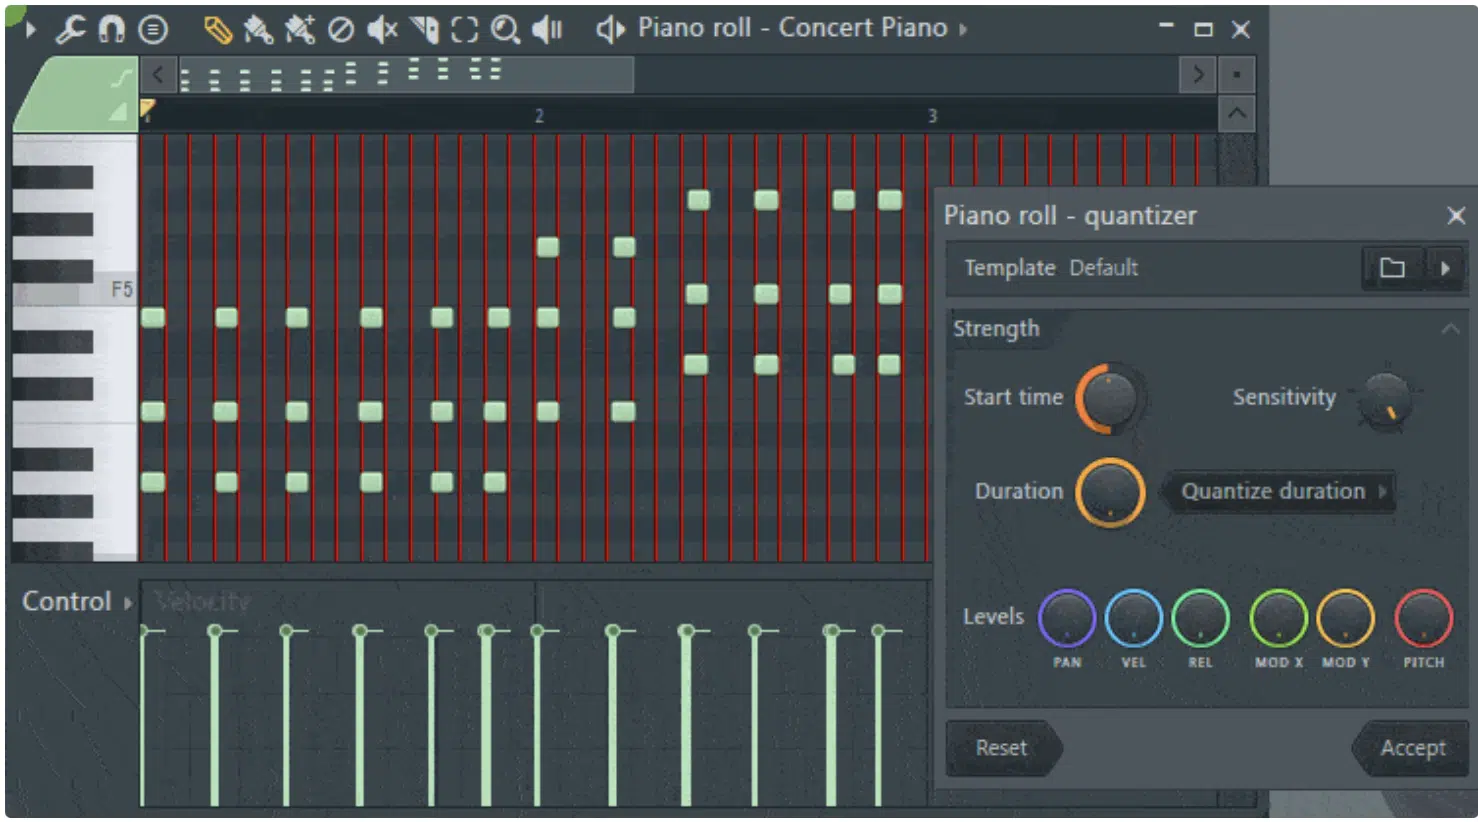
When working with MIDI in FL Studio, shortcuts like ALT+Q to quantize and ALT+S to strum notes revolutionize the editing process.
Quantizing aligns MIDI notes to the grid based on timing, ensuring that your performances are tight and in time.
The strum function, on the other hand, applies a human touch to chords and melodies.
It staggers the start times and velocities of notes to mimic the natural play of an instrument (which is another way you’ll tracks will sound more professional).
The CTRL+Up/Down Arrow keys for moving notes by an octave and CTRL+ALT+Right/Left Arrow for nudging notes slightly off-grid are also invaluable for detailed MIDI editing.
These shortcuts allow for nuanced expression and can help breathe life into your MIDI performances.
It will help them feel more organic and less quantized.
-
Pro Tip: Audio Clip Channels (Quick Edits and Arrangements)
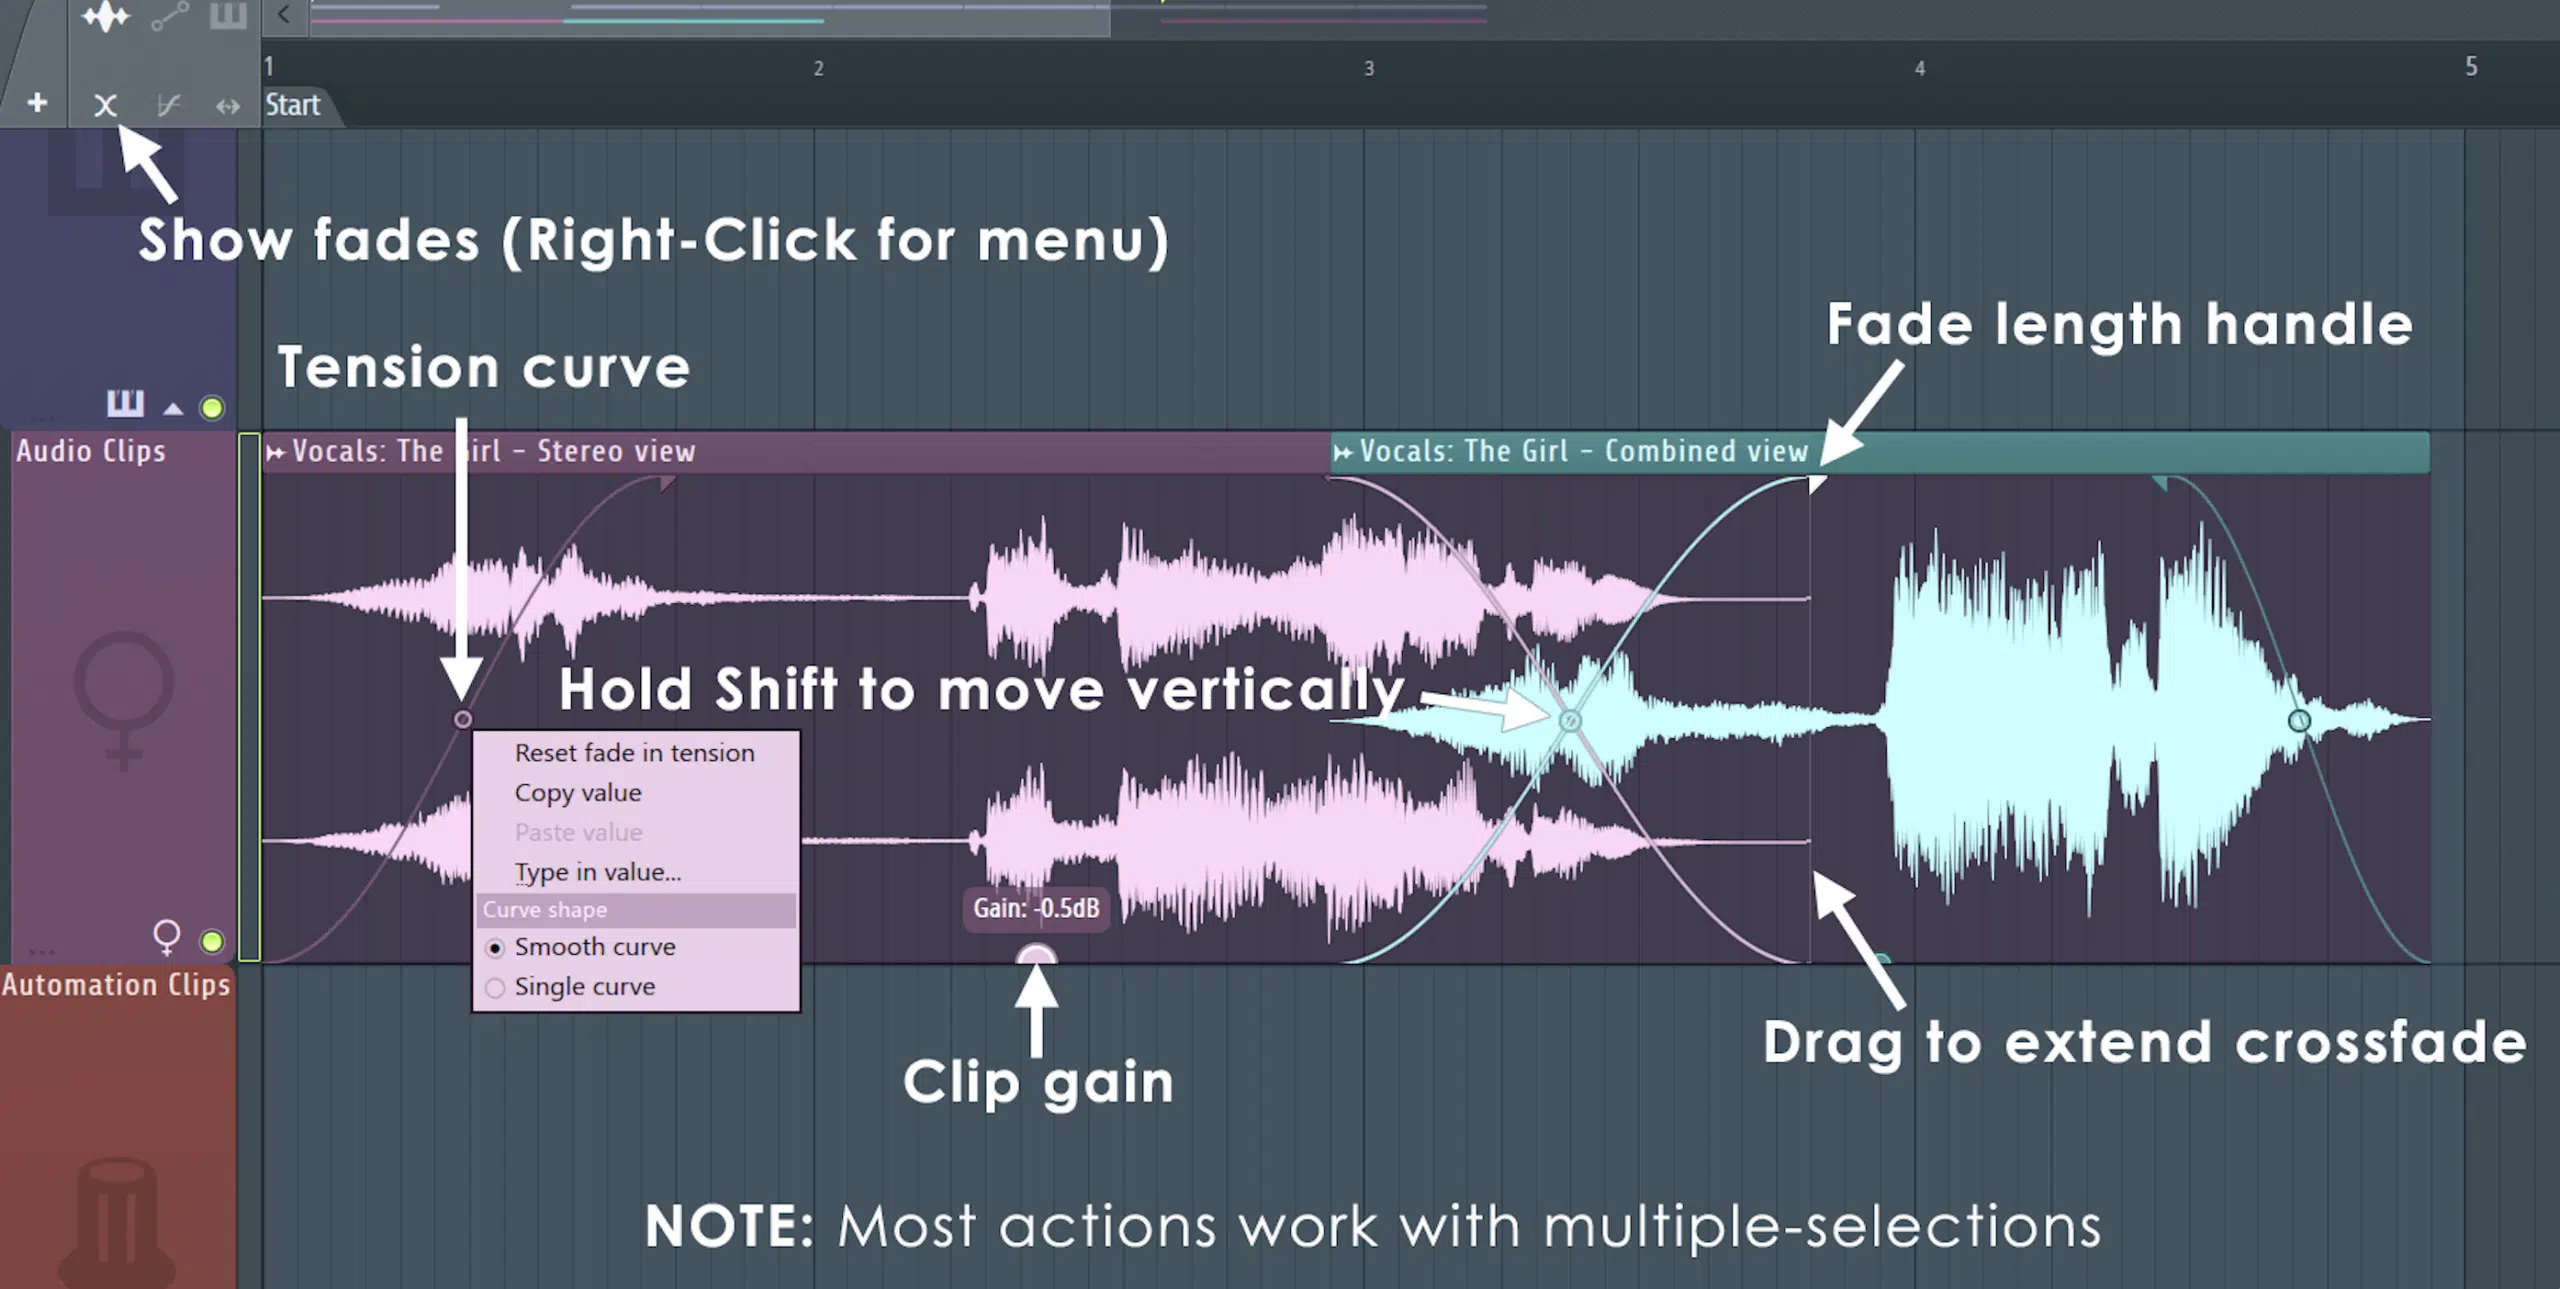
Editing audio clips in FL Studio is made efficient with shortcuts designed for quick slicing, moving, and timing adjustments.
Using the S key to access the Slice tool instantly and then clicking on an audio clip allows you to cut sections precisely where needed.
This is key for creating clean edits or rearranging parts of a recording.
-
Bonus: Additional FL Studio Keyboard Shortcuts
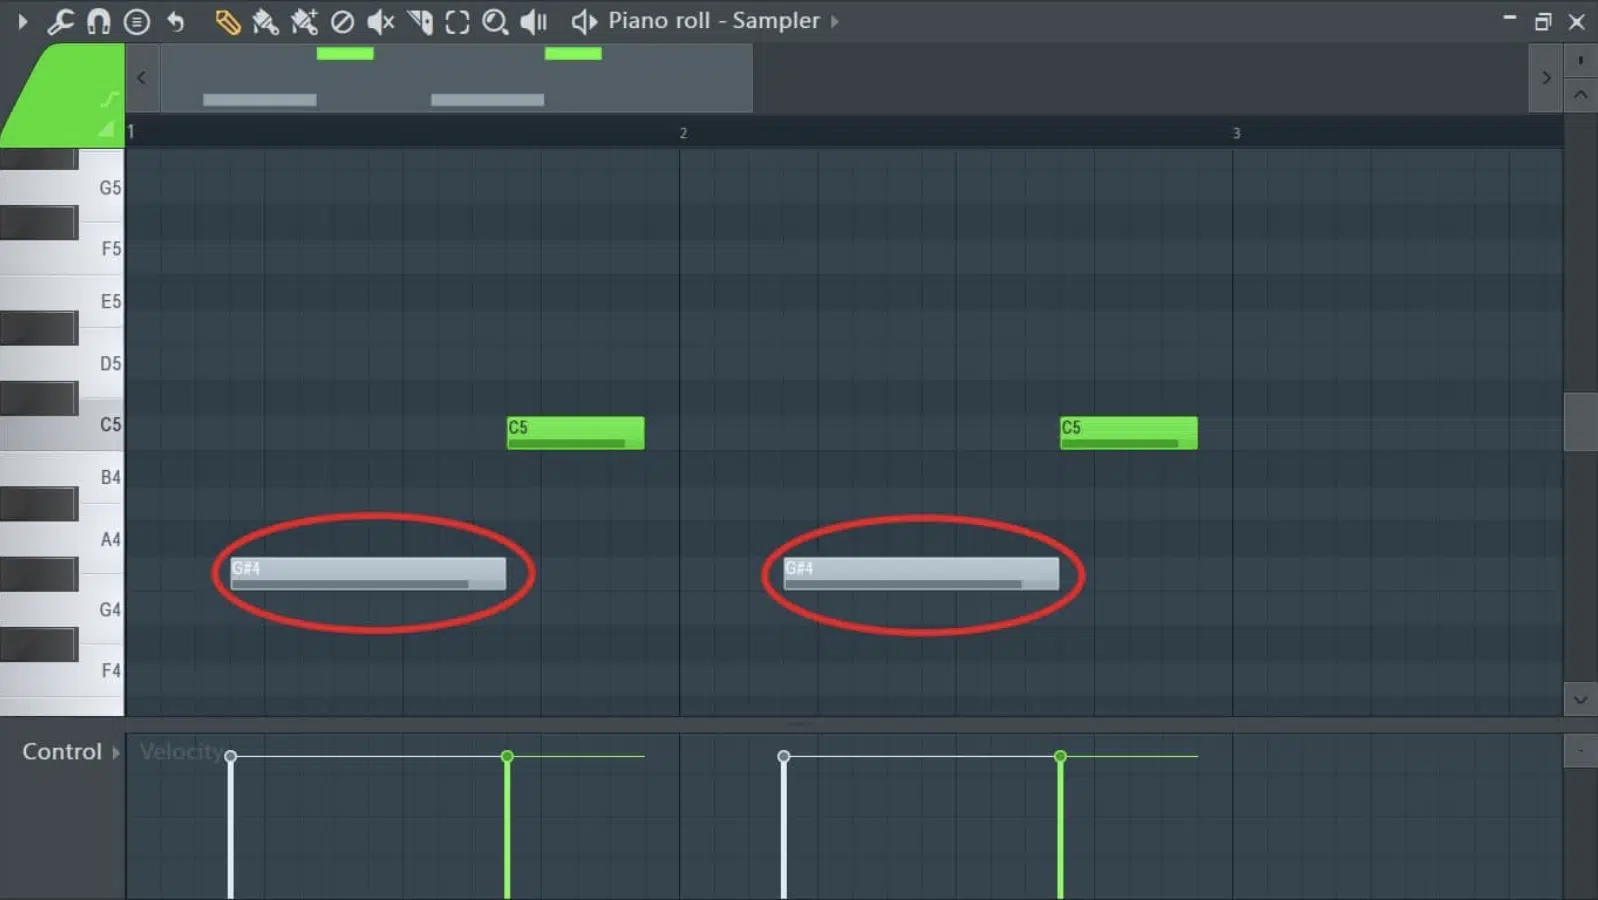
Some FL Studio keyboard shortcuts provide unique functions that are essential for enhancing your music production workflow, but you don’t hear that much.
For example, the playback tool is not commonly mentioned, but it’s incredibly useful for quickly auditioning parts of your track.
By combining CTRL+ALT with your mouse click, you can initiate playback with the playback tool from any point in your beat.
This way, you’ll have a solid way to hear edits or changes instantly.
Also, the mute tool plays a key role in the mixing process and allows you to quickly silence tracks with a single click.
This FL Studio shortcut is great when trying to isolate sounds or troubleshoot elements within your mix.
For producers who like to work with complex projects, the ability to select multiple mixer tracks simultaneously can also be a game-changer.
This feature, accessible by holding CTRL while clicking on mixer tracks, makes the process of applying effects or adjustments to several tracks at once much easier.
When it comes to organization and efficiency, the channel rack provides many shortcuts like group-selected channels (e.g., g group selected shift in the channel rack).
This allows you to move, delete, or adjust settings for a group of channels simultaneously.
Additionally, the link-selected channels beginning with a specific mixer track (often used with the arrange windows pattern selector) allows for a more intuitive/organized flow.
FL Studio Shortcuts: Final Thoughts
FL Studio shortcuts will not only speed up your workflow but also unlock new creative possibilities and enhance your overall production process.
By using the FL Studio shortcuts we covered today, you’ll be mastering the interface, editing, and arranging your tracks like a seasoned pro in no time.
To further boost your skills, don’t miss out on this invaluable Free Project Files pack.
This pack contains 3 professional project files that give you an exclusive behind-the-scenes look at how professional-quality tracks are made in FL Studio.
These files are polished, perfectly processed, and represent the best way to see firsthand the power of effective workflow and techniques in FL Studio.
They’re the perfect resource to elevate your own music and understand what this versatile DAW is truly capable of.
With the right FL Studio shortcuts at your fingertips and professional project files as your guide, there’s no limit to the music you can create.
Until next time…


Leave a Reply
You must belogged in to post a comment.