AU plugins are indispensable in the music production world.
They can completely transform your tracks and enhance your skills, as they offer endless effects and instruments.
AU plugins enhance the capabilities of digital audio workstations (DAW), like Logic Pro, so you can achieve unparalleled sound quality and versatility.
From creating unique soundscapes with synthesizers to adding depth with dynamic processing, knowing how to install AU plugins properly is key.
It ensures seamless integration with your DAW and empowers you to fully utilize (and master) your music production software.
In today’s article, we’ll be breaking down:
- The essence of audio units ✓
- The difference between AU plugins and VST plugins ✓
- Preparing your system for AU plugin installation ✓
- A step-by-step guide on installing AU plugins in Logic Pro ✓
- How to organize your AU plugin library for efficiency ✓
- Techniques for adding and inserting AU plugins into your projects ✓
- Troubleshooting common AU plugin installation issues ✓
- Advanced tips for optimizing AU plugin usage ✓
- Much more ✓
By the end of this article, you’ll know everything about how to install AU plugins on Logic Pro so you can get back to making legendary tracks.
So, if you’re ready to crush the installation and optimization process AU plugins, let’s dive right in…
Table of Contents
What are AU Plugins?

AU (audio units) plugins act as modular components that can be loaded into compatible host applications, such as Logic Pro, to extend their functionality.
This includes everything from dope reverb effects to complex synthesizers, giving you different sonic textures and tools to work with.
The AU format is famous for its deep integration with the macOS system 一 providing a high degree of stability and efficiency.
This is especially true when dealing with complex projects or large numbers of instruments audio FX.
This integration is key for ensuring that audio units work within your digital audio workstation (DAW) properly.
It enhances the creative workflow and minimizing technical distractions.
AU plugins are renowned for their versatility and the quality of audio processing they offer.
Whether it’s shaping your sound with dynamic processing plugins (like compressors and EQs) or exploring new soundscapes with virtual instruments and MIDI effects plugins, the AU format can get the job done.
AU plugins allows for:
- Real-time audio processing
- Complex routing capabilities
- Support for advanced features like MIDI input & automation
So, if you’re looking to produce professional, show-stopping audio projects on your Macintosh HD, AU plugins are invaluable.
Plus, their capability to juggle multiple instances flawlessly makes them super beneficial if you’re working on beats with high track counts and extensive plugin use.
It will help you lay down your vision without any compromises.
AU Plugins vs VST Plugins: Breaking it Down

When you’re in the music production world there are two main types of plugins (aside from AAX, naturally):
- AU (Audio Units) plugins
- VST (Virtual Studio Technology) plugins
Both AU and VST plugins are essential tools that offer legendary effects and instruments, however they are completely different in terms of compatibility/integration.
You’re most likely going to incorporate both VST plug ins and AU plugins so understanding how each work is very important.
AU plugins are specifically designed for macOS systems 一 providing a solid and integrated experience with Logic Pro.
VST plugins are more universally compatible across different operating systems, as the VST version is more widely recognized.
Choosing between AU and VST plugins often comes down to your specific DAW and operating system.
Logic Pro users benefit significantly from audio units due to their optimized performance and seamless integration within the macOS environment.
VST plug ins on the other hand, though widely supported, may require additional steps to install.
Plus, a VST version/VST plugin may not perform as efficiently as their AU counterparts within Logic Pro, of course.
-
Pro Tip
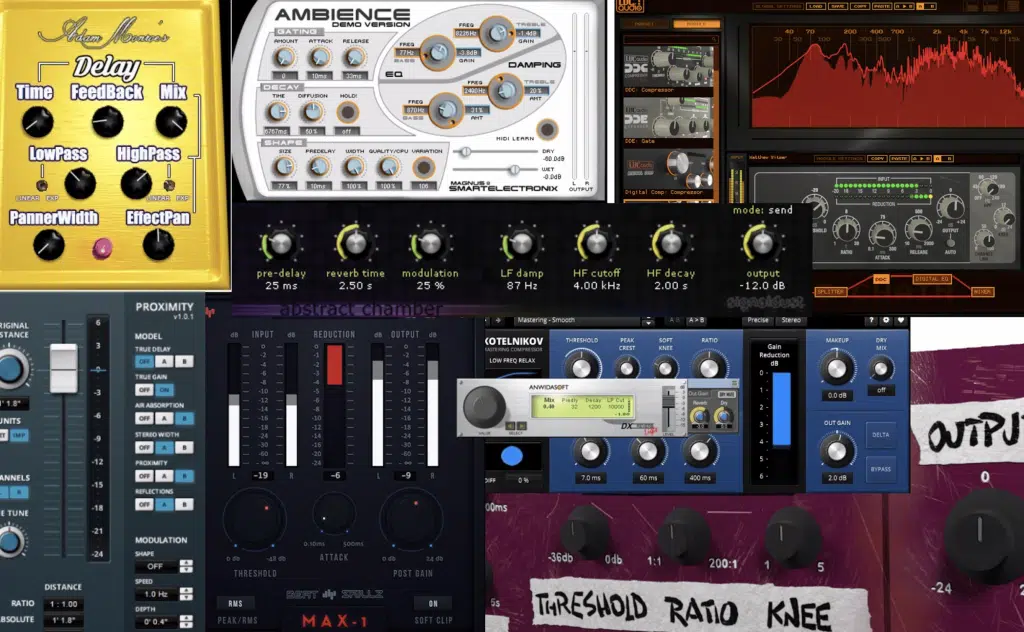
The strategic decision to install VST plugins alongside audio units on Mac systems can significantly enhance your production toolkit.
When you mix audio units and VST versions it can provide a layer of flexibility and compatibility that is super useful when:
- Collaborating across various DAWs
- Sharing projects with others
By using both VST and AU plugins, it will give you a more versatile workflow and ensure you always have the right tools at your disposal.
Yes, regardless of how demanding your project is or the technical environment.
Preparing Your System for Installation
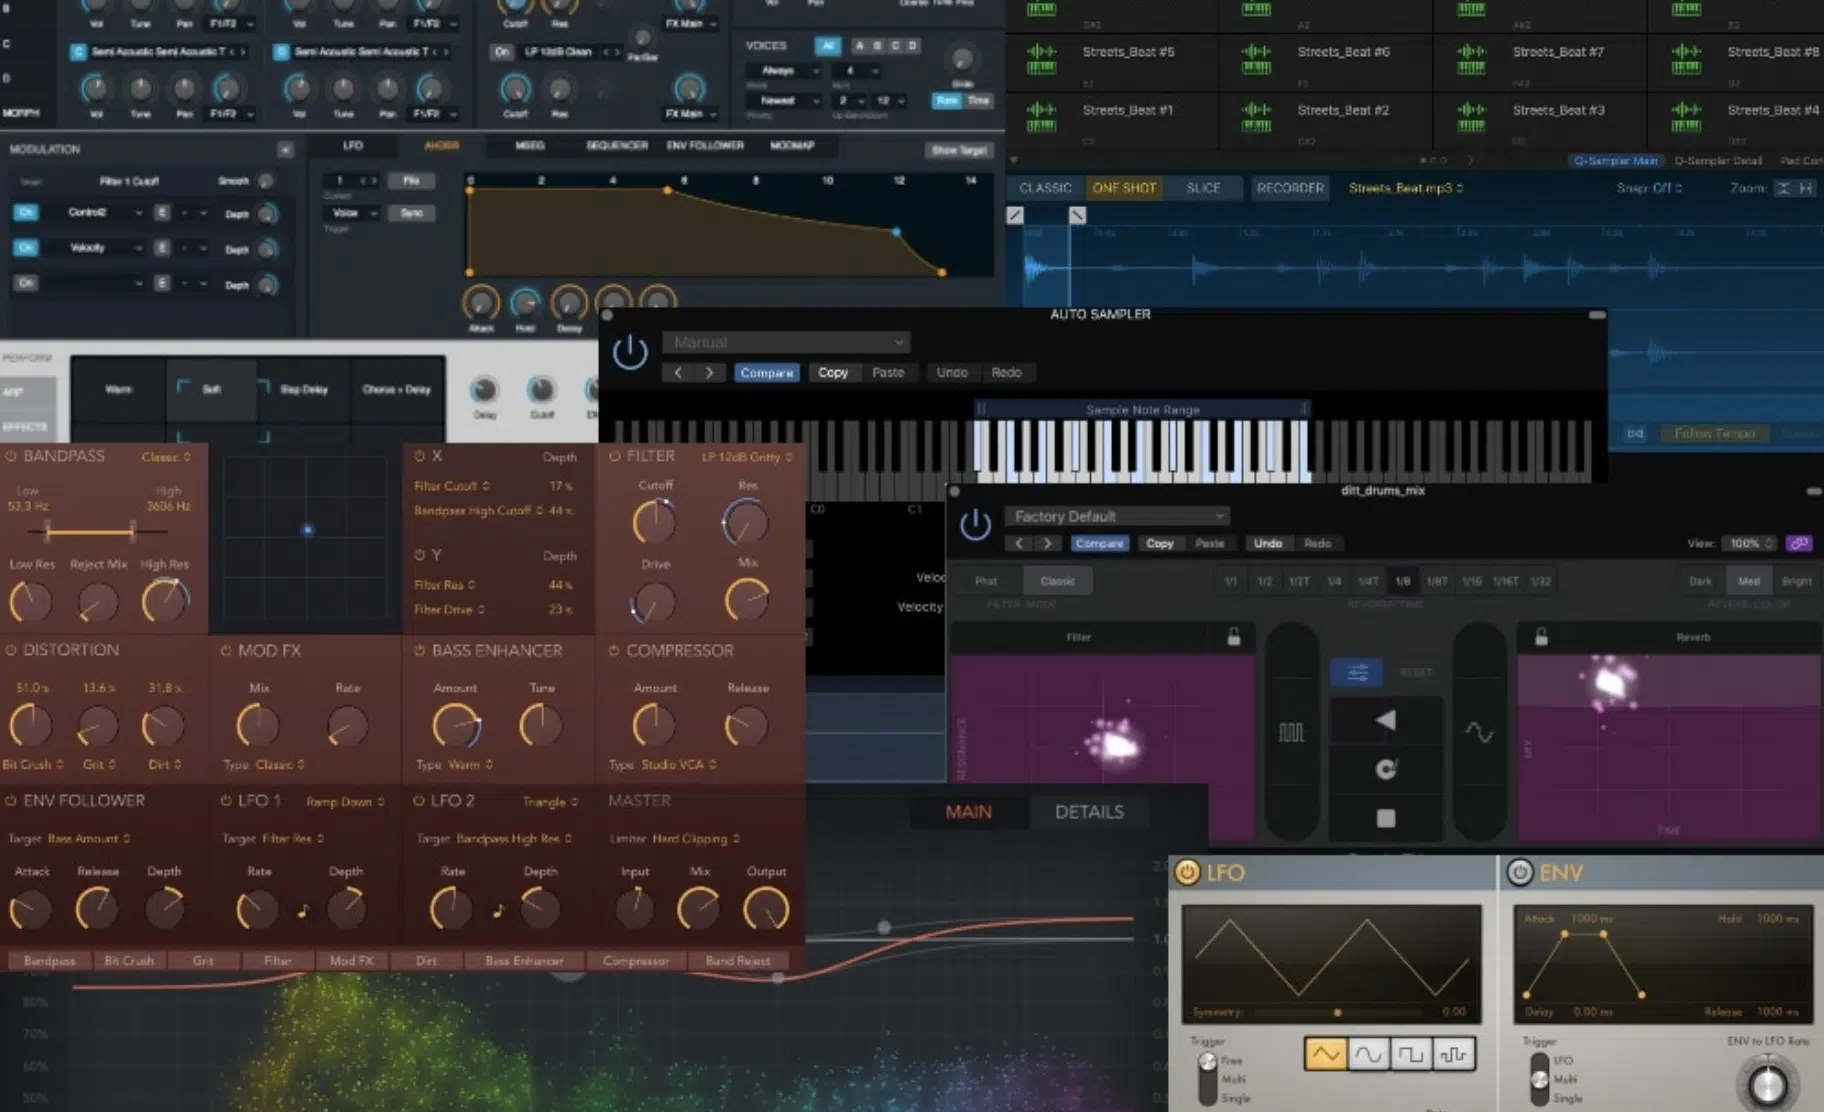
Before installing AU plugins, it’s super important to ensure your system meets the necessary requirements.
This includes checking compatibility with your operating system and Logic Pro version, as well as ensuring sufficient storage space and system resources.
For users of Apple Silicon Macs, verifying that the audio units are compatible with the ARM architecture is essential to avoid potential performance issues.
Preparing your system also involves performing a backup of your current studio setup.
This precautionary step ensures that you can restore your system to its previous state in case the installation of new plugins causes any conflicts or issues.
Taking the time to prepare your system can save you from potential headaches down the line, so trust me this simple step is certainly worth it.
How to Install AU Plugins in Logic Pro: Step-by-Step
Now let’s break, step-by-step, how to install AU plug ins in Logic Pro easily and efficiently, so you never have to worry about it again.
- 1. Finding and Downloading AU Plugins

Begin by selecting AU plugins that meet your specific production process needs and make sure they are compatible with your version of Logic Pro and macOS.
Once selected, download the AU plugin files (typically in .component format) to your computer or laptop.
Side note, if you’re looking for the best computers and laptops for music production, we’ve got you covered.
- 2. Installation Process
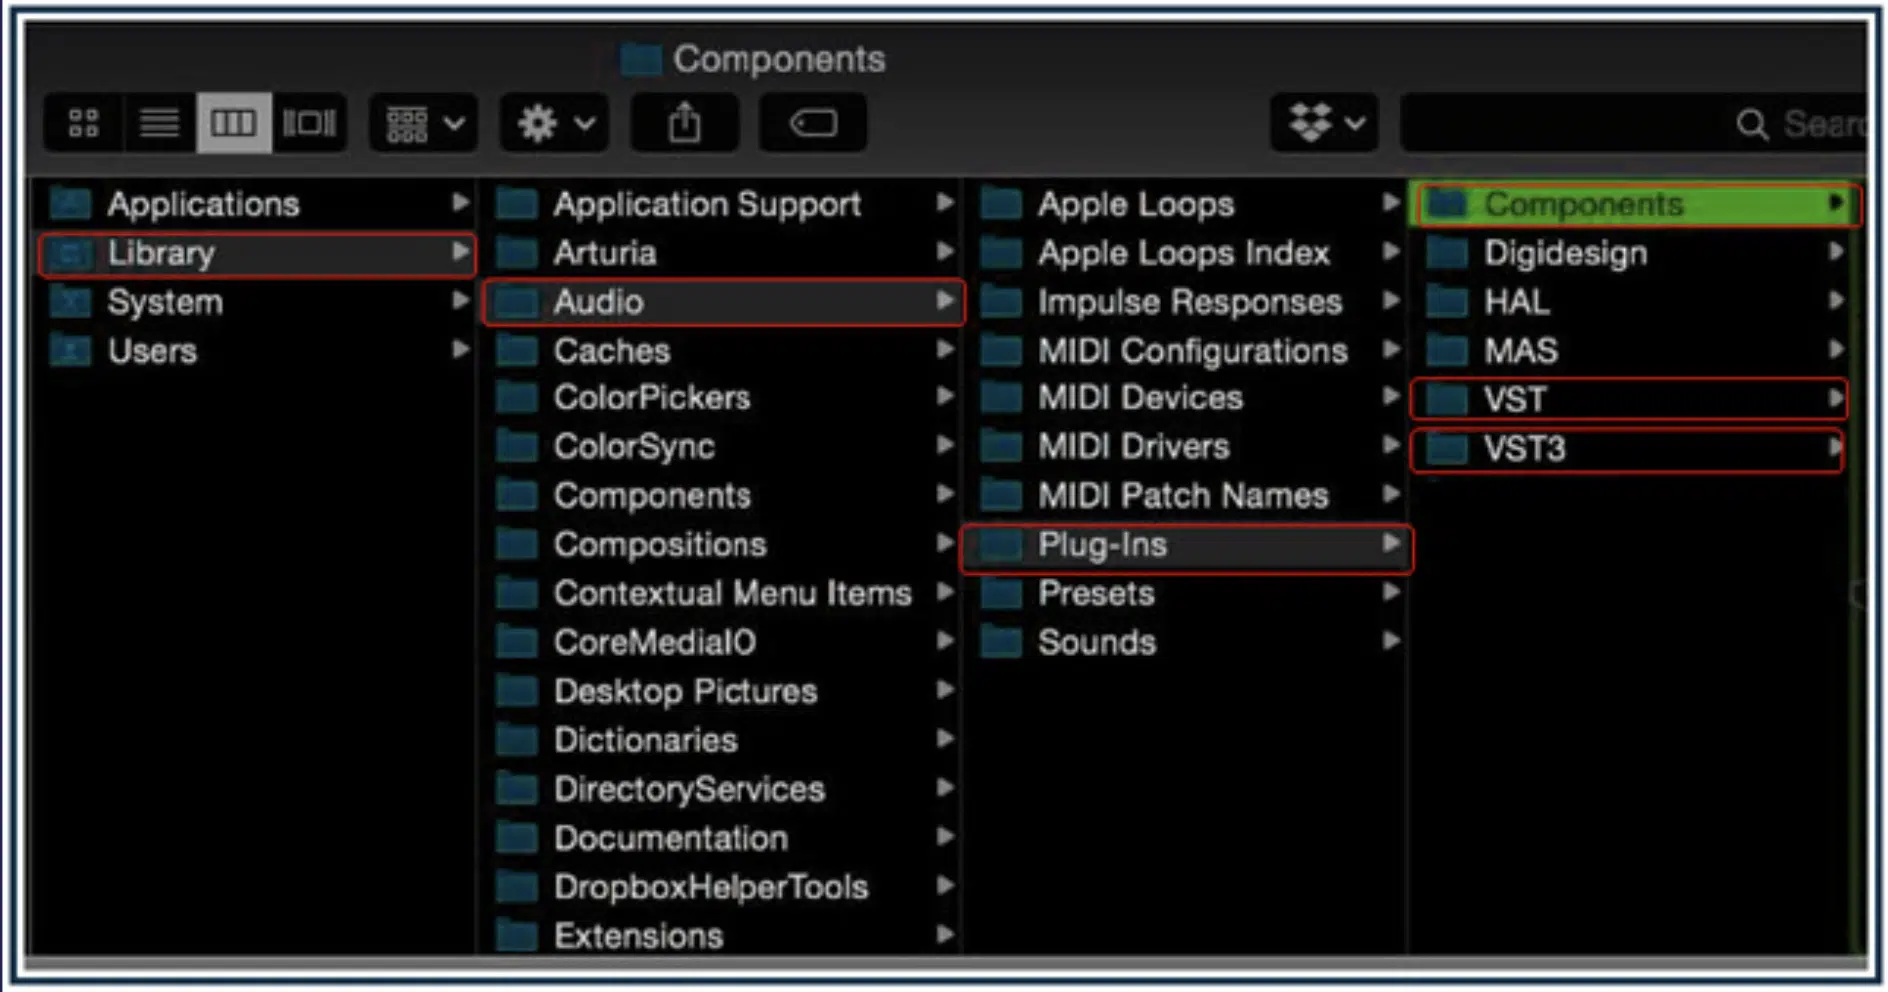
After downloading your AU plugins, locate the downloaded files and copy them to the “Library/Audio/Plug-Ins/Components” folder on your Macintosh HD.
This specific folder is where Logic Pro scans for audio units upon startup.
NOTE: For users navigating the macOS file system, accessing the Macintosh HD might require you to open the Finder, select “Go” from the top menu, and then “Go to Folder” before typing in the path to the Components folder.
- 3. Verifying Installed Plugins in Logic Pro
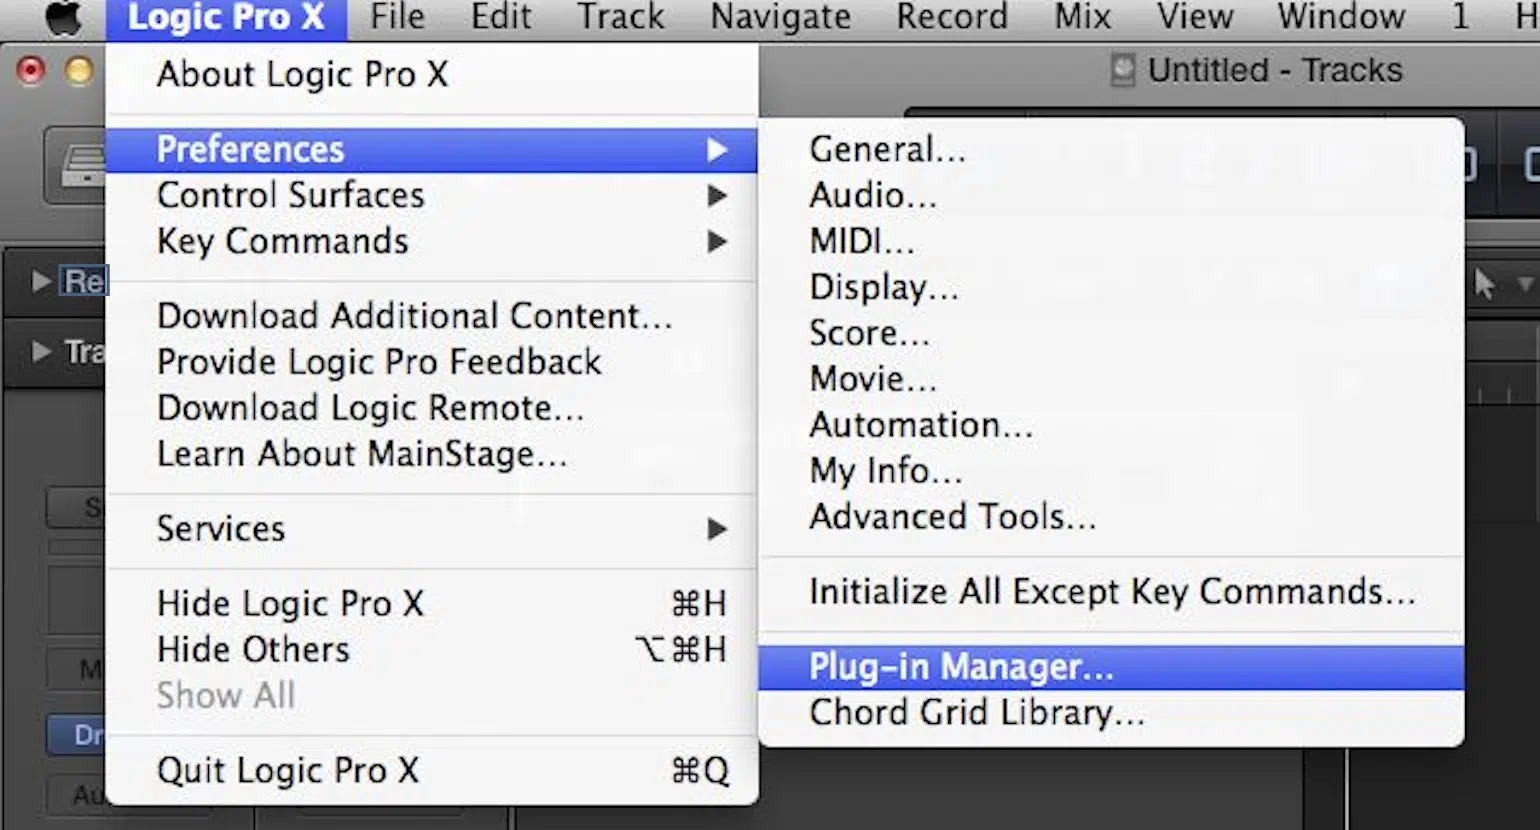
Once your plugins are copied to the appropriate folder, open Logic Pro.
Navigate to the Plugin Manager under Logic Pro’s preferences to verify that your new AU plugins are listed and activated.
If you encounter any issues, restarting Logic Pro or rescanning the plugin directory can often resolve plugin recognition problems.
Remember, when you install plugins, it just comes down to a few simple steps that will feel like second nature in no time.
Managing Your Installed Plugins in Logic Pro
Having your AU plug ins installed is just the beginning. To truly integrate them into your music production workflow, organization and management is key; let’s break it down.
-
Organizing Your Plugin Library
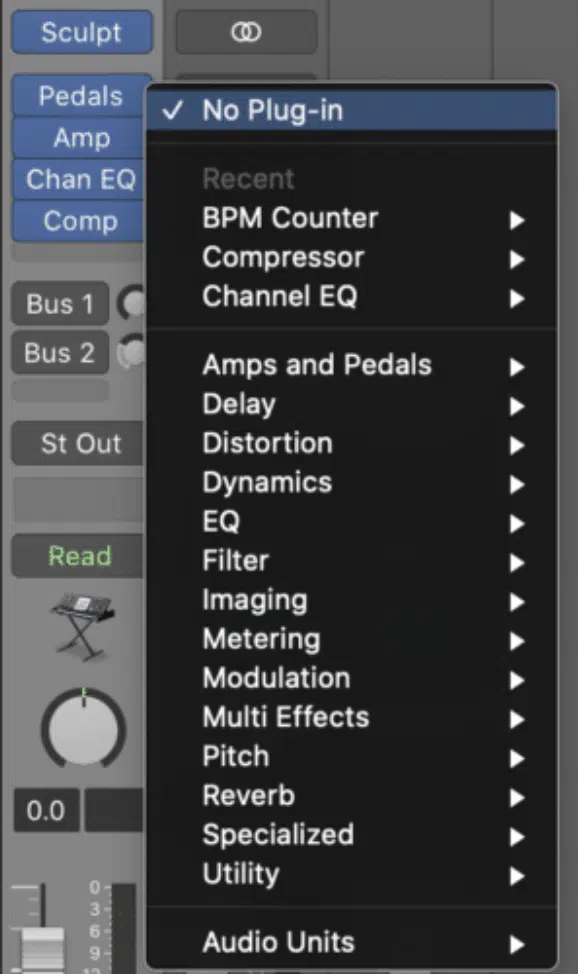
After you’ve installed AU plugins, it’s all about organization and efficiency to get that streamlined workflow you’ll need to produce professional tracks.
For Logic Pro users, this means categorizing and sorting your AU plugins in a way that makes sense to you.
One effective strategy is to utilize Logic Pro’s built-in Plugin Manager, which allows for custom organization of plugins manually into folders based on:
- Type
- Manufacturer
- Personal preference
- Etc.
This can reduce the pointless time spent searching for the right effect or instrument, which encourages a more intuitive and fluid creative process.
For instance, you could create separate folders for dynamics processors, EQs, reverbs, and AU instruments, or even organize your plugins by their usage in specific projects or genres.
Also, Logic Pro’s Smart Folders feature can automate part of this organization.
By setting criteria based on plug in attributes, such as the plugin format (AU, VST, etc.) or the type of effect (modulation, distortion/saturation, spatial, etc.), Smart Folders can dynamically organize your library.
This makes it much easier to manipulate and select the appropriate audio units for your track.
NOTE: Make sure to keep your plug in library up to date by regularly reviewing and pruning unused or outdated plugins.
-
How to Add Plugins/Insert Plugins into Your Projects
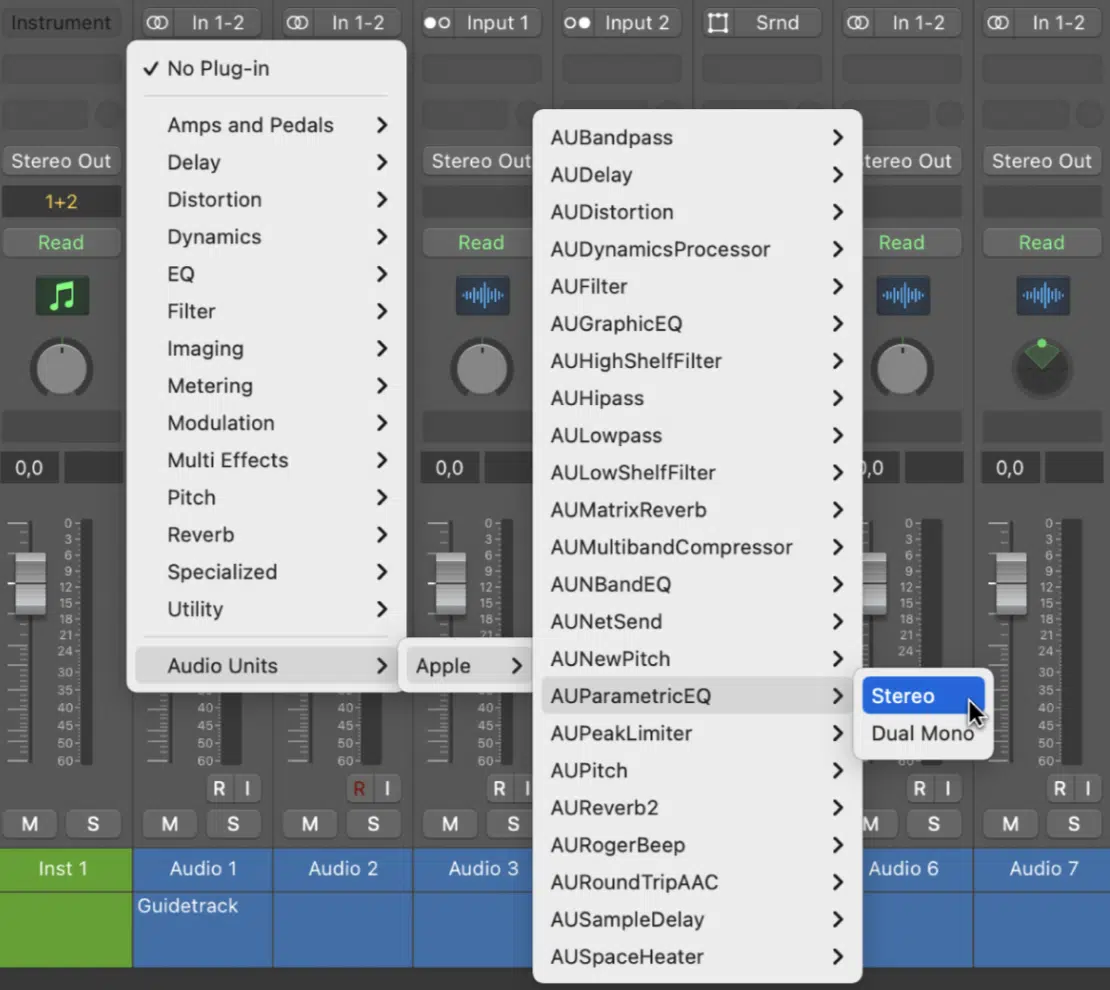
Incorporating AU plug ins into your Logic Pro projects is a straightforward process that unlocks endless creative possibilities.
To add plugins to a track, you simply click on an empty insert slot in the channel strip, which brings up a dropdown menu breaking down your organized plug in library.
From here, finding the desired audio unit is easy as pie, thanks to the categorization you’ve already set up.
For example, inserting an AU synthesizer into a MIDI track to create lush pads or powerful leads.
Or, adding an audio unit compressor to a vocal track for dynamic control, can be done with just a few clicks.
The flexibility of Logic Pro’s signal routing options opens up some exciting sonic exploration possibilities when messing around with AU plugins.
Meaning, when you insert plugins (multiple) in series, it lets you create custom signal chains for innovative sound design or mixing purposes.
For instance, chaining a distortion plugin into an EQ and then into a reverb can create a textured, atmospheric guitar sound that stands out in a mix.
Additionally, Logic Pro allows for parallel processing by using auxiliary sends to route the signal to an effects bus, where you can blend the original signal with processed signals from various audio units for depth and dimension.
Note

For optimal MIDI output and audio processing performance, always customize the install location of your plugins during the installer phase to a default directory known for low CPU usage.
This practice ensures your system efficiently handles various plugin formats 一 keeping your music production process smooth and responsive.
How to Install AU Plugins: Final Thoughts
When you learn how to install AU plugins properly, it will help streamline your music production workflow and enhance the quality of your sound design.
Plus, save you time troubleshooting compatibility issues and free up your creative energy for what really matters: making show-stopping music.
Speaking of legendary AU plugins, if you haven’t downloaded Zen Master yet, you are seriously missing out.
Compatible with all DAWs and available for Windows and Mac in VST/VST3, AU, and AAX plugin formats, Zen Master is the TOP lo-fi plugin on the market today.
And the best part is… it’s free!
With Zen Master, you can take any sound and make it feel lo-fi, warm, and vintage in less than 3 seconds.
Say goodbye to boring mixes forever by leveraging its 5 new & unique effects 一 it’s the perfect combo of analog/digital modeled effects (for an otherworldly hybrid effect).
Now that you know how to install AU plugins properly, go and make beats that not only take over, but end up on the top of the charts.
Until next time…


Leave a Reply
You must belogged in to post a comment.