Multiband compression is a compelling and powerful tool in the audio production landscape.
It can provide you with unmatched control over the various elements of your mix.
If you’ve found yourself frustrated by the limitations of standard compression, or if you’re looking to level up your tracks in an exciting way, multiband compression is the way to go.
In today’s article, we’ll be journeying into the heart of this remarkable tool 一 exploring its functions, capabilities, and applications.
Here’s a quick overview of what we’ll cover:
- Defining multiband compression ✓
- The power of frequency bands ✓
- Utilizing the flexibility of multiband compressors ✓
- Multiband compression vs. standard compression ✓
- Multiband compression vs. sidechain compression ✓
- All about frequency ranges & bands in multiband compression ✓
- Multiband compression applications, tips, tricks, professional methods ✓
Multiband compression can be a game-changer if you’re looking to gain meticulous control over your mix.
And after reading this article, you’ll never have to ask yourself how to use multiband compression again, as you’ll be an absolute pro!
So, let’s dive in…
Table of Contents
- What is Multiband Compression?
- The Power of Frequency Bands
- Utilizing the Flexibility of Multiband Compressors
- From Standard Compression to Multiband: A Sonic Revolution
- Inside the Multiband Compressor: Controls & Functions
- Diving Deeper: Crossover Frequencies & Other Advanced Compression Controls
- Exploring Multiband Dynamics: The Secret Sauce
- How to Use Multiband Compression Like a Pro
- Multiband Compression Vs. Sidechain Compression: Choosing the Right Tool
- Understanding Frequency Range in the Audio Spectrum
- How to Compress Specific Frequency Ranges
- Multiband Compression: Practical Examples
- How to Use Multiband Compression: Final Thoughts
What is Multiband Compression?
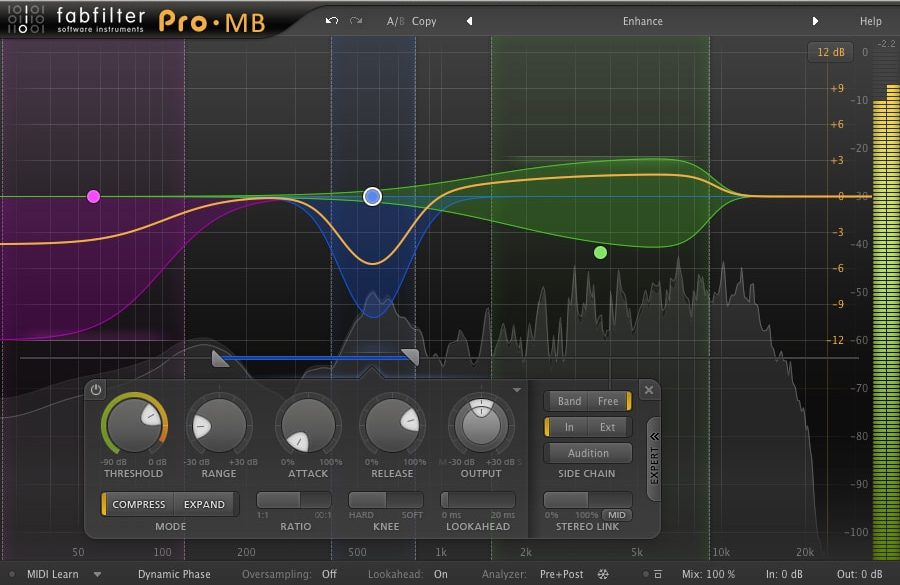
When you hear the term multiband compression, think of it as a super-charged, ultra-specific type of standard compression.
The magic of multiband compression lies in its ability to isolate and process multiple different frequency bands (each with different settings) within your audio signal independently.
For instance, if you’ve recorded an acoustic guitar and find the low frequencies overpowering the mix, you can selectively compress that low-frequency range 一 leaving the mid and high frequencies unaffected.
This flexibility is what makes a multiband compressor an invaluable tool in your production arsenal.
While a normal compressor applies gain reduction to the entire frequency spectrum, a multiband compressor can target specific frequency ranges.
It’s like having a team of standard compressors working on different sections of your mix, all under your command.
Imagine working on a lead vocal with a multiband compressor.
You notice the sibilance in the high-frequency band is too harsh, while the low frequencies need more presence.
With multiband compression, you can tame the sibilance and boost the lows simultaneously, resulting in a balanced, professional-sounding vocal.
And luckily, by the end of this read, you’ll be able to use multiband compression properly without a second thought.
The Power of Frequency Bands
The magic behind multiband compression is in its ability to work with separate frequency bands.
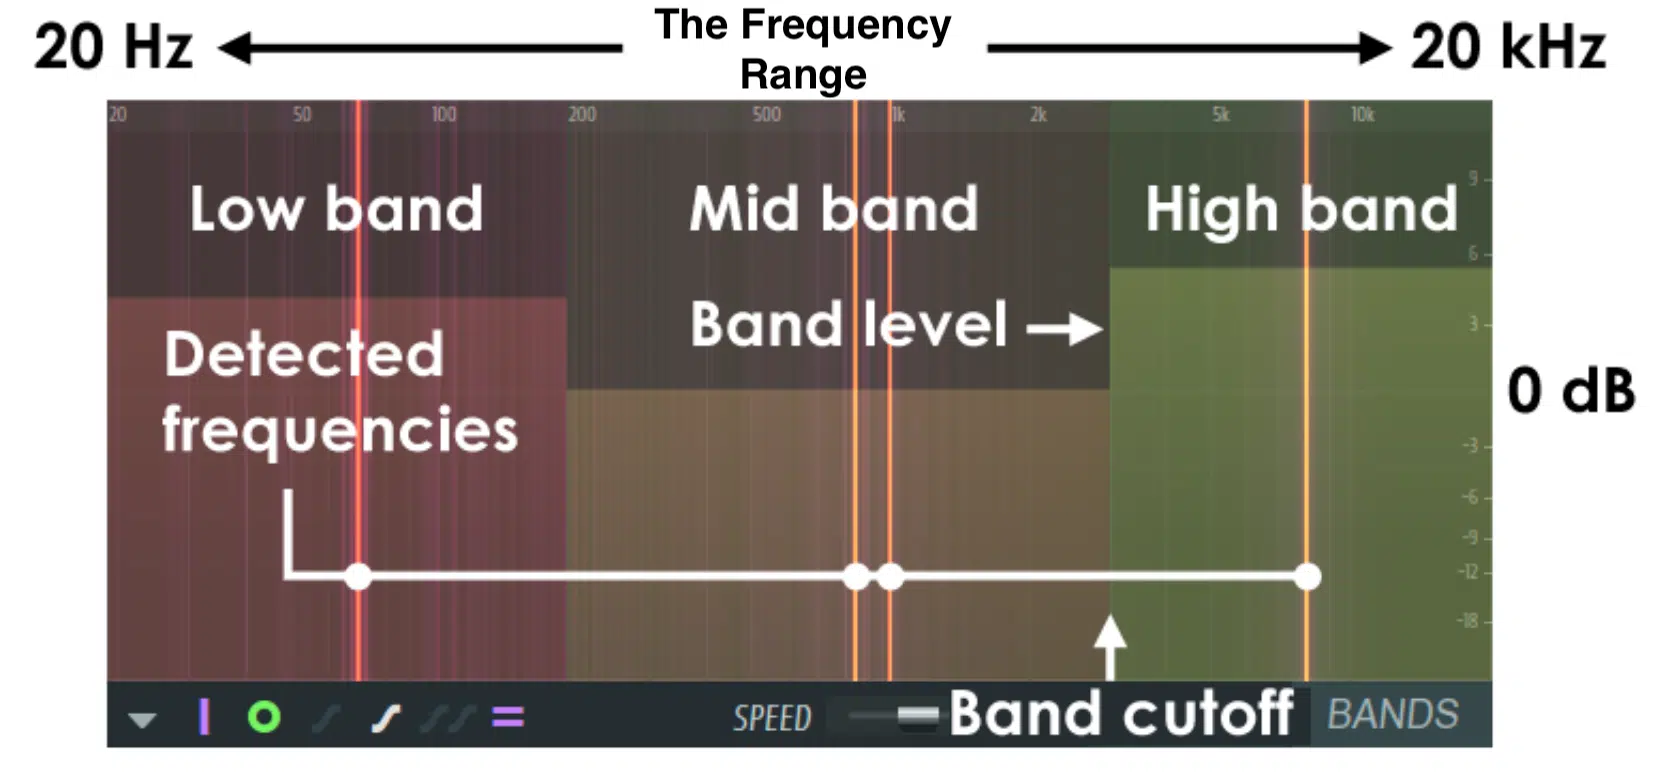
Each band operates as a standalone compressor, applying gain reduction to its designated frequency range.
This offers an invaluable level of control when shaping your mix.
Understanding frequency bands is key when using multiband compression.
In the audio signal, these bands typically fall into these three categories:
- Low (below 500 Hz)
- Mid (500 Hz – 2 kHz)
- High (above 2 kHz)
Each band corresponds to a specific area in the frequency spectrum and carries unique sonic characteristics.
- The low-band 一 Where you’ll find the weight and power of your kick drum.
- The mid band 一 The home of vocals, snare drums, and guitars.
- The high-frequency band 一 Includes cymbals, hi-hats, and the sparkle of an acoustic guitar.
Understanding all the bands allows you to manipulate them independently using multiband compression, thus creating a balanced and cohesive mix.
Picture this: you’re mixing an EDM track, and you want the kick drum to cut through without overwhelming the bassline in the same frequency range…
Using multiband compression, you can compress the kick and bass independently, which preserves their individuality while ensuring they work together to create a powerful, driving low end.
Utilizing the Flexibility of Multiband Compressors
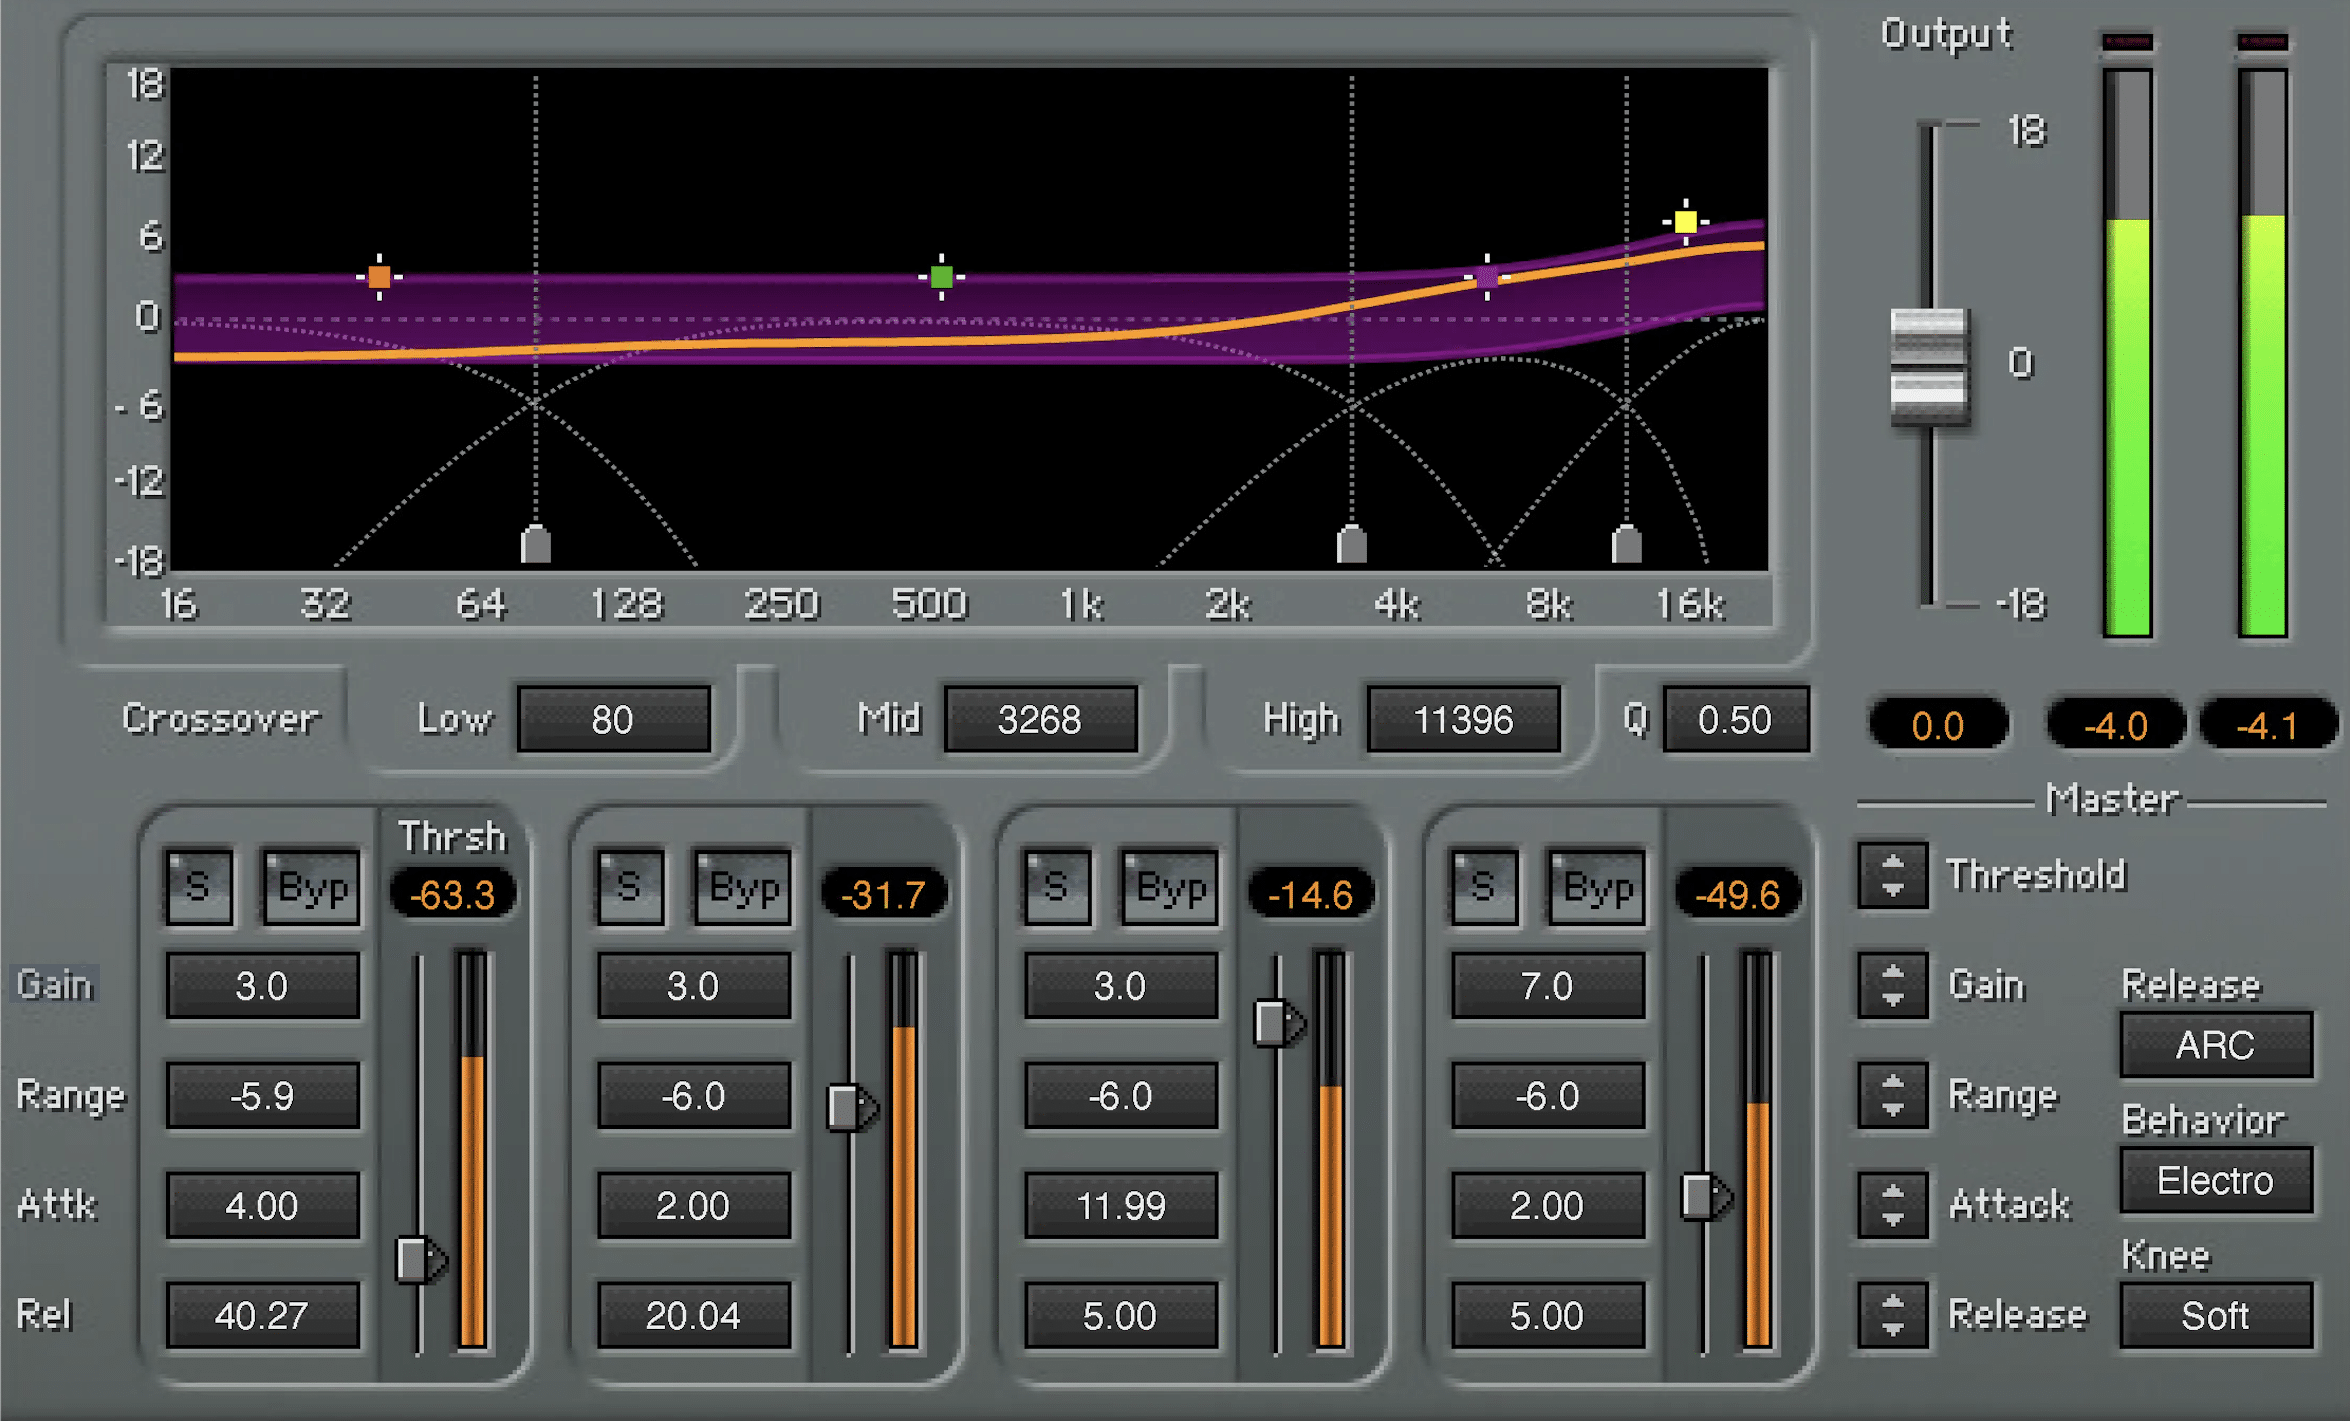
A multiband compressor’s power lies in its super adaptability.
It has the ability to apply different compression settings to specific frequency ranges and gives you more control than a single-band compressor.
For example, if you’re working on a track where the bass is too loud and the vocals are getting lost in the mid-range frequency, you can set your multiband compressor to reduce the bass and boost the mids.
And the best part?…
These adjustments won’t affect the other frequency ranges!
Multiband compression also excels when dealing with dynamic range.
By selectively applying compression to the loud parts of certain frequency bands, you can preserve the overall dynamic range of the audio signal 一 with greater control and precision.
As well as ensure that no particular band becomes too dominant or too weak.
When used correctly, multiband compressor plugins can enhance the sound in ways that standard compressors simply cannot.
From Standard Compression to Multiband: A Sonic Revolution
Before the advent of multiband compression, we had normal compression (which is still widely used and relevant today).
However, the introduction of multiband compression has been a game-changer and offers an advanced level of control over your mixes.
The main difference between standard compression and multiband compression is how they handle the audio signal.
- Standard compression 一 Applies the same compression settings across the entire frequency spectrum.
- Multiband compression 一 Allows you to apply different settings to different frequency bands.
Both have their specific purposes and scenarios in which they shine.
So, let’s break it down.
Multiband vs Standard Compression: When To Use Them

Let’s take the example of an acoustic guitar track to start.
The low-end might be boomy and overwhelming, while the high-end could be a tad bright.
If you used a standard compressor to tame the boomy low-end, it might end up making the high-end too dull.
This is where multiband compression steps in.
With a multiband compressor, you can compress the low frequencies of the acoustic guitar without affecting the brightness of the higher frequencies 一 resulting in a balanced and pleasing guitar sound.
This is just one instance where multiband compression outshines standard compression.
Similarly, while dealing with a vocal track, a singer might have certain syllables that are harsh or piercing only in a specific frequency range.
Rather than pulling down the entire level with a normal compressor, a multiband compressor can smoothly handle the harshness without affecting the rest of the vocals.
And it’s not just for solving problems… Multiband compression can be a creative tool as well.
For instance, if you’re mastering a track and want to add some punch to the drums without making the vocals aggressive.
With multiband compression, you can add more compression to the low frequencies where the kick and snare punch lies.
All while leaving the mid-range frequency where most of the vocal energy lies untouched.
NOTE: It’s also ideal for sidechain compression if you’re not looking for your entire bassline to ‘duck’ when a kick is triggered.
You can selectively duck only the frequency range that the kick occupies.
As you can see, the possibilities with multiband compression are endless, and once you start exploring, you’ll find your own unique applications for it.
Inside the Multiband Compressor: Controls & Functions
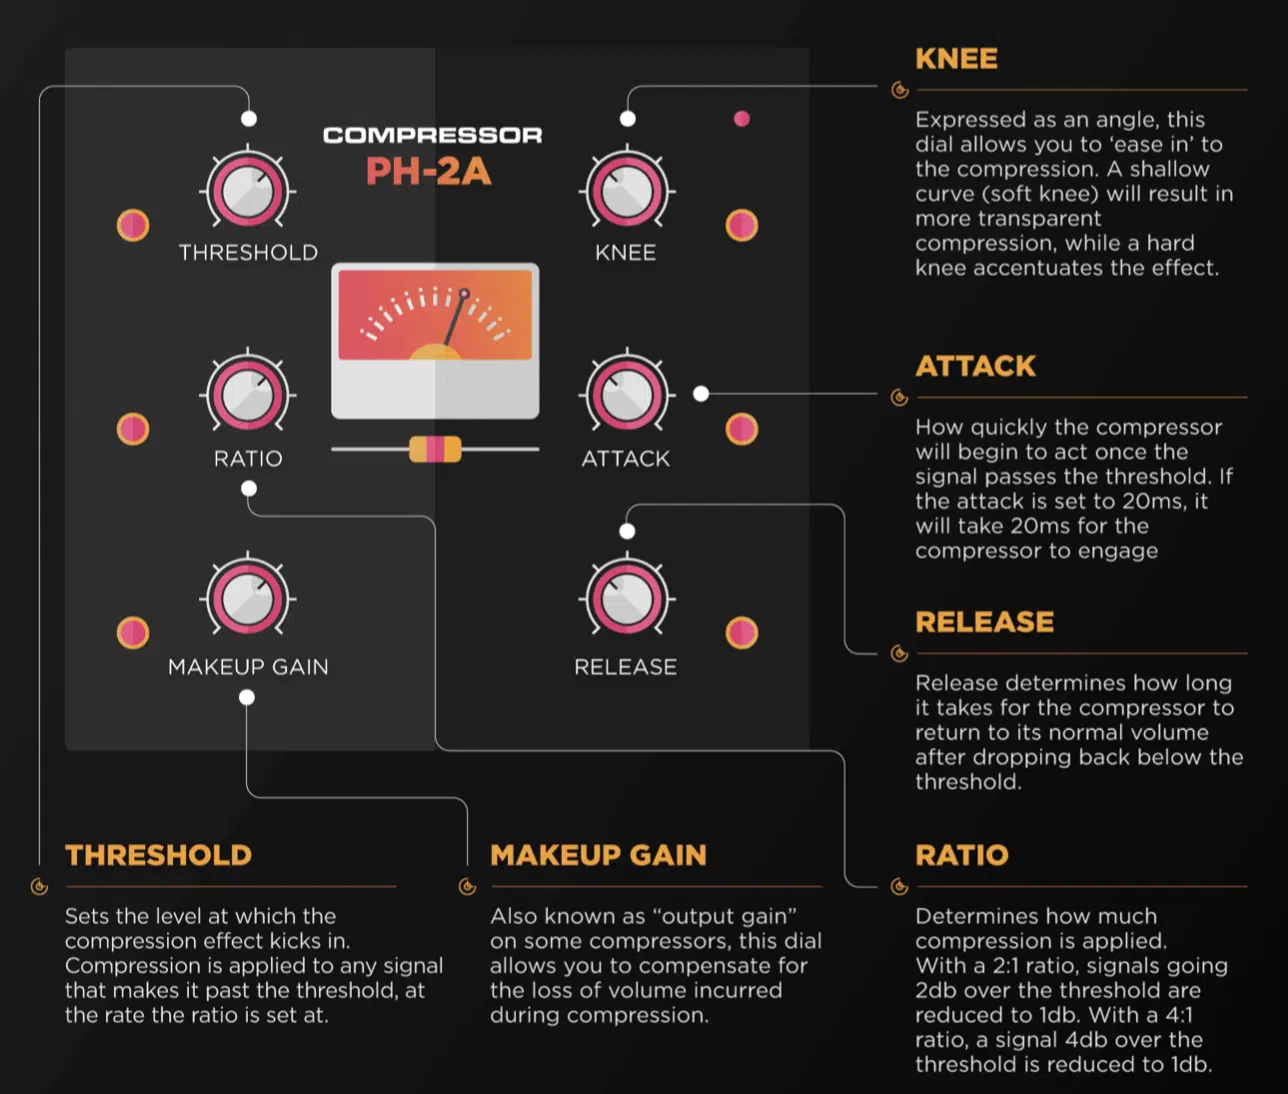
Now that you have a solid understanding of what multiband compression actually is, let’s break down the controls and functions of the multiband compressor itself.
Multiband compressors might seem quite daunting at first, with their multitude of knobs and controls, but don’t worry, we’ve got you covered.
Most multiband compressors have similar control elements, even if their layout and design might vary, so we’re breaking down the most common.
NOTE: While it will appear to have a much more advanced parameter set, it’s essentially all the same controls you’ll find on a standard compressor (just duplicated for each band).
To start with, you’ll usually have a series of bands, often represented by sliders or knobs, which correspond to the different frequency ranges of your audio signal.
Each band will have its own set of controls, which typically include threshold, ratio, attack & release times.
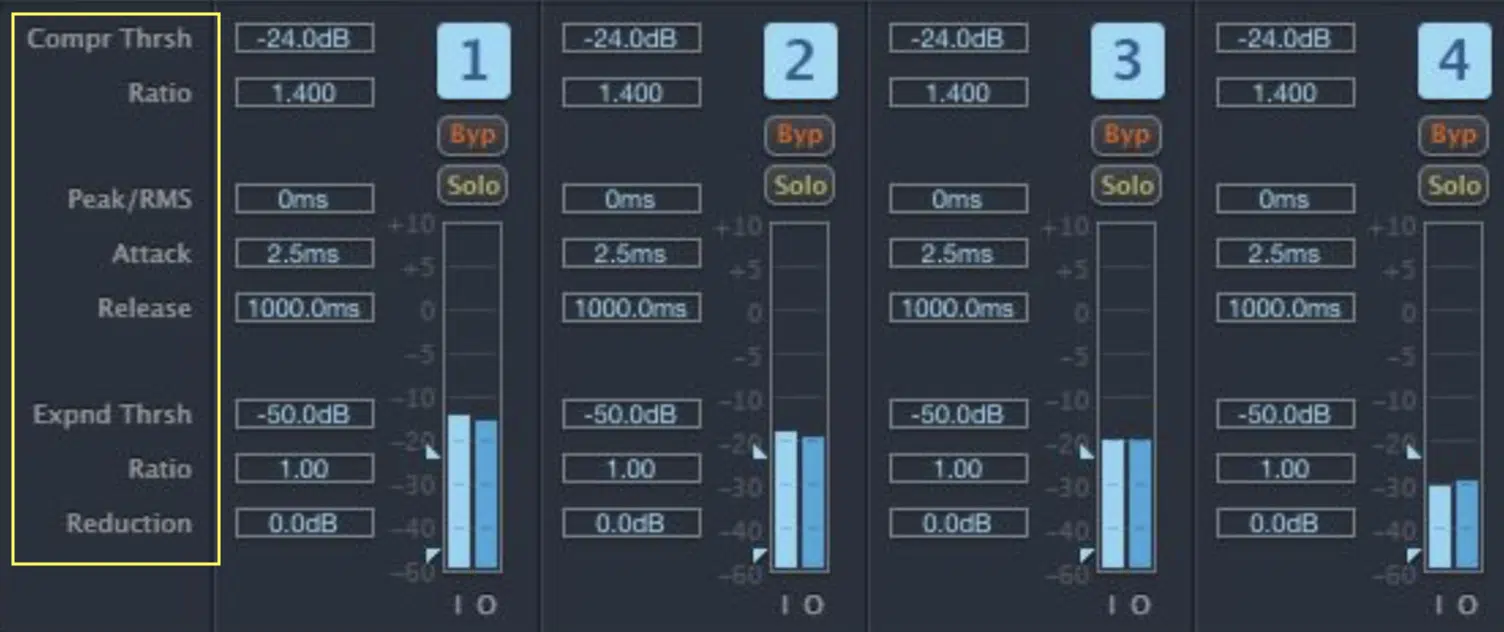
- The Threshold Control 一 Determines at what level the compression begins to take effect within a specific band.
- The Ratio Control 一 Decides the degree of compression applied once the audio signal exceeds the threshold.
- Attack & Release Times 一 Dictate how quickly the compressor responds to changes in the audio signal.
Some multiband compressors also feature ‘knee’ control, which lets you choose between:
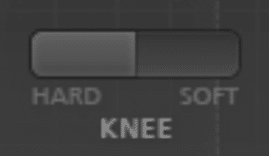
- A hard knee (for a more abrupt, assertive compression)
- A soft knee (for a smoother, more subtle compression)
Others might offer a range control, which sets the maximum gain reduction for each band, giving you even more control over the dynamics.
Lastly, you have the makeup gain controls which allow you to compensate for the level reduction caused by compression.
![]()
Getting familiar with these specific controls will ensure that you learn how to use multiband compression at full capacity.
Diving Deeper: Crossover Frequencies & Other Advanced Compression Controls
Crossover frequencies determine the points where the audio signal gets divided into different bands.
![]()
Depending on your multiband compressor plugin, you may have the option to adjust each crossover point 一 enabling you to tailor the bands to the specific needs of your mix.
Some multiband compressors also provide a ‘Solo’ or ‘Mute’ function for each band, allowing you to isolate or silence specific bands.
This is most useful when analyzing and tweaking the parameters and applying compression, but can be used to selectively mute or solo specific frequency regions within the signal.
This is a great feature for honing in on specific frequency ranges and making precise adjustments.
A gain-reduction meter is another super common, and rather essential feature.

It displays the amount of compression being applied to each band in real-time (which is super handy for visual feedback).
Lastly, there’s the mix control.

The mix control lets you balance the processed signal with the original, unprocessed signal.
It’s a powerful tool for maintaining a natural feel to your mix while still benefiting from the dynamic control that multiband compression offers.
NOTE: It’s also super beneficial for parallel compression.
Don’t forget, every control on your multiband compressor is a tool to shape your sound. The trick is to understand what each one does and how they all interact.
Once you get that, you’re well on your way to mastering multiband compression.
Exploring Multiband Dynamics: The Secret Sauce
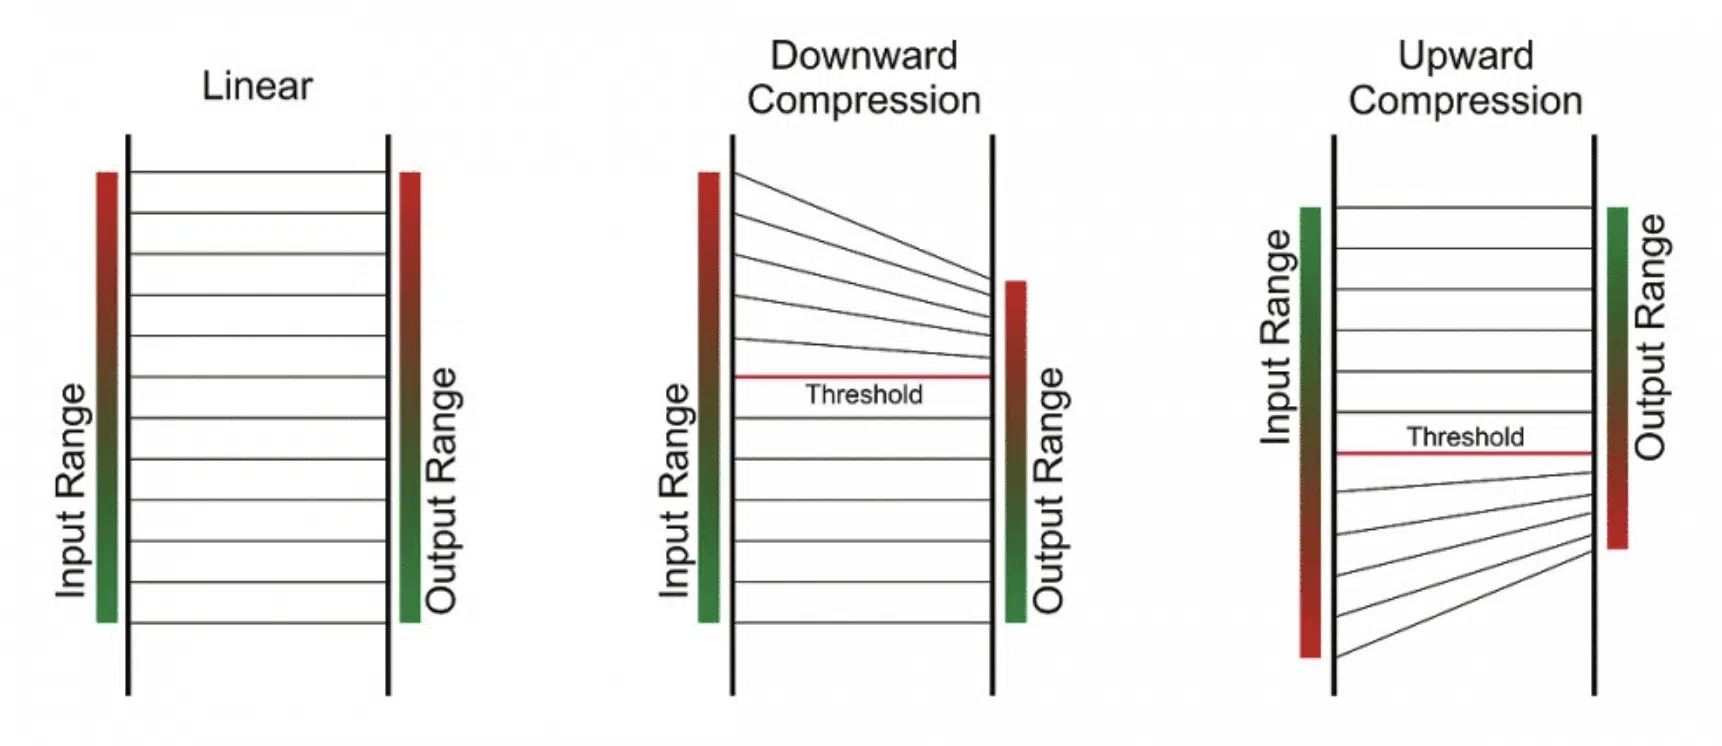
A unique aspect of more advanced multiband compressors is multiband dynamic functionality.
This feature extends the functionality of multiband compression to include gating and expansion, further enhancing your ability to manipulate the audio signal.
Even more advanced, albeit rare, multiband compressors allow you to apply both types of compression:
- Downward compression (standard), which reduces loud sounds above the threshold
- Upward compression, which increases quiet sounds below the threshold
This is the hallmark trait of the OTT-style compressors that you’ll find in Ableton and Serum.
It can bring out subtle details in a mix or help to tame excessively dynamic parts.
Expansion and gating operate on a similar principle, but instead of reducing loud sounds, they reduce or eliminate quiet sounds.
You can use these to eliminate noise or to give a sharper attack to percussive sounds.
Just like the crossover frequency controls, the controls for these dynamic processes are usually found on each band, so you can adjust them independently.
This is multiband dynamics in a nutshell: complex but incredibly powerful.
How to Use Multiband Compression Like a Pro
Multiband compression is a powerful beast, there’s no doubt about it, so here are a few tips to further enhance your understanding so you’re able to use it with confidence.
-
Starting with the Basics: Setting Up Your Multiband Compressor
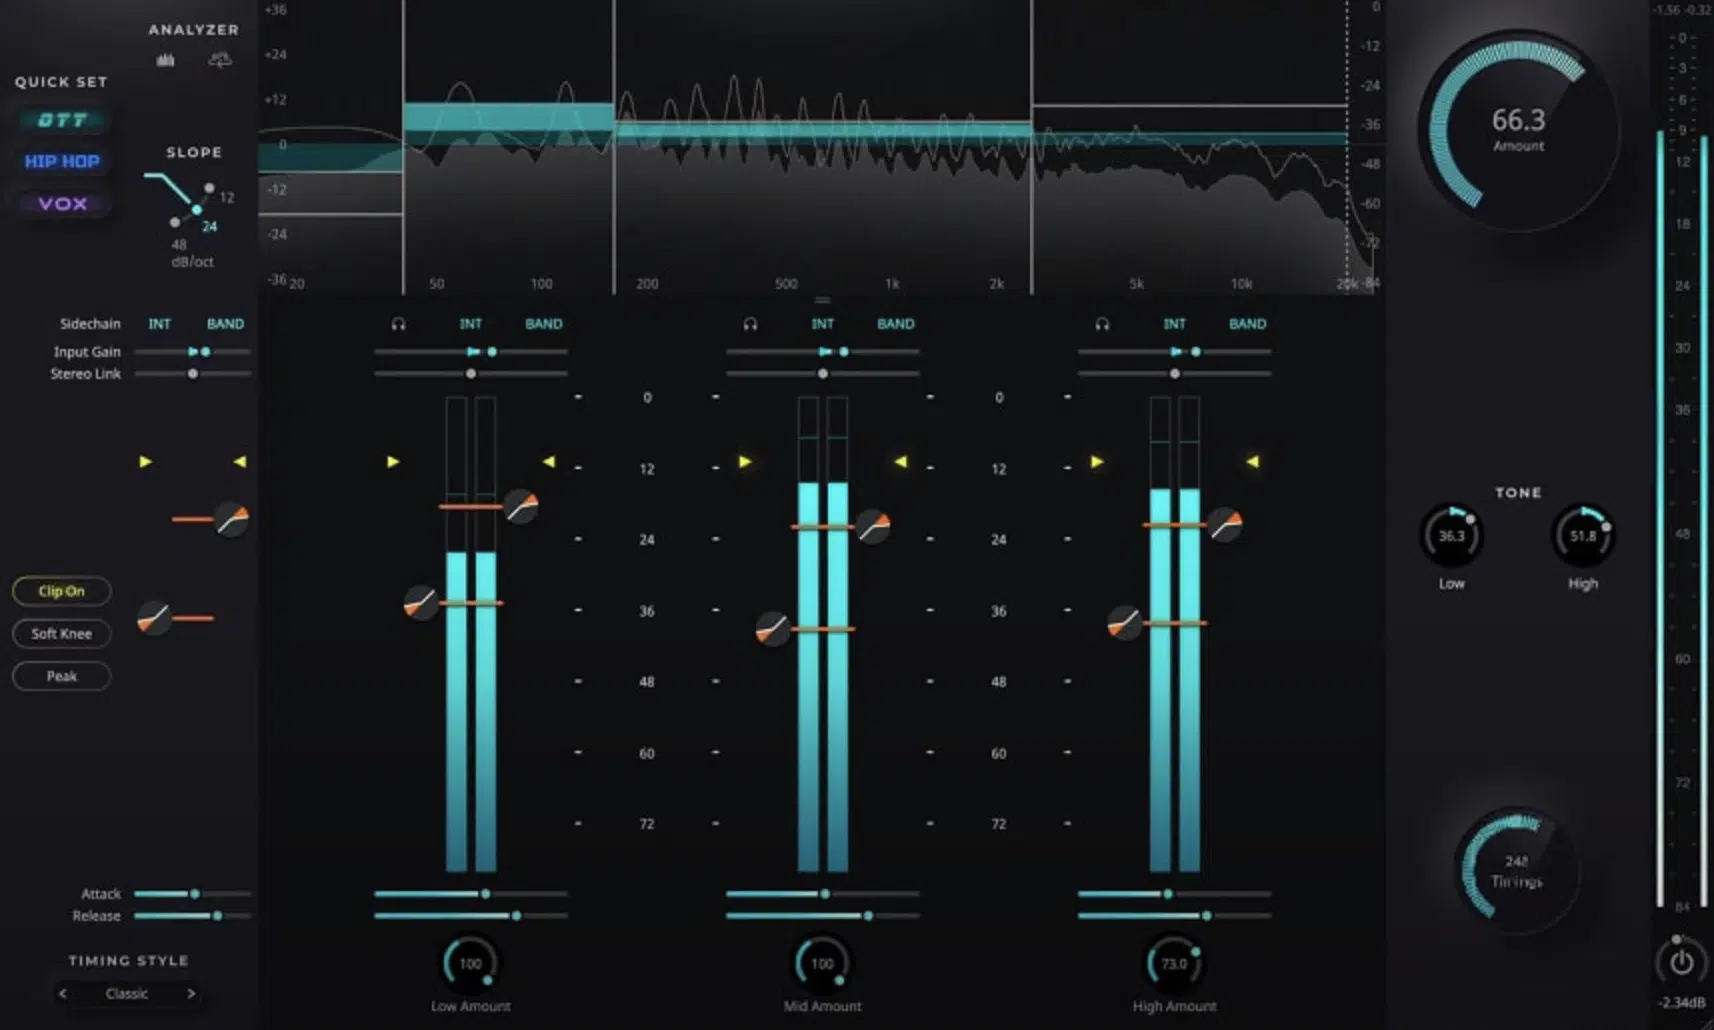
The first thing you need to do when setting up your multiband compressor is to load up your multiband compressor plugin on the track you want to process.
Once you’ve done that, start by setting the crossover frequencies, which will determine the range of frequencies each band will affect.
It’s generally a good idea to start with the default band divisions, and then adjust as needed based on the audio content you’re working with.
NOTE: These ‘default’ values will vary greatly based on the specific type of material you’re processing.
So, starting with an instrument-specific preset (like a guitar or bass default preset for guitar and bass) is best.
Use your ears and trust your judgment 一 remember, you’re aiming to find the most natural-sounding divisions.
Next, you should adjust the threshold and ratio for each band.
Remember, the threshold sets the level at which the compressor starts working, and the ratio determines how much compression is applied once the audio signal crosses the threshold.
This part is pretty straightforward, so you should catch on fairly quickly.
-
Fine-Tuning Your Compression Settings
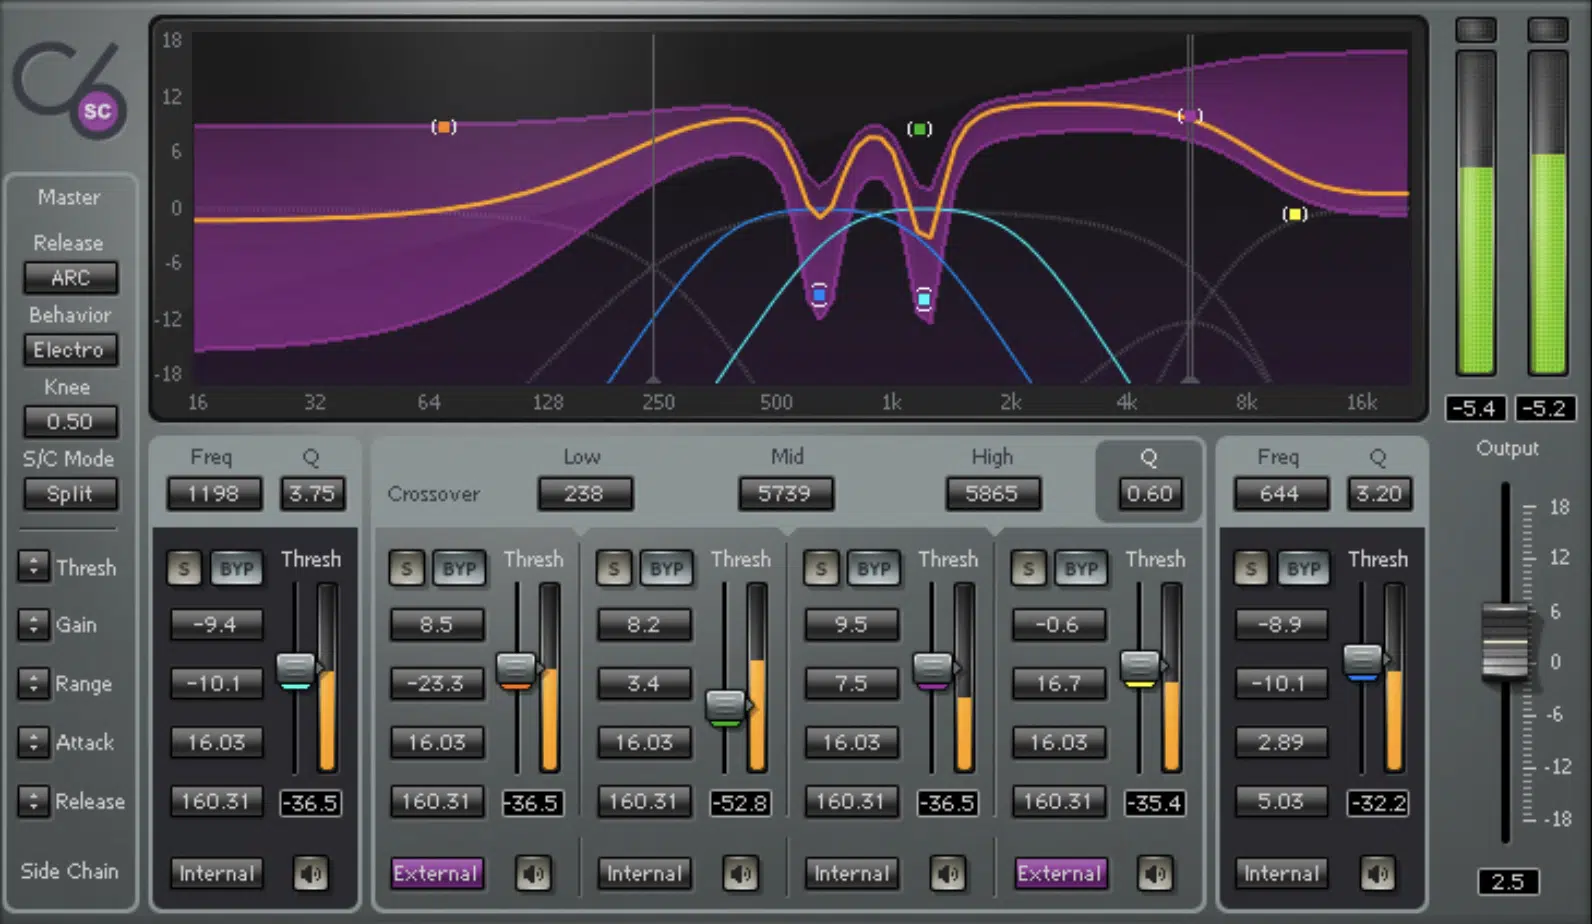
Once you’ve got your basic settings dialed in, it’s time to get into the nitty-gritty: tweaking your compression settings.
This is where you can really start to sculpt your sound.
Just keep in mind that these settings are also the most temperamental, so proceed with caution.
Start with the attack and release times.
- The attack time 一 Will determine how quickly the compressor responds once the audio signal crosses the threshold.
- The release time 一 Will determine how quickly it stops compressing (releases) after the signal drops below the threshold.
A good rule of thumb is to set faster attack and release times for higher frequency bands, and slower times for lower bands.
This is because higher frequencies typically have shorter waveforms and require faster compression to keep them under control.
You can also adjust the knee setting if your compressor has one (as we discussed).
- A soft knee can provide a more transparent, natural sound.
- A hard knee will result in a more aggressive compression effect.
Finally, adjust your make-up gain.
After applying compression, you’ll likely have reduced the level of your audio signal.
The make-up gain lets you bring it back up to a suitable level and balances out the ‘illusion’ of compression.
It allows you to compare the signal’s pre-/post-compression at identical volume levels.
Multiband Compression Vs. Sidechain Compression: Choosing the Right Tool
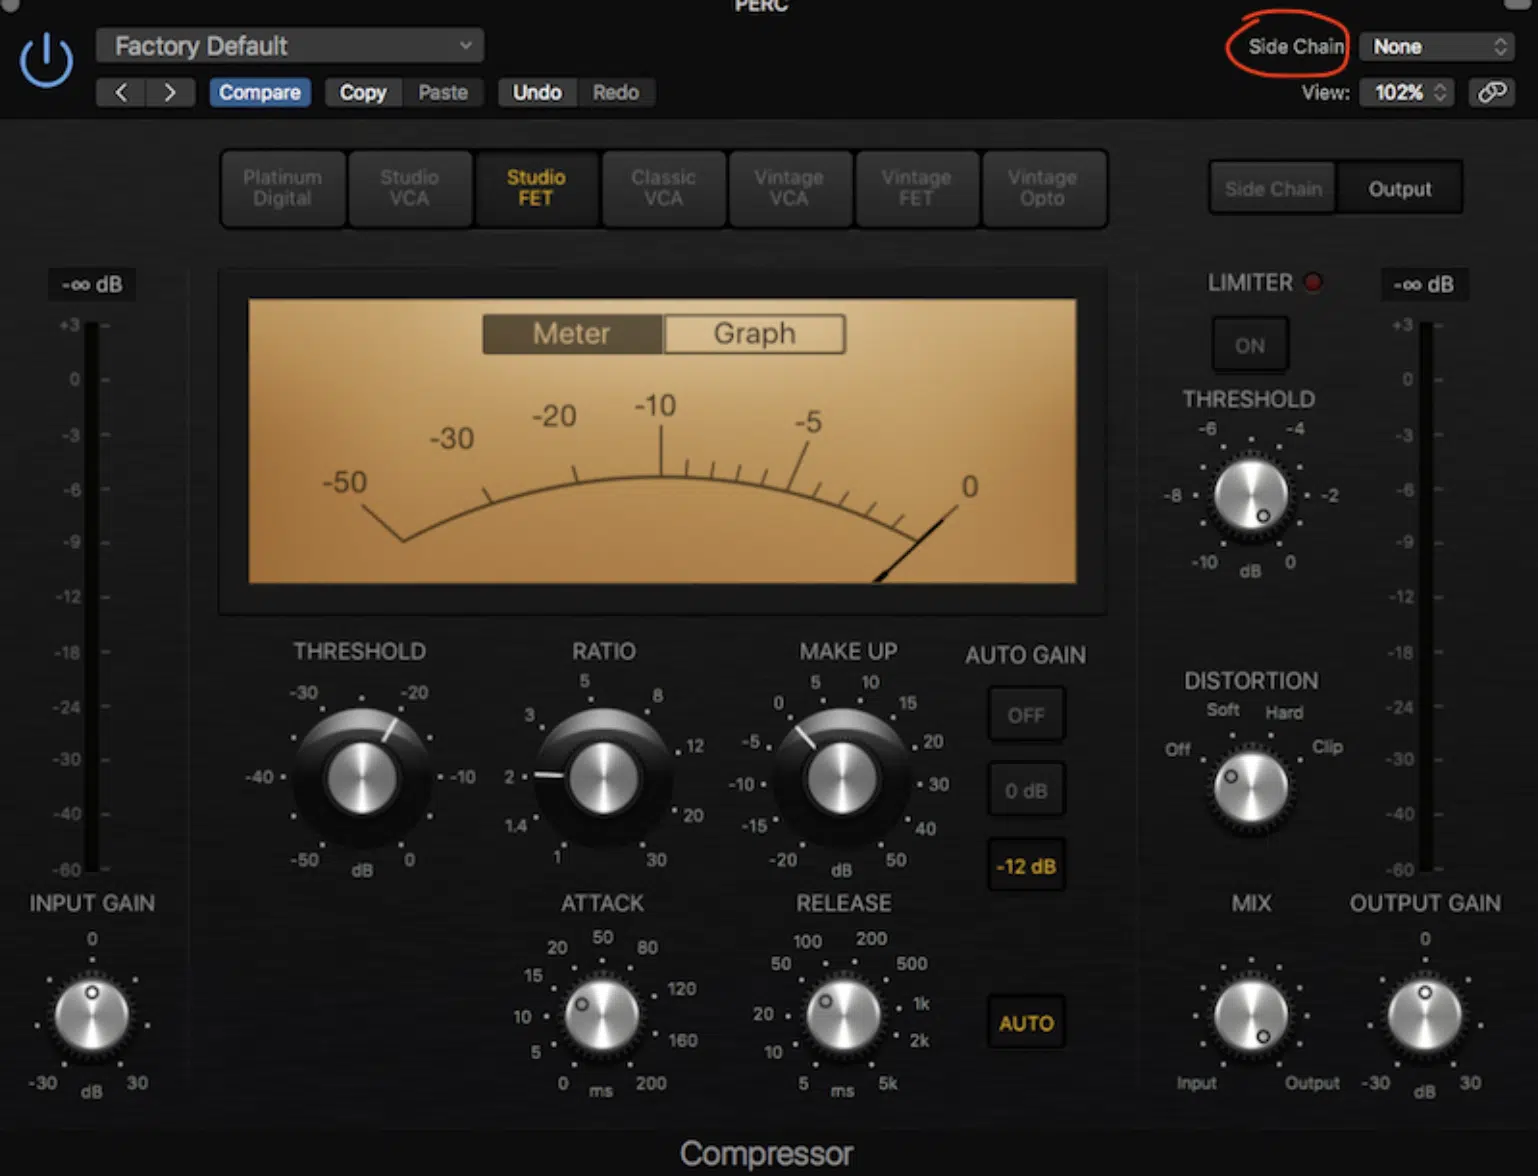
Now that we’re comfortable with multiband compression, let’s talk about another tool in your audio toolbox: sidechain compression.
In essence, sidechain compression is a technique where the compressor’s action is controlled by a separate audio signal, rather than the signal being processed.
It’s commonly used to create a pumping effect in EDM, where the kick drum triggers compression on the bass track.
This results in the bass line ‘ducking’ each time the kick drum hits 一 creating rhythmic variation and clarity between the two elements.
Another popular use of sidechain compression is in broadcast, where it’s used to automatically lower the volume of background music when a voiceover begins, and raise it again when the voiceover ends.
This ensures that the spoken words are always clearly audible above the music.
-
The Interplay Between Sidechain & Multiband Compression
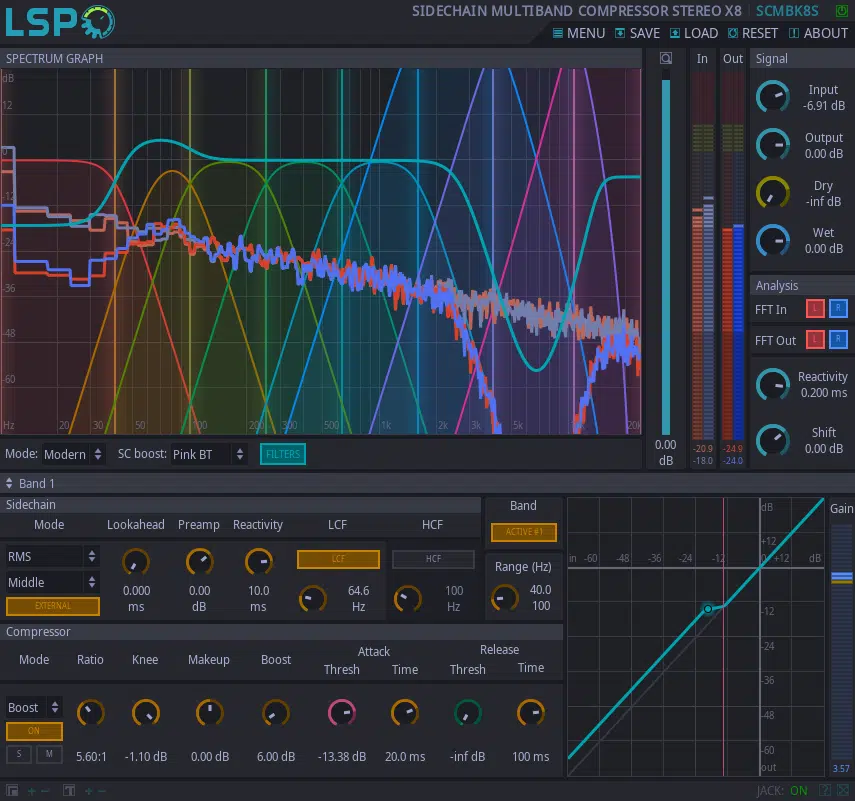
At first glance, sidechain compression and multiband compression might seem unrelated…
One manipulates the dynamic range based on the frequency content, while the other alters the dynamic range based on a separate audio signal.
However, there’s a fascinating interplay between the two.
For instance, some multiband compressors have a sidechain input for each band which allows you to trigger compression in specific frequency ranges based on an external audio signal.
This can be incredibly useful for solving complex mixing issues or for creative sound design endeavors.
Imagine you have a full mix where the vocal and guitar are clashing in the midrange frequencies.
You could use sidechain input in a multiband compressor to trigger compression on the guitar track whenever the vocals are present 一 effectively carving out space for the vocals in the mix.
-
When Do I Use Each?
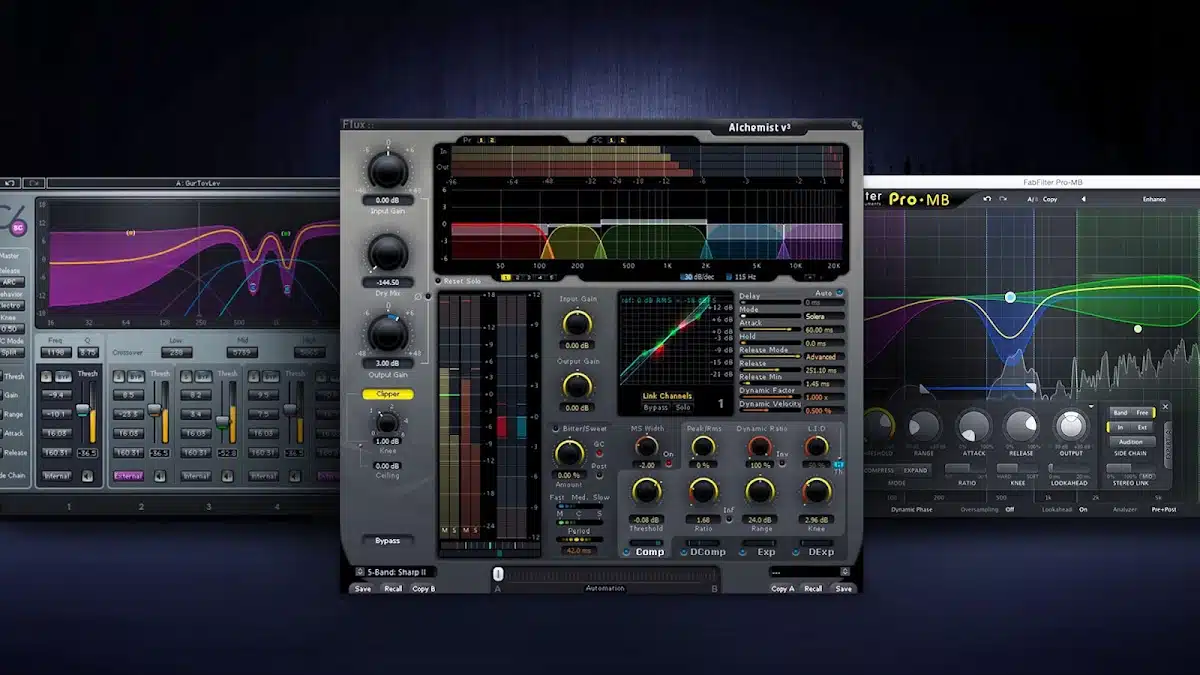
So, when should you use multiband compression and when should you use sidechain compression?
The answer, as with many things in music production, is “it depends.”
- Multiband compression is particularly useful when you need to control the dynamics of specific frequency ranges within a single audio source (such as taming a boomy bass or adding brightness to a dull vocal).
- Sidechain compression, on the other hand, is great for managing the relationship between two different audio sources.
If one element of your mix is consistently overpowering another, sidechain compression can help.
Of course, there’s nothing stopping you from using both tools together, and many professional producers and mixing engineers, including myself, do so in certain situations.
The key is to understand the strengths of each technique and to choose the right tool for the job at hand.
Understanding Frequency Range in the Audio Spectrum
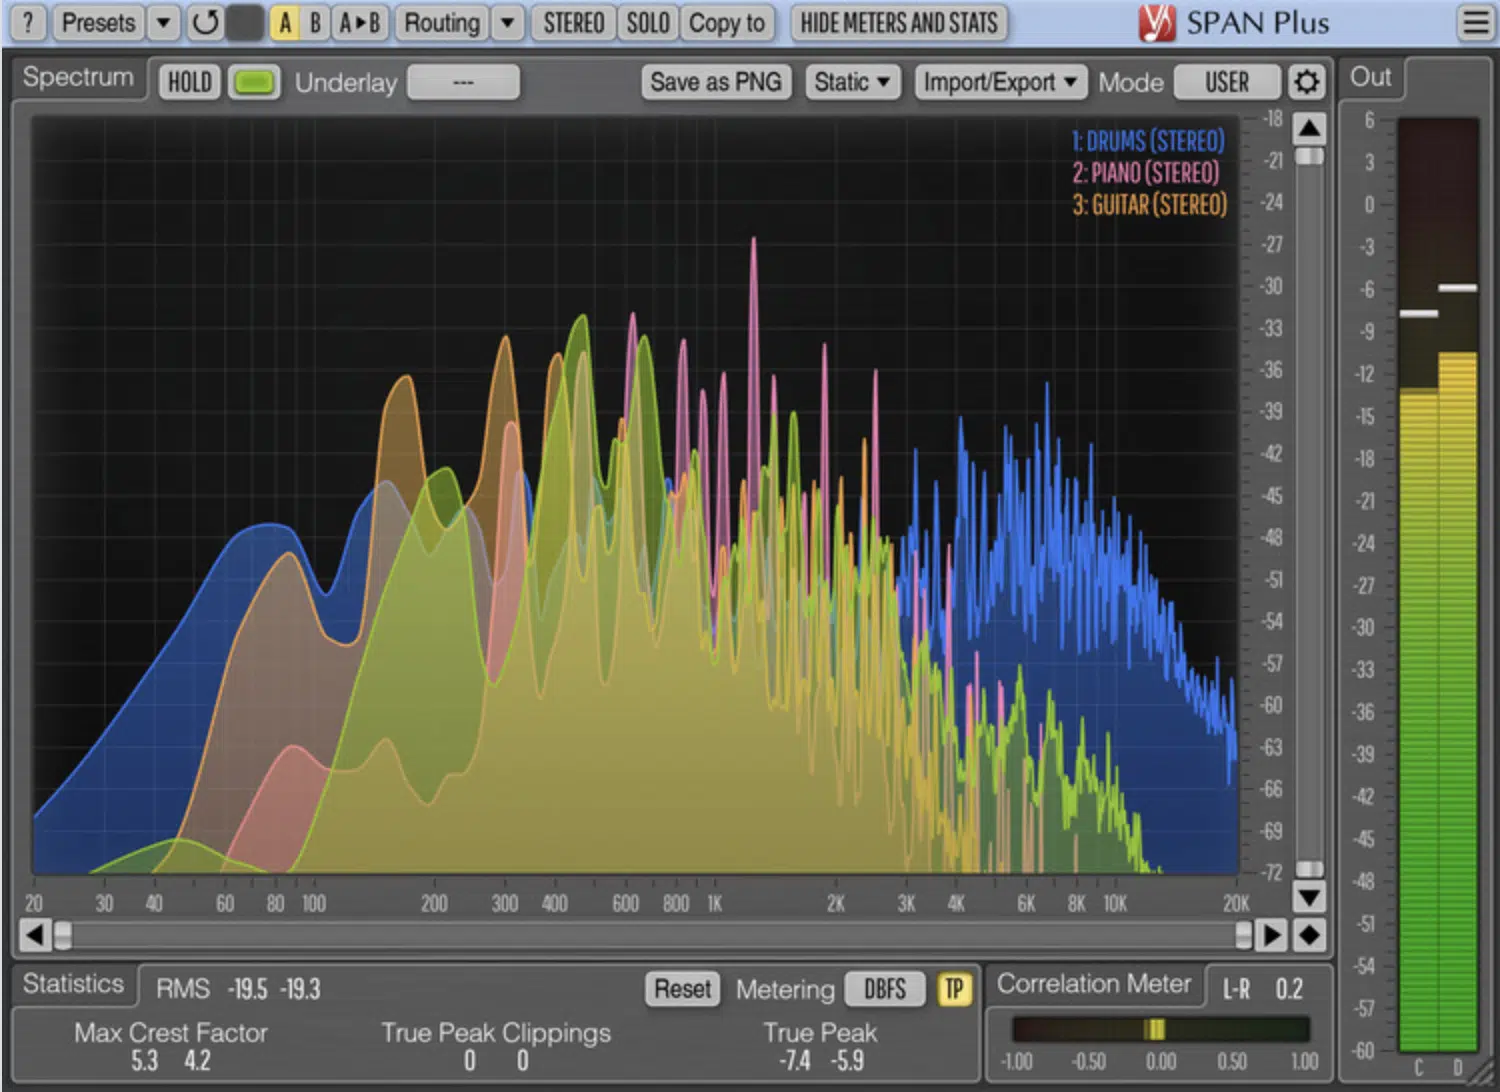
Before we delve into manipulating different frequency ranges with multiband compression (below), it’s important to understand the audio spectrum.
The audio spectrum is the full range of frequencies that are audible to the human ear, typically from 20 Hz to 20 kHz.
This spectrum is usually divided into three main parts:
- The low-end or bass (below 250 Hz)
- The midrange (250 Hz to 4 kHz)
- The high-end or treble (above 4 kHz)
Each frequency range corresponds to different elements in your mix.
- The low-end 一 Where you’ll find the kick drum and bass guitar.
- The midrange 一 Covers most vocal and instrumental frequencies.
- The high-end 一 Includes the sibilance of vocals, the brightness of cymbals, and other higher harmonics.
Understanding these ranges is crucial when using multiband compression because it lets you target specific elements in your mix.
By compressing each frequency band independently, you can bring out the best in each part of your audio signal.
How to Compress Specific Frequency Ranges
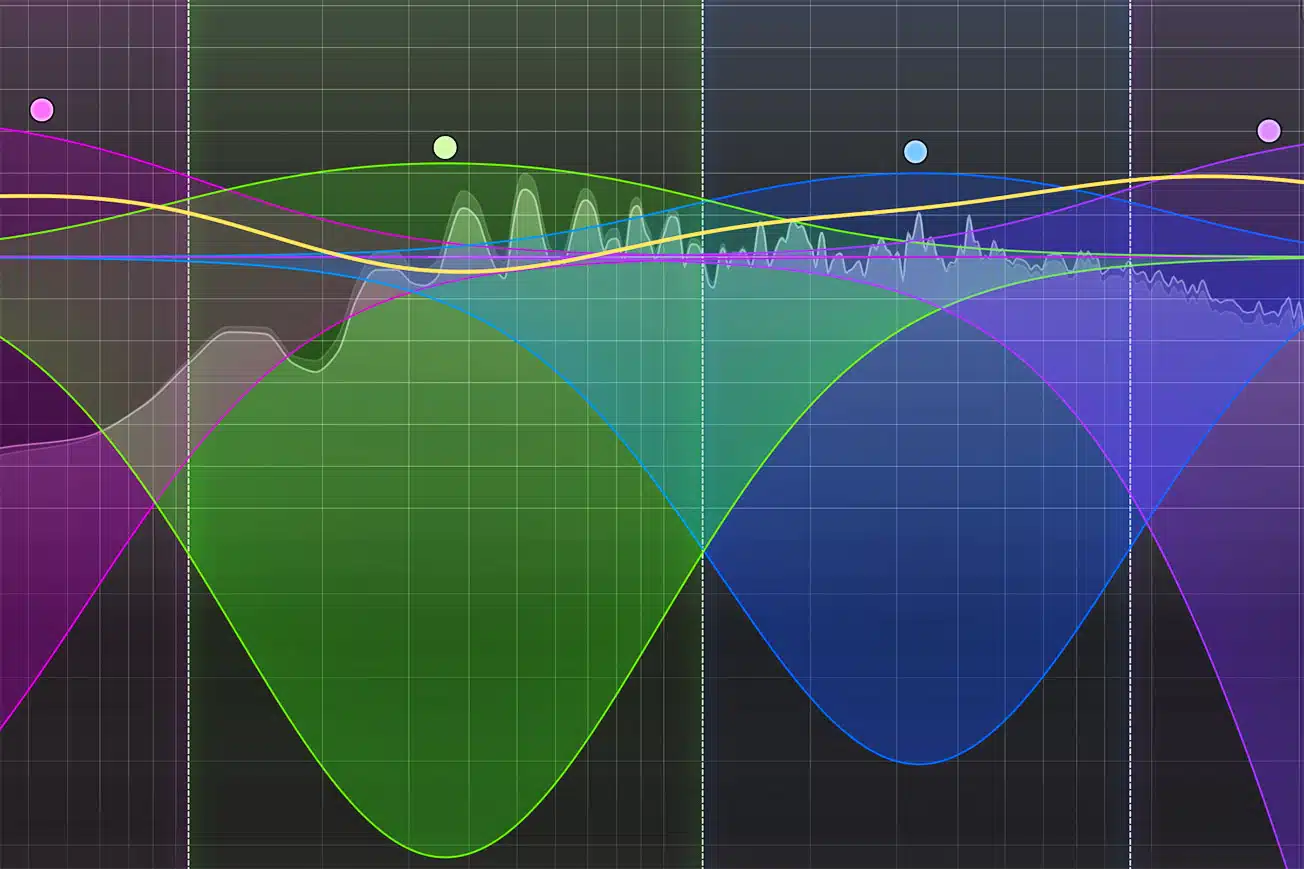
Let’s say you want to compress a specific frequency range in your mix… How would you go about it?
Well, here’s a step-by-step guide:
STEP 1 一 Select the band that corresponds to the frequency range you want to work with.
Adjust the crossover frequencies if necessary to better target the problem area.
STEP 2 一 Set the threshold and ratio for this band.
If you’re looking to tame an overly loud bass, for example, you might want to set a low threshold and high ratio to apply a substantial amount of compression to the low frequencies.
STEP 3 一 Adjust the attack and release times.
- A faster attack time: can help to quickly clamp down on sudden, loud sounds.
- A slower release time: can make the compression less noticeable and more natural-sounding.
As always, the key to successful compression is to use your ears.
Listen carefully to the results of your adjustments, and don’t be afraid to experiment until you get the sound you’re looking for.
Multiband Compression: Practical Examples
Now let’s look at practical examples for each frequency range (low, mid, and high).
-
The Sparkle on the Acoustic Guitar (High)
Let’s say you want to add some ‘sparkle’ or brightness to the guitar without making it sound harsh.
To do this, you could use a multiband compressor to apply gentle compression to the high frequencies.
Start by setting the crossover frequency to target the upper midrange and treble frequencies (somewhere around 2-4 kHz and above).
Then, set a moderate threshold and ratio.
NOTE: You don’t want to squash the life out of the high frequencies, just tame them a bit to add some shine.
-
Bringing Clarity to the Vocal Track (Mid-Range)
Another common use of multiband compression is to bring clarity to a vocal track.
Vocals often have a wide dynamic range and can vary drastically in volume and intensity 一 which is where multiband compression can be incredibly handy.
Try focusing on the midrange frequencies, usually around 1-3 kHz, where the core tonalities of the human voice lie.
By applying compression to this band, you can help to ensure a consistent vocal level without affecting the bass or high frequencies.
Additionally, sibilance – the harsh ‘s’ and ‘t’ sounds in vocals – typically resides in the high-mid to high frequencies (5-10 kHz).
If this is causing issues in your mix, you could apply compression to this specific band to subtly tame these sounds.
This will maintain the clarity and expressiveness of the vocals without introducing harshness.
-
Punching Up the Kick Drum (Low)
The kick drum is a crucial element in many genres, providing the rhythmic foundation of the track.
However, getting it to sit right in the mix can be a challenge.
That’s where multiband compression can come in handy.
By applying compression to the low-frequency band (below 100 Hz), you can tighten up the sound of the kick 一 adding punch and ensuring it doesn’t become overpowering.
This can be particularly useful in genres like rock, hip-hop, and EDM, where a strong and clear kick drum sound is essential.
Conversely, if you’re finding that your kick drum lacks presence in the mix, you could apply some light compression to the low-mid frequencies (around 100-250 Hz) where the body of the kick drum sound lies.
This can help to bring out the character of the kick and make it more noticeable in the mix.
Remember, the goal with multiband compression – as with any mix technique – is balance.
You’re trying to bring out the best in each element of your mix, without letting any one element dominate.
With practice and careful listening, you’ll learn how to use multiband compression like a boss and discover it can be a powerful tool in your audio mixing arsenal.
How to Use Multiband Compression: Final Thoughts
We’ve reached the end of the article, so you should definitely know how to use multiband compression with confidence.
But, what good is all this knowledge if you don’t put it into practice?…
One of the best ways to learn is by doing, and for this reason, you should download these fire, free 808 samples.
These are not just any 808s 一 they’re high-quality, professionally crafted samples that offer plenty of scopes for you to apply your newfound multiband compression skills.
For instance, try using multiband compression to manipulate the specific bass frequency where your kick resides.
This can prevent frequency clashing and phase issues, leading to a cleaner, more balanced mix.
With the precise control you’ve gained from understanding multiband compression, you can duck the bass frequency as much or as little as needed.
All without suffering from the dreaded pumping effect that often occurs with standard compression.
In essence, multiband compression can grant you a level of surgical precision when working with these 808 samples (or any audio signal, for that matter).
By applying the techniques we’ve discussed, you can shape and control each element in your mix and ensure a cleaner, punchier, and more professional-sounding track.
So, grab those free 808 samples and start experimenting with multiband compression.
See how it can transform your mix and elevate your music production skills to new heights.
Until next time…


Leave a Reply
You must belogged in to post a comment.