Mixing music is like baking a cake.
Just as a cake requires the right ingredients and the perfect amount of time in the oven, a great mix requires the right balance of elements and plenty of attention to detail.
But unlike a cake, you can’t just stick a mix in the oven and wait for it to be done…
It takes a little bit of magic and a whole lot of skill to get it just right.
In this post, we’re going to explore 7 proven ways to achieve the perfect mix.
Whether you’re a beginner or an expert, these tips will help you get an ideal mix every single time.
Plus, your tracks will sound professional beyond belief.
So grab your mixing spoon and put on your headphones, because we’re about to dive into the sweet science of mixing music.
Table of Contents
What Is Mixing?
Mixing is the process of taking multiple recorded tracks and blending them together to create a final stereo mix.
This process involves adjusting various elements in order to achieve a balanced and cohesive sound.
These include:
- Volume
- Panning
- EQ
It’s a crucial part of the music production process and can ultimately make or break your final product.
A well-mixed track can sound polished, pristine, and ready for release.
On the other hand, a poorly-mixed multi track recording can sound unbalanced, muddy, and unprofessional… and nobody wants that.
If you’ve ever heard a song that wasn’t mixed correctly, then you certainly know how vital it is.
Mixing requires a combination of technical knowledge and creative skill that all music producers and mix engineers must know.
It involves understanding the fundamentals of sound and music theory, as well as having a keen ear for how different elements fit together in a mix.
Whether you’re mixing your own tracks or working alongside a professional mixer, understanding the basics of mixing is essential for creating great-sounding music.
NOTE: This article is breaking down 7 ways to optimize your entire mix and how a poor mix can ruin your entire song.
However, if you’re looking for a full breakdown of what exactly mixing is (in-depth), and also how it compares to the mastering stage, click here.
1. Start With a Good Recording
The quality of your mix is heavily dependent on the quality of your recordings.
The recording process is very important in order to mix properly, especially when it comes to your own music.
If your recording process is bad, it will be quite difficult to achieve a dynamic mix.
Luckily, you’ve come to the right place to learn the tricks of the trade in order to guarantee your mix sounds good and your mixing skills are on point.
Use Quality Microphones
Before you start mixing, make sure to invest in high-quality microphones that are suitable for the instruments or vocalsyou’re recording.
Good microphones will pick up the nuances of the sound and help capture a more realistic representation of the instrument or voice.

If you’re striving to be a professional mixing and mastering engineer, you need to have the right mixing and mastering tools.
Record In a Good Acoustic Space
Choose a room that is acoustically treated, meaning it has minimal reflections and reverberation.
Mixing and mastering engineers will tell you that it gives you a cleaner, more controlled sound.
2. Use High-Quality Headphones and Monitors
Choosing the right headphones or monitors is essential in ensuring your mix sounds great.
Audio mixing and sound mixing would be an absolute disaster if that mix engineer (you) didn’t use the proper headphones.
Here are some things to consider:
Choose Flat-Response Headphones
When it comes to mixing music, having accurate monitoring is absolutely essential.
This means being able to hear the mix as it truly sounds, without any coloration or distortion from multiple speakers or headphones.
While studio monitors are ideal, they can be super expensive and impractical.
In these situations, headphones can be a great alternative.

It’s important to look for ones with a flat frequency response.
They reproduce sound as accurately as possible, minus any exaggerated/diminished frequencies.
This allows you to hear the mix as it truly sounds, without any coloration or distortion.
Flat-response headphones are designed to be as neutral and transparent as possible.
You’ll soon find out that bass frequencies and an audio recording can sound super different on these headphones.
Make sure your left and right speakers are both up to par. Multitrack recording, mixing and mastering, and audio processing all depend on prime speakers.
Invest In Quality Monitors When You Mix Music
If you prefer mixing with monitors, invest in quality ones that provide accurate and detailed sound.
Look for monitors that have a flat frequency response and can handle a wide range of frequencies.
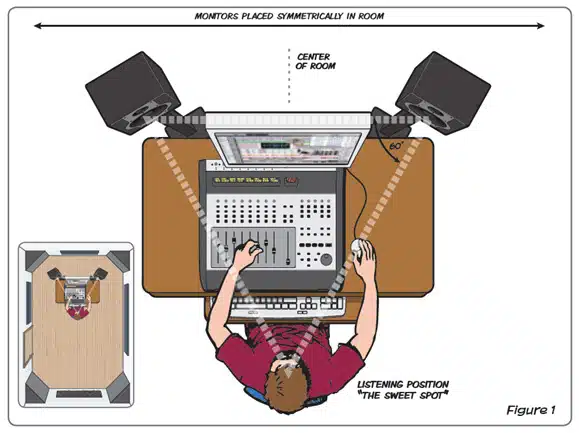
- Position the monitors correctly 一 They should be at ear level and angled slightly toward your listening position. You don’t have to be a full-blown mixing engineer to procure a great final mix.
- Calibrate the monitors using a reference track or a dedicated calibration tool 一 This ensures that they are set up to reproduce sound as accurately as possible.
- Be aware of the limitations of monitors 一 While they provide a more accurate representation of the mix than headphones, they still have limitations when it comes to reproducing low frequencies.
3. Use EQ to Balance Frequencies
EQ (Equalization) is a tool that allows you to adjust the balance of frequencies in your mix.
This is essential for ensuring that each instrument or element in the mix has its own space and doesn’t clash with other elements.
Otherwise, it can cause unwanted issues that will ultimately ruin your mix.
Whether you’re working with multiple audio tracks or just one, you need to be familiar with EQ.
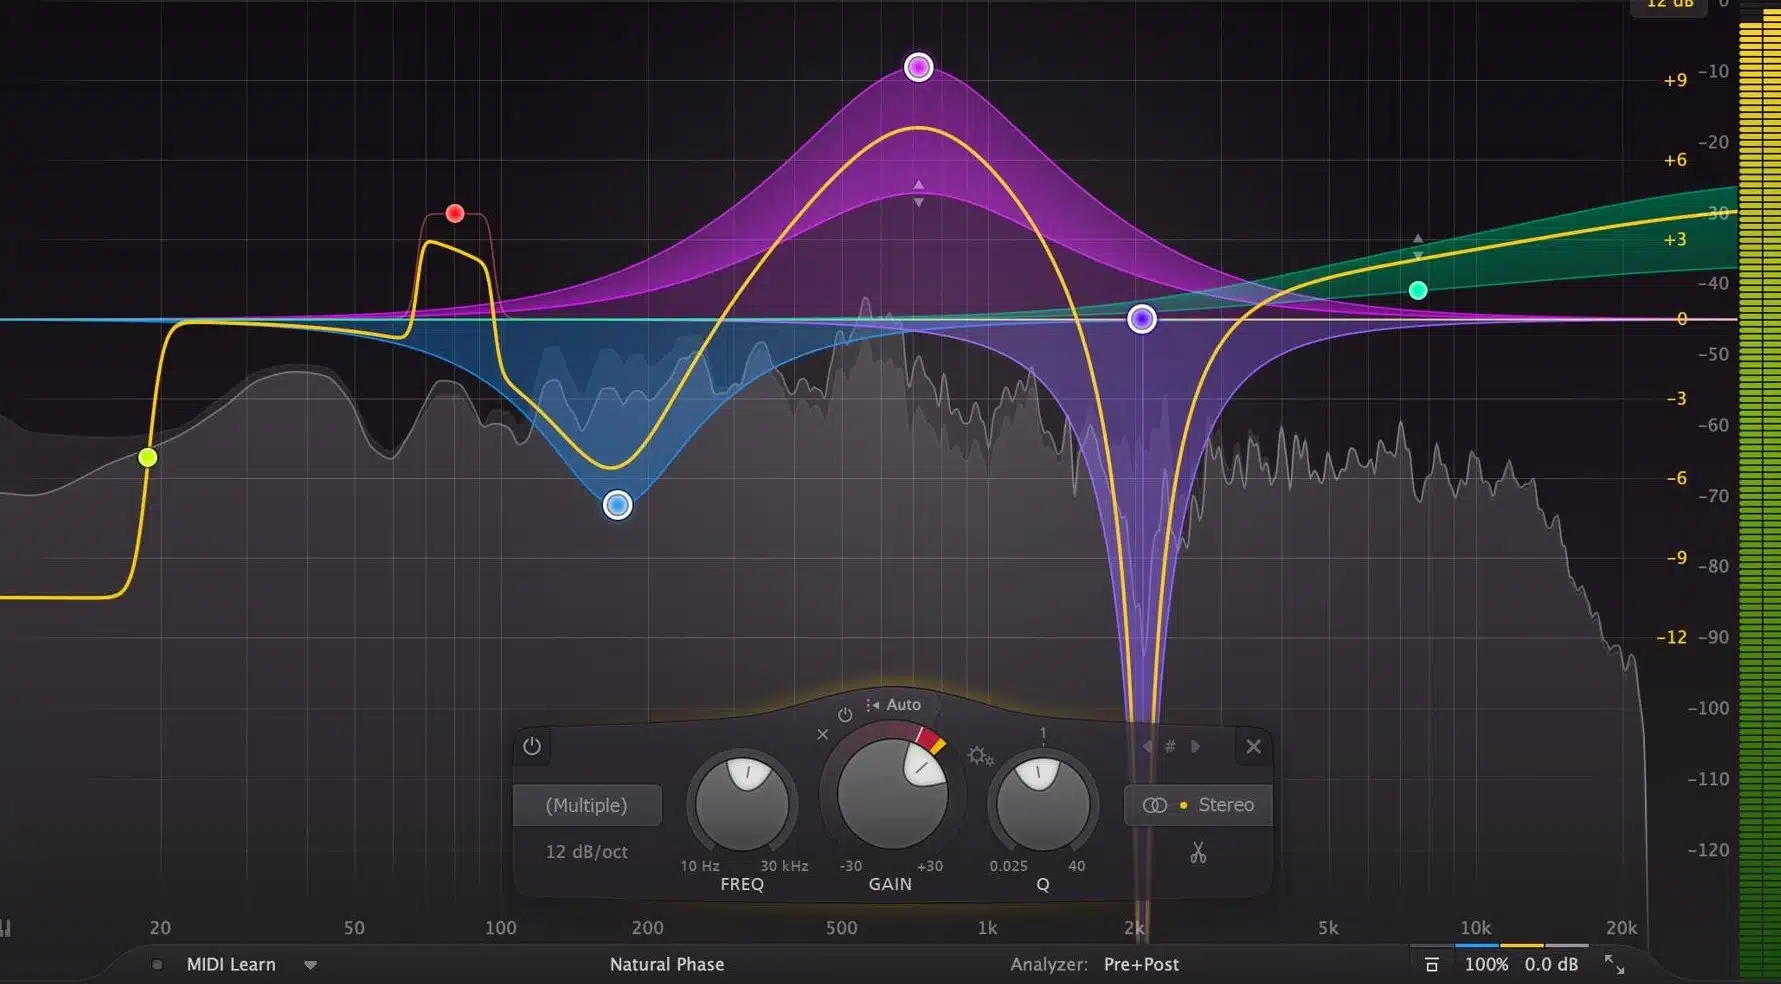
When using EQ, it’s important to be subtle and make small adjustments.
Here are some tips for using EQ effectively:
Audio Mixing Tip: Use a High-Pass Filter
You’re going to want to use a high-pass filter (HPF) to remove unwanted low frequencies.
This will help clean up the mix, prevent it from sounding muddy, and enhance your mixing process.
High-pass filters allow high-frequency signals to pass through while attenuating or cutting low-frequency signals.
In other words, it allows higher frequencies to “pass” through the filter while blocking or reducing lower frequencies.
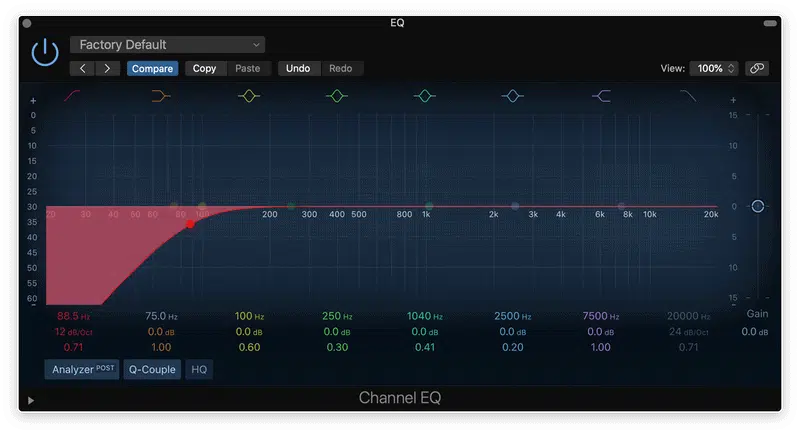
They remove unwanted low-frequency noise or rumble from a recording.
This can include that annoying hum from an air conditioner or traffic passing outside your house.
By cutting or attenuating these frequencies, you’ll avoid a rough mix.
High-pass filters are also used to clean up individual tracks in a mix.
For example, you might use a high-pass filter on a guitar track to remove low-frequency rumble that can muddy up the mix, or on lead vocals to remove low-frequency noise or proximity effect.
Getting acquainted with high-pass filters is necessary if you’re going to make beats like a pro, so don’t overlook them.
Note: High-pass filters are different than low pass filters.
Cut, Don’t Boost
Instead of boosting frequencies that you want to stand out, try cutting frequencies that are clashing with other elements in the mix.
This will create more space and clarity in the mix.
Mixing engineers swear by this technique.
Mixing Process: Consider The Range You’re Working In
You’re going to want to take the frequency range of the particular instrument part/element you’re working on into consideration.
For example, vocals typically have a prominent range between 1 kHz and 4 kHz.
A bass guitar, kick drum, and drum tracks in general on the other hand are typically in the 50 Hz to 100 Hz range.
Adjusting the EQ accordingly can help make sure that each element has ample room, and ensures you produce a great sounding mix.
Music mixing is a refined art that you’ll need to know like the back of your hand.
4. Use Compression to Control Dynamics
Compression is a tool that allows mix engineers to control the dynamic range of a track.
In other words, the difference between the loudest & softest parts.
This ensures that all the sounds are balanced and consistent.
Don’t Use Too Much Compression
When using compression, it’s important to use it sparingly and not overdo it.
Too much compression can completely destroy the mix during the mixing stage.
Here are some tips for using compression effectively:
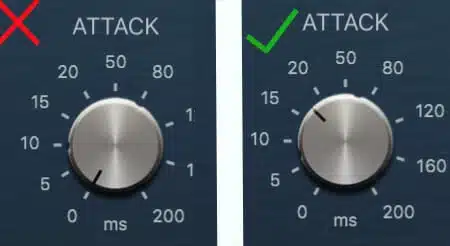
- Use a slow attack time to let the initial transients of the sound through 一 This will help preserve the punch and impact of the sound.
- Use a light touch 一 To even out the levels of the individual track and add sustain to instruments like guitars and vocals.
- Use a ratio of 2:1 to 4:1 一 For gentler compression.
- Use a ratio of 10:1 or higher 一 For heavier compression.
For an in-depth look into the next step of mixing (gain staging and stereo imaging), click here.
5. Use Reverb to Create Space
Reverb is a tool that allows you to create the illusion of space in your mix.
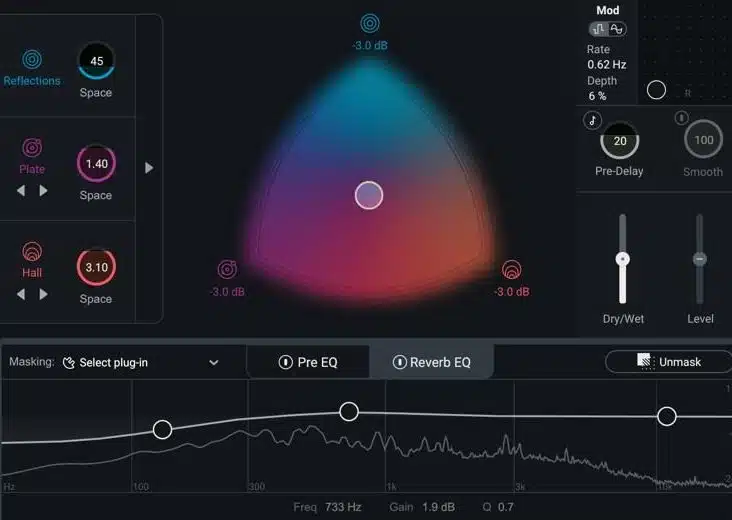
It can help give a track depth and create a sense of distance between instruments or elements.
When using reverb, it’s important to be subtle and not overdo it.
So, if you’re a mixing engineer or aspiring mixing engineer you’ll need to know this.
Here are some tips for using reverb effectively on your own music:
Use Different Types of Reverb to Achieve Different Effects
A plate reverb might work well for vocals, while a hall reverb might be better suited for drums.
You have to experiment with each type of reverb in order to achieve a professional mix.
Digital audio workstations (DAWs) offer a wide range of mixing tools that allow you to create professional-quality audio tracks and virtual instruments from the comfort of your home studio.
Use a Light Touch & Don’t Overdo it
Too much reverb can make a mix sound muddy.
You don’t want your audience to immediately turn off your separate tracks because it sounds washed out.
Music production is all about keeping it simple while sounding professional.
Consider the Size & Shape of the Virtual Space You’re Creating
A large hall reverb might work well for creating a sense of distance, while a smaller room reverb might work better for creating a sense of intimacy.
6. Use Panning to Create Width
Panning is a tool that allows you to position elements in the stereo field.
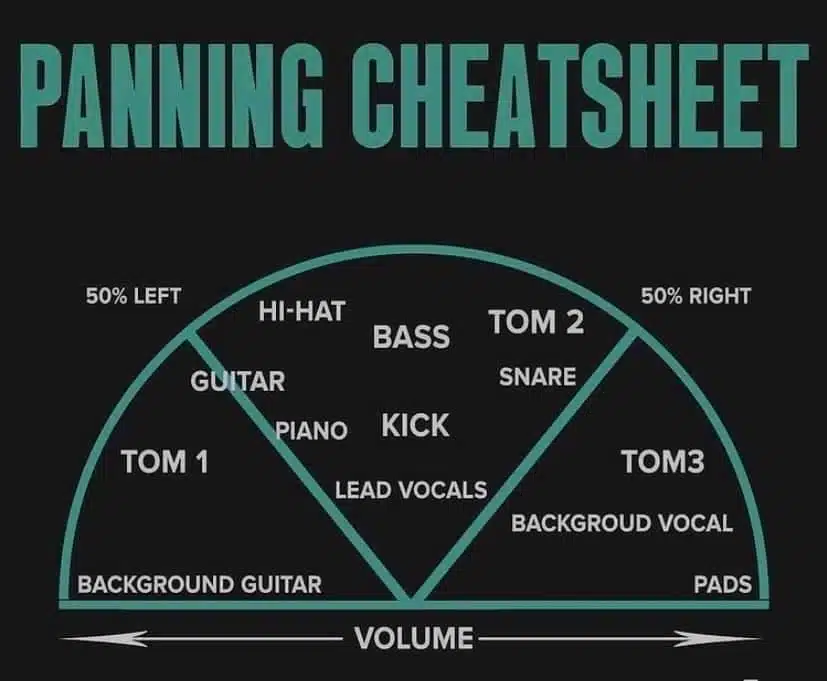
This can help create a sense of space and width in the mix.
For example, you might pan a guitar to the left and a keyboard to the right to create a sense of separation between the two instruments.
Or you might pan a snare drum slightly to the left and a hi-hat slightly to the right.
This will create a sense of balance and movement in the rhythm section.
If you want some additional ear candy, you can pan between the left and right channels in your audio files. Mixing music mixing, and mastering is all about creativity.
You’ll also need to consider the frequency spectrum of the specific sound when panning.
Low-frequency sounds (like bass and kick drums) should generally be centered.
High-frequency sounds (like cymbals and hi-hats) can be panned more freely.
It’s important to note that panning should be used with caution.
Just like reverb, you don’t want to overdo it.
Too much panning can create an unnatural or unbalanced mix when it comes to audio mixing and recording.
Use it Sparingly
Don’t pan everything hard left or right until you understand the stereo field in depth.
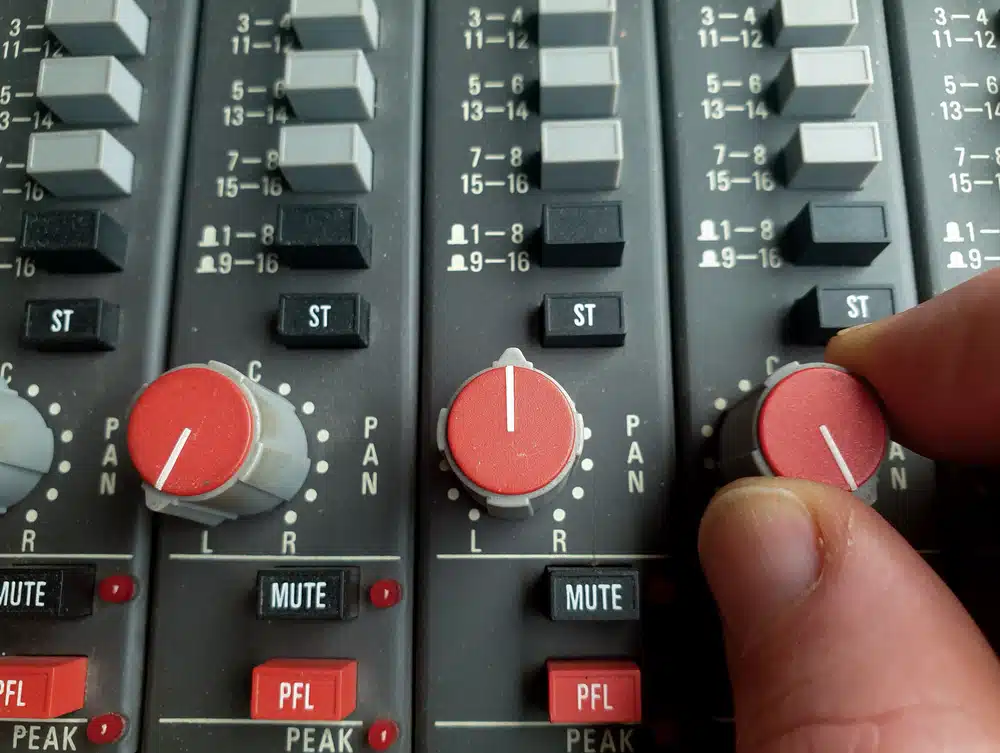
If you do, it will never ultimately be a good mix in the end. You’ll have people covering their ears.
Except when you get acclimated and know how to navigate around like a pro.
You may have to adjust your volume faders during the panning process.
Consider the Frequency Range of the Element You’re Panning
You might pan a hi-hat to the left to create space for the snare…
While the snare itself gets panned to the right. Watch your output signal.
Experiment With Different Panning Positions
Experimentation is key in every aspect of music production now, and panning is no different.
Diverse panning positions will help you achieve different effects.
For example, panning a guitar slightly to the left can create a sense of space, while panning it to the right can create a more focused and direct sound.
Mixing music is about your ultimate goals, and what matches your audio track best.
Create a Sense of Movement in the Mix
You can use panning to create a sense of ‘movement’ in your mix.
For instance, you can pan a synth sound back & forth to create a sense of motion and interest.
These minor details can help you stand out in a major way, so don’t overlook them.
From one track to another, you’ll hear the difference.
Use Automation to Create Dynamic Panning Effects
Automation is an essential tool for creating dynamic and interesting music mixing.
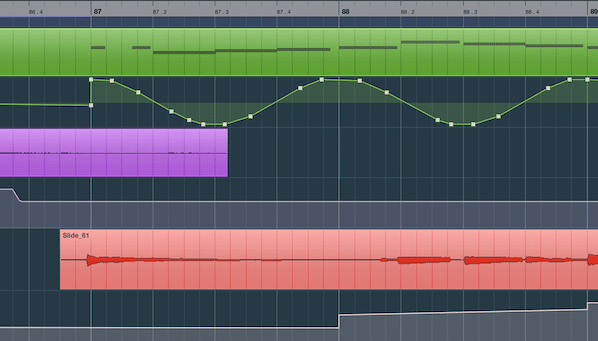
It allows you to create changes and movements in the mix that is impossible to achieve manually.
For example, you might automate a rise in volume during a chorus.
This will create a sense of excitement and energy. A whole band couldn’t match your skills after you master these mixing techniques.
Or, you can try to automate a filter sweep on a synth sound to create a sense of movement and interest.
It’s all about getting creative, so never limit yourself, just don’t overdo it.
7. Take Frequent Breaks (Ear Fatigue Is Real)
Music mixing is a tiring and challenging process and it’s easy to lose track of time.
However, if you don’t take frequent breaks to give your ears a break, you can also lose track of perspective as well.
Meaning, you might think your mix still sounds good, but after taking a break and returning, it could be disastrous.
So, before you get to that point, here are a few tips to avoid that frustrating occurrence altogether.
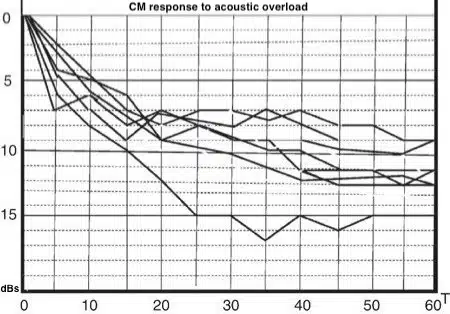
Take regular breaks 一 Mix for a set period of time and then take a break. This will give your ears a chance to rest and help you come back to the mix with fresh ears. Mixing engineers would never mix music without taking breaks, and neither should you.
Listen in different environments 一 When it comes to mixing audio, you’ll need to listen back in different environments, such as through your car stereo, on your phone, or through headphones. This will help you hear how your mix translates to different listening devices.
Listen to reference tracks 一 Let’s say you’re making a pop song. Choose a few tracks in the same genre and listen to them periodically throughout the mixing process. This will help you keep a reference of what a well-mixed track sounds like.
Final Thoughts
Mixing music is an art form that requires skill, practice, and a ton of patience.
With the 7 ways we’ve explored in this blog post, you’ll have a solid foundation for getting the perfect mix every time.
Remember to:
- Start with a good recording
- Use high-quality headphones and monitors
- Add EQ to balance frequencies
- Incorporate compression to control dynamics
- Include reverb to create space
- Apply panning to create width
- Take frequent breaks and listen with fresh ears
But most importantly, don’t forget to trust your ears and be creative!
Experiment, try new things, and don’t be afraid to make mistakes.
After all, it’s the imperfections that make music so beautiful.
If you’re looking for loops that are already mixed to absolute perfection, check out our FREE Unison Beatmaker Box (Free Teaser) pack.
It includes professional, pristine loops that will instantly blow the minds of your listeners.
And yes, they all come with matching audio stems and MIDI for ultimate convenience.
Until next time…


Leave a Reply
You must belogged in to post a comment.