Time stretching is all about adjusting the timing of audio to fit your needs without altering its pitch.
It involves changing playback speed, syncing tracks with different tempos, and creating unique sound design effects that blow people’s minds.
As producers, it can help you match audio clips like a boss, experiment with creative effects, and transform an ordinary audio sample into something insane.
Plus, make sure your tracks are polished by understanding how to avoid artifacts and optimize every single stretch.
That’s why we’re breaking down everything you need to know about time stretching, like:
- How time stretching works/how to time stretch like a boss ✓
- Different types of time-stretching modes ✓
- Key tools and techniques ✓
- How to stretch vocals and instruments ✓
- Syncing beats for perfect timing ✓
- Creative effects using stretching ✓
- How to be artifact free ✓
- Time-stretching and pitch-shifting differences ✓
- Pro tips, tricks, and techniques to help you master it ✓
- Much more about time stretching ✓
By knowing all about time stretching, you’ll be able to synchronize tracks perfectly, manipulate samples, and create professional-quality beats every single time.
Plus, make sure your audio files are clean, precise, and sonically unique (which is always a plus).
If you want to really enhance your workflow and push your music production skills to the next level, mastering time stretching is the key, so let’s get into it.
Table of Contents
What is Time Stretching?
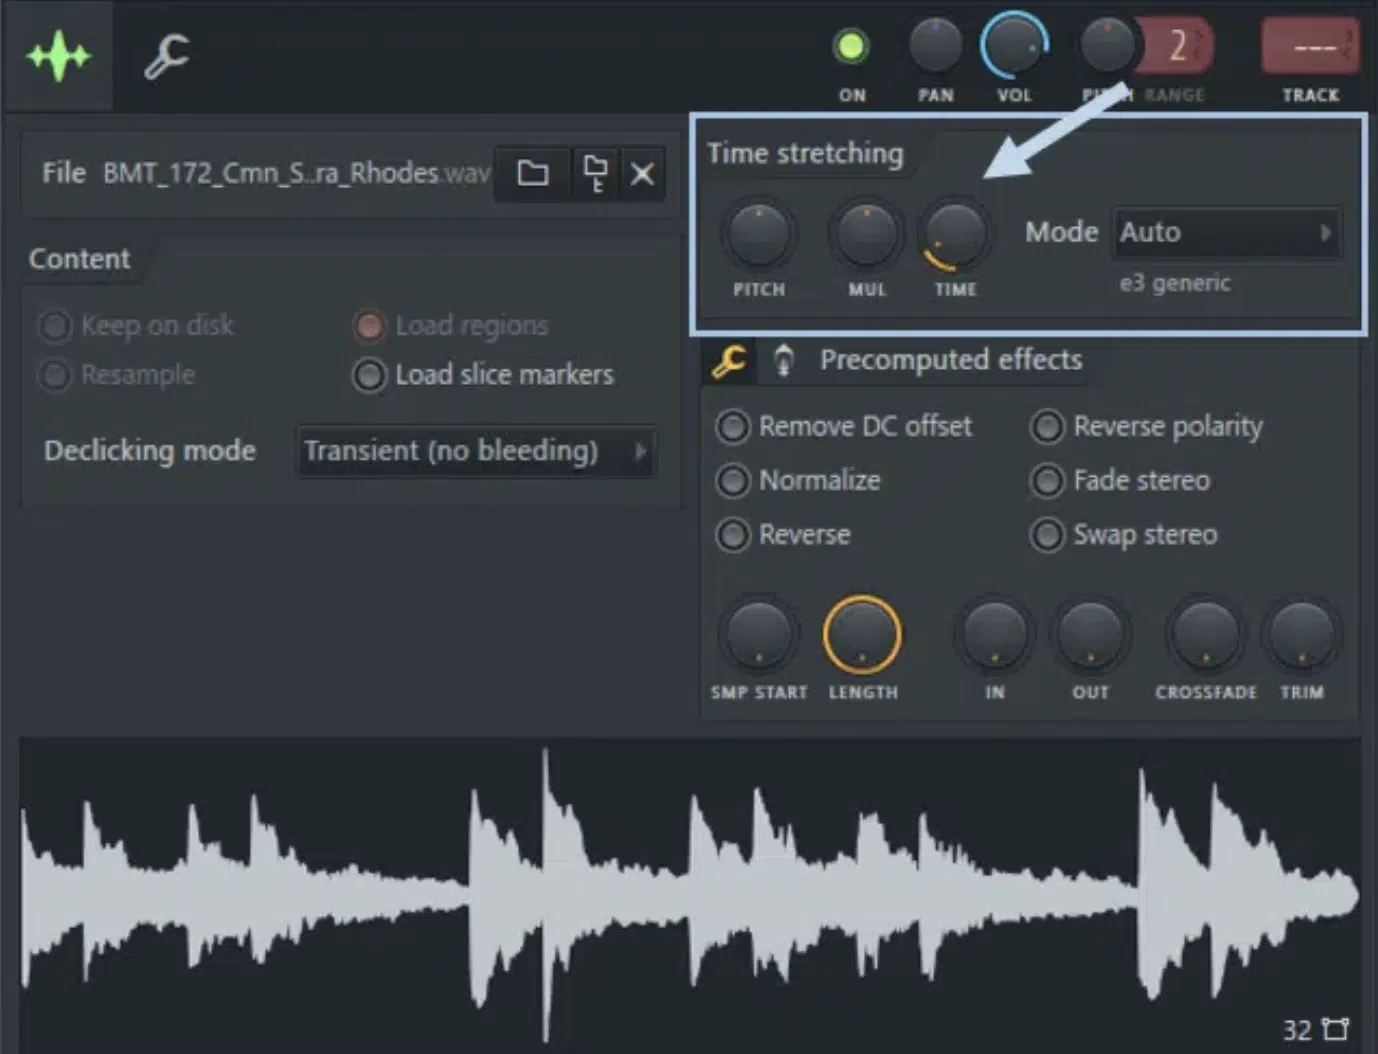
Time stretching is the process of changing the duration of an audio file without altering its pitch.
For example, you can take a vocal recorded at 120 BPM and make it fit a track running at 90 BPM, while keeping the singer’s pitch intact.
When it comes to music production, this method is key, especially when working with audio files that need to match the session tempo of your project.
Logic Pro’s Flex Time and Ableton Live’s Warp Mode make this possible by analyzing the timing of an audio clip and allowing precise adjustments, which we’ll break down later.
If you’re beat-making all day, you’re certainly going to stretch drum loops or samples to fit your project’s tempo flawlessly, so it’s important you know how.
When used creatively, time stretching can transform ordinary sounds into unique, stretched-out textures that work well in ambient or experimental sound design.
To master time stretching, it’s important to understand how different algorithms (like granular or complex algorithms) affect the quality of the output.
Don’t worry, we’ll break it all down in detail throughout the article so you can get a solid understanding.
The Basics of Time-Stretching
Time stretching may sound complicated at first, but trust me it’s easy to understand with the right techniques. So, let’s kick things off by breaking down how to time stretch, including specific settings, modes, and tools you’ll need to get started.
-
How to Time Stretch Like a Boss: Breaking it Down
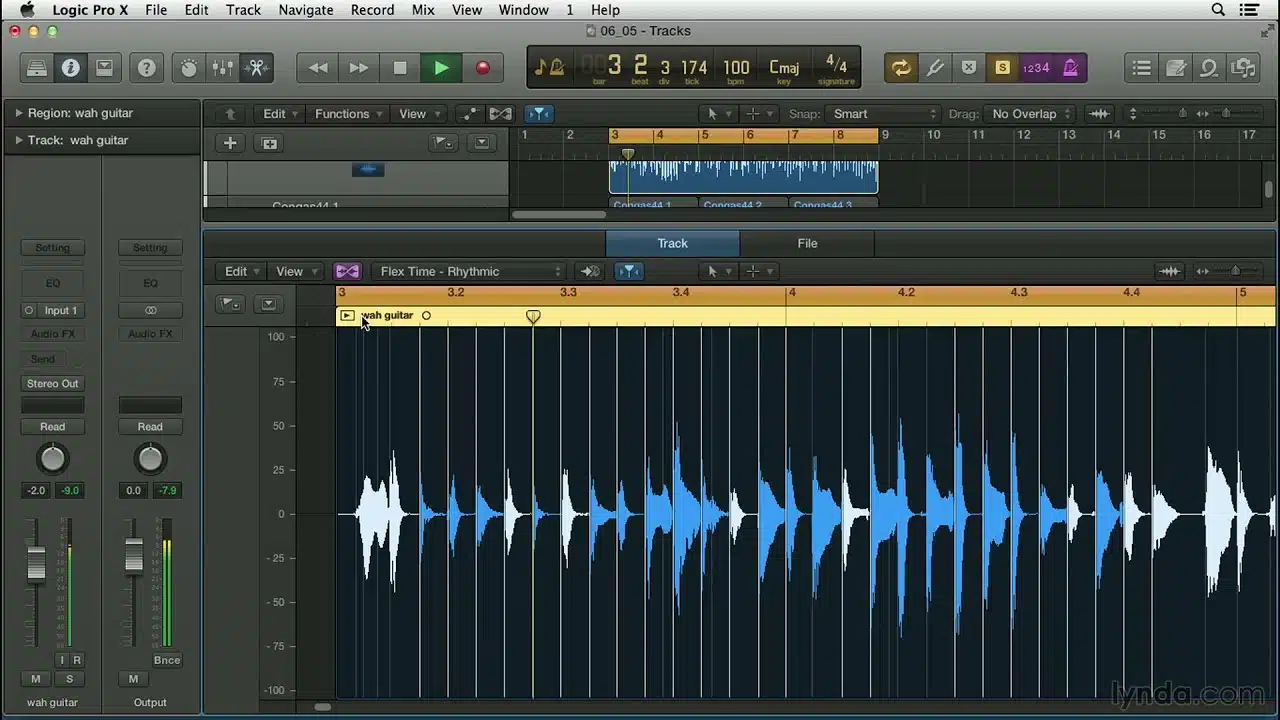
To time stretch like a boss, start by selecting the right tool in your DAW, like Logic Pro’s Flex Time or Ableton Live’s Warp Mode.
Then, enable the appropriate mode for your audio file… Monophonic for vocals or Rhythmic for drums.
In Logic Pro, once Flex Time is active, use the drag tool to adjust the audio clip’s duration to match your unique project’s session tempo.
This could be syncing a 100 BPM loop to 120 BPM, or whatever you’re working with.
For Ableton Live, use the Complex Pro Warp Mode to guarantee high quality for harmonic audio files when stretching or shrinking.
When stretching vocals, make sure to avoid pushing beyond ±50% of the original tempo to minimize artifacts, unless you’re aiming for a unique creative effect.
NOTE: Granular stretching tools like PaulXStretch are perfect for extreme stretching because they easily help you turn short sounds into atmospheric textures.
Adjustments like Flex Strength in Logic Pro or Warp Markers in Ableton Live let you refine the timing and avoid unwanted phasing, so play around with that.
Always experiment with these settings to fit the sound design needs of your project.
For finishing touches, apply pitch correction to ensure the sample’s pitch aligns with your track’s key, and you should be good to go.
-
Elastic Audio
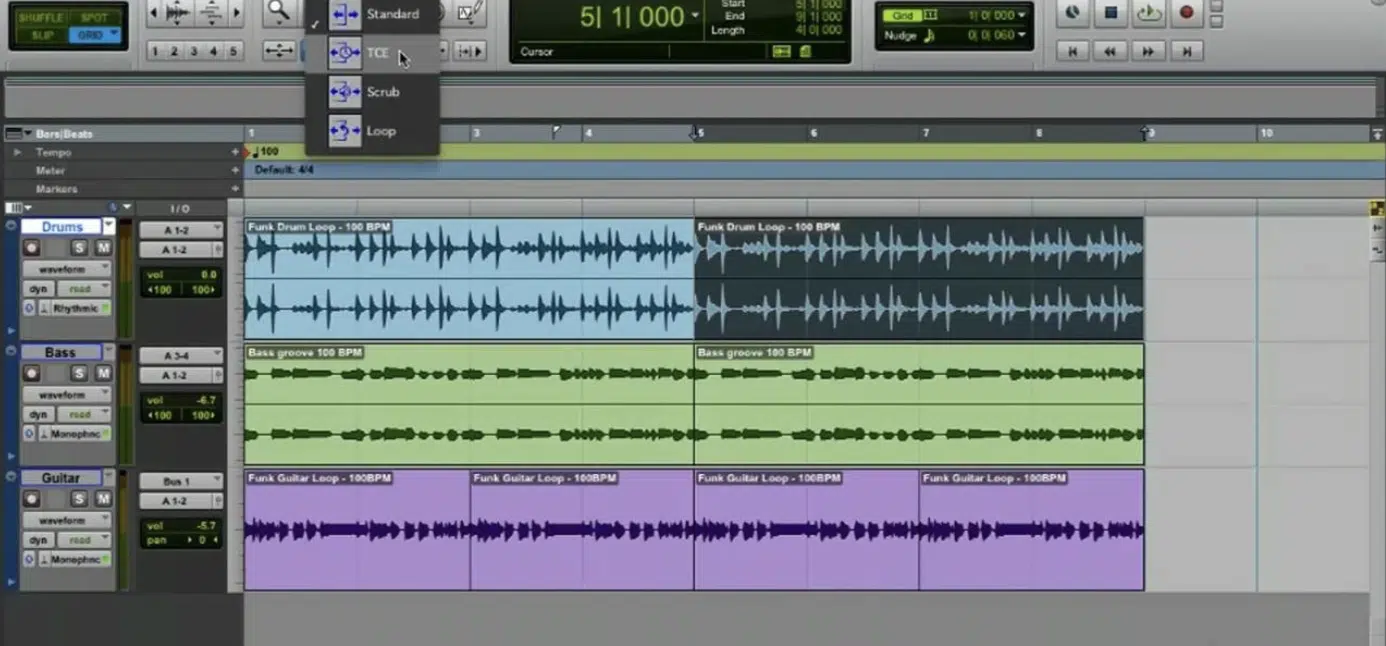
In the music production world, elastic audio is Elastic Audio is a staple for producers working in Pro Tools 一 giving precise control over the timing of audio files.
A lot of people asked me to incorporate this, so here we are.
To get started, activate Elastic Audio by clicking the Elastic Audio button on your track and selecting the correct mode.
Again, choose Monophonic for vocals, Rhythmic for drums, or Polyphonic for instruments.
For example, when syncing a live drum recording to a project at 120 BPM, use Rhythmic mode to maintain sharp transients and natural flow.
A good rule of thumb in my experience is to keep adjustments within 10–20% of the original tempo to avoid noticeable artifacts.
For tighter control, use the Warp Markers to manually align drum hits or vocal phrases to the grid.
NOTE: If you notice any phase issues on layered tracks, simply adjust the Elastic Properties slider to tweak the speed or duration until the timing feels locked in.
Elastic Audio is perfect for moderate edits, but for extreme stretches (e.g., doubling the length of a track), expect some quality loss that may work as a creative effect in experimental music.
-
Granular Time-Stretching
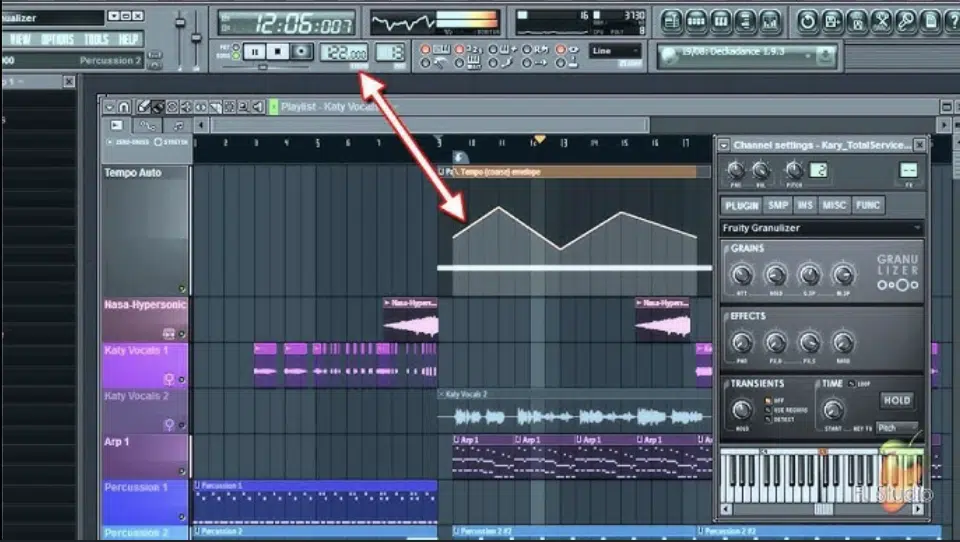
Granular time-stretching is perfect when it comes to pushing the limits of audio processing by breaking audio files into tiny little grains.
In PaulXStretch, you can stretch a 10-second vocal snippet to 10 minutes, creating ethereal, drone-like textures for ambient projects.
To make sure everything is smooth and on point:
- Set the grain size to 30–50 milliseconds for most musical content.
- Larger grains (100–200 ms) if you’re going for rhythmic glitch effects.
In Ableton Live, use the Texture Warp Mode to adjust grain size and flux 一 a setting of 20% flux adds organic variation without making the sound feel unstable.
For more atmospheric effects, stretch your clip by at least 300–400% and layer it with reverb to create epic, cinematic backdrops.
Just make sure to always monitor the quality of the output at extreme settings because overprocessing can introduce unwanted noise, and nobody wants that.
One of my favs is turning short vocal chops into haunting pads; combine granular stretching with pitch correction to keep the output in the same key as your track.
Granular time-stretching is a go-to for producers looking to transform a basic audio sample into something that’s really going to blow the minds of your listeners.
So, if that’s you, and I certainly hope it is, make sure to experiment with that.
-
Algorithmic Time-Stretching
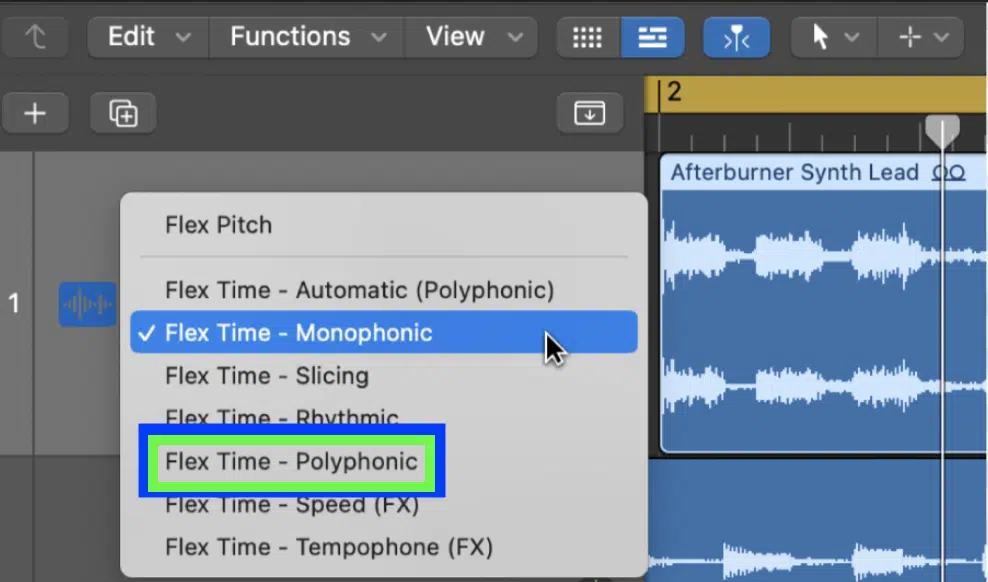
Algorithmic time-stretching is the backbone of most modern DAWs, using complex algorithms to preserve audio fidelity when adjusting tempo.
In Logic Pro, enable Flex Time and use the Polyphonic mode for multi-layered audio files, like a chord progression recorded at 90 BPM being stretched to fit 120 BPM.
A good setting for subtle adjustments is ±5–10 BPM from the original tempo so the quality remains proper.
For more harmonic material, plugins like Melodyne or Auto-Tune let you manipulate audio clips on a note-by-note basis while maintaining phase alignment across layers.
When working with rhythmic samples, set the Beats Warp Mode in Ableton Live with a transient envelope of 20 ms to preserve punch and clarity.
If you’re dealing with any glitches in high-frequency content, lower the formant settings or try Monophonic mode for single-pitch material.
Algorithmic stretching is also great for syncing long stems to a new session tempo…
For instance, adjusting a 130 BPM loop to 125 BPM works flawlessly with Logic’s Slicing mode and it’s super straightforward.
NOTE: Test different algorithm presets to match the specific sound you’re working with, balancing speed and quality in your final mix; that’s the key.
Expert Time-Stretching Techniques
When you want to go beyond basic adjustments, mastering expert time-stretching techniques can take your productions to the next level. So, for this next section, let’s get into the best methods for beat matching, stretching vocals, and avoiding common artifacts.
-
Time-Stretching for Beat Matching

Beat matching is essential for blending tracks with a different tempo, especially in DJ sets or remixes.
For example, if you’re matching up a 128 BPM drum loop with a 125 BPM project in Ableton Live, set Warp Mode to Beats.
Then, adjust the transient envelope to around 25 ms for super clean transients.
In Logic Pro, use Flex Time’s Rhythmic mode, and set grid snapping to “Smart” for precise adjustments when dragging the edges of your loops.
A great trick is to layer a time-stretched audio file with additional percussion to mask any minor artifacts and add depth to your beat.
PRO TIP: If the loop doesn’t sit perfectly, manually adjust Warp Markers in Ableton or use the Flex tool in Logic to lock key drum hits to the grid.
For more drastic tempo changes, test Complex Pro in Ableton or Polyphonic mode in Logic to preserve harmonic and rhythmic clarity.
If you just make sure everything aligns just the way you like by referring to the session tempo before exporting, you’ll be on point.
-
Stretching Vocals and Instruments
Producer Society
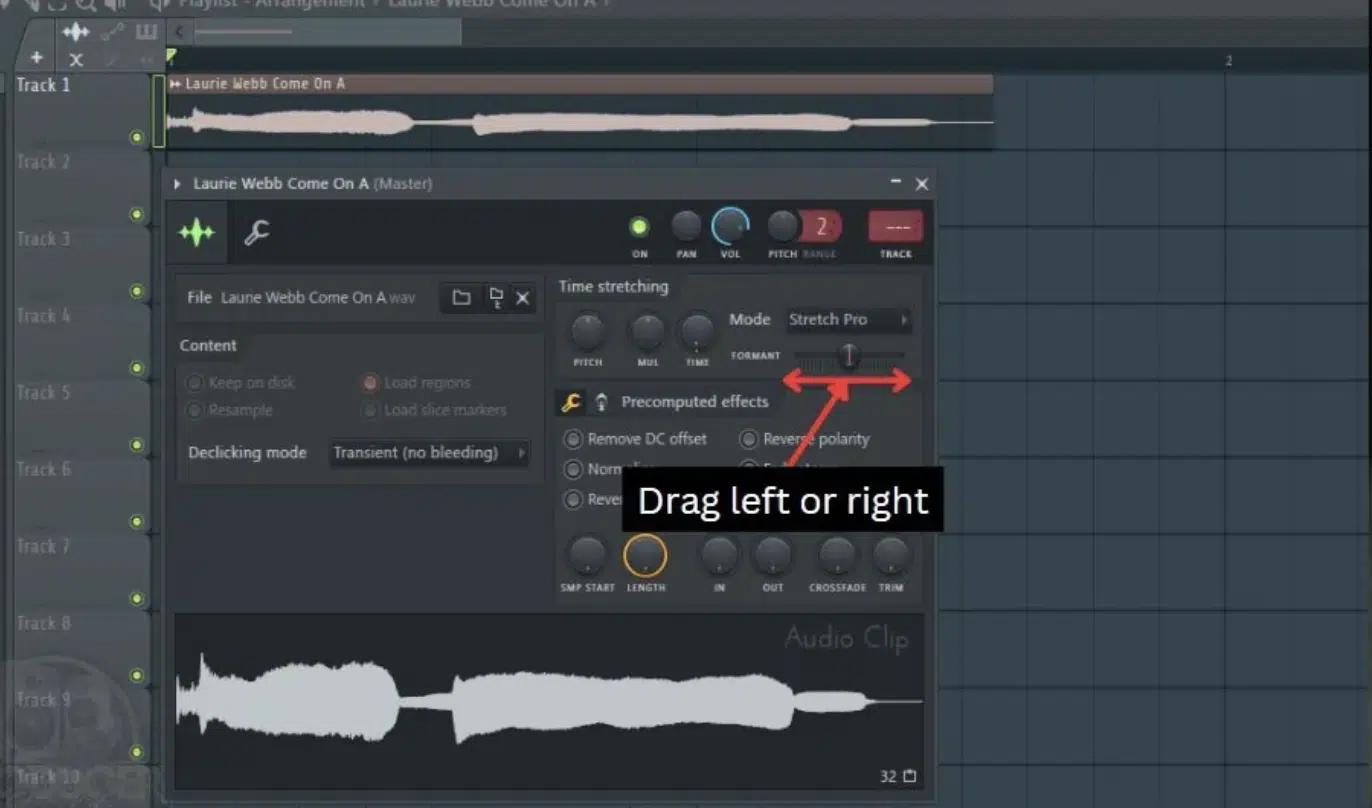
Stretching vocals and instruments requires very careful attention to sound quality and timing, so don’t slack in this area.
In Logic Pro, use Flex Time with Monophonic mode for vocals and Polyphonic for instruments like pianos or strings.
For example, if you’re adjusting a vocal track recorded at 110 BPM to fit a 120 BPM project, keep the stretch under ±10% to keep natural phrasing.
I know it sounds like a super simple thing, but it makes a huge difference.
In Ableton Live, the Complex Pro Warp Mode is excellent for retaining harmonic edge, especially for sustained notes in instruments or layered vocals.
NOTE: Always apply subtle pitch correction after stretching vocals to ensure the sample’s pitch stays consistent, especially in genres where pitch accuracy is key.
For instruments, granular plugins/software like PaulXStretch can transform short stabs into lush pads by stretching them 300–400%.
To avoid timing artifacts, adjust the grain size or transient sensitivity settings in your DAW—30 ms is a good starting point for most projects.
I personally like to layer the stretched audio with light reverb and delay to smooth out imperfections and add depth to your tracks, so play around with that.
Just remember, stretching vocals and instruments is as much about precision as it is about creative effects, so make sure you keep that balance.
-
My Favorite Creative Effects Using Time-Stretching
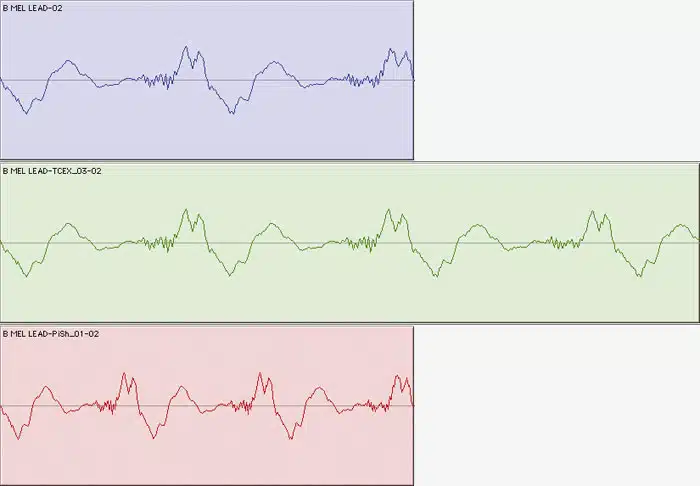
Time-stretching isn’t just for syncing audio files… It’s a tool for creating unique creative effects that elevate your sound design skills as well.
One method I love is using extreme stretching on vocal snippets with a granular plugin to produce atmospheric pads.
For example, stretch a 3-second vocal chop by 1000% and layer it with reverb for a haunting cinematic effect.
If you work in Ableton Live, try Texture Warp Mode with a grain size of 50 ms and 30% flux to add organic, unpredictable movement to sustained sounds.
Another creative use is stretching percussion loops in Logic Pro’s Flex Time:
- Setting them to Rhythmic mode.
- Applying a reverse delay to the stretched version.
This will give you an otherworldly (straight up epic) rhythm that people instantly react to.
A tip of mine is to slow down instrument stabs to create long, droning tones and adjust their pitch to fit your track’s key using a pitch-shifting plugin.
Mix these techniques with automation of playback speed or transient settings for super immersive soundscapes.
Always play around with layering stretched audio against its original to create textured arrangements that will help you sound extra professional.
This opens up endless possibilities for transforming even the simplest samples into something extraordinary and mind-blowing.
-
Different Modes of Time-Stretching: Summing it Up
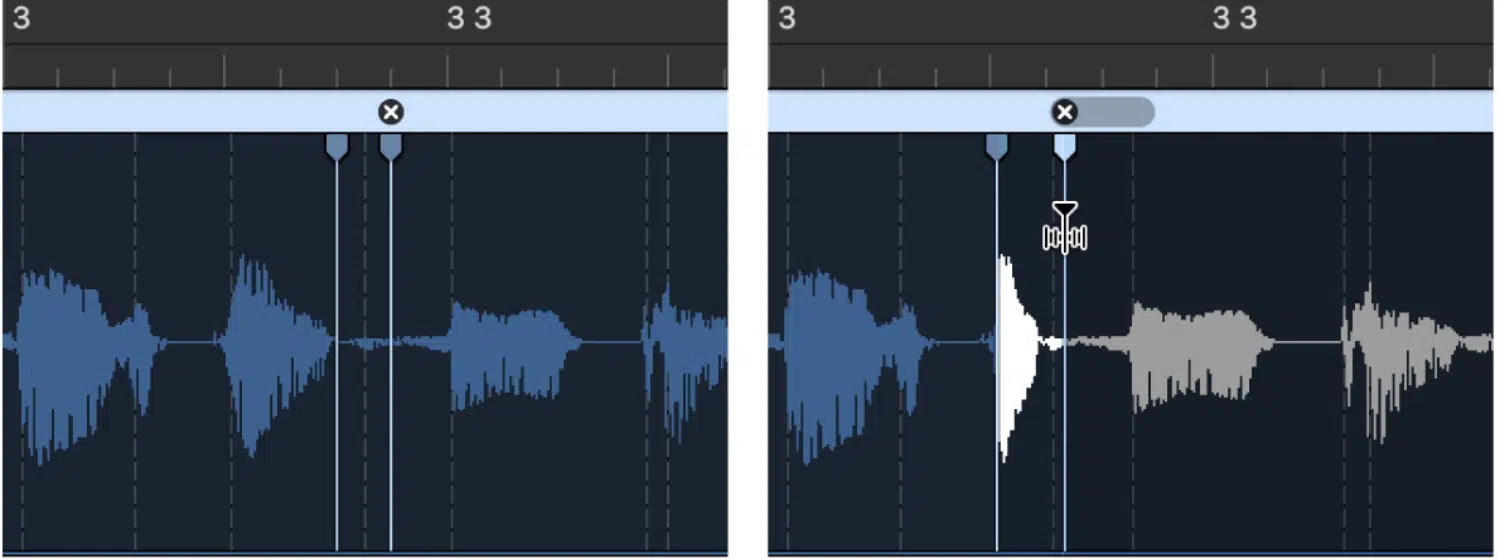
Choosing the right time-stretching mode is the key to making your audio files super high-quality, which is what you always want.
For vocals, use Monophonic mode in Logic Pro or Complex Pro in Ableton Live to preserve natural phrasing while stretching.
Instruments with harmonic complexity (like pianos or guitars) benefit from Polyphonic mode, which prioritizes pitch stability during stretching.
For rhythmic content, such as drum loops, Rhythmic mode or Beats Warp Mode ensures transients remain punchy; set the transient envelope to 20–30 ms for the best results.
In granular tools, use grain size settings of 40 ms for smooth effects or larger values like 150 ms for glitchy textures.
For experimental uses, switch to Flex Pitch mode in Logic to simultaneously adjust timing and pitch 一 opening up advanced sound manipulation options.
Always test multiple modes on the same audio clip to determine which works best for your specific needs.
Each mode applies unique processing for specific types of sounds.
Understanding these modes can help you make sure your tracks stay polished while letting you play around with creative stretching ideas.
PRO TIP: When you time-stretch anything, to make sure things are artifact-free, you should always use the appropriate mode for the type of audio and keep adjustments within a reasonable range (generally ±10–20% of the original tempo).
Plus, fine-tune settings like grain size, transient sensitivity, or formant preservation depending on the material.
Bonus: Time-Stretching and Pitch-Shifting (Key Differences)
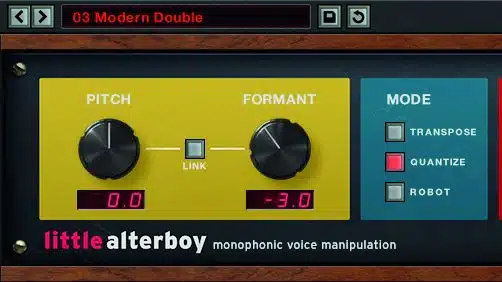
Time stretching and pitch shifting are two similar techniques in music production, but they do serve different purposes, and it’s important to know them.
Time stretching changes the playback speed of an audio clip so can adjust its duration without altering the sample’s pitch.
For example, stretching a vocal phrase recorded at 120 BPM to fit a slower 100 BPM tempo keeps the vocal pitch steady to keep its original key.
Pitch-shifting adjusts the tonal characteristics of audio, which lets you raise or lower the pitch independently of time.
An example of pitch scaling is shifting a guitar riff up 5 semitones to match the harmonics of another track while keeping its timing intact.
When working with vocals, combining time stretching and pitch shifting can be incredibly powerful.
For example, slowing down a vocal track by 50% with time stretching and then applying a -2 semitone pitch shift creates a darker, more atmospheric tone.
For cleaner results, use pitch correction after extreme adjustments to maintain smooth transitions between notes so everything is flawless.
Another great use of pitch scaling is in layered harmonies 一 stretch a backing vocal to double its original length, then pitch-shift it up an octave to create an ethereal effect.
NOTE: A great trick with drums is to stretch a percussive loop by 25% for a slower groove and subtly shift its pitch down by a few cents to add weight.
Time stretching and pitch shifting are also perfect for transforming instrument stabs into lush pads…
Simply stretch them by 400% and apply pitch scaling to experiment with harmonics.
Just remember to watch out for artifacts that come about when taking things to the next level, and apply pitch correction to polish the final sound like we talked about.
Whether you’re aligning mismatched tempos or tweaking the tonal variety of your own tracks, mastering time stretching and pitch shifting is super beneficial.
Final Thoughts
Time stretching doesn’t only let you sync tempos or reshape audio, but it has the ability to completely transform your tracks.
It can refine timing, unlock new creative possibilities, and help you bring a professional edge to your beats.
Using today’s tips and tricks, we broke down, you can seriously enhance your workflow and create show-stopping tracks that people instantly find intriguing.
But remember, it’s all about choosing the right settings and experimenting, not overdoing it or sacrificing quality.
And, to help you really enhance your time-stretching skills (plus every other effect in the game), you’ve got to check out these insane Free Project Files.
They include 3 professional project files that show you exactly how to make a killer beat from start to finish 一 including techniques like time stretching and pitch shifting.
These files are created by the best in the business to give you the cheat codes, so trust me, you don’t want to miss out on this one.
Mastering time stretching takes practice, but with the right approach, you’ll be creating tracks that sound polished, innovative, and uniquely yours.
Go ahead and experiment and keep pushing your tracks to new heights every single day (not even the sky’s the limit).
Until next time…


Leave a Reply
You must belogged in to post a comment.