When it comes to vocals, sibilance is always going to be a concern.
It can completely derail a great vocal performance and make your mix sound harsh or unpolished, and nobody wants that.
Plus, when it comes to creating a smooth, professional sound, excessive sibilance can distract your listener and reduce the overall quality of your tracks.
As music producers working with artists and vocals all the time, knowing the different ways to successfully avoid sibilance and prevent it from happening is key.
That’s why I’m breaking down everything you need to know, like:
- What is sibilance ✓
- How to identify sibilance in vocals ✓
- Best microphones to reduce sibilance ✓
- Proper mic placement & using pop filters ✓
- Expert vocal techniques to minimize sibilance ✓
- How to de-ess vocals like a pro ✓
- Advanced tips like dynamic EQ & multiband compression ✓
- Spectral editing for ultimate precision ✓
- Much more to help you answer, ‘what is sibilance ✓
By knowing all about sibilance, different techniques, and how to control it, you’ll be all set and ready to knock out pro-level songs.
This way, you can deliver vocals that sound super clean every single time.
Plus, successfully manage harsh frequencies, keep your mixes clean, and impress artists, listeners, and clients like a boss.
Table of Contents
What is Sibilance Exactly?

Sibilance is the sharp, hissing sound you sometimes hear in vocals, especially during consonant sounds like “s,” “sh,” or “ch.”
It happens when higher frequencies resonate more than usual, which makes certain words super harsh or distracting (super unprofessional).
Sibilance sounds are usually a result of the way air passes through the mouth during speech; accentuating specific letters like “Ss” or “Ch.”
A good example is when singers hit words with strong “S” sounds… If you’ve ever noticed an almost snake-like hiss cutting through a mix, that’s sibilance.
It’s super noticeable in human speech when microphones boost higher frequencies, emphasizing these tones.
Sibilance occurs when a combination of factors aligns:
- Bad microphone placement
- Sloppy vocal performance
- Sometimes even the EQ choices in your mix
To identify it in vocals, listen closely or analyze the higher frequencies (around 5kHz to 8kHz) in your audio.
Using software tools like a spectrum analyzer can help pinpoint these sharp tones that stand out from other sounds.
Don’t worry, we’ll break it all down throughout the article so you get the full picture.
-
Microphone Selection and Placement

The microphone you choose can seriously affect the amount of sibilance in your recording.
For example, a condenser microphone often emphasizes higher frequencies, making sibilance more pronounced.
A dynamic microphone, on the flip side, tends to handle sharp consonant sounds like “S” and “Ch” more gently, so keep that in mind.
When recording a sibilant vocalist, go for a microphone with a flatter frequency response or one specifically designed to handle vocals smoothly.
That will always be your best bet.
Placement is just as important, so you’ll want to position the microphone slightly off-axis from the singer’s mouth (around 15–30 degrees)
This will reduce the direct impact of air bursts that accentuate sibilance.
Let’s say the vocalist tends to emphasize “S” sounds…
Positioning the mic slightly above their mouth and angled downward can help kill these harsh frequencies without sacrificing clarity, which you never want.
A good starting distance is around 6–8 inches from the microphone, but this can always be adjusted based on the vocalist’s dynamics and the room acoustics.
NOTE: If the proximity effect adds too much bass or accentuates higher frequencies, increasing the distance by about 2–3 inches should create a more balanced tone.
-
Using Pop Filters and Windscreens

A pop filter is going to be your best friend when it comes to managing sibilance.
By diffusing the airflow between the singer and the microphone, it softens the more harsh consonants like “S” and “Ch.”
You’ll want to place the pop filter about 3–6 inches away from the mic for the best results because any more/less than that causes its own problems.
For outdoor or live recording, a windscreen can also help minimize sibilance, although it’s typically better at reducing plosive sounds.
For studio sessions, I personally like to use a dual-layer pop filter because it catches a wider range of air bursts and other sibilant sounds.
And, smooths out sibilant peaks before they hit the microphone (it makes a big difference, trust me).
Remember, a poorly positioned filter won’t stop the problem, so make sure it’s in line with the vocalist’s mouth but not too close to their lips.
This will allow space for natural airflow and make things much cleaner and on point.
Post-Production Strategies: Breaking it Down
Even with the best recording techniques, some sibilance will still make its way into your mix. Luckily, there are great post-production strategies to tame sibilant sounds and make sure your vocals sit super smoothly in the mix. Let’s break it down.
-
De-Essing
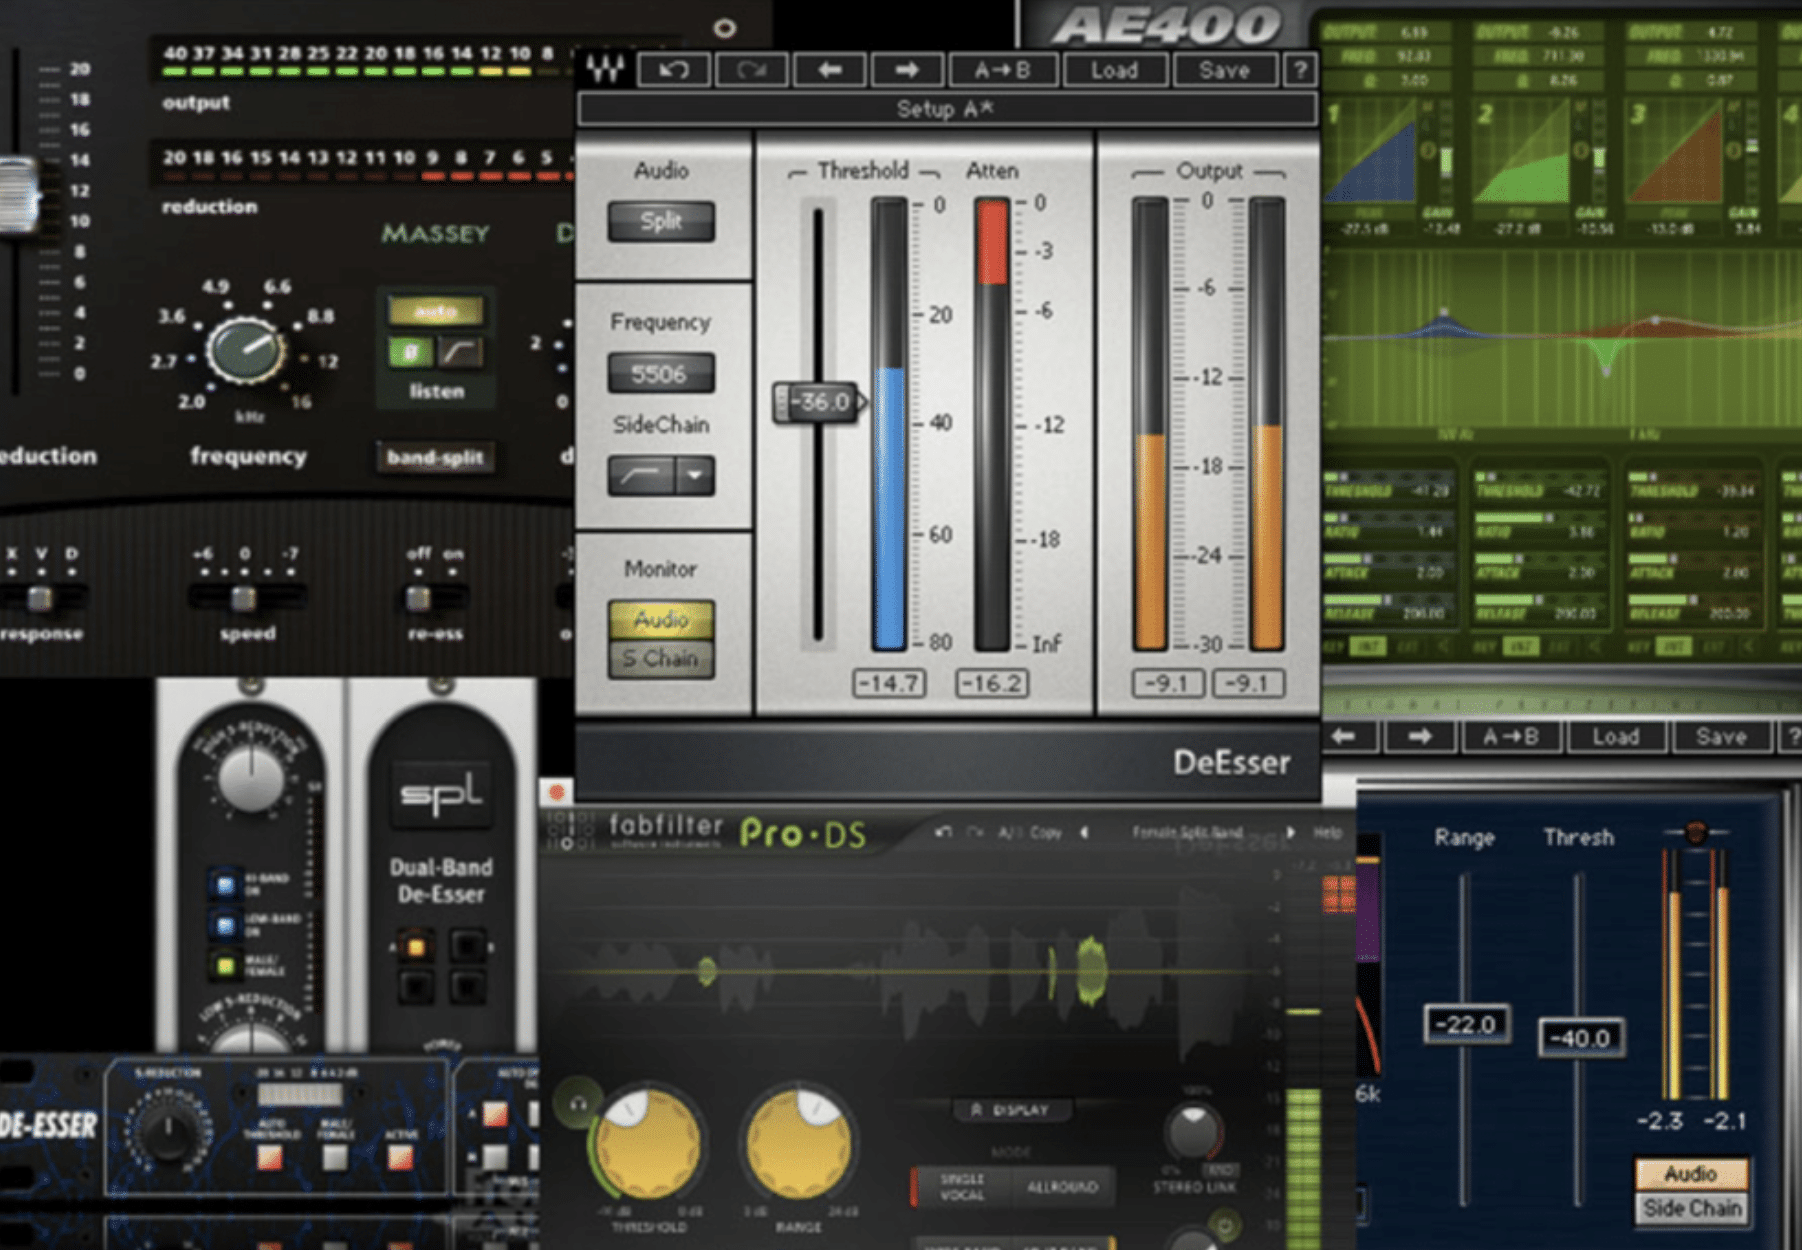
De-essing is one of the best, most effective ways to handle sibilance during post-production, hands down.
A de-esser works by targeting the specific frequency range where sibilance lives, usually between 5kHz and 8kHz, and reducing those harsh tones dynamically as they appear.
Meaning, if a vocalist’s “S” sounds are peaking at 7kHz, you can use a de-esser to compress that exact range without affecting the rest of the vocal track.
To start, throw a de-esser plugin on your vocal chain and set the frequency band to the region where sibilant sounds are most noticeable.
Start with the threshold at a moderate setting (like -15dB) and tweak it gradually until you hear the sibilance reduce without dulling the vocal’s natural brightness sounds.
If you hear things starting to get super dull, pull it back a little bit.
Keep the attack and release times short, around 1-2ms attack and 10-20ms release, to catch those quick, sharp peaks like a boss.
Pro Tip
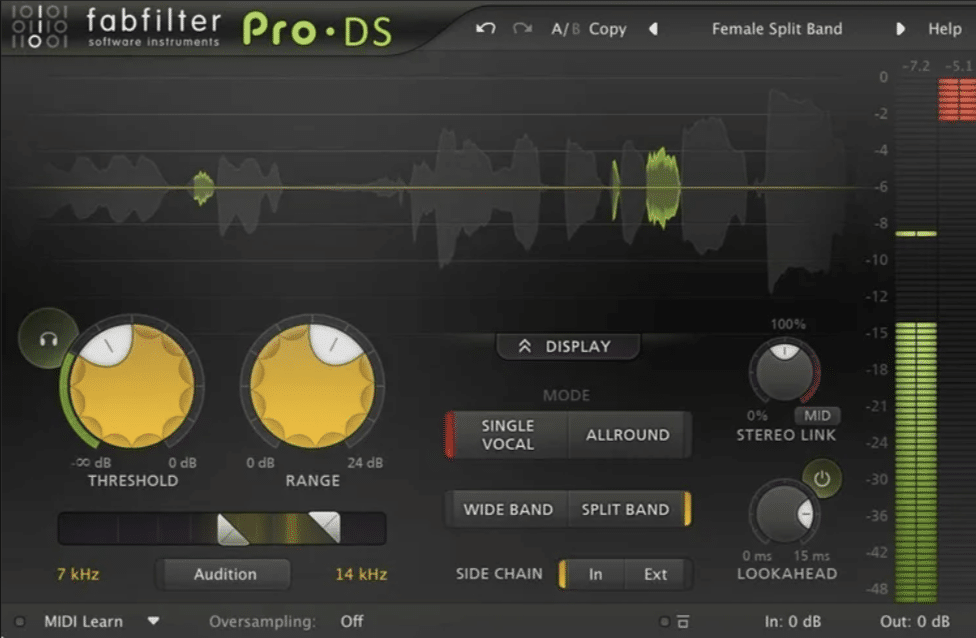
If you’re unsure of the exact frequency, use the sidechain monitor feature available in many plugins, like FabFilter Pro-DS, to solo the affected range.
Listening with your ear in this mode will help you pinpoint the most distracting sibilance examples and fine-tune the de-esser settings like a boss.
Remember, the goal is to make the “Ss” blend naturally with the other sounds, not to eliminate them entirely.
-
Manual Automation Techniques
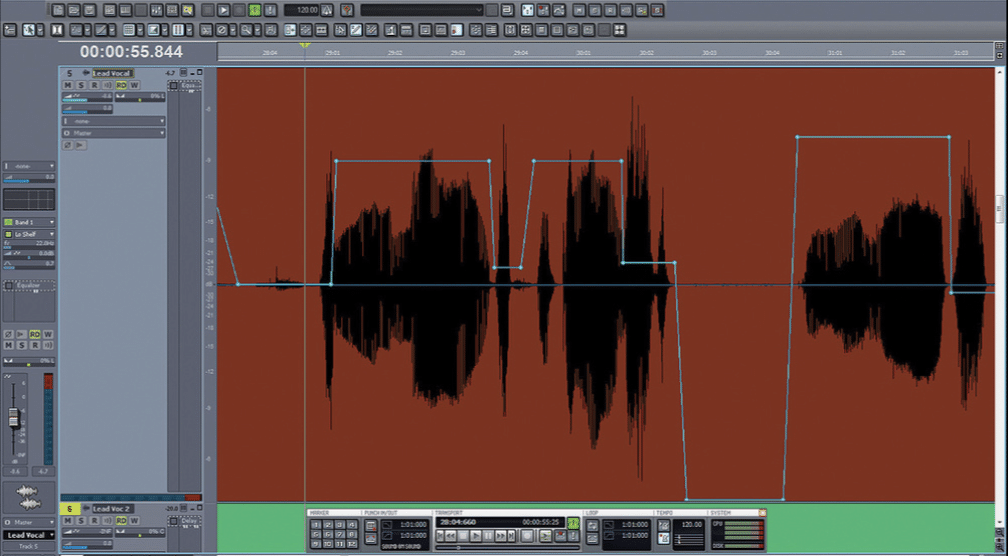
If you want total control over sibilance, manual automation is an excellent technique, and actually pretty fun if you’re a perfectionist like myself.
It lets you zero-in on specific problem areas and tackle them with razor-sharp precision.
You’ll want to start by zooming in on your vocal track and identifying the exact moments where sibilance peaks occur.
These happen on consonant-heavy words like “same” or “this.”
To locate them visually, look for sharp spikes in the waveform, which typically occur in the higher frequency range (around 5kHz–8kHz).
Or, just use a spectrum analyzer to isolate these problem areas; easy peasy.
Once you locate them, automate the volume of the sibilant sections by dipping them by about 2–5dB.
For example, if the word “hiss” spikes around 7kHz, simply isolate the “Ss” portion and pull down its gain slightly to balance it with the rest of the vocal.
A reduction of around 3dB usually works well for reducing harshness while keeping clarity.
Many DAWs, like Logic or Ableton, let you draw volume automation directly onto the waveform 一 making this process precise and visual.
For extra control, you can use a narrow Q band in your EQ to gently reduce the harsh frequencies in tandem with volume dips so the tone remains balanced.
Use a short fade in and fade out around the automated section to ensure the adjustment sounds natural and seamless.
Pro Tip

You always want to focus on consistency… If a certain type of sibilance occurs frequently, such as “S” tails at the end of phrases, apply automation to one section.
Then, copy and paste the settings to other similar occurrences.
While it’s more time-consuming than using a de-esser, manual automation ensures that only the offending sounds are affected, leaving the rest of the vocal untouched.
So, overall I would certainly say it’s worth it, just don’t slack in this area.
-
Dynamic EQ for Sibilance Control
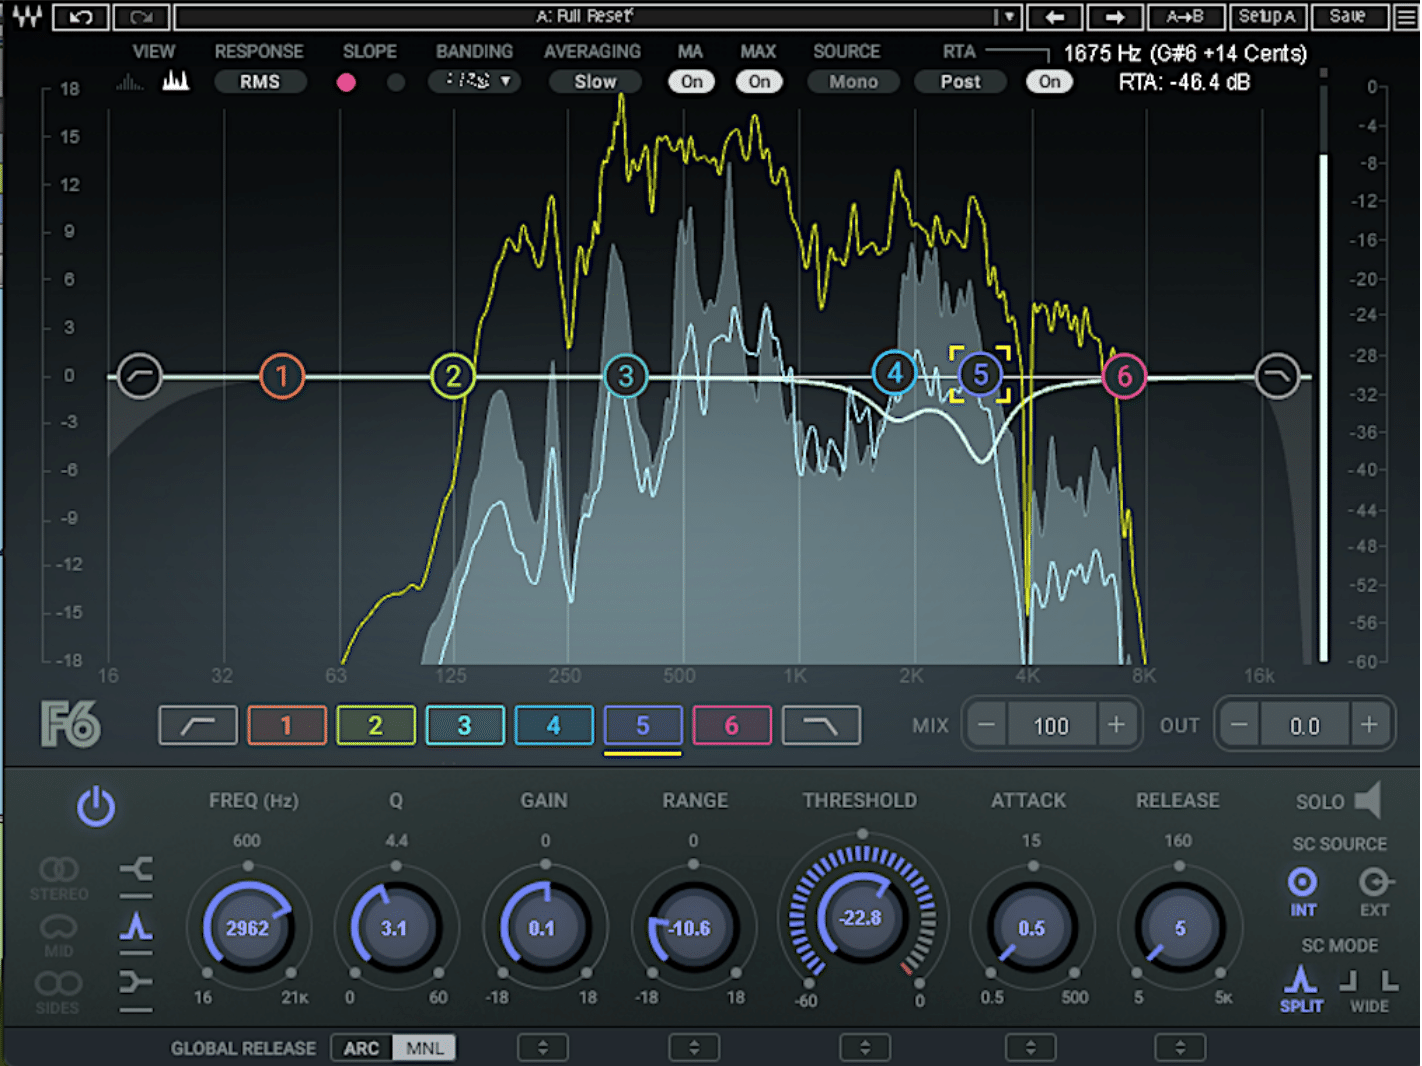
Dynamic EQ is perfect for dealing with sibilance because it lets you get more flexible than traditional de-essers do.
Unlike static EQ, which applies a constant cut to a specific frequency range, dynamic EQ adjusts only when sibilance occurs.
For example, if you’ve identified harsh peaks around 6.5kHz, you can simply set a dynamic EQ band to attenuate that range only when the sibilance spikes.
Start by loading a dynamic EQ plugin, like FabFilter Pro-Q 3 or TDR Nova, and use its solo band function to sweep through the higher frequencies (5kHz–8kHz).
Once you’ve pinpointed the problem frequency, set the threshold so that attenuation kicks in only when the sibilant sounds exceed a certain level.
A good starting point might be a threshold of -20dB with a reduction of 2-4dB, though you’ll need to adjust based on the actual sound of your track, of course.
Pro Tip
For smoother control, use a mid-to-narrow Q factor (around 3–6) to target sibilance without affecting surrounding frequencies.
Make sure the attack is fast, around 1ms, so the EQ reacts immediately to the sharp consonants, and set the release time between 20ms and 50ms to avoid unnatural dips.
Advanced Techniques
If you already know the answers to the question, ‘what is sibilance’ or just want to get crazy, let’s break down some advanced techniques. They go beyond the basics, helping you to manage sibilance and preserve the integrity of the vocals and overall mix.
-
Multiband Compression
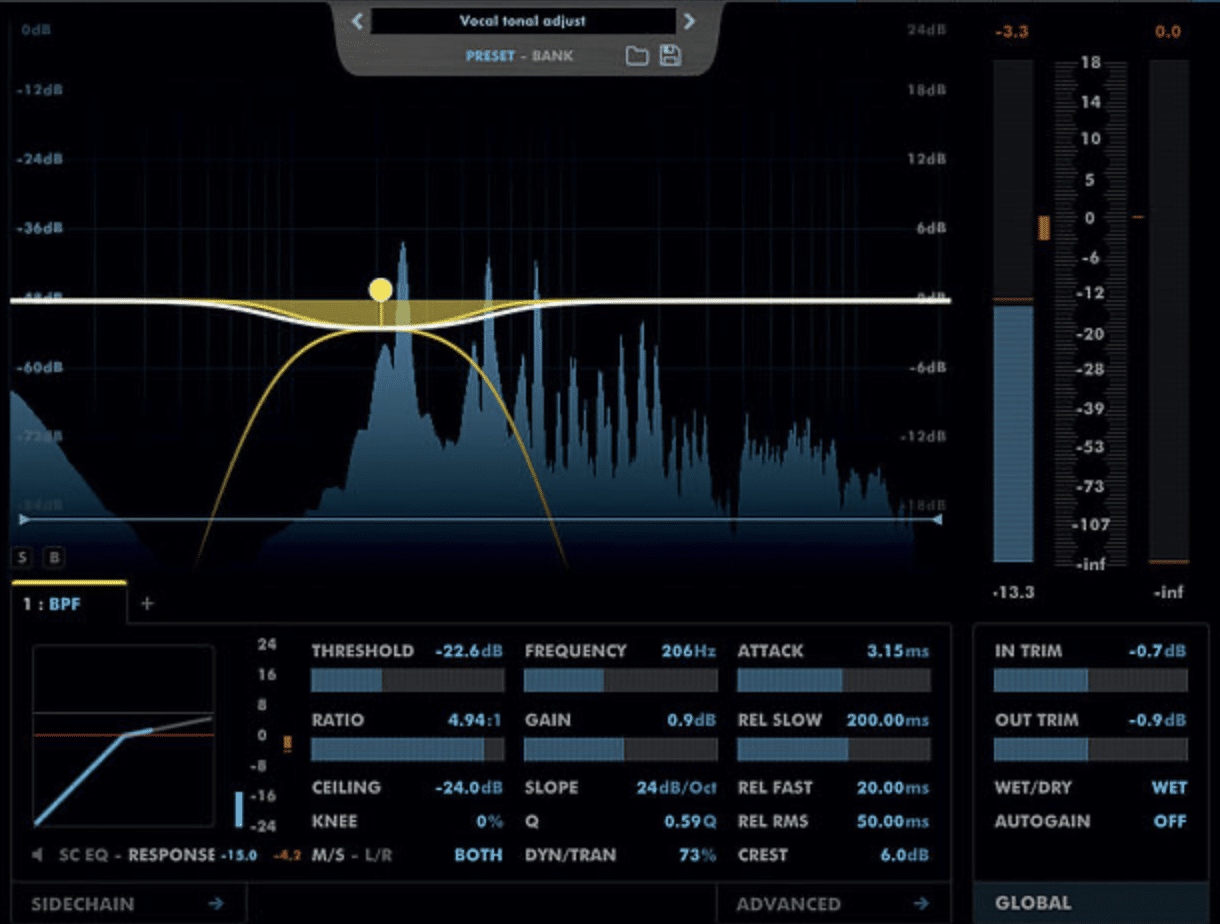
Multiband compression is a great way to manage sibilance, especially when it’s tied to dynamic changes in the performance.
Unlike a de-esser, which targets a narrow frequency range, multiband compression allows you to isolate and control broader frequency bands.
So, if you’re working with more complex vocal tracks, it’s perfect.
For example, if your vocalist’s “S” and “T” sounds are prominent in the 6kHz–9kHz range, you can set up a compressor to only attenuate that band when it becomes too harsh.
When using your multiband compressor, solo the upper-mid frequency band and adjust its crossover points to focus on the sibilance range (usually between 5kHz and 10kHz).
Set the threshold so that compression activates only when those frequencies spike, and use a ratio between 2:1 and 4:1 for subtle but effective control.
Fast attack times (1–3ms) and medium release times (20–50ms) work best for catching sibilant peaks without affecting the overall tone of the vocals, so start there.
Pro Tip
Listen to how the compression interacts with your mix, especially in busy arrangements.
If the sibilance reduction feels way too aggressive, back off the gain reduction by 1–2dB and re-check the balance in context.
Your audience will appreciate what you produced, trust me.
-
Parallel Processing for Sibilance Management
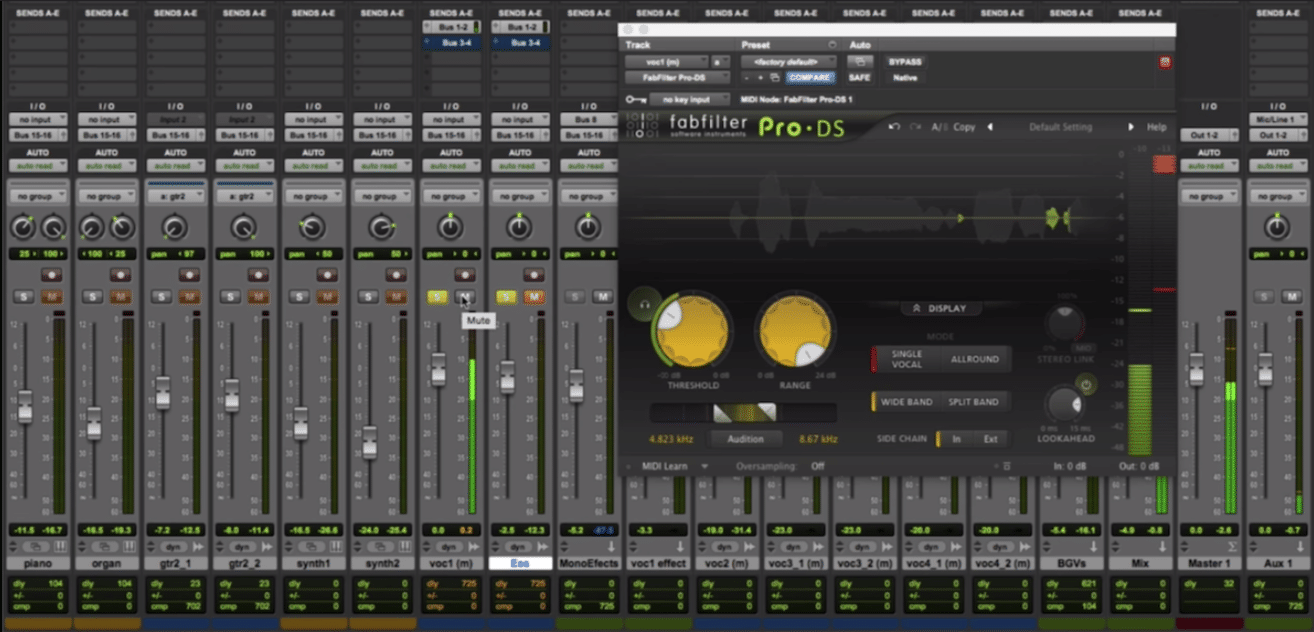
Parallel processing can be a game-changer when dealing with sibilance because it lets you keep the natural, more authentic vibe while subtly reducing harshness.
The whole idea is to process a duplicate track specifically for sibilance control and blend it back with the original to achieve a balanced result.
Meaning, you’ll want to create a duplicate vocal track and apply heavy de-essing or dynamic EQ to it 一 focusing solely on the higher frequencies where sibilance lives.
On the parallel track, insert a de-esser or dynamic EQ and set it to aggressively target the sibilance range, typically 6kHz–8kHz.
A threshold of -20dB and a reduction of 4–6dB are good starting points, but explore/adjust these settings based on the specific recording.
Push the processing harder than you usually would since this track will be blended subtly with the original.
Then, slowly blend the processed signal back with the original until the sibilance is tamed but the vocal retains its natural presence (the perfect middle).
Use the parallel track’s volume fader to control how much of the processed signal is added.
NOTE: Try keeping the parallel channel at -15dB relative to the original vocal to maintain the most natural sound possible.
-
Spectral Editing
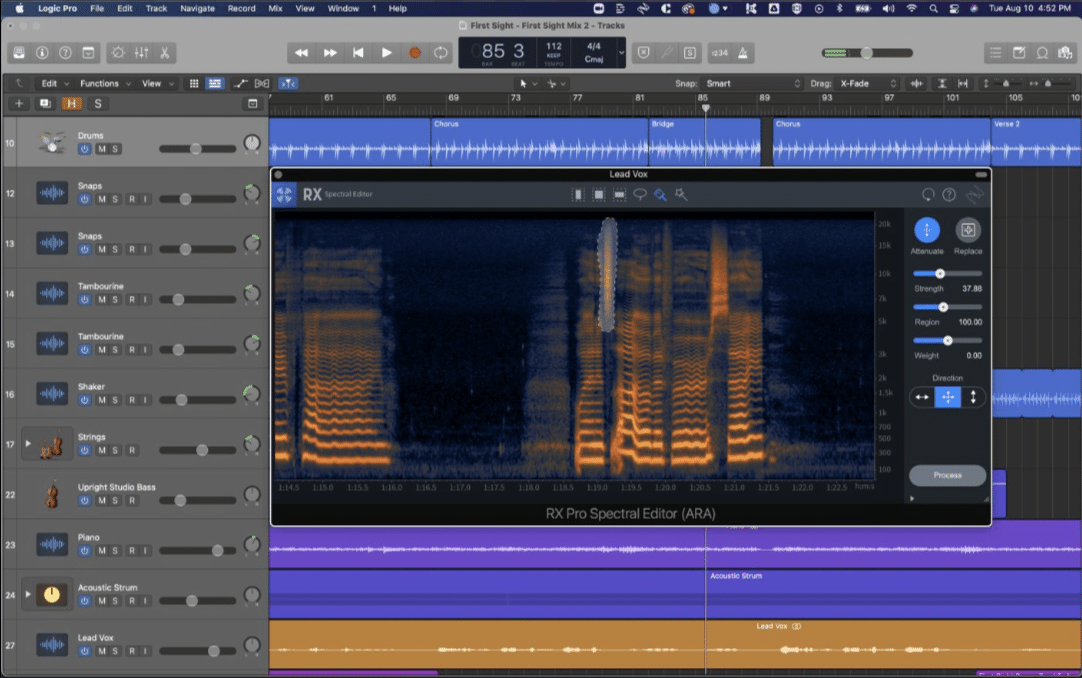
Spectral editing is another awesome one for tackling sibilance because it lets you visually isolate and manipulate specific frequencies.
This technique involves analyzing your vocal track in a spectral editor, where you can see sibilant sounds as bright, concentrated peaks in the higher frequencies.
Again, these are usually located around 5kHz–10kHz.
For example, when the vocalist sings words like “this” or “snake” (or anything other hissing sound/harsh words) the “Ss” will appear as sharp, narrow bands on the spectrogram.
Once you identify these problematic areas, use the spectral editing tool to attenuate just the sibilant peaks without messing up the rest of the vocal performance.
A gentle reduction of around 2–4dB in these specific regions often works well 一 leaving the original tone on point while successfully smoothing out the harsher elements.
Be careful not to over-edit…
If the “Ss” become too soft when you hear it, the vocals may lose all of their clarity, which can be just as distracting as excessive sibilance (lose-lose right there).
Pro Tip
Zoom in on the waveform and match the attenuation closely to the duration of the sibilant consonants so the adjustments are targeted only at the sibilance.
And, don’t interfere with surrounding vowel sounds or other elements.
While spectral editing takes some serious time and focus, it provides unparalleled control; making it an ideal choice for tracks with noticeable sibilance issues that persist.
Yes, even after other methods like de-essing (as we talked about earlier) have been implemented.
Final Thoughts

When you’re asking yourself, “what is sibilance,” just remember it’s all about managing those sharp, hissing sounds that can make vocals harsh or distracting.
You have to remember to destroy sibilance at the source by using proper recording techniques and smart post-production strategies like de-essing and dynamic EQ.
Plus, never ignore it in your final mix, that’s for sure.
This way, your vocals will sound smooth, polished, and professional, and your tracks will always have the perfect balance of clarity and balance.
And, as a special bonus, you’ve got to check out the best Free Vocal Samples in the entire music industry.
It includes 20 professional-quality vocal loops, chops, and one-shots that are flawless (and of course, zero sibilance).
They’re the perfect way for you to make your tracks catchy and add the missing piece to your music every single time.
If you want perfectly processed vocals, then look no further 一 and yes, all the files are cleared for personal and commercial use.
You can use them in your music however you want.
When you truly understand “what is sibilance” and how to control it, you can handle any vocal recording like a boss.
Keep these techniques in mind, and you’ll have no trouble creating tracks that sound clean, polished, and ready to dominate the competition.
Until next time…



Leave a Reply
You must belogged in to post a comment.