Automation is a creative tool that lets you apply changes ahead of time, like turning up the volume of a guitar solo or making a vocal echo bounce around during a chorus.
It can help you create those show-stopping effects in songs that make you go “How did they do that?”
Plus, keep your music sounding great on any speaker, of course.
So, as a music producer, understanding automation and how to use it creatively can completely transform your tracks.
It’s what helps you polish your song, add some magic to your music, and make sure everyone hears it the way you intended.
In today’s article, we’ll break down everything about automation in music, like:
- What automation refers to & why it matters ✓
- How to use automation for volume and pan control ✓
- Adding life to your tracks with dynamic effects ✓
- Getting creative with powerful automation ✓
- Tips for automating vocal tracks ✓
- Mixing with automation for clearer sound ✓
- Choosing the right tools for automation ✓
- Professional automation techniques ✓
- Much more! ✓
By the end of this, you’ll have the tools and knowledge to use automation like a boss so your music stands out and feel more alive.
Whether you’re just starting out or you’ve been at it for a while, getting a handle on automation is going to seriously enhance your tracks.
So, let’s dive in…
Table of Contents
What is Automation?
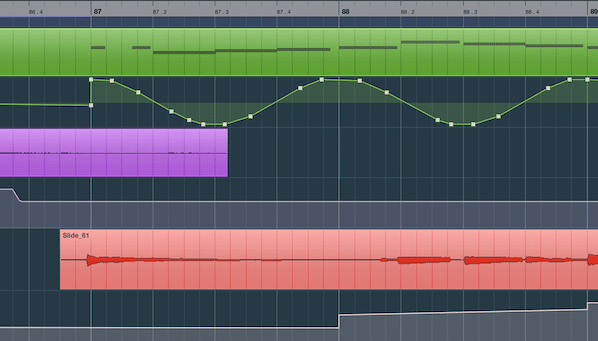
Automation in music production is a foundational tool that empowers producers (like yourself) to dictate precise changes in various parameters of a mix over time.
This can include making adjustments in:
- Volume
- Pan settings
- Effect levels
- The specific parameters of synthesizers or software instruments
At its core, automation enables these changes to be programmed once and then executed perfectly on each playback.
It’s like setting up a series of dominoes to fall exactly as planned, with each domino representing a change in your mix.
This precision and repeatability ensures that your artistic intent is preserved, no matter how many times a track is played.
Now, the importance of automation cannot be overstated!
It brings a dynamic evolution to the sound, allowing for crescendos, decrescendos, and nuanced expressions that make music more engaging and emotionally resonant.
For instance, automating a gradual increase in the volume of a guitar solo can make it fly above the mix at the climax 一 capturing the listener’s full attention.
Also, automating the panning of a rhythmic element can help add movement and space for an extra captivating stereo effect that enhances the listening experience.
On top of that, it ensures consistency in your mix across different playback systems and eliminates the need for manual adjustments during live mixing sessions.
Let’s break it down a little more…
-
Understanding Automation Data
Automation data represents the specific instructions that dictate how and when changes occur within a track.
When you adjust a parameter such as the cutoff frequency on a synthesizer during a playback session, this creates automation data.
This existing data is then interpreted by your DAW (digital audio workstation), which reproduces the exact movements during subsequent playbacks.
For instance, drawing an automation curve that lowers the cutoff frequency of a synth over eight bars can gradually darken the texture of the sound.
It adds a moody transition into a quieter section of your track.
Automation data can be meticulously edited to refine the music production process, offering you the ability to make precise adjustments to your whole track.
Editing automation data directly affects how automation curves appear and behave 一 helping with detailed control over how parameters evolve over time.
Through these edits, you might fine-tune the volume automation of a guitar solo, ensuring it rises above the mix at the perfect moment for maximum impact.
Or, other creative techniques which we’ll break down throughout the article.
-
The Role of Automation Curves
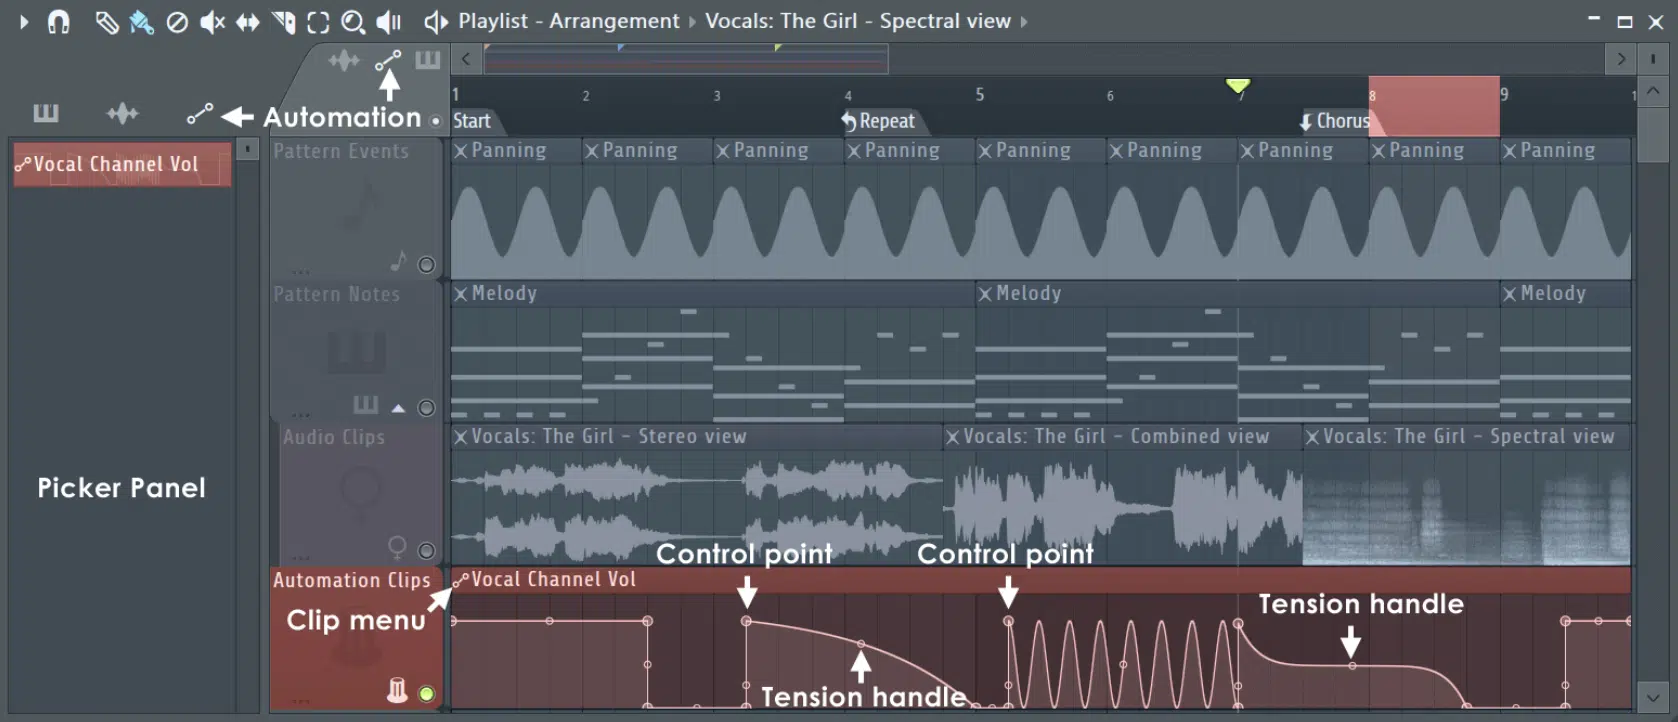
Automation curves are graphical representations that show the trajectory of parameter changes over time.
These curves help with smooth transitions between parameter values to make sure that changes in your music feel natural (and intentional).
For example, an automation curve could be applied to the pan parameter, gradually moving a sound from the left to the right speaker.
This creates a sense of movement across the stereo field.
This production technique can be used to add interest to static elements or to guide the listener’s focus throughout a piece.
You can utilize automation curves not only for straightforward adjustments like volume and pan but also for more complex parameter changes such as:
- Effect intensities
- Filter sweeps
A common technique involves applying an automation curve to the reverb send level on a vocal track 一 increasing it during a song’s climax to add depth and intensity.
The flexibility of powerful automation curves makes them invaluable tools for creative expression and technical precision in music production.
Common Automation Modes: Explained
Automation modes dictate how automation data is read, written, and applied within your DAW. Hence the names of the three primary automation modes: read, write, and latch.
Read Mode
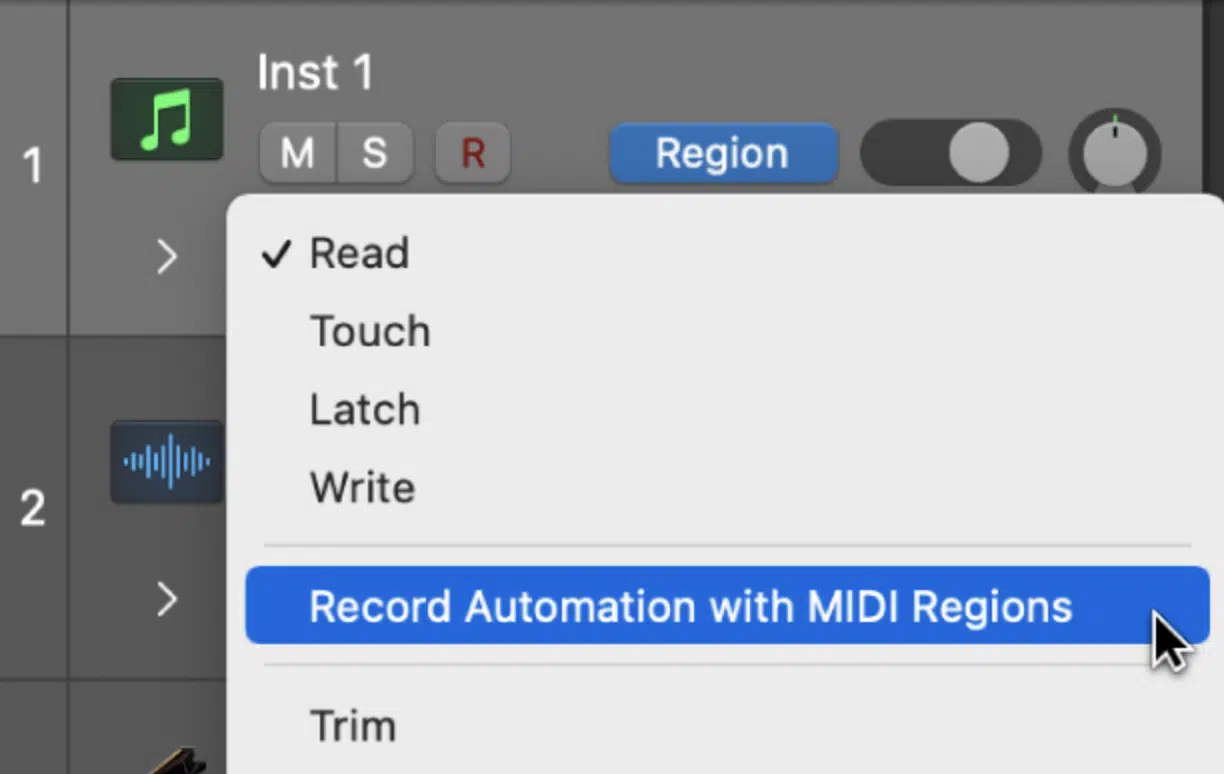
After you’ve set up your automation lines and breakpoints in the automation lanes of your digital audio workstation (DAW), read mode plays back these automated moves exactly as you’ve programmed them.
It ensures that every element occurs right on cue, like every volume swell, pan sweep, or effect change.
This mode is essential for the final playback of your track, where consistency and precision are key to achieving the sound you’ve spent the time refining.
Write Mode
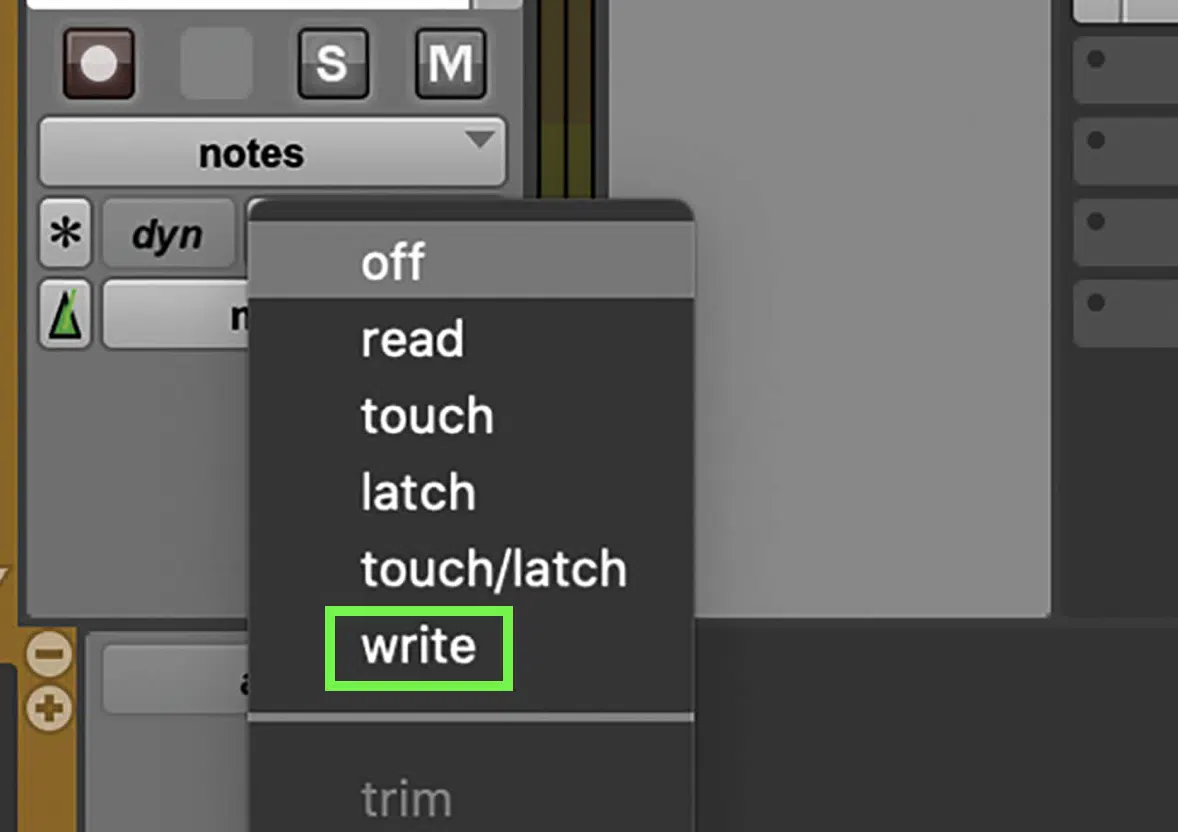
This is where the creative process really kicks in.
As you play through your track, you can adjust parameters in real-time, and your DAW records these movements (recorded automation) 一 creating automation data on the fly.
Whether you’re moving a volume fader, tweaking an EQ setting, or changing effect parameters, write mode captures every action.
This automation mode is ideal for capturing the spontaneity of a live mix or for when you want to manually sculpt the dynamics of your beat with precision and a pencil tool.
Just keep in mind that write mode will overwrite any existing automation data on the track, so it’s best used when you’re ready to commit to new automation moves.
Latch Mode
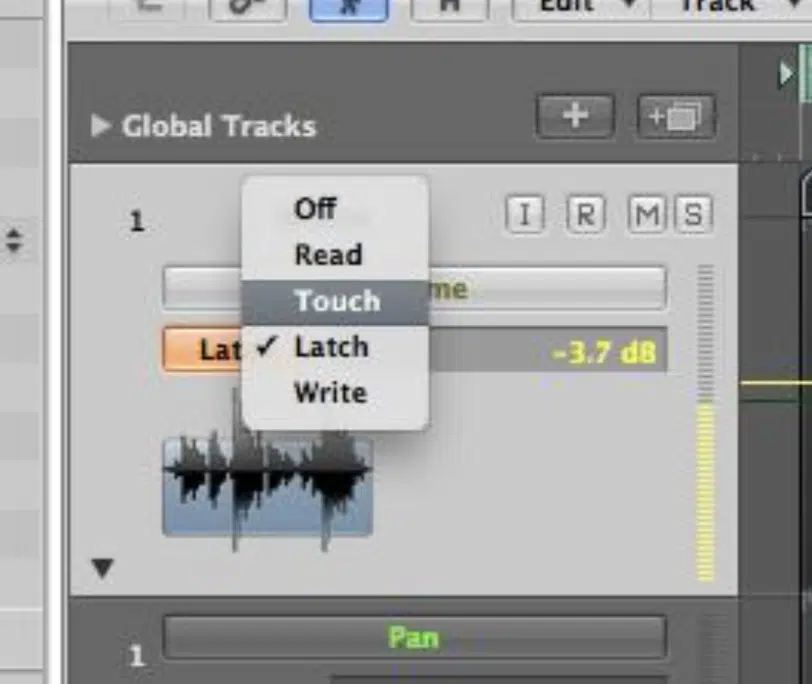
Offers a middle ground between the precision of write mode and the playback reliability of read mode.
In latch mode, your DAW begins recording automation data only after you’ve made a change to a parameter, and it continues to record any further adjustments until you stop playback.
This mode is particularly useful for making tweaks to specific sections of your track without overwriting your entire automation lane.
Once you let go of the control, the last value is held (or “latched”) until the next time you adjust it in the mixing process; intuitive adjustments.
Understanding these common automation modes and knowing when to use each can greatly enhance your mixing processes.
It gives you more creative freedom and control over the final sound of your tracks.
Whether you’re drawing automation for subtle effect transitions or using a MIDI controller for dynamic mix automation.
Side note, if you want to know the best MIDI controllers or MIDI keyboards in the game, we’ve got you covered.
Essential Applications of Automation
Automation finds its place in various aspects of music production, from mixing to creative sound design. Let’s break it down so you can use automate things creatively and enhance your production skills.
-
Volume Automation
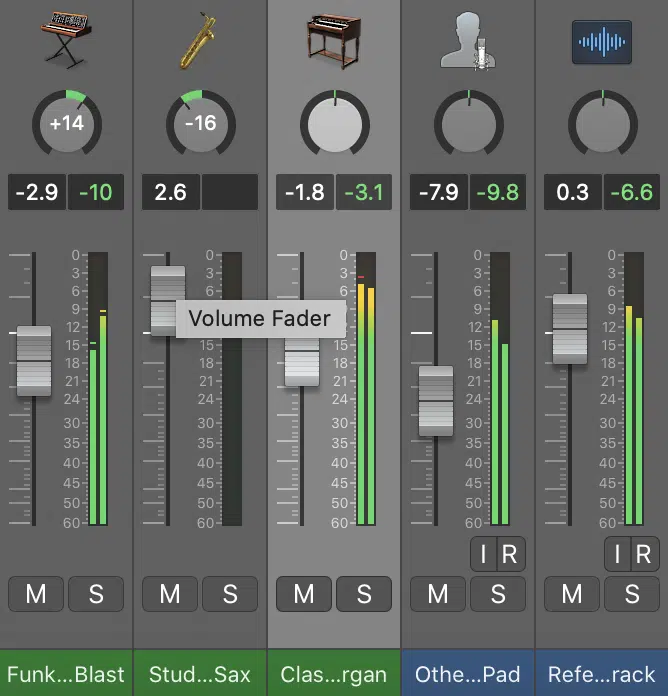
Volume automation is a super creative tool for managing the dynamic range and balance of a mix.
When you automate the volume of individual tracks, it ensures that each individual element is heard clearly at the right moments.
For instance, when you start automating a slight reduction in the volume of rhythm guitar tracks during a vocal passage, it can prevent masking and maintain clarity.
This technique is especially important in when you create with dense arrangements where space is at a premium.
Additionally, volume automation can be used creatively to shape the energy and flow of a track.
A slow, automated increase in volume on a build-up section before a drop can heighten anticipation and deliver a more impactful chorus.
This approach can turn a flat, static mix into a dynamic and engaging listening experience, guiding the listener through the emotional highs and lows.
-
Pan Automation & The Stereo Field
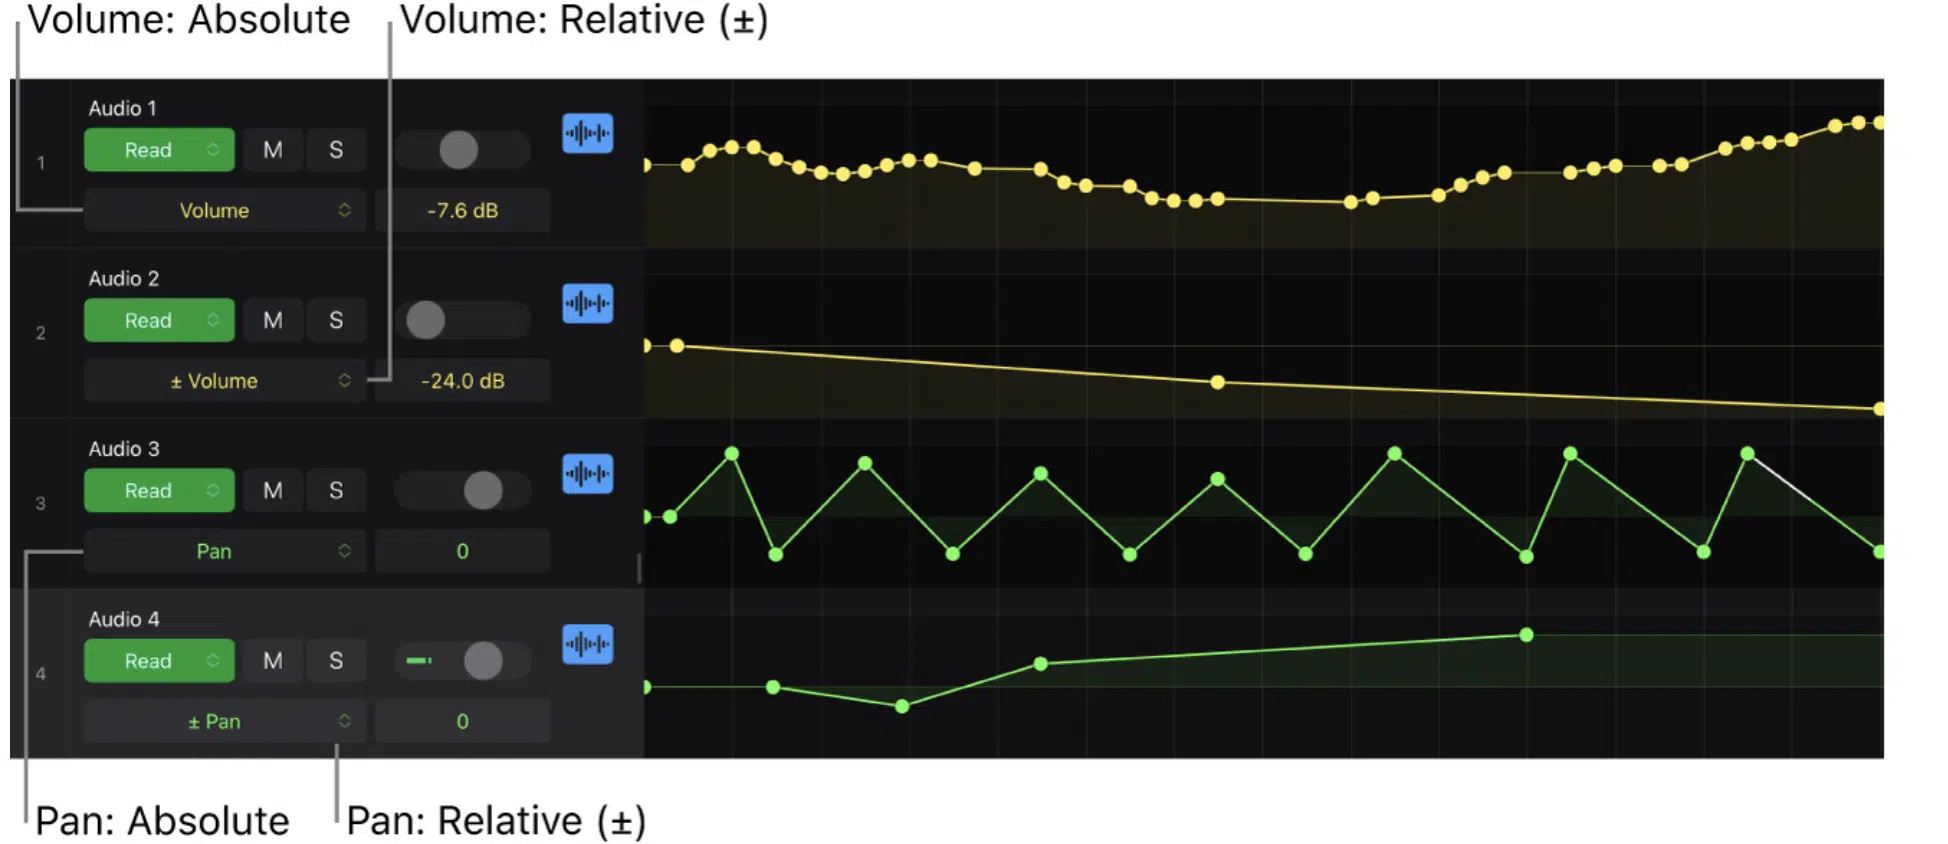
Pan automation is your go-to technique for moving sounds across the stereo field, creating an immersive listening experience that can make tracks come alive.
By automating the pan, you can guide a sound from left to right or back and forth, adding a dynamic element that captures the listener’s attention.
For instance, automating a rhythmic guitar riff to slowly pan from one side of the stereo field to the other can give the illusion of movement.
It will enhance the spatial depth of your mix.
In a dense mix, using pan automation on elements like synth lines or background vocals can help separate sounds that might otherwise compete for the same sonic space.
Imagine a scenario where during the verse, the background vocals gently shift from the center to the sides.
It makes room for the lead vocal to stand out more prominently in the middle.
Not only does this clear up the mix, but it also creates a more engaging audio landscape for the listener.
Pro Tip
Pan automation is especially effective in electronic music, where stereo movement can be a key element of the genre’s style.
Taking a hi-hat pattern and automating its pan to tick across the stereo field/stereo position from left to right with each beat can add an energizing quality to the rhythm.
In cinematic music, pan automation can mimic/add movement of objects or characters across a scene, adding to the storytelling aspect and helping you to create new ideas.
-
Dynamic Effects through Automation
Dynamic effects can seriously gain new dimensions when paired with existing automation, like:
Automating the threshold and ratio settings of a compressor on a vocal track can make the singer’s voice more consistent in the mix during louder sections while allowing it to breathe and retain its dynamics during softer parts.
This level of control is key for professional-sounding beats.
Similarly, automating the decay time of a reverb on a snare drum can make it sound tighter and more controlled during verses.
Then, more spacious and atmospheric during choruses.
This change in ambiance will definitely contribute to the emotional impact of your entire song; taking your listener on a whole journey.
-
Automation for Vocal Tracks
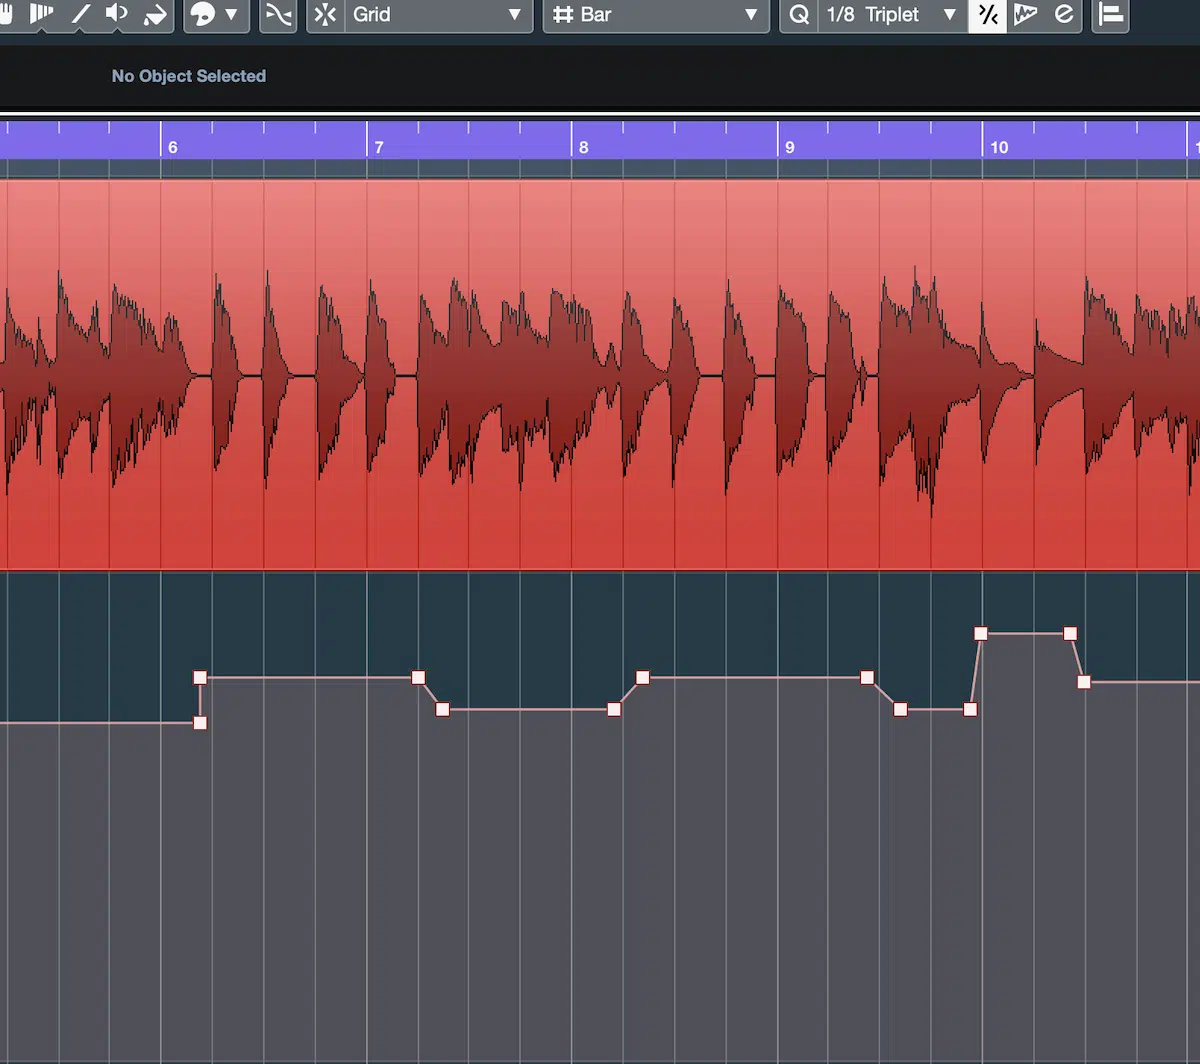
Automation is particularly valuable for vocal tracks, where dynamic control and expressiveness are paramount.
Automating the volume of a lead vocal to ensure it sits perfectly in the mix at all times can make the difference between an amateur and a professional-sounding track.
This might involve subtle adjustments to keep the vocals upfront during a powerful instrumental section.
Additionally, when you automate effects like delay and reverb on vocals, recording automation, can enhance the emotional impact of a performance.
For instance:
- Increasing the reverb level during a song’s climax 一 Adds a sense of space and grandeur.
- Pulling it back during verses 一 Keeps the vocals clear and intimate.
These touches contribute to a more engaging and polished final product.
Remember, it’s all about experimentation and playing around with different methods in order discover exciting new sounds.
Creative Uses of Automation

Getting creative with automation extends way beyond simple volume and pan adjustments…
It opens up a whole world of crazy opportunities to set your whole track apart.
By automating effect parameters, you can breathe life into static sounds and create dynamic shifts in your music that engage the listener.
For example, automating the rate and depth of a chorus effect on a guitar track can make it evolve from a subtle shimmer in the verse to a lush, wide sound in the chorus.
It will add a layer of intrigue, appeal, and depth to your song.
Automation can also be super exciting when it comes to creating tension and release, (especially in electronic genres).
For example, you could automate your synthesizer’s cutoff frequency to slowly increase during a buildup, making the sound grow brighter/more intense, leading up to a drop.
This not only captivates your audience but also gives your track a professional polish.
Another creative application is to automate the dry/wet mix of a reverb on a vocal track, starting with a dry sound in the verse and gradually increasing the reverb towards the chorus.
It creates a sense of expansion and space that works with the emotion you’re trying to convey.
-
Exclusive Technique!
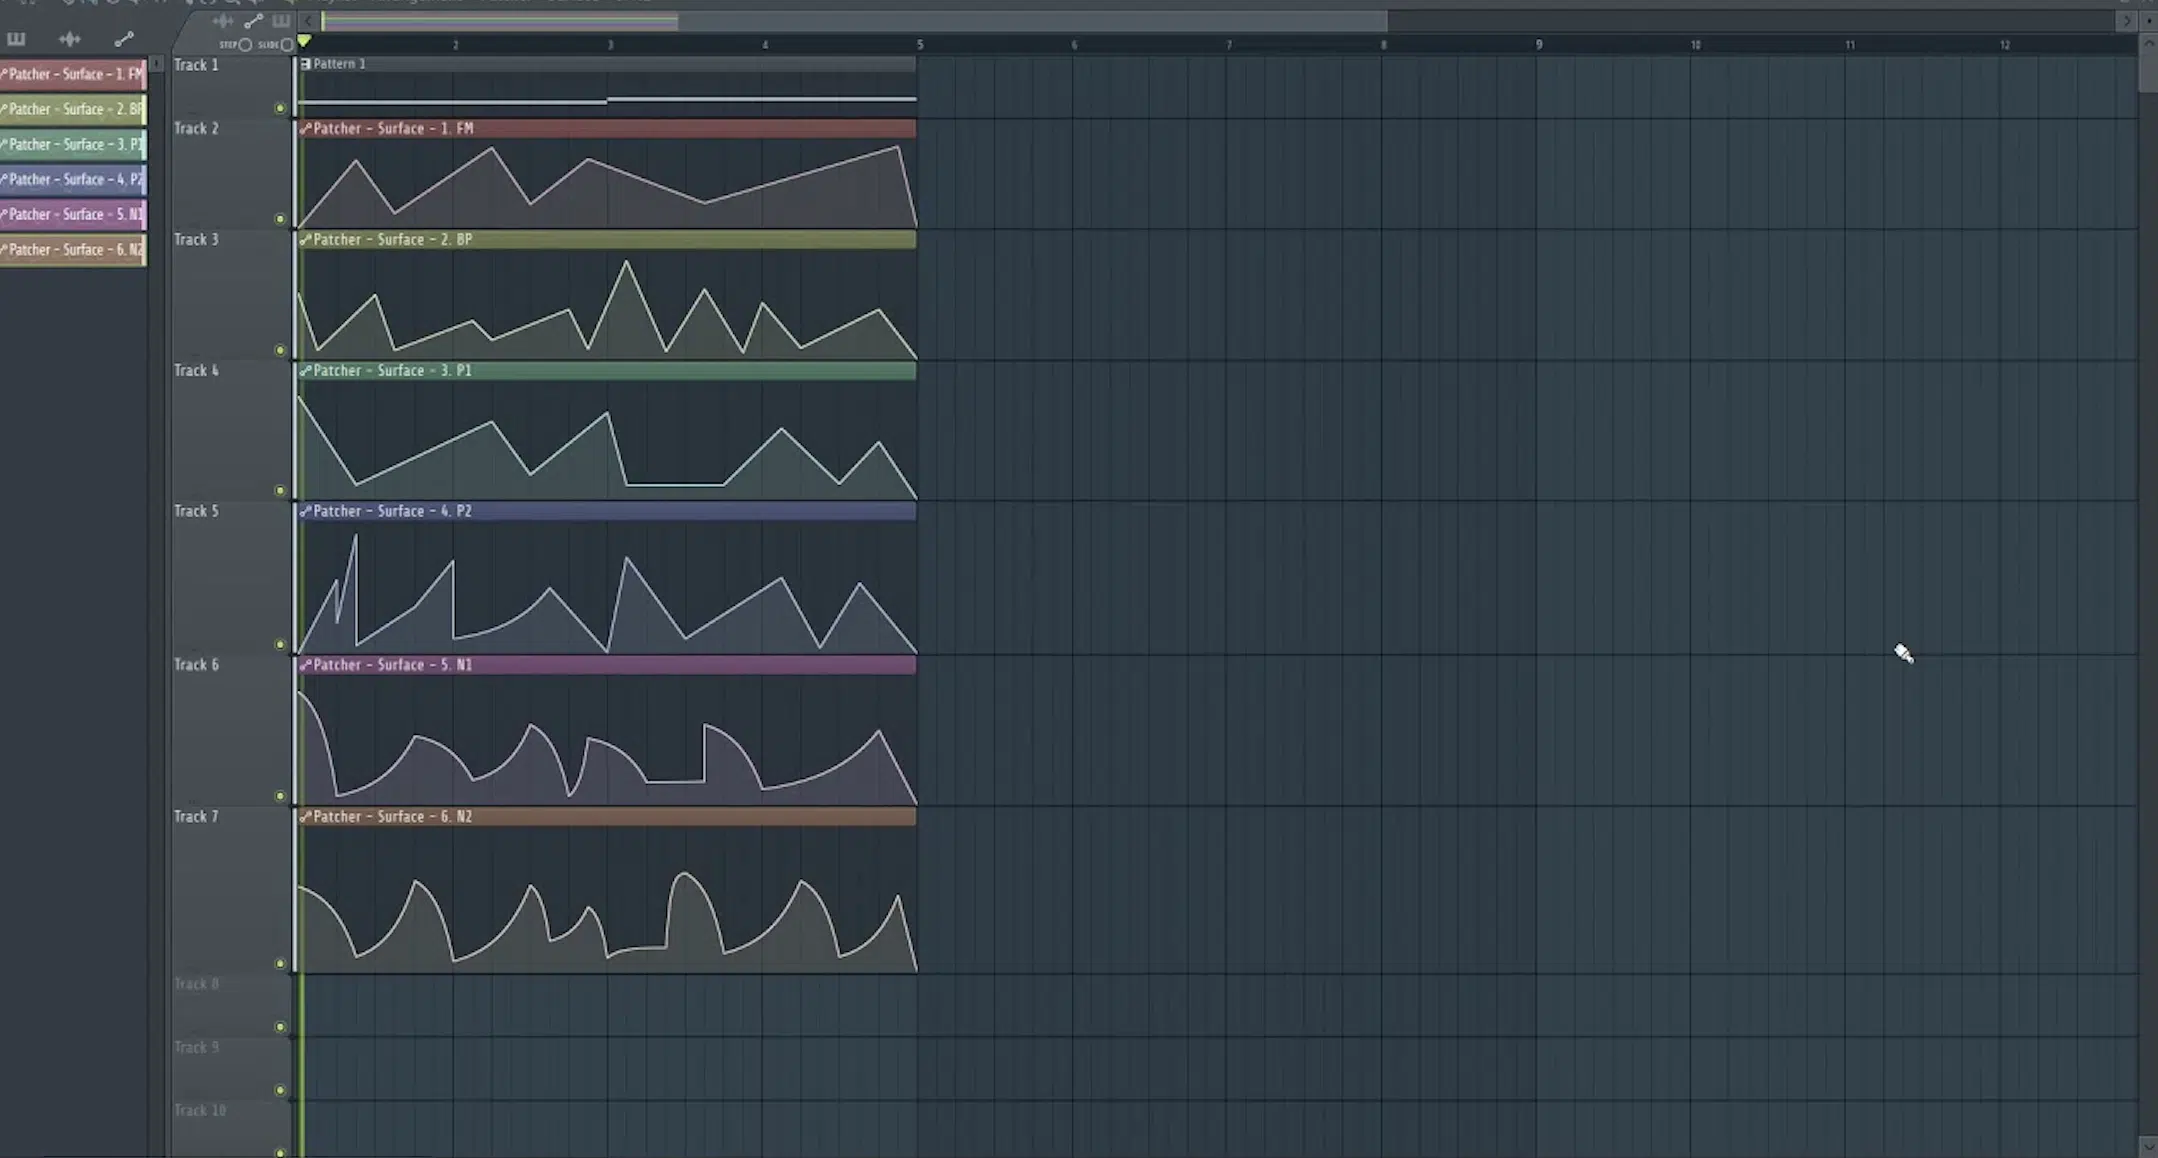
Use automation to modulate parameters in a synth or effect plugin that aren’t accessible through the standard modulation matrix.
This allows for the creation of custom LFO shapes and modulation patterns that aren’t available within that specific device.
For example, if you’re working with a synth that has a static filter cutoff, you can draw an automation line to mimic a complex LFO pattern.
This will give you endless unique modulation effects.
If you want to create legendary tracks or get insanely cool new ideas, this is your key.
-
Using Automation to Sculpt Sound
Beyond dynamics and effects, automation can sculpt and shape the sound itself.
Automating the different parameters of a synthesizer, like oscillator pitch or modulation depth, can turn a simple sound into a complex evolving texture.
This technique is invaluable for creating sounds that are truly unique to your music.
Filter automation is another powerful sound-shaping tool.
By automating a low-pass filter on a pad sound, you can control its brightness and presence in the mix.
It allows it to swell up in intensity or fade into the background as the track demands.
This mixing process method is key for managing the energy levels of your tracks and keeping the listener engaged from start to finish.
Automation Madness: Bonus Tips & Tricks
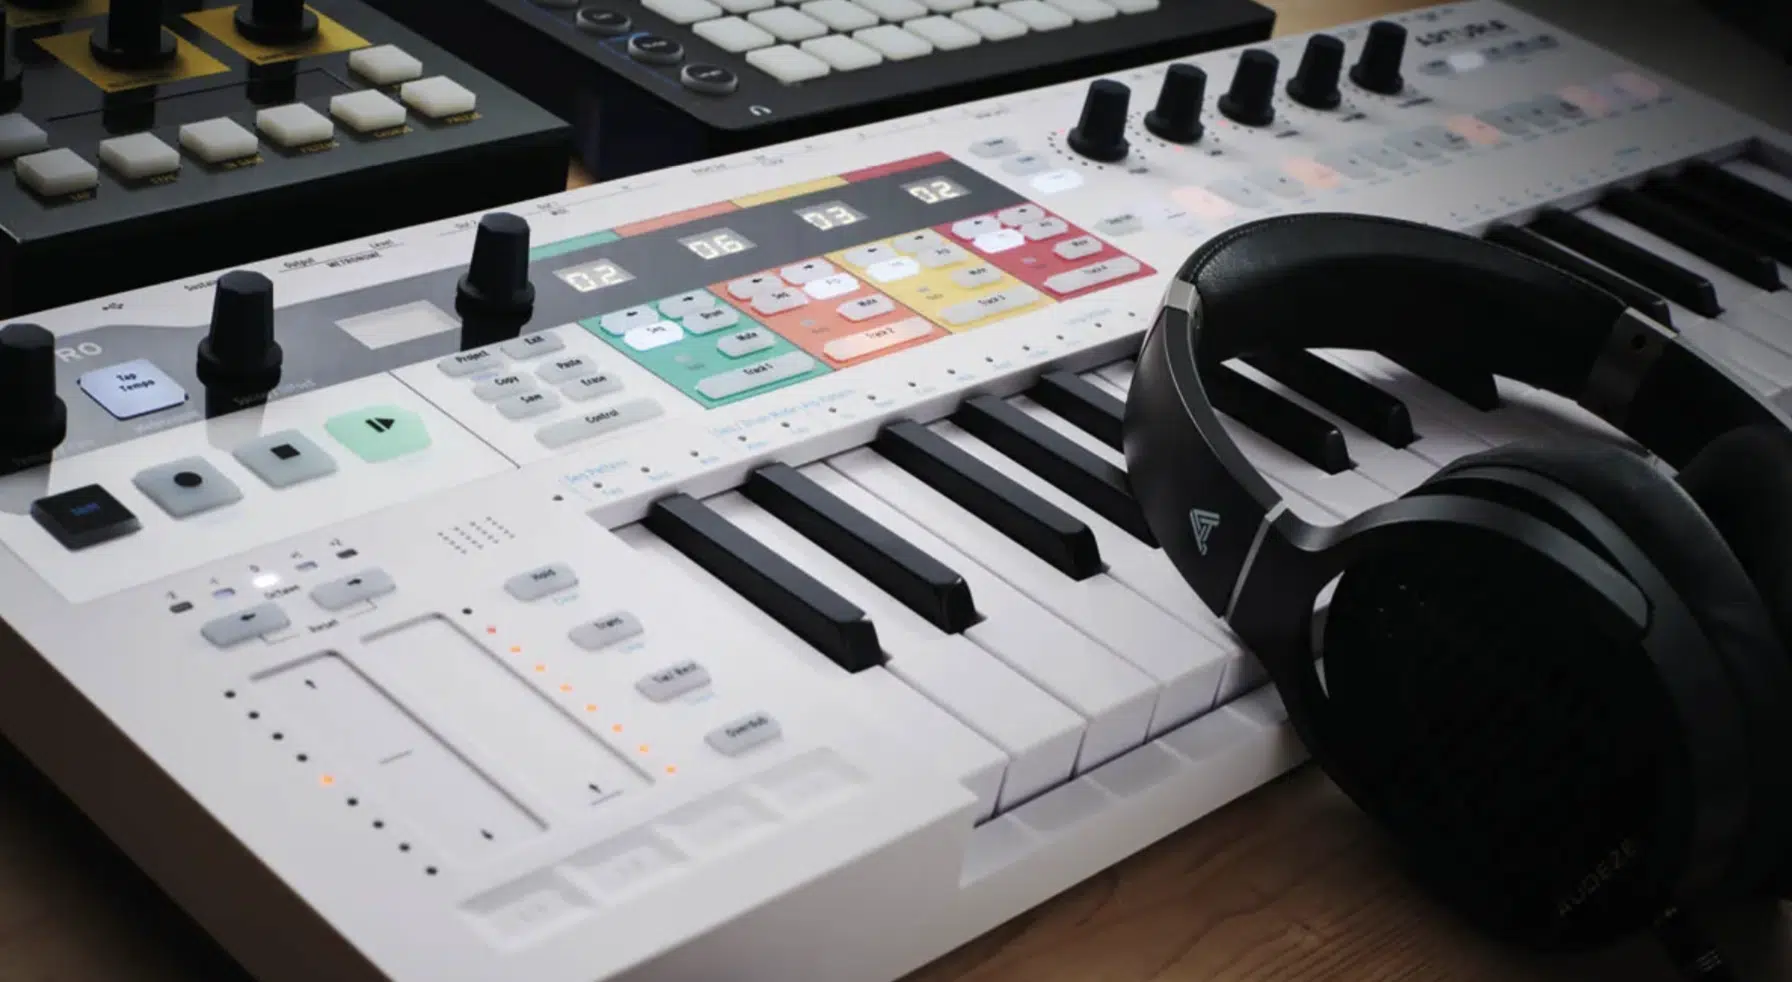
So, to wrap things up, let’s just dive into a few more exciting ways to manipulate audio automation.
Use a MIDI controller to introduce real-time automation into your mix, providing a tactile and intuitive way to shape your sound.
By mapping multiple parameters to your MIDI controller, you can dynamically adjust effects, volumes, and pans.
You’ll be recording these movements into your modern DAWs (like Pro Tools, Logic Pro, Ableton, etc.).
This approach brings a human touch to mix automation 一 making each automation line and breakpoint feel more organic and expressive.
You’ll be able to, for example, tweak a synth’s filter cutoff with a knob in real-time.
This will capture every little nuance of your movement into the automation lanes of your track for a performance that breathes with life.
Additionally, exploring the art of drawing automation can unlock even more new dimensions and help you develop new tools and skills.
Instead of relying solely on linear automation lines, experiment with drawing intricate patterns and shapes into your automation lanes.
This technique allows for precise control over automation breakpoints.
These specific points/different points will help you to create complex rhythmic changes and effects that would be challenging to perform manually.
For instance, drawing a sine wave pattern on the pan automation lane can create a mesmerizing back-and-forth movement, adding a psychedelic twist to your mix.
By combining the precision of drawing automation with the expressiveness of MIDI controller input, you can push the boundaries of mix automation.
It will infuse your MIDI tracks with unparalleled depth and creativity.
Automation in Music: Final Thoughts
Automation in music has the ability to help you transform a flat, static mix into a dynamic chart topper.
Plus, as you now know, mastering automation can help you achieve professional-level sound quality and bring your creative visions to life.
As well as unlock new sound design possibilities and inspiration.
By leveraging techniques such as volume automation, pan sweeps, and dynamic effects processing, you can give your tracks with life and movement that people get hooked on.
To get an invaluable breakdown of these techniques in action, you’ve got to check out these Free Project Files.
They let you see exactly how pro-quality tracks are made, showing all the automation techniques we’ve discussed today (volume automation, pan automation, effects, etc.).
Reading about them is one thing, but analyzing tracks that were created by the best producers and sound designers around will seriously up your game.
So, go use these automation in music production techniques to create mind-blowing tracks that not only stand out, but completely take over.
Until next time…


Leave a Reply
You must belogged in to post a comment.