Bass sounds can literally make or break a beat… they instantly add depth, drive, and set a solid foundation that listeners feel in their core.
A killer bass sound can make a track unforgettable, while a weak bass makes your whole song lose energy and impact (and nobody wants that).
Plus, nailing your bass tone is what separates a good mix from an exceptional one.
As producers, knowing exactly how to make your bass sounds super punchy, clear, and powerful is invaluable.
It can help completely elevate your tracks 一 giving them that professional edge that makes them stand out.
That’s why we’re breaking down everything you need to know, like:
- Understanding bass frequencies ✓
- Learn how to choose the right waveforms ✓
- Exploring essential synthesis techniques ✓
- Shaping your bass sound with envelopes ✓
- Adding modulation for movement ✓
- Enhancing bass with effects ✓
- Layering for a full bass sound ✓
- Applying sidechain compression ✓
- Using EQ for clarity ✓
- Sampling and resampling techniques ✓
- Much more to make your bass sound shine ✓
By the end of this article, your bass sounds will dominate the competition.
With techniques that make your bass powerful, dynamic, and precisely controlled, you’ll be able to craft basslines that add unmatched energy to your tracks.
This way, your tracks will always hit hard and leave an impact, blowing your competition right out of the water.
Table of Contents
- Understanding Bass Frequencies: Bass Sound Basics
- Choosing the Right Waveforms for Your Bass Sound
- Exploring Synthesis Techniques
- Creating Effective Bass Envelopes
- Adding Modulation for Bass Movement: Breaking it Down
- Enhancing Your Bass Sound with Effects
- Applying Sidechain Compression
- EQ Techniques
- Sampling and Resampling Techniques
- Syncing Bass with Drums
- Advanced Sound Design Techniques
- Final Thoughts
Understanding Bass Frequencies: Bass Sound Basics
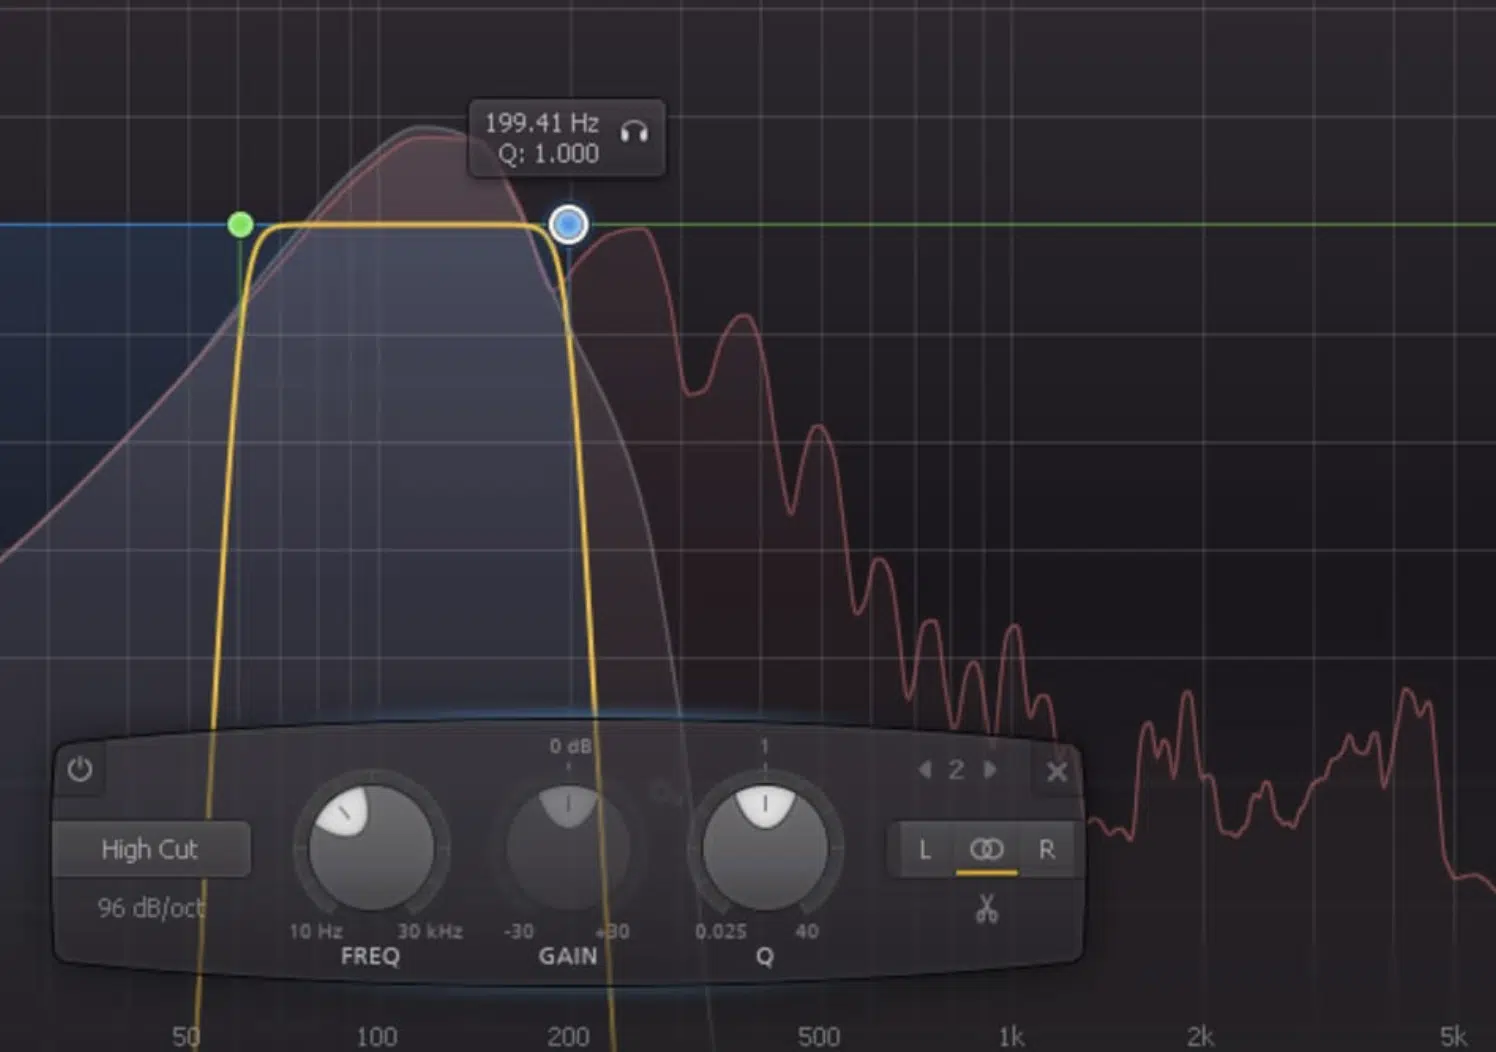
When it comes to creating the perfect bass sound, understanding bass frequencies is undoubtedly the first step (setting the foundation).
Bass frequencies are what give your music that deep, rumbling low-end, filling out the mix and giving it power.
Bass frequencies generally fall within 20Hz to 250Hz, with sub-bass residing between 20Hz and 60Hz, which creates that deep, rumbly foundation you feel rather than hear.
Some of my favorite sounds in the entire universe, if we’re being honest.
For a cleaner mix, I always cut any frequencies below 30Hz, as these can create unnecessary mud without adding anything useful to the bass tone.
The mid-bass range (from about 60Hz to 150Hz) gives punch and presence to the bass sound, and that’s really what it’s all about.
NOTE: You’re going to try boosting around 100Hz by 2-3 dB if you want the bass to cut through but still sit well under the kick drum, so keep that in mind.
Lastly, around 150Hz to 250Hz, you’ll find a bit more definition, especially helpful for bass guitar tones.
But make sure to go easy on boosts here, as it can interfere with other low-mid elements like snares or vocals, and you certainly don’t want that.
Choosing the Right Waveforms for Your Bass Sound
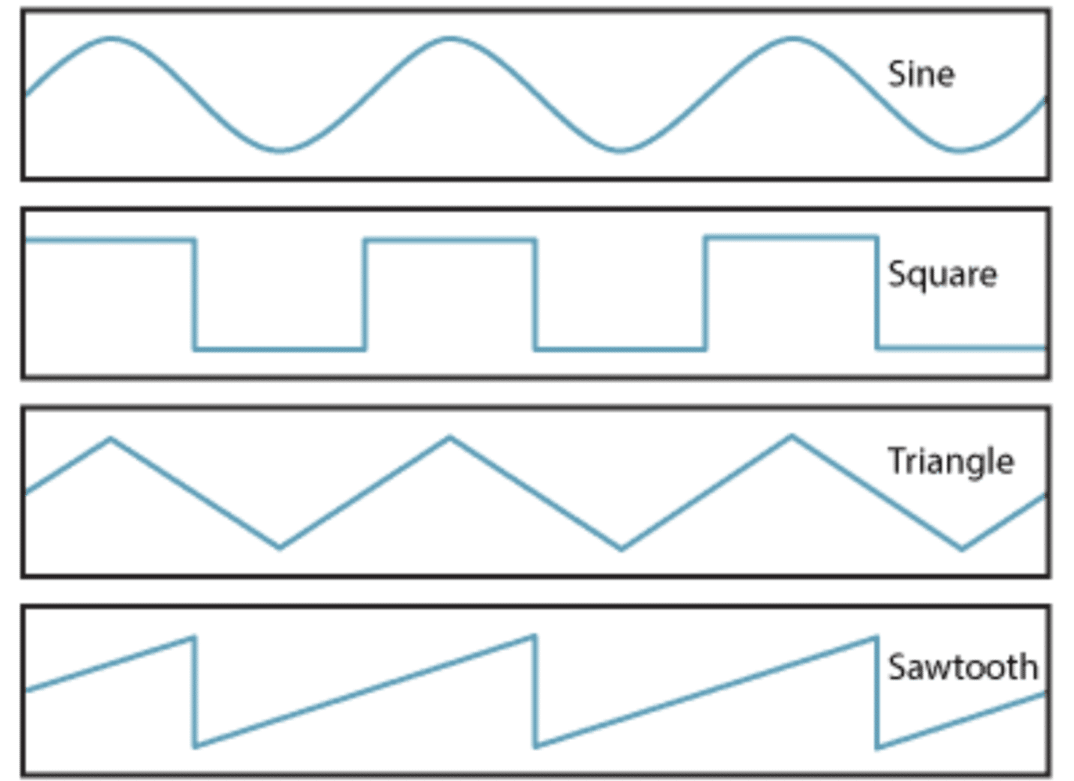
The specific type of waveform you start with seriously affects the character and texture of your bass sound, so pay attention.
#1. Sine waves are perfect for deep, pure sub-bass tones because they carry minimal harmonic content, which keeps the low-end super clean.
I find that setting the sine wave around 40-60Hz is ideal for sub-bass tones.
Especially true if you’re aiming for that deep, foundational presence without interference from higher harmonics.
When I want that classic 808 bass, I usually start with a sine wave and add a slight pitch envelope to create more punch at the attack.
Make sure to set it to around 5 ms and a decay 200-300 ms.
Side note, adding a bit of saturation afterward (usually around 5-10% on the drive) can enhance the harmonics even more, while keeping that signature low-end pristine.
#2. A sawtooth waveform, with its epic harmonics, is great for an aggressive, buzzy bass tone that cuts through even in dense mixes.
For a bass that stands out, I like to set the sawtooth wave’s cutoff frequency at around 80Hz.
Then, I use a high-pass filter just above that (around 100Hz) to successfully prevent clashing with the kick drum in the low-end.
This is perfect for most rock or electronic music genres where you want that gritty edge.
#3. Square waves, on the other hand, give a hollow, resonant quality that works well for replicating bass guitar sounds.
When using a square wave, I’ll add a low-pass filter around 100Hz with a gentle slope (12 dB/octave) to tame the highs while keeping that warm, resonant quality in the low-mids 一 keeping the focus on the low-end.
#4. Triangle waves are less common but can add a subtle edge when layered with sine waves for a bit more presence without overwhelming the bass tone.
If I do use a triangle wave (which isn’t too common), it’s at about 20-30% volume under a sine wave, with both set between 40-80Hz…
This adds just enough harmonic content to help the bass stand out without taking up too much space in the mix.
Exploring Synthesis Techniques
When dialing in the bass sound, synthesis techniques can make all the difference.
Subtractive Synthesis
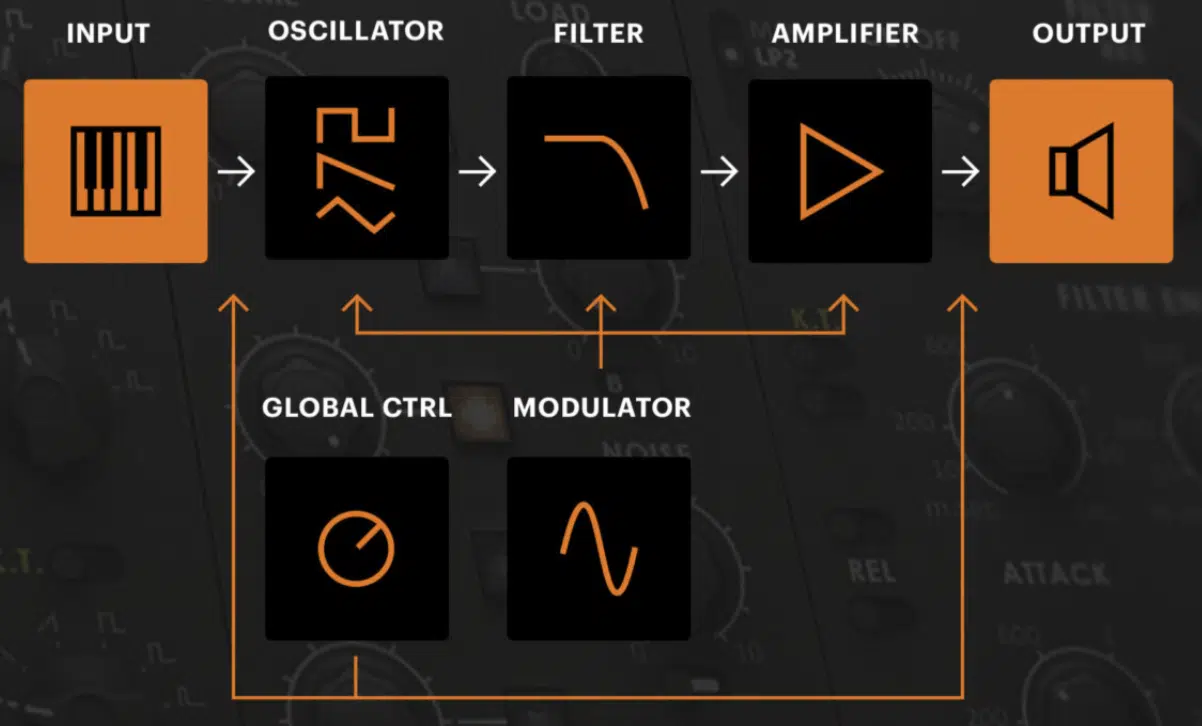
Subtractive synthesis, where you start with a solid waveform (like a saw wave) and filter out specific frequencies, is perfect for clean, controlled bass tones.
I usually set a low-pass filter at 80Hz to 120Hz to keep things warm without any harsh overtones messing things up.
I often add resonance just slightly (around 15-20%) at the cutoff point to emphasize warmth, which makes the bass feel even fuller.
Frequency Modulation (FM) Synthesis
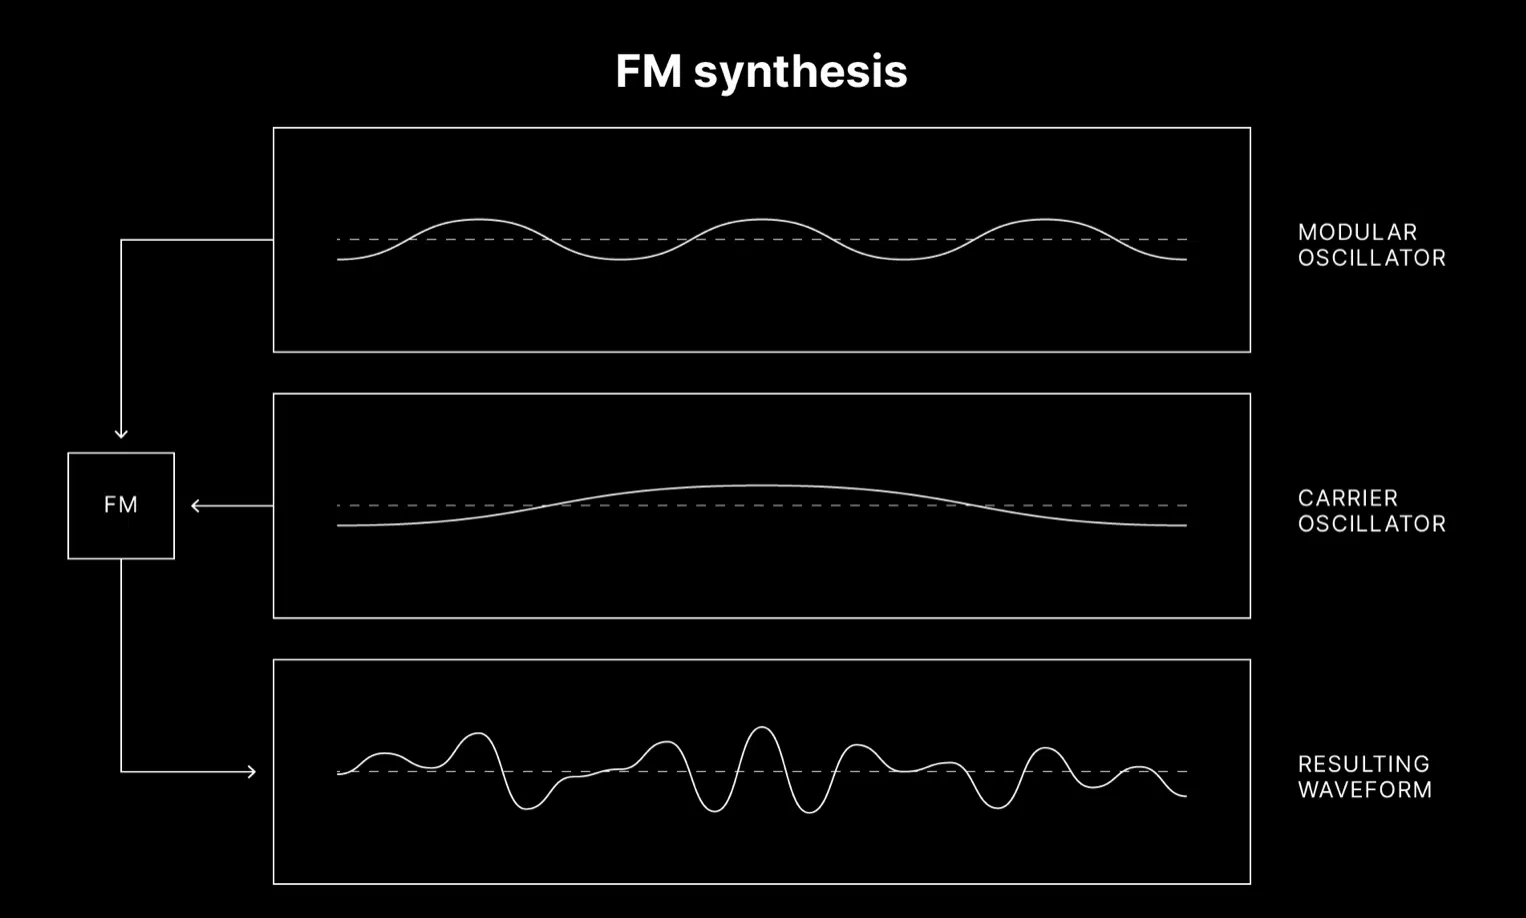
FM synthesis, on the other hand, uses just one oscillator to modulate the frequency of another 一 creating complex and gritty textures.
To add a touch of grit to a bass, I set a modulator oscillator to a ratio of 1:2 with the carrier for a thicker tone with edgy harmonics (perfect for aggressive bass styles).
This one is pretty much famous in the dubstep and deep house genres.
Side note, adjusting the modulation index at around 30% can give the bass an extra edge without overpowering the mix.
If you’re not sure what the modulation index is, it’s simply a parameter that controls the intensity of the frequency modulation.
Wavetable Synthesis
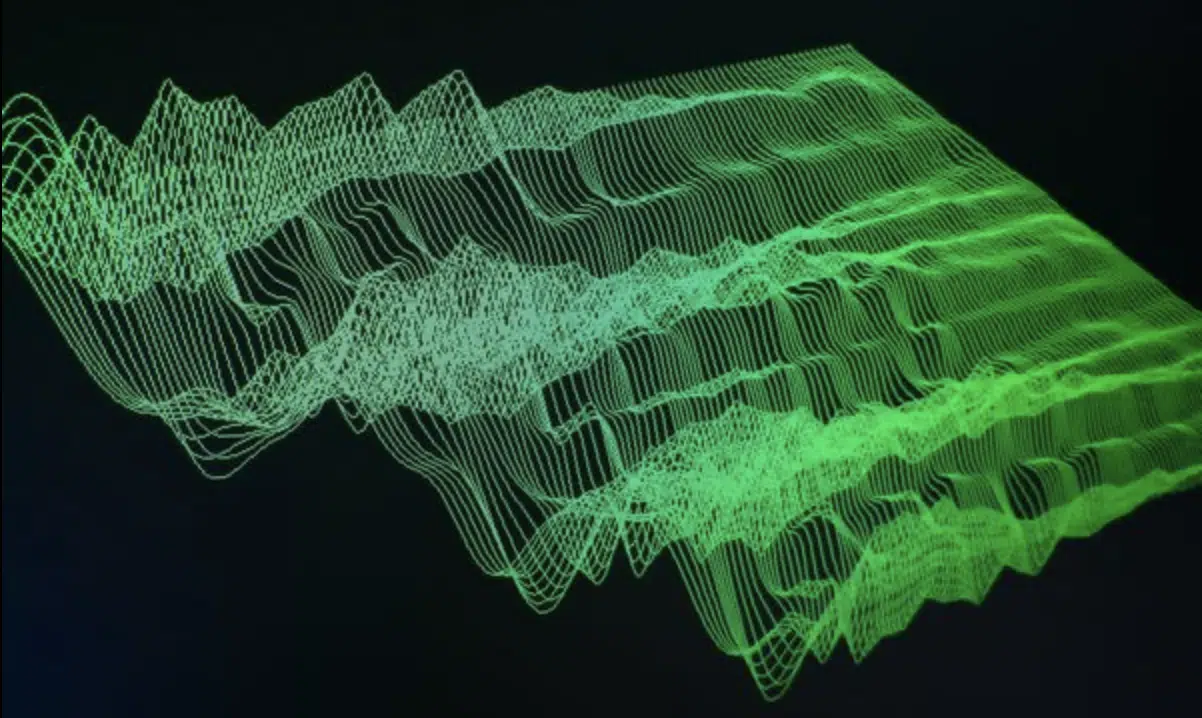
Wavetable synthesis lets you morph between different waveforms for even more flexibility and dynamics when knocking out bass sounds.
Try sweeping through the wavetable position with a low LFO rate (around 0.5 Hz) for a subtle shift in the tone over time.
For even more impact, try setting the LFO depth to 30-40% so it doesn’t overpower the fundamental sound but adds just enough movement to keep things interesting.
This adds a dynamic quality that works especially well for evolving bass sounds.
Each synthesis method brings its own character, so I like playing around with and blending techniques for more depth and variety in the bass.
Never, ever be afraid to try out new things and think outside the box.
For example, combining a subtractive synth layer for the sub-bass with an FM layer in the mid-bass range can create a full-spectrum sound that’s warm/aggressive.
Creating Effective Bass Envelopes
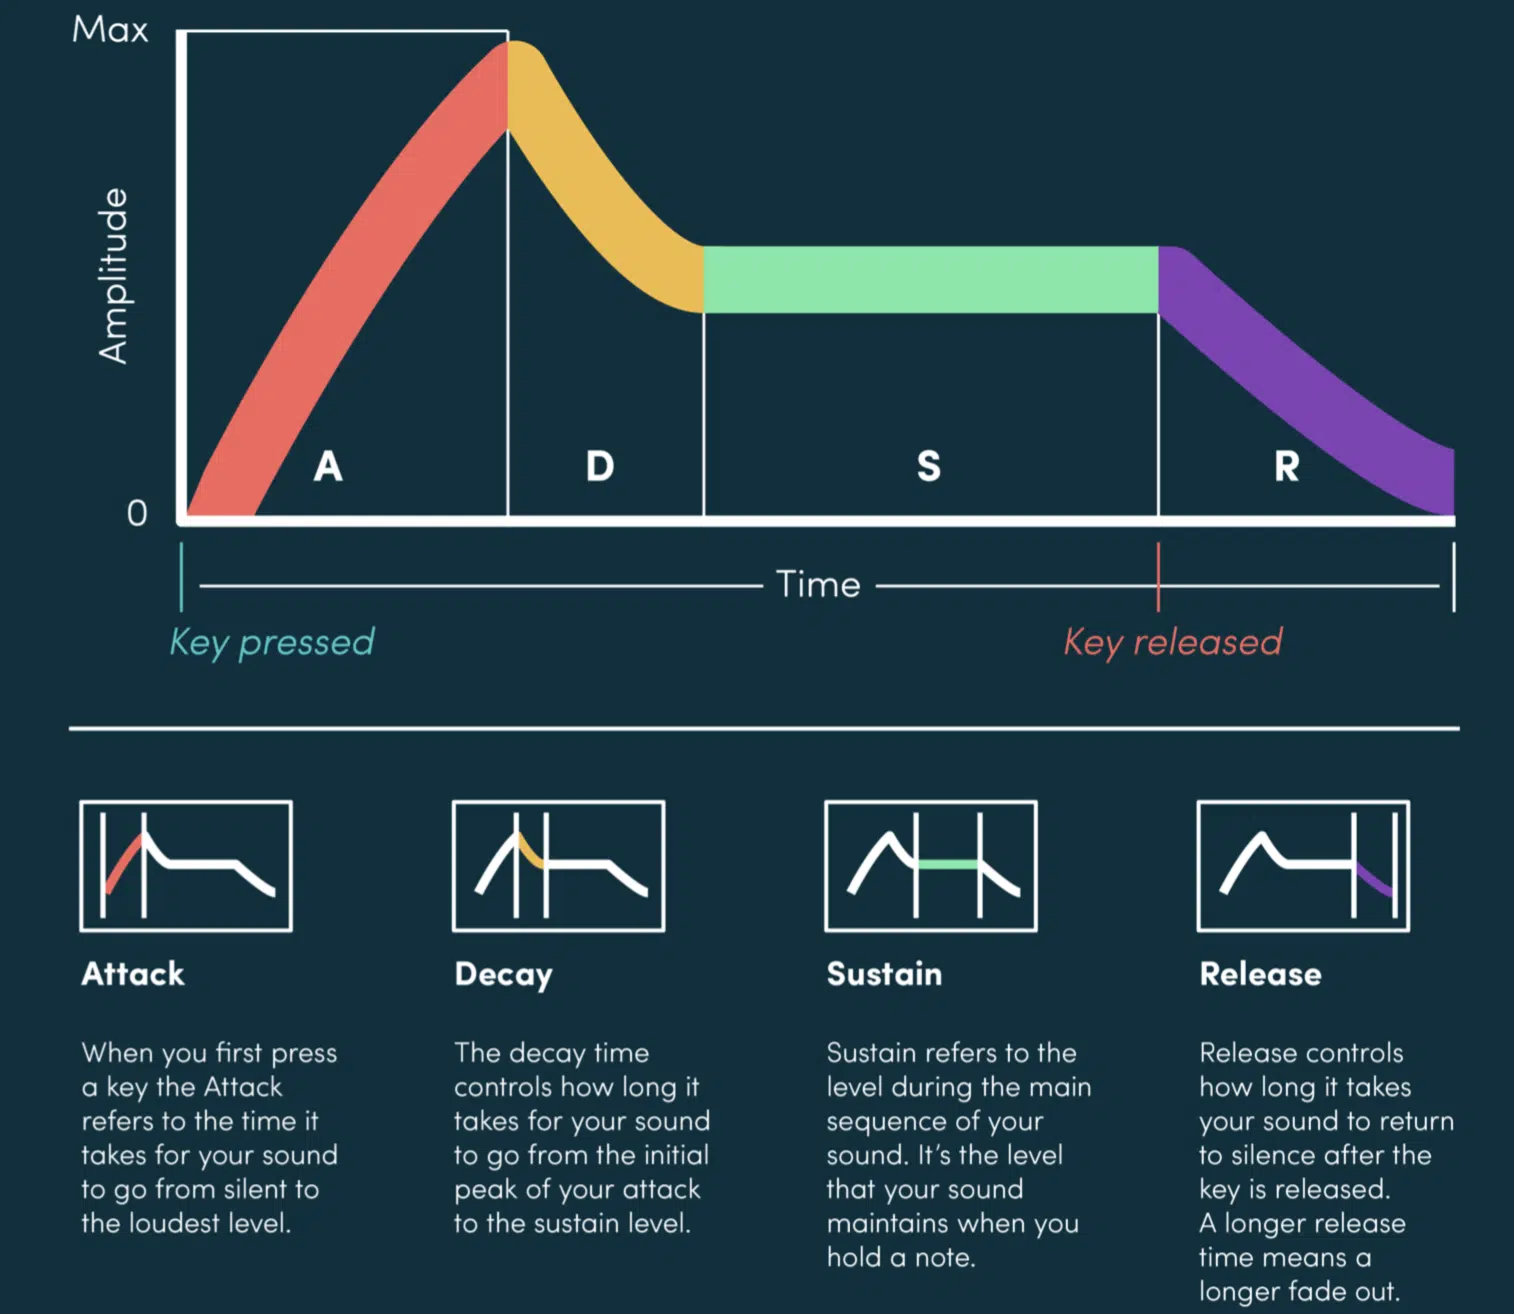
Envelopes shape the dynamics of your bass sound, and getting these right can make your bass hit just the way you want, and how your audience wants to hear it.
For sub-bass that sits smoothly in the mix, I usually go for a short attack (around 5-10 ms) so it hits fast, followed by a longer decay and sustain to give it body.
If you want a percussive bass sound, like in electronic or hip-hop beats, use a fast attack and a short decay (under 50 ms) to keep it punchy and tight.
Increasing the release time can be helpful too, especially if the bass is meant to fill out a larger space in the mix…
Try around 150-200 ms, which keeps it from cutting off too abruptly.
Try to adjust these settings as you play around with the bass tone in context with the rest of your track 一 sometimes small tweaks make a super big difference.
Adding Modulation for Bass Movement: Breaking it Down
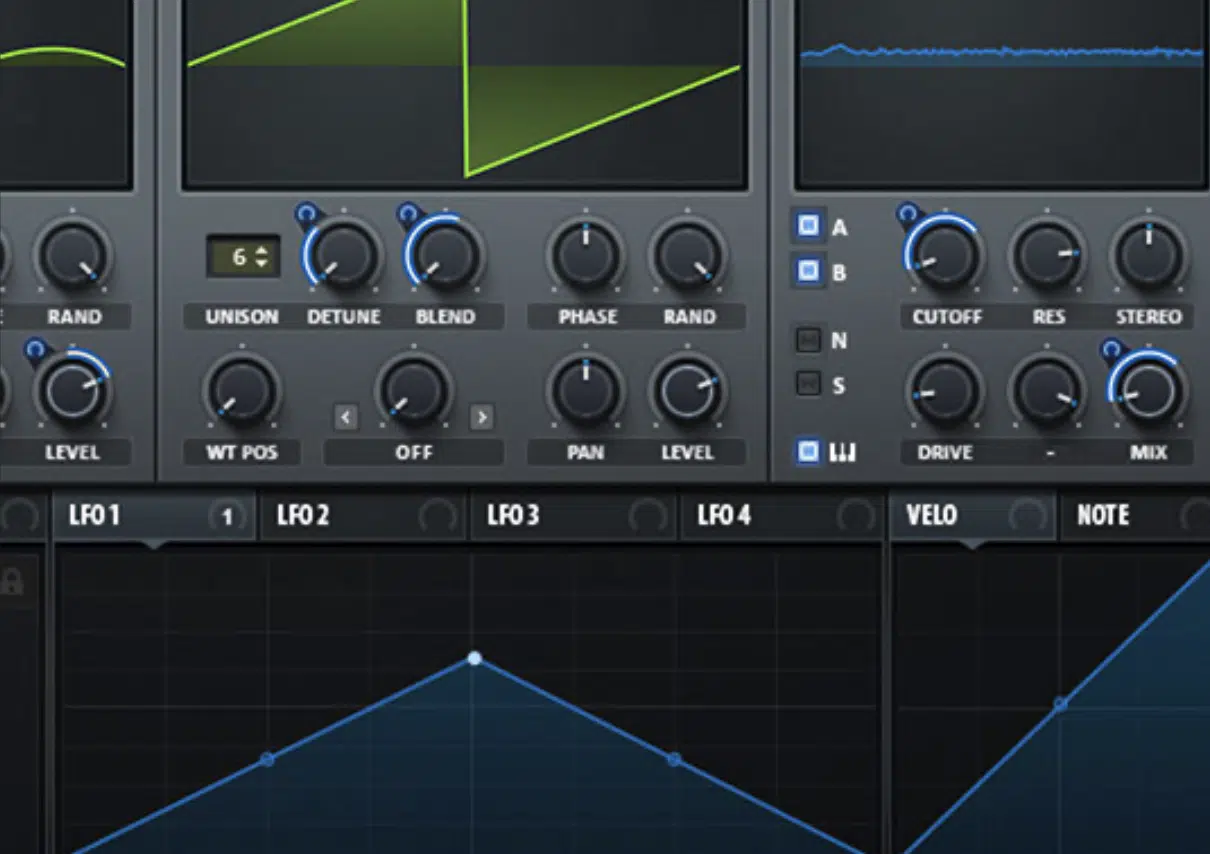
I know we touched on this a little bit already, but it definitely deserved its very own section because it’s a huge part of making your bass sound blow speakers out.
Modulation is key to creating bass sounds that feel alive and dynamic, even in genres that call for a stable low-end.
Using an LFO to subtly modulate the pitch or filter cutoff adds movement…
I find setting an LFO to around 0.3 Hz and routing it to a low-pass filter is subtle but gives just enough pulse.
And, creates a gentle sweep effect that brings just enough energy without pulling the bass out of its frequency range.
NOTE: This trick works great when you’re going for a more ambient or lo-fi feel 一 keeping the bass present but not too bold.
For a more intense, wobbling bass sound (think dubstep), crank up the LFO rate to around 1-2 Hz and set it to modulate the amplitude, so it feels rhythmic.
I typically adjust the depth to around 50% because it’s enough to feel the wobble without overshadowing other elements in the mix.
Another trick is using envelope modulation on the filter cutoff to enhance each bass note’s attack.
You’ll want to set it so that the filter slightly opens when each note hits, giving a mini sweep effect that adds impact and clarity to all bass notes.
Specifically: set the envelope’s attack to a short 10 ms and the decay to around 100-150 ms, so the filter slightly opens on each note hit.
These small movements are what make the bass sound engaging without overpowering the rest of your mix, captivating any ears that hear it.
Enhancing Your Bass Sound with Effects
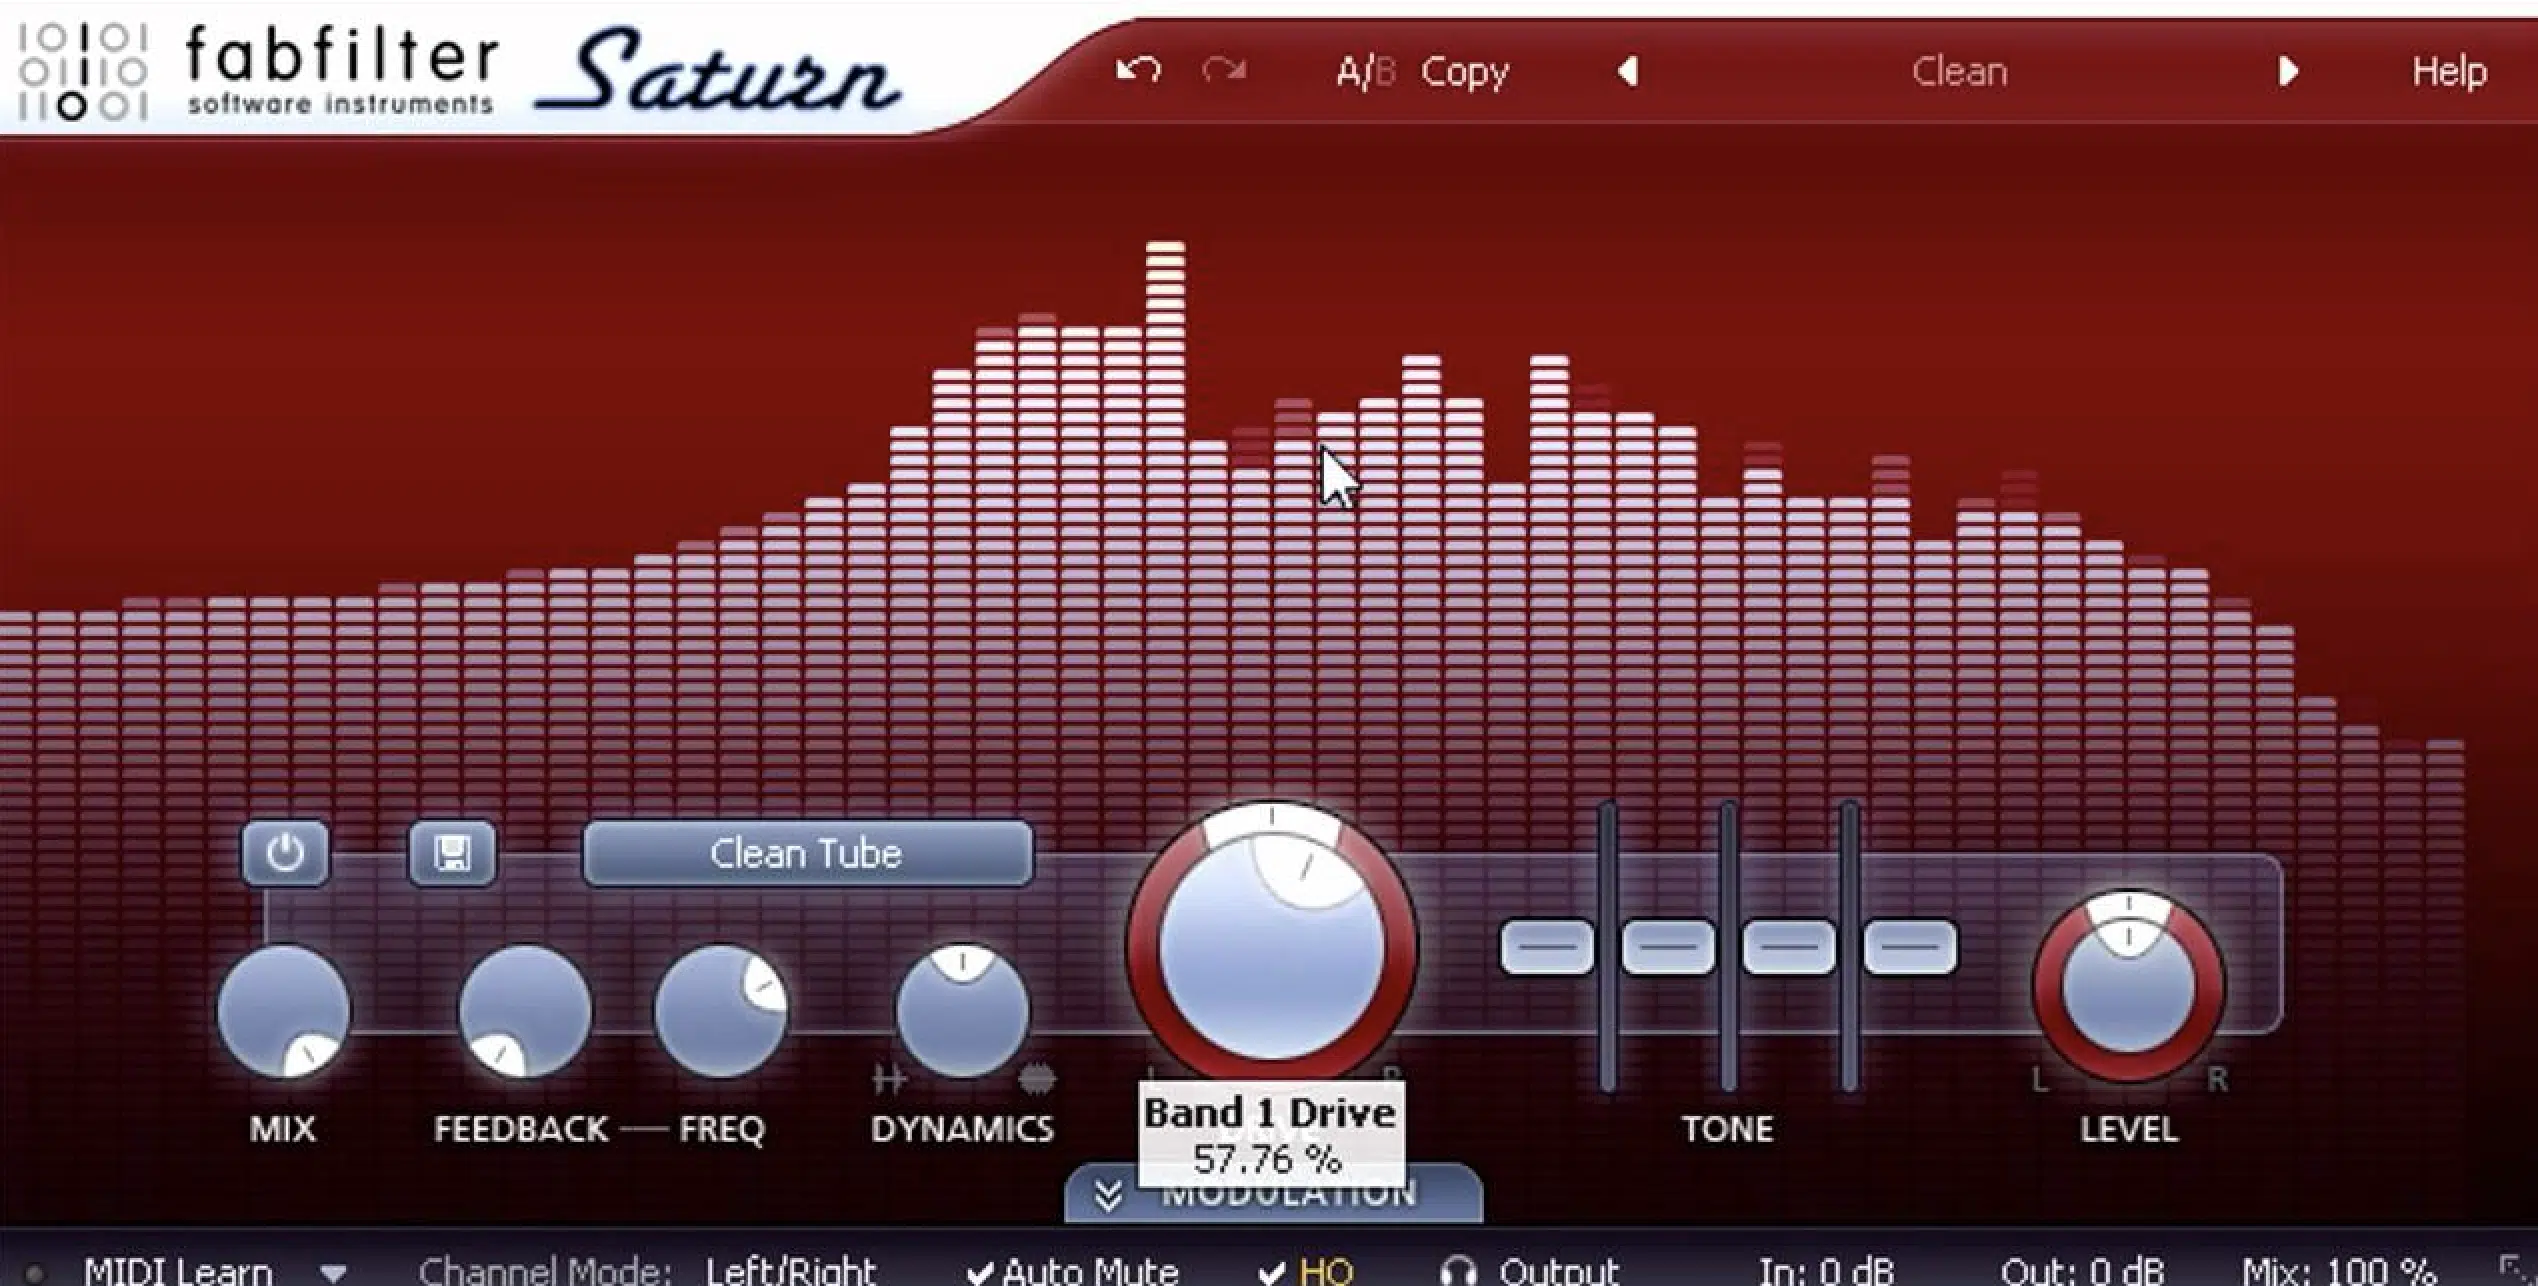
Effects can, of course, shape a bass sounds character and add depth, grit, or space, taking it from flat to powerful.
Distortion is a go-to effect when it comes to my playing technique, as it adds harmonics that make the bass richer and more aggressive.
I often dial in distortion with a drive setting around 20-30% (enough to add presence without overwhelming the low-end).
For added character, I set the distortion’s tone control to focus on the mid-range (around 250Hz-500Hz), which adds grit without muddying the sub-bass.
If I’m looking for a heavily saturated bass, I might push the drive up to 50%, but only if I plan on filtering out any harsh high-end artifacts that come with it.
For width, I like to apply a touch of chorus to mid-range bass layers focused in the mid-range.
I typically set the chorus depth to around 15-20% and keep the rate low (around 0.3 Hz) to avoid creating a noticeable, undeniably powerful wobble.
This setup gives the bass sound a wider, more spacious and immersive feel without spreading the low-end, which can cause phase issues.
NOTE: The key here is keeping the chorus effect subtle. Just enough to add width to the mid frequencies while the sub-bass remains focused and clean in mono.
Reverb is best used with caution if you really want to maintain punch.
You’ll want to set the mix to under 10% with a decay around 0.5 seconds to give just enough room without losing focus, but tweak it as you see fit.
If I need a bit more room, I might stretch the decay to 0.8 seconds, but anything more tends to muddy up the low-end.
High-pass filtering the reverb at around 200Hz also helps keep it from interfering with the sub-bass 一 letting the bass maintain clarity while adding just a touch of depth.
-
Pro Tip: Layering for a Full Bass Sound
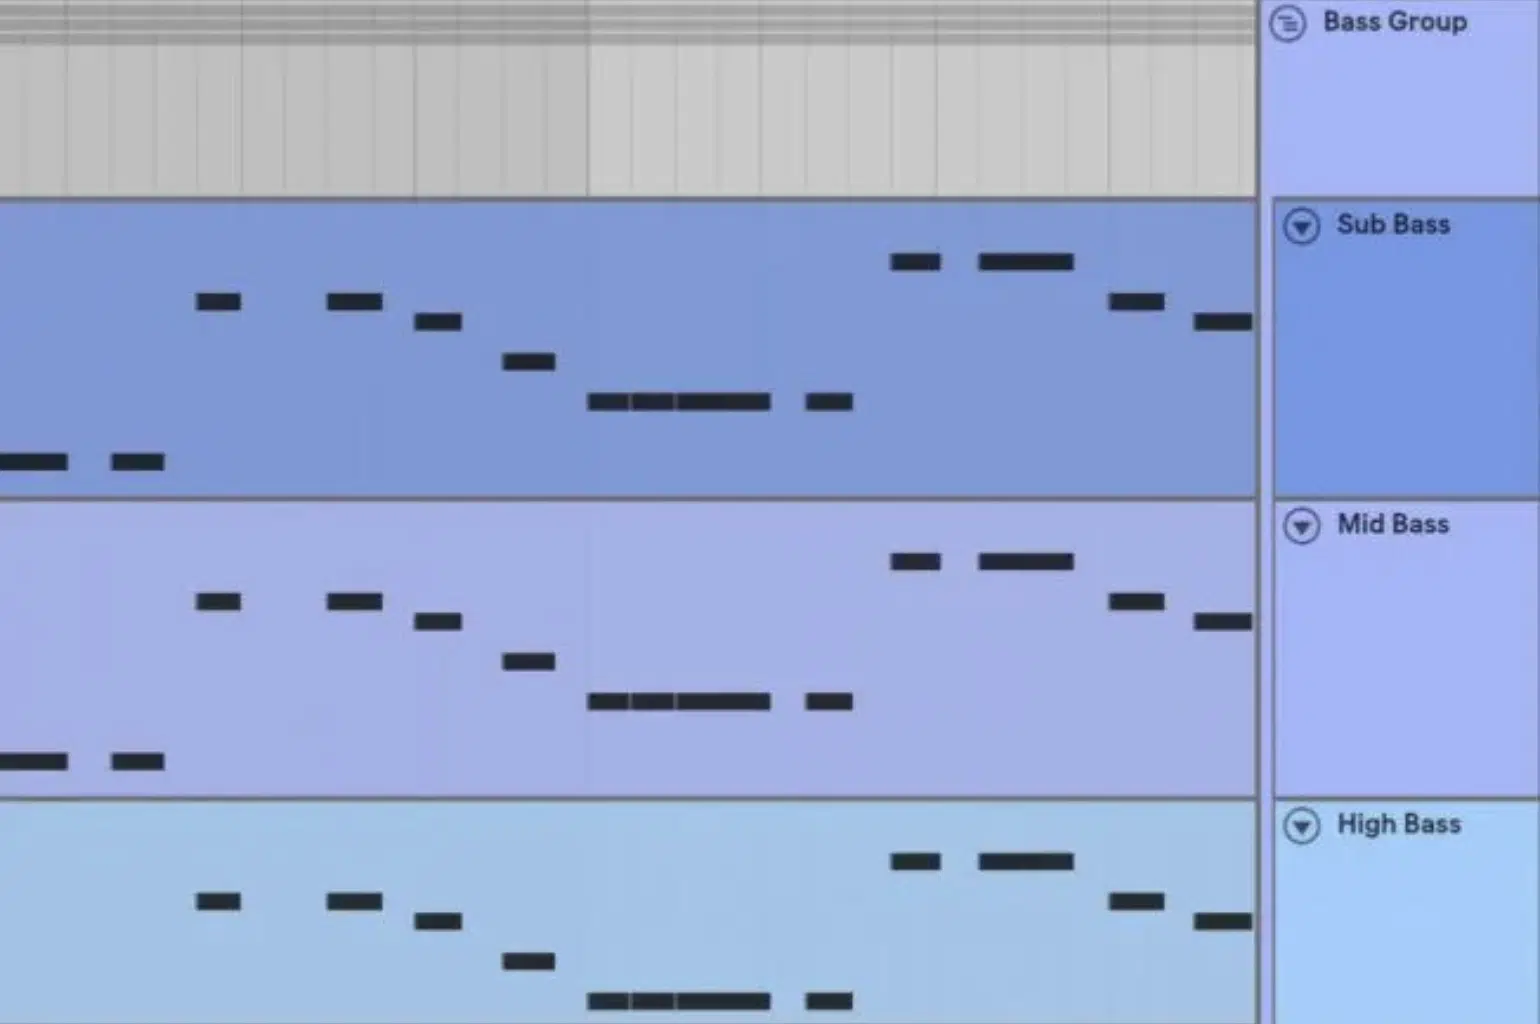
Layering bass sounds is essential for achieving a balanced, full sound across all frequencies.
One of the more common techniques is to separate the sub-bass (keeping it clean and in mono for clarity) and add layers for mid-range and upper harmonics.
I’ll usually create:
- One: A sub-bass layer below 80Hz.
- Two: A mid-bass sound around 100Hz-200Hz with slight distortion.
- Three: An upper layer if needed for texture, using stereo widening for everything above 200Hz to avoid phase issues.
Mono compatibility on the low-end is everything, especially if your track might be played in clubs, blasting through loudspeaker.
So, always check in mono to make sure the bass holds strong.
Applying Sidechain Compression
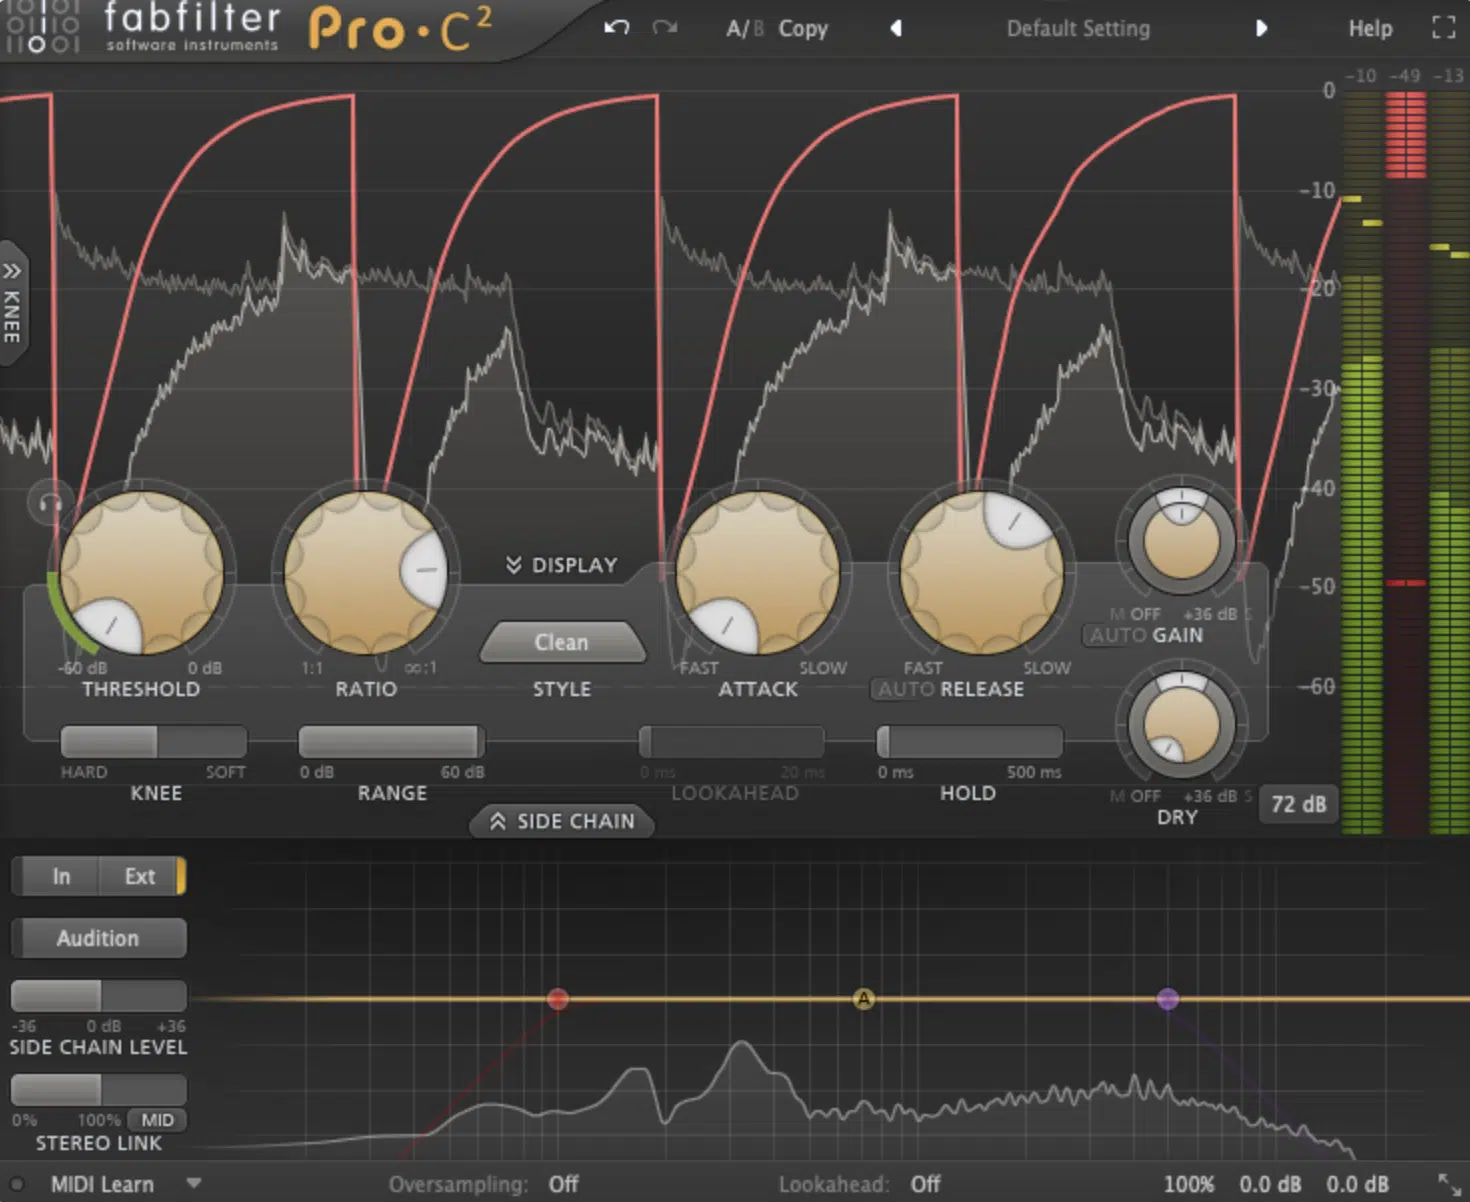
Sidechain compression is a technique that ducks the bass sound whenever the kick drum hits, creating rhythmic space.
It makes your bass sound feel more fluid with the drums.
This is typically achieved by setting the kick as the sidechain input on the compressor applied to the bass track.
For example, I frequently start with a threshold around -20dB and a ratio of 4:1, with a fast attack (around 1 ms) and release (around 100 ms) for a punchy result.
If you’re looking for a more pronounced “pumping” effect 一 increasing the release time will enhance that rhythmic swell.
EQ Techniques
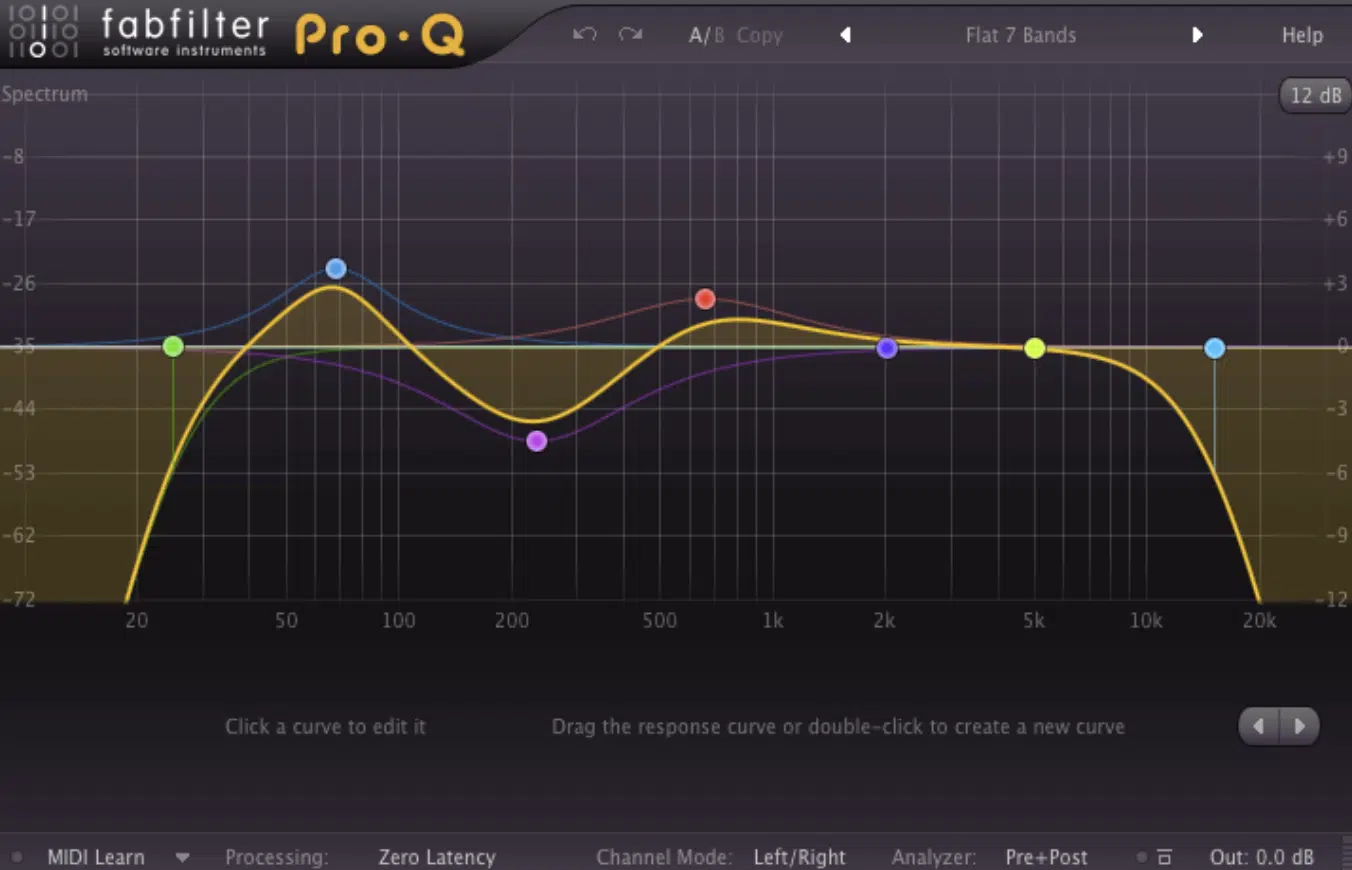
If you really want to refine your bass sound, EQ is one of the keys, helping to carve out the exact tone you’re looking for.
Start by cutting unnecessary low-end mud below 30Hz to keep the sub-bass clean.
Use a high-pass filter with a gentle 12 dB/octave slope at 30Hz to clean up those inaudible frequencies without thinning out the low-end too much.
For mid-bass clarity, I often make a slight boost around 100Hz-150Hz to add punch, but it’s essential to avoid crowding this area if you have a heavy kick drum.
This frequency range adds weight and body to the bass, but be careful not to overdo it if you’re also boosting your kick drum in this area.
When working with a dense mix, I usually keep the Q setting fairly wide (around 0.7) to avoid creating a narrow boost that could sound unnatural.
To prevent the bass from clashing with other instruments, you should use a narrow cut in the 200Hz to 500Hz range, which helps to reduce “boxiness.”
And, it leaves room for vocals or synths in that frequency band.
I usually set the Q higher here, around 4.0, and cut by 2-3 dB to create space for other instruments without stripping the bass of its fullness.
Fine-tuning with EQ can make your bass sit perfectly in the mix without overpowering or muddying the overall sound.
For final tweaks, I sometimes use a shelving filter on the high-end, around 3kHz 一 cutting by about 1 dB to keep any accidental noise or unwanted harmonics in check.
These small adjustments with EQ help the bass sit right where it belongs: strong, clear, and impactful, but never, ever overwhelming.
-
Pro Tip: Different Types of Bass (808, Reese, and Pluck)
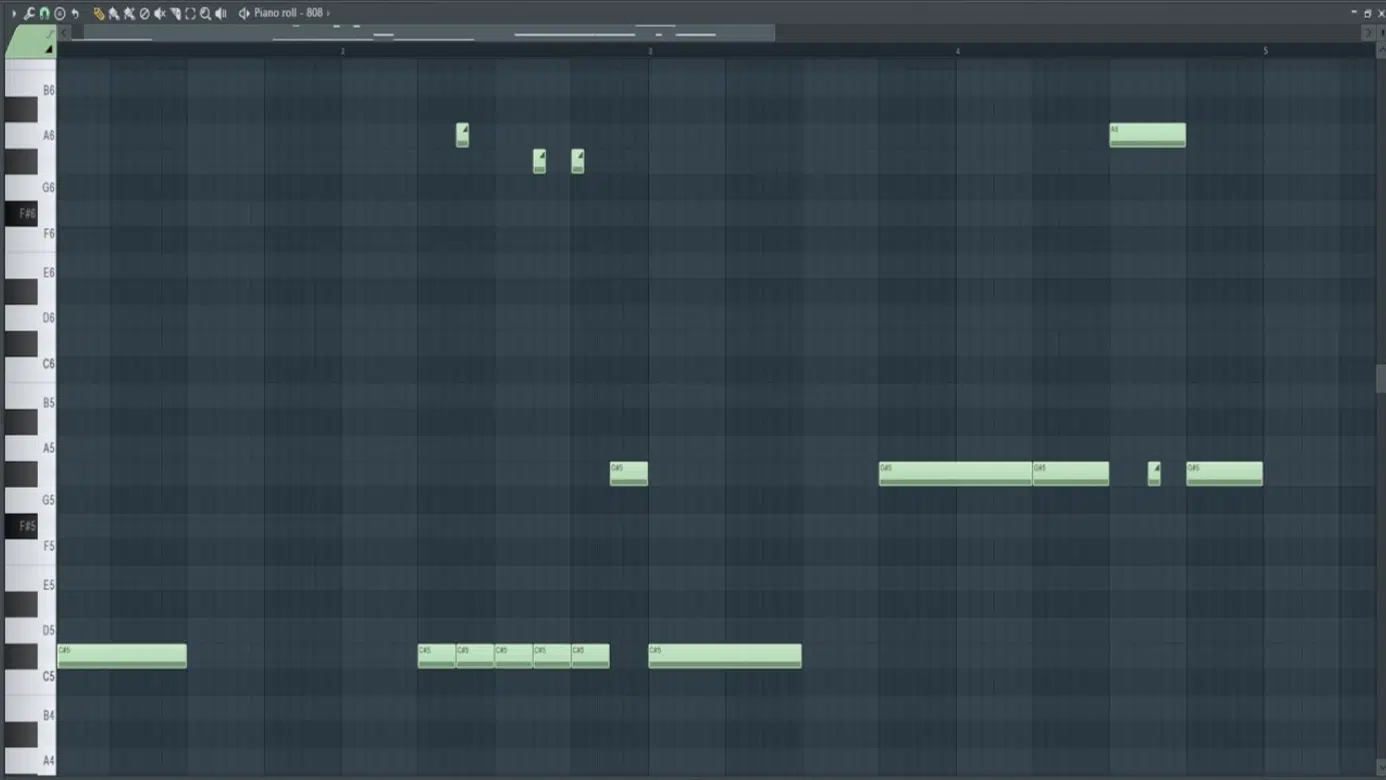
808 Slides
Different types of bass sounds bring unique characteristics to your track, each one fit to specific styles and vibes.
As a producer, it’s always super beneficial to know everything you possibly can, and this involves knowing the main types of bass.
The 808 bass, iconic in hip-hop and trap, is known for its deep, pure sub-bass tone, which is best achieved by using a sine wave with minimal harmonics.
To give it that classic punchy attack, I like to add a slight pitch envelope 一 setting the attack to around 5 ms and the decay to roughly 800 ms.
It creates a sustained, rumbling bass that fills out the low-end without overpowering other elements in the mix.
Adding a subtle distortion (around 10% drive) on the high end of the 808 can also help it cut through without losing its deep, clean character.
The Reese bass, on the other hand, is all about thickness and movement, created by detuning two saw waves against each other to create a “wobbling” effect.
To get a fuller, evolving sound, I usually set one one oscillator to -12 cents and the other to +12 cents.
A touch of low-pass filtering around 150Hz keeps the wobble from becoming too harsh, while a moderate LFO rate of about 0.5 Hz adds more rhythmic movement to the sound.
The pluck bass sound, last but not least, is perfect for adding a percussive element.
I typically use a saw wave or square wave for a pluck bass and set a sharp decay of around 100 ms with a short release (about 50 ms) to give it that quick, punchy vibe.
Adding a low-pass filter with the cutoff around 200 Hz and a bit of resonance helps shape the pluck’s transient while keeping it tight in the mix.
If you want it to pop even more, try layering a triangle wave underneath to reinforce the low-end without muddying up the clarity of the attack.
Sampling and Resampling Techniques
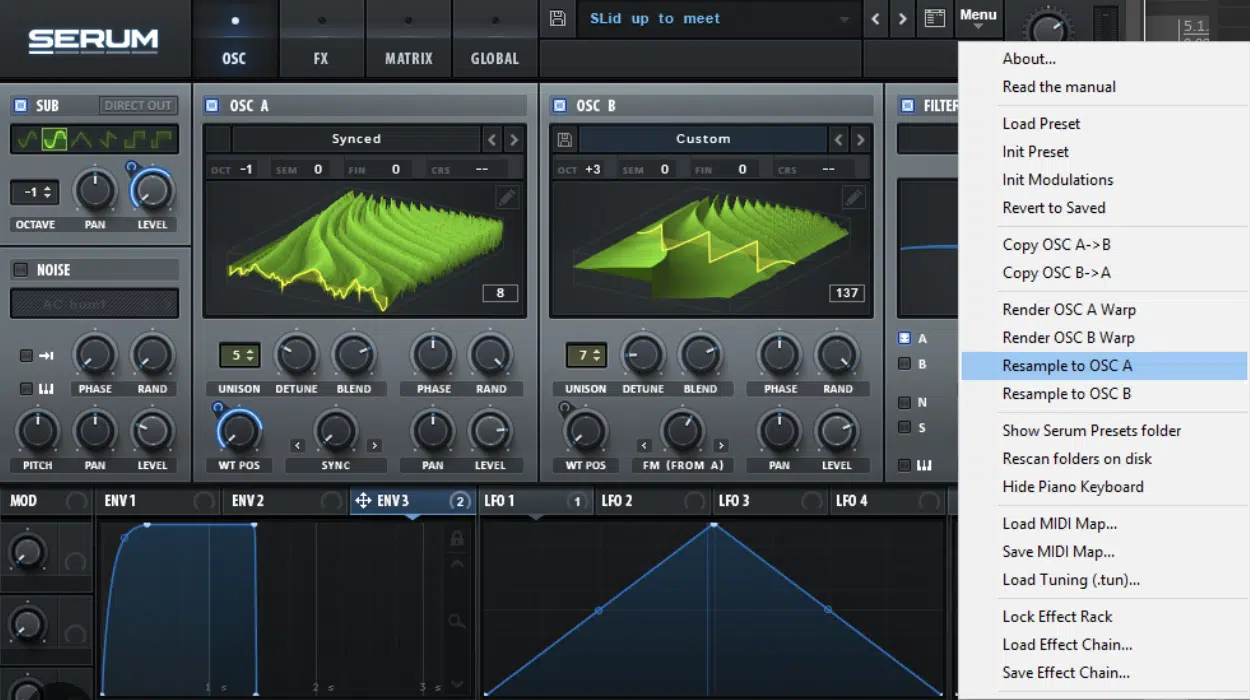
Sampling and resampling are solid techniques for building unique bass sounds with layers of depth and character.
Start by creating a bass sound using synthesis, then bounce it to audio and manipulate the sample with:
- Pitch shifting
- Distortion
- Reversing to add new texture
Personally, I like to use a low-pass filter at around 200 Hz on the resampled bass to keep the low-end smooth and layered.
Then, I might add a second, more aggressive distortion on the top end for grit.
This process of resampling allows you to achieve a bass sound that’s distinct and layered with mesmerizing, complex harmonics.
Which would, by the way, be difficult to create with synthesis alone.
Syncing Bass with Drums
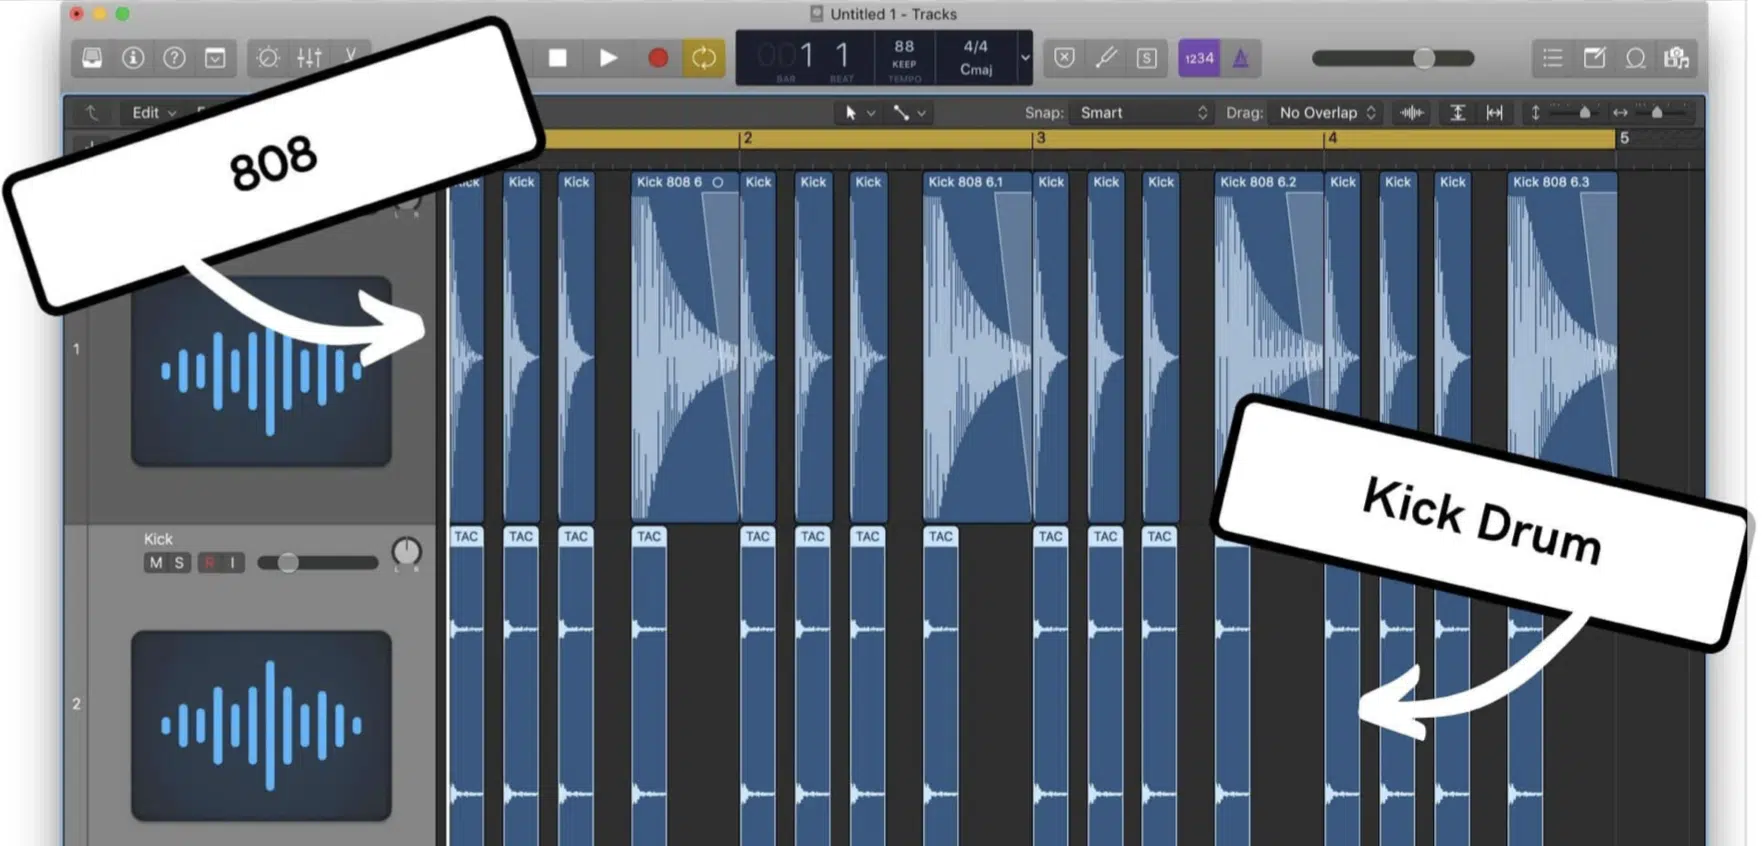
Syncing bass with drums is key for a cohesive groove and to make sure both elements support each other rhythmically.
Start by tuning the bass sound to match the kick drum’s fundamental frequency, which usually falls between 50Hz and 80Hz.
This ensures they complement rather than compete with each other.
I prefer to slightly delay the bass sound by 5-10 ms to give the kick a bit of breathing room 一 letting the two blend naturally without any clashing.
For genres that require tight, punchy rhythm (like hip-hop or EDM), creating bass patterns that follow the kick rhythm can lock in the groove and give the track a stronger, unified foundation.
Advanced Sound Design Techniques
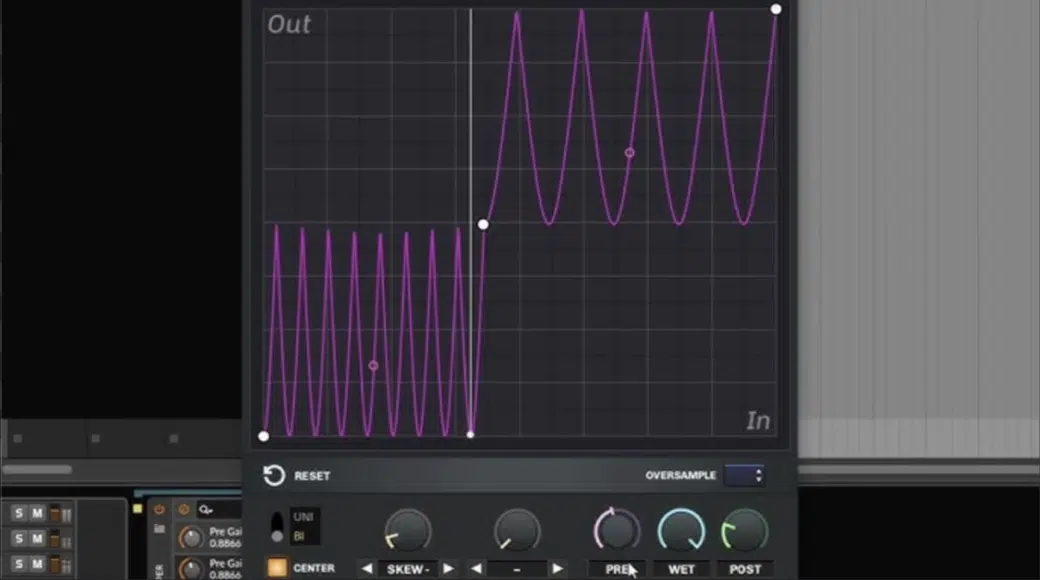
Advanced sound design techniques take your bass sound to the next level by layering in subtle details and characteristics that make it stand out in the mix.
One powerful technique, for example, is wavefolding (above).
This is basically like a more intense version of distortion that folds back the waveform on itself, creating epic harmonic overtones…
I like to set the fold amount between 30-50% to keep it aggressive without losing clarity in the low-end.
Another technique is using a frequency band splitter to process different parts of the bass sound individually/separately.
You can try applying chorus only to the mid-range frequencies around 200Hz for added width while keeping the sub-bass clean and centered.
Granular synthesis, which breaks the bass sound into tiny “grains” and rearranges them, can also add a unique, evolving quality to the bass.
This has to be one of my favorite synthesis types, but it can be a little confusing for beginners, so just make sure to practice, practice, practice.
Lastly, using subtle pitch modulation (about 5-10 cents) on your bass tone adds movement without pulling the bass sound too far off pitch, which kills the ears.
This is effective for long-held bass notes that need a bit of life.
-
Pro Tip: Final Mixing and Mastering Tips for Bass
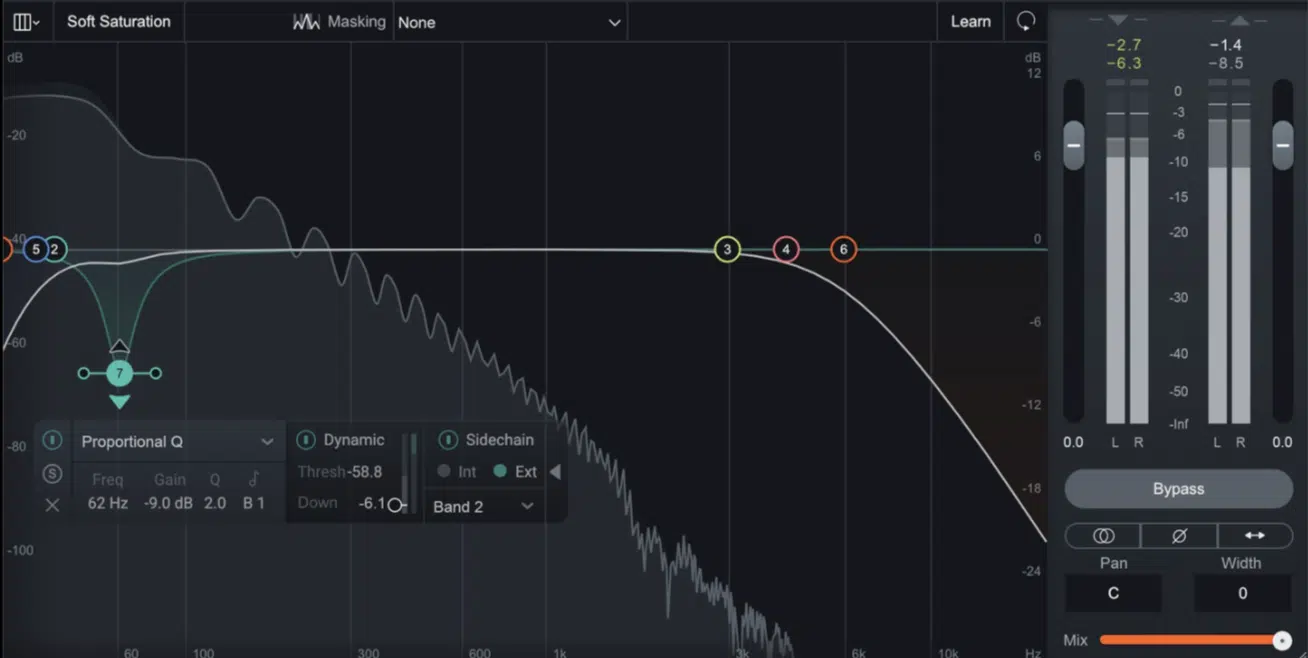
When it comes to mixing and mastering bass, you’ve got to pay attention to:
- Levels
- EQ
- Compression
Start by setting the bass level to sit slightly below the kick drum, which creates a balanced low-end that doesn’t overpower.
For EQ, I usually cut around 200Hz to prevent muddying and boost around 80Hz for punch 一 keep these boosts narrow to avoid crowding other instruments when released.
Finally, applying a light limiter on the bass channel with a threshold at -1 dB can prevent any unexpected peaks without completely squashing the dynamics.
This helps the bass sound stay consistent in the final mix.
This should cover everything to make sure your bass sounds professional, clear, and ready for release every time.
Side note, if you want to learn how to mix or master your tracks, step-by-step, we’ve got you covered.
Final Thoughts

To make your bass sound really stand out and blow people’s minds, remember, you’ve got to combine unique textures, precision, and just the right amount of grit.
It’s all about knocking out an energetic, professional-quality bass sound that fills the mix without overwhelming it.
Using the tips and techniques we talked about today, you’ll certainly be able to develop a signature bass tone 一 one that adds power and presence to your tracks.
One tool that’s invaluable for producers looking to achieve the ultimate bass sound is the new, highly-renowned 808 Machine plugin.
This cutting-edge plugin uses AI to generate custom 808 bass tones, giving you endless options that hit hard and elevate your mix.
With only five simple controls, it’s incredibly easy to use, yet it offers limitless customization, ensuring each bass is unique to your specific beat.
Plus, its AI wavetable generation creates everything from clean, punchy subs to dirty, aggressive 808s.
So, whether you’re after something classic or modern, it’s got you covered.
Plus, each click generates a fresh, hard-hitting 808, so your bass sound will always be unique and memorable (and dominate the competition, I should mention).
Once you master these techniques and tools, your bass sounds will have the power to shine in any mix.
Just keep refining, experimenting, and pushing boundaries to make sure your tracks are always impactful and unforgettable.
And like I said, never be afraid to think outside the box and get super creative.
This way, you’ll not only stand out in the competitive industry but also create basslines that leave a lasting impression way after the song ends.
Until next time…
Download The #1 808 Generator in the Game


Leave a Reply
You must belogged in to post a comment.