Drums are the heartbeat of your track 一 driving the rhythm, setting the pace, and often defining the entire feel of a song.
But making your drums sound just right can be one of the most challenging aspects of music production.
This is where EQ comes into play.
Learning how to EQ drums is an essential skill that can elevate your tracks to new heights and give you that tight, punchy, well-balanced drum sound.
In today’s article, we’ll be breaking down:
- The basics of EQ & why it’s so important ✓
- Unpacking a variety of different EQ techniques ✓
- How to use high-pass filters & low-pass filters ✓
- How to EQ specific elements & hit types in your drum kits ✓
- Tackling tricky issues like drum bleed & floor noise ✓
- Exploring different types of EQ (dynamic, parametric & graphic EQ) ✓
EQ (equalization) is all about balance.
It’s all about highlighting (boosting) the key elements you want to shine and minimizing (cutting) those you don’t.
With drums, this involves giving each piece of the drum kit its own sonic space, allowing it to be heard clearly without clashing with the others.
It’s a bit like a sonic jigsaw puzzle, and EQ is the handy tool you use to make the pieces fit together perfectly.
By the end of this guide, you’ll have a solid understanding of how to EQ drums for a professional sound.
So, let’s dive in…
Table of Contents
- What is EQ & Why Does It Matter?
- The Importance of EQ in Drum Production
- Kick Start Your Track: EQing the Kick Drum
- The Snare Drum: A Central Element in Your Drum Mix
- The Role & Sound of Floor Toms
- Dynamic EQ vs. Graphic EQ Plugins: Which to Use
- Common EQ Techniques for Drums
- How to EQ Drums: Final Thoughts
What is EQ & Why Does It Matter?
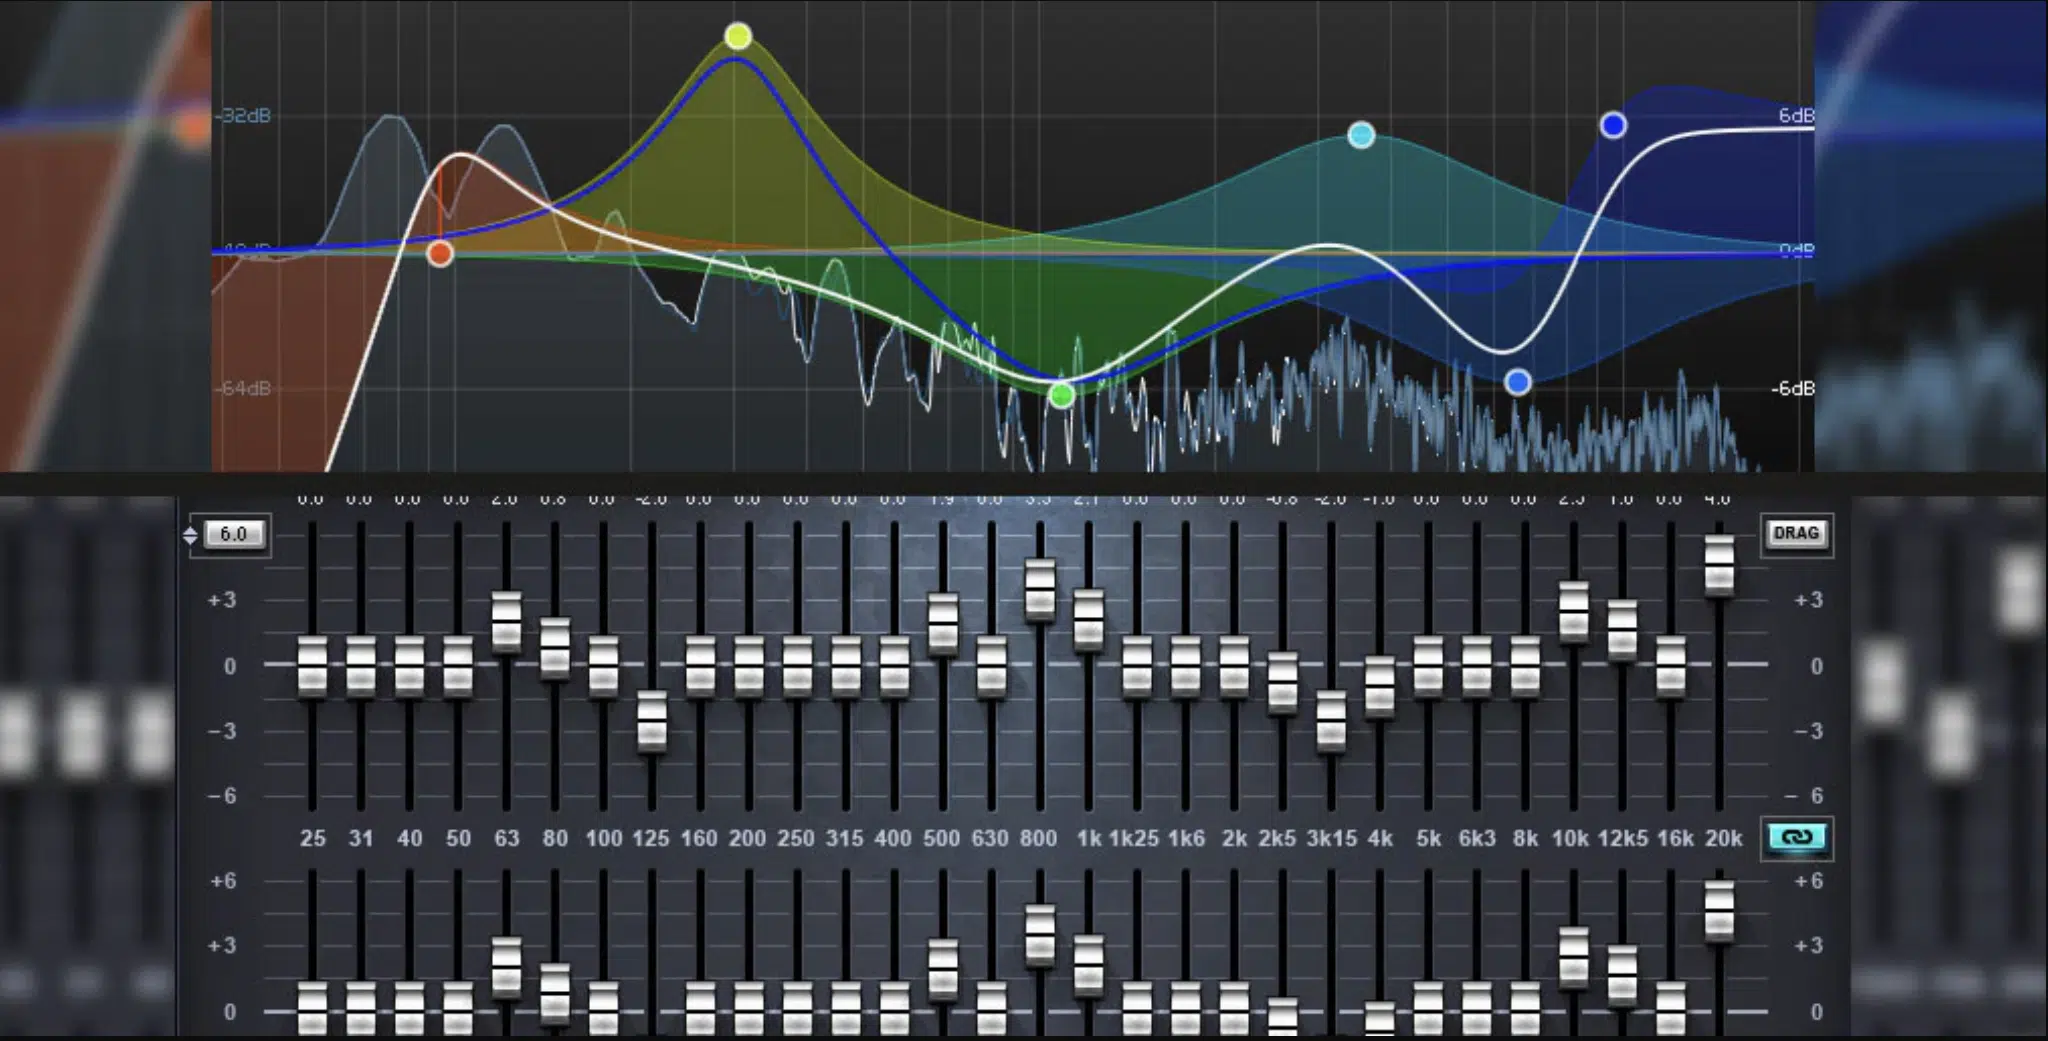
EQ, short for equalization, is like the secret sauce in your music production recipe.
The EQ can subtly balance or completely transform the sound of any track.
Now, how does this relate to drums?…
Well, it’s all about getting the drum mix just right and learning how to EQ drums properly.
Using EQ on your drums is crucial for carving out space in your mix.
It allows you to control which frequencies are boosted and which are cut 一 giving you the ability to shape your drum sound.
The trick to a good EQ is understanding the frequency spectrum and how each element of your drum kit interacts within this range.
Whether it’s the punchy low end of your kick drum or the crisp high-end attack of your snare, each component of your drum kit has a unique frequency range it operates within.
Learning to manipulate these frequencies using EQ is what sets the pro producers apart from the rest.
And that’s exactly what we’ll be covering today.
The Importance of EQ in Drum Production
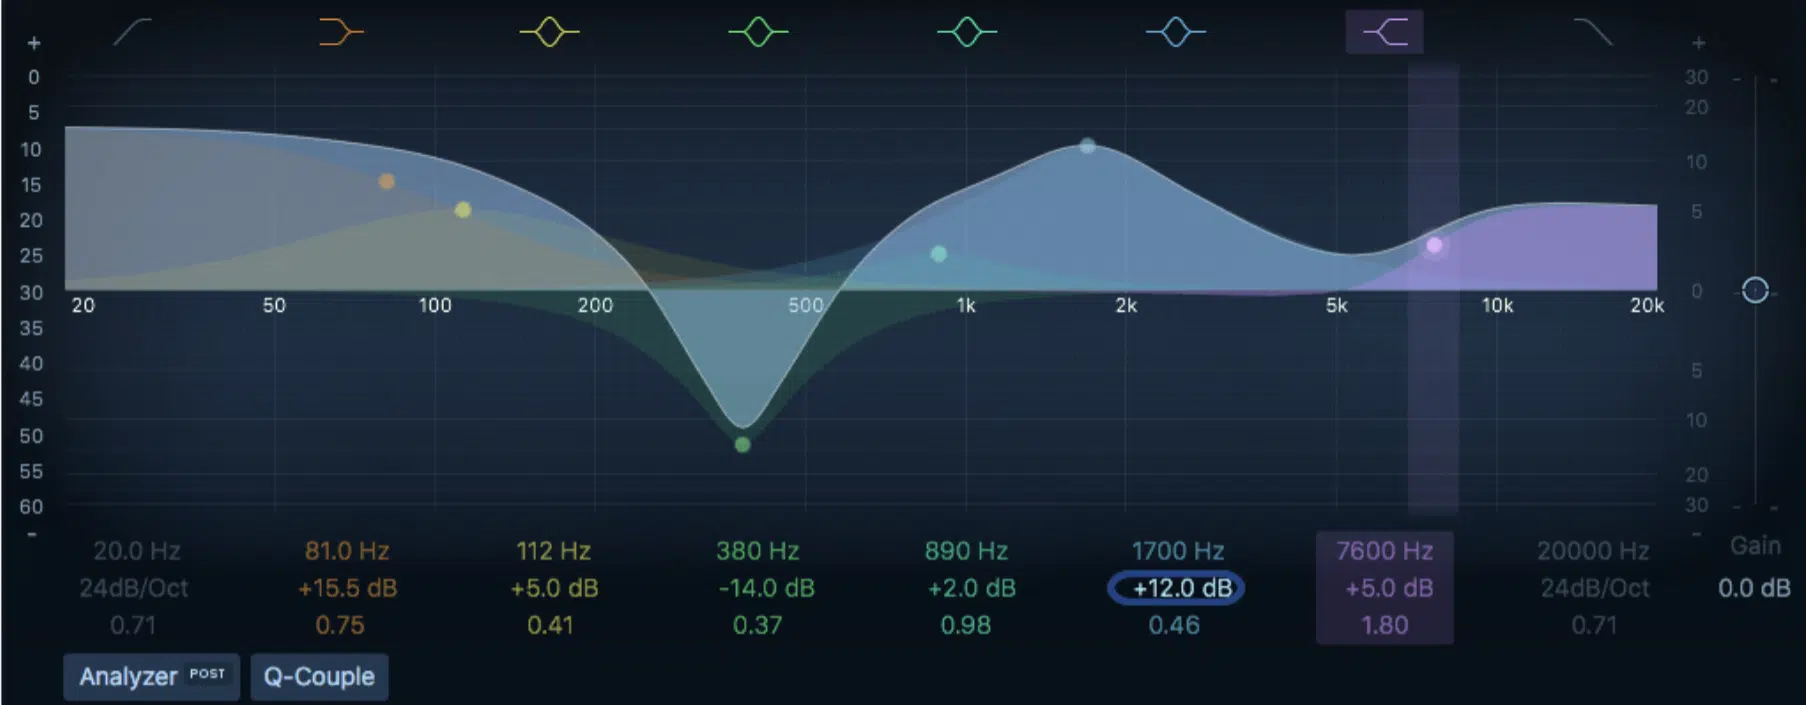
When learning how to EQ drums, just remember that a well-EQed drum kit can make or break your track.
The impact of a kick drum, such as the snap of a snare, and the resonance of toms 一 all contribute to the overall groove and feel of your song.
With EQ, you have the power to shape your drum sound to fit the vibe you’re going for.
If you’re working on a hip-hop track, for instance, you might want:
- A kick drum that punches through the mix
- A snare that pops
- Hi-hats that sizzle
In other words, EQ is your tool to customize your drum sound, ensuring it cuts through the mix without clashing with other elements of the track.
In fact, you can even sculpt the frequencies to create new (or drastically improved) drum kits with just EQ alone.
And let me tell you, there’s nothing more satisfying than a well-EQed drum mix sitting perfectly in your track.
Kick Start Your Track: EQing the Kick Drum
The kick drum is the foundational element in any hip-hop track, providing that crucial low-end thump that gets heads nodding.
Let’s delve into how to EQ the kick drum for a sound that’s punchy, deep, and perfectly balanced within your mix.
Fundamentals of the Kick Drum Sound
The kick drum is the heartbeat of any great track, setting the pulse and driving the rhythm.
So, needless to say, getting your kick drum EQ right is crucial.
- A poorly EQ’ed kick drum 一 Leads to a muddy mix or a kick that disappears among the other elements.
It can also clash with the bass drum and other low-end elements, causing a host of issues you may already be familiar with (like phase cancellation).
- A properly EQ’ed kick drum 一 Adds sufficient depth and body to your music and ensures the low-end elements are not clashing.
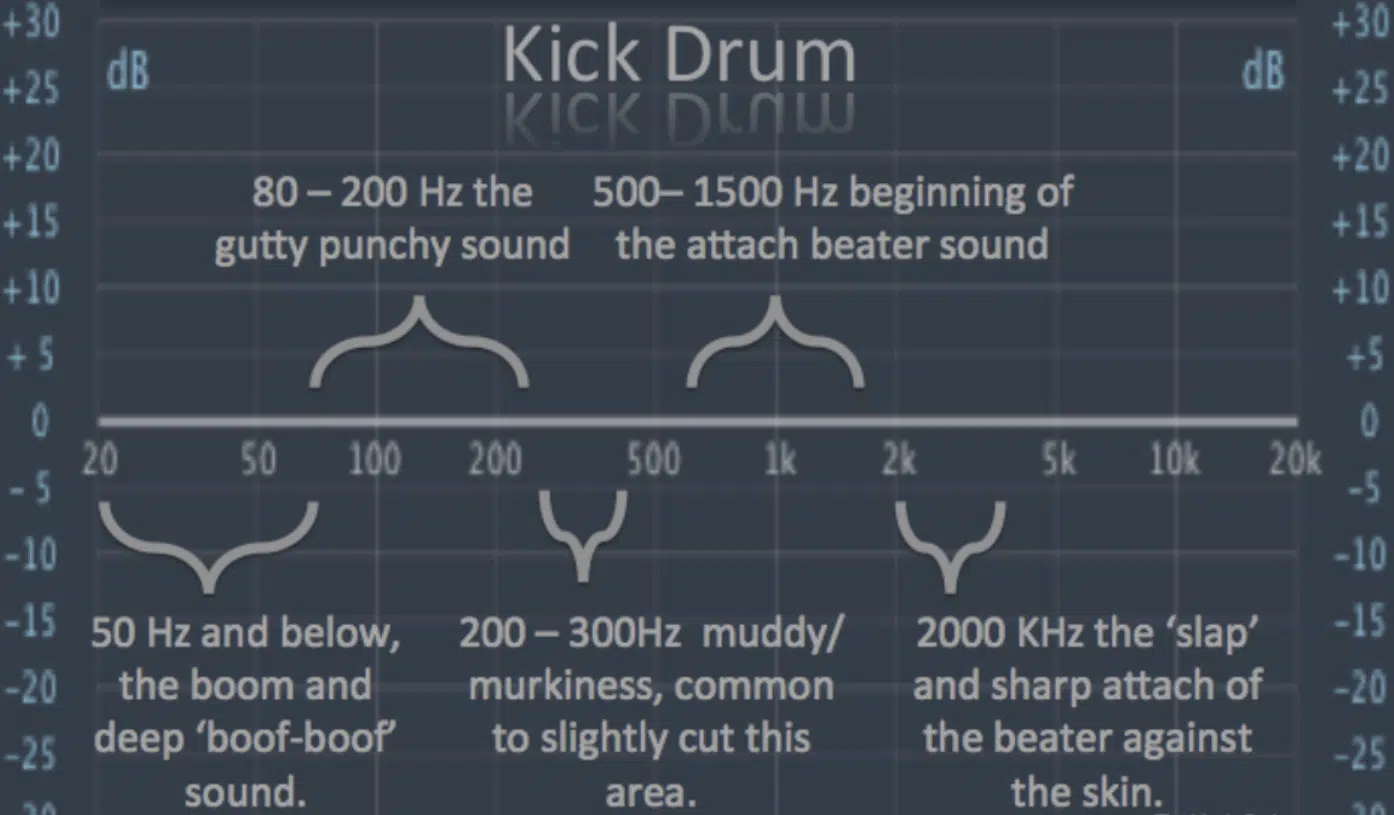
The fundamental frequency of most kick drums sits somewhere between 60 to 100 Hz, so this is a good starting point when it comes to EQing.
This is where you get the deep, low-end thump that makes the listener feel the beat in their chest.
It’s very important to know this when learning how to EQ drums.
In the upper-frequency range (around 2-4 kHz) is where the ‘click’ or ‘beater’ sound of the kick drum resides.
This is what gives the kick drum its attack and helps it cut through the mix.
Getting a good balance between the lower and upper frequencies is key to achieving a professional and intriguing kick drum sound.
Kick Drum EQ: Techniques for a Punchy Sound
Now, let’s talk about specific techniques on how to EQ your kick drum for that punchy sound that’s so crucial in hip-hop and trap production.
1. Start with a high-pass filter.
This will get rid of any unwanted low-end frequencies that might muddy your mix.
2. Set your cut-off frequency to around 40 Hz.
This will leave the fundamental frequencies intact while cleaning up the super low-end that most speaker systems can’t reproduce anyway.
3. Use another band to boost the fundamental frequency.
This will enhance the body and depth of your kick.
If your kick lacks punch 一 try boosting around the 2-4 kHz range for more attack.
NOTE: For an even punchier sound, you can also use a low shelving boost to emphasize the low frequencies.
Alternatively, for an even bigger sound, you can bring the high-pass cutoff right around the fundamental.
Then, increase the resonance a little for a resonant boost (shown below).
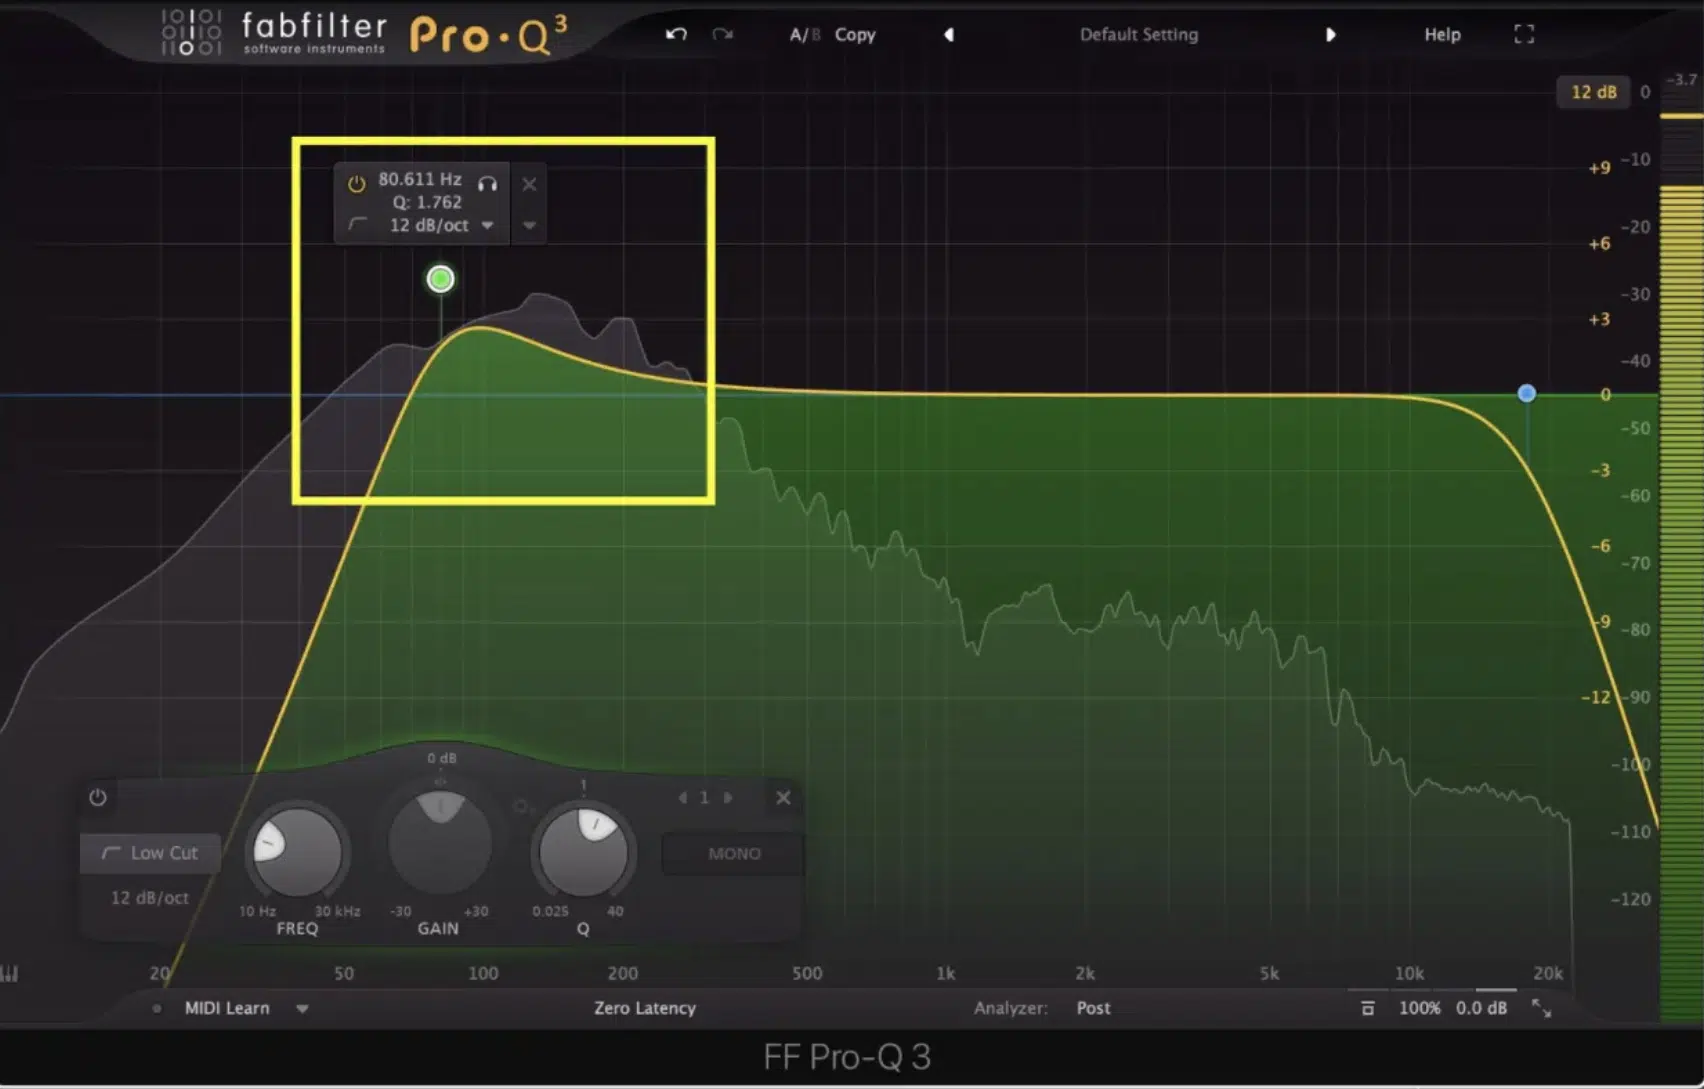
But remember, less is more, especially when you’re first learning how to EQ drums.
It’s better to make small, subtle adjustments to avoid a boomy or overpowering kick drum sound.
Overcoming Common Kick Drum EQ Challenges

Now, it’s not always smooth sailing when EQing your kick drum.
You might encounter challenges like floor noise, or your kick drum might clash with your bass.
But don’t worry, with a few EQ tricks up your sleeve, you can easily overcome these issues.
Floor noise can often creep into your kick drum recordings, adding unnecessary low-end rumble.
This won’t be found in digitally synthesized kicks and drums (such as in a synth like Serum), but rather those recorded live with kick drum microphones.
Or, from a drum kit and/or re-recorded for analog/digital electronics.
To tackle this, simply apply a high-pass filter to roll off those super-low frequencies.
If your kick drum is clashing with your bass, try carving out space in your bass EQ for your kick to sit.
For example, if your kick drum’s fundamental frequency is at 80 Hz 一 try applying a slight cut at the same frequency on your bass.
This will allow your kick drum to shine through without competing with the bass.
NOTE: This is a static cut. Meaning, regardless of whether the kick is being triggered, your bass will then have a dip in the range you’re cutting.
This may be fine for now…
However, for a really punchy, low-end heavy mix, doing this same cut on the bass with a dynamic EQ side-chained to the kick will carve out the space you’re looking for in the bass.
It functions more like a frequency-specific or multiband sidechain compression than anything else.
The Snare Drum: A Central Element in Your Drum Mix
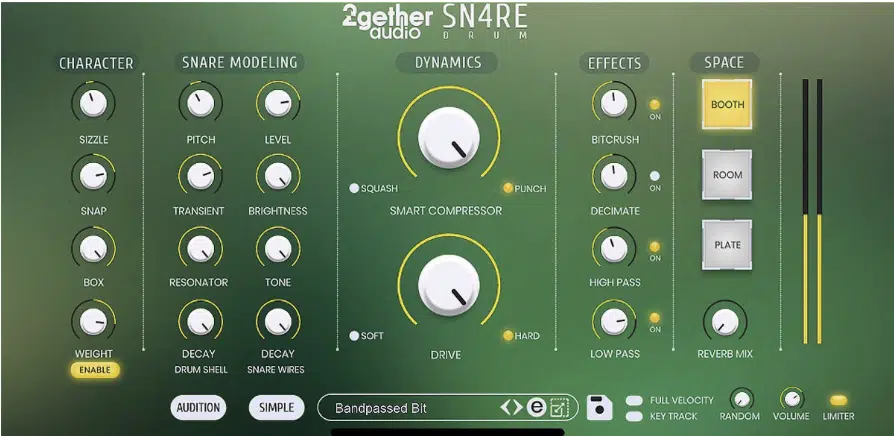
After the kick drum, the snare is arguably the most important part of your drum mix, especially in hip-hop production.
A well-EQed snare drum can give your track that extra ‘snap’ it needs to really stand out.
So, how do you EQ a snare drum to make it sound just right?
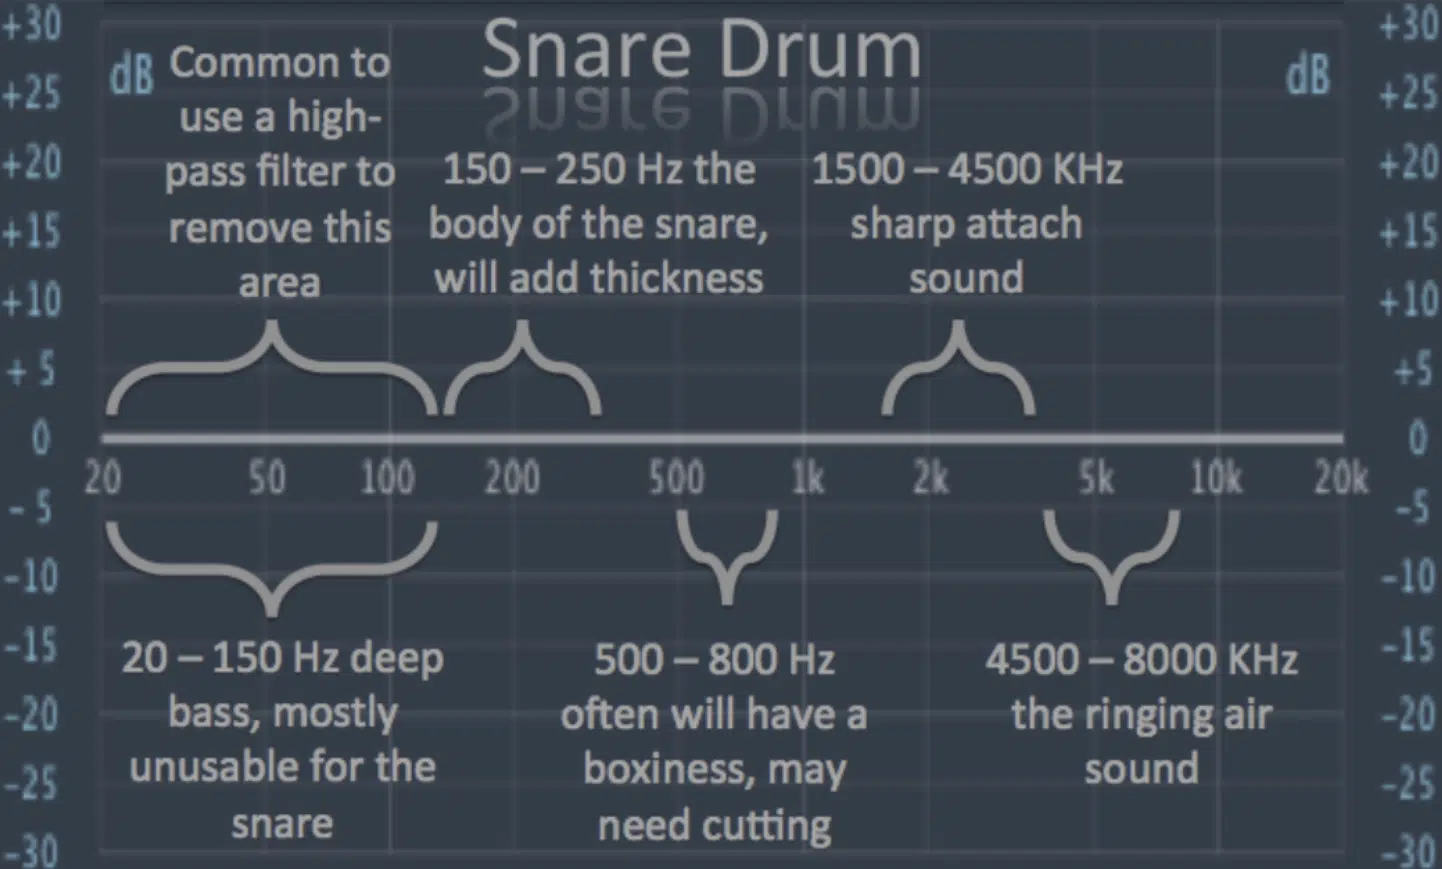
The snare drum operates in a higher frequency range than the kick drum, primarily between 200 Hz and 10 kHz.
- The low end (around 200 Hz) 一 Where you get the body or ‘weight’ of the snare drum sound.
- The higher frequencies (above 2 kHz) 一 Contribute to the snare’s ‘snap’ or ‘crack.’
The key to a great snare drum EQ is balancing these low or high frequencies.
Too much low end can make your snare sound boomy or muffled, while too much high end can result in a thin, harsh sound.
If you’re learning how to EQ drums, finding that perfect balance is vital.
Snare Drum EQ: Crafting a Dynamic Drum Sound
When it comes to snare drum EQ, the right approach is key.
My approach is a bit like sculpting: I start with a block (the raw snare sound) and carve away until I have a shape (the EQed snare sound) that fits perfectly in my mix.
STEP 1 一 Apply a high-pass filter to get rid of any unnecessary low frequencies that might be making your snare sound muddy.
I usually set the cutoff frequency around 100 Hz, but this can vary depending on the specific snare drum sound you’re working with.
NOTE: Just be sure, when doing this, that you don’t cut out too much of the heart of the snare’s low-end, as it holds much more weight than you think.
STEP 2 一 Use a parametric filter (typical EQ band) to sweep through the frequency spectrum.
You’re listening for any frequencies that:
- Stick out
- Sound unpleasant
- Are annoying or piercing
When you find one of those ‘hot spots,’ simply make a narrow cut to reduce it.
STEP 3 一 The high frequencies of the snare are very important.
They give the snare its presence in the mix.
If your snare is lacking in brightness, try giving it a boost with a high-shelf filter around 6 kHz or above.
Or, even better, find a specific area in the top-end to bring out the desired tone (known as pseudo-tuning your snares).
By using a somewhat narrow/resonant boost for a certain range, you can bring out any tone/note you want, as long as there’s content in that area.
You’ll be amazed by what this hack can do to your snares when done correctly.
Pairing Your Snare with Your Kick Drum
Creating a cohesive drum sound isn’t just about EQing each drum individually; it’s about how they all work together.
This type of bus/group processing is explained in-depth in our Mix Bus article.
And the relationship between your kick and snare is one of the most crucial to get right.
After EQing your snare drum, you should try solo’ing it along with your kick drum.
Then, ask yourself:
- Do they interact well?
- Do they complement each other?
- Do they clash?
If they are indeed clashing 一 you may need to quickly go back and properly adjust your EQ settings.
Perhaps your snare has too much low end and it’s interfering with your kick drum.
Or maybe your kick drum’s attack is too sharp and it’s overpowering your snare.
Whatever the issue, remember when you’re learning how to EQ drums, they need to work together.
The Role & Sound of Floor Toms
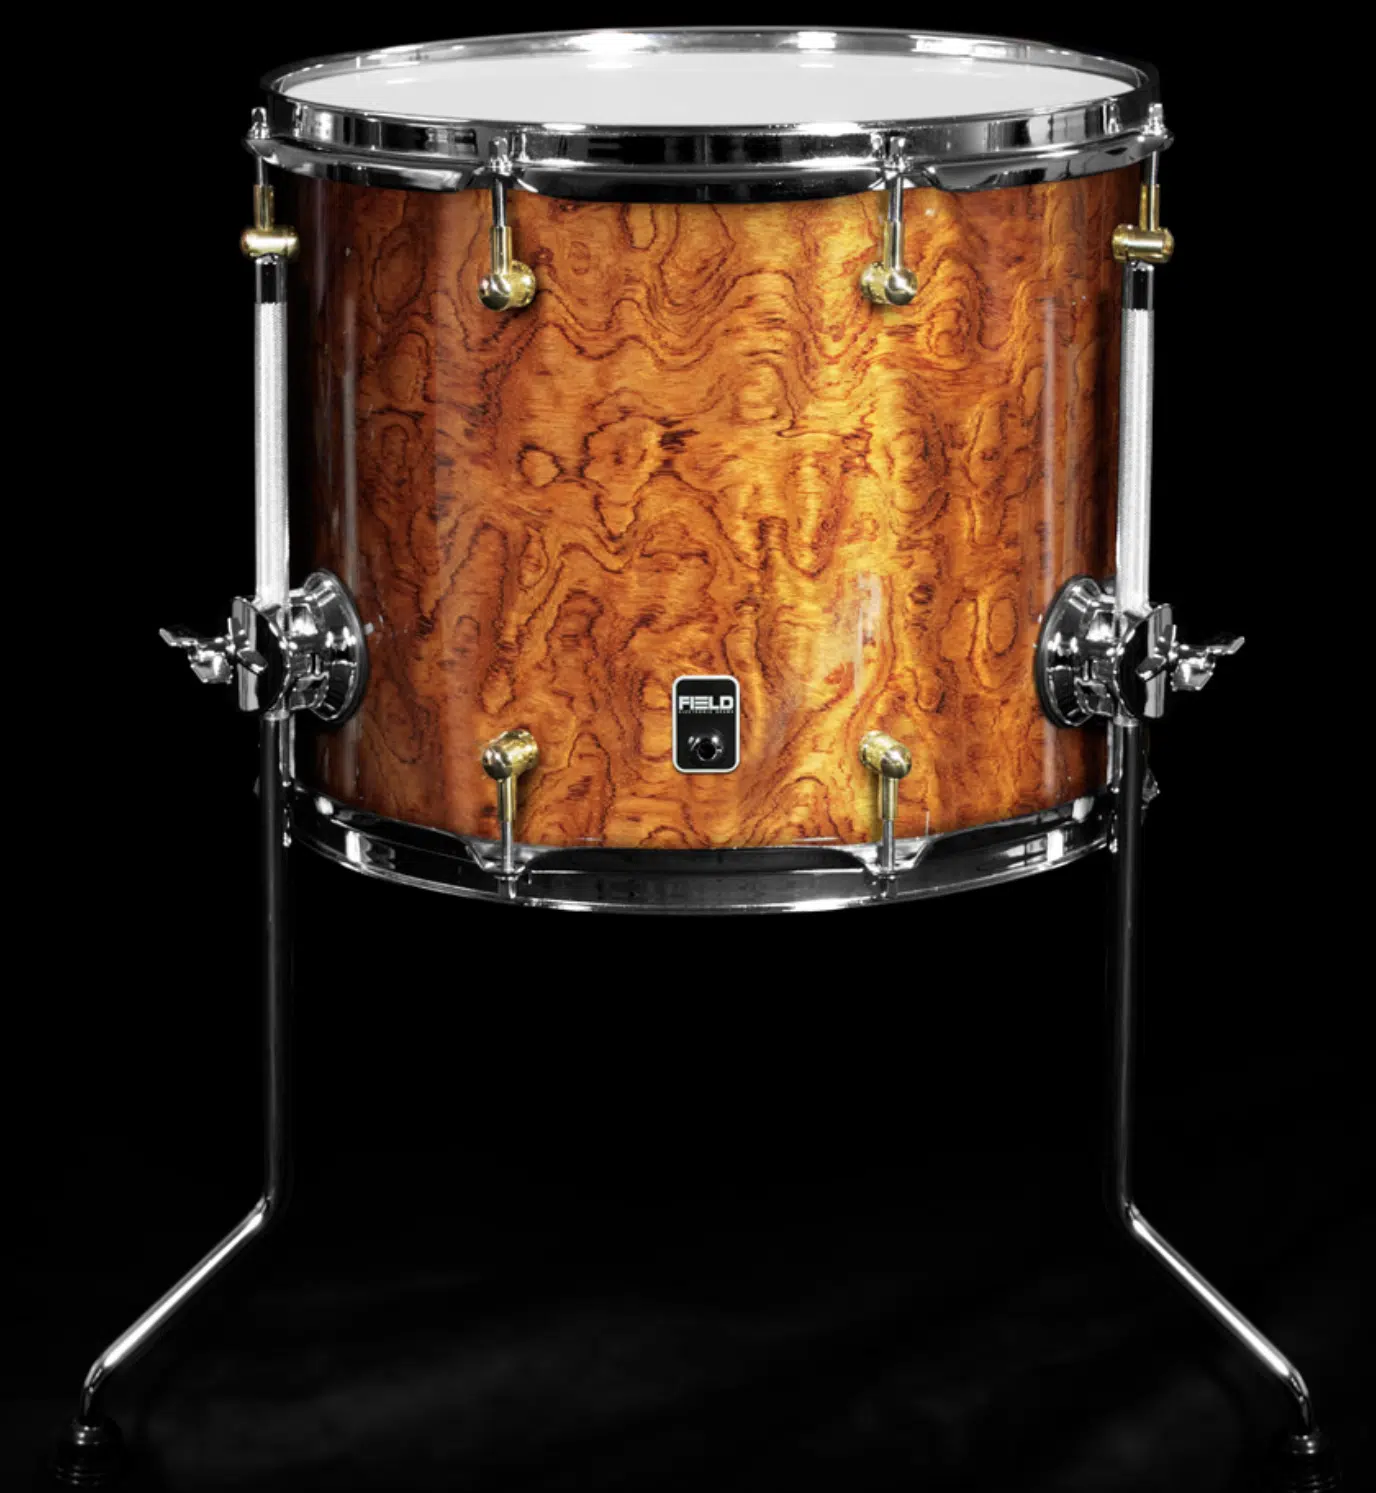
When it comes to the drum kit, floor toms bring in a unique flavor.
They serve up the deep, low-end punch that can really drive a song forward.
So, how should you EQ these bad boys to really let them shine and avoid a really cheap sound?
Well, first, you need to understand that floor toms live mainly in the low-mid range of the frequency spectrum (around 80 Hz to 300 Hz).
This is where we get that deep, resonant punch that makes floor toms such a satisfying part of the drum kit.
To let your floor tom fill its role effectively, it needs to have enough presence in this frequency range.
But beware, too much can lead to a muddy, boomy sound that overshadows (or may clash with) the rest of your drum mix.
-
Techniques for Floor Toms
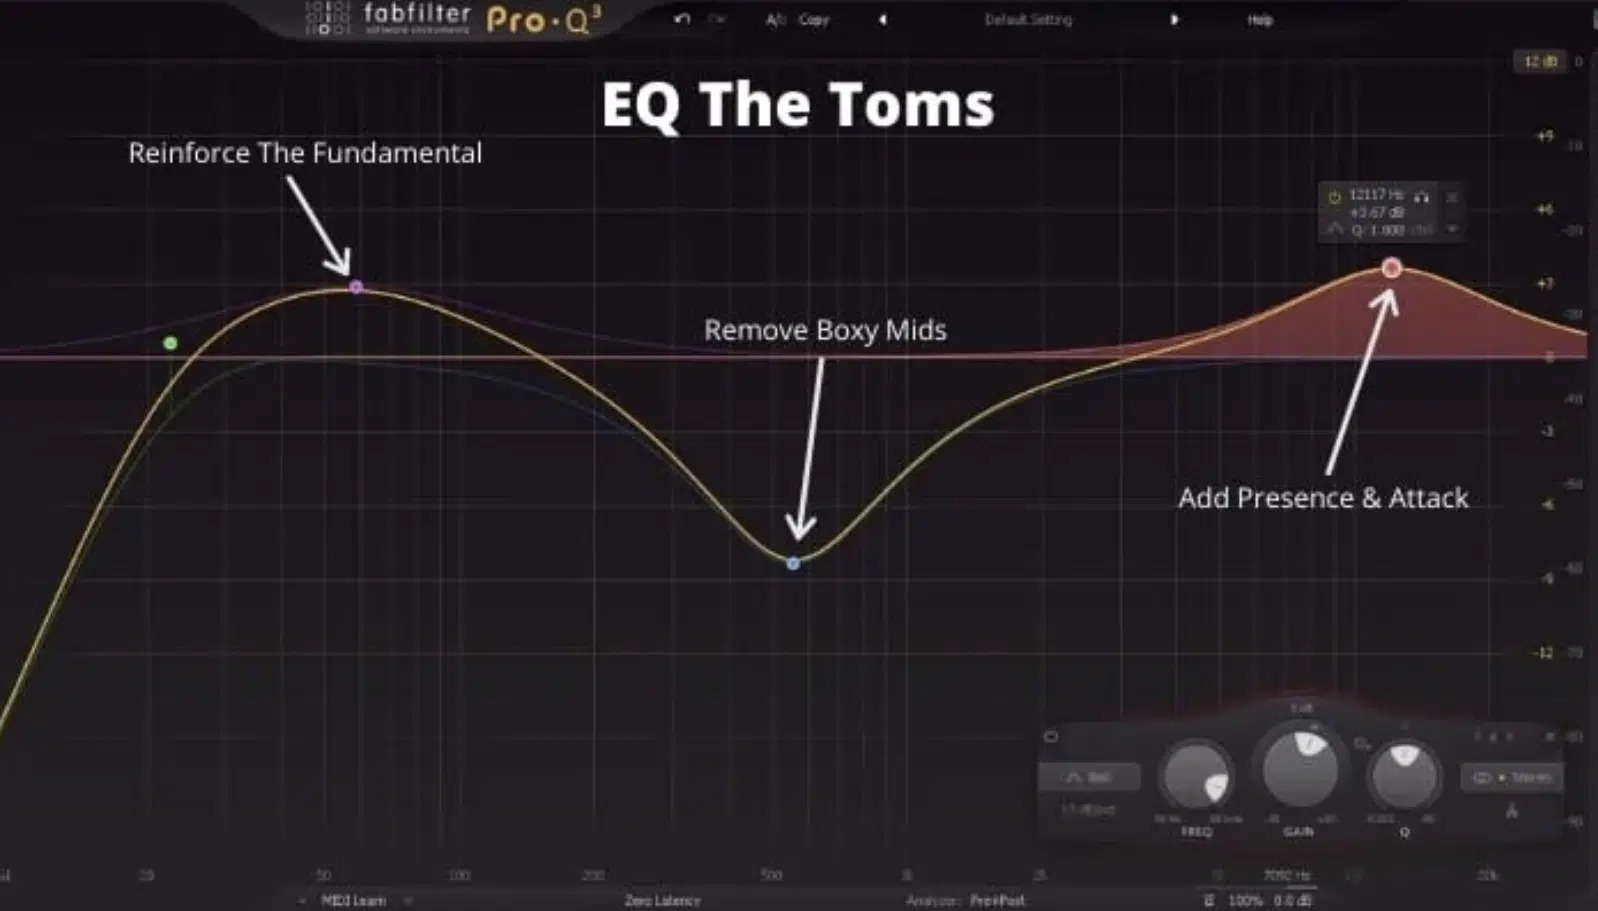
When it comes to EQing floor toms, it’s often more about what you cut than what you boost.
Remember, you’re looking to balance the low-mid punch of the floor toms with the rest of the drum mix.
Use a high-pass filter to roll off everything below about 40-50 Hz.
Again, be cautious about removing too much of the low-end, as they’re crucial and play a greater role on the toms than you may realize.
This helps eliminate unnecessary low-end frequencies that can completely mess up your mix.
- If your floor toms sound boxy or muffled 一 Try making a small cut in the 400 Hz to 600 Hz range, which helps to clean up the drum sound and make the toms sound more focused.
- If your floor toms are lacking in presence 一 A boost in the 2 kHz to 4 kHz range can help them cut through the mix.
Be careful not to overdo it, as too much boost in this area can make your toms sound super harsh.
When learning how to EQ drums, always keep in mind that subtly is typically your best bet.
-
Tackling Floor Noise: Removing Unwanted Frequencies
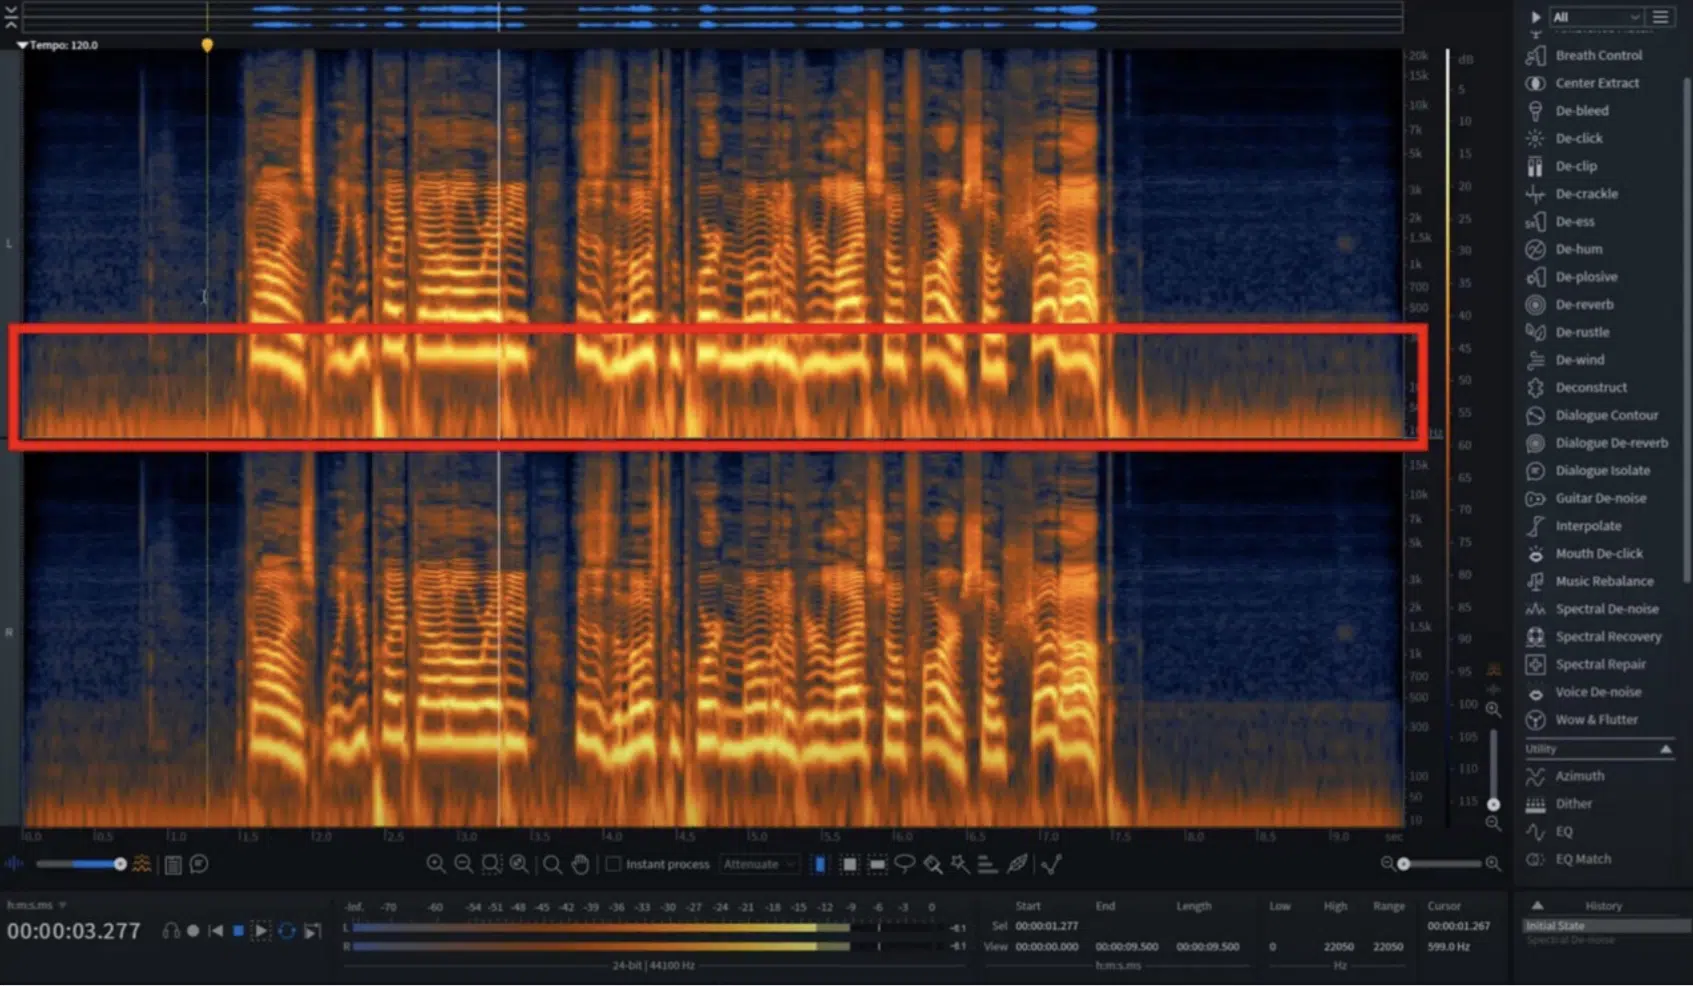
Like all drums, floor toms can come with their share of unwanted frequencies or ‘floor noise.’
This could be anything from an annoying resonance to a distracting rattle.
To tackle these problems, try using a very simple EQ method called notch filtering.
This involves using a parametric filter to make very narrow cuts at the specific frequencies that are causing problems.
It’s a great tool for fine-tuning your drum sound.
For example, if there’s a particular resonance that’s bothering you:
- Use your parametric filter to sweep through the frequency range until you find it.
- Simply make a narrow cut to reduce it.
Keep in mind, the key here is to be surgical.
You’re not trying to alter the overall awesome drum sound 一 just to remove those problematic frequencies.
This is the key to achieving a great drum mix or drum beat.
Dynamic EQ vs. Graphic EQ Plugins: Which to Use
Choosing the right EQ tool can be as critical as how you use it.
In this section, we’ll be comparing dynamic EQ and graphic EQ plugins 一 helping you understand their strengths and how to utilize each one for the best drum mix results.
-
Understanding Dynamic EQ
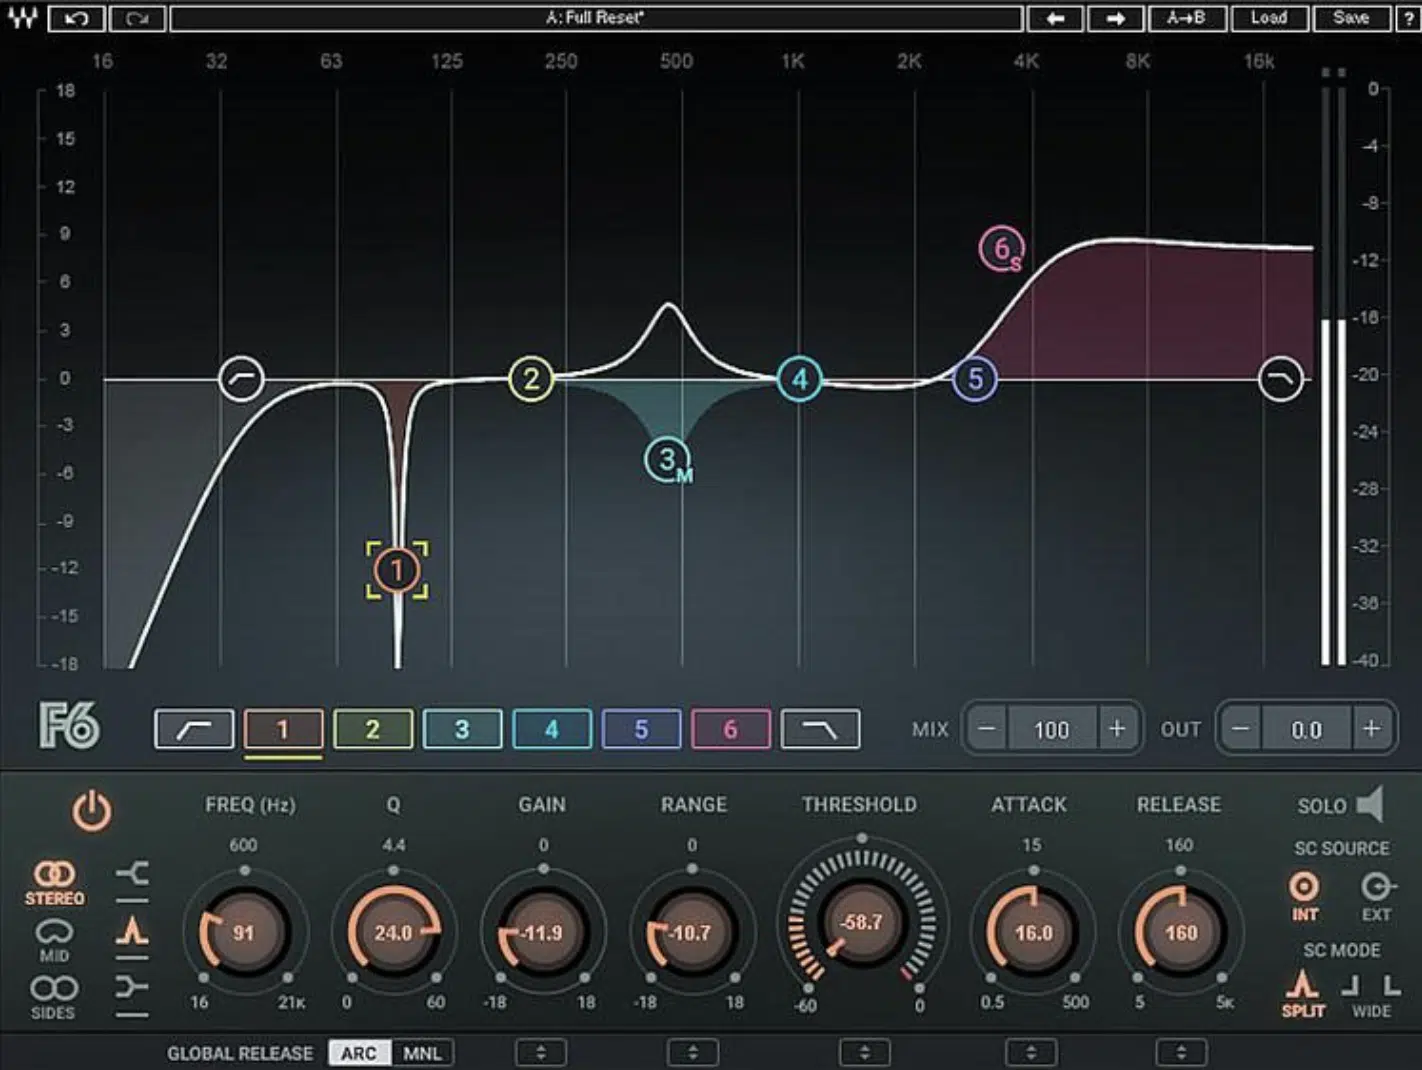
Dynamic EQ, as the name suggests, is an EQ that reacts dynamically to the input signal.
Meaning, it only applies its EQ curve when the input signal crosses a certain threshold.
Dynamic EQ functions similar to a multiband compressor, except you’re using EQ instead of compression.
This can be incredibly useful when dealing with issues like drum bleed or trying to retain/increase the dynamics of your mix.
For example, you could set up a dynamic EQ to reduce the level of a specific frequency range whenever (and only when the snare drum hits).
Therefore, minimizing the amount of snare bleed in your kick drum mic.
Another key advantage of dynamic EQ is that it allows you to target specific frequency bands without affecting the rest of the signal.
This can give you a high level of control over your drum sound.
-
Exploring Graphic EQ Plugins
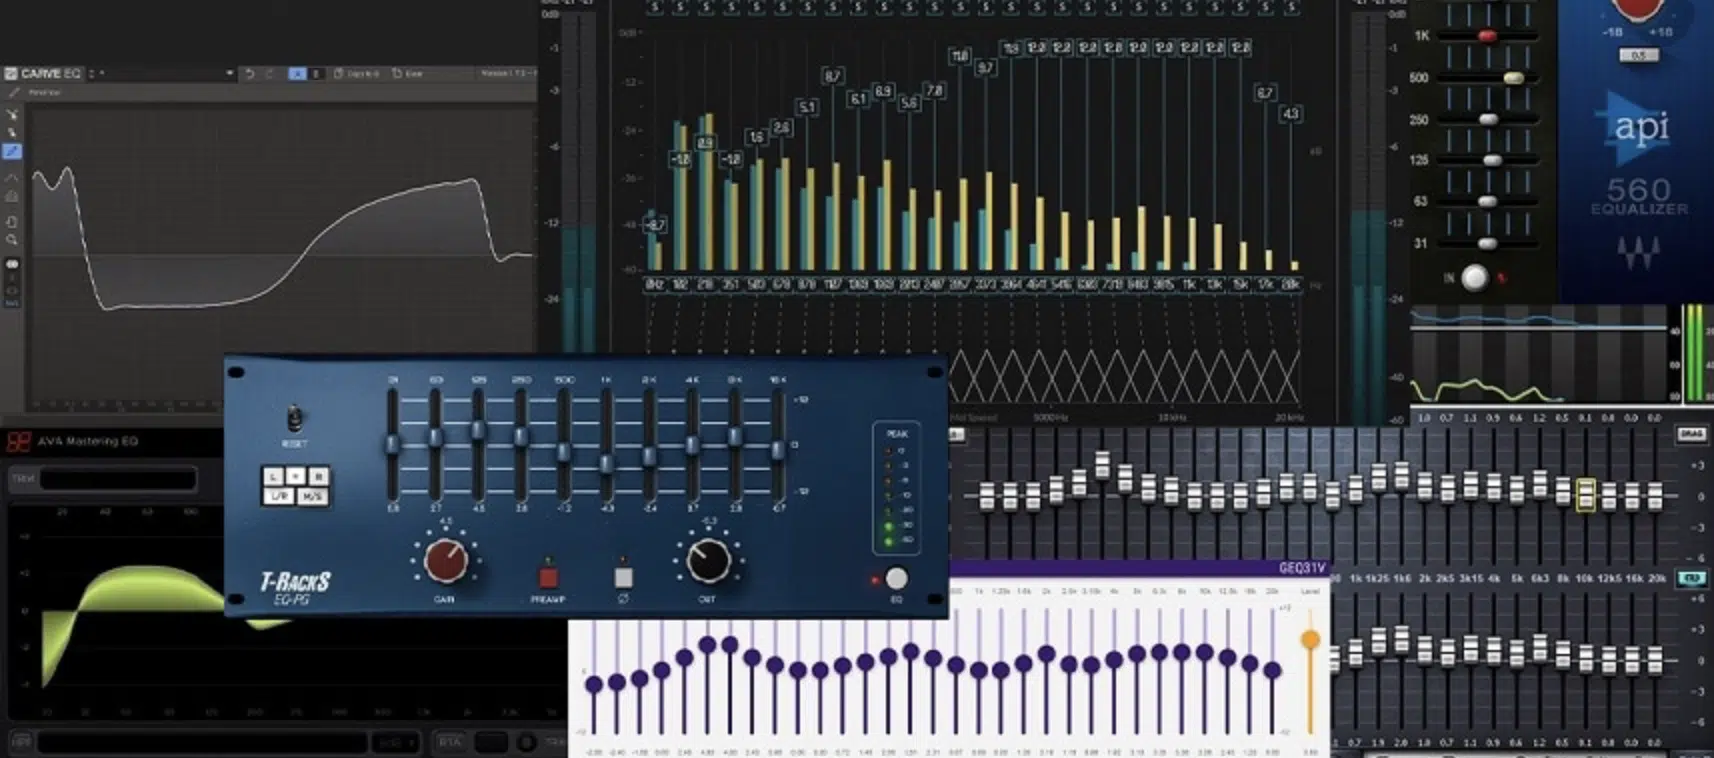
On the other hand, we have graphic EQ plugins.
These can have a very similar effect as traditional EQs (parametric EQs), however, they’re less flexible and look/operate differently.
Instead of using a band or a set of unlimited bands to go virtually anywhere in the spectrum, graphic EQs are more precise and focused.
They allow you to adjust the level of specific frequency bands using a predetermined set of sliders, versus being fully adjustable in the frequencies in which they effect.
The layout of these sliders often resembles a graph, which is where the name originally came from.
Graphic EQ plugins can be a great tool for shaping the overall sound of your drums.
They allow you to make broad strokes 一 boosting or cutting large bands of frequencies at once.
However, they may not offer the same level of precision or flexibility as a dynamic or parametric EQ.
Most graphic EQ plugins have fixed frequency bands, meaning you can’t adjust the frequency range or even the bandwidth (resonance) of each band.
-
Dynamic EQ vs. Graphic EQ: The Verdict

So, which should you use, dynamic EQ or graphic EQ plugins?
As with many things in music production, the answer is: it truly depends.
Dynamic EQ can be a powerful tool for tackling specific issues, like:
- Drum bleed
- Unwanted frequencies
- Problematic resonances
Its ability to react to the input signal makes it highly versatile and precise.
Graphic EQ, on the other hand, can be more intuitive and easier to use for shaping the overall sound of your drums.
They’re also more accurate in regard to phase shifts and inconsistencies when compared to both dynamic EQ and parametric EQ.
As well as functions quicker when it comes to dialing in your desired results.
However, it will not offer the same level of precision as a dynamic EQ.
My advice is to familiarize yourself with both types of EQs and understand their strengths and weaknesses.
The best tool for the job often depends on the specific task at hand!
When you’re learning how to EQ drums, knowing about as many EQ plugins (and types) as possible is super beneficial.
Common EQ Techniques for Drums
Now that we’ve covered the basics and dived deep into specific parts of the drum kit, it’s time to explore some common EQ techniques you can apply to your drums.
These strategies will arm you with the know-how to shape your drum sound in any way you want.
-
Using High-pass filters & Low-pass Filters
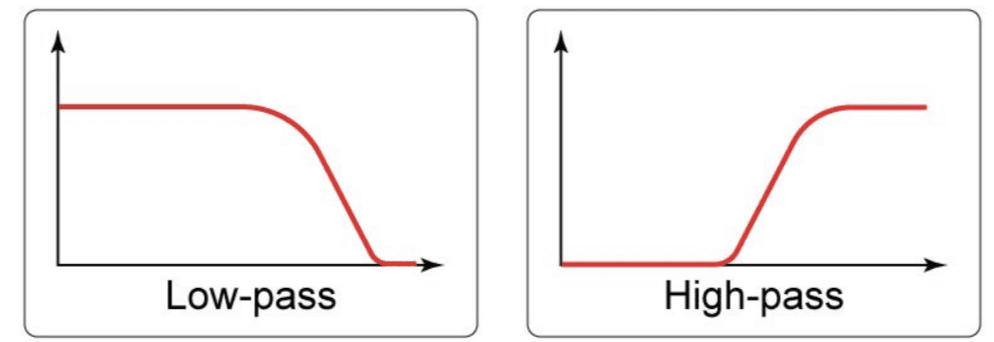
High-pass filters and low-pass filters are absolutely key tools when you’re learning how to EQ drums.
These types of filters allow you to control which frequencies are allowed to pass through the filter.
- A high-pass filter 一 Allows high frequencies through.
- A low-pass filter 一 Allows low frequencies through.
For example, a high-pass filter on your kick drums can help get rid of unwanted low-end frequencies, like stage rumble or mic handling noise.
Setting the cutoff frequency (around 40-60Hz) can be a good starting point, but every drum recording will vary depending on the specifics.
Low-pass filters are also very handy.
They’re great for getting rid of unnecessary high frequencies that can make your drum sound thin or harsh.
Applying a low-pass filter to your snare drum EQ, for instance, and setting the cutoff frequency around 10kHz can help your snare drum sound warmer, more natural.
-
Working with Frequency Bands: Low-mids, High Frequencies & More
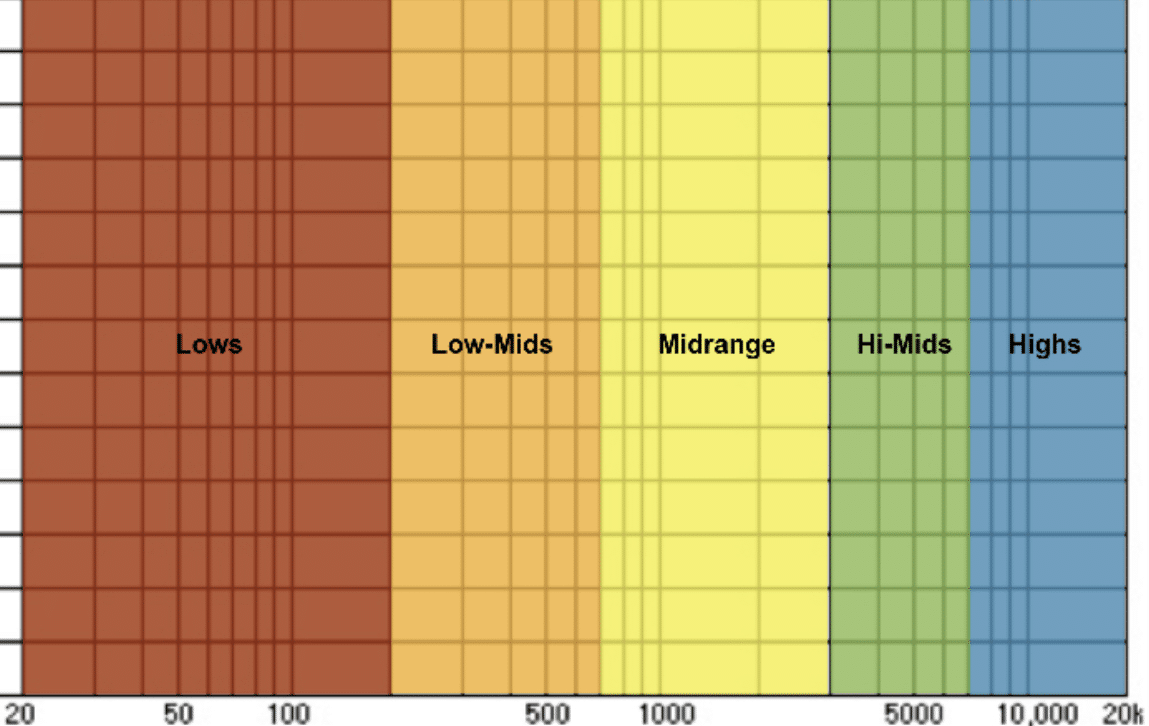
Understanding the different frequency bands is a very important aspect of drum EQ.
Each part of the drum kit operates within a certain frequency range, and understanding this can help you to achieve a balanced, powerful drum mix.
The kick drum: often sits in the low-frequency range, typically below 100Hz.
This is where the weight and power of the kick drum sound come from.
A bit of a boost here can give your kick drum a solid, punchy sound.
The snare drum: usually sits higher in the frequency spectrum, typically between 1kHz and 4kHz.
Boosting in this area can help your snare cut through the mix.
The toms: usually live in the mid-frequency range, typically between 400Hz and 2kHz.
Boosting these frequencies can add body and depth to your tom sounds.
The cymbals and hi-hats: sit at the top end of the frequency spectrum.
When mixing drums, this is typically where the highly-desirable sparkle and air in your drum mix comes from.
-
Applying EQ Curves & Parametric Filters
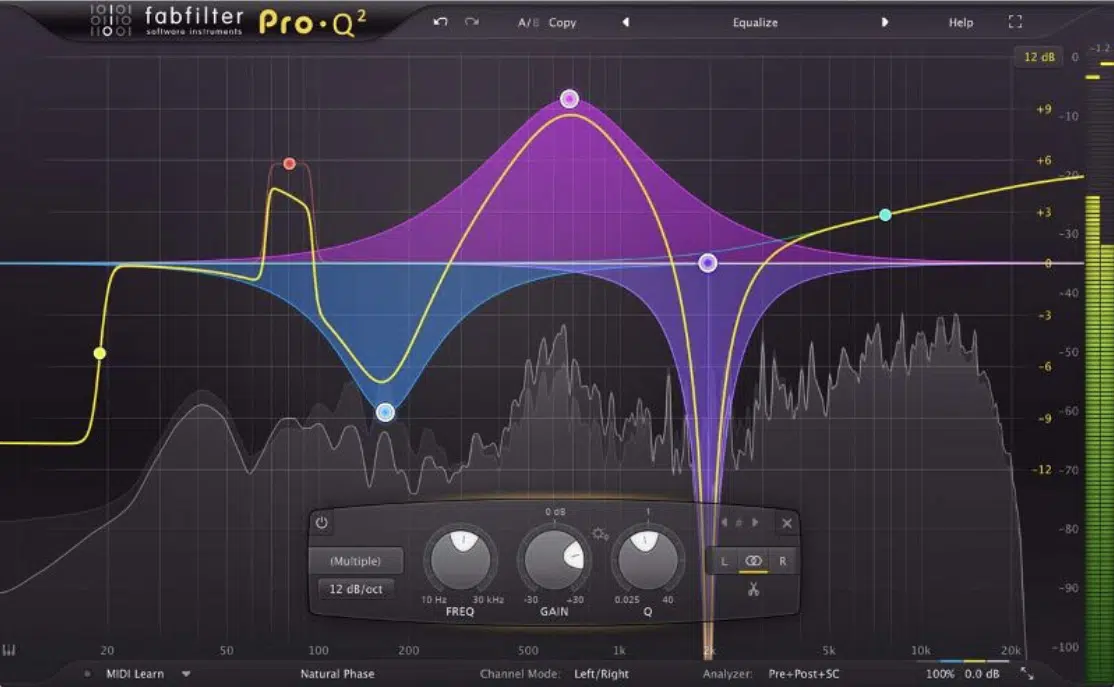
The EQ curve is the visual representation of your EQ settings.
It can provide a quick overview of your EQ decisions and help you spot any potential issues.
This is what makes parametric filters such powerful tools.
Having a visual representation of the effect it’s having on the spectrum is super beneficial (unlike graphic EQ).
They allow you to boost or cut specific frequencies, and adjust the ‘Q’ or bandwidth of those boosts or cuts.
NOTE: This is a great tool for fine-tuning your kick drum EQ sounds.
For instance, you might use a parametric filter to add a bit of low-end boost to your kick drum EQ 一 while simultaneously cutting some of the boxiness in the midrange.
This could help to achieve a punchy, tight kick drum EQ sound that cuts through the mix.
How to EQ Drums: Final Thoughts
Now you’re equipped with the knowledge you need to create punchy, crisp, and impactful drum mixes.
Therefore, you’ll never have to wonder how to EQ drums again.
But learning doesn’t stop here, and neither should your pursuit of a killer drum sound…
If you’re eager to put these tips into action but don’t have the time to start from scratch, you need to check out these completely free drum loops.
This fantastic resource includes 12 professionally crafted, perfectly EQ’d drum loops.
You can simply plug these loops into your own tracks 一 saving you time and ensuring your drum sound is on point.
These loops aren’t just standard drum patterns, they’re a product of all the EQ knowledge we’ve covered in this guide.
Each loop is a testament to the power of a good kick drum EQ, the snap of a well-mixed snare, and the depth of a floor tom with just the right amount of low-end frequencies.
By using these drum loops, you’ll not only have a set of high-quality drum tracks, but you’ll also get a real-time example of how these EQ techniques can completely shape your drum sound.
It’s the perfect companion as you continue your journey toward EQ mastery.
Remember, the key to a great drum mix lies not just in the sound but also in how you shape and control that sound.
And with the techniques outlined in this guide on how to EQ drums, you’re well on your way to achieving just that.
Until next time…


Leave a Reply
You must belogged in to post a comment.