Unwanted noise in your audio signal is, by far, the most annoying and detrimental issue when it comes to recording.
The best way to battle this frustrating noise problem is with the use of Noise Gates and Expanders.
When applied correctly, these processors are how you reduce and eliminate unwanted sounds (noise) from your signal.
If you don’t use them, then your individual tracks won’t fit well in your mix and your sound won’t be as clean and clear.
But that’s not all they’re good for…
Today we’re breaking down what exactly Noise Gates and Expanders are, in depth, and how you can properly implement them to ensure your sound is professional and concise.
Although they are used in different situations, and aren’t always interchangeable, noise gates and expanders are very closely related to each other.
In the same way a compressor and limiter are related.
They accomplish the same thing (reducing noise and increasing a signal’s dynamic range) with nearly identical parameters.
Because of this fact, it’s super common for noise gates to double as expanders.
Table of Contents
IMPORTANT NOTE
Even though you’re removing noise with these processors today, don’t consider all noise to be bad.
It’s oftentimes the complete opposite.
Since nothing is ever truly silent, a little background noise in a recording can actually be a good thing.
As a producer, this is a very important fact to remember.
It’s also a valuable tool in synthesis and sound design, as it creates texture and can be tuned/pitched when manipulated correctly.
Your frame of mind should never be to eliminate all sound, all the time.
Instead, look at noise reduction/removal as a solution to a problem, not the end all be all.
Unless you’re bringing it in for creative purposes, which we will also be covering today.
Now that you’re aware of the power of silence, let’s dive in…
WHAT IS A NOISE GATE?
A Noise Gate is a processor used to block any sound (noise) that’s coming through your audio channel once you set a noise threshold.
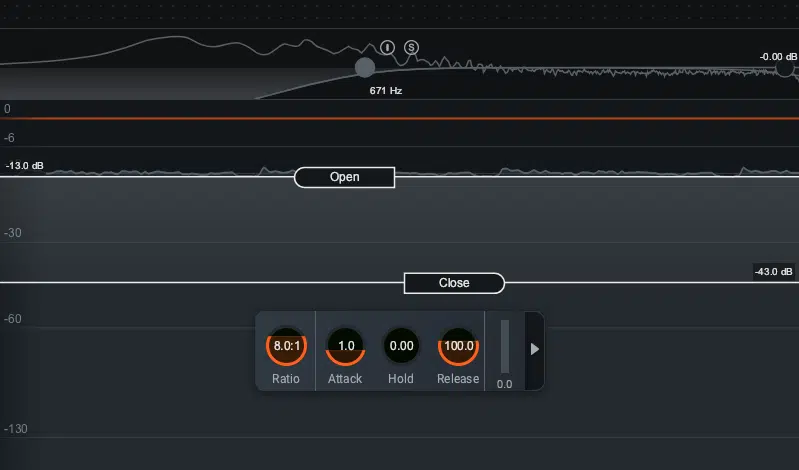
It essentially was created to remove/block what is considered to be ‘low-level’ background noise.
This includes things like electronics (leakage), air conditioners, and other noise, even including breathing.
Noise gates are also commonly used to remove more than just low-level background noise as well, such as crowds at a big event.
If you’re a DJ, for example, this would be used when you’re performing.
When using a noise gate it’s important to make sure that the noise level of the material you plan to keep is louder than the part you wish to remove.
This should be by a significant amount to get satisfactory results.
This is because, unlike expanders (below), noise gates work in an ‘all or nothing’ fashion.
- When sound is below this specified threshold 一 the gate is closed, blocking any noise.
- When sound is louder than (goes above) this specified threshold 一 the gate opens, allowing sound through.
After that, it all comes down to carefully setting the Attack and Release time, as well as the Ratio.
Plus, depending on the noise gate itself, additional, more obscure features.
Doing this will ensure that your noise gate isn’t blatantly apparent in any way, and no unwanted artifacts will occur in the process.
If all this sounds a little familiar to you, just flipped… then you must know about compression.
The similarities between noise gates and compressors are not just a coincidence, as they were both designed to alter an instruments’ signal level.
Compressors are used to make sure a signal above a certain threshold is consistent with the rest of the track (reducing the dynamic range).
Noise gates, on the other hand, attenuate signals which register below the threshold (increasing the dynamic range).
If you’re comfortable with your compressor when making a beat, then the use of noise gates should be a piece of cake.
WHAT IS AN EXPANDER?
The simplest way to describe the duties of an Expander is: they make quiet sounds even quieter.
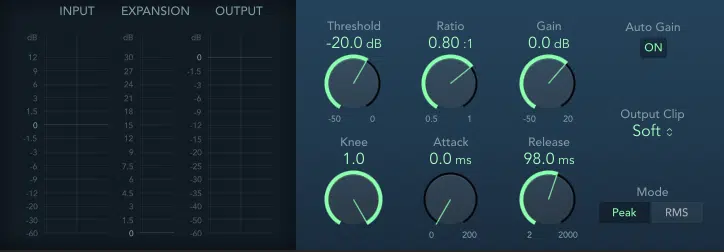
While expanders can come in many different varieties (each offering distinct functionality) we’re talking about Downward Expanders today.
This is true for the majority of the time you see expanders mentioned unless they’re specifically described otherwise.
All downward expanders are similar and interchangeable, but the same cannot be said for something like Upward Expanders.
They’re more like Limiters, as they make quiet sounds louder.
So, to avoid any confusion, just remember we’re only referencing Downward Expanders in this article.
As stated before, noise gates and expanders are almost one and the same.
While it’s now always encouraged, like swapping a compressor for a limiter, the two can be used to accomplish the same task.
It’s just harder than one might think, and certainly not ideal.
Why? 2 reasons:
- Being totally devoid of sound (which a noise gate would make happen) can make a great song seem unauthentic.
- For sonic reasons, it’s better to reduce the noise rather than remove it completely. It makes it sound more pleasing to the ear.
A noise gate is not traditionally used for reducing sound, but rather eliminating it completely.
Remember, all or nothing.
Having said that, the majority of noise gates also offer expansion functionality.
The smart thing to do, unless you’re 100% sure you want the noise entirely gone, is load-up an expander first.
If you can get away without using a noise gate, it’s much wiser to do so!
NOISE GATES & EXPANDERS: HOW & WHEN TO USE THEM
As discussed, noise gates and expanders are very similar to compressors.
Yes, they accomplish opposite tasks, but they operate using the same set of parameters.
Once you wrap your head around that, you won’t have a hard time when transferring from one to the other, in terms of functionality.
Plus, your music will sound unique and professional.
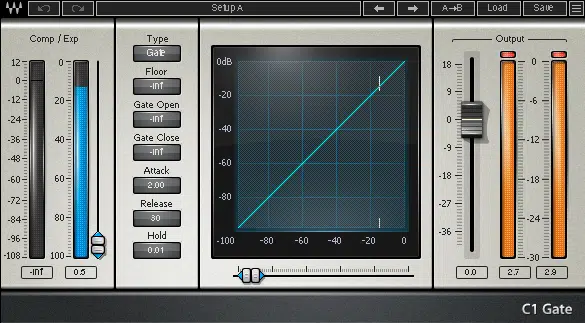
STEP 1 一 Set your Threshold.
This is by far the most important step when using these processors.
- When it comes to the noise gate 一 it indicates when to be opened/closed.
- When it comes to the expander 一 it will indicate the level at which you want it to be triggered.
Some of the best, most modern noise gates and expanders have 2 Thresholds.
- The first for when it opens
- The second for when it should return to its original position (closed)
This can also be applied to other parameters as well. Most commonly the Attack and Release time.
Check out Slate’s two new classic & drum noise gates (in the VMR) for great examples of a noise gate with independent controls for each stage.
STEP 2 一 Set the Attack and Release time.
When it comes to noise gates and expanders, the Attack and Release times are much more vital than, let’s say, when you use compression.
They are much more sensitive in these cases because, if done incorrectly, it can completely ruin what’s left of your signal.
- Attack time 一 determines how long it will take for the noise gate or expander to reach its maximum value (open/close).
- Release time 一 determines how long it will take, once the signal is no longer passed through the threshold to ease up and return back to normal again.
Don’t cut corners when attempting to tweak these parameters to (near) perfection.
Whereas they undoubtedly take the most time and manipulation, they also have the biggest impact on your overall results.
Yes, it may drive you a tad crazy in the process, but it’ll be totally worth it, I promise.
STEP 3 一 Set the Ratio
Once you have the general settings under control, it’s time to determine how much attenuation the noise gate or expander will apply.
Similar to compression, the Ratio represents how many dBs the processor will allow through, for every 1 dB that the threshold is breached.
For example, if you set the Ratio to 6:1, the noise gate will reduce the level by 6 dB for every 1 dB the signal is over the (set) threshold.
STEP 4 (optional) 一 The ‘Knee’
Noise gates and expanders may have additional parameters, depending on the developer, but there’s 1 you’ll see at least 50% of the time: the ‘Knee.’
What the Knee does is determine the way in which the noise gate is applied to your signal.
It’s equivalent to the various ‘Cutoff’ slopes when you’re using an EQ.
- A ‘soft’ knee is gentle and applied in a more gradual way 一 comparable to an EQs Slope of 6-12 dB/octave.
- A ‘hard’ knee is steeper, sharper, and more immediate 一 comparable to an EQs Slope of 24-48 dB/octave.
It’s hard to tell exactly what you may need until you experiment.
It all depends on the source material and the specific session you’re working in.
If you find yourself getting too overwhelmed, you can usually just leave it at its default position and call it a day.
In reality, most noise gates you use will typically be set to 1 value (static) or dynamically change with the input and current parameters.
GATED SNARE/REVERB

This noise gate technique was first popularized back in the ’80s and has remained a popular staple ever since.
It is an instantly recognizable snare effect, arguably the most known drum effect around.
You know when a snare with a ton of reverb is applied, and suddenly cuts off during the decay phase?
Yup, that one.
All you’ll need is your favorite reverb, along with any stock snare that fits your intended vibe.
This effect doesn’t need to (and shouldn’t) remain exclusive to a snare, that’s simply its origin.
Next time you want to hit the listener with an unexpected change-up, try this.
One of my personal favorite ways to use this technique is applying it to the last word of a vocal.
Either at the end of a verse or right before a transition.
STEP 1 一 Determine where you’d like to apply this effect.
For this example, we’re using a snare sample found within our drum loop that was created using Drum Monkey, which is available here.
STEP 2 一 Bounce it down to Audio & separate your drum parts
Although Drum Monkey contains drum samples, it’s triggered by and programmed using MIDI.
For this reason, you’re going to first bounce it down to Audio.
This is done for ultimate control and predictability; mainly to avoid any phase issues.
It’s common for producers to bounce down their drum loops as a whole… but you should try to never do this!
When programming drums using 1 self-contained plugin, more often than not, you really don’t have a choice.
Drum Monkey, however, offers a multi-output version.
This is ideal because, in order to properly mix and apply drum parts & specific effects (like gated reverb), it’s essential to have each individual drum sample/hit designated to its own track.
Once you’ve processed each track individually, you’re able to mix the loop as a whole by applying bus processing.
Everything you need to know about this can be found in our Master Compression article.
If this is not possible with your current setup, simply do it old school:
- SOLO each drum part within your drum plugin
- Bounce each hit individually
Before moving on to step 3, make sure your snare is on its own track.
STEP 3 一 Apply a reverb with rather extreme settings and a higher WET level than normal.
You’ll want to also ensure a relatively big size and generous (long) Decay.
However, not so long that it doesn’t (quickly) have any obvious decay.
Otherwise, it’ll be hard for the noise gate to differentiate between the part of the signal you want to gate, and the signal you want passing through it.
Aside from those stipulations, the rest is all about your preferences and overall goals.
NOTE: This effect is traditionally applied, and sounds best when using a reverb of the ‘Plate’ variety.
But again, that’s a decision to be made on a session-by-session basis.
- If your DAW offers clip-specific plugin-processing 一 separate the snare (split it) and apply the reverb only to that clip/region.
- If your DAW does NOT offer this 一 isolate the samples you want to add the gated reverb to and place them on their own track (with the reverb applied).
STEP 4 一 Bounce the snare with the reverb applied so you’re no longer dealing with a highly variable plugin.
From here, it will be consistent and provide you with the stability needed for the noise gate to do its thing properly.
Don’t worry if the tail seems too long, because you’re about to fix that.
STEP 5 一 Add the noise gate.
Even though you’re doing this last, your noise gate should be the first active processor in the chain; on your bounced/frozen snare, with reverb applied.
Determine exactly when you want the noise gate to cut the reverb off.
Then, quickly reference the output level at that very point.
Around that mark, is where you’re going to set the Threshold.
If done correctly, your snare’s reverb should now be gated!
Even if you find it too abrupt, you can simply tweak it with the Dither parameters (which is what they’re ultimately used for).
STEP 6 一 Manipulate the Attack and Decay until it sounds right.
After that, you’re good to go and should have a wicked effect guaranteed to catch your listener’s attention immediately.
RHYTHMIC GATING
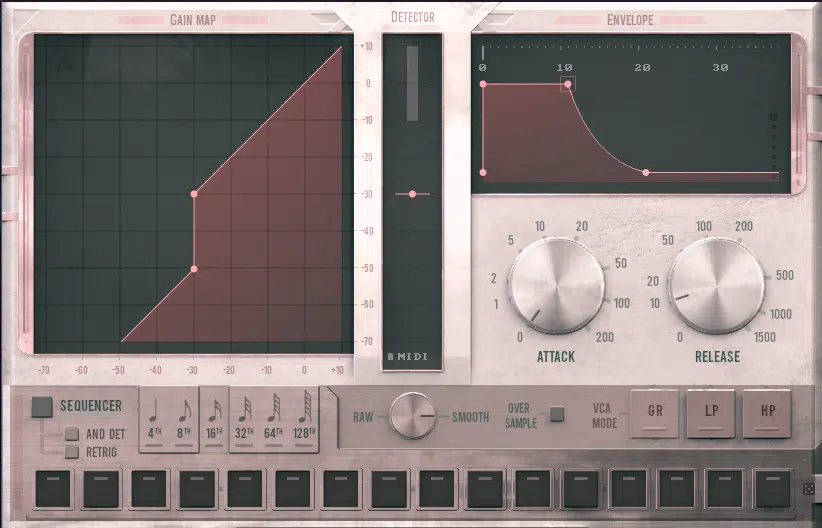
While this is a fairly common effect, the most popular noise gates won’t offer the control or flexibility to pull it off correctly…
So, you’ll have two options to guarantee you can:
- Use a noise gate designed, or equipped with Creative Use features (like multi-stage envelopes, LFOs and/or modulation signals).
- Create your own pseudo-noise gate.
To better get an understanding of what this effect is used for, think about when you hear a stutter-like sound (during a vocal, for instance).
Usually, that stutter repeats a designated portion of a sample.
For this particular technique, however, it produces more of a ‘glitchy’ result or one that’s heard when a signal is suddenly cut out.
- Simply cut out (mute) your sample’s Level for the remainder of any given word. This should be done in a rhythmic, strategic manner.
It’s ideal when you want to include a little variety, or for subtle differences when you already have stutters (or are sick of hearing them).
Accomplishing it without a Creative Noise Gate requires nothing more than your DAW and a little Automation.
It can always serve as your (‘fail-safe’ noise gate).
GATING & EXPANDING WITHOUT A NOISE GATE OR EXPANDER
Using Level Automation to implement your own, custom noise gating is typically the quickest, easiest, most efficient technique.
There’s virtually no guesswork involved at all.
You’re actually able to draw out what you’d like to be done to the signal (lined up with the signal/sample) and visually see it in front of your eyes.
For many reasons, this is super beneficial.
However, don’t consider it to be the ideal (noise gate) technique for corrective purposes.
It will get the job done and the results will be sonically identical, but you’ll have a harder time manually implementing it.
Unless you have a super costly, top-notch Creative gate-type plugin, that is.
All you have to do is:
- Apply the Theory of gating
- Implement it using (and drawing) Volume Automation
It’s that simple!
A WORD TO THE WISE
Similar to all volume-level related automation, your Mixer Fader should never be your go-to parameter to automate a track/signals’ level.
It restricts you from being able to adjust that fader at any point in the mix, without it resetting the next time the automation is read (everytime playback occurs).
You should always be automating the actual audio clip/input volume at the source, not the mixer.
This remains true regardless of whether you want your noise gate to be applied pre- or post-effects.
Just be aware of any existing processing that may need to be altered when applying your noise gate pre-effects.
That’s why it’s usually a good idea to automate the level post-effects/fader.
A more detailed way to apply this type of automation can be found in our MIDI article.
Including techniques and DAWs that enable you to skip the intricate process of drawing in the desired shapes (by hand).
That’s one task you could literally drive yourself crazy trying to perfect.
This is done by having a wide range of shapes that you can automatically apply, combine, adjust, and manipulate to fit any need.
Below, you can see an example of this being done in StudioOne.
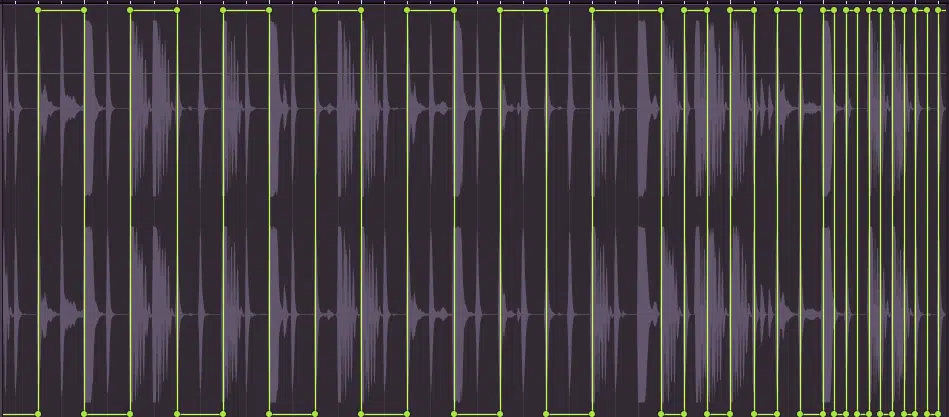
As the track reaches the last bar before the transition, you can see it gradually speeds up from ‘gating’ at a division of 1/4th, to 1/8th, to 1/16th.
All you have to do is draw in the shapes and change the SNAP/QUANTIZE value.
This is usually what you’re going for, as using just 1 speed can be pretty basic (or generic), and nobody wants that.
TOP 5 NOISE GATES FOR CREATIVE & CORRECTIVE PURPOSES
(All of the following noise gates are recommended, and preferred by audio professionals)
- 1. PRO-G BY FABFILTER
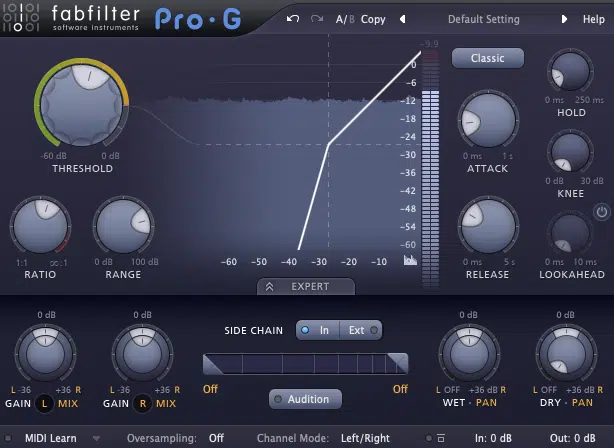
When it comes to FabFilter plugins, they are always of the highest quality.
In fact, they’re arguably the best in the digital plugin game today.
Pro-G is no exception. It is a modern classic noise gate and a favorite amongst industry professionals.
It offers all the features you could ever ask for in a noise gate… even some you didn’t even know you needed.
Such as:
- Perfectly tuned algorithms
- Complete control over the side chain and channel linking
- Advanced internal & external sidechain functionality
- Excellent metering
- Great UI
When it comes to Audio processors, noise gates are one of the few you’d want to be applied with calibrated sample-accuracy precision, and FabFilter absolutely killed it.
- 2. SLATE’S GATE BUNDLE (NEW CLASSIC & DRUM NOISE GATES)
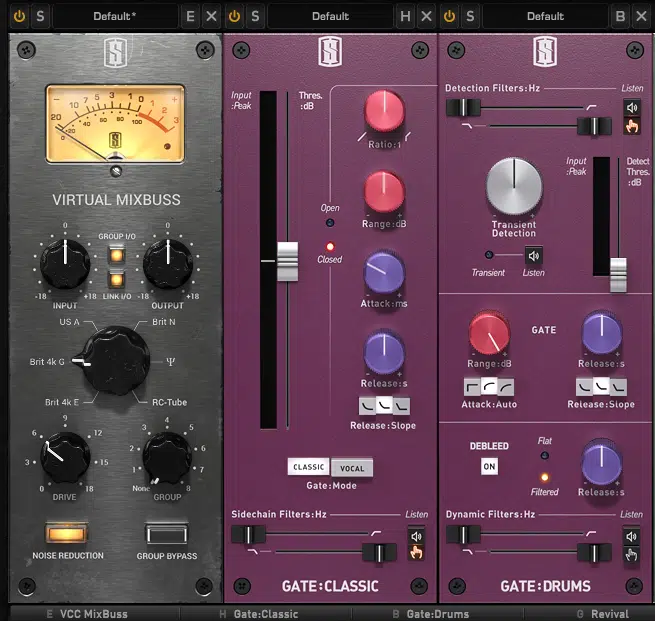
Slate is the FabFilter of plugins in the analog-modeled world, and considered elite in their category.
The Gates Bundle is one of the most important tools in an audio engineer’s arsenal.
- When used tactically 一 it eliminates or reduces unwanted bleed, or background noise from recorded source material.
- When used creatively 一 its applications are virtually limitless.
They recently released 2 separate noise gates in their VMR subscription bundle:
- Gates: Classic
- Gates: Drum
While inspired by analog concepts, they are still very modern and precise.
They may not have every feature that Pro-G has, but they do come equipped with some rare options.
They also make a perfect addition to (virtually) any traditional digital noise gate you might have.
- The first one (Classic) is an all-around universal noise gate.
- The second one (Drums) is strictly a drum noise gate (with amazing flexibility).
Similar to any plugin in Slate’s collection, the price of subscription is well worth it.
It even includes a synth (ANA 2 by Sonic Academy) plus extra, fully-featured plugin goodies from Thu3 and Kilohearts.
- 3. ALLIGATOR (REASON RACK)
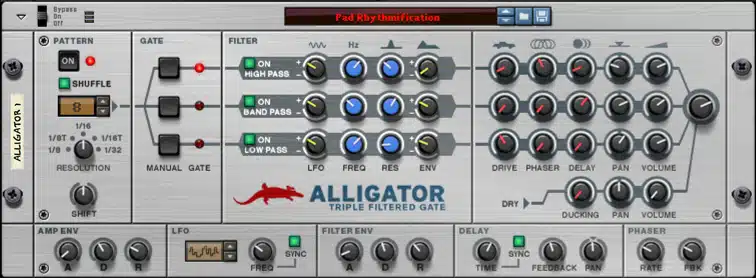
When it comes to creative noise gates, this plugin is superior.
Especially when you want (or need) a noise gate applied to a signal, but don’t exactly know where.
Alligator is a three channel, pattern-based gate effect that turns bland pads into rhythmic textures.
It gives you the ability to radically twist your loops and tweak boring beats into blockrocking breaks.
With a few clicks you can turn any static 1-note signal into a rhythmic beast.
The inspiration Alligator gives you is unparalleled, and can even be the basis of your entire track.
It can add rhythm and accents to a flat synth sound, change the feel of a percussion loop, or be used as a powerful remixing tool.
Plus, now that the reason rack doesn’t just support 3rd party plugins, but is also considered a 3rd party plugin, you can use it in any DAW.
There’s no excuse to not at least give Reason+ a go.
It will, most likely, become your escape route during extended periods of beat block (or lack of inspiration).
Not just when attempting to start a track, but when attempting to finish it as well.
- 4. SHAPERBOX 2 BY CABLEGUYS
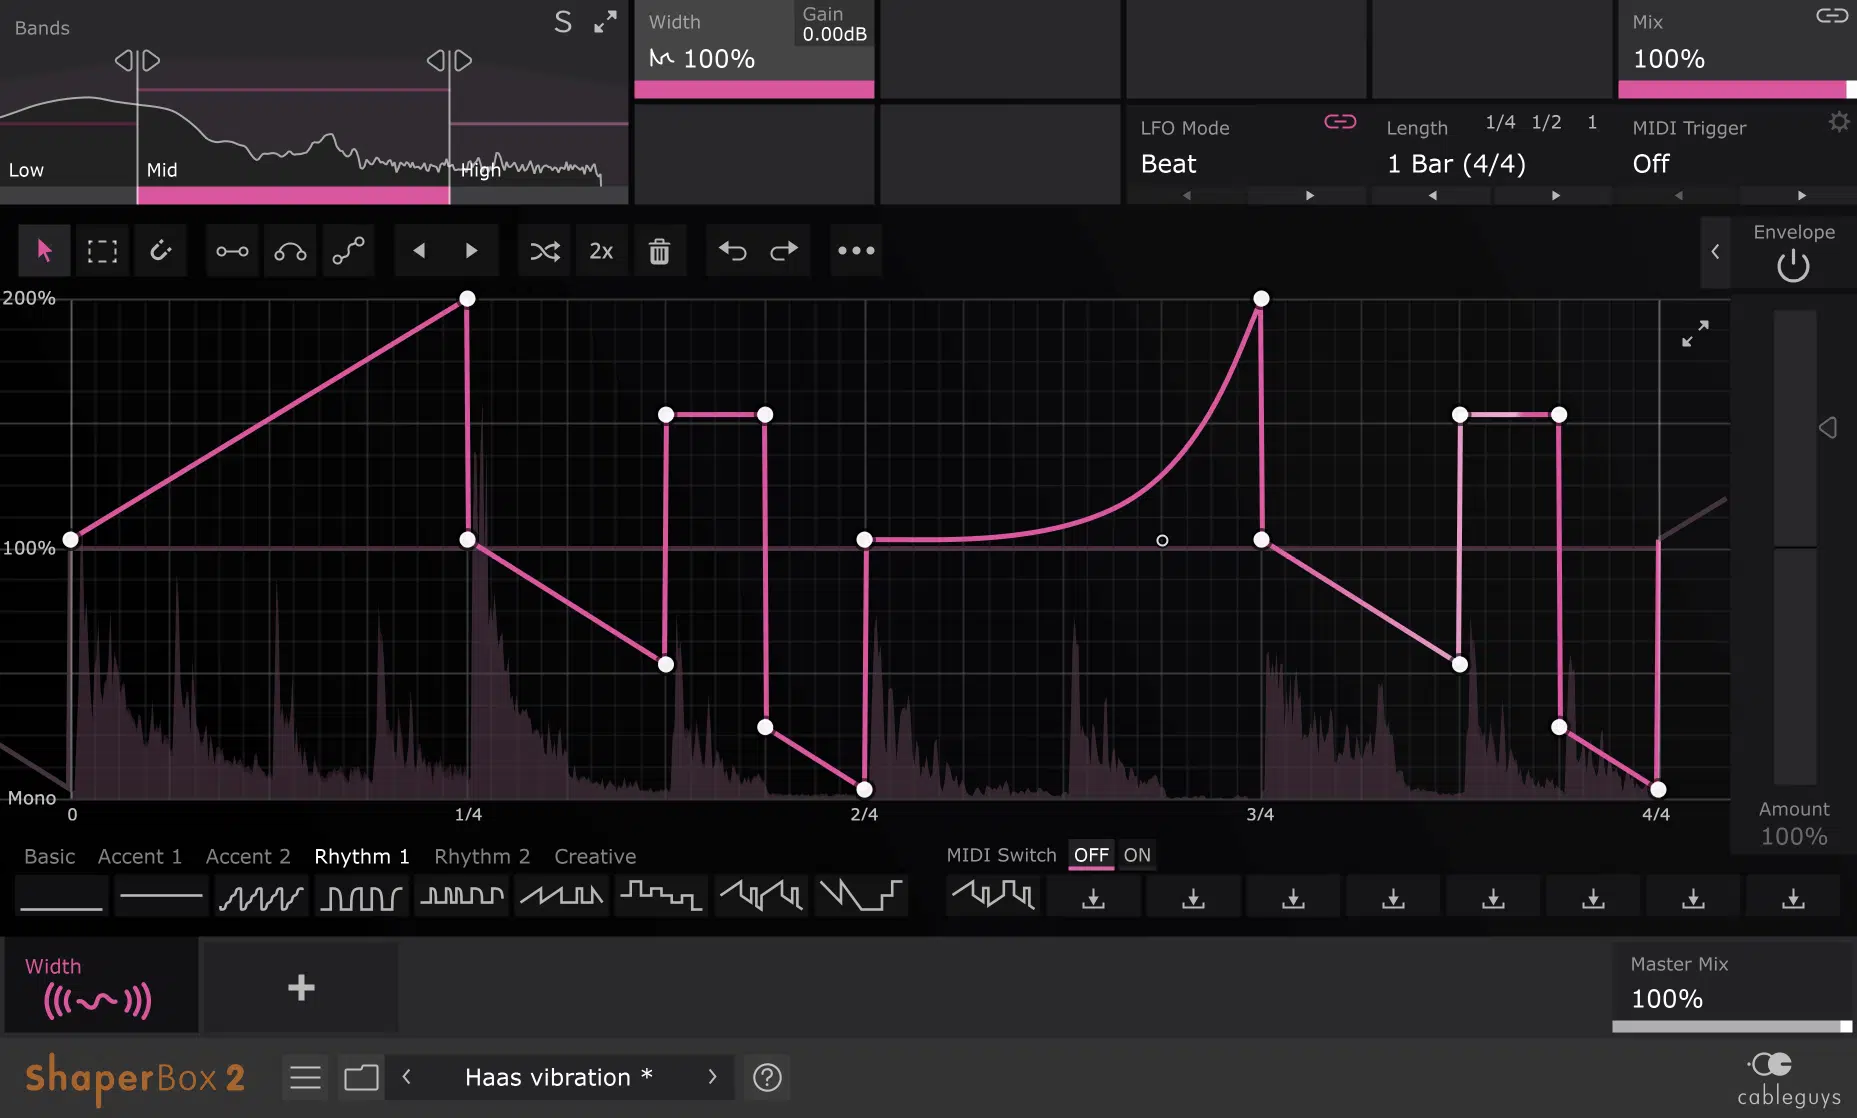
ShaperBox 2 is on our top noise gate list because it encompasses both creative and creative features & functions.
Eight effects in one, to be exact:
- TimeShaper 2
- VolumeShaper 6
- FilterShaper Core 2
- PanShaper 3
- WidthShaper 2
- CrushShaper
- DriveShaper
- NoiseShaper
You can purchase each individually if you’d like.
It is one of the most fully-customizable plugins in any category, period.
With it’s insanely reasonable price I wouldn’t be surprised if you passed it up because it seemed ‘too good to be true.’
Well, believe me when I tell you, it’s one of those rare gems that are cheap but insanely good.
ShaperBox 2 gives you ultimate control over filtering, volume, panning, stereo width, and even the flow of time.
- 5. GATEKEEPER BY POLYVERSE MUSIC
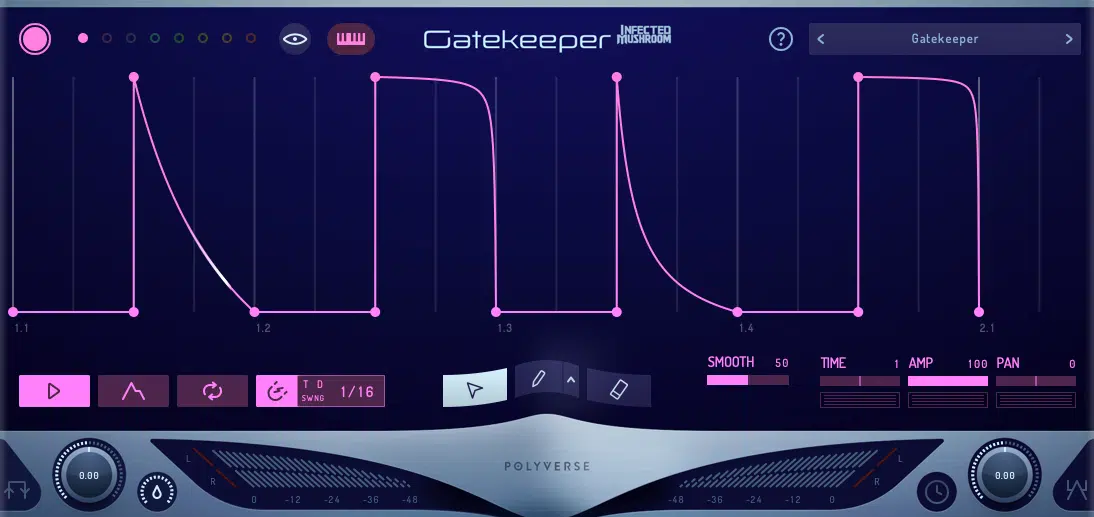
Polyverse Gatekeeper is the cutting edge of volume modulation, and also very beginner friendly.
It is capable of sample-fast transitions and comes equipped with a unique variable smoothing algorithm.
This allows for drastic, punchy gating and sequencing while keeping the output super smooth.
The epitome of ‘silence speaks volumes.’
You can use it as a simple ADSR or a complex envelope.
It can also serve as an LFO, noise gate, step sequencer, sample-accurate volume automator, CV modulator, and much more.
Gatekeeper is the best alternative to Shaperboxs’ VolumeShaper by Cableguys.
Although, I prefer Shaperbox when a CV signal (when using modular or hardware synths) needs to be outputted.
The best thing about both Gatekeeper and Shaperbox is the fact that they exceed simple volume automation.
When routed properly, Gatekeeper can be used as a tool to modulate just about anything.
And, let’s be honest, modulation is what it’s all about.
FINAL THOUGHTS
Noise is all around us.
But when it comes to producing and recording music/audio, you’re oftentimes capturing multiple sources separately.
Usually at different times, sometimes in different rooms or studios.
When you stack these unwanted noises on top of one another, the effect can be absolutely detrimental.
The trick is to make it seem like all your sound sources exist in one (cohesive) space.
That’s why it’s important to understand, and use Noise Gates & Expanders when you need to reduce/eliminate certain (problematic) elements.
If not, the audio won’t hold much weight, will sound unprofessional, and certainly won’t be ready to upload anywhere.
Gating is a simple solution to a super common problem.
Unless implemented from the start, it’s nearly impossible to fix.
So, before it’s too late, you must first analyze your music and determine whether or not you’ll need to apply it.
Music is all about dynamics… and if you have the misconception that bigger is always better, you’re going to be drowning in unwanted noise.
To ensure your samples are professional, and ‘gated’ to perfection, simply download the FREE Unison Artist Series Essentials.
They contain proper, polished, super clean samples by the world’s top producers.
These samples have generated over 10 million plays and have been used in chart-topping tracks.
They’re the perfect samples to use in order to try out these new gating techniques!
Until next time…


