Dubstep beats are all about hard-hitting bass, intricate drum patterns, and dynamic sound design that keeps people hooked from start to finish.
They bring in massive energy and a powerful low-end that shakes up any sound system.
Plus, they use killer effects, atmospheric intros, and intense drops all day long.
As dubstep producers, learning exactly how to make dubstep tracks the right way can completely change the game.
That’s why I’m breaking down everything you need to know, like:
- Choosing the right kick and snare ✓
- Adding crisp hi-hats and percussion ✓
- Laying down powerful sub-bass ✓
- Designing signature wobble bass sounds ✓
- Using vocal samples and chops ✓
- Building intense intros and drops ✓
- Structuring transitions and breakdowns ✓
- Layering and resampling techniques ✓
- Creative use of automation ✓
- Mastering glitch effects and sound design ✓
- Advanced tips & tricks for producing dubstep ✓
- Much more, from drum samples to advanced sound design ✓
After today’s article, you’ll know how to make dubstep music like a boss and learn how to create dynamic tracks that blow the competition away.
And keep your listeners totally addicted too, which doesn’t hurt.
You’ll also learn some super creative automation and resampling techniques that can take your sound to the next level (plus other advanced tips & tricks as well).
This way, your dubstep tracks will always have that unique edge and intense energy that stands out in any mix.
Table of Contents
- Quick History of Dubstep
- How to Make Dubstep Beats: Step-by-Step
- Step #1. Creating Dubstep Drum Patterns
- #2. Developing a Killer Bassline
- #3: Adding Melodic and Harmonic Elements
- #4: Structuring Your Dubstep Track
- #5. Mixing and Mastering Dubstep: Key Considerations
- #6. Advanced Tips, Tricks & Techniques
- Final Thoughts
Quick History of Dubstep
Before we get into the nitty-gritty of how to make dubstep tracks, let’s take a quick look back at its origins to understand what makes this genre so unique…
Dubstep emerged from the UK garage scene in the early 2000s, blending dark basslines and syncopated drum patterns to create a sound that was legendary.
It quickly caught the attention of underground audiences, with artists like Skream, Benga, and Burial transforming the classic dubstep sound we know today.
Dubstep’s signature features is what sets it apart from all bass music genres, like:
- Heavy sub-bass
- Half-time kick rhythms
- Epic drops/transitions
- Unique sound design
- Those unmistakable wobbles
Over time, dubstep evolved of course, picking up elements from other electronic music styles like drum and bass 一 making dubstep a truly versatile genre.
Today, dubstep is a staple in both club settings and DJ sets, loved for its ability to shake the dance floor with massive bass drops and cool sound design techniques.
From classic dubstep tracks to modern dubstep, this genre remains one of the most dynamic, giving producers like yourself endless room for creativity.
So now that we got the history out of the way, let’s talk about how to make dubstep beats that capture this iconic sound.
How to Make Dubstep Beats: Step-by-Step

To kick things off, we’re breaking down how to make dubstep beats with epic drum patterns that will help you achieve the powerful, head-nodding vibe of a true dubstep track. But don’t worry, we’ll cover everything from designing punchy drums to creating signature bass sounds and everything in between.
Step #1. Creating Dubstep Drum Patterns
When we talk about producing dubstep beats, we’re looking for dubstep drums/drum samples that hit hard and command attention. Dubstep drums lay the groundwork for the entire track, and getting these elements right is essential. Let’s kick things off with the core of any good drum beat: the kick and snare.
-
Designing a Powerful Kick and Snare
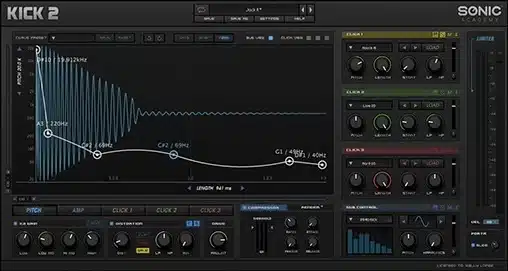
The kick and snare are the heart of any drum pattern, but in dubstep, they need to be so strong they cut right through the bass-heavy mix.
Choose a kick drum that hits low and hard, typically around 100 Hz.
When it comes to a dubstep drum beat, the kick should have a strong, punchy impact, almost like a thud you can feel in your soul.
You can achieve this by layering a deep sub-kick with a more mid-range kick, then balancing the two layers.
Boost the low-end with EQ to bring out the fullness around 100-120 Hz without overpowering any of the other elements.
For the snare, you’ll want a sample that’s snappy and crisp, usually with a sharp peak around the 200-250 Hz range.
Dubstep snare samples from any top sample pack tend to have a metallic edge, so just make sure to pick something that pierces through the mix.
One that has a tight attack and short decay to avoid a muddy mix and, if you can, layer a short reverb on the snare.
Make sure to set the reverb decay between 0.8 and 1.2 seconds so it fills the space without lingering too long.
I’d recommend adjusting the reverb’s high-pass filter to around 250 Hz to keep low frequencies from building up and muddying the kick.
A key trick in dubstep is placing the snare on the third beat in a half-time feel.
So, if you’re working with a 140 BPM track, that half-time snare will give your beat a steady, heavy groove that’s easy to nod along to.
And if you’re looking for more snap, consider layering your snare with a subtle clap or a short, bright sound to enhance its presence even more.
PRO TIP
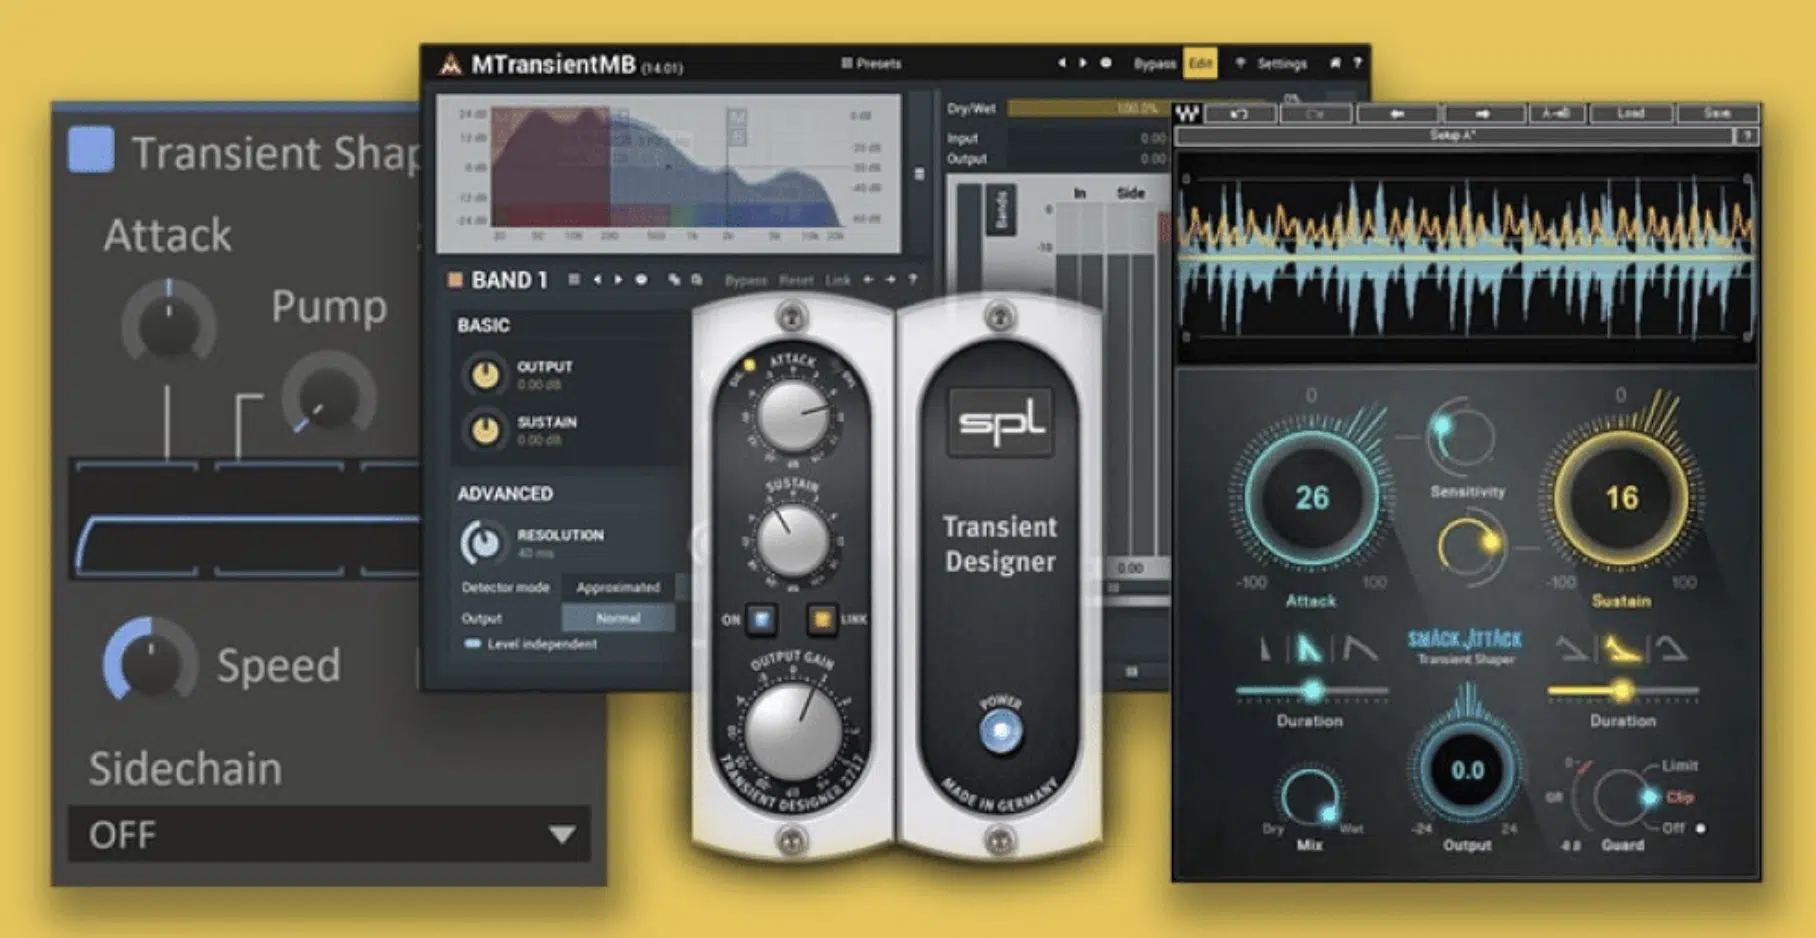
Use a transient shaper on both the kick and snare to make sure they’re tight and punchy.
Increasing the attack and slightly reducing the sustain gives both drums a more defined shape in the mix, which is always a good idea.
You’ll also want to dial up the attack just enough to make each drum hit sound sharp, just don’t go overboard because too much attack can make it sound unnatural.
When you’ve got the kick and snare hitting just right, they’ll give your dubstep beat that powerful backbone needed for the bass-heavy sections.
When you’re first learning how to make dubstep, this is very important.
-
Hi-Hats and Percussion
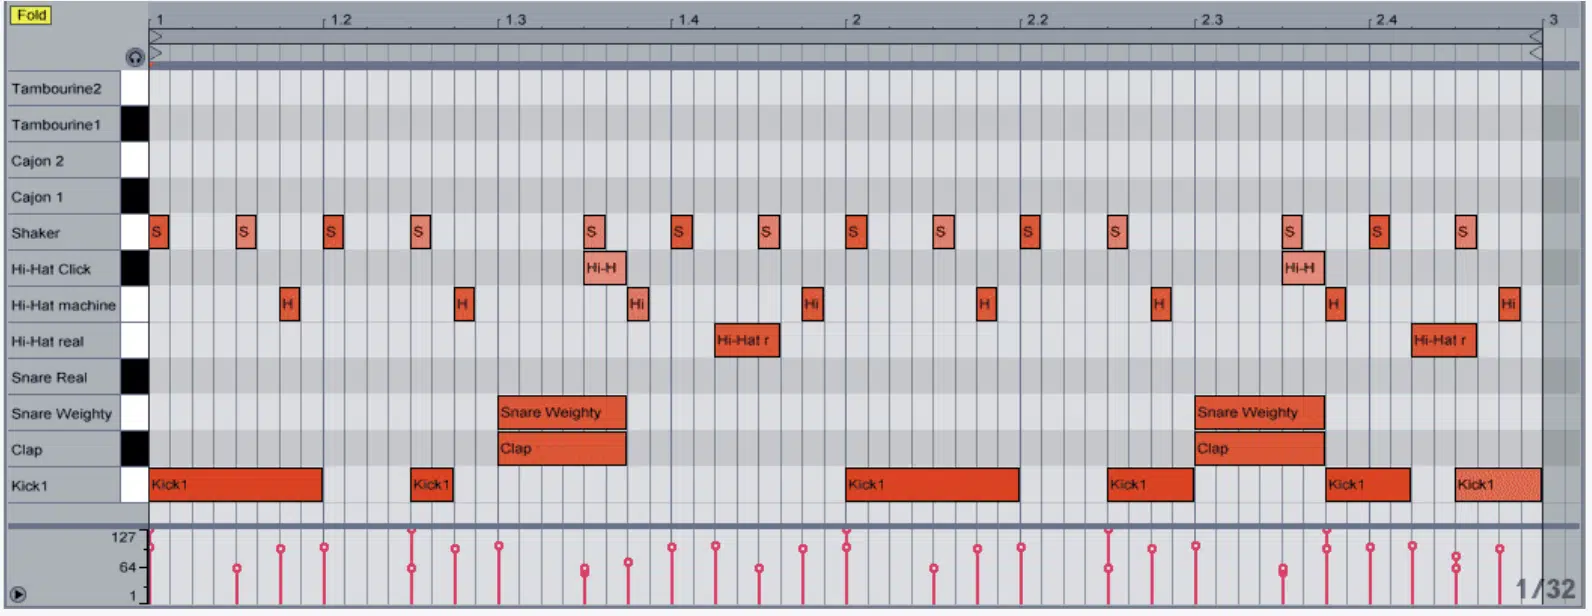
Hi-hats and percussion add much-needed texture and groove to any dubstep beat, bringing out the rhythmic feel and helping to define each section of the track.
Closed hi-hats, especially, add a crisp, ticking sound that mixes well (well, contrasts well I should say) with the deep kick and snare.
For a classic dubstep feel, you should place closed hi-hats on the off-beats (like the “and” of each beat) to create a steady groove that complements the half-time snare.
Just don’t forget to keep the closed hi-hats short and snappy with a decay of about 100 ms, so they stay tight and don’t clutter the mix.
Open hi-hats can be used sparingly to hype up certain parts of the drum beat, for instance, adding an open hi-hat right before each snare hit.
This subtle touch enhances the rhythm without overwhelming the main beat.
If you want the hi-hats to sound even crisper, use a high-pass filter and roll off anything below 400 Hz to keep them super clean.
When it comes to percussion, adding certain sounds like shakers or metallic hits can make your drum beat more unique.
Play around with percussion elements by layering unusual samples or using virtual instruments to create cool sounds that stand out.
Sometimes I’ll add a bit of swing or slight delay to the shakers or secondary percussion sounds to create a bit of a shuffle, adding a humanized touch to the groove.
I also like to use subtle panning on my hi-hats and percussion elements to give them a sense of space.
Panning hi-hats slightly left and right opens up the stereo field 一 making your dubstep drum beat feel wider and more immersive, which is great.
Try placing closed hi-hats around -15 to +15 on the pan knob for a subtle spread, while keeping percussion elements around -20 to +20 for a balanced yet dynamic sound.
PRO TIP: Adding sidechain compression to certain percussion elements, especially open hi-hats, can help them breathe and sync with the kick.
This keeps your beat flowing naturally and gives the mix some extra bounce.
#2. Developing a Killer Bassline
Now that you’ve got a solid drum beat, it’s time to build the bass foundation. Creating a strong, layered bassline is essential in dubstep, and we’ll start by looking at how to make a powerful sub-bass. This is the second step in learning how to make dubstep.
-
Creating the Sub-Bass Layer
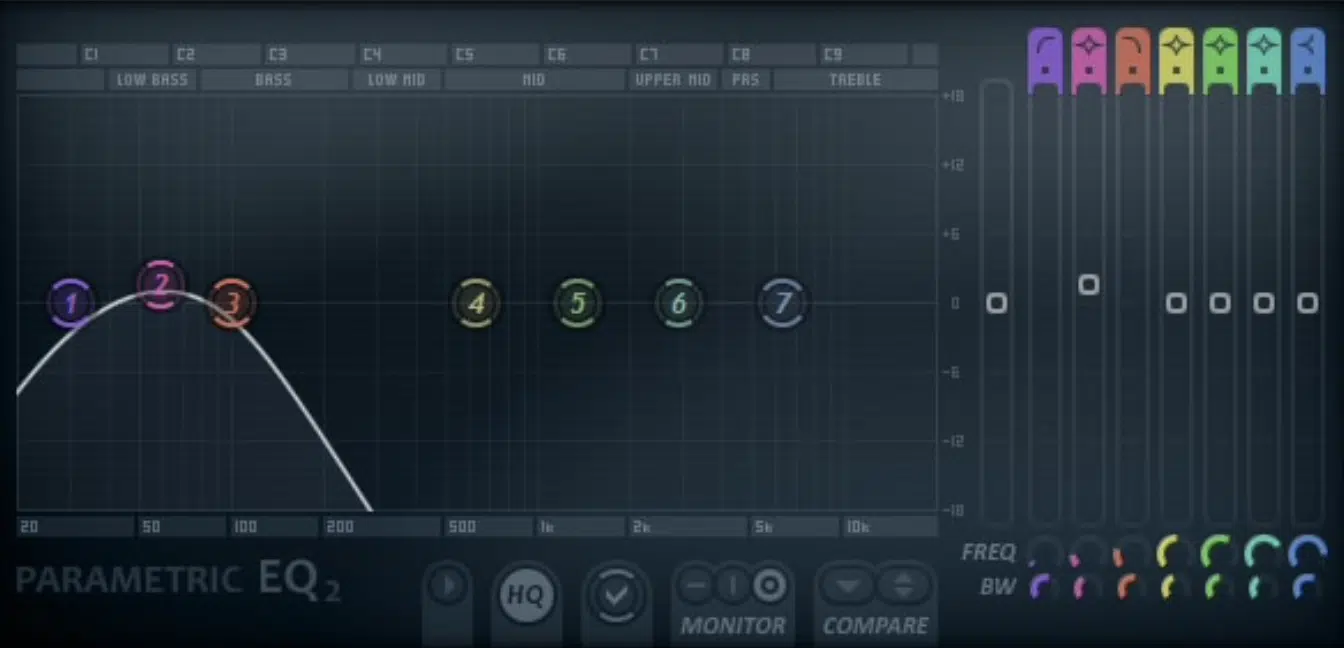
The sub-bass is the foundation of any good dubstep track, that’s a no-brainer.
It’s that low, rumbling layer that you feel more than you hear, and it should sit around 30-60 Hz in the frequency spectrum.
Start with a sine wave as the base for your sub-bass because it has a clean, rounded tone that’s perfect for low frequencies.
In most DAWs (like Ableton Live or FL Studio), you can use a virtual instrument like Serum, Massive, or any bass synth to generate a sine wave.
When setting the sub-bass level, keep it just below the kick so it fills out the low end without dominating or outshining other elements.
Aim for the sub-bass to peak around -6 dB, then use sidechain compression to duck it slightly whenever the kick hits.
This keeps the low-end clean and prevents the bass frequencies from clashing 一 creating a smoother, more polished dubstep beat.
One trick I use to make the sub-bass sound more powerful, especially when I was first learning how to make dubstep, is adding a subtle layer of saturation.
This doesn’t make the sub-bass too audible, but it adds a bit of warmth and makes the sub feel denser, which is always a good thing.
Use a soft saturation plugin with a minimal amount (just enough to make a difference when you A/B test with and without it).
Side note, if you want to learn all about reference tracks, which you should certainly use when learning how to make dubstep beats, we got you with our reference track article.
Adding a low-pass filter with a cutoff around 60 Hz also helps keep the sub-bass frequencies focused and prevents any higher frequencies from interfering.
To add a bit more movement to the sub-bass, try modulating the volume slightly; almost like creating a pulse effect.
Use an LFO set to a very slow rate (around 0.1-0.2 Hz) and apply it to the volume to create a subtle wobble that adds life to the bass without making it too obvious.
NOTE
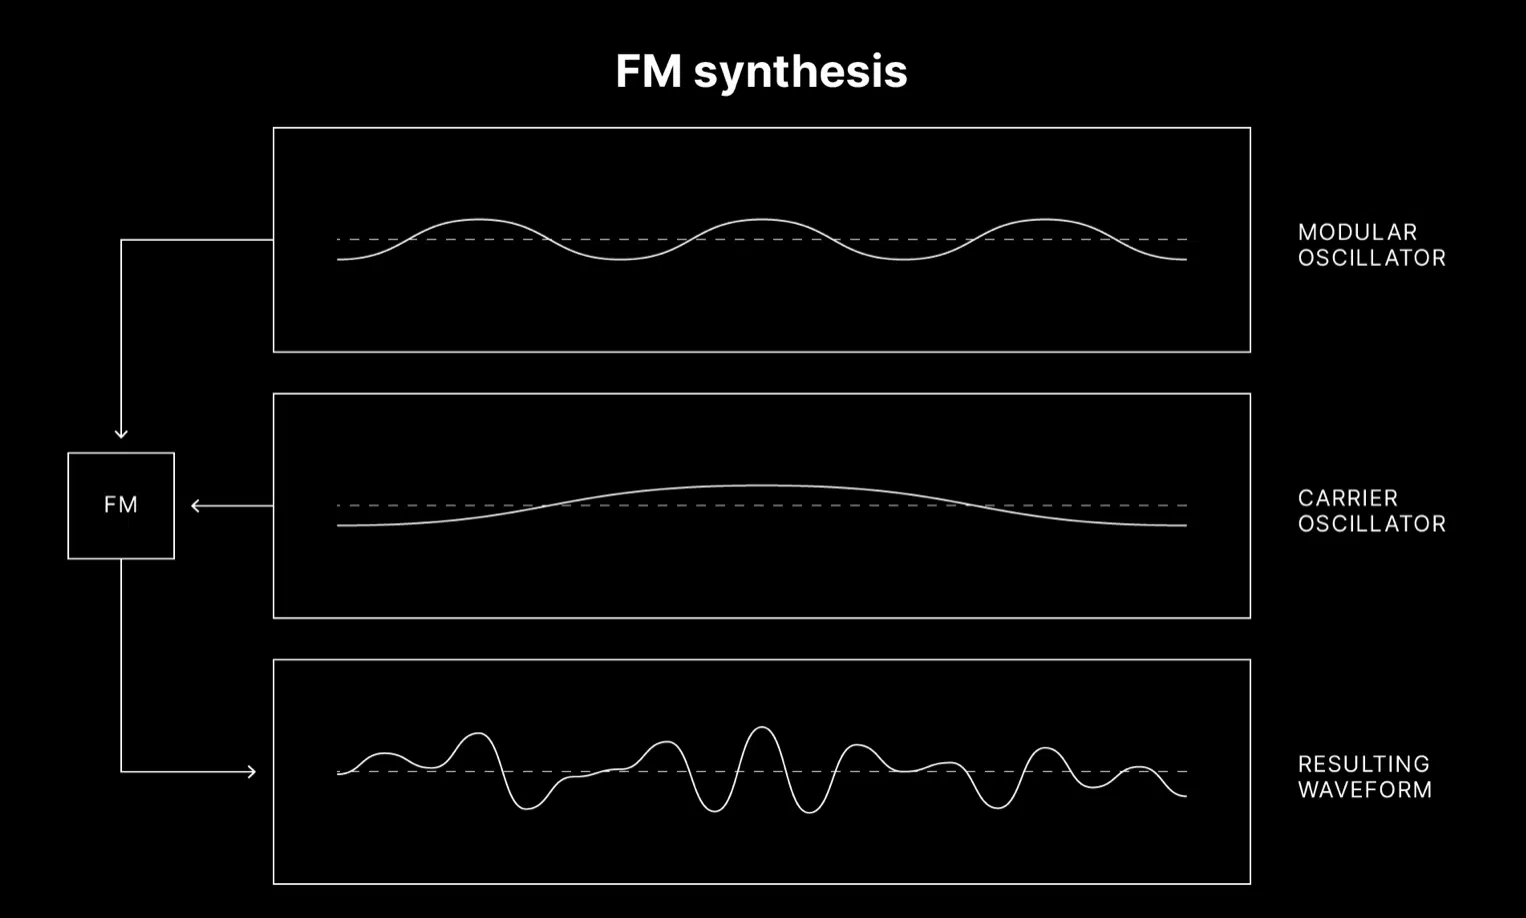
This technique can also work well with FM synthesis if you want to add some harmonic richness to the sub-bass while keeping it tight and focused in the low end. We’ll break it down a little more in the following section.
Finally, be aware of how the sub-bass interacts with other bass sounds…
The sub should be felt as a separate, solid foundation underneath the more complex bass sounds layered above it.
When you’re first learning how to make dubstep tracks that really stand out, balancing these elements is key so they have that heavy, driving force in the low-end.
-
Wobble Bass Techniques
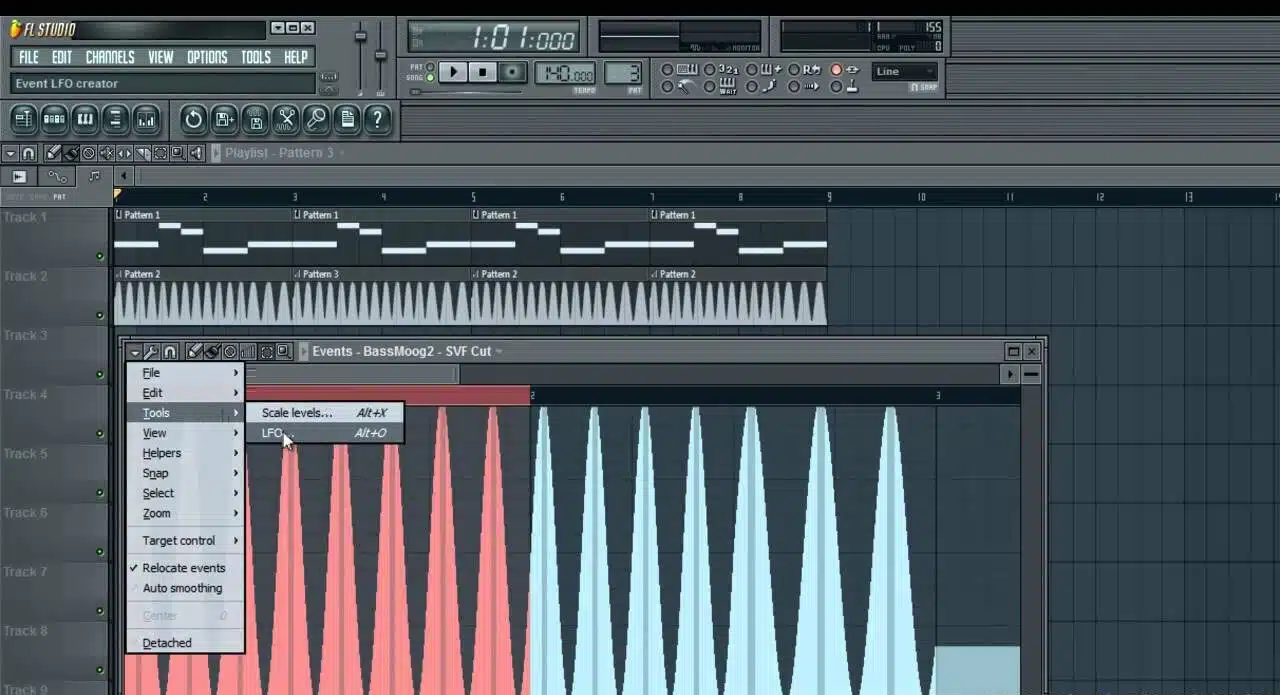
When learning how to make dubstep beats, mastering wobble bass techniques is everything, because it’s really what they’re all about.
You’re going to begin with a saw or square wave bass in whichever virtual instrument you like best, and set an LFO to modulate the filter cutoff frequency.
For a deep wobble, set the LFO rate to quarter or eighth notes… This creates that signature pulse that syncs perfectly with a 140 BPM dubstep track.
Keep the low-pass filter cutoff around 150-200 Hz to highlight the mid-range ‘growl,’ which will give the wobble bass its aggressive edge.
NOTE: Use FM synthesis on your bass sound, adding harmonic richness and grit like we just touched upon. Set the FM amount low (around 15-20%) so it enhances the texture without overwhelming the bassline.
You’ll also want to apply sidechain compression on the wobble bass to ensure it ducks whenever the kick hits 一 creating room for both elements to shine.
Setting the sidechain threshold around -10 dB and the release to about 50 ms should give a clean, rhythmic bounce to your wobble that people really love.
If you want to make the wobble more even intense during build-ups, automate the LFO rate to increase to sixteenth notes, then return to quarter notes during the drop.
You can also add slight saturation (around 10-15%) to make the bass cut through the mix without adding excessive highs.
This blend of techniques will give your dubstep beat a wobble bass that drives the rhythm and energizes the low end just the way you should want it.
#3: Adding Melodic and Harmonic Elements
Creating melodic and harmonic elements adds depth and contrast to your dubstep track, making it more than just a heavy bassline. So, for this next step, let’s learn how to make dubstep beats that balance bass with melodic depth (very important).
-
Designing Lead Synths
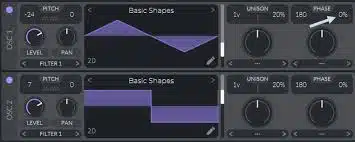
To design lead synths that complement your bass sound perfectly, start with a saw wave or square wave lead in a synth like Serum or Massive X (by Native Instruments).
These waveforms are perfect for dubstep because of their bright, aggressive tone.
Apply a low-pass filter at around 500-600 Hz to tame the high end, keeping the lead from clashing with the wobble bass.
Then, dial in unison voices to thicken the lead 一 setting it to 3-4 voices with a slight detune (around 3-5%) adds width and impact is my advice, but play around with it.
For even more texture, add a distortion plugin or a touch of saturation at around 10-15%, which gives the lead a gritty edge without making it overly harsh.
To create movement in the sound, use an LFO to modulate the pitch or filter cutoff.
Next, set the LFO to a slow rate (around 0.3-0.5 Hz) for a gentle wobble that keeps the lead synth dynamic without overpowering the beat.
Adding reverb with a decay of 1-1.5 seconds and around 20% wet mix helps the lead sit nicely in the space, especially during the track’s build-up sections, so keep that in mind.
Finally, to make sure the lead synth fits into the mix, add sidechain compression to sync it with the punchy kick and wobble bass.
Set the sidechain ratio to 4:1 and adjust the release to around 60 ms, so the lead synth quickly recovers after each kick.
When you’re producing dubstep, these settings will give your tracks a lead that’s powerful, balanced, and full of personality.
It won’t only help you learn how to make dubstep like a boss, but enhance your production skills as a whole.
-
Vocal Samples and Chops
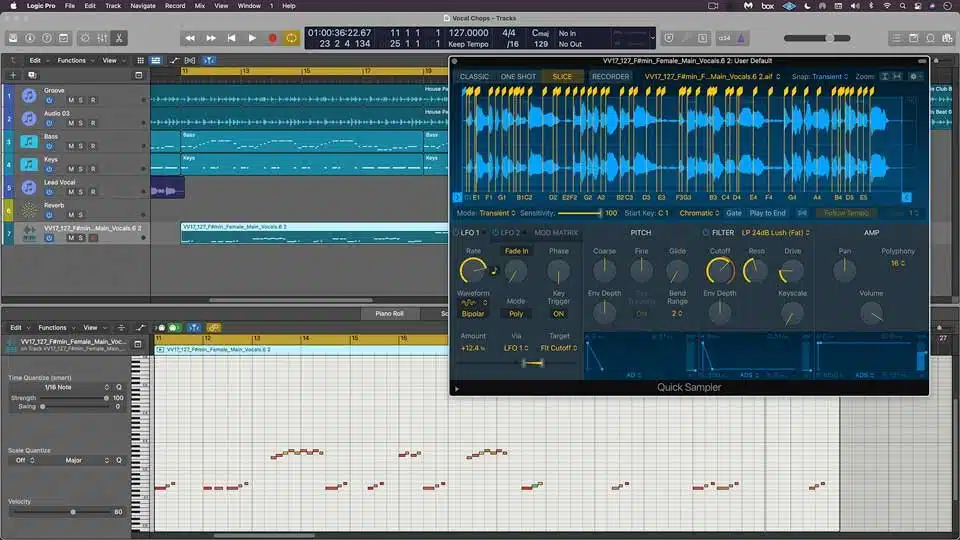
Vocal samples are a great way to add human elements and a unique edge to your dubstep track, so let’s get into it.
Begin by selecting a vocal sample that fits the tone of your beat (sample packs often include vocals specifically tweaked for electronic music which you can find anywhere).
Or, you can record your own if you want something truly custom, just make sure you know what you’re doing and fine-tune it to taste.
Use a high-pass filter to cut out any frequencies below 200 Hz so the vocal is clear and doesn’t clash with the bass, like the other sections.
To create an energetic, glitchy feel, chop the vocal into short sections (around 1/16 or 1/32 note lengths).
You can do this in your DAW’s piano roll or audio editor (I recommend FL Studio or Ableton Live for this), then rearrange the chops to add rhythmic variation.
Side note, if you want to learn all about FL’s piano roll, we got you.
To make a dubstep beat have that classic dubstep sound, add reverb with a decay time of about 1 second and a wet/dry mix of 20%.
This will give the vocal chops a bit of space without washing them out.
One trick I love is pitch-shifting certain chops because pitching a vocal up or down by an octave can give it a robotic, intense feel.
Adding sidechain compression to the vocal sample can also help it fit into the mix without overpowering other elements.
If you want to try it out, tweak the sidechain release to around 40-50 ms, so the vocal has a quick but smooth recovery after each kick.
For extra effect, try layering a delay on the vocal chops with a short time setting (around 200 ms) and a low feedback (10-15%).
This adds a slight echo without muddying the beat.
Remember, carefully placed vocal samples and chops can elevate your dubstep beat, adding character and uniqueness to the final track.
#4: Structuring Your Dubstep Track
Structuring your dubstep track the right way will keep your listeners totally invested. Remember, dubstep relies on dynamic shifts and energy changes all the way through. So, let’s cover how to make dubstep beats that flow smoothly from intro to drop 一 keeping the energy high and the rhythm captivating.
-
The Intro and Build-Up
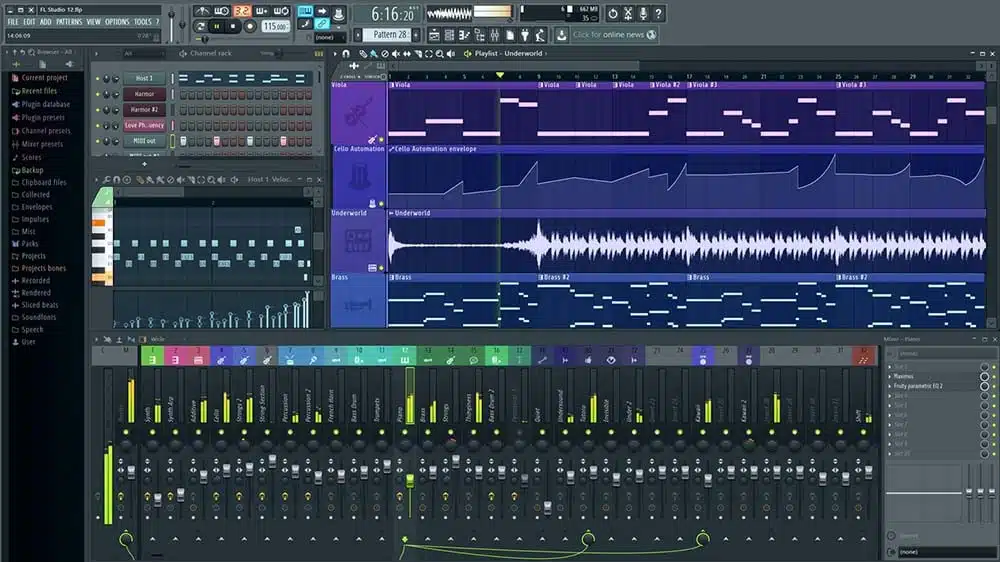
The intro and build-up are where you set the mood and build anticipation for the drop; it’s all about getting them hyped up and anticipated.
Begin with a simple sub-bass and light drum beat (such as hi-hats and a low kick) to lay down the initial rhythm.
To keep things clean, roll off the low-end frequencies on instruments that don’t need them, using a high-pass filter around 150-200 Hz.
Slowly introduce melodic elements, like a lead synth with a low-pass filter starting around 200 Hz or so.
It gradually increases the filter cutoff to bring out more frequencies as the track builds.
One way to build tension is by adding reverb and delay on specific sounds, like percussion elements or vocal chops, to give the intro an open, atmospheric feel.
Set the reverb decay between 1.5 and 2 seconds and keep the mix around 20-30% wet.
You can also add a rising white noise effect, automating the volume and cutoff frequency so it grows in intensity over 4-8 bars is a classic dubstep technique.
To create a sense of movement, automate the filter cutoff on the bass and lead synths 一 gradually opening them up as you get closer to the drop.
For extra impact, add a snare roll leading into the drop, using 1/16 or 1/32 notes and increasing the velocity of each hit.
A slight pitch rise on the snare roll adds intensity and lets listeners know the drop is coming soon, so you definitely want to play around with that.
When you’re learning how to make dubstep tracks, just remember that it’s all about keeping your audience hooked and hyped up.
Finally, cut all low-end elements briefly in the last beat before the drop to create a moment of silence, which adds to the dramatic effect when the dubstep bass returns.
-
Designing the Drops
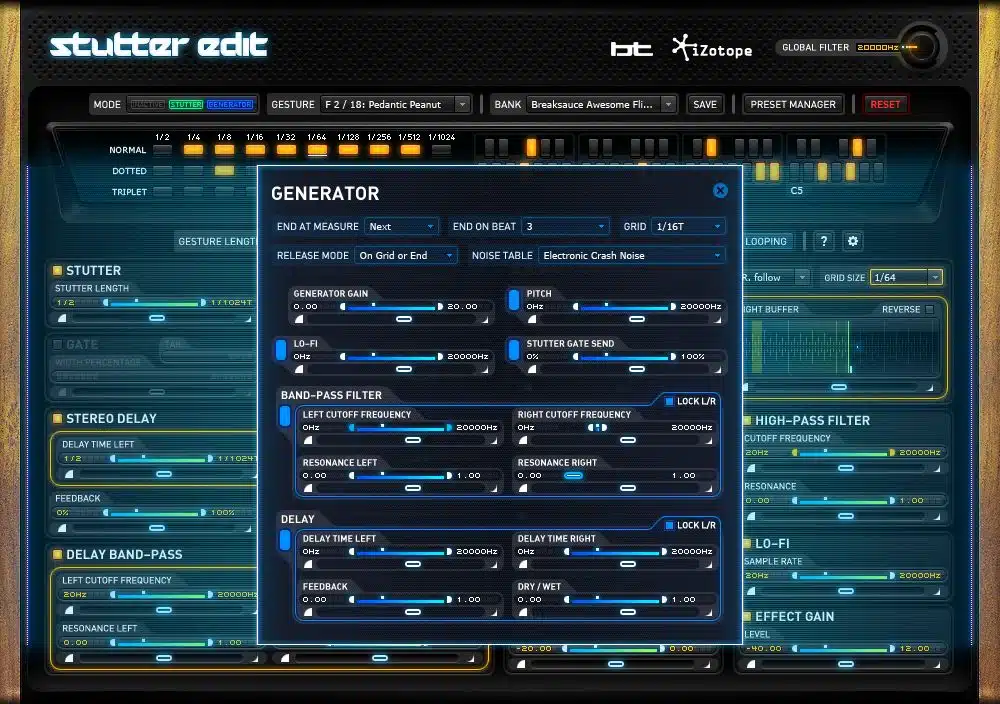
When you produce dubstep tracks, the drop is where all that energy is released, making it one of the most important parts of a dubstep beat, hands-down.
To make the drop hit hard, you’ll want to use a super powerful kick drum with a short, punchy decay and plenty of low-end energy, around 100 Hz.
Layer this with a wobble bass or sub-bass that’s sidechained to the kick so each bass hit has room to breathe.
Set the sidechain threshold around -10 dB with a quick attack and release (around 30 ms) for a tight, pulsing effect.
One key to a memorable drop is using a combination of wobble bass techniques and LFO automation on the filter cutoff.
Set the LFO rate to quarter notes for a steady groove, then switch it up to eighth or sixteenth notes for a more frantic feel during certain phrases.
A distortion plugin with around 20% drive should do the trick because it adds grit to the bass and helps it cut through the mix.
Add high-energy percussion elements like rides or claps to emphasize each beat 一 panning them slightly left and right for a wider stereo effect.
Layer your main bass sound with a mid-range bass that has more harmonic content, using a filter cutoff around 200-300 Hz to avoid clashing with the sub-bass.
To make a dubstep track with an even more dynamic drop, automate the LFO rate and occasionally introduce brief moments of silence or glitch effects.
This will keep the energy unpredictable and exciting, and help you learn how to make dubstep tracks like the pros do.
-
Breakdowns and Transitions
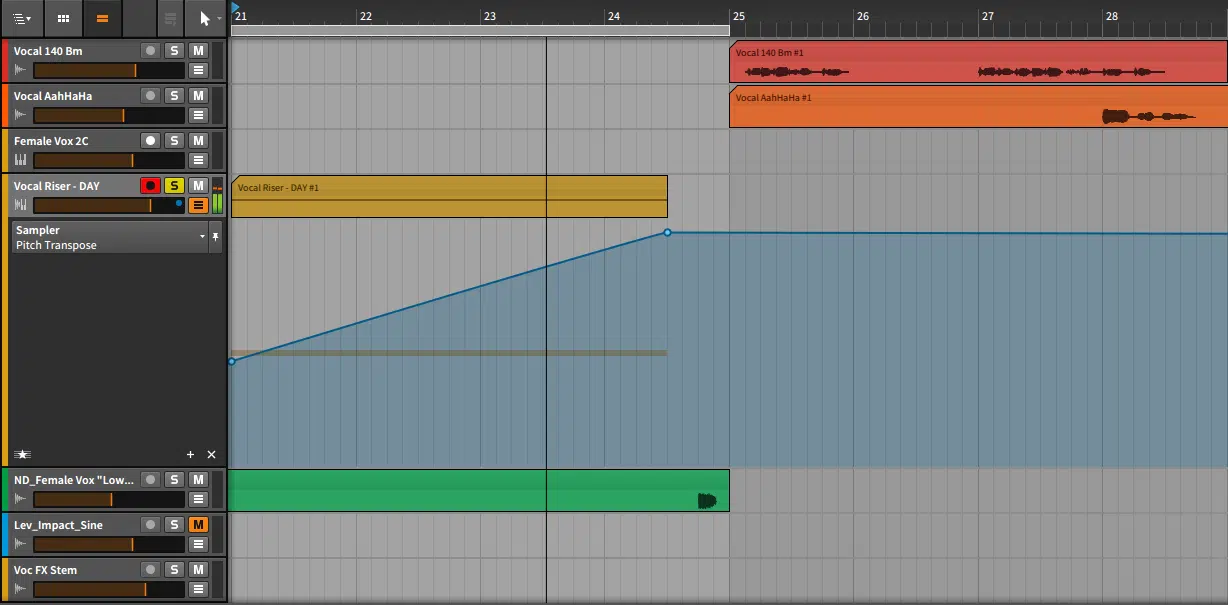
Breakdowns and transitions are super important when you’re learning how to make dubstep tracks because they provide breathing room in a dubstep track.
It gets the listener invested and excited for the next drop, too.
When dealing with dubstep breakdowns, you’ll want to reduce the intensity by removing the sub-bass and keeping only light percussion, like closed hi-hats or soft kicks.
A low-pass filter can be applied to the lead synth to soften it 一 setting the cutoff around 300-400 Hz to create a mellower, chill vibe.
Using reverb and delay on percussion elements (like a snare sample or clap) can add an ambient feel to breakdowns.
You’ll want to set the reverb decay between 1.5 and 2.5 seconds, and keep the wet mix around 30-40% to make the space feel expansive.
For smoother transitions, try adding sweeping effects or rising white noise with a 4- to 8-bar build to signal upcoming changes in energy.
These sweeps will help your bridge sections and signal the return of the heavier dubstep bass elements.
To keep things interesting, add subtle vocal samples or chopped vocal chops with a high-pass filter around 200 Hz.
This will keep the vocal airy and distinct from the low-end bass.
Also, a short drum fill (using kick, snare, and toms) can add extra excitement right before the drop, which many dubstep tracks don’t have, so it’ll give you a leg up.
And keep in mind that adjusting the filter cutoff frequency on lead sounds during transitions can give your track a dynamic flow, so don’t sleep on that either.
#5. Mixing and Mastering Dubstep: Key Considerations

Mixing and mastering dubstep require careful attention to frequency balance, compression, and spatial effects to give the track a polished and powerful sound.
Start by making sure that each element in the track has its own frequency range, especially the:
- Sub-bass (30-60 Hz)
- Mid-bass (100-200 Hz)
- High frequencies (above 10 kHz)
Use a high-pass filter on elements that don’t need low-end frequencies, like hi-hats or vocal samples, setting it around 150-200 Hz to keep the sub-bass clean/impactful.
For compression, apply a multiband compressor on the bass to control each frequency range individually, setting the threshold around -10 dB with a 2:1 ratio for the low end.
You’ll want higher ratios for mid-range elements if needed.
This mixing technique will help you retain the punchiness of the kick drum and keep the wobble bass super tight and right.
Make sure to throw on a limiter on the master track with a ceiling around -0.2 dB to avoid clipping while maximizing loudness (fine-tune it to taste).
Just make sure your limiter’s release is set around 100 ms to prevent unwanted distortion that can make things sound super amateurish.
Adding reverb and delay can help space out your sounds too…
So, use reverb on lead synths or vocal samples with a decay around 1.2-1.5 seconds, and adjust the wet/dry mix to around 20%.
This will ensure it sounds good and present but not overwhelming.
For the final element, apply stereo widening (sparingly) on high-frequency elements to keep the bass mono and centered, enhancing the low-end power of your dubstep beat.
#6. Advanced Tips, Tricks & Techniques
To take your dubstep music production skills to the next level and make a dubstep track that dominates other producers, you should dive into some more advanced techniques. Ones that add depth and creativity to your bass sounds and overall mix. So, let’s break down how to make dubstep beats with that professional polish/edge.
-
Layering and Resampling Bass Sounds
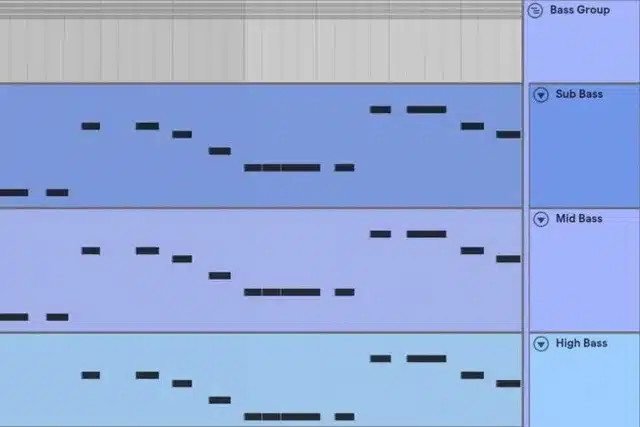
Layering and resampling bass sounds can add massive depth to your dubstep track, giving it the power and complexity that define the genre.
Start with a strong sub-bass layer using a sine wave and keep it clean and centered in the low-end frequencies, around 30-60 Hz.
Then, add a mid-range bass layer using a saw or square wave with some distortion to create a growling texture…
Set the low-pass filter cutoff around 200-300 Hz to keep it separate from the sub-bass.
After you’ve layered your bass, bounce (or “resample”) the entire bass sound to a new audio track, which lets you apply additional effects without overloading your CPU.
Resampling opens you up to a world of innovative sound design too, and you guys know how much I love sound design.
You’re going to try adding a phaser or chorus effect with a low wet mix (around 10%) to give your dubstep bass even more movement.
For extra music production power, use saturation at around 20% to make the bass feel more aggressive and cut through the mix better.
PRO TIP: Use automation on the resampled dubstep bass track’s filter cutoff or LFO rate. By gradually increasing the LFO speed or adjusting the filter, you can create a sound of progression and dynamics in the bass.
If you’re looking for a unique effect, apply pitch automation to the bass 一 pitching it up or down by an octave at specific points to keep things interesting.
To finish, add sidechain compression on the resampled bass track, setting the threshold around -12 dB and a fast release (30-50 ms) to let the kick breathe.
This technique keeps the bass powerful but also rhythmically tight so your dubstep beat hits with that hard, syncopated bounce that’s key in dubstep bass music.
-
Creative Use of Automation
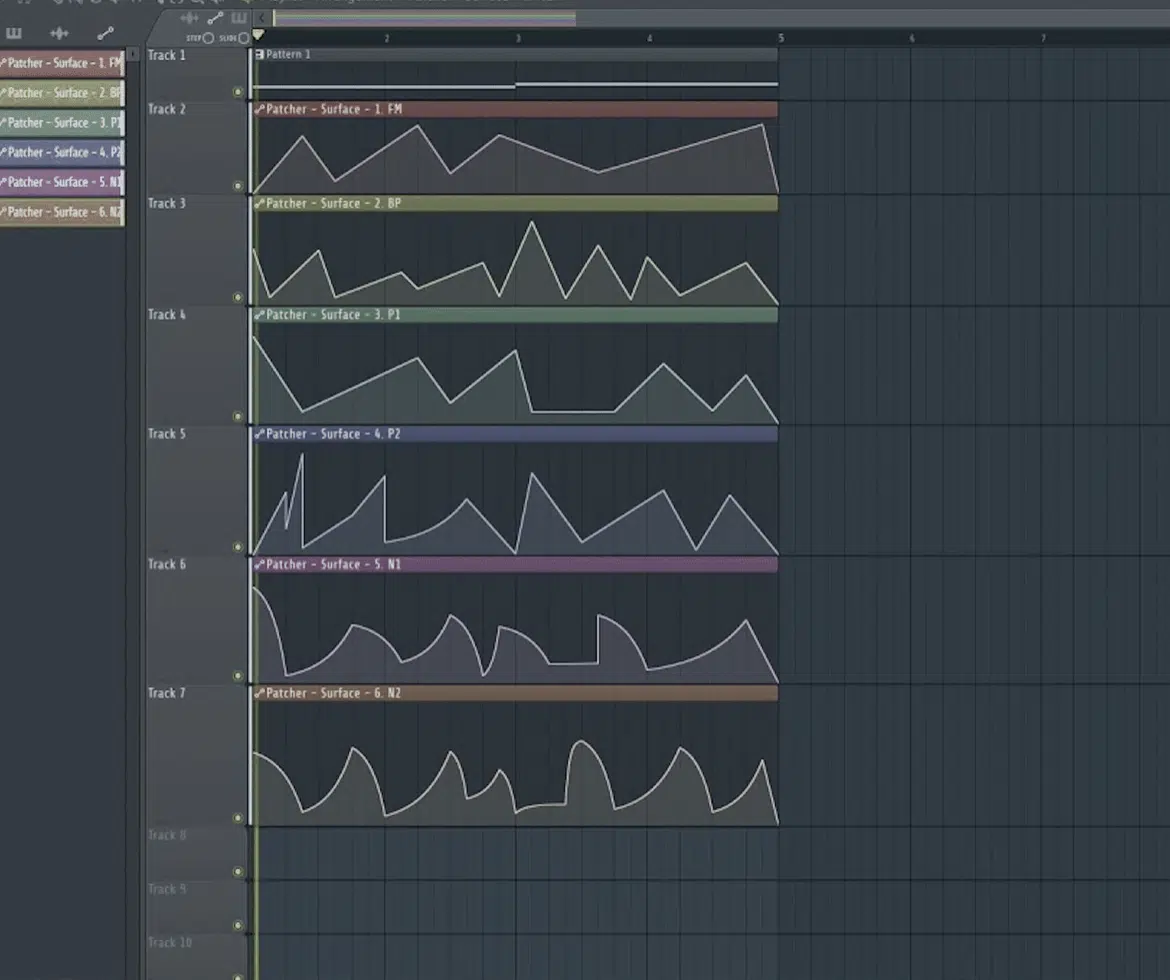
Automation was like made for dubstep production, so dubstep producers like yourself need to learn how to creatively use it for maximum movement and interest.
When learning how to make dubstep beats, you’ll find that automating parameters will add a dynamic, evolving feel, like:
- Filter cutoff
- LFO rate
- Reverb
Start by automating the filter cutoff on your main bass.
For example, setting the cutoff to open gradually across 4-8 bars can build intensity, especially leading into a drop.
Also, using a low-pass filter with an initial cutoff around 150 Hz and gradually opening it to around 300-400 Hz is a great idea.
Another great technique is LFO rate automation on the wobble bass.
Also, try automating the LFO rate from quarter notes to sixteenth notes as you approach the drop, which quickens the wobble and adds tension.
PRO TIP: Apply reverb automation on lead synths or vocal samples. Setting reverb to increase in the build-up, then cutting it suddenly right before the drop, can create a dramatic contrast.
Just keep the reverb decay around 1.5 seconds and automate the wet/dry mix from 10% up to 40% during the build-up.
To make the mix feel alive, automate panning for percussion elements like hi-hats, starting with subtle left-right movement, panning between -10 to +10.
Volume automation also works well for vocal chops 一 allowing certain parts to stand out and others to fade into the background.
By creatively using automation, you can make each section flow perfectly and give your dubstep song a sense of progression and excitement.
-
Glitch Effects and Sound Design Techniques
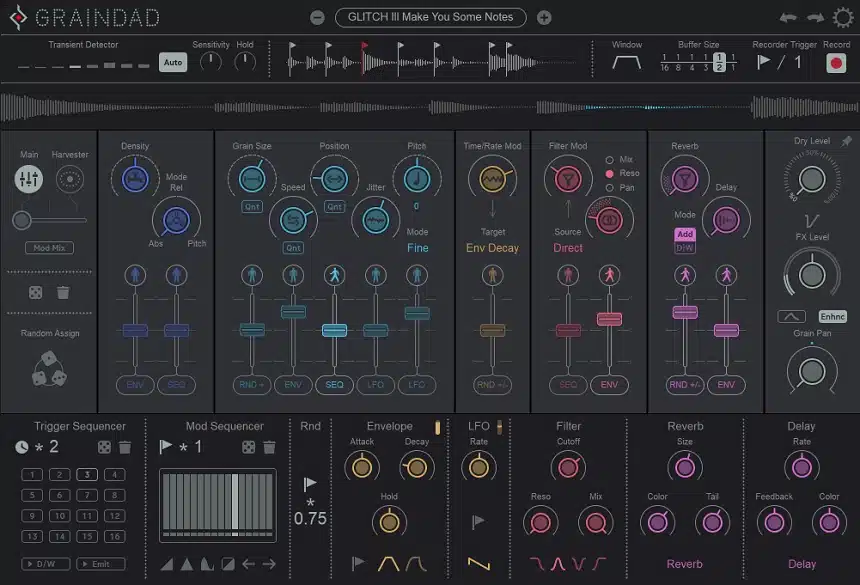
Glitch effects and unique sound design techniques are dope when learning how to make dubstep beats that sound fresh and captivating.
To get started, apply a bitcrusher effect on specific sounds (like percussion or synth stabs) to create that classic glitchy, lo-fi texture.
Set the bit reduction around 8-12 bits and mix it in at around 15-20% wet to keep it subtle, because subtly is very important here.
Bitcrushing adds a gritty, digital edge without overpowering the mix.
Adding stutter effects to vocals or lead synths also works well. In your DAW, duplicate a small section (like a 1/32 or 1/64 note) of audio, then repeat it to create a stutter effect.
Layer this with a high-pass filter to keep it from clashing with the bass, setting the cutoff around 200 Hz.
Another great trick is to use frequency shifter automation on your dubstep bass sounds 一 shifting the pitch up or down slightly during transitions.
Or, fills to add unpredictability to the beat.
Using sidechain compression creatively on glitch sounds can also help them fit into the rhythm, so you’ll want to set the sidechain threshold around -8 dB with a quick attack and release (30-40 ms) for a tight, punchy effect.
Ring modulation is another option for making dubstep beats that have those awesome glitchy, robotic sounds.
Apply it to mid-range elements, setting the modulation frequency around 200-500 Hz to create metallic textures.
To top it off, try randomizing the pitch on certain glitch effects using a random LFO or automation as we talked about earlier.
NOTE: Small pitch shifts (1-2 semitones up or down) create slight variation without destroying the harmony, so start with those when learning how to make dubstep.
Bottom line, when used the right way, glitch effects can give your dubstep track a distinct edge, making it stand out in the electronic music space.
Final Thoughts
Learning how to make dubstep can be a little tricky at first, I can’t lie.
But, once you understand how to structure your track, layer bass sounds, and add creative automation, you’ll be just fine.
Using the techniques, tricks, and tips we covered today, you’ll be able to knockout dubstep beats that hit hard and keep listeners hooked.
Plus, you’ll make your dubstep beats sound professional, dynamic, and totally unique.
Just remember, when you’re learning how to make dubstep tracks, it’s more about experimenting and finding your own style than following strict rules.
So, don’t be afraid to try new effects, tweak your settings, and push the boundaries of what dubstep can be altogether.
As a special bonus, if you’re looking to elevate your music even further and learn how to make dubstep quicker, you’ve got to check out this invaluable Dubstep Chord Collection.
It includes expertly crafted MIDI chords and progressions designed specifically for dubstep 一 created by the world’s top producers.
It’s perfect for producers at any level, helping you learn how to make dubstep with epic chord progressions that sound deep and powerful right from the start.
The legendary sounds in this pack can be the perfect foundation for your own tracks, saving you time on chord-building while giving you the flexibility to customize each one.
So, with everything you’ve learned here, you’re well on your way to mastering how to make dubstep like a pro.
Just make sure to really practice the process, stay creative, think outside of the box, and let your unique style shine through so it always feels authentic.
Until next time…


Leave a Reply
You must belogged in to post a comment.