Compression is a vital component of your music production process.
It guards your mix against excessive peaks and troughs in volume 一 maintaining a balanced output that can hold its own in today’s loudness-hungry music scene.
Therefore, not knowing the answer to “What does a compressor do?” can be super counterproductive.
But don’t worry, we’re going to be breaking it down today.
Meaning, you’ll not only understand its function but also how to leverage it for superior sound.
In today’s article, we’ll be breaking down:
- What a compressor is & what it does ✓
- The key components of compressors ✓
- The power of control in compression ✓
- How compression can enhance your mixes ✓
- How to balance the loud and quiet parts ✓
- The intricacies of the audio signal in compression ✓
- Compression tips, tricks, and techniques ✓
By the end of this article, you’ll be equipped with the knowledge to manipulate the dynamic range of your audio, balance your tracks, and create a professional-sounding mix.
You’ll never have to ask yourself “What does a compressor do” again.
So, let’s dive in…
Table of Contents
Demystifying Audio Compression
Imagine a crowd of sound waves, each with its unique amplitude, competing for attention in your track.
That’s where audio compression and, more specifically, your trusty audio compressor come into play.
-
What is a Compressor & What Does a Compressor Do?
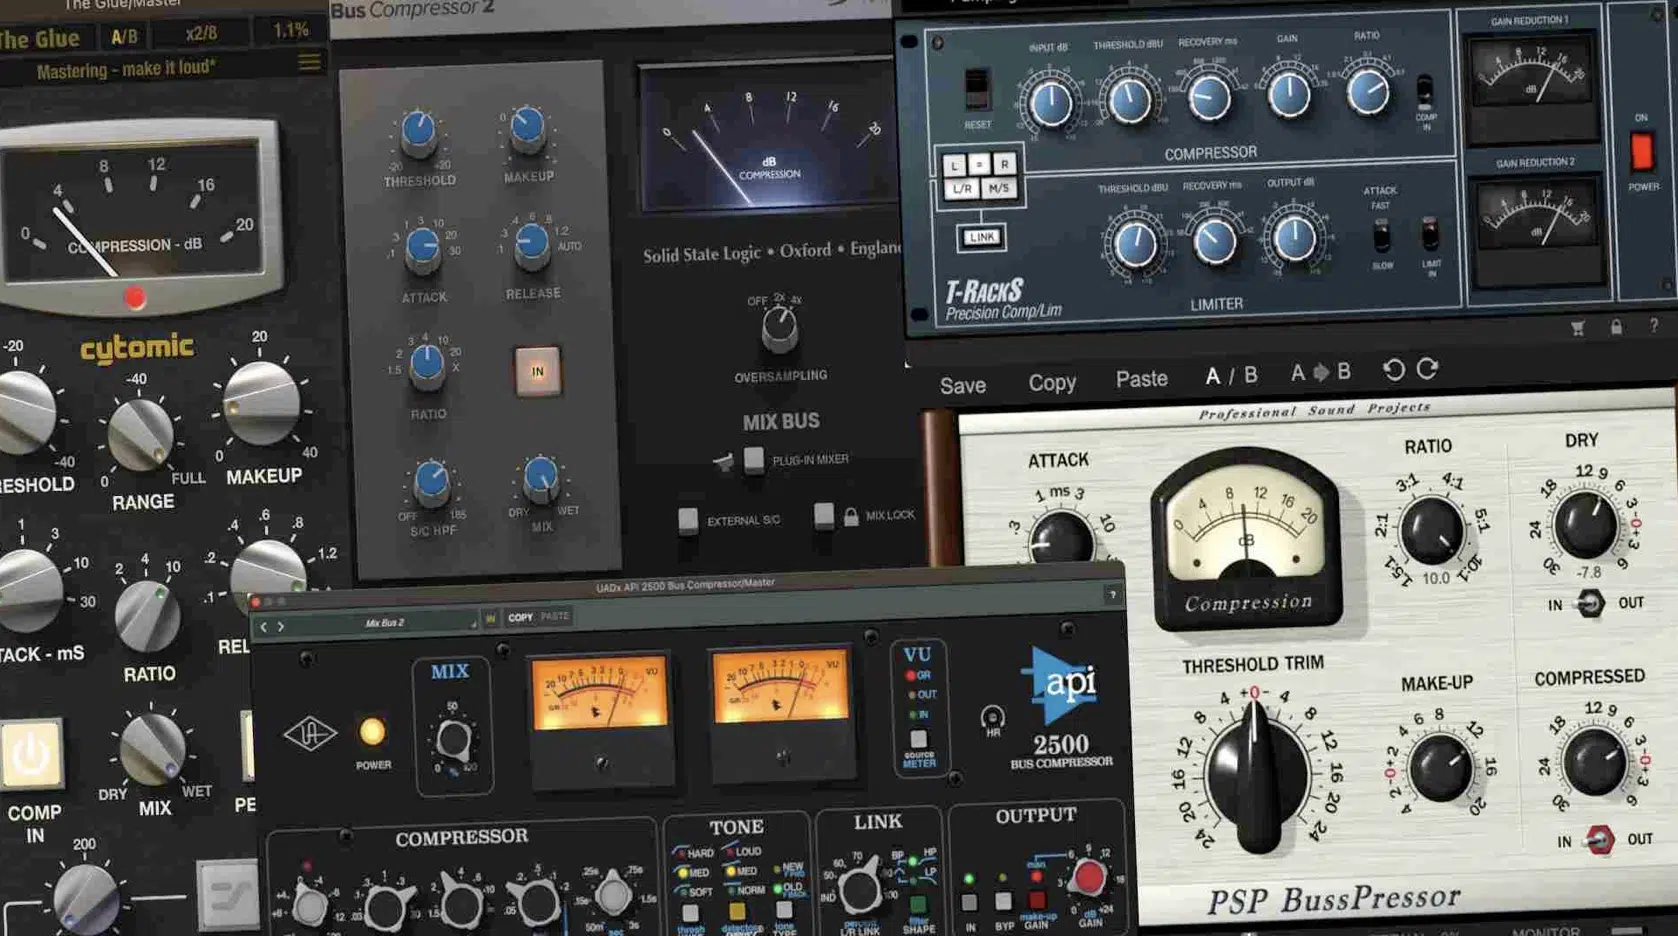
So, what does a compressor do?…
In simple terms, an audio compressor is a tool in the recording and mixing process that helps manage the dynamic range of your track.
Essentially, it controls the volume of the loud and quiet parts of your audio signal 一 ensuring no sound peaks or troughs are too extreme.
Compressors work like vigilant audio bouncers; smoothly and efficiently controlling the fluctuating volumes.
When an audio signal exceeds a set threshold level, the compressor reduces its amplitude.
This prevents it from becoming overpoweringly loud (and obnoxious).
This gives you a more controlled and balanced audio output, making for a smoother listening experience.
-
Breaking Down the Key Components of Compressors
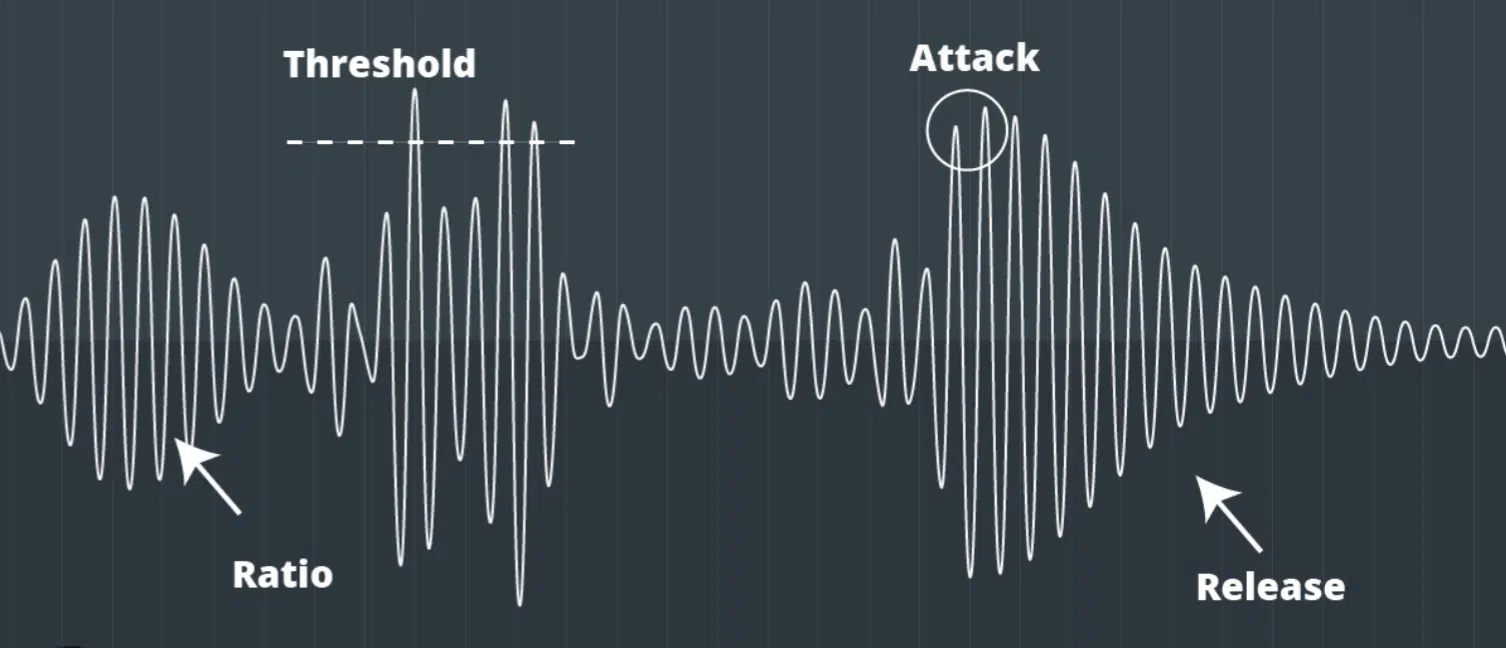
While the magic of compressors is simple to grasp, it’s the inner workings and components that add depth to their functionality.
The four main controls in most compressors are:
- Threshold
- Ratio
- Attack
- Release
Now, let’s break down what each of these key components does.
The threshold control is your starting line.
It’s the level at which the compressor works on your audio signal.
Any signal exceeding the threshold level is treated and compressed 一 while the quieter parts remain untouched.
The ratio determines how hard the compressor works.
If you set a high ratio, the compressor reduces the volume of the loud parts more dramatically.
The attack and release controls determine how quickly the compressor responds and releases the audio signal.
Balancing these controls gives you the compressed signal that can transform your tracks.
-
The Importance of Compressed Signals in Your Mix
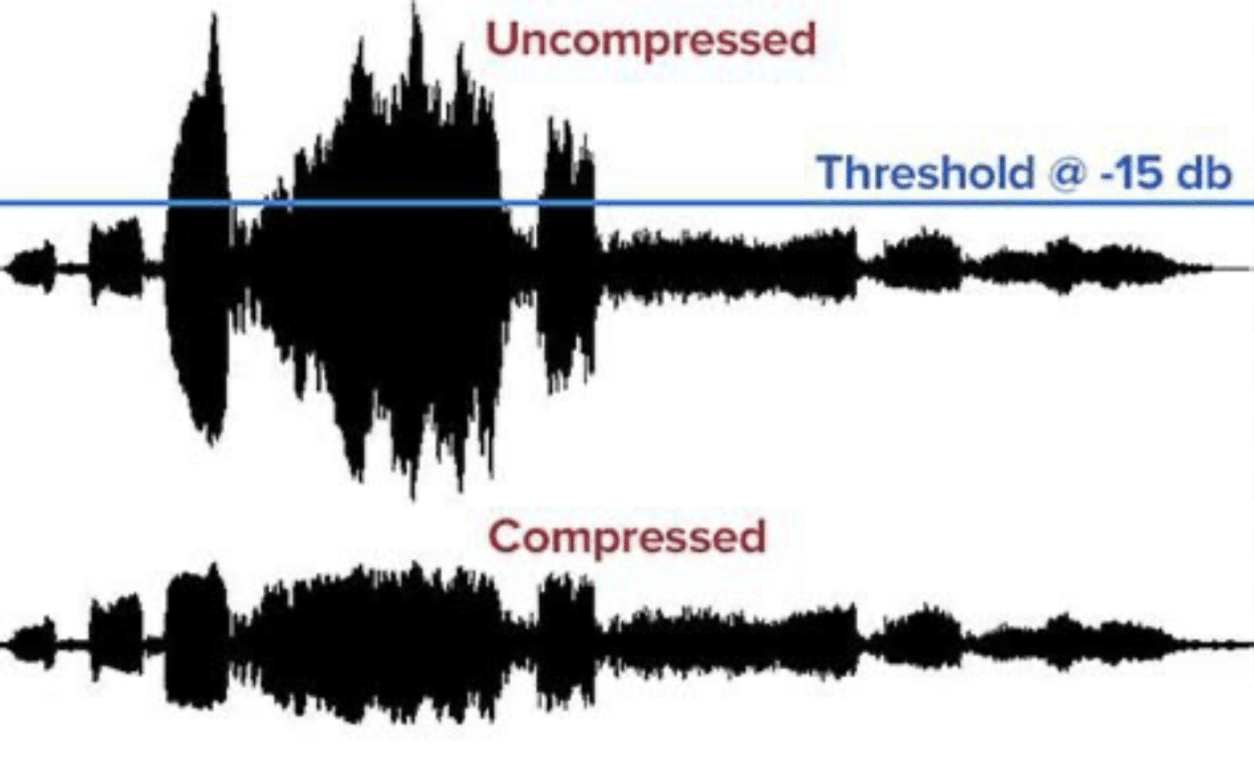
A compressed signal can significantly enhance your mix.
Compressing your audio can help level out the dynamic range and make the quieter parts of your track more prominent.
This compression effect makes your track more balanced and more pleasant to listen to.
Moreover, proper use of audio compression can bring forward subtle elements in your track that might be overshadowed by louder parts.
This makes each element in your mix audible and clear 一 ensuring none of your crafted sounds are lost in the audio landscape.
Control & Its Power in Compression
Speaking of controls, their importance in the grand scheme of audio compression cannot be overstated.
Each knob and slider in a compressor is like a character in a novel; contributing to the overall story.
-
Threshold Level: The Magic Starts Here

The threshold level is like the bouncer of your audio club… any audio signal loud enough gets flagged down.
The magic of compression begins at this point.
- The louder parts 一 Are moderated.
- The quiet parts 一 Can groove uninterrupted.
This gives you the ability to balance the dynamic range effectively and makes sure that the loudest parts do not overwhelm the quieter ones.
Think of it like adjusting the height of a limbo bar.
The lower you set the threshold, the more your signal will have to duck to get under it.
-
Compression Ratio: Fine-Tuning Your Sound
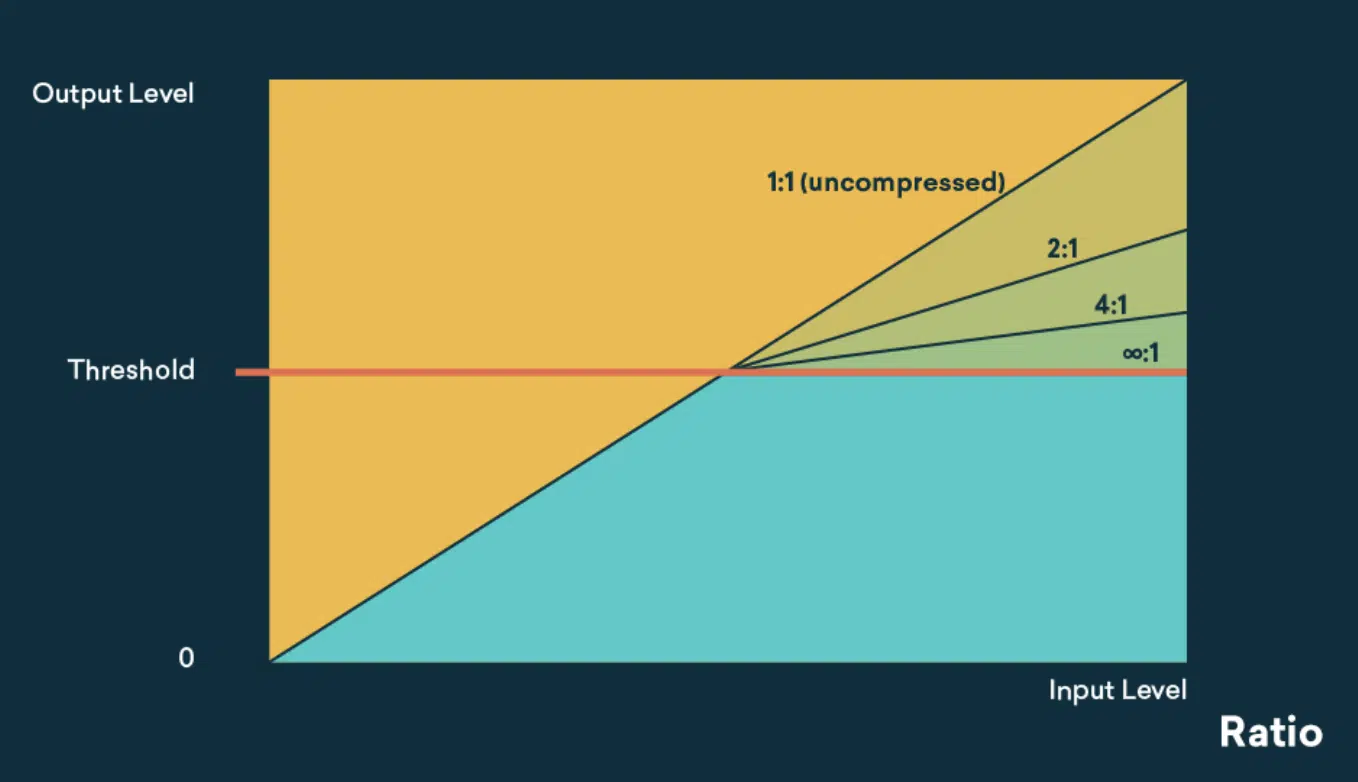
Next comes the ratio, your tool for fine-tuning the compression effect.
It determines how much the volume of the loud parts is reduced once they cross the threshold level.
For example, a 4:1 ratio means that for every 4 dB of volume over the threshold, only 1 dB will make it out of the compressor.
This level of control allows you to subtly or dramatically reshape the dynamics of your sound, depending on what your mix needs.
-
Output Gain & Make Up Gain
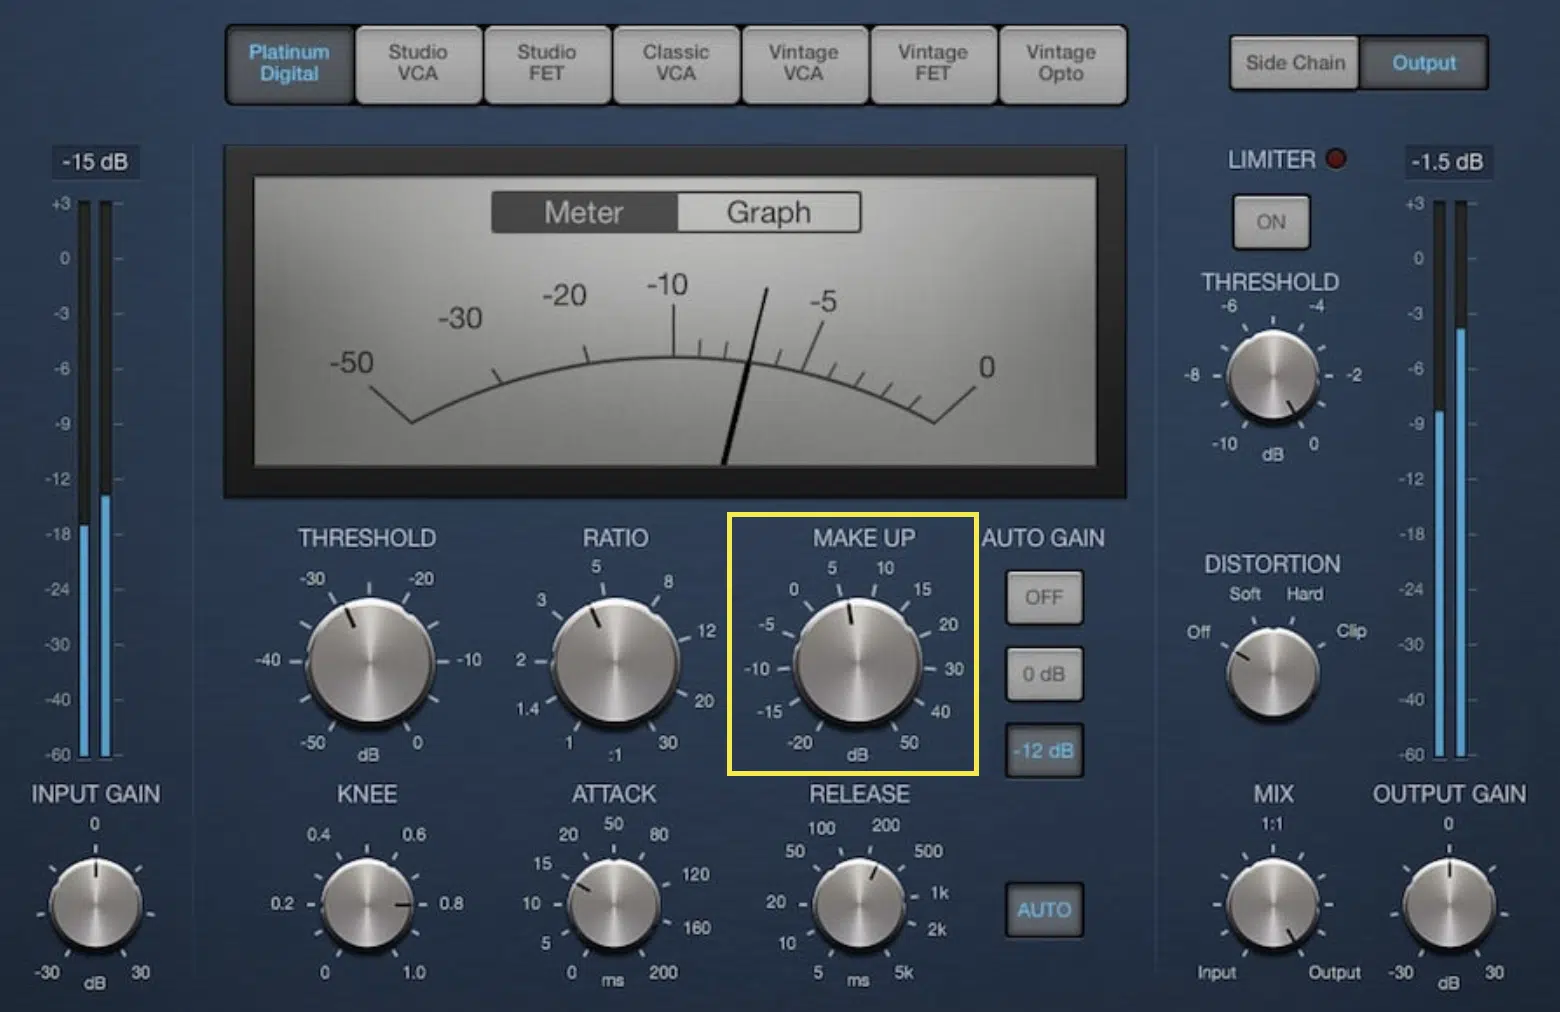
When you compress the loudest parts, the overall volume of your track can decrease.
This is where the output gain and make up gain come in.
They help in restoring the volume lost during compression, which ultimately ensures a balanced output.
- Output gain 一 Controls the overall volume of the compressed signal.
- The make up gain 一 Allows you to add back some of the lost loudness after compression.
It’s like giving a volume boost to your overall track while keeping the dynamics under control.
In essence, it’s not just about controlling the loud parts.
It’s also about elevating the overall volume of your track, post-compression, to match the level it was at before.
It’s about balance and ensuring that the quieter elements aren’t lost in the compression process.
-
Attack and Release: The Dynamic Duo in Compression
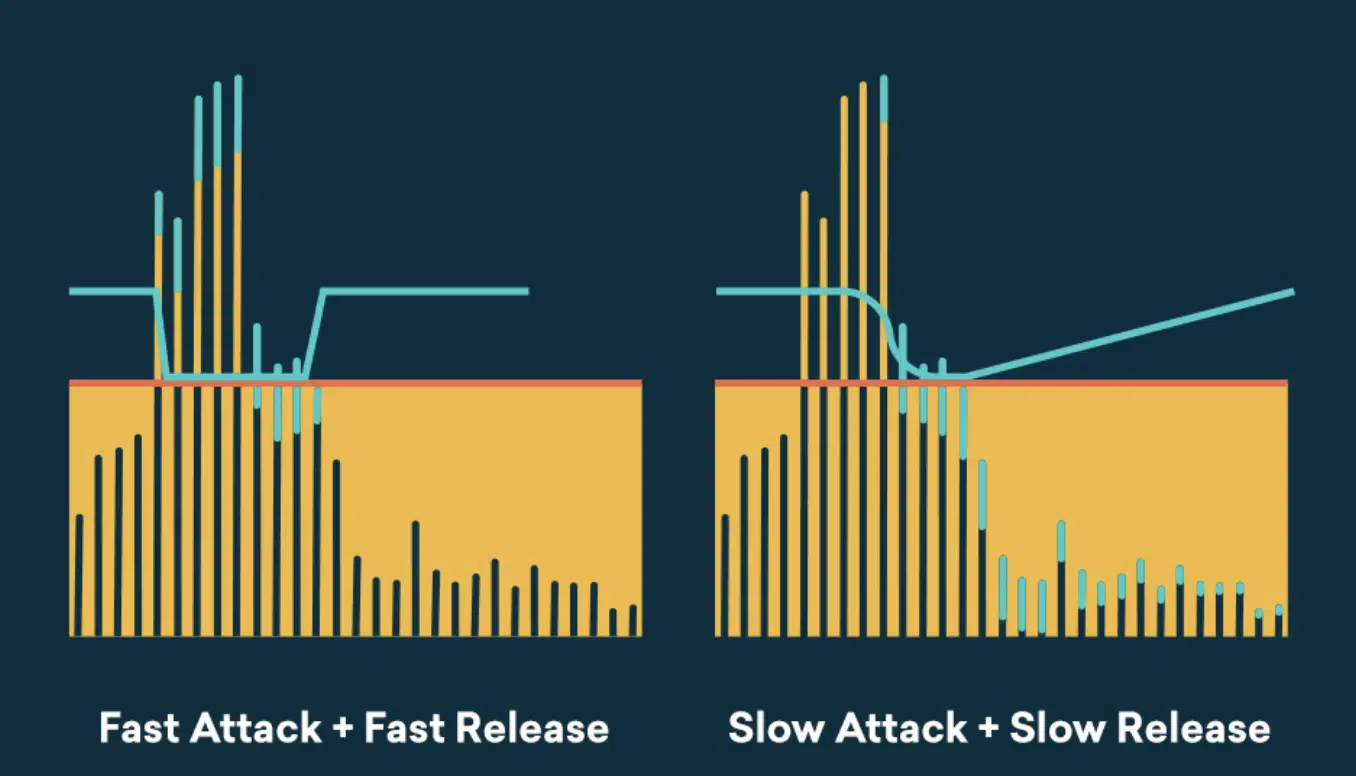
Attack and release controls are the dynamic duo that dictates how quickly the compressor responds and stops compressing the audio signal.
They play a vital role in determining the texture and feel of the compressed signal.
The attack control sets how fast the compressor reduces the volume after the signal crosses the threshold:
- A fast attack 一 Clamps down quickly on loud parts, making it useful for curbing sudden, loud sounds
- A slower attack 一 Allows more of the initial sound through before compression kicks in, preserving some natural dynamics.
The release control, on the other hand, dictates how quickly the compressor stops working after the signal falls below the threshold:
- A fast release 一 Means the compressor stops quickly, restoring the signal to its original volume.
- A slower release 一 Keeps the compression effect going for a longer time.
This control can help maintain a consistent volume level, reducing sudden dips or jumps in loudness.
The Art of Balancing Loud and Quiet Parts
One of the main reasons we use compressors is to balance the loud and quiet parts of our mix.
This dynamic interplay is what gives your music its unique feel and groove.
This way, you can spend less time in your DAW and more time releasing and promoting your music!
-
Taming the Loudest Parts: When the Compressor Takes Control
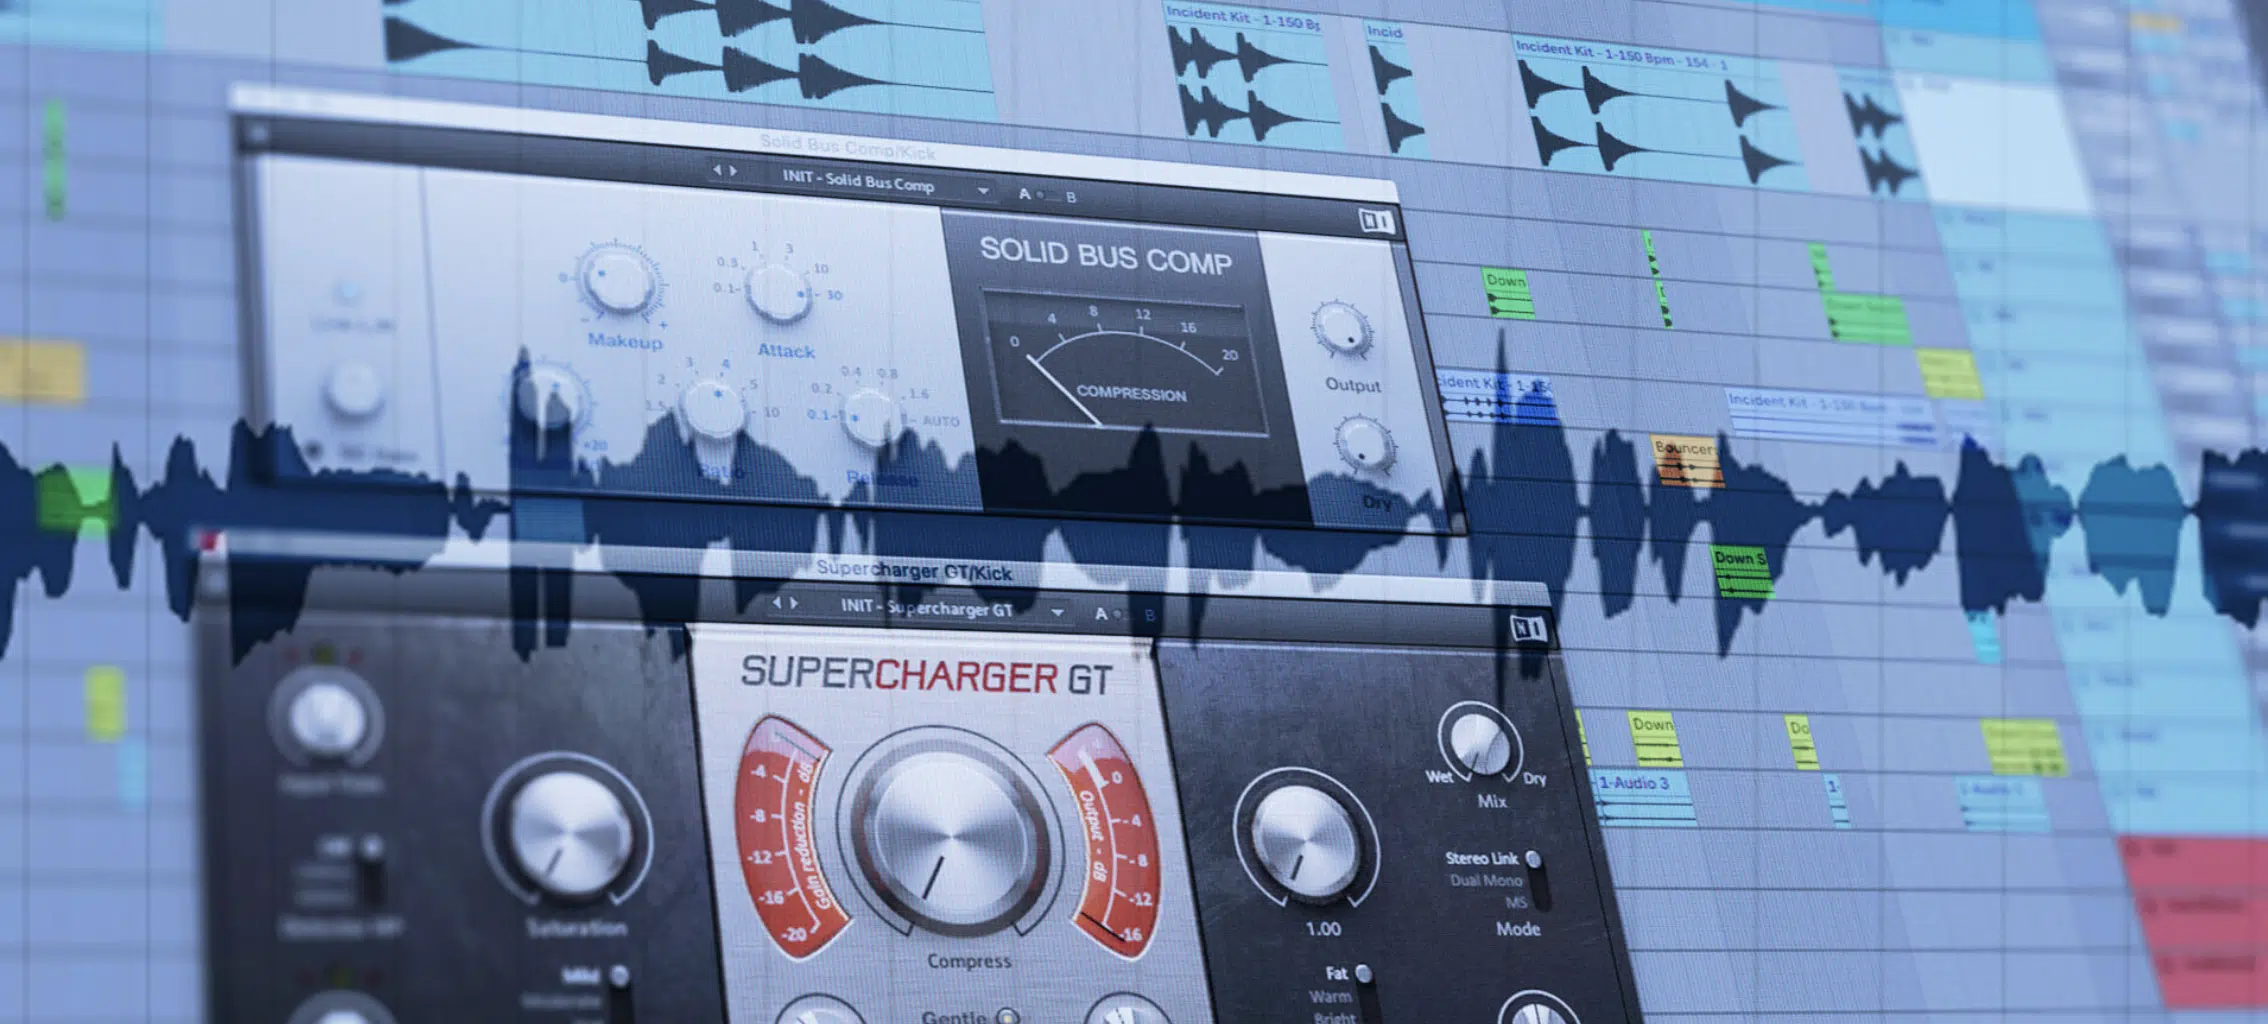
When you’ve got those banging beats or soaring synths that are a little too eager, compression steps in to tame them.
Once your audio signal crosses the threshold level, the compressor reduces its large volume according to the set ratio.
This ensures that the loudest parts don’t overwhelm the rest of your mix, maintaining a well-balanced sound (aka, a compressed state).
Imagine a compressor like an air conditioner…
On a scorching day, the heat can be overwhelming, much like those peaking sounds in your mix.
But just like how an air conditioner transforms the heat into cool air, the compressor cools down those peaks.
This ensures that your mix feels comfortable and balanced.
-
Lifting the Quiet Parts: How Compression Effect Empowers Your Mix
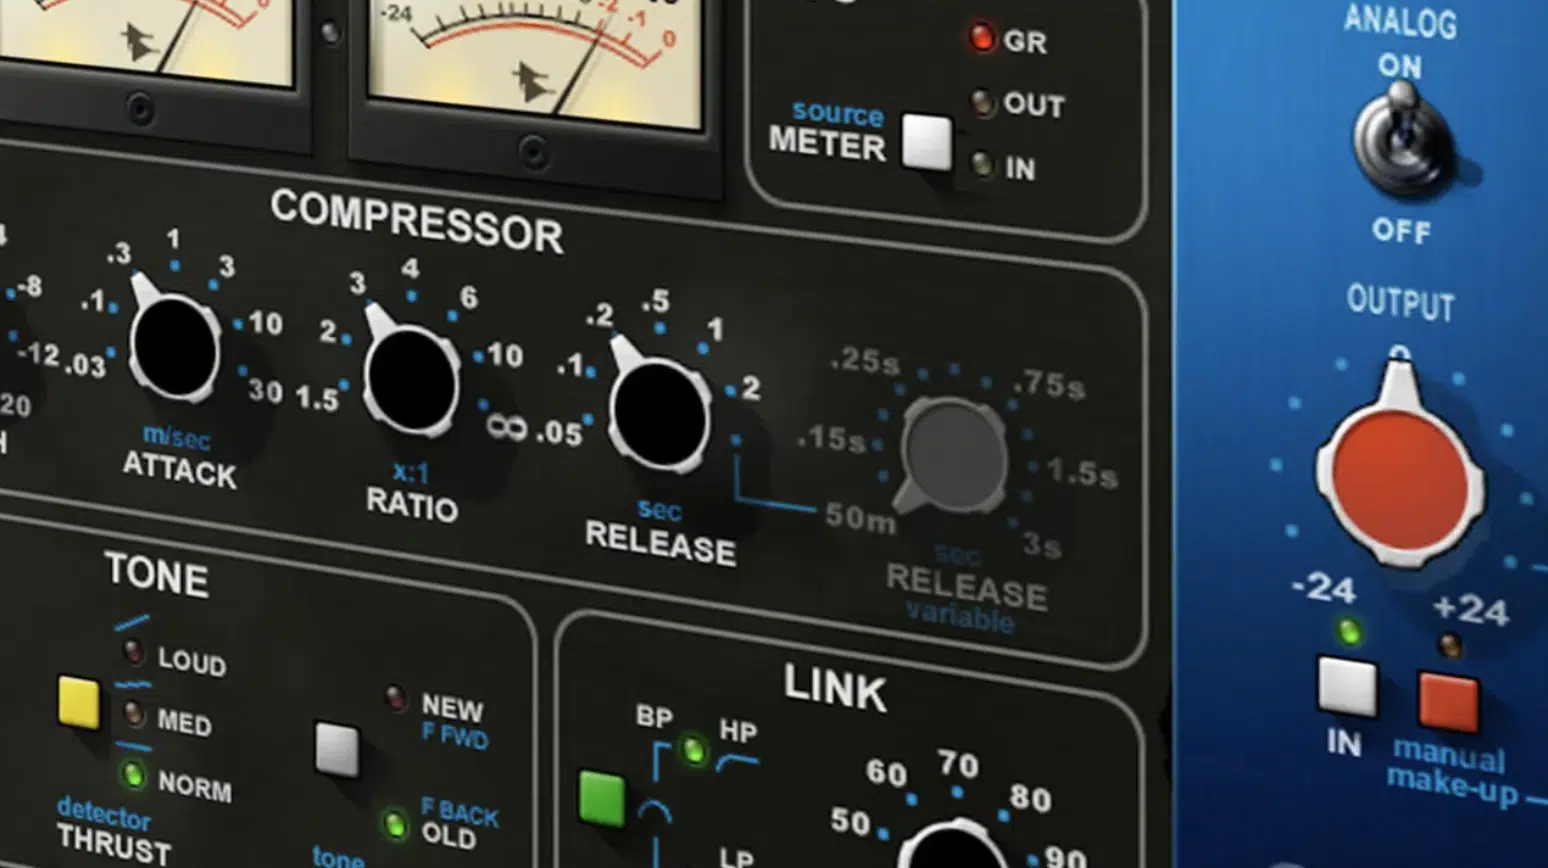
But compressors aren’t just about reigning in the loud…
They’re equally skilled at bringing out and emphasizing the quiet parts.
By reducing the loudest parts, the quieter elements in your mix get a chance to shine.
Using make up gain or output gain properly after compression can lift the overall volume 一 allowing the subtler sounds to become more audible.
It’s like turning up the volume on the whispers in your mix, ensuring they’re heard clearly and provide the right energy.
-
The Role of Compression in Maintaining Dynamic Range
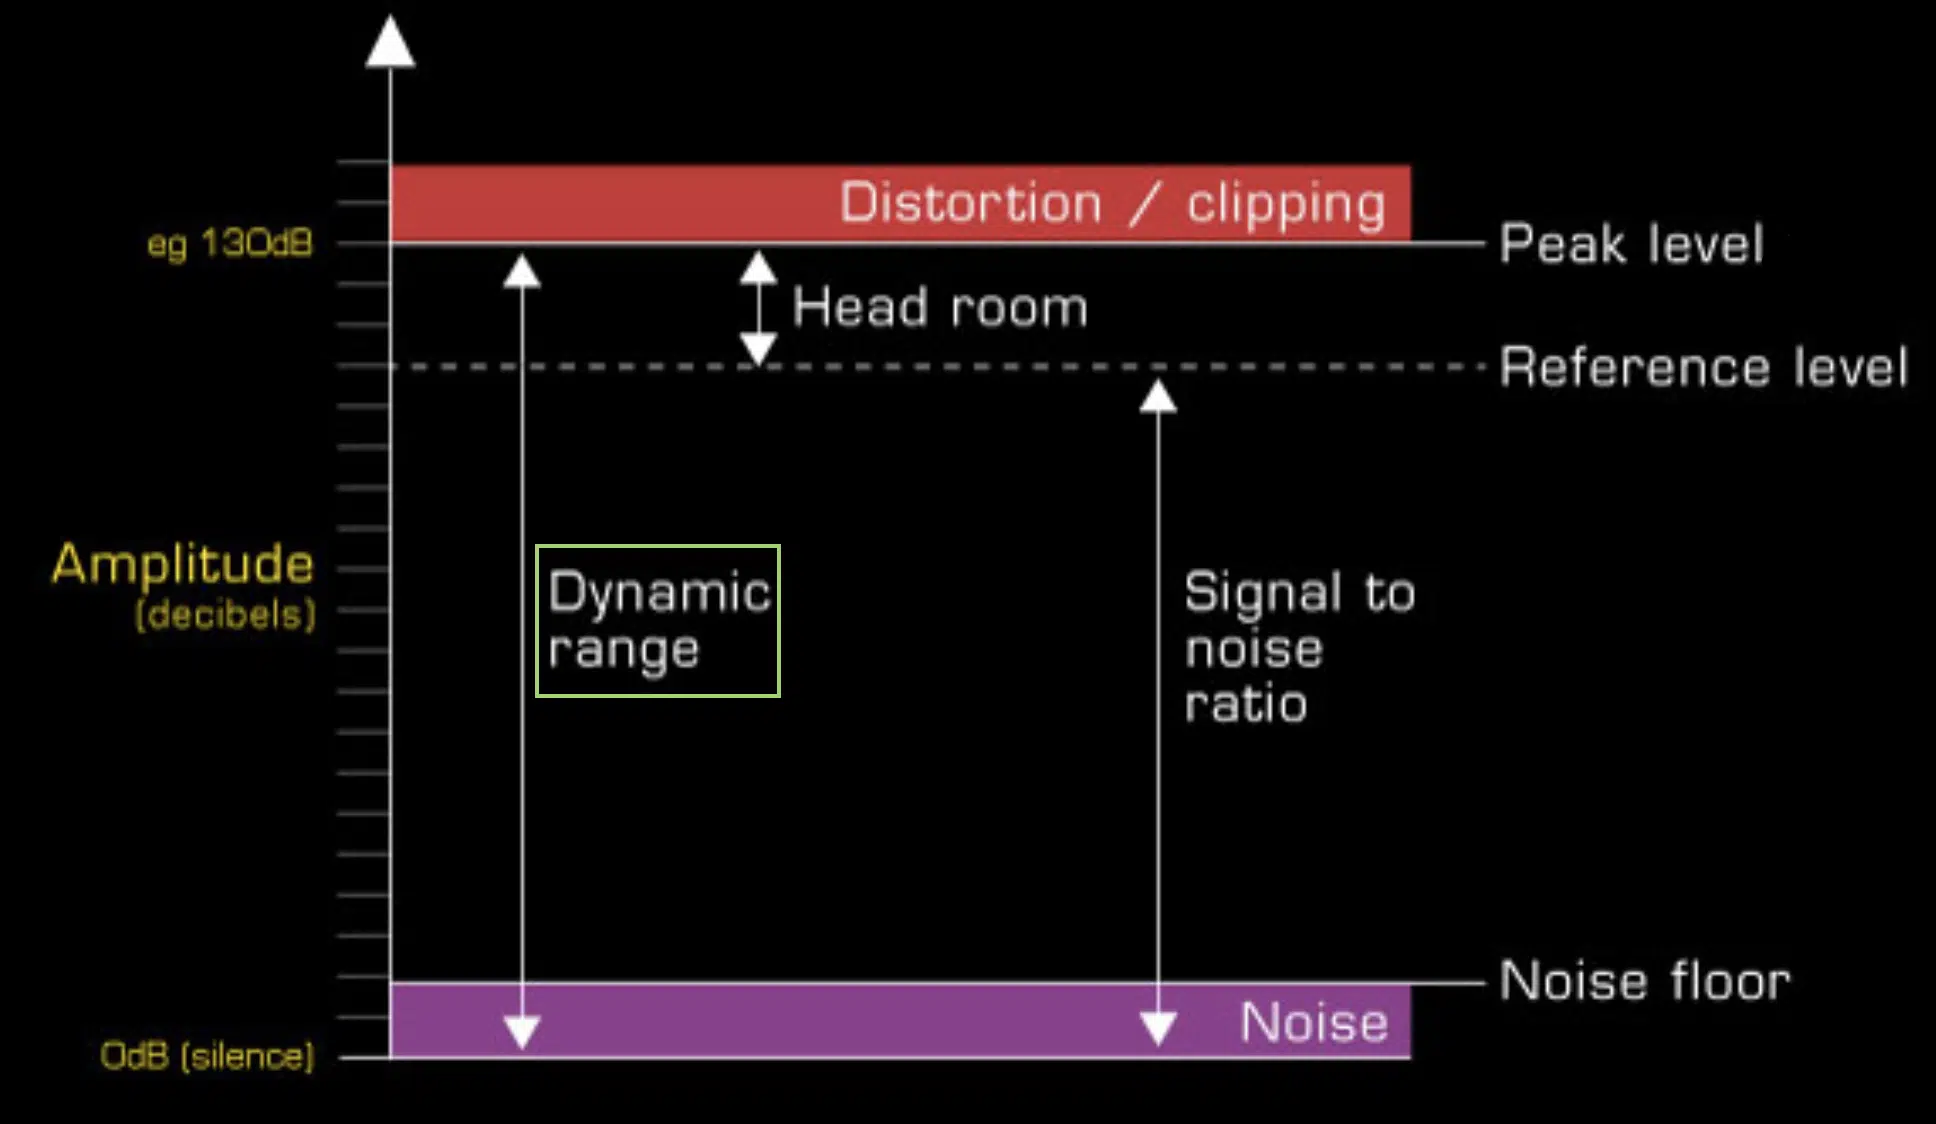
While compression is often associated with reducing dynamic range, it’s more about managing it effectively.
By controlling the loudest parts and bringing out the quiet ones, compressors can help maintain a balanced dynamic range that feels natural and pleasing to the ear.
Even in a genre like hip-hop, known for its loud and punchy beats, the dynamic range plays an essential role.
Compression can help ensure that the vocals don’t get drowned out by the beats or that the subtle instrumental elements don’t go unnoticed amidst the solid rhythmic patterns.
Also, maintaining a healthy dynamic range can enhance the powerful impact of your music.
Meaning, it won’t just be a single-stage beat, it will contain multiple intriguing layers.
The ebb and flow of volume levels (when done correctly) can reflect the emotional intensity of a song 一 making the loud parts feel louder and the quiet parts more intimate.
So, while it might seem counterintuitive, a compressor, by carefully controlling these dynamics, actually contributes to the expressive power of your music.
NOTE: If you want to learn all about upward compression or sidechain compression, we’ve got you covered.
The Intricacies of Audio Signal in Compression
In the world of audio compression, the signal is king.
Understanding how the signal behaves and reacts to compression can make the difference between a great, efficient mix and a mediocre, sloppy one.
-
Input, Amplitude & the Quest for the Perfect Volume
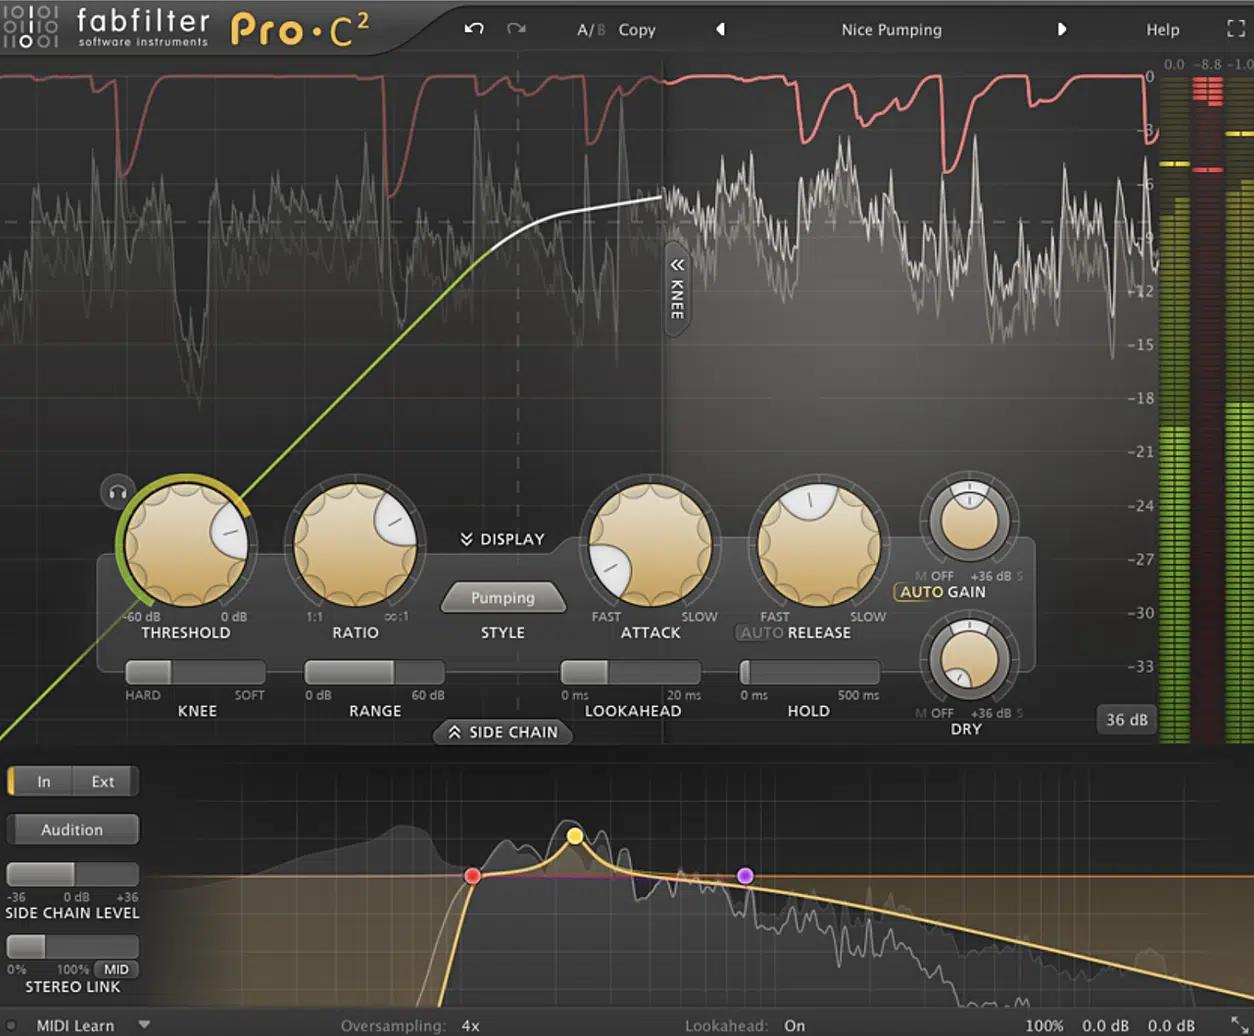
When working with compressors, the volume of the input signal is crucial.
The compressor’s effect is directly related to the amplitude of the input signal 一 the louder the input, the more noticeable the compression.
The quest for the perfect volume starts with setting the right input level.
- If the input level is too low 一 The compressor may not trigger at all, resulting in no compression.
- If the input level is too high 一 The compressor might clamp down too hard, making your sound overly squashed and unnatural.
Understanding and manipulating the amplitude of your audio signal allows you to better control how your compressor behaves.
A perfect volume is not always about being the loudest.
It’s about finding the right balance where every element in your mix is heard, and the dynamics are controlled.
If you’d like to discover even more mixing mistakes (like valuing volume over balance), we’ve got you covered.
-
Decoding the Compression Effect on an Audio Signal
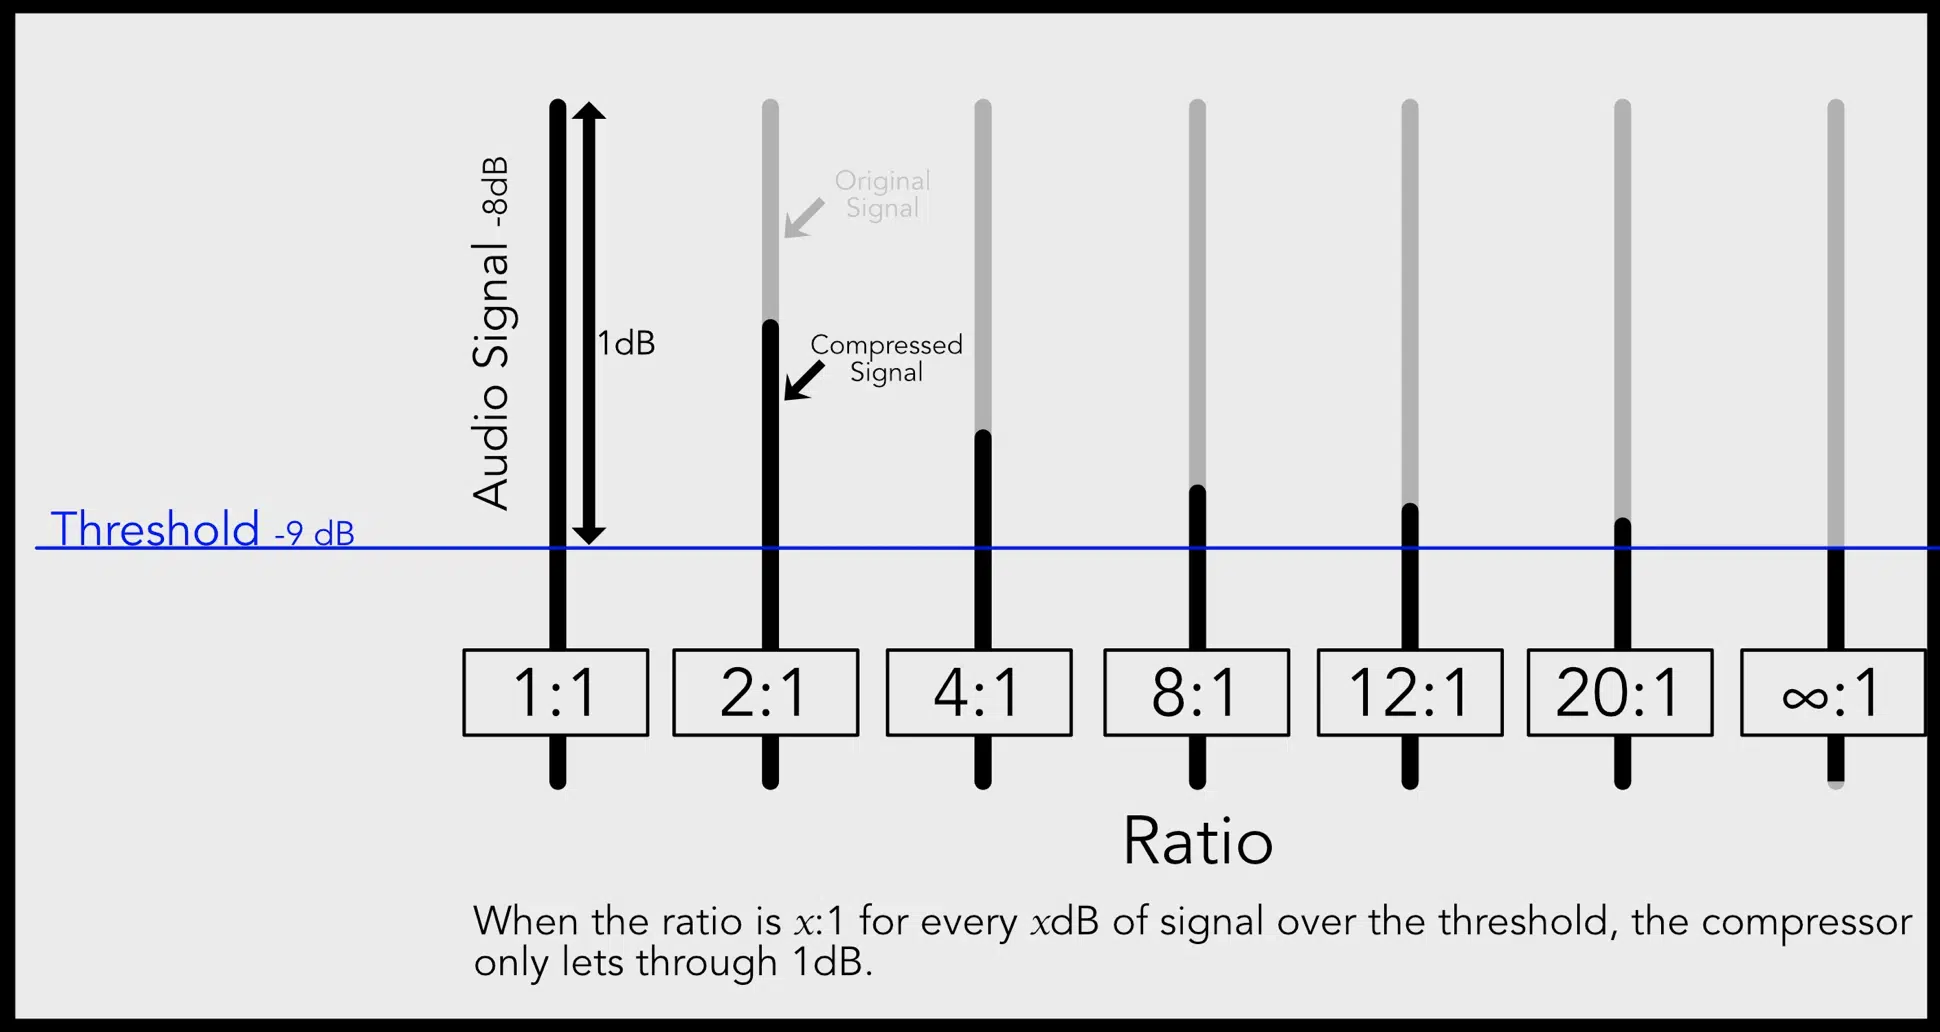
When an audio signal undergoes compression, it’s transformed in various ways.
The overall volume decreases, and the dynamic range (the difference between the loudest and quietest parts) is reduced.
This compression effect can drastically change how your mix sounds.
However, it’s important to remember that not all sounds react the same way to compression.
- Low-frequency sounds (like a bass guitar or kick drum) 一 Can often handle more compression without sounding unnatural.
- High-frequency sounds (like cymbals or vocal sibilance) 一 Might become harsh or overly pronounced with too much compression.
It’s all about understanding the unique balance.
This way, you’ll be able to produce a professional, addicting track.
Practical Guide to Using an Audio Compressor
Now that we’ve unraveled the theory behind audio compression, let’s get our hands dirty and explore the practical aspect of using a compressor.
-
Setting Your Compressor for Mixing
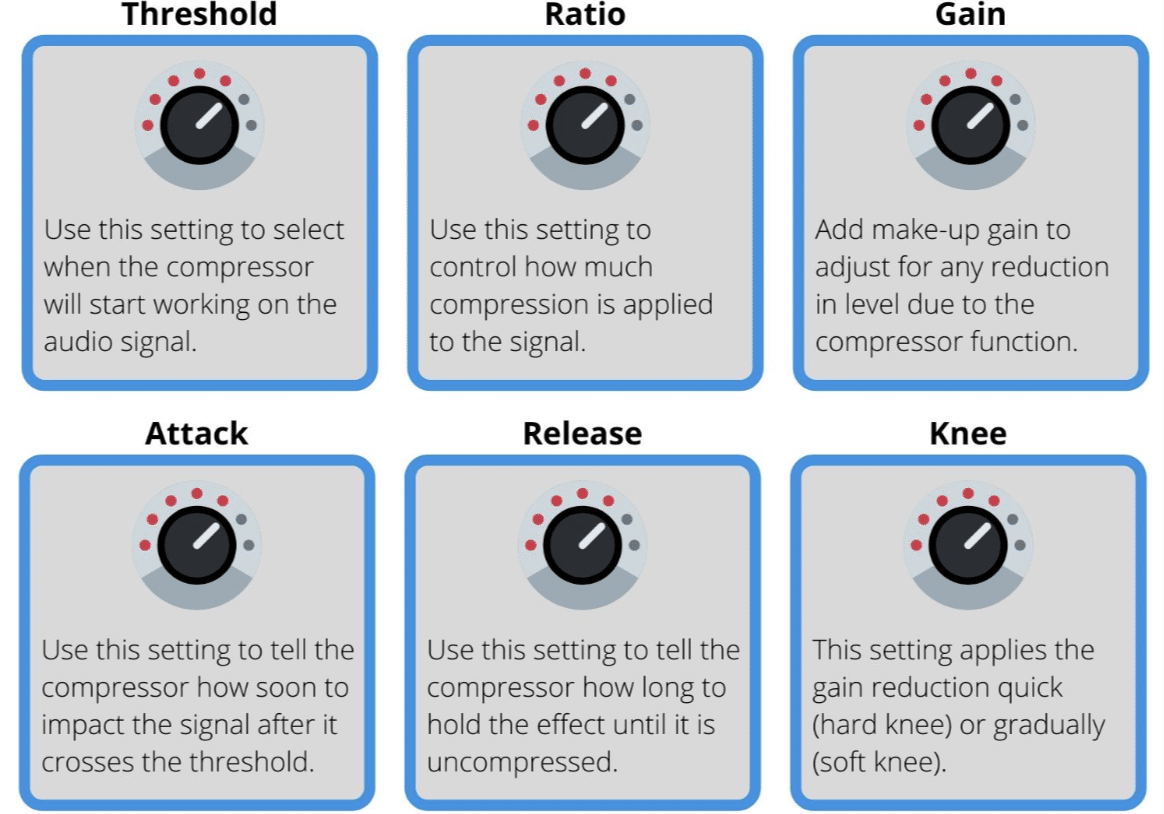
When setting your compressor for mixing, there are a few things you’ll want to ensure are set up correctly, so let’s jump in.
#1. Adjust the threshold and ratio controls.
You’ll want to set the threshold so that the compressor kicks in during the louder parts of your track.
Remember, the ratio control determines how much these loud parts are reduced (a higher ratio results in more compression).
#2. Adjust the attack and release controls to fine-tune how your compressor reacts.
A fast attack is great for controlling sharp, sudden sounds, while a slow attack lets more of the original sound through before compression kicks in.
The release control should be adjusted to suit the rhythm and feel of your music – fast for a quick return to the original volume, or slow for a more gradual release.
#3. Tweak the make-up gain to compensate for the volume lost during compression.
Be sure to constantly A/B your settings, (e,g, compare the compressed and uncompressed sound) to make sure you’re enhancing your mix and not squashing it.
-
Common Types of Compressors You’ll Encounter
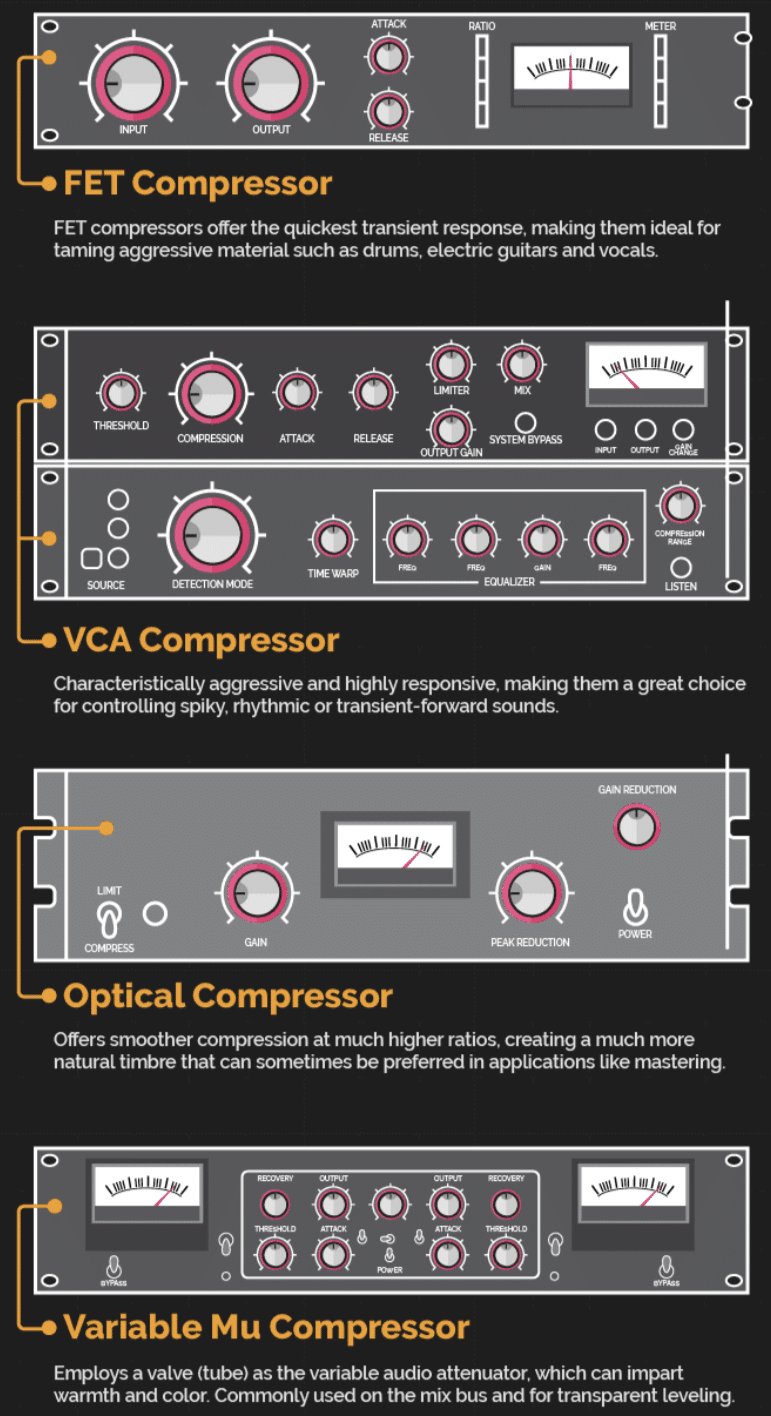
In your journey into audio compression, you’ll encounter several types of compressors, each with their unique characteristics.
The most common types include:
- VCA 一 Known for their precision and versatility; making them a go-to choice for a variety of audio signals.
- Opto 一 Offer a more smooth and more musical compression, ideal for vocals or acoustic instruments.
- FET 一 Great for achieving a punchy and aggressive sound.
- Tube Compressors 一 Provide a warm and vintage tone often sought after in music production.
Becoming acquainted with these types of compressors, and even other types, will seriously help your journey to becoming a compression master.
In fact, we have an article that breaks down each and every single type mentioned, which you can check out here.
-
How to Enhance Your Tracks with Compression
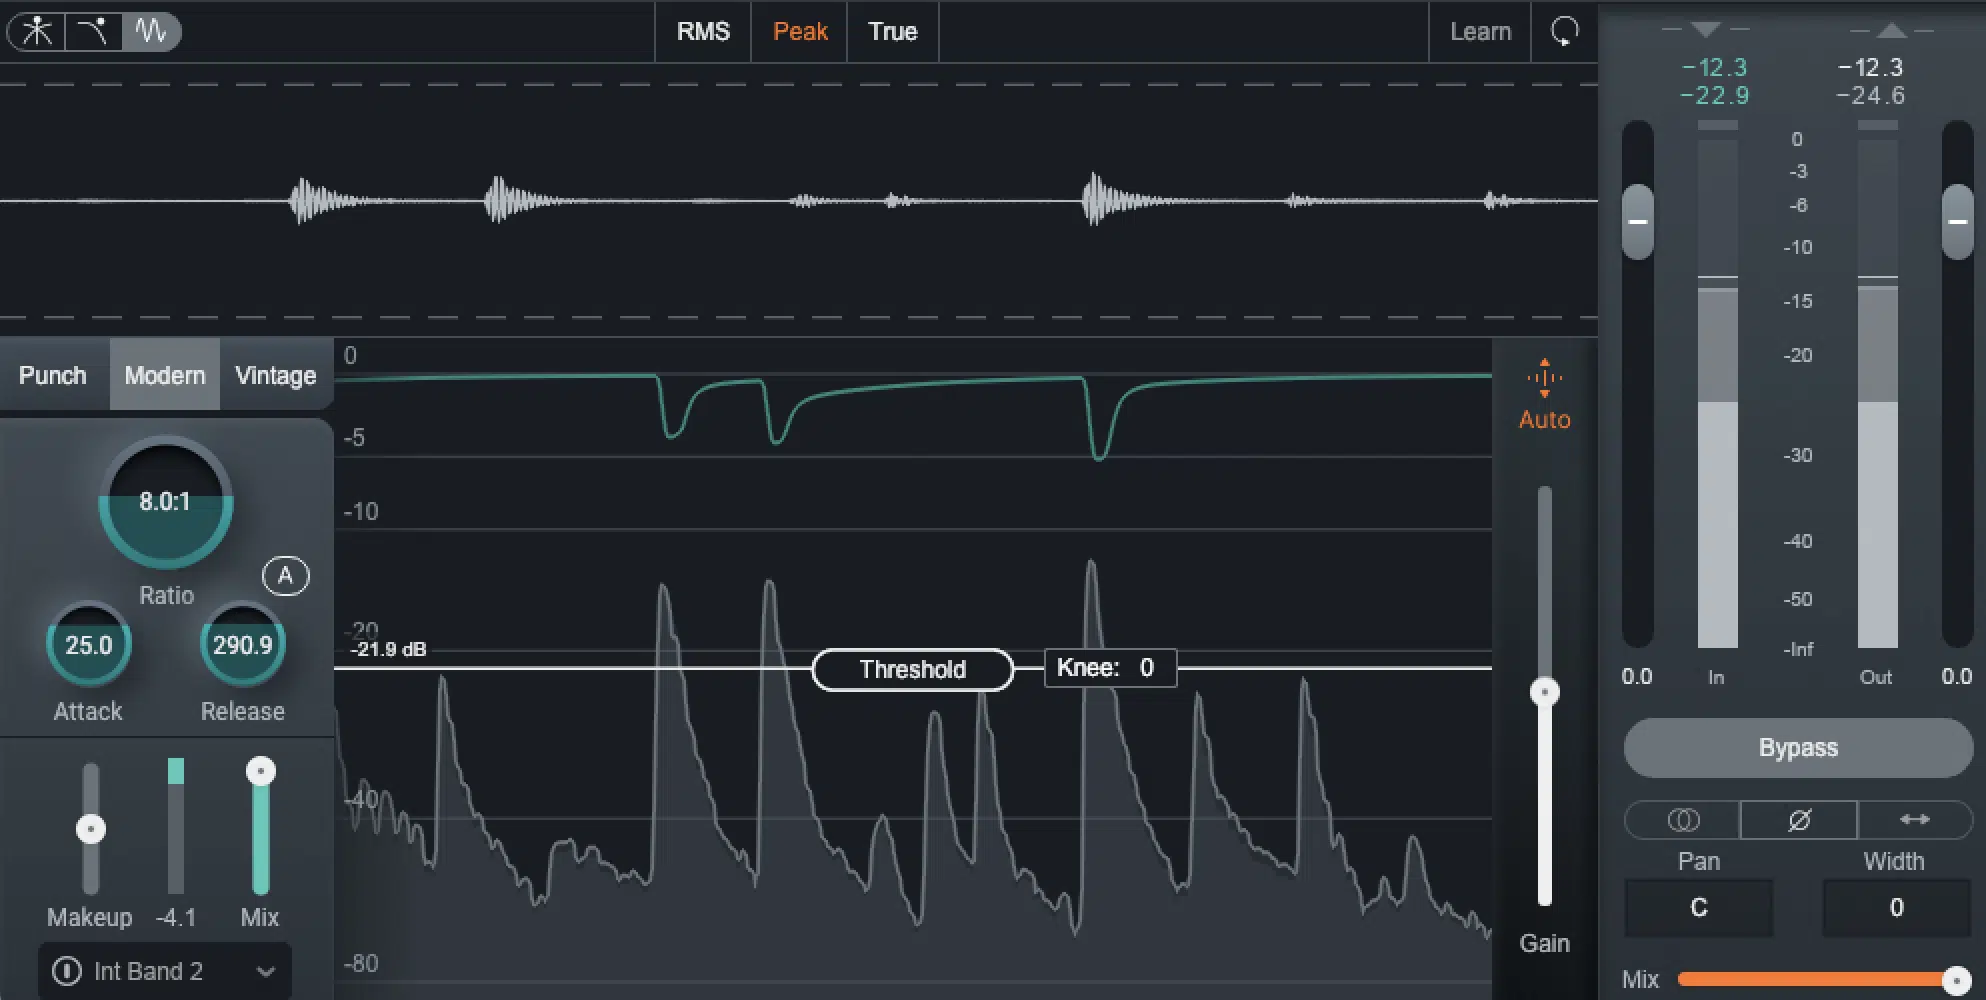
The art of enhancing your tracks with compression lies in subtle touches and careful adjustments.
The goal should basically always be to make your mix sound better, not just louder.
For instance, you can use a compressor to tighten up a drum track by reducing the loud drum hits and boosting the overall level to bring out the quieter details.
On vocals, gentle compression can help control dynamic fluctuations 一 allowing the vocal track to sit well in the mix and sound normal without being too loud or too quiet.
With a compressor, you have the power to:
- Shape your sound
- Add punch
- Control dynamics
- Bring clarity to your mix
Remember, less is often more when it comes to compression.
A heavy-handed approach can lead to an over-compressed, lifeless mix.
Instead, aim for subtle control of your dynamics, and let the natural beauty of your music shine through.
What Does a Compressor Do? Final Thoughts
As you’ve now learned, compression can seriously help make your tracks sound balanced and professional.
It’s a powerful tool in the hands of any digital music producer, especially when it’s used with an understanding of its mechanics and impact on your audio.
But don’t just take my word for it…
To really get a grip on what a compressor does and how it influences sound, it’s beneficial to study and analyze professional templates.
That’s where these professionally crafted, free Famous Beatmaker Templates come into play.
These epic templates provide a comprehensive look into the inner workings of well-structured tracks from the pros.
By using these templates as a reference, you can dissect the use of compression within a professional context.
You can observe and learn how to apply compression, understand how it interacts with other elements in the effects chain, and see firsthand how it contributes to a balanced and high-quality mix.
Remember, just like any tool, a compressor is only as effective as the person using it.
With the knowledge you’ve gained from this article and the insights you’ll acquire from exploring these famous templates, you’re well on your way to harnessing the full potential of compression.
Until next time…


Leave a Reply
You must belogged in to post a comment.