Modulation effects are super powerful tools that can bring life, depth, and movement to any track.
They can add subtle texture, create sweeping transitions, and help shape the stereo image of your sound.
Plus, modulation effects help you achieve that rhythmic pulsing, spatial shifts, and dynamic interplay between elements that people go crazy for.
As producers, learning all about different modulation effects can seriously enhance your mixes 一 giving you more control over how each element interacts and stands out.
That’s why I’m breaking down everything you need to know, like:
- What modulation means ✓
- Rate control, depth adjustments & feedback options ✓
- LFO sync settings ✓
- Delay time variation ✓
- Stereo width manipulation ✓
- Phase shifting ✓
- Amplitude modulation ✓
- Pitch modulation ✓
- Panning effects ✓
- Envelope modulation ✓
- All important modulation effects (e.g., chorus/vibrato effects) ✓
- Advanced tips for using audio effects ✓
- Much more ✓
After this article, you’ll know about all the most essential modulation effects, from tremolo and chorus to flanger and ring modulation.
As well as how to apply each one in your tracks like an absolute boss.
You’ll also learn some advanced techniques for layering and syncing effects to add even more depth and precision (can you say show-stopping).
With these skills, your tracks will always sound dynamic, engaging, and professional.
Table of Contents
What are Modulation Effects Exactly?
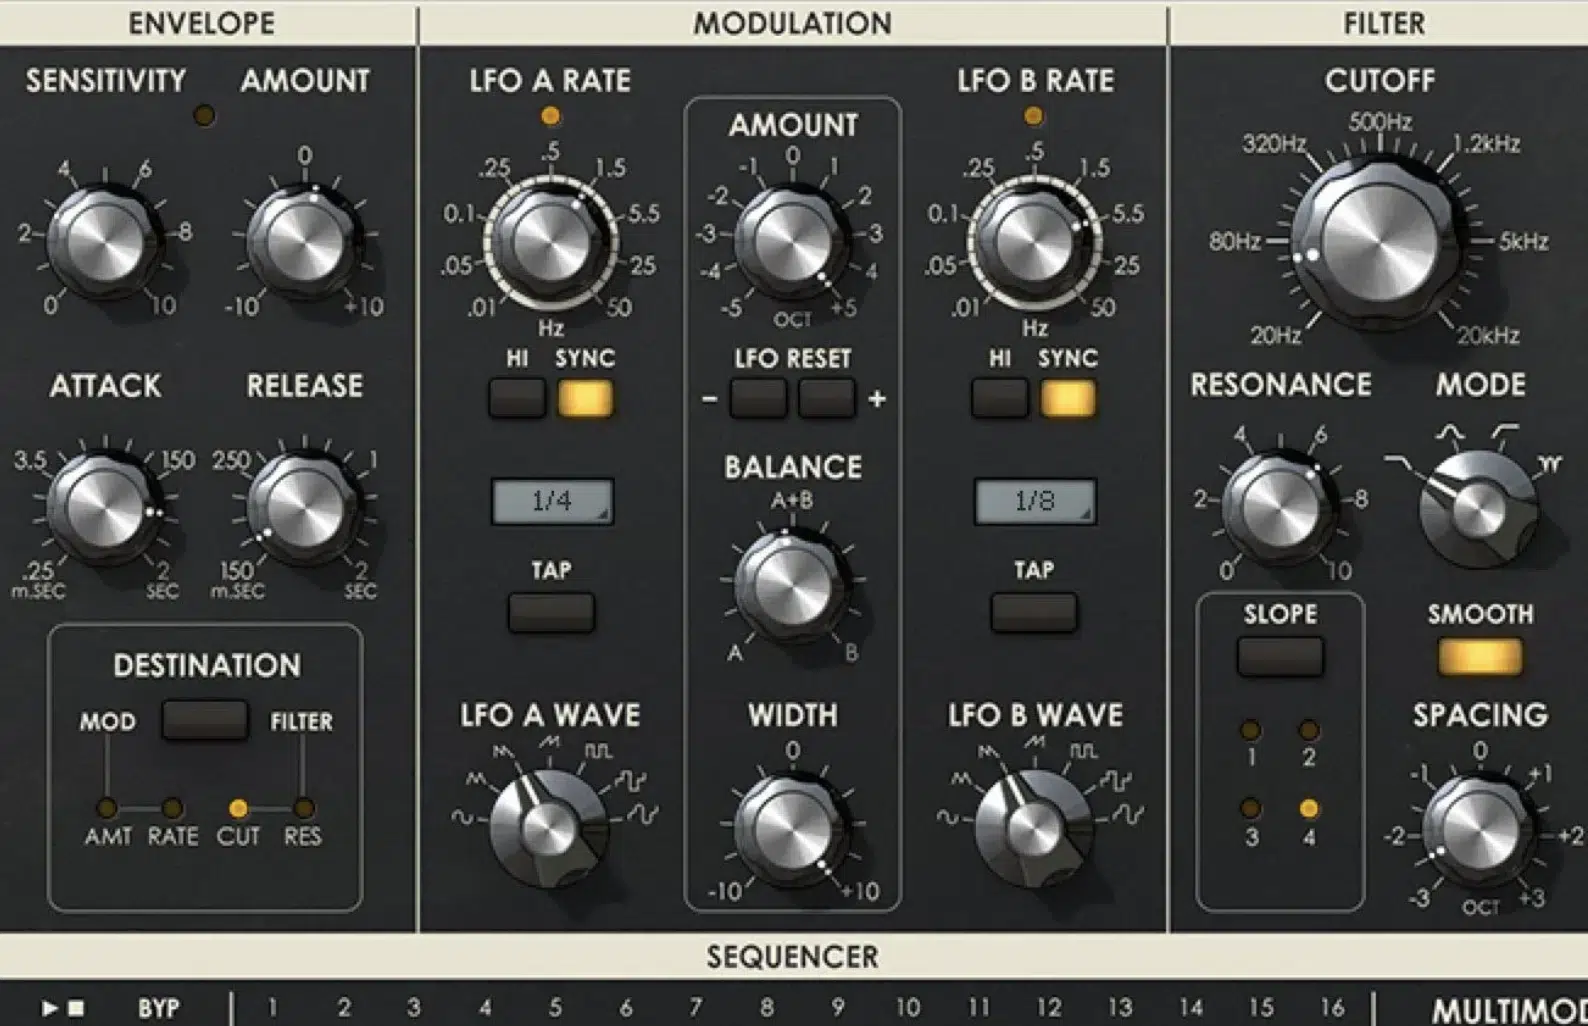
Modulation effects can completely shape and transform your audio by altering parameters over time, like:
- Amplitude
- Pitch
- Frequency spectrum
It adds unmatched movement and complexity to your sounds that really shine.
Whether you’re using a chorus effect for stereo width, a vibrato effect for subtle pitch modulation, or a flanger effect to create sweeping textures, each modulation effect brings its own character to the mix.
They all rely on modulating a specific part of the audio signal (often with controls for rate, depth, and feedback) to let you fine-tune the resulting sound.
Many modulation effects, like tremolo effects or phaser effects, use a low-frequency oscillator (LFO) to create rhythmic changes that sync with your track’s tempo.
This creates a cohesive groove that is out of this world.
Honestly, if you want to make it as a producer in the music business, you’ve got to know about all different modulation effects.
But don’t worry, that’s exactly what we’re breaking down today, in detail, throughout the article 一 by the end, you’ll have a super solid understanding.
Key Concepts of Modulation
Before we break down the actual modulation effects themselves, it’s very important you know all about the key concepts. Understanding these basics will make it easier to see how each modulation effect brings something unique to your sound. So, let’s dive in.
-
Understanding Carriers and Modulators
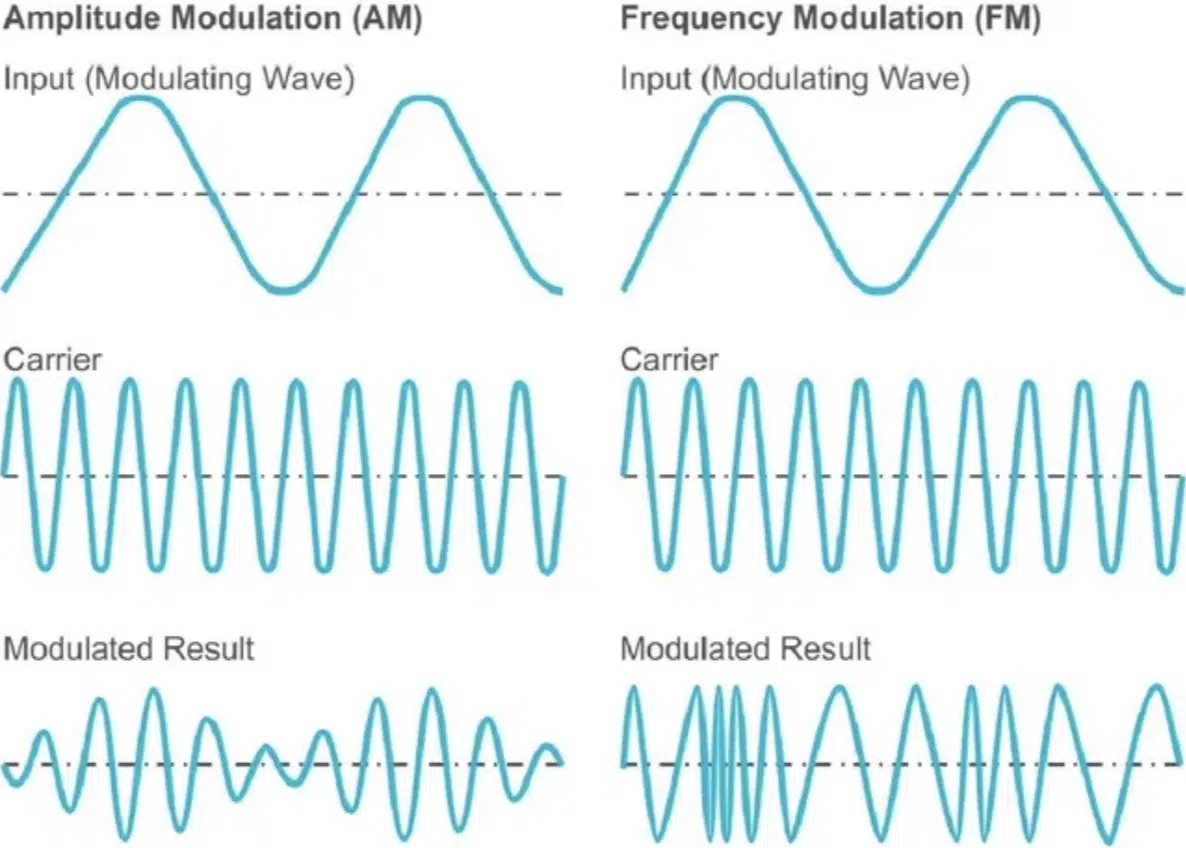
When it comes to modulation, you have two main components:
- The carrier signal
- The modulator
#1. The carrier is typically the audio signal you’re working with… Think of it as the “main” sound or source signal you want to manipulate.
This might be a synth line, vocal, or guitar riff that is the foundation of your modulation effect.
In other words, the carrier is the sound you want to shape, but on its own, it’s static and doesn’t have the movement or dynamic changes you’re aiming for.
For example, if you’re working with a steady synth pad, the carrier signal is the raw sound you’ll be applying modulation to in order to make it more epic or textured.
Bottom line, the carrier wave defines the original character and tone of the sound, which will be manipulated by the modulator.
#2. The modulator, on the other hand, is what controls the change 一 introducing shifts in amplitude, pitch, or other parameters.
It doesn’t usually produce sound on its own but instead applies its motion to the carrier, which alters the carrier’s characteristics over time.
The modulator can be set to different rates and depths to determine how intense or subtle the modulation effect will be, pretty straightforward.
For example, in amplitude modulation (tremolo effect), the modulator repeatedly raises and lowers the volume of the carrier signal 一 creating that sick rhythmic pulsing.
When modulating pitch, as in a vibrato effect, the modulator gradually raises and lowers the pitch of the carrier signal to create a “wobbling” feel.
In some modulation effects, the modulator directly manipulates the carrier wave, adjusting its shape and movement to create unique textures.
This interaction gives modulation effects their distinctive “movement” and dynamic shifts which, in turn, shapes the overall mood of your sound.
Just remember that different modulator frequencies create either subtle or dramatic effects, depending on the parameters you set and how the modulator interacts with the carrier wave.
-
Low-Frequency Oscillators (LFOs)
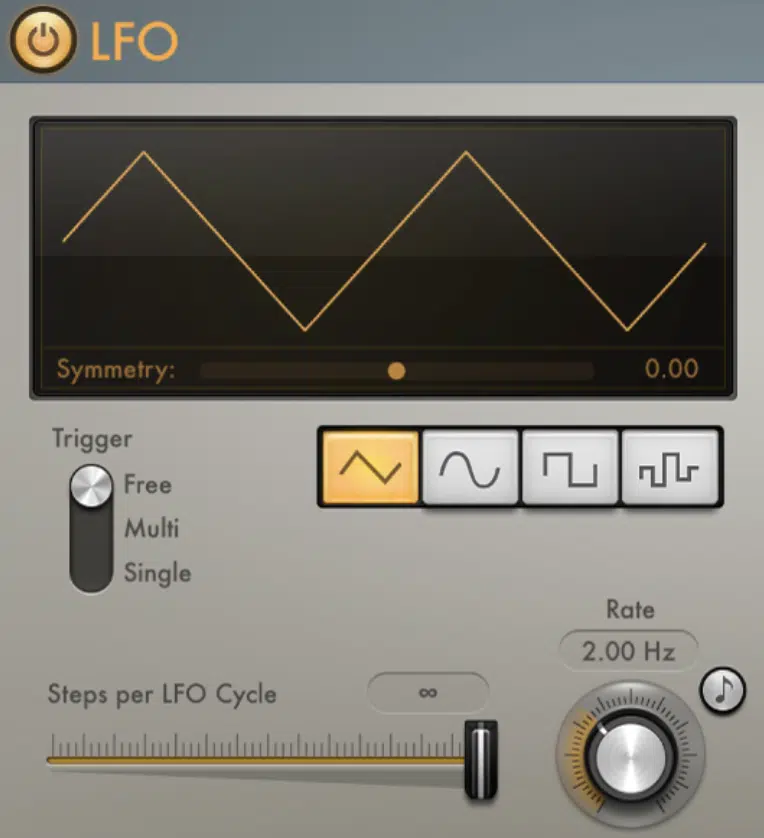
Low-Frequency Oscillators (LFOs) are the heartbeat of modulation effects, so to speak.
Operating at frequencies typically below 20 Hz, they’re used to modulate aspects of the carrier signal like pitch, volume, or pan without creating an audible tone of their own.
Think of them as mechanics… working ‘under the hood’ to add subtle or dramatic movement to the carrier signal.
With modulation effects like chorus or vibrato, LFOs allow you to control how quickly (rate) and deeply (depth) these effects interact with the audio signal.
For example, setting a slow rate (around 0.5-1 Hz) on an LFO controlling pitch modulation, you get a slow, evolving wave that can add an almost orchestral quality.
For a faster, rhythmic effect, like in a tremolo or auto-pan, set the rate between 4-8 Hz and adjust the depth to around 50-70%.
You’ll find LFO rate and depth parameters on modulation pedals or plugins, so you can dial in anything from subtle shifts to sweeping changes in your sound, no problem.
In our DAW, LFOs give us that added layer of control 一 creating that “pulsing” or “shimmering” effect that people are almost addicted to.
NOTE: Try experimenting with waveform shapes.
A triangle wave provides smooth, cyclic movement, while a square wave produces abrupt, staccato-like changes, perfect for adding edge to rhythmic elements.
By using DAW automation or a MOD wheel you’re able to adjust the LFO rate or depth in real-time, so don’t be afraid to go crazy.
-
Key Parameters: Rate, Depth, and Waveform Shapes
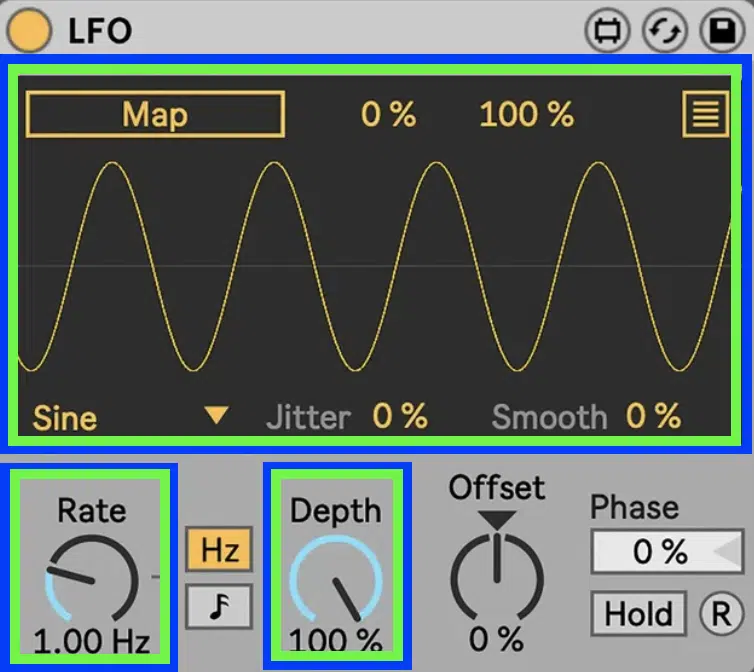
When it comes to modulation, three main parameters shape the outcome: rate, depth, and waveform as we already talked a lot about, but let’s just sum it up real quick.
#1. Rate controls the speed at which the modulation occurs.
In effects like the vibrato or tremolo effect, adjusting the rate gives you anything from a gentle sway to a rapid, stuttering pulse.
#2. Depth determines the intensity of the modulation, so a high depth setting makes the effect more pronounced.
A lower depth, on the other hand, can create a subtle, almost subliminal motion.
#3. Waveform shapes (whether they’re sine, square, triangle, or sawtooth) define the overall character of the modulation’s motion.
A sine wave offers smooth, cyclical changes, while a square wave gives a more abrupt, on-off quality 一 the one you chose boils down to what you’re aiming for.
For example, using a triangle wave in a chorus effect can produce a smooth, spacious feel, whereas a square wave in amplitude modulation can create an edgy chop.
By experimenting with these parameters, you can create a modulation effect that complements your specific sound design goals.
3 Main Types of Modulation Synthesis (Quick Rundown)
Before diving into specific modulation effects, you first have to understand the primary types of modulation synthesis. Each of these are the foundation for the unique effects we’ll explore, so let’s break it down.
-
Amplitude (AM)
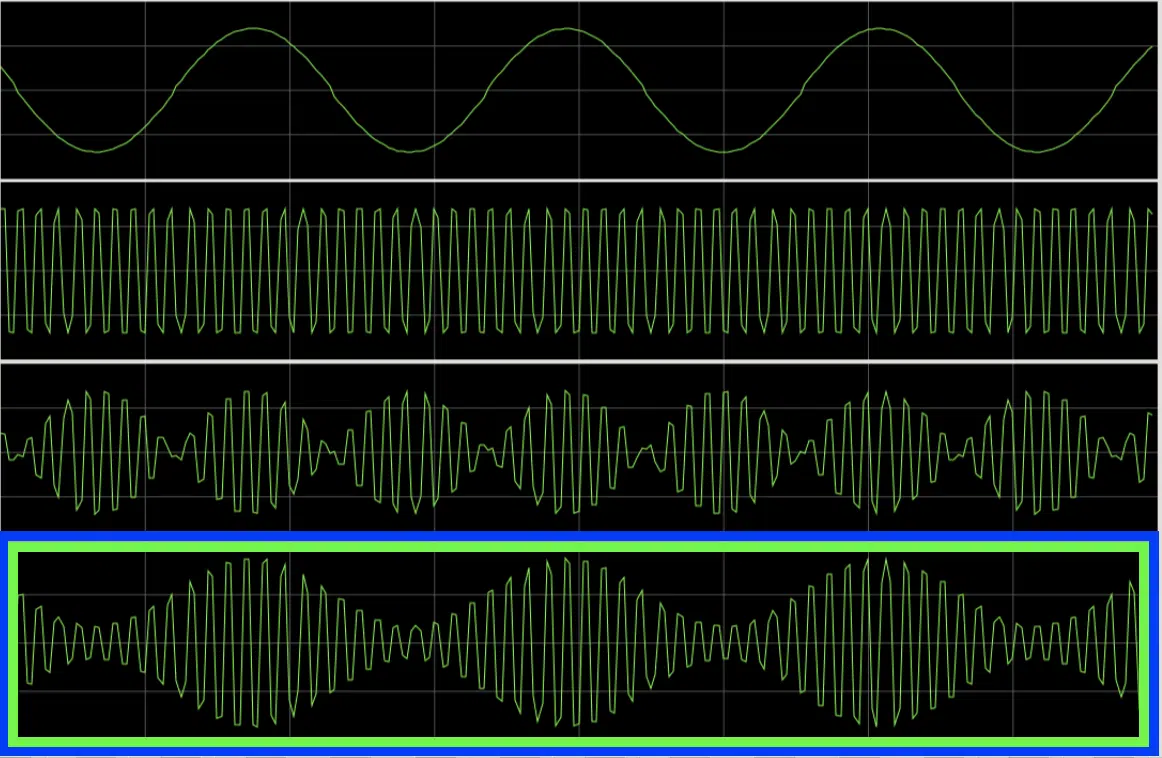
Amplitude modulation (aka volume modulation) changes the volume of the carrier signal over time.
By adjusting the amplitude, this type of modulation creates rhythmic pulses, from subtle to intense, depending on the rate and depth settings.
Tremolo is a classic example of amplitude modulation 一 it continuously raises and lowers the volume to give a sense of movement without altering pitch.
This is great for adding rhythm and dynamics, especially on pads or synths.
-
Frequency (FM)
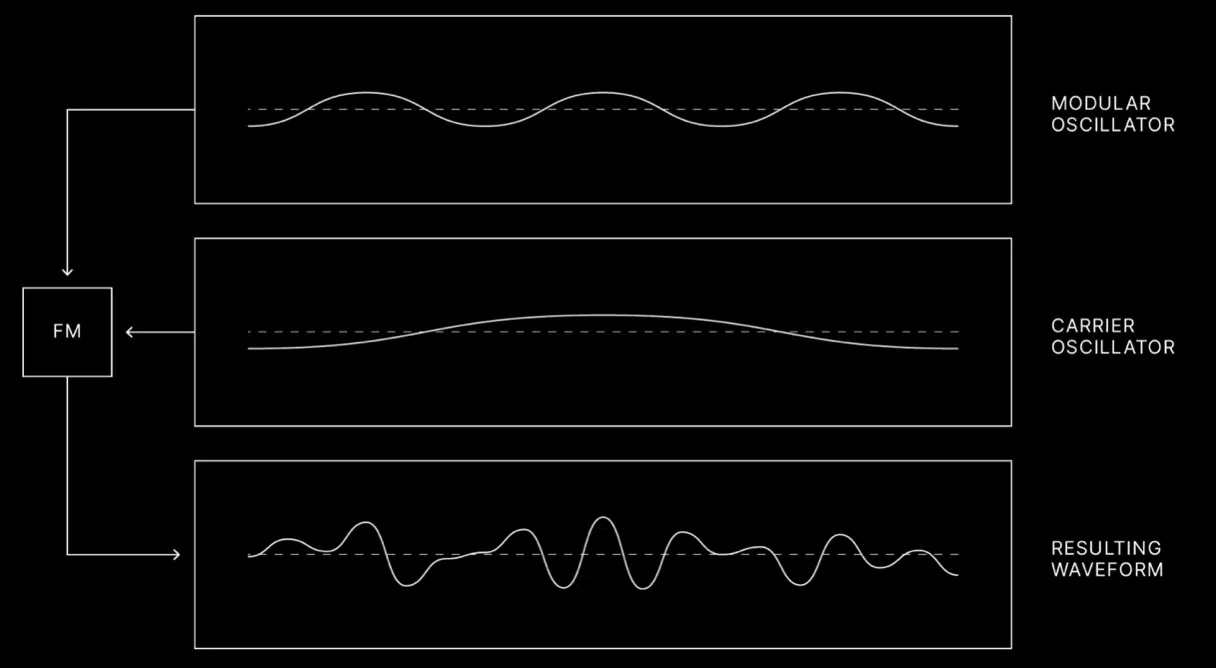
Frequency modulation (aka pitch modulation) varies the pitch of the carrier signal in a wave-like motion.
This creates a “wobble” effect, where the pitch shifts up and down 一 providing a sense of vibrato or natural fluctuation.
For example, vibrato uses frequency modulation to achieve a super expressive sound similar to how a singer or instrumentalist naturally wavers on a sustained note.
Adjusting the rate and depth allows for anything from a subtle pitch shift to a dramatic, oscillating effect (it’s all about the exact vibe you’re going for).
-
Phase
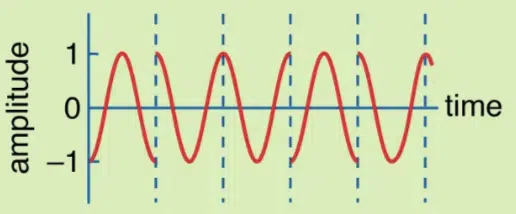
Last but not least, phase modulation adjusts the timing of the carrier wave’s phase, which alters how the wave cycles interact with each other.
Unlike frequency modulation, phase modulation doesn’t directly change pitch, but instead affects the relationship between waves to create a sweeping/swirling motion.
The phaser effect uses phase modulation to create notches in the frequency spectrum, producing that iconic, evolving “whooshing” sound that I and millions of other producers love working with.
Phase modulation is ideal for adding depth and motion, especially on guitars or synths.
Breaking Down the Most Essential Modulation Effects
Now that we covered the basics, it’s important to understand how each unique one shapes your sound, of course. So, let’s break down the most important modulation effects for unmatched depth, movement, and character to your tracks.
#1. The Tremolo Effect (Amplitude Modulation)
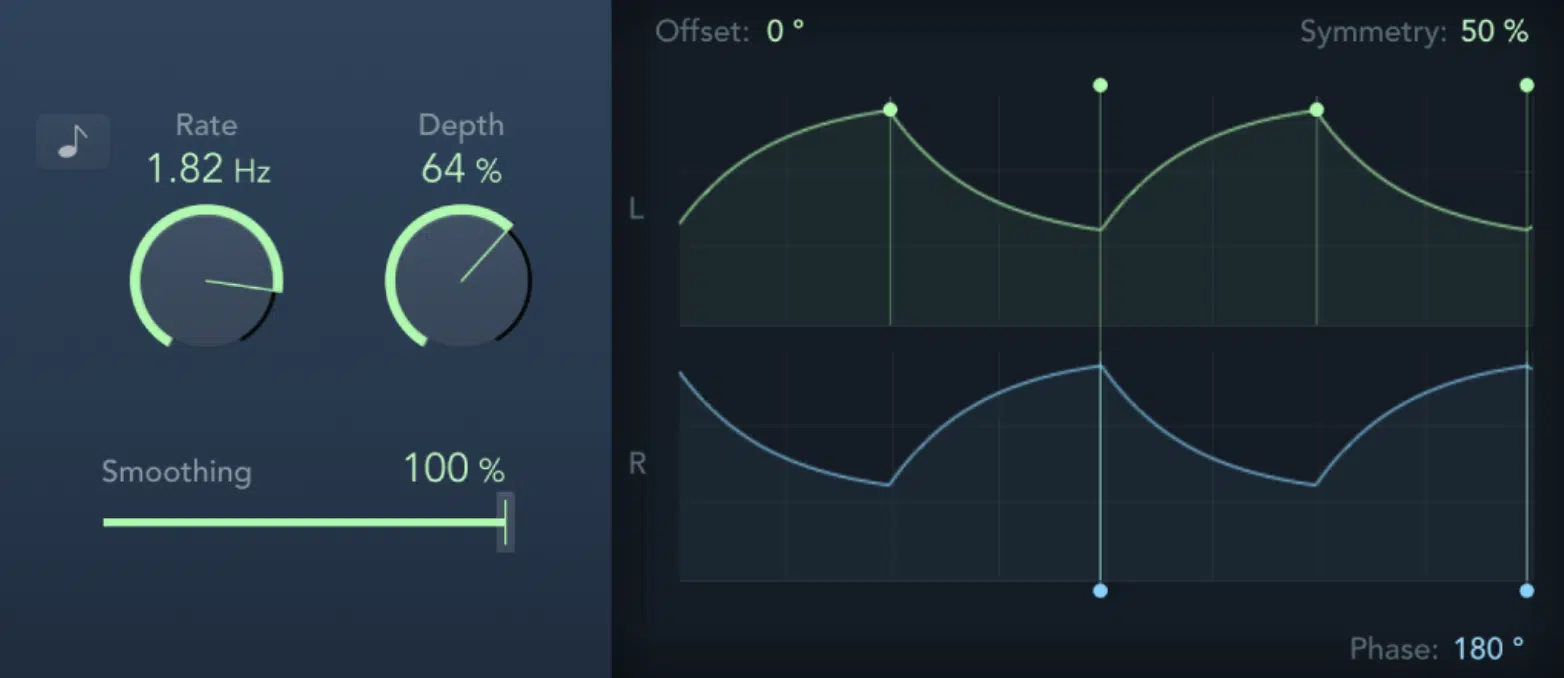
Tremolo effects are all about amplitude modulation, where the volume of the sound fluctuates in a controlled pattern to create a pulsing sensation.
If you’re working with a synth pad and want to add movement subtly, try setting the rate to around 4 Hz and depth at 20-30% to create a gentle, flowing feel.
For more intensity, bump the depth up to 70% and the rate to 8-10 Hz to get that choppy, almost stuttering effect.
This is super popular in EDM breakdowns or when building tension in any genre.
Personally, I love adding a touch of stereo width with tremolo by setting up a panning tremolo that bounces the signal between left and right.
It really livens up the stereo image, big time.
You can also get creative by automating the tremolo rate in your DAW 一 gradually speeding up or slowing down the pulse to create a dynamic rise/fall in energy.
Remember, different speeds make all the difference.
Just be cautious with heavy tremolo on lead vocals. It can distract from the clarity, so a lower depth (around 10-15%) is usually best; you don’t want things to get distorted.
And if you’re after that warm, vintage tremolo, try a plugin that emulates tape machines for an ethereal, more organic sound.
#2. Vibrato Effects (Pitch Modulation)
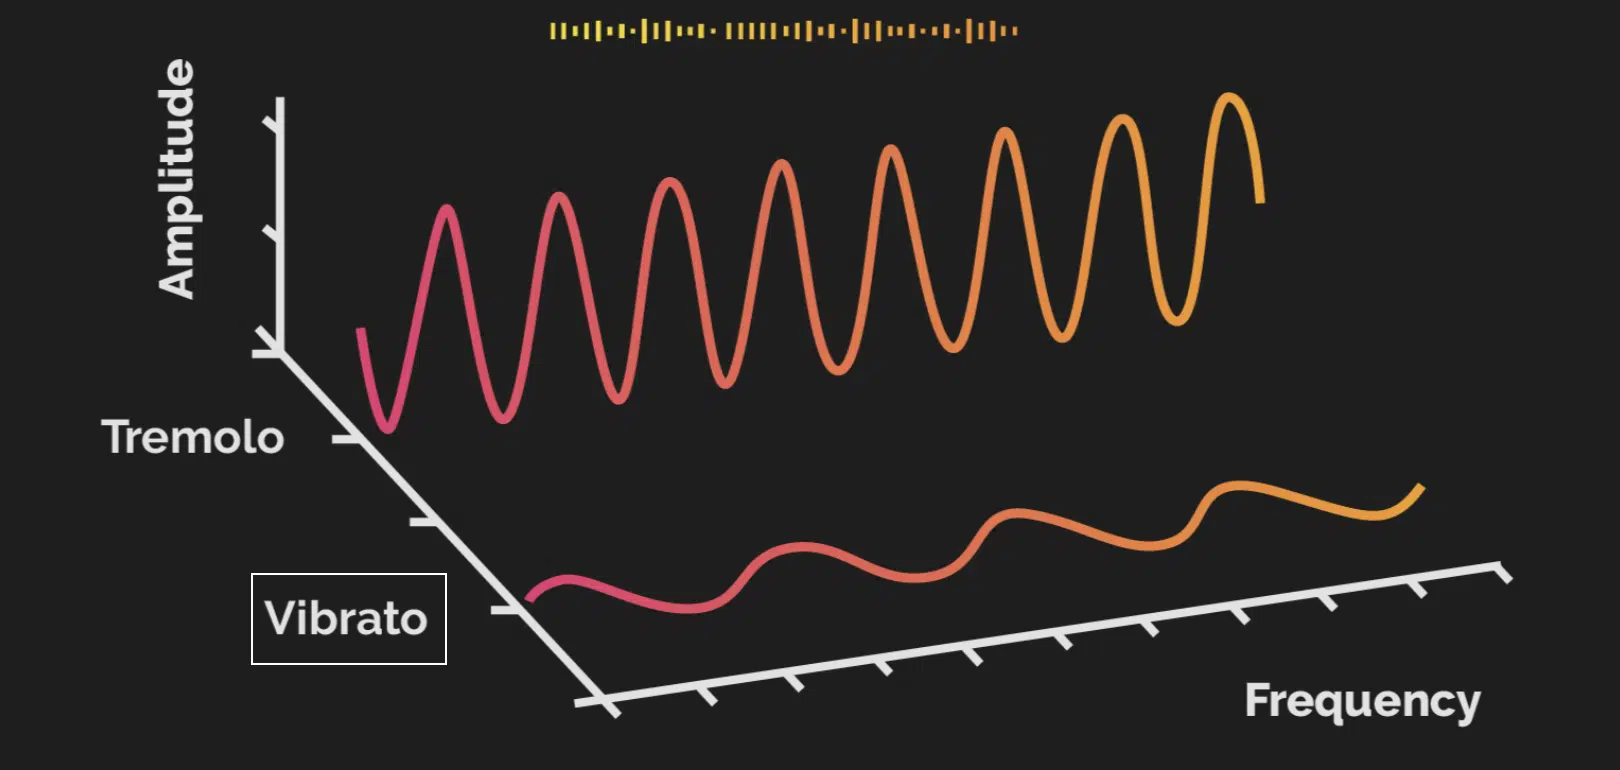
Unlike the tremolo effect, which modulates volume, the vibrato effect focuses on pitch modulation, where the pitch of the audio signal shifts up and down.
This is done in a super smooth, wave-like motion.
This gives a more melodic, “wobbling” quality, which is perfect for adding emotional movement without affecting amplitude.
I like to set the rate between 3-5 Hz with a depth of around 15-20% to add just enough character without overshadowing the original pitch.
For a more pronounced vibrato on guitar or keys, try a depth of 40-50%, which brings out that classic, expressive feel perfect for solos or lead sections (super human-like).
Adding a vibrato effect to your sound source can also bring a sense of realism because it mimics the subtle pitch fluctuations you’d get from a live instrument.
If you’re using a modulation pedal or an LFO, syncing the vibrato rate to the tempo of your track can create a fluid/clean rhythm that enhances the groove even more.
For more experimental textures, layer a vibrato effect with a slower, wide-panning chorus effect.
The combination creates a dreamy, lush sound that fills out the stereo image.
NOTE: If you’re looking to build intensity in a breakdown or bridge, use automation to gradually increase the vibrato depth in your modulation section.
This will bring some serious drama as the modulation effect intensifies.
-
Pro Tip for Live Musicians
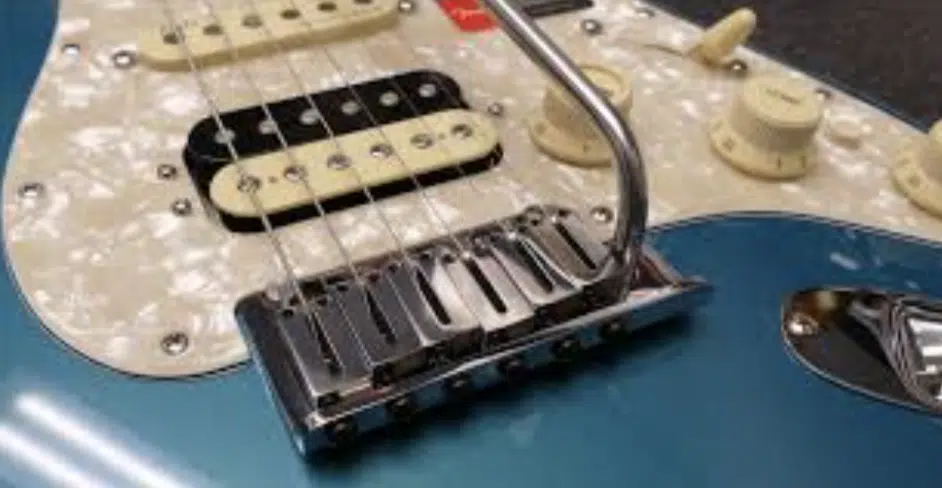
To create a dynamic, evolving sound that mimics the cyclic nature of a Doppler shift, try using a tremolo arm on your guitar to create subtle pitch bends.
When combined with a guitar effect like a phaser or flanger, this technique adds a “moving” quality similar to how radio waves fluctuate in and out of range.
Run the effected signal through guitar amplifiers to add warmth/richness 一 amplifying the sense of movement perfectly.
This works especially great for atmospheric or psychedelic genres because it helps you achieve an immersive sound that feels like it’s moving through frikkin’ space.
#3. Chorus Effect
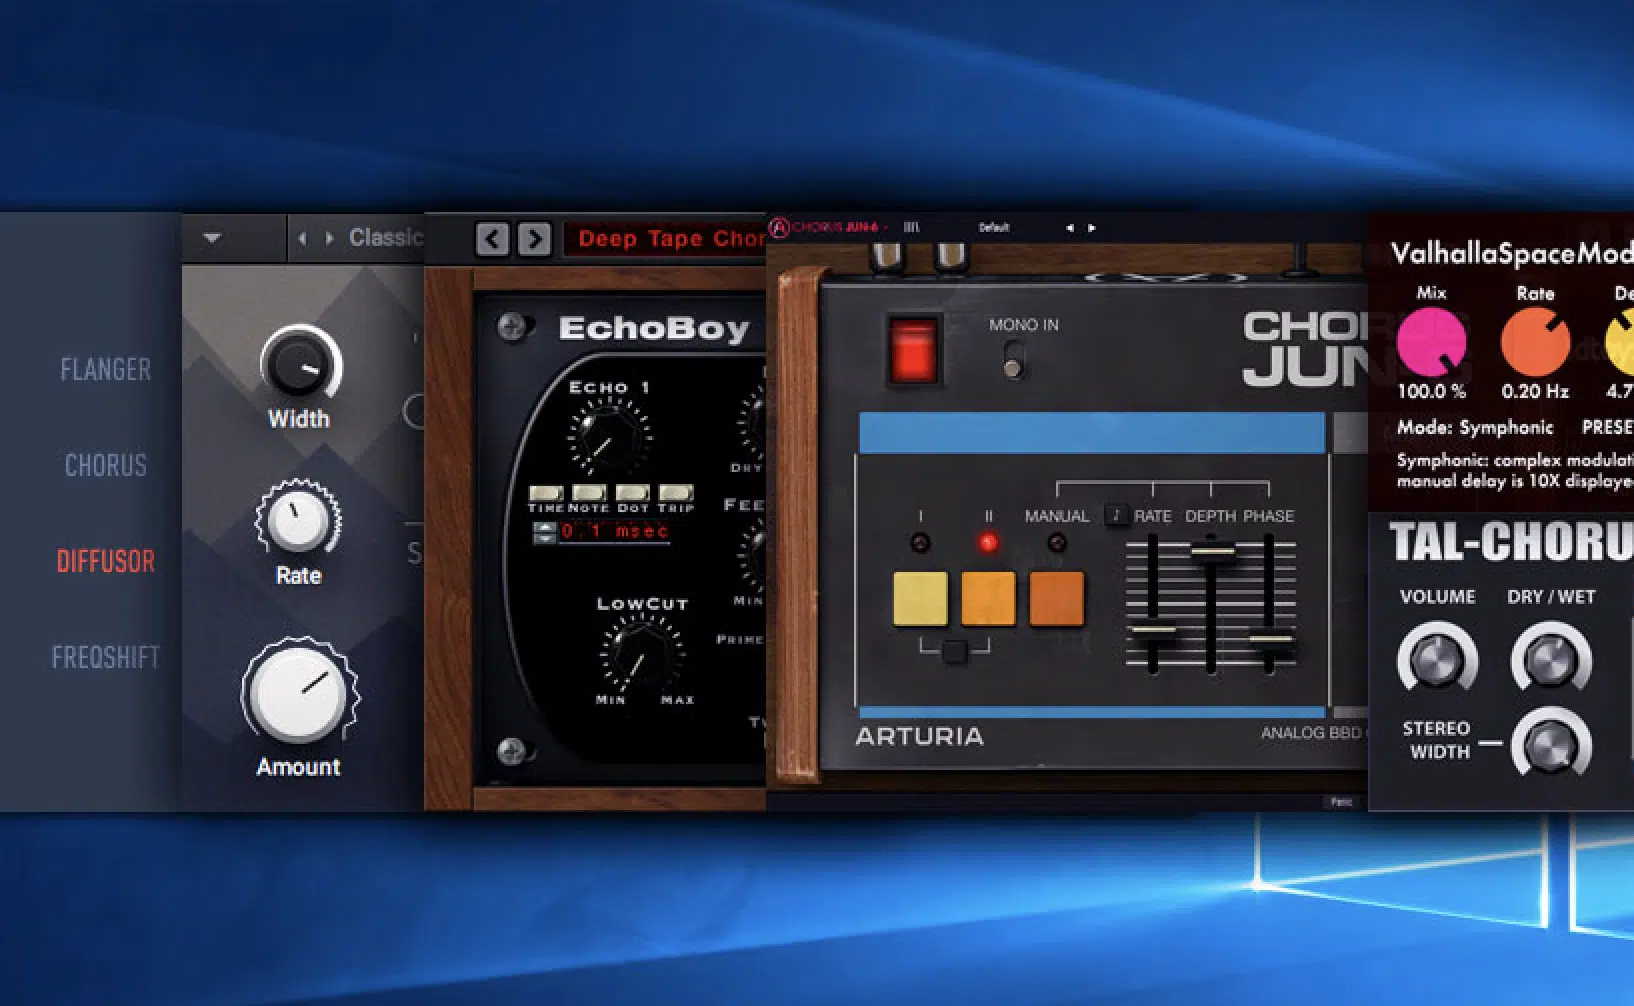
The chorus effect is an OG when it comes to widening sounds by duplicating the original signal 一 detuning and delaying it slightly to give that lush, layered vibe.
When I want a subtle chorus effect on vocals, I set the delay time around 20 ms and depth at 15%, which creates a light doubling effect that sits smoothly in the mix.
For synths (especially pads) try a depth of 40-50% and a delay time around 30 ms. This creates a thick, enveloping sound that’s great for adding warmth and presence.
If you’re after an ‘80s-inspired vibe, set the rate to 0.5 Hz for that slow, sweeping motion which you’ll hear all the time in synthwave or retro-pop tracks.
Chorus pedals and plugins are fantastic for dialing in specific characteristics…
I’d recommend experimenting with feedback control to add extra resonance, especially on low-frequency synths.
Personally, I like using a stereo chorus plugin for wider sounds 一 setting the left and right channels slightly offset to create a more immersive stereo image.
And for a classic analog chorus sound, check out pedals like the Electro-Harmonix Electric Mistress. It’s one of my go-tos for adding character to electric guitar lines.
-
Pro Tip
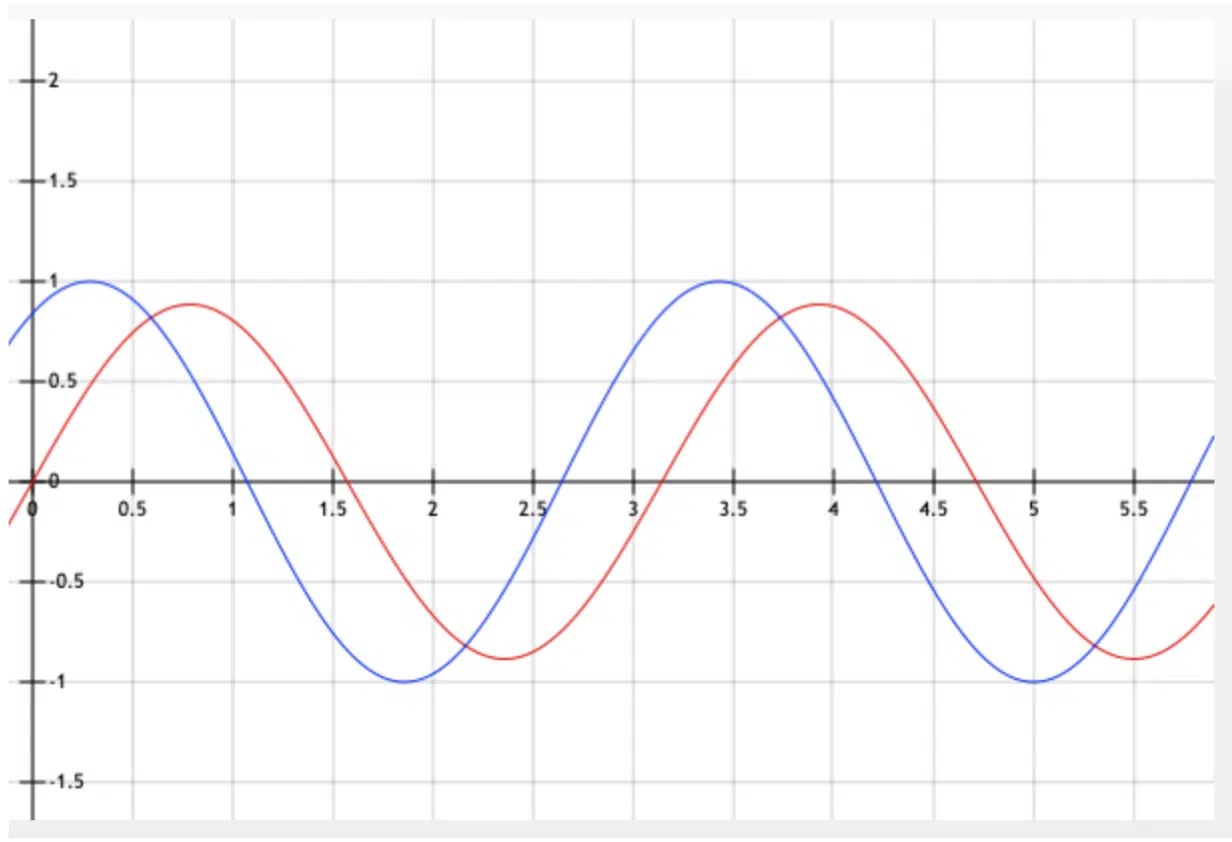
When blending chorus/vibrato effects, there is one main difference to keep in mind.
And that is: chorus uses a shorter delay to create its widening effect, whereas vibrato directly modulates pitch.
For precise control, map your MOD wheel to the rate or depth of the effect. This way, you can gradually blend the clean signal with the effect.
Using the MOD wheel here allows you to adjust the intensity in real-time 一 letting you dial in anything from a subtle layer to a more pronounced sound.
Remember, since most modulation effects respond well to dynamic adjustments, this works perfectly for adding expressive control to your track.
#4. Flanger Effect
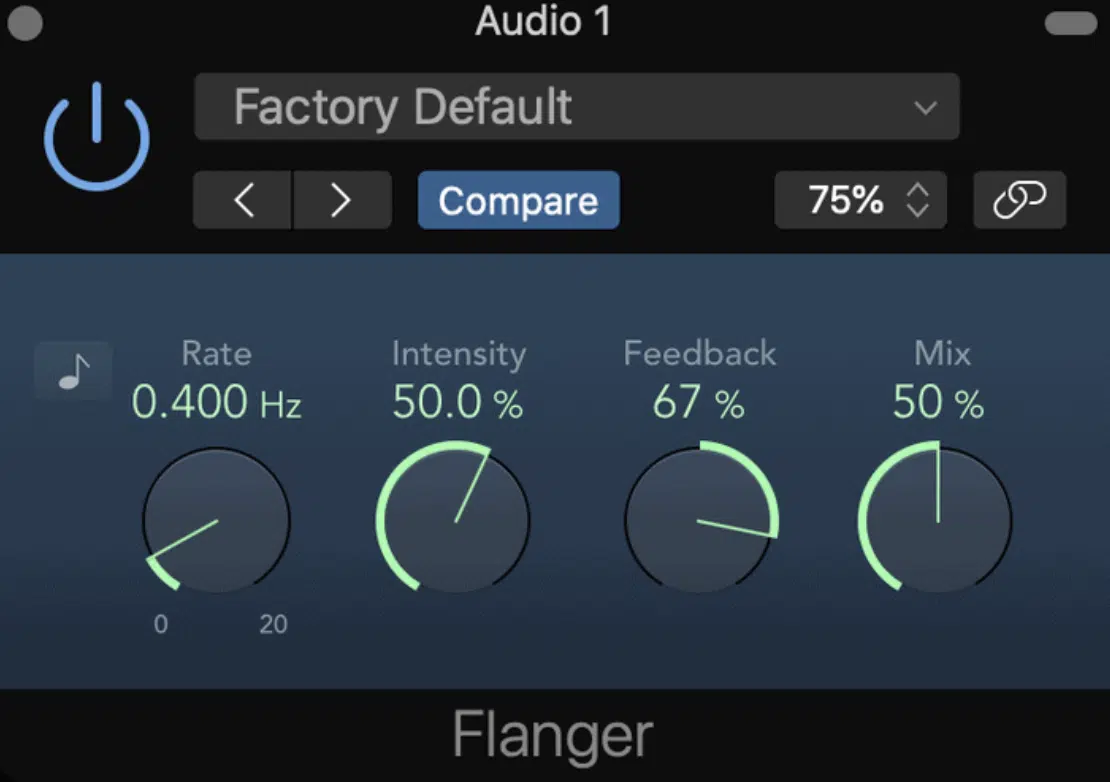
The flanger effect creates this cool, sweeping, kind of jet-like sound by blending the original signal with a slightly delayed version of itself.
To dial in a subtle flange on drums or guitar, start with a delay time of around 1-5 ms and set the depth to around 20%.
This creates a light, sweeping texture that doesn’t overpower the dry signal.
For a more intense flanger effect, increase the depth to 50% and set the rate between 0.2-0.5 Hz for that slow, spacey swirl that’s ideal for build-ups/breakdowns.
I often play with the feedback control (set it around 30-40%) to create more resonance and a metallic tone, which is perfect for all electronic genres honestly.
Personally, I love using flanger on synth pads, setting the rate slow and the feedback high because it makes the pad sound like it’s swirling/evolving across the stereo field.
It will almost hypnotize your audience it’s so awesome.
And if you want to push it further, try adding a slight delay to the modulated delay itself to add a layered depth to the flanger, which can really fill out a mix nicely.
#5. Phaser Effect

Phaser effects work by splitting the audio signal and sending part of it through an array of all-pass filters, which phase-shift the signal.
It too creates that signature swirling effect I was talking about.
This phase-shifting is what gives phasers their distinctive, moving “swish” as different frequencies interact and cancel out along the audio signal path.
For a classic phaser effect on guitars, set the rate around 0.5-1 Hz and depth at 30%, which will give a subtle but intriguing sweep, great for adding warmth to clean tones.
If you’re looking for a deeper, more psychedelic sound, bump the depth up to 60% and set the feedback control between 20-40%.
This successfully introduces more in-your-face notches in the frequency spectrum.
I typically use a slower rate (around 0.3 Hz) on synths to create a wide, atmospheric sweep that sits beautifully in ambient or downtempo tracks.
Another trick is to use a phase shifter with a modulated delay…
This combination adds a rhythmic movement that shifts with the beat, which is perfect for modern electronic or house music.
I like to use DAW automation to adjust the feedback and depth over time, giving the phaser a constantly evolving texture that keeps the listener engaged.
NOTE: If you’re not sure what all-pass filters are, they’re just filters that shift the phase of certain frequencies without changing their amplitude.
They let phasers create notches in the frequency spectrum, basically.
#6. Ring Modulation Effect
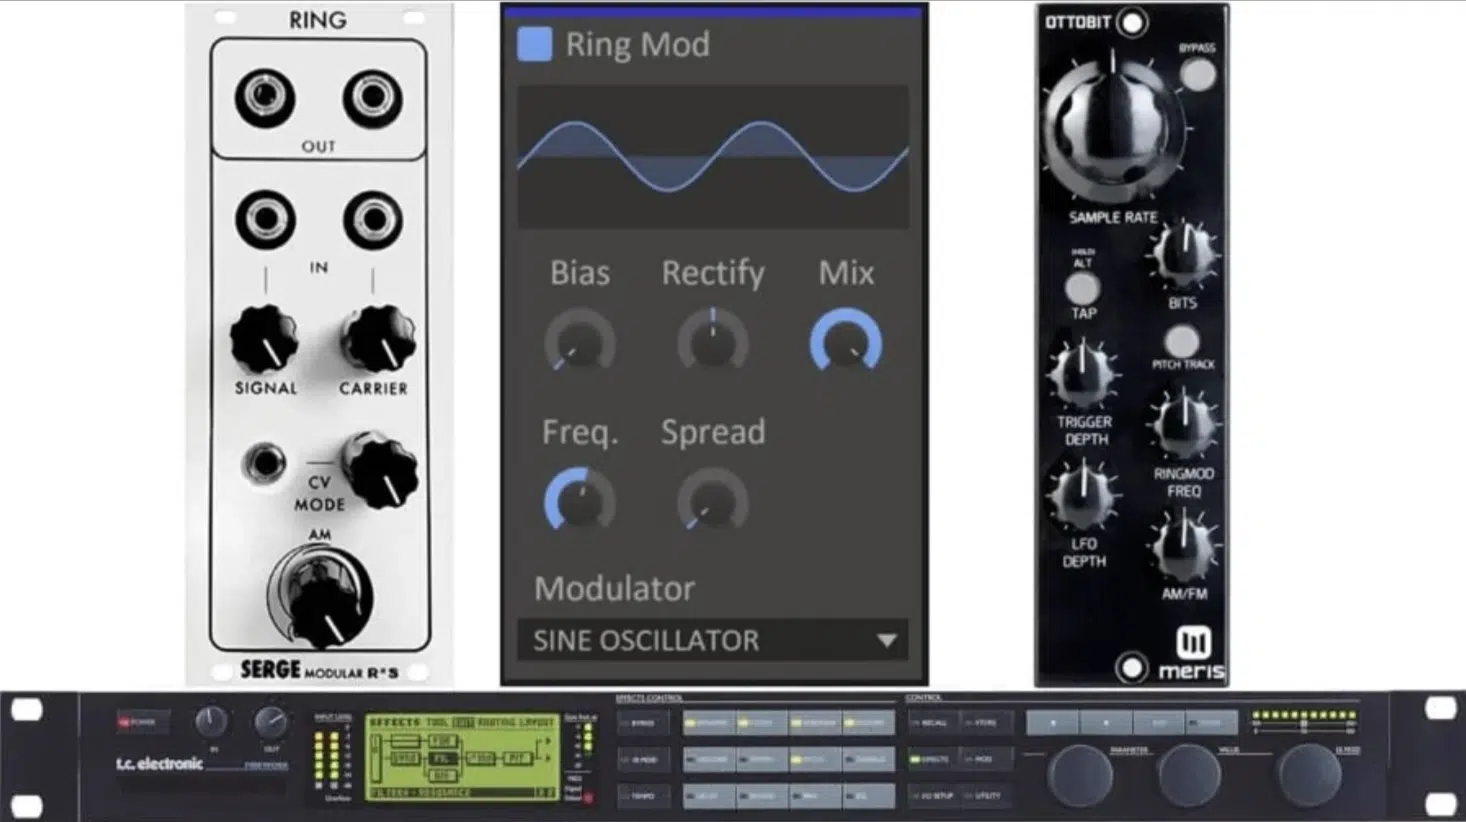
Ring modulation is one of the more experimental modulation effects.
It combines the audio signal with a modulation source (usually a sine or square wave) to create completely new frequencies.
The ring modulation effect, especially when the modulator frequency is set high, can give you some really cool textures that are:
- Unique
- Metallic
- Robotic
For more low-key, subtle textures you can try setting the modulator around 10-20 Hz and keeping the depth low, at around 20-30%.
This can add a slight edge to basses or synths without overpowering them.
I myself like using ring modulation on drum loops at a higher frequency (around 100 Hz) and depth around 50% because it creates a gritty feel that can really add attitude.
But again, it all depends on the specific vibe you’re going for.
With ring modulation, you’re also generating new frequencies that aren’t present in the original signal, which gives this lovely effect its distinct “otherworldly” vibe.
If you’re looking for something truly wild, try automating the modulator frequency because sweeping it up or down can create an intense, sweeping sound.
It will blow your mind and is perfect for cinematic sound design or more experimental tracks that need to instantly captivate.
PRO TIP: Layer a ring modulator with a clean signal for a mix of organic and electronic tones 一 adding complexity without losing the core of the sound, which is great.
#7. Frequency Shifting
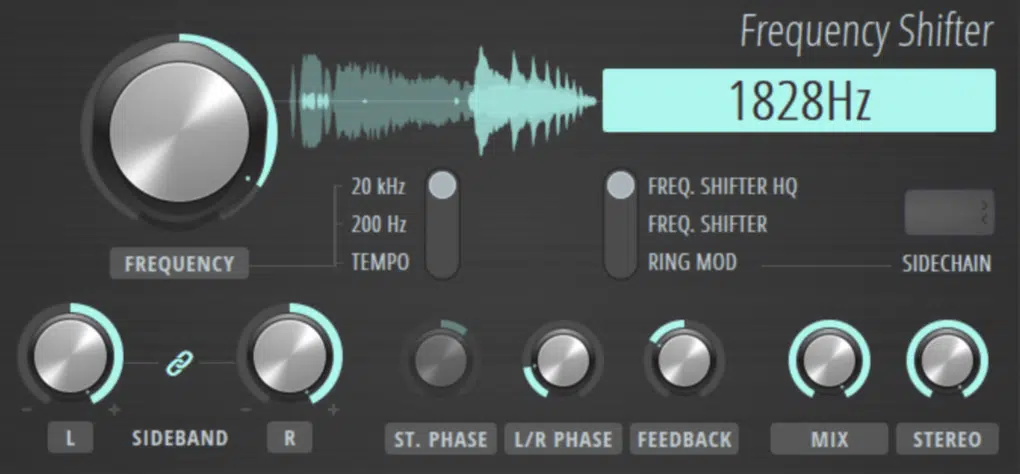
Frequency shifting is a unique modulation effect that shifts every frequency in the audio signal by a fixed amount, rather than a relative interval like pitch shifting.
This can create a very surreal and dissonant sound, especially when used with high shift values around 500-1000 Hz.
If you’re looking for a more subtle, haunting quality, try setting the shift around 50-100 Hz and keeping the mix at 30-40%.
This works beautifully on vocals or pads to create a slightly “off” feeling without being too obvious or obnoxious.
One of my favorite uses of frequency shifting is on hi-hats or percussion loops…
A small shift of around 10 Hz and a high mix level can make the sound feel slightly “detuned,” which adds a ton of character to boring, repetitive patterns.
Frequency shifting also plays nicely in stereo because, by offsetting the shift values slightly on each channel, you can create a wider/more spatial sound.
I recommend using DAW automation to change the shift amount over time, simply letting it move with your track’s energy.
If you’re into ambient or experimental genres, this modulation effect is a game-changer for adding an eerie, evolving layer to any sound source.
#8. Auto-Pan
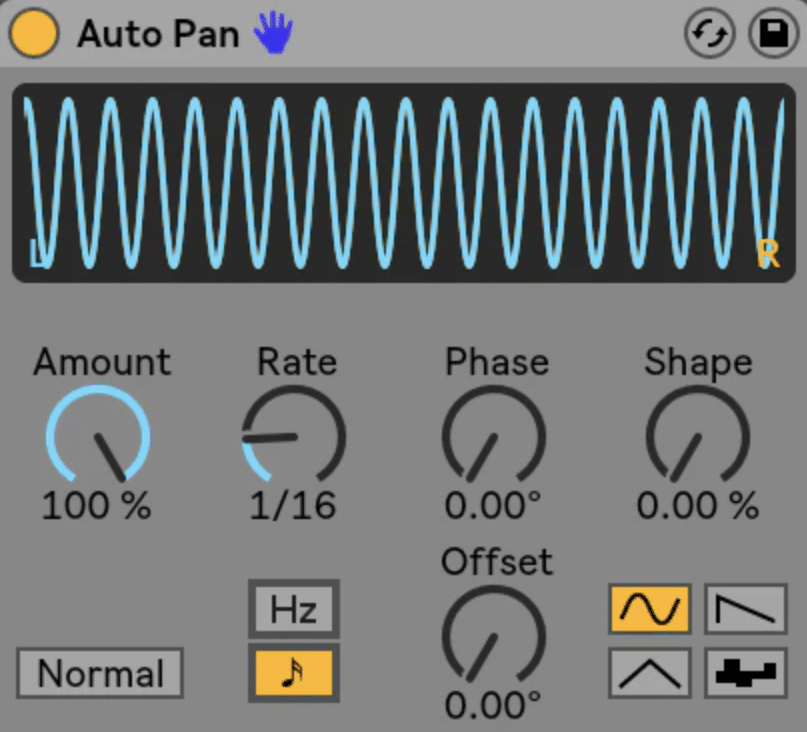
If you want some serious movement across the stereo field, auto-panning will not let you down (if you know what you’re doing, of course).
Simply put, auto-pan is a modulation effect that shifts the audio signal between the left and right channels, pretty easy and straightforward.
If you’re working with a pad or ambient sound, try setting the rate between 0.2-0.5 Hz with the depth at around 70% for a slow, sweeping motion.
It will enhance the stereo image all day.
For a faster, rhythmic pan effect, increase the rate to around 4 Hz and drop the depth to around 40% 一 this creates a subtle bounce that works great on hi-hats or shakers.
I usually use auto-pan on synth arpeggios and set the rate to sync with the tempo (e.g., on eighth or sixteenth notes) so it grooves along with the beat.
When you want to add intensity, try automating the depth to gradually increase during a buildup for a “spinning” effect that grabs the listener’s attention right away.
Another trick I’ve learned is to set auto-pan on vocals with a low rate and depth which will give a subtle movement that helps vocals sit in the mix without being too static.
If you’re working in electronic genres, auto-pan can be a powerful way to add dynamics, especially when combined with DAW automation for custom pan sweeps.
#9. Envelope Modulation
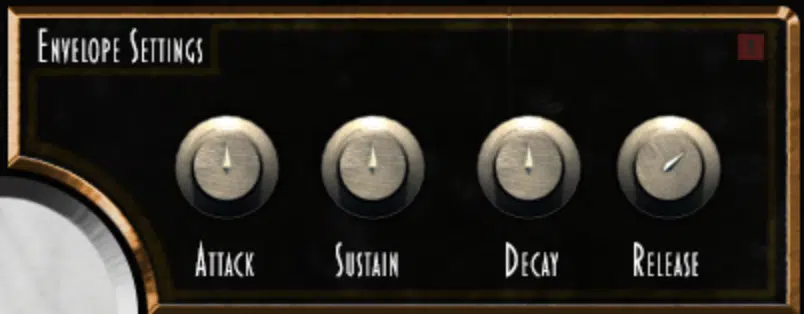
Envelope modulation uses an ADSR envelope (attack, decay, sustain, release) to control various parameters over time, adding dynamic control to a sound.
One of my favorite uses of envelope modulation is on a filter cutoff in basslines…
If you want to try it out, simply set a quick attack and decay (about 10-20 ms for each) and it will give you a punchy, percussive sound that adds definition to each note.
For synths or pads, try a slower attack (200-300 ms) with a long release 一 it will create a smooth, evolving sound that builds and fades in a more natural way.
NOTE: When setting the envelope depth, keep in mind that higher values will create a more pronounced effect. I recommend starting around 50% and adjusting from there based on how bold you want the modulation to be.
Another powerful technique is to modulate the amplitude with an envelope, setting a long decay to add a tail that sustains just enough to fill out the space.
All without overpowering other elements, of course.
Personally, I love using envelope modulation on reverb parameters to create a swelling effect.
If you want to try it out too, just set the attack high so the reverb builds gradually, then release it at the end for a smooth fade.
Envelope modulation is one of those techniques that lets you shape each sound dynamically, adding expressive control that reacts to your playing style or programming.
And, overall, it’s a pretty solid technique that I use all the time, and it’s great to help you enhance your sound design skills overall.
Bonus #1: Using Sidechain Modulation for Dynamic Interplay
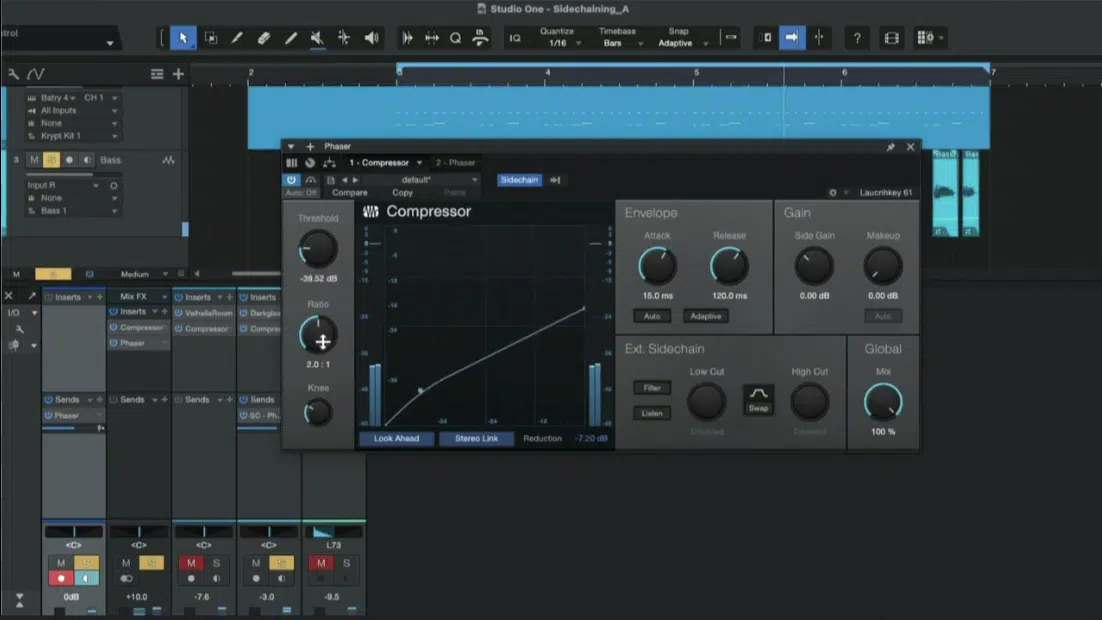
Sidechain modulation is a super solid way to create interplay between elements, adding dynamic movement and rhythmic modulation to your mix.
Essentially, sidechain modulation works by using one signal (often a rhythmic element like a kick drum) to control the effect applied to another sound.
This way, the modulation can follow the beat of the track properly.
To use it with great impact, sidechain a modulated delay or reverb to your kick drum or bass, so the modulation effect pulses in time with the beat.
For example, set the delay’s rate to match a quarter or eighth note and adjust the depth to around 50% (this will create a clean signal that leaves enough room for the low-end).
I like to apply sidechain modulation to auto-pan 一 making the stereo image “bounce” in sync with the track’s rhythm, which is especially sick on synths or vocals.
NOTE: To do this, set the auto-pan rate to match your track’s BPM, and sidechain it to the kick drum or snare. You’ve got to try it out on wide-panned synths or vocal layers.
Setting a low-frequency oscillator as the modulation source, setting the rate around 0.5-1 Hz, gives you a sweeping sidechain effect that’s ideal for ambient/EDM.
You can even layer sidechained effects like a chorus effect and tremolo effect on lead synths, sidechaining them to the snare for a dynamic, responsive sound.
This technique helps the resulting sound interact naturally with the beat, adding a sense of movement and space.
Bonus# 2: How to Use Modulation Pedals Like a Boss
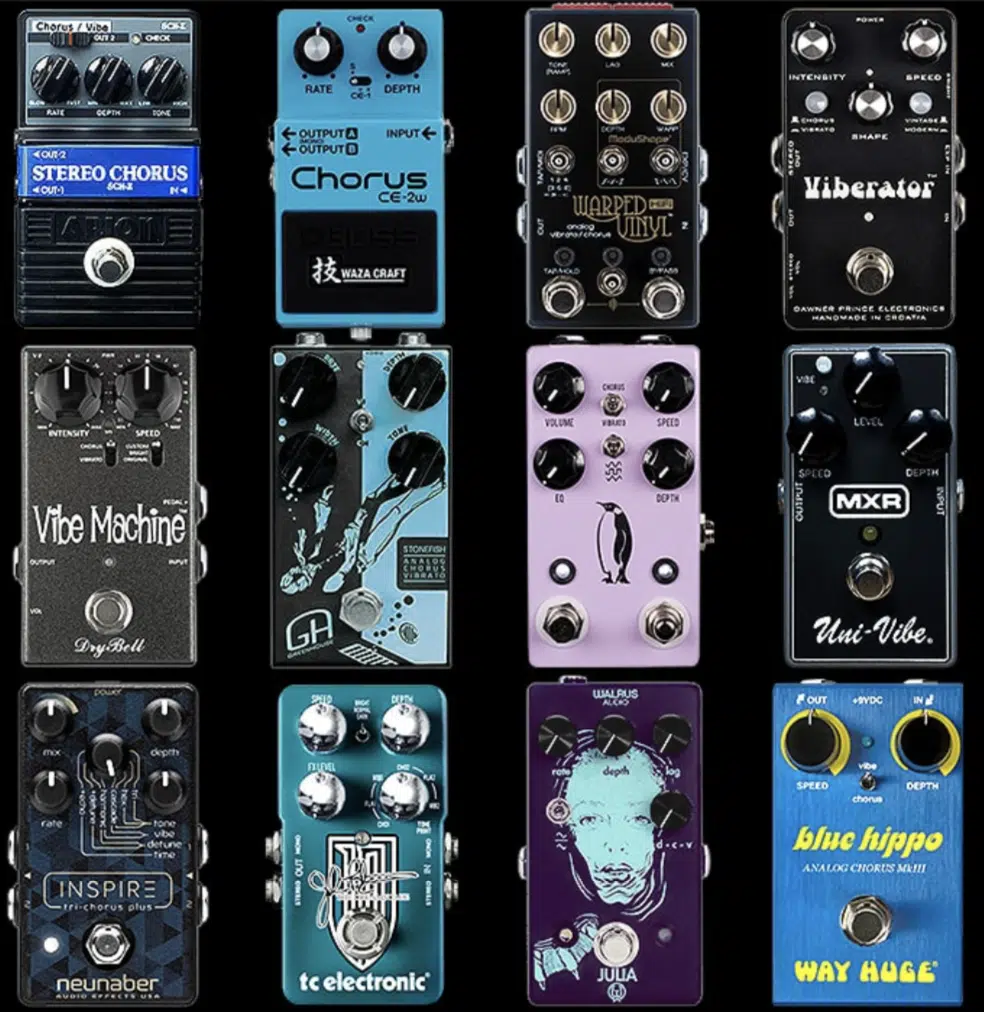
Modulation pedals (like chorus pedals or flanger pedals) add hands-on control and dynamic flexibility to your sound, perfect for live performance and studio sessions.
For a solid stereo image, try setting the chorus pedal rate low and depth around 50%.
This gives you a spacious, layered sound source that fills the mix without overpowering the dry signal, which is the entire theme of this article really.
I recommend experimenting with pedals on different instruments beyond electric guitar because using a modulation pedal on synths or vocals can add unique textures that work well in various genres as well.
To take it up a notch, connect modulation pedals through your DAW’s effects loop and automate settings like depth or rate for maximum creative control.
Many guitar amps include built-in modulation effects, which blend beautifully when combined with external pedals 一 adding tonal versatility.
An MXR phase pedal can add a subtle phasing that enhances the stereo image.
A rotary speaker effect pedal brings a classic, swirling sound perfect for creating a dramatic effect in your mix.
With these audio effects, you can easily enhance your production workflow and character with each audio effect choice.
This will, in turn, obviously make your tracks dominate the competition (cha-ching).
Final Thoughts
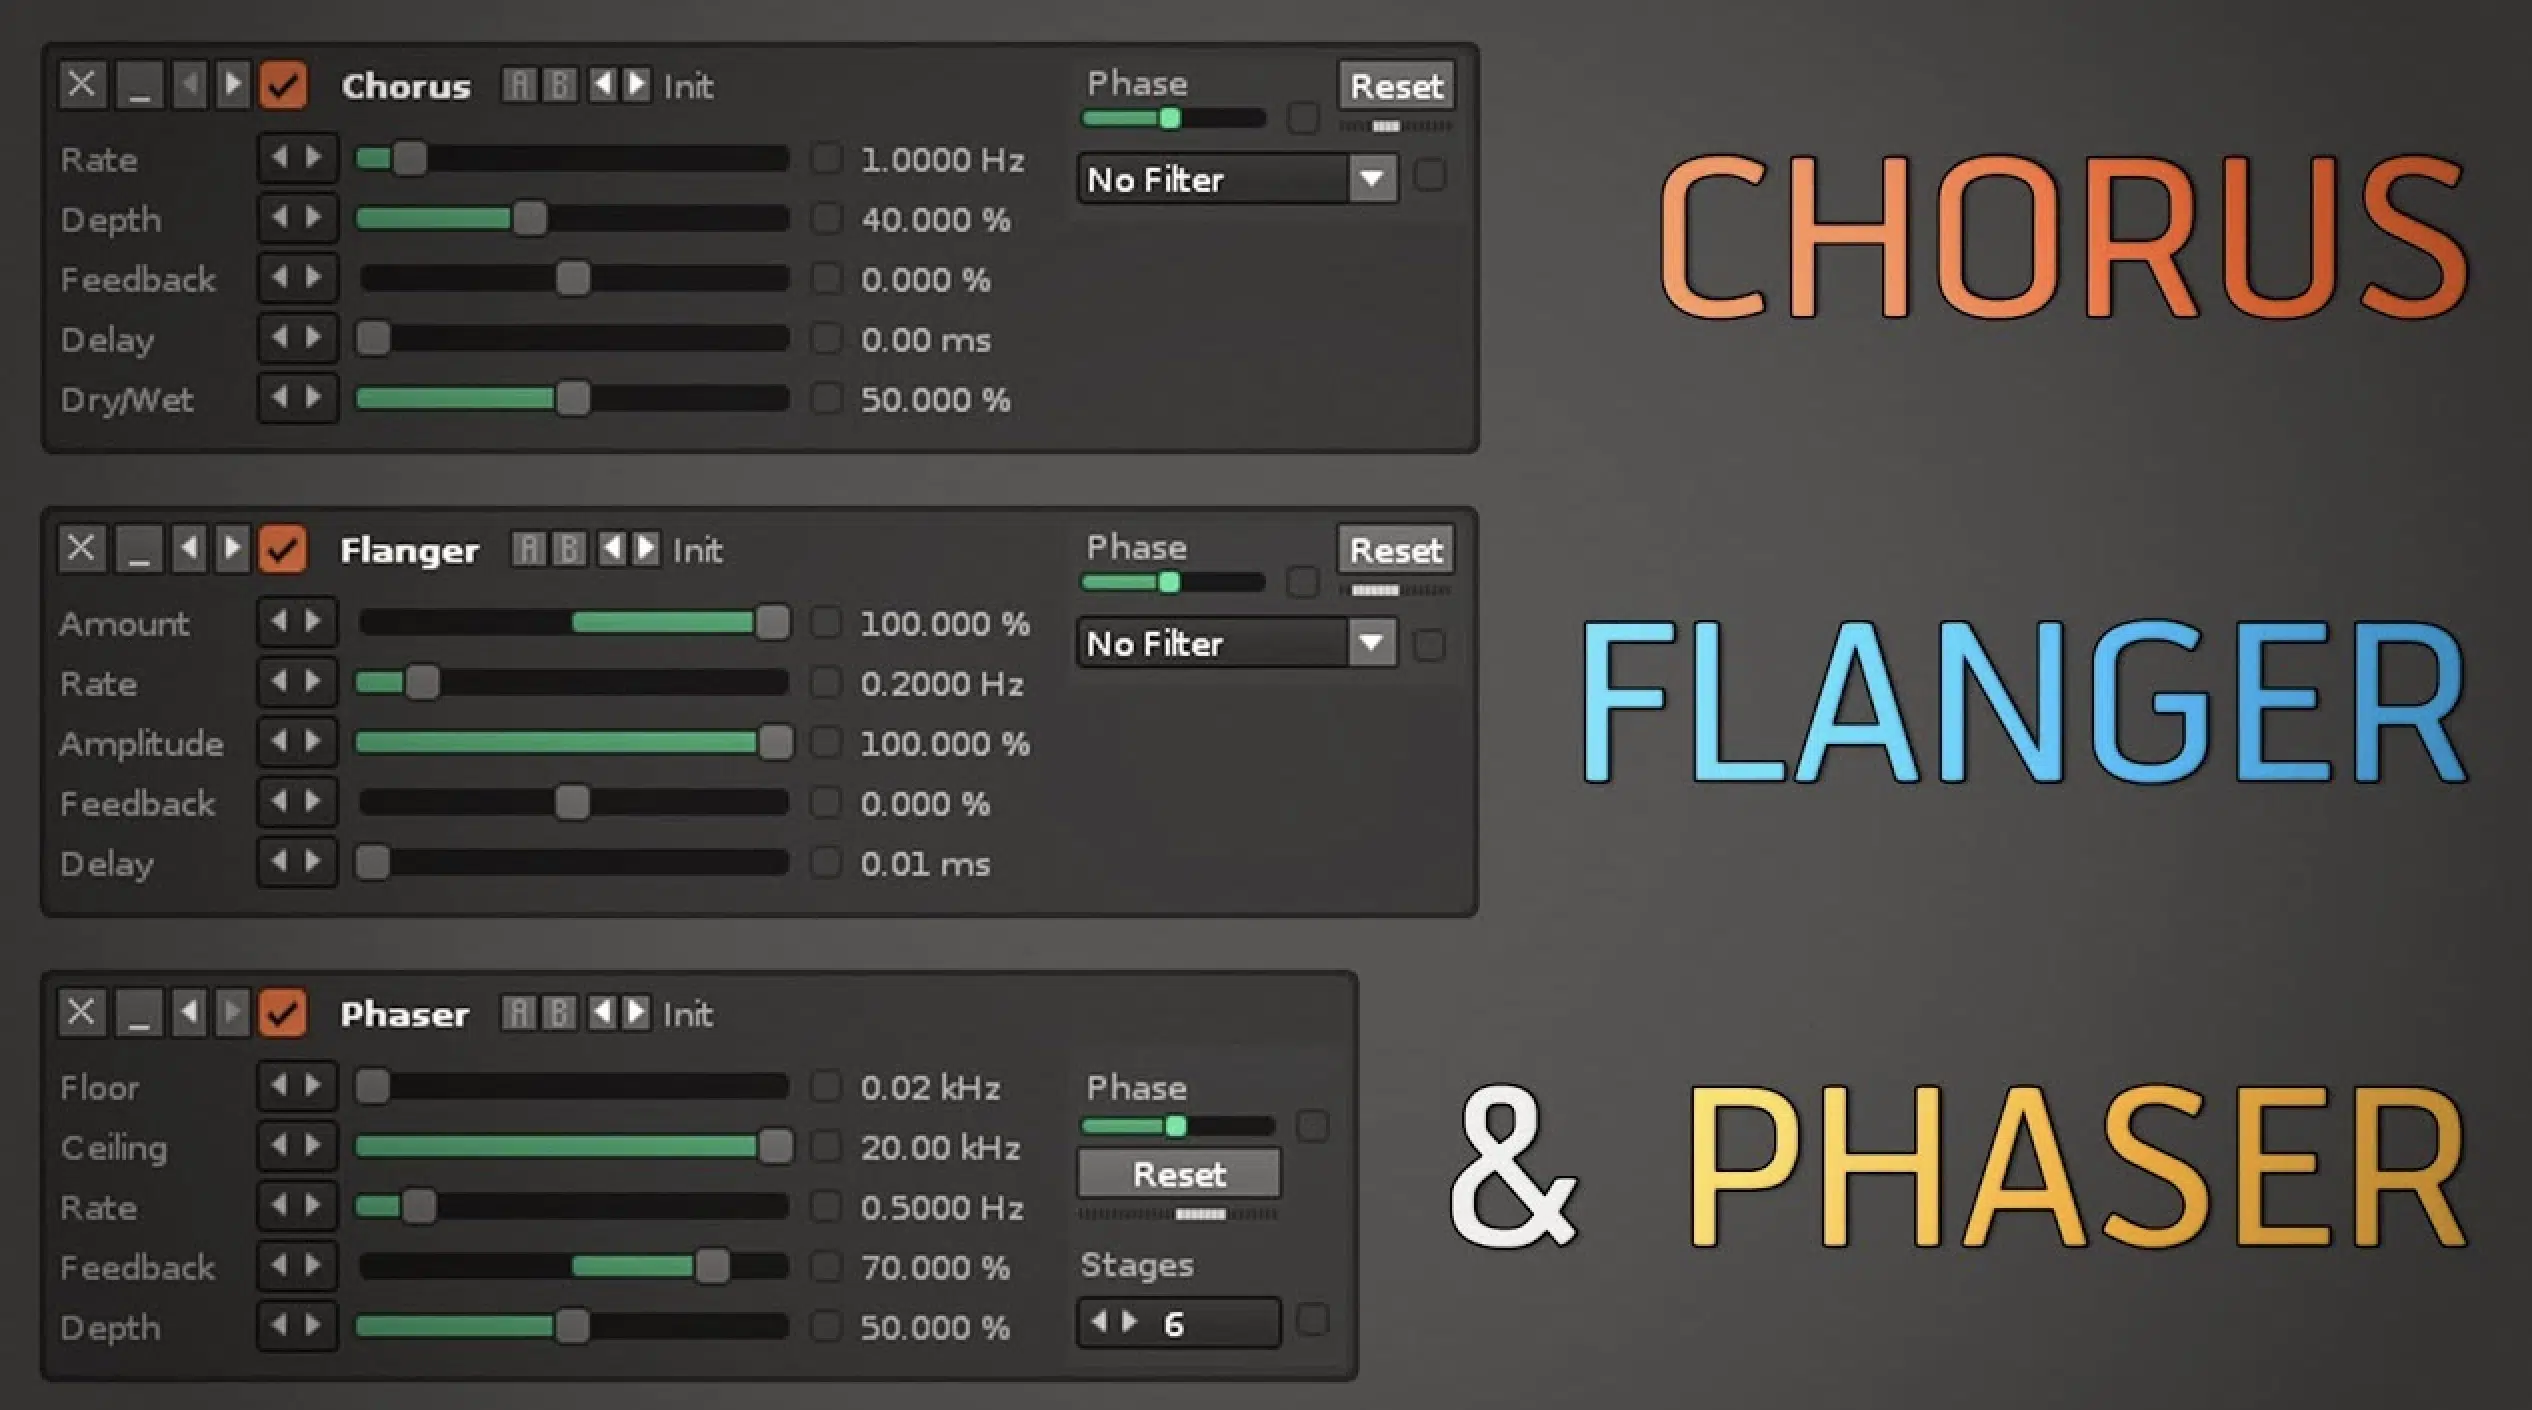
Modulation effects, as you now know, are incredibly powerful tools for adding depth, movement, and character to your tracks.
They can shape everything from subtle textures to dramatic shifts and bring a sense of life to any sound.
Plus, if you use the techniques we talked about, modulation effects can seriously elevate your mixes, helping them stand out and feel more dynamic.
It’s all about understanding each effect’s unique properties and experimenting with how they interact in your mix (there is no creative limit here, people!).
So, if you’re ready to take your modulation skills even further, you’ve got to check out this incredibly awesome Free Project Files pack.
It includes 3 project files that are all invaluable learning tools 一 breaking down the beat-making process from start to finish, like having the cheat codes.
Each was created by the industry’s best producers and sound designers, so you know you’re getting the top-of-the-line stuff.
They’ll show you exactly how modulation effects like chorus, vibrato, and sidechain are applied in real-world tracks and how to manipulate them like a boss.
With fully processed and polished projects, this pack is the ultimate learning tool for exploring and analyzing how innovative modulation can completely transform a track.
After diving into these files, you’ll have a solid understanding of how modulation effects work, from subtle additions to intricate layering and everything in between.
Just make sure to play around with these techniques, constantly practice, trust your creativity, and let modulation bring your tracks to life.
Until next time…


Leave a Reply
You must belogged in to post a comment.