As producers, learning how to mix music is super important.
You need to know how to balance multiple audio tracks, make each element fit into the frequency spectrum, and create a cohesive sound that feels polished.
Plus, you’ve got to get creative with the effects, automation, EQ, and compression you’re using, plus much more so it sounds like a professional mix.
It takes a lot of attention to detail to make everything work together flawlessly, which is why I’m breaking down everything you need to know, like:
- How to mix music, step-by-step ✓
- Setting up your session with color coding ✓
- Proper gain staging for clean audio ✓
- Fixing muddy low-mids and harsh highs ✓
- Using compression levels to control dynamics ✓
- Adding depth with reverb and delay ✓
- Enhancing clarity with dynamic EQ ✓
- Getting the low-end right with sidechaining ✓
- Creating width with mid/side processing ✓
- Adding warmth and punch with harmonic distortion ✓
- Much more about mixing music like a pro ✓
In order to master how to mix music (no pun intended), you’ve got to understand the key tools and exactly when/how to use them.
If not, your mixes will sound messy, unbalanced, or just plain amateurish, and let’s be honest, nobody has time for that.
So, as long as you pay attention to the details, stay creative, and follow the tips we’re talking about you’ll have a much better understanding of the whole process.
Table of Contents
Setting the Foundation for a Clean Mix
Before you touch an EQ or compressor, preparation is #1. A disorganized session or improper recording process will make it harder to achieve a professional mix. So, to kick things off, let’s cover all the basics needed to create a clean slate so you can start mixing like a boss.
-
Organizing Your DAW Session
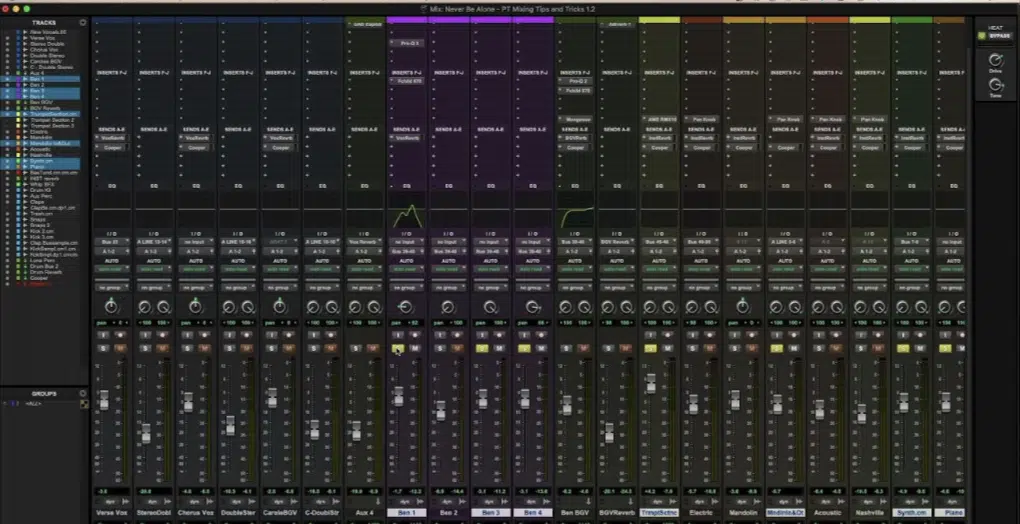
When you open your DAW (digital audio workstation), whether it’s Pro Tools or FL Studio, the first thing to do is organize your session.
Rename all your tracks with clear labels like, instead of something generic like “Audio 3,” use names that reflect what’s actually there.
This could be things like “Lead Vocal,” “Kick Drum,” or “Guitar Lead.”
Whatever makes it easy to find what you’re looking for, especially when dealing with multiple audio tracks (it sounds like a little thing but it’s huge).
Next, assign colors to groups of tracks, for example, use green for drums, blue for vocals, and purple for synths.
It may sound simple, but when you’re navigating through 50+ tracks, color coding can save you a huge amount of time, no joke.
You’ll also want to group similar tracks into buses.
For instance, all your drum tracks (kick, snare, toms, cymbals) should go to a Drum Bus, while your background vocals can go to a Vocal Bus.
This lets you apply effects or adjust volume levels for an entire group rather than tweaking individual tracks one by one.
Finally, clean up your timeline by deleting unused takes or empty audio regions.
Remember, a clutter-free session isn’t just about aesthetics 一 it should help you focus on creating a cohesive sound as quickly as humanly possible.
-
Gain Staging for Optimal Headroom
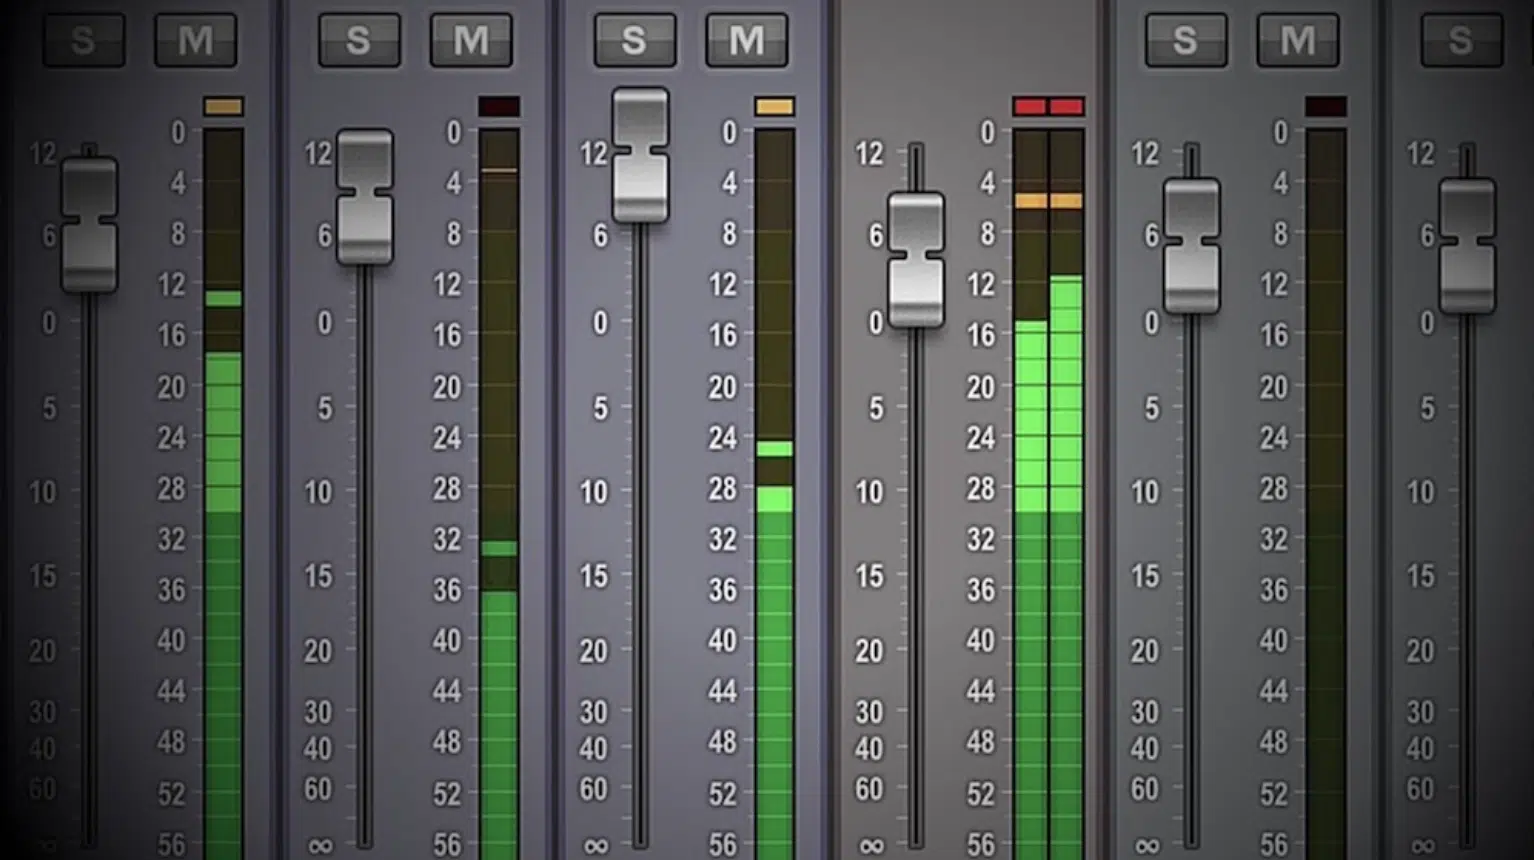
Gain staging is a super important process that is actually overlooked a lot, and trust me when I say you do NOT want to be one of those people
It ensures your tracks are at optimal volume levels before you start applying plugins.
And without proper gain staging, your mix can become distorted or lose clarity 一 especially during the mastering stage.
You’ll want to start by adjusting the clip gain or trim plugin on each track so it peaks around -18 dBFS to leave ample headroom for plugins and prevent them from distorting.
For example, if your snare track is peaking at -6 dB, lower it by 12 dB to reach that sweet spot (it’s pretty straightforward, but 100% necessary).
Next make sure to check your drum bus, particularly the kick drum and snare, as they usually dominate the low-end.
If these are too loud, they’ll mask other elements like the bass guitar or synth pads and you never want that to happen.
Use a peak or RMS meter to monitor input levels and avoid clipping, and tools like the Waves VU Meter are great tools for visualizing whether your tracks are too hot.
PRO TIP: Keep an eye on your frequency spectrum when gain staging.
For example, a vocal track might not look loud on the meters but could still overpower the mix if its mids are too prominent, so you need to know for sure.
Also, use EQ to cut specific frequencies (e.g., 300–500 Hz) if necessary.
By taking the time to properly gain stage, you’re setting yourself up for a smoother mixing process and avoiding unnecessary headaches later.
-
Cleaning Up Your Audio Tracks
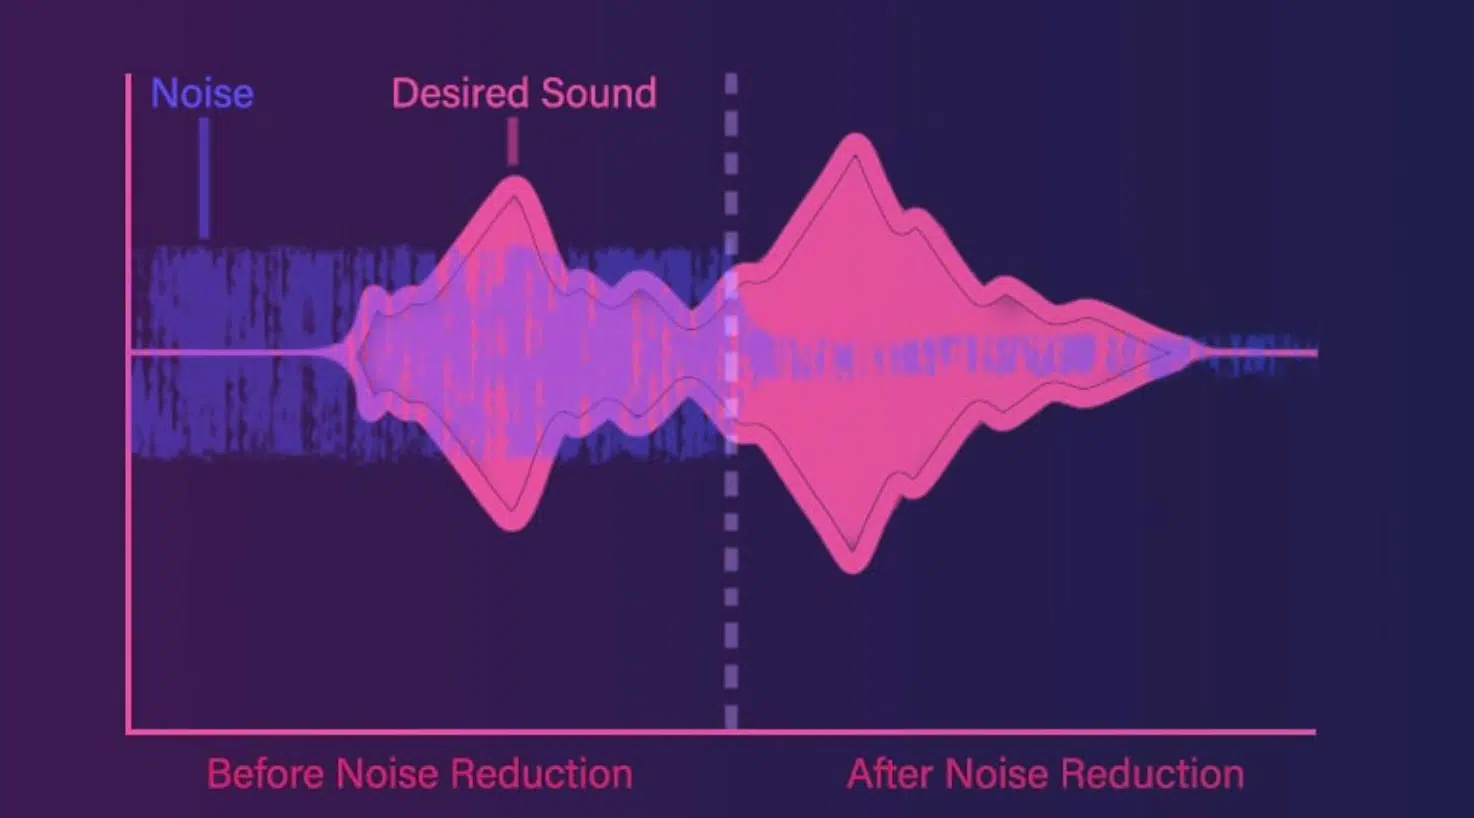
Cleaning up your tracks is another must-do for a polished finished mix… Think of it as removing clutter so the important elements can shine.
For this process, you’ll start with noise reduction.
For example, if your artist recorded vocals in a less-than-ideal space, you might hear a faint hiss or hum in the background.
Use a noise reduction plugin like iZotope RX or a stock noise gate to remove it.
Set the gate’s threshold just below the quietest part of the vocal to avoid cutting into the performance, which could honestly ruin everything.
Trim silent sections at the start and end of each track, which is especially important for background vocals or other instruments that don’t play throughout the entire song.
For example, I would trim out the gaps between guitar strums to keep the track clean.
Next, use a subtractive EQ to remove unnecessary frequencies 一 a common trick is to apply a high-pass filter to everything except the bass and kick.
Personally I usually set the high-pass filter to around 80 Hz to remove low-end rumble in my vocals without affecting the warmth of the voice, but this is open.
If a track has any pops, clicks, or plosives, you can fix them manually with clip editing or use a de-clicking plugin.
Even small tweak like this can make a big difference in the overall mix and help you learn how to mix music the right way.
-
Organizing Your Session: Grouping Tracks & Setting Up AUX Returns
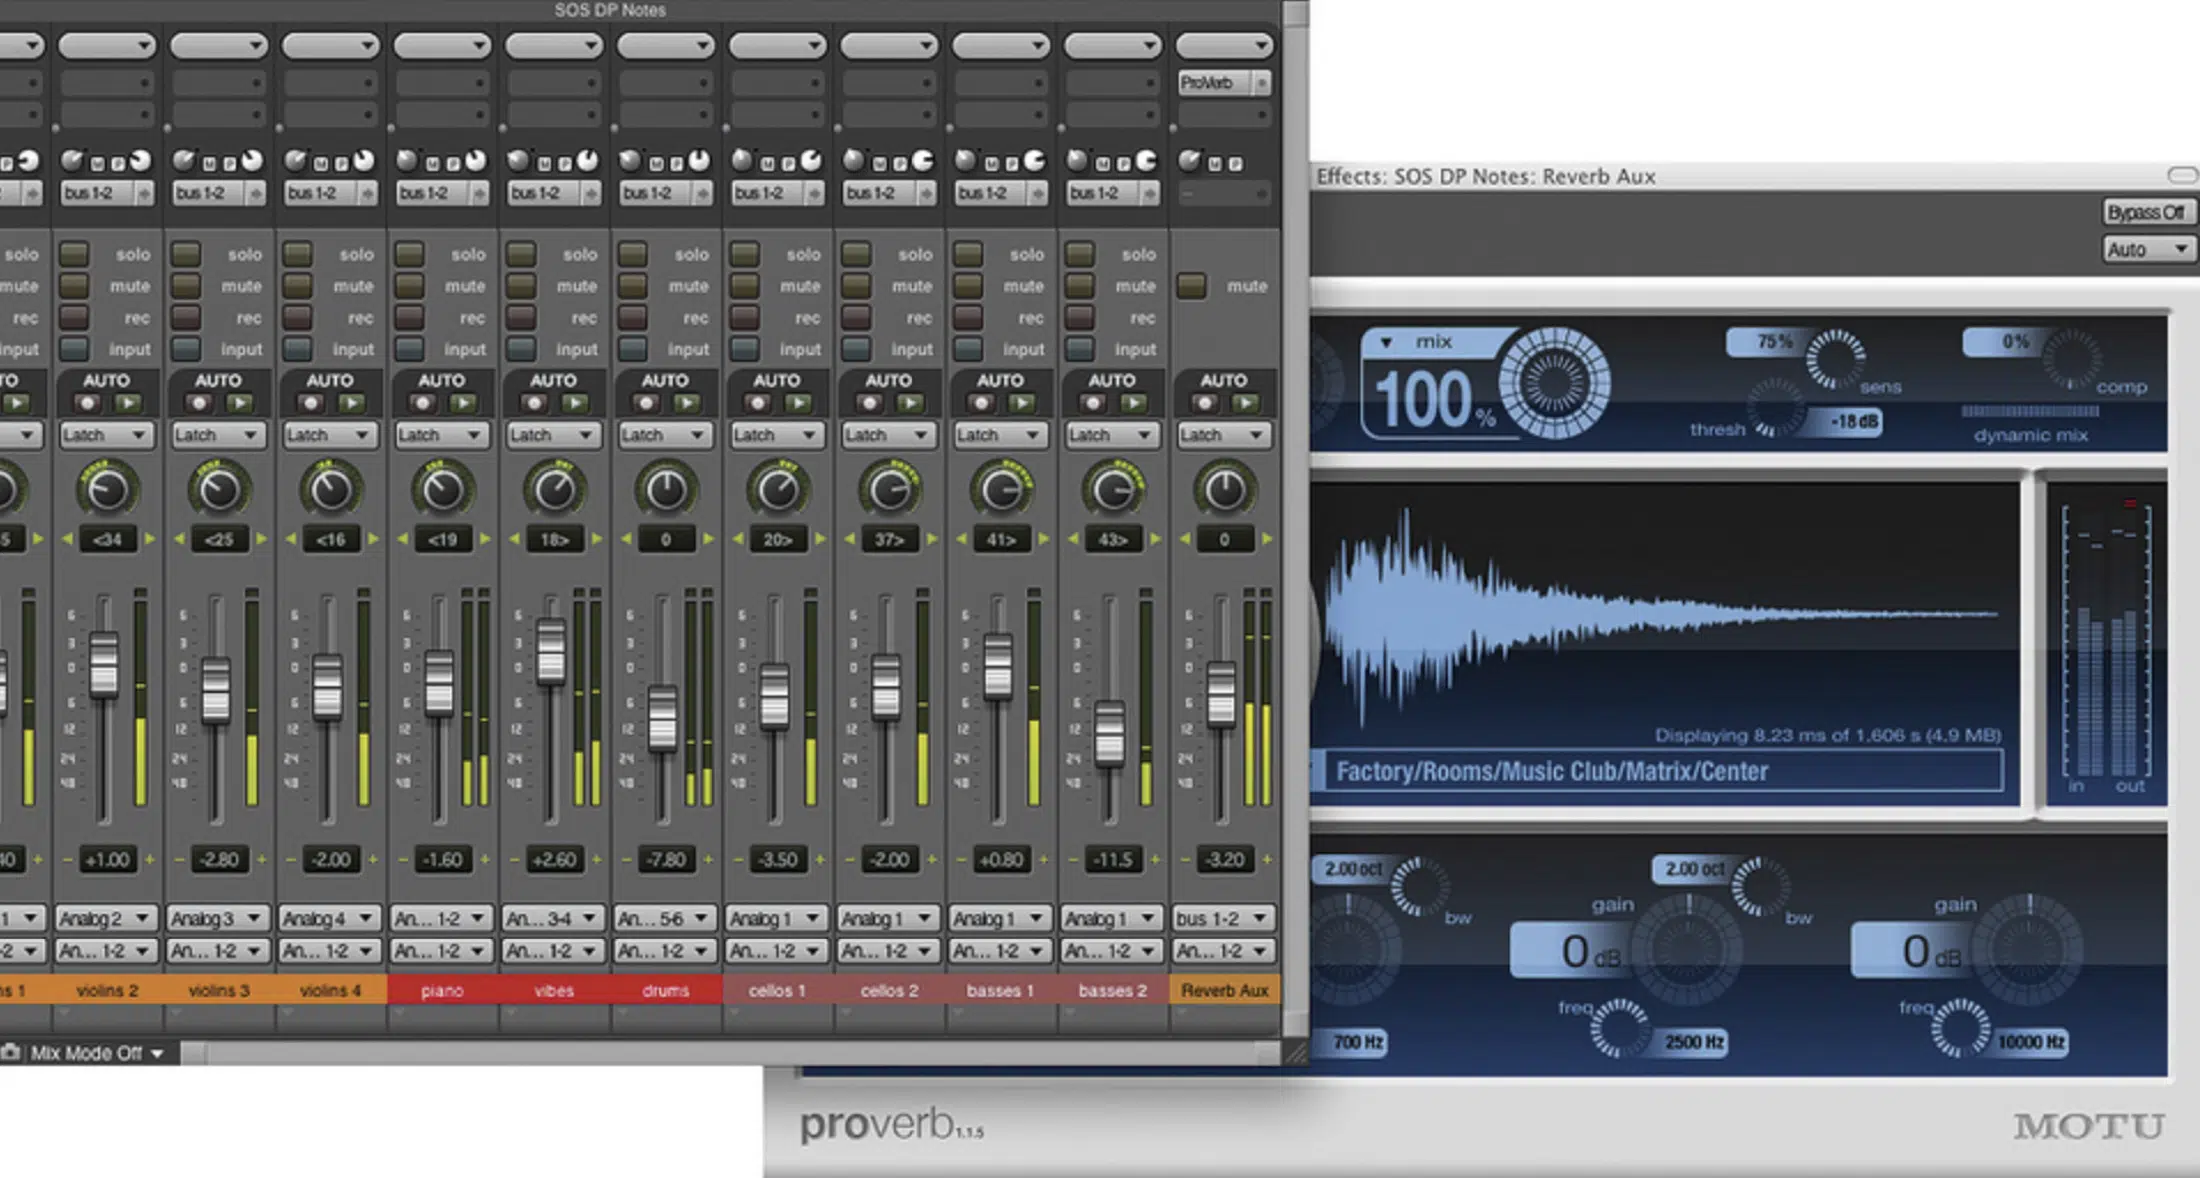
Grouping tracks and setting up AUX returns will help you streamline your workflow and keep your mix organized so you can get down to business.
Let’s start with grouping…
For example, take all your drum tracks (kick, snare, hi-hats, toms) and route them to a Drum Bus, where you’ll apply light compression with settings like:
- 4:1 ratio
- 10 ms attack
- 50 ms release
This will bring all the cohesion to the drum group without squashing their dynamics.
Now, you’re going to set up AUX tracks for effects 一 start with creating an AUX track for reverb and another one for delay.
I recommend using a plate reverb for vocals, with a decay time of around 2.5 seconds and a pre-delay of 20 ms, but dealer’s choice (just make sure it helps not hurts).
Then, send all vocal tracks to this AUX track, adjusting the send levels for each one.
When it comes to delay, a stereo slapback (80 ms on the left, 120 ms on the right) can add depth to background vocals or synths.
Use subtle amounts to keep the effect noticeable but not distracting.
Organizing your session this way makes it easy to manage large projects and will make sure your mixing tools are used properly.
-
Choosing Reference Tracks
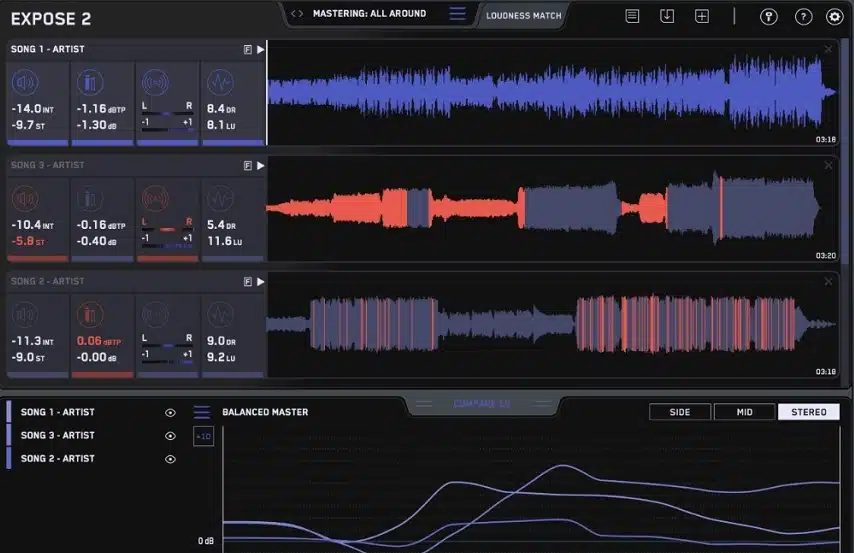
Reference tracks are basically cheat codes when it comes to mixing music.
If you’re ever unsure about how your track stacks up against a professional standard, a good reference track will set you straight.
The idea isn’t to copy the mix but to use it as a guide for your mixing decisions.
When picking a reference track, choose one in the same genre and style as your own music.
For example, if I’m mixing a house track, I’ll grab something like a Disclosure or Calvin Harris song because their mixes are insanely clean.
And I find their low-end punches without being overbearing.
If it’s hip-hop, I’ll pull up a Kendrick Lamar track since his mixing process always balances intricate beats with clear vocals (you get the point).
Once you’ve chosen your reference, simply import it into your session and lower its volume to match your rough mix.
This is important: mastered tracks are louder, and you don’t want that to throw you off.
Then you’re going to want to use a level-matching plugin like Metric AB to ensure both tracks are at the same perceived loudness.
Personally, I’ll solo the reference track and listen specifically for how the kick drum and bass interact, and I suggest you do the same.
For example, if my bass guitar feels muddy compared to the reference, I’ll use a high-pass filter to cut everything below 40 Hz on the bass track.
Then I’ll A/B between my mix and the reference to hear the difference.
Just make sure to pay attention to the stereo image, too.
Is the reference wider than your mix? If so, try panning your other elements like guitars or synths further out while keeping the center strong with your vocals and bass.
This trick creates a cohesive sound that feels professional.
Lastly, don’t obsess and drive yourself crazy 一 Reference tracks are a tool, not a crutch, so use them to guide your ears, not to clone someone else’s finished mix.
Bottom line, trust your instincts and remember that your own mix should have its own music identity.
How to Mix Music: Step-by-Step
Now that your session is prepped, it’s time to dive into the actual mixing process. When you learn how to mix music, you’ll realize it isn’t just about technical skills 一 it’s about making choices that serve the song best. Let’s break it down.
-
The Role of EQ in Mixing
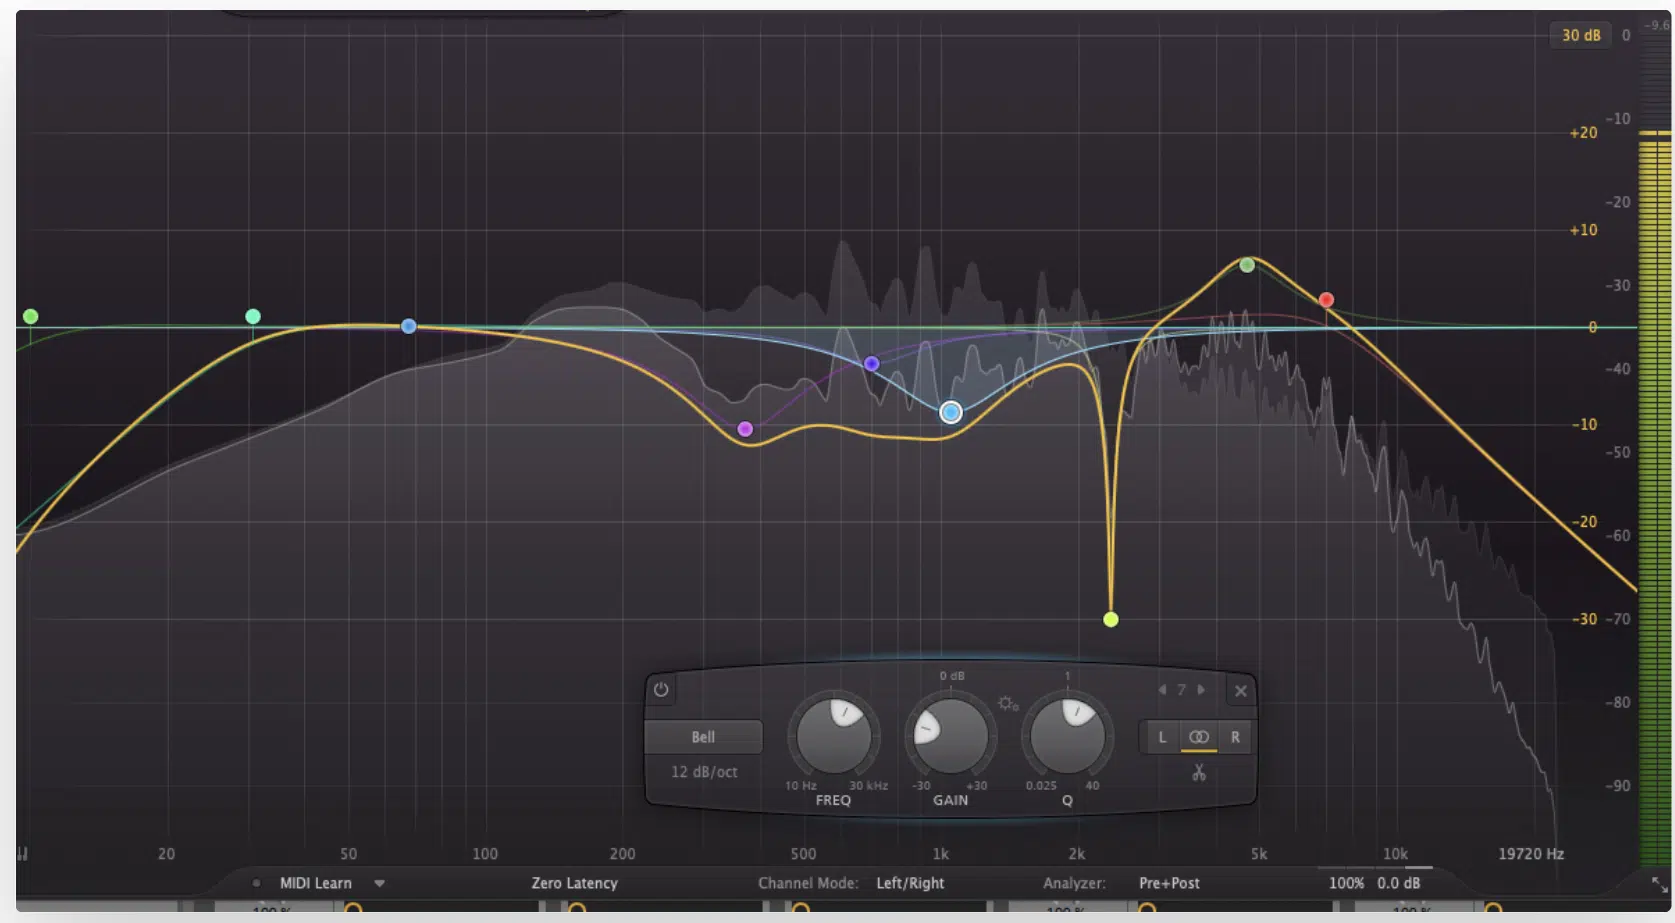
EQ is your go-to tool for shaping the frequency spectrum of your tracks.
It’s not just about making things sound better 一 it’s about giving each element its own space in the mix.
Start with subtractive EQ, for example, if your vocal track has a boxy tone, cut around 300–500 Hz by 3–4 dB using a narrow Q setting.
This removes muddiness and lets the vocal breathe.
On the flip side, if your snare lacks presence, boost around 2–3 kHz by 2 dB to add clarity and another tip is to high-pass everything that doesn’t need low-end.
For instance, I set a high-pass filter at 80 Hz for guitars and 100 Hz for vocals to eliminate rumble without affecting their overall tone.
For bass and kick, let them dominate the low-end below 80 Hz while cutting overlapping frequencies to avoid any masking.
What I also like to do is use EQ creatively too, like if I want my synth pad to sound warmer, I’ll boost 200–400 Hz with a wide Q.
Or, if I’m mixing vocals and want them to sparkle, I’ll add a gentle boost around 10–12 kHz (just don’t overdo it; subtle EQ moves can make a huge difference).
PRO TIP: Use a spectrum analyzer to see what’s happening in your frequency range. It’s great for spotting problem areas like harsh highs or muddy lows.
Lastly, EQ is not one-size-fits-all when you’re learning how to mix music, and because every track is different, listen carefully and make the best possible mixing decisions.
-
Compression as a Dynamic Tool
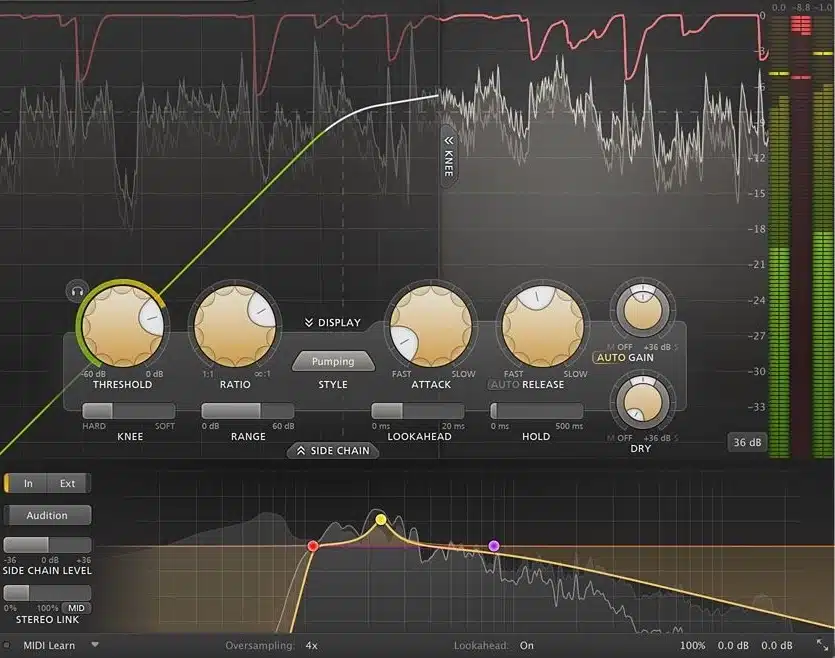
Compression is like the glue that holds your mix together because it controls dynamics and makes sure that quieter parts don’t get lost and louder peaks don’t dominate.
But it’s not just about control because it can also add punch/character to your tracks.
Start with your drums… For a kick drum, set the ratio to 4:1, with an attack time of 10 ms and a release of 50 ms.
This lets the initial transient punch through while tightening the sustain, then adjust the threshold so the gain reduction meter shows around 3–4 dB of compression.
On vocals, compression can make a singer’s performance feel more consistent.
I like to use two compressors in series:
- The first for gentle leveling (2:1 ratio, 2 dB gain reduction)
- The second for more aggressive control (4:1 ratio, 3 dB gain reduction)
This will smooth out the dynamics while keeping the performance lively and on point.
Parallel compression is another powerful tool.
For example, duplicate your drum bus, heavily compress the duplicate (8:1 ratio, fast attack), and blend it back with the uncompressed bus to add energy.
Compression is also great for adding warmth and harmonic distortion, so try to use an analog-style compressor like the SSL G-Bus to add subtle color to your mix.
Set the threshold so the needle barely moves 一 sometimes just 1–2 dB of compression can make a big difference.
PRO TIP: Always listen for pumping or unnatural artifacts when compressing. If it sounds wrong, adjust the attack and release times or back off the threshold.
Finally, remember that compression is about enhancing the song, not flattening it, so use it intentionally and your mix will feel dynamic/polished every single time.
-
Adding Depth with Reverb and Delay
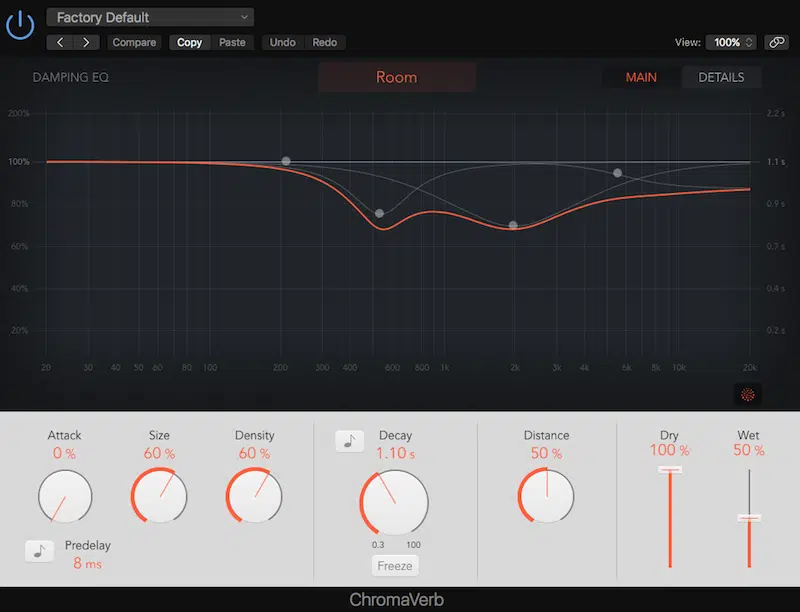
Reverb and delay are like the secret sauce when you’re learning how to mix music because they help create space and depth in your track.
The key is to use them with caution, so they enhance the sound without overwhelming it, which can completely crush everything and you don’t want that.
For reverb, start by using a plate reverb on vocals with a 2-second decay and a pre-delay of about 20 ms 一 keeping the vocal clear while giving it a sense of space.
On drums, try a room reverb with a shorter decay (0.8–1.2 seconds) to add natural ambience without muddying the low-end.
Delay is excellent for adding rhythmic movement.
For example, use a quarter-note delay on a lead guitar to make it pop, or a slapback delay (around 80 ms) on background vocals for extra width.
A pro trick is to automate the wet/dry mix of reverb and delay during transitions.
For instance, increase the reverb tail on the last word of a vocal phrase to create drama before the chorus hits.
If you’re working on a dense mix, try EQing the reverb and delay returns.
Cutting the low-end (below 150 Hz) and high-end (above 8 kHz) will help them sit in the mix without clashing with the main elements.
One of my favorite techniques is using pre-delay creatively… For a lead vocal, set the pre-delay to 50 ms so the reverb starts just after the vocal.
This keeps the performance upfront while still feeling spacious.
Finally, use a mono delay on a kick or snare to add subtle depth without widening the stereo image too much.
Bottom line, reverb and delay are powerful tools, but the trick is to use them carefully so they enhance rather than distract.
-
Balancing Levels Across the Mix
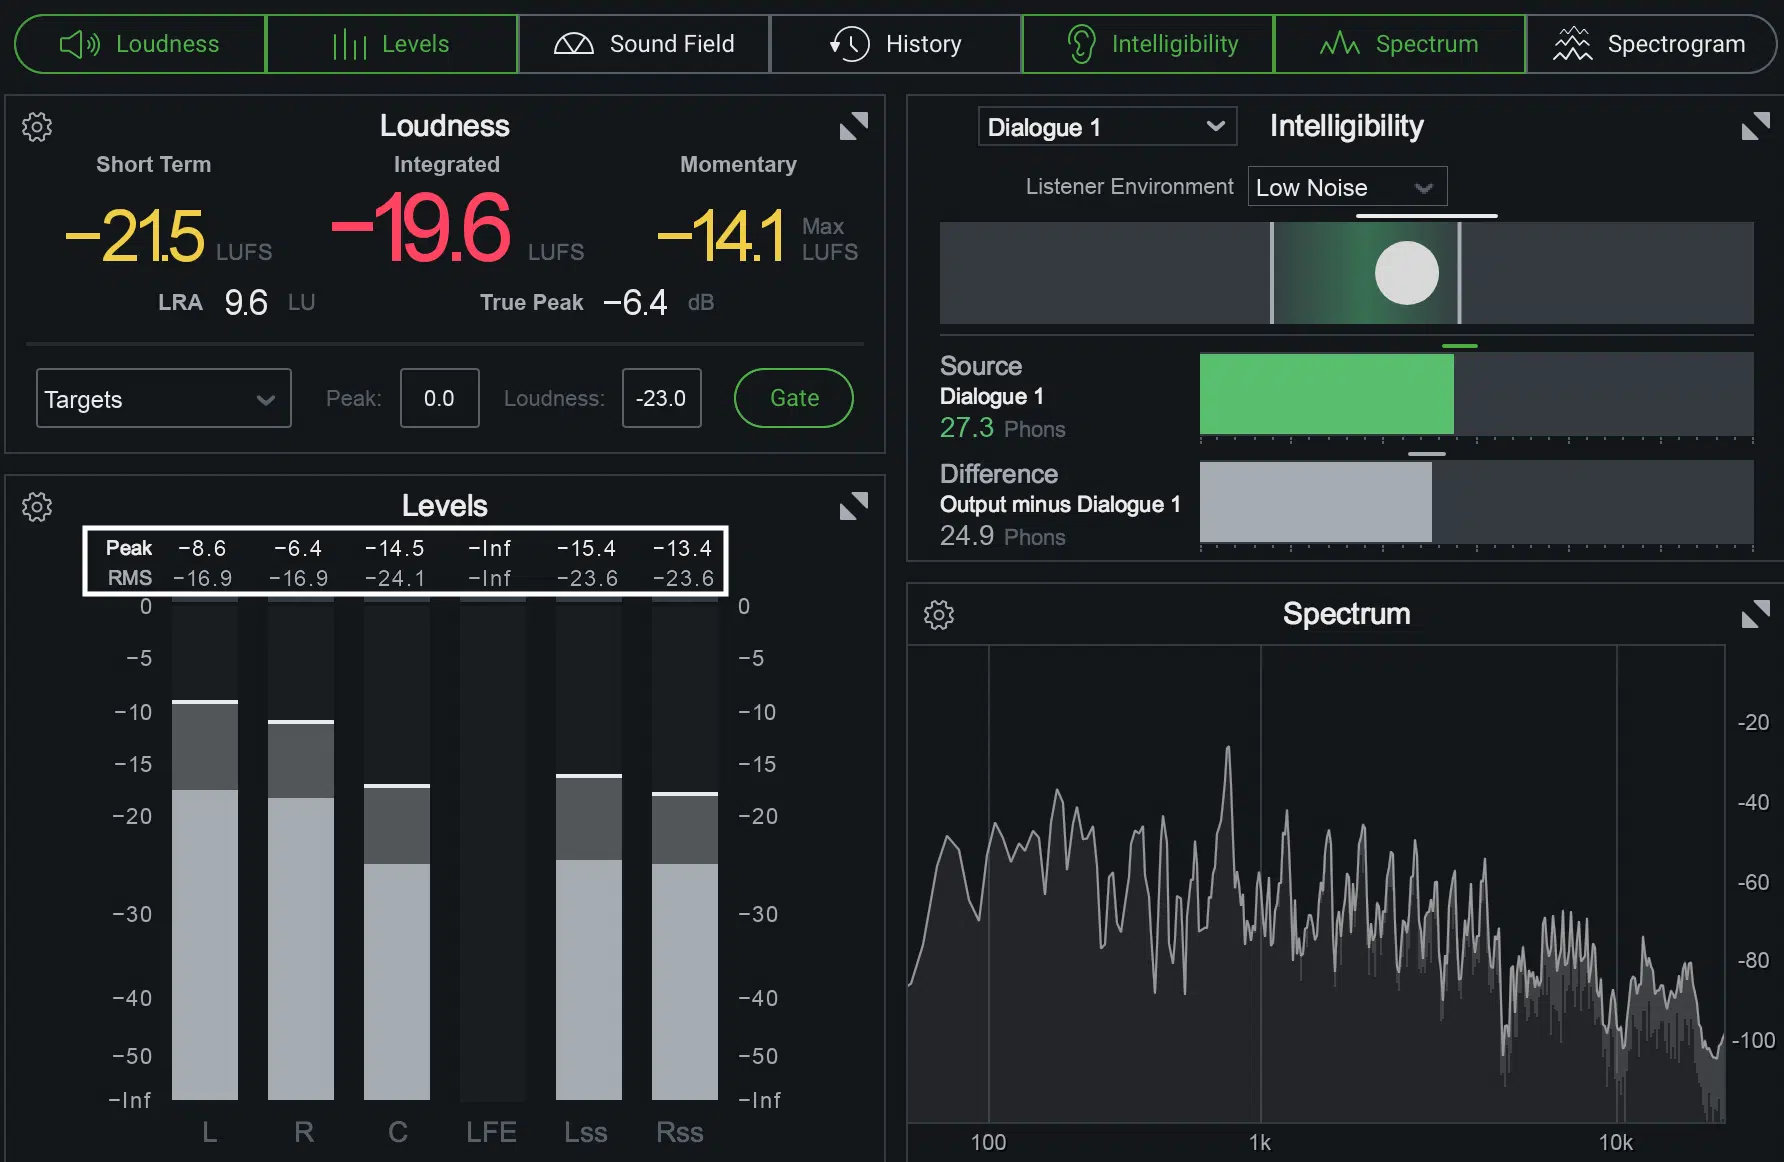
Balancing volume levels is the foundation of any great mix that no amount of EQ or compression will fix a poorly balanced track.
They like to use the expression you can’t put makeup on a pig, but I don’t know how I feel about that one.
Start with a static mix by pulling all the faders down, then bring up the kick drum to a comfortable level.
Add the snare next, then the hi-hats and cymbals so all the drums feel cohesive before moving on to the bass guitar.
For vocals, aim for them to sit 2–3 dB louder than the main instrumental elements 一 this keeps them front and center without overpowering the mix.
If you’re struggling to get the balance right, just solo the vocals and drums together first because it often reveals whether the rhythm section is too loud or soft.
A great trick is to lower your monitoring volume while balancing.
At lower levels, the most prominent elements will stand out, which makes it much easier to judge if something is too loud.
Automation is also essential for maintaining balance throughout the entire song.
For instance, bring up quieter elements like pads during a verse and pull them back during the chorus to create contrast.
Again, you’ll want to use metering tools to check RMS levels on your buses.
For example, aim for -14 dBFS on your instrumental bus and around -12 dBFS on the vocal bus for a balanced mix with plenty of headroom for the mastering stage.
When you’re learning how to mix music, make sure to always check your mix in mono periodically.
This ensures your mixing decisions translate well across all playback systems, even those with limited stereo image capabilities like phone speakers.
-
Stereo Imaging and Panning
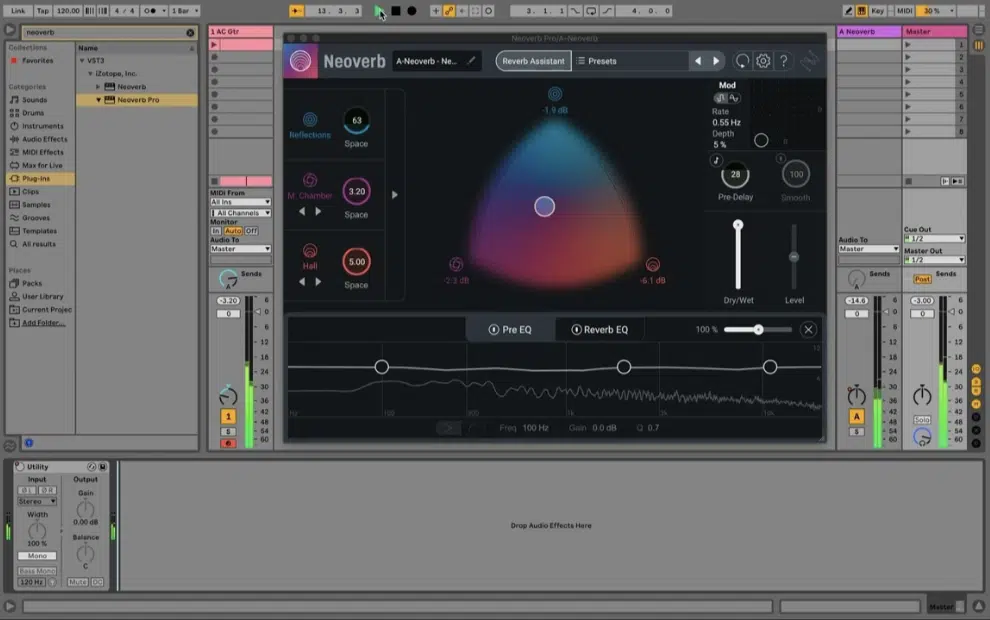
Panning and stereo imaging are super important when it comes to creating a wide, immersive mix that sounds professional.
They help define where each element sits in the frequency spectrum and keep everything from clashing in the center.
It’s super important to understand when you’re learning how to mix music.
Start with your drums 一 pan the hi-hats slightly to the right (around 20%) and the toms across the stereo field to mimic a natural drum kit layout.
For the overhead mics, if applicable, spread them wide (70–80%) to capture the full stereo width.
Bass and kick should stay dead center to anchor the low-end and make sure it translates well across playback systems.
Vocals also sit best in the center, but you can add stereo width by panning doubles or harmonies hard left and right.
For synths, pads, or guitars, experiment with wider panning (50–100%) to fill out the mix, just be careful not to leave the center too empty.
This can make your mix feel unbalanced and just straight up sloppy.
NOTE: Using mid/side processing can further enhance your stereo image.
For example, boost the high-mids (2–5 kHz) on the sides of a synth pad to make it feel wider while keeping the center clean.
Another pro tip: Use a stereo widener sparingly. It’s tempting to go big, I know, but overdoing it can create phase issues and make your mix sound weak in mono.
Finally, you’ll want to automate panning for extra movement (for instance, pan a delay return from left to right during a build-up to create tension and excitement).
-
Adding Effects
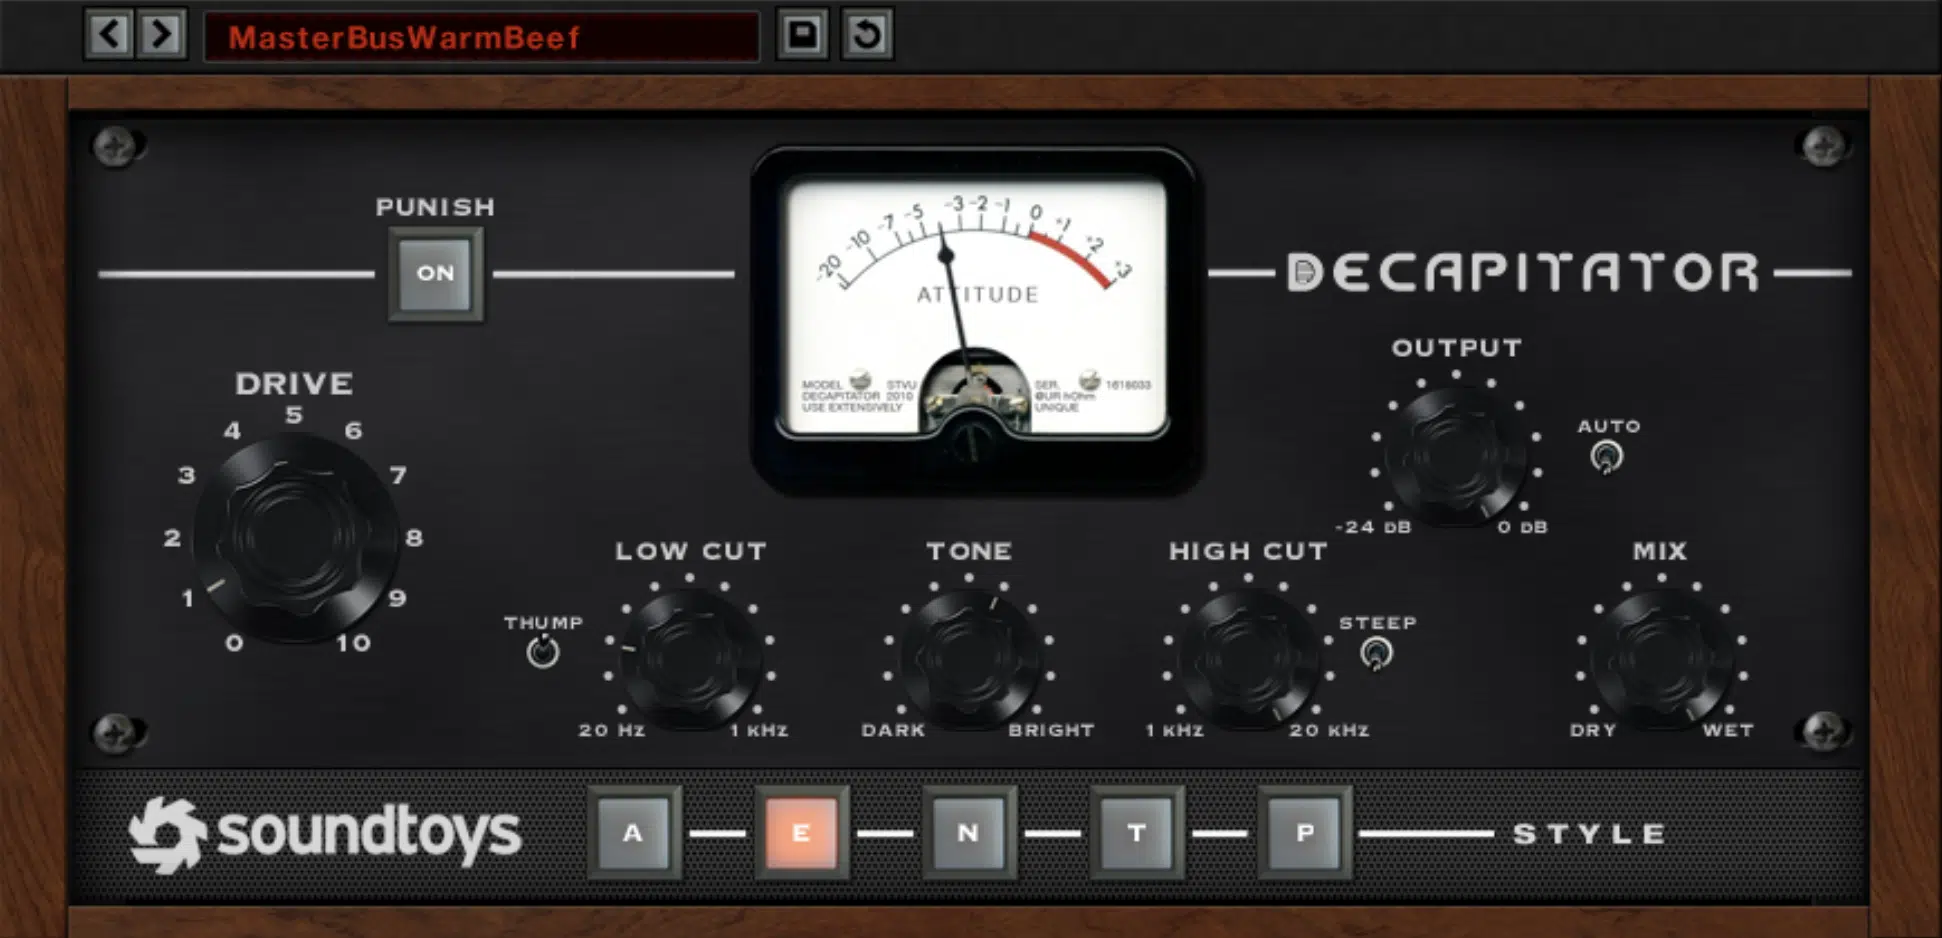
Effects are where you can get creative and add personality to your mix music, and honestly they’re my favorite to play around with.
From harmonic distortion to modulation, the right effect can take a track from boring to unforgettable, and it’s important when you’re learning how to mix music.
Start with distortion or saturation, like adding a touch of harmonic distortion to a vocal track using Soundtoys Decapitator (this is my fav, but dealer’s choice).
Set the drive to around 3 and blend it with the dry signal to add character without overwhelming the vocal.
Modulation effects like chorus and flanger are also awesome for adding movement.
So, use a light chorus on background vocals or synths to thicken the sound and set the depth to around 25% and the rate to 0.5 Hz for a subtle shimmer.
For transitions, try a reverse reverb effect.
Simply bounce a vocal phrase, reverse it, and send it through a long reverb with a decay of 5–6 seconds to create a swell effect that leads into the next section.
Don’t forget about transient shaping…
On drums, use a transient shaper to add attack to the snare or reduce sustain on the toms for a tighter sound.
PRO TIP: Layer your effects. For instance, stack a delay with a short feedback time on top of a reverb to add depth and rhythm at the same time.
Just be sure to EQ the effect returns to avoid muddiness.
Finally, automation is your best friend when it comes to effects, so fade in a flanger on a guitar track during the verse or increase reverb on a snare hit for emphasis.
Small changes like these keep your mix dynamic and engaging and it will help you know how to mix music like a boss.
Refining Your Mix Even More
When you’ve nailed the basics of how to mix music, it’s time to kick things up a notch so you can make your tracks stand out even more and learn how to mix music like the professionals do. This way, you’ll refine your sound to perfection, enhance clarity, and give your mix a more polished edge.
-
Layering Tracks
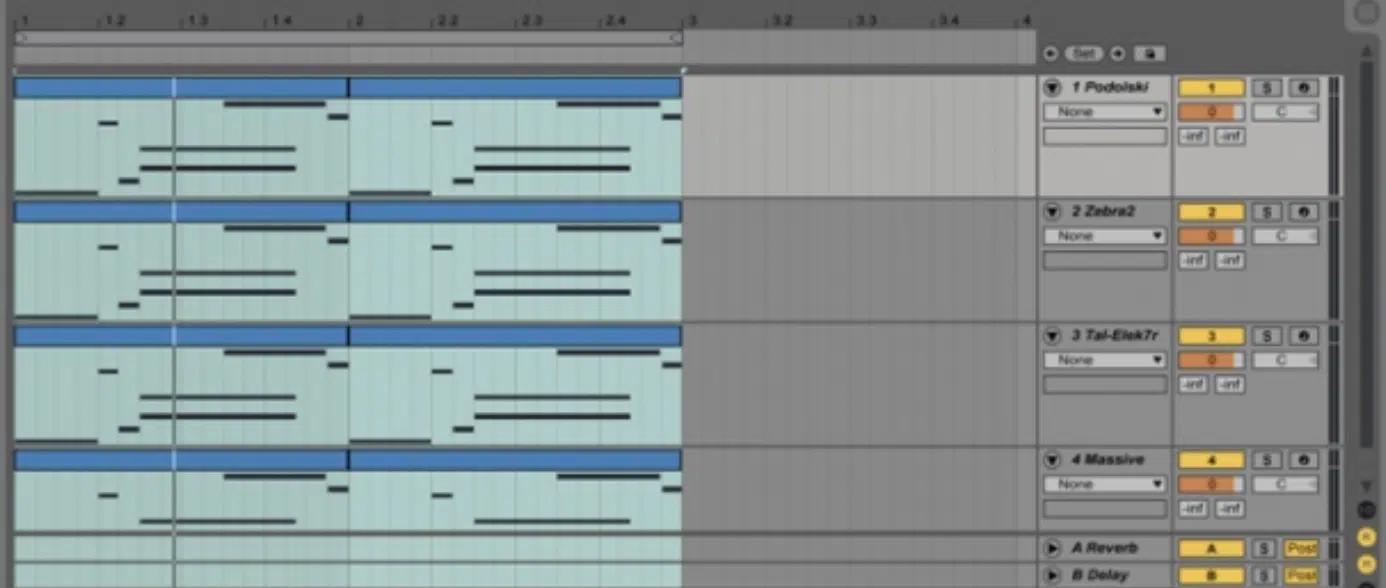
Layering Synths
Like I touched upon in the last section, layering is one of the best ways to create a fuller, richer sound, and when you’re learning how to mix music, it’s key.
It’s all about combining multiple tracks to add depth and complexity without muddying the overall frequency spectrum.
Start with drums, like layering a snappy, high-end clap with a deep, punchy snare to create a balanced and impactful hit.
Just make sure each layer occupies a different frequency range to avoid any overlap.
Use EQ to carve out space 一 cut 200–500 Hz from the clap and boost the same range on the snare to let them complement each other.
For synths, layer a bright lead sound with a warm pad underneath to fill out the mids and pan the layers slightly apart (e.g., one at 20% left and the other at 20% right).
This will create a wide, immersive stereo image that you should be aiming for.
Vocals can benefit from layering too in some situations.
So, if you feel like it benefits your mix, you can add a slightly delayed double track to the lead vocal and pan it slightly off-center for thickness.
Then, layer a harmonized vocal track, EQing it to boost 3–5 kHz for clarity and air.
You can even use saturation on one of the layers to add character like any good mixing engineer would.
For example, add subtle tape saturation to a vocal layer to make it stand out while keeping the main vocal clean (this contrast creates depth and texture in your own mix).
-
Parallel Processing
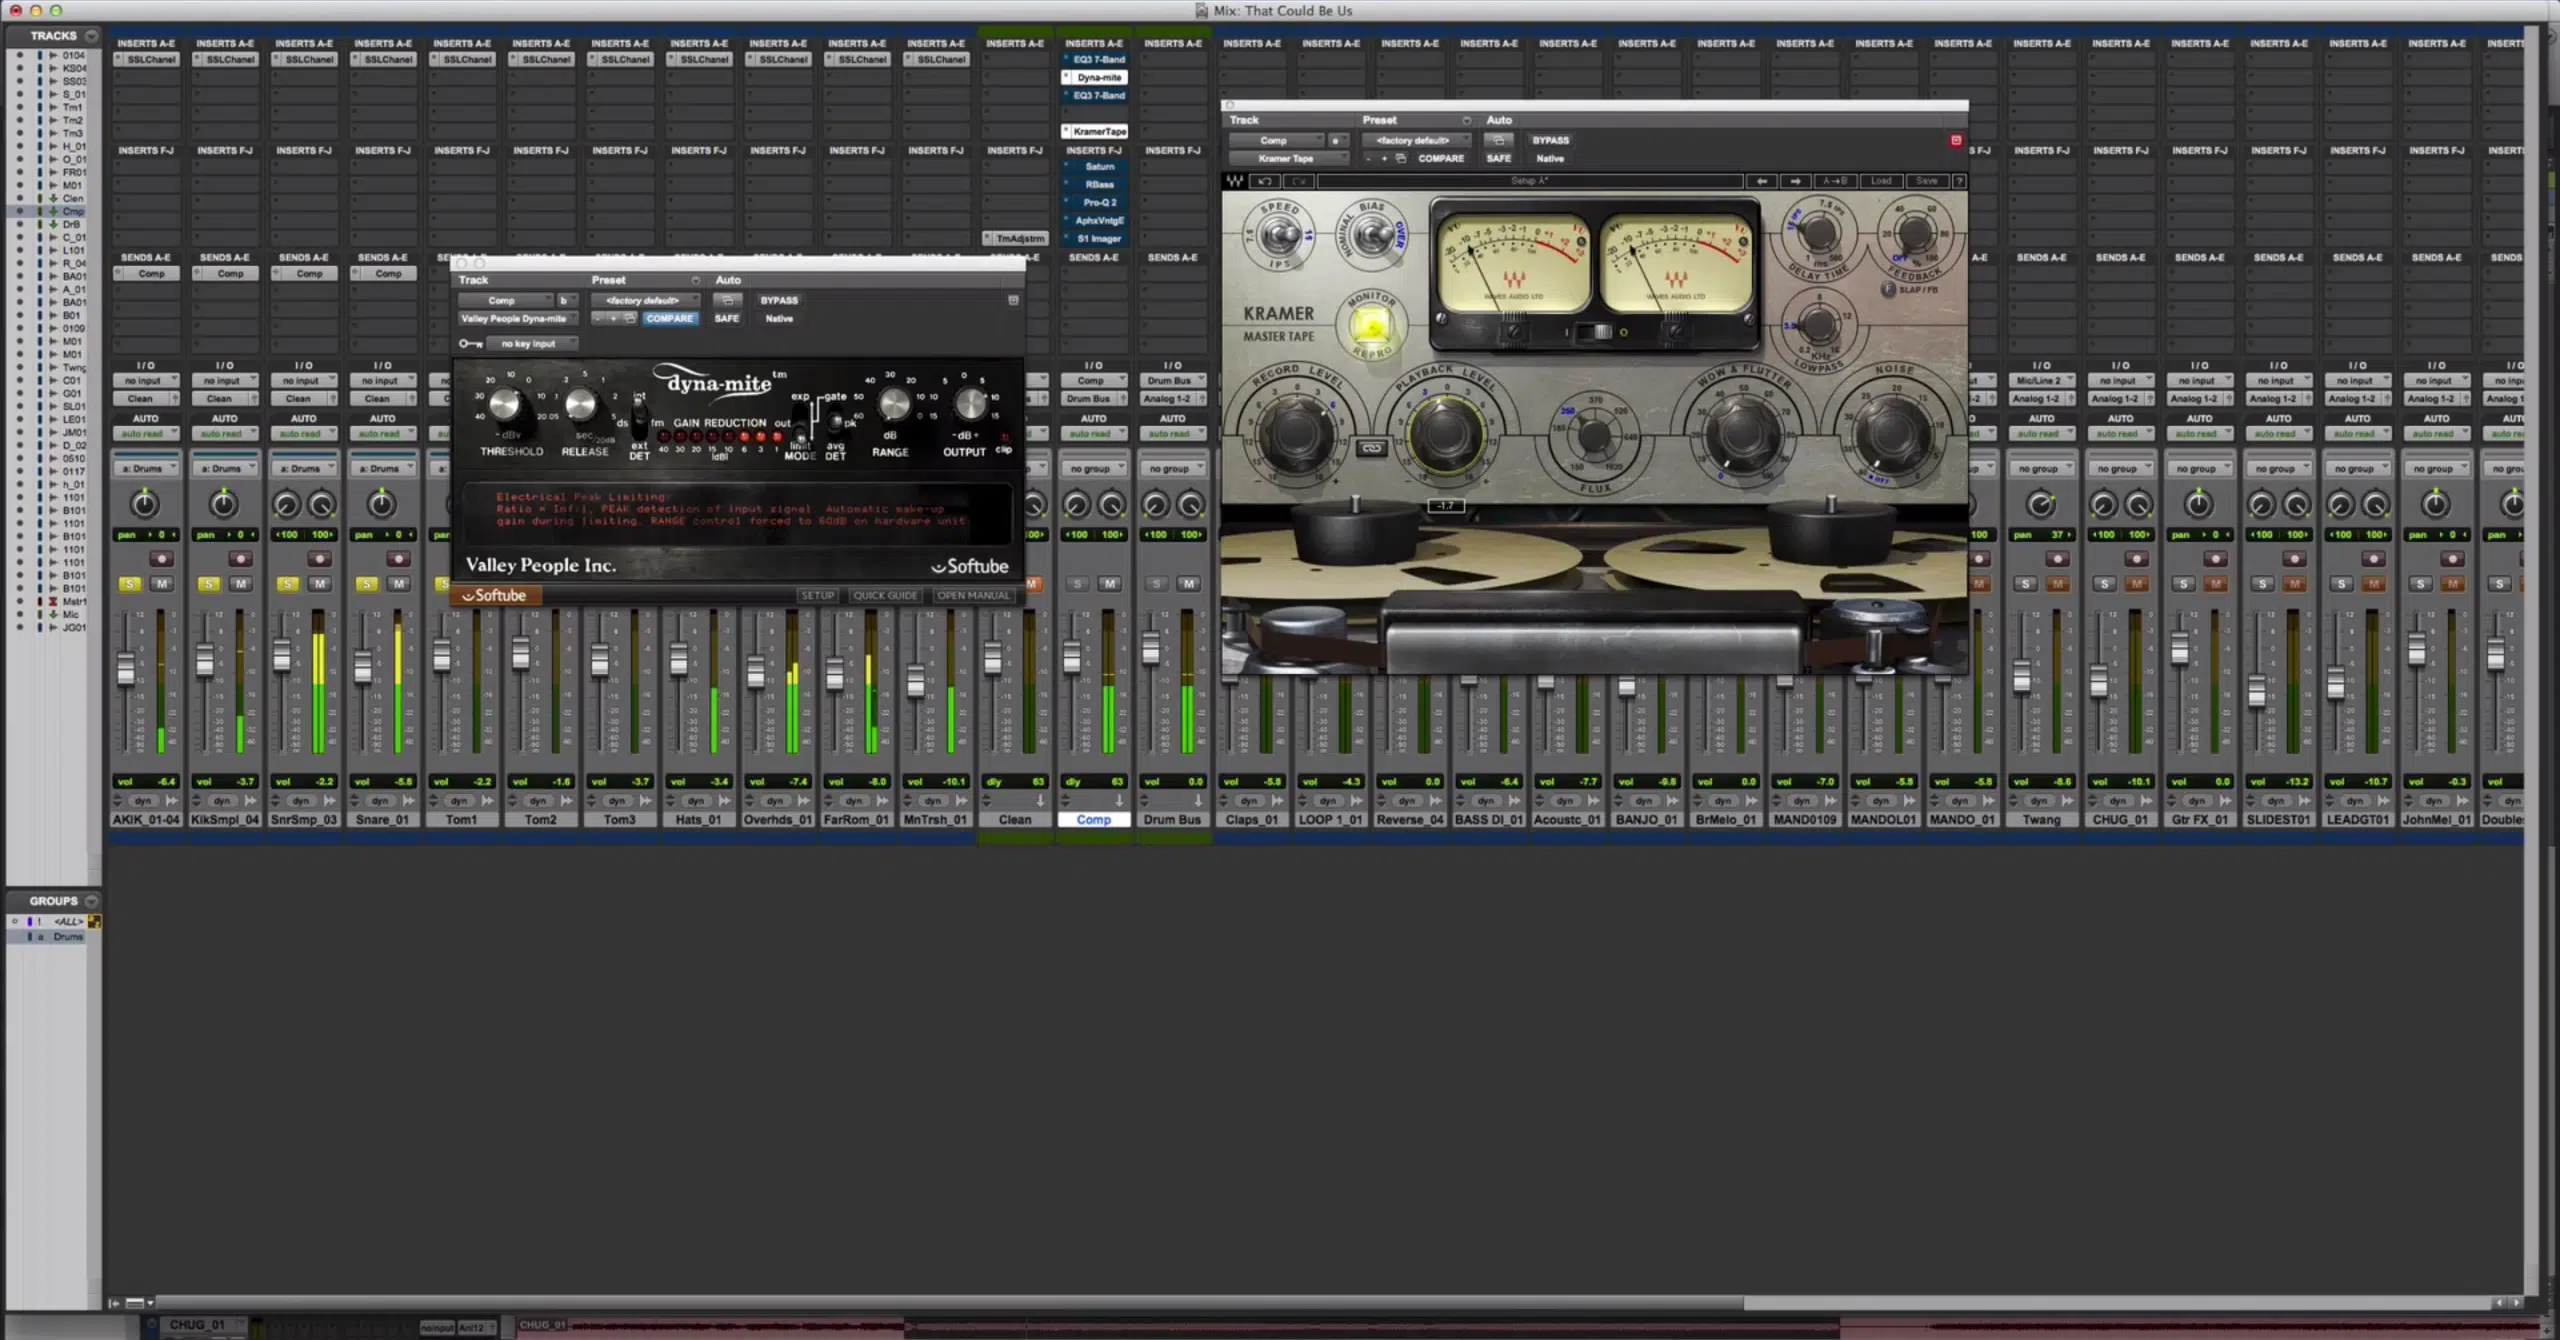
Parallel processing is a powerful tool that lets you blend heavily processed audio with the original signal for maximum control and impact.
It’s a go-to technique for:
- Drums
- Vocals
- Even bass
For drums, create a duplicate of your drum bus and compress it heavily.
Use a fast attack (5 ms) and medium release (50 ms) with a 6:1 ratio 一 aiming for 10 dB of gain reduction like we talked about earlier.
Blend this compressed version back with the original signal to add punch and energy without sacrificing dynamics.
On vocals, parallel compression can make the performance feel more upfront, and you can set up a parallel chain with a vintage-style compressor, such as an LA-2A emulation.
Then, drive the compressor hard, then mix it back in at around 20% wet.
This technique keeps the natural dynamics of the vocal while boosting the quieter parts for consistency and professionalism.
Parallel saturation works wonders on bass in most situations.
To achieve this, duplicate the bass track, apply distortion to the copy (try a drive setting of 4–5), and blend it in subtly to add grit and presence.
This helps the bass cut through without competing with the kick drum.
PRO TIP: Use parallel EQ on pads or synths. For example, duplicate the pad track, apply a high-shelf boost at 8 kHz on the copy, and blend it back in.
This adds airiness to the top end while keeping the original lush and warm, and helps you learn how to mix music faster.
-
Controlling Transients When you Mix a Song
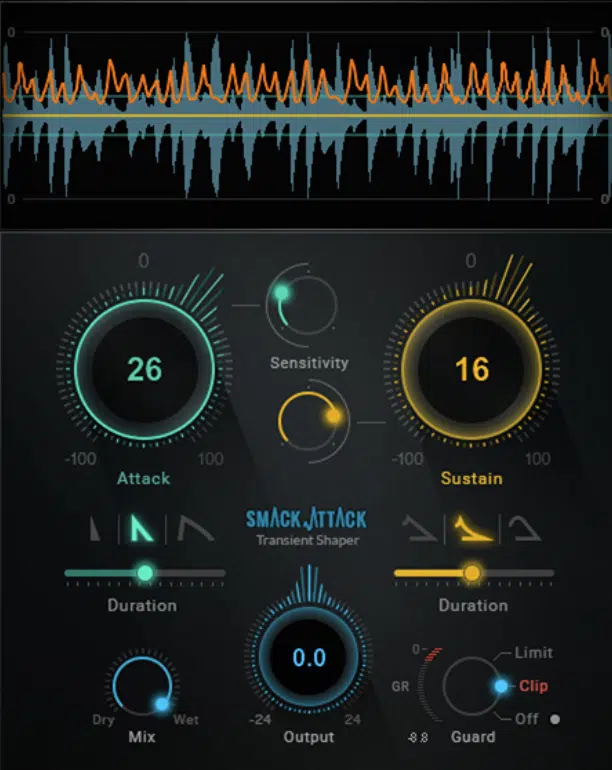
Transients are the initial attack of a sound, and controlling them is key to a good mix.
When done right, it makes sure every element punches through without overwhelming the other elements, which is kind of the whole thing.
Start with a transient shaper on your snare drum.
Then, increase the attack by 10–15% to emphasize its punch, and reduce the sustain by 10% to tighten it up. This makes the snare pop in the mix without adding extra volume.
For kicks, focus on the low-end transient.
Use a compressor with a slow attack (20 ms) and a medium release (40 ms) to let the punchy transient cut through before controlling the tail.
Set the threshold to reduce 4–5 dB during peaks for a balanced sound.
If you’re working on a mix with a guitar or piano that has overly harsh transients, use a dynamic EQ to tame specific peaks.
For example, if the attack feels too sharp around 2–3 kHz, set the EQ to cut only during those moments.
Layered sounds (like a clap and snare combo) can seriously benefit from transient control too, so keep that in mind.
Adjust the attack and release on each layer to avoid clashing transients that can muddy the frequency spectrum.
PRO TIP: Use sidechain compression creatively. For example, duck the transient of a bassline slightly when the kick hits.
Set the sidechain threshold to 3–4 dB reduction for a tight, cohesive rhythm section.
-
Automation
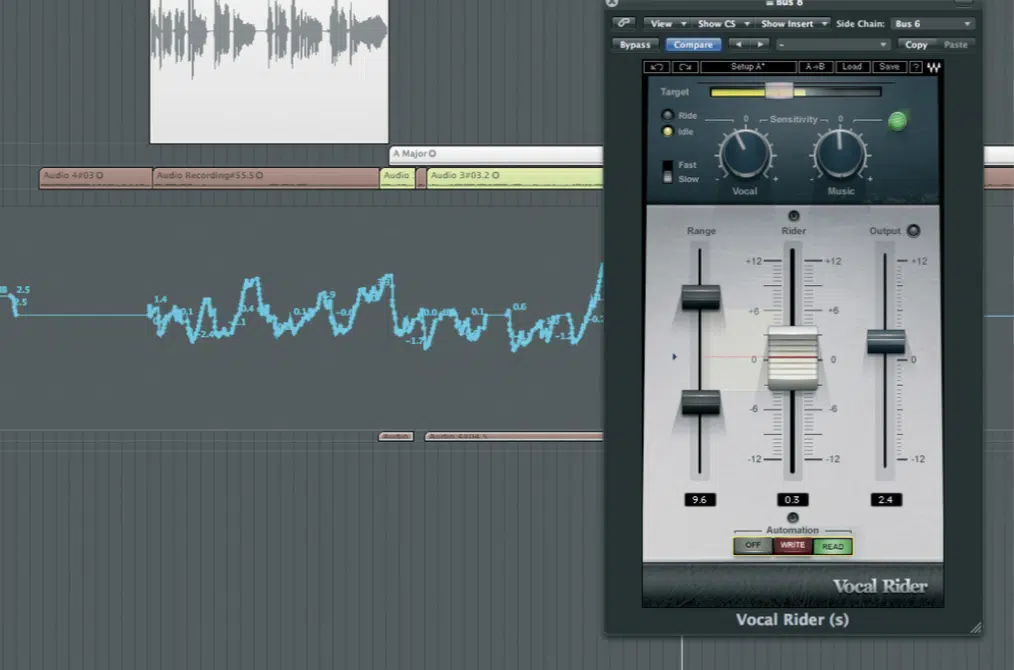
Volume Automation (Vocals)
I know I’ve talked a little bit about automation, but I felt like I should break it down in detail so you really get a solid understanding when you’re learning how to mix music.
Automation is the secret weapon for adding movement and emotion to your own songs.
It lets you control how elements evolve over time, ensuring the mix stays dynamic and engaging from start to finish.
Volume automation is the most common and powerful.
For example, gradually bring up the volume of a pad in the pre-chorus to build tension, then drop it slightly as the chorus kicks in to make room for the vocals and drums.
You can automate panning to create a sense of motion like panning a delayed guitar part from left to right during a breakdown.
Just make sure to set the pan automation to a smooth curve for a natural feel.
Effect automation is where things get really fun…
Increase the reverb tail on the last word of a vocal phrase or fade in a flanger on a synth during the bridge; this adds a touch of drama and keeps the listener engaged.
For more advanced moves, you can even automate EQ parameters.
If a vocal gets harsh at 3 kHz during certain phrases, automate a dynamic EQ to dip only in those moments to keep the vocal smooth without affecting its presence elsewhere.
PRO TIP: Use automation to highlight key moments in the song structure.
For example, automate a subtle volume boost (1–2 dB) on the snare during the chorus to emphasize the groove.
Automation takes time to get right, but the effort pays off in a finished mix that feels alive and professional when you’re learning how to mix music.
8 Advanced Tips for Mixing Music (Bonus)
By now, you’ve learned how to mix music from start to finish, for the most part. But if you want to take your skills to the next level, these advanced mixing tips will push your mixes to the next level. So, let’s play around with some techniques that go beyond the basics when you mix a song.
#1. Using Dynamic EQ for Precision
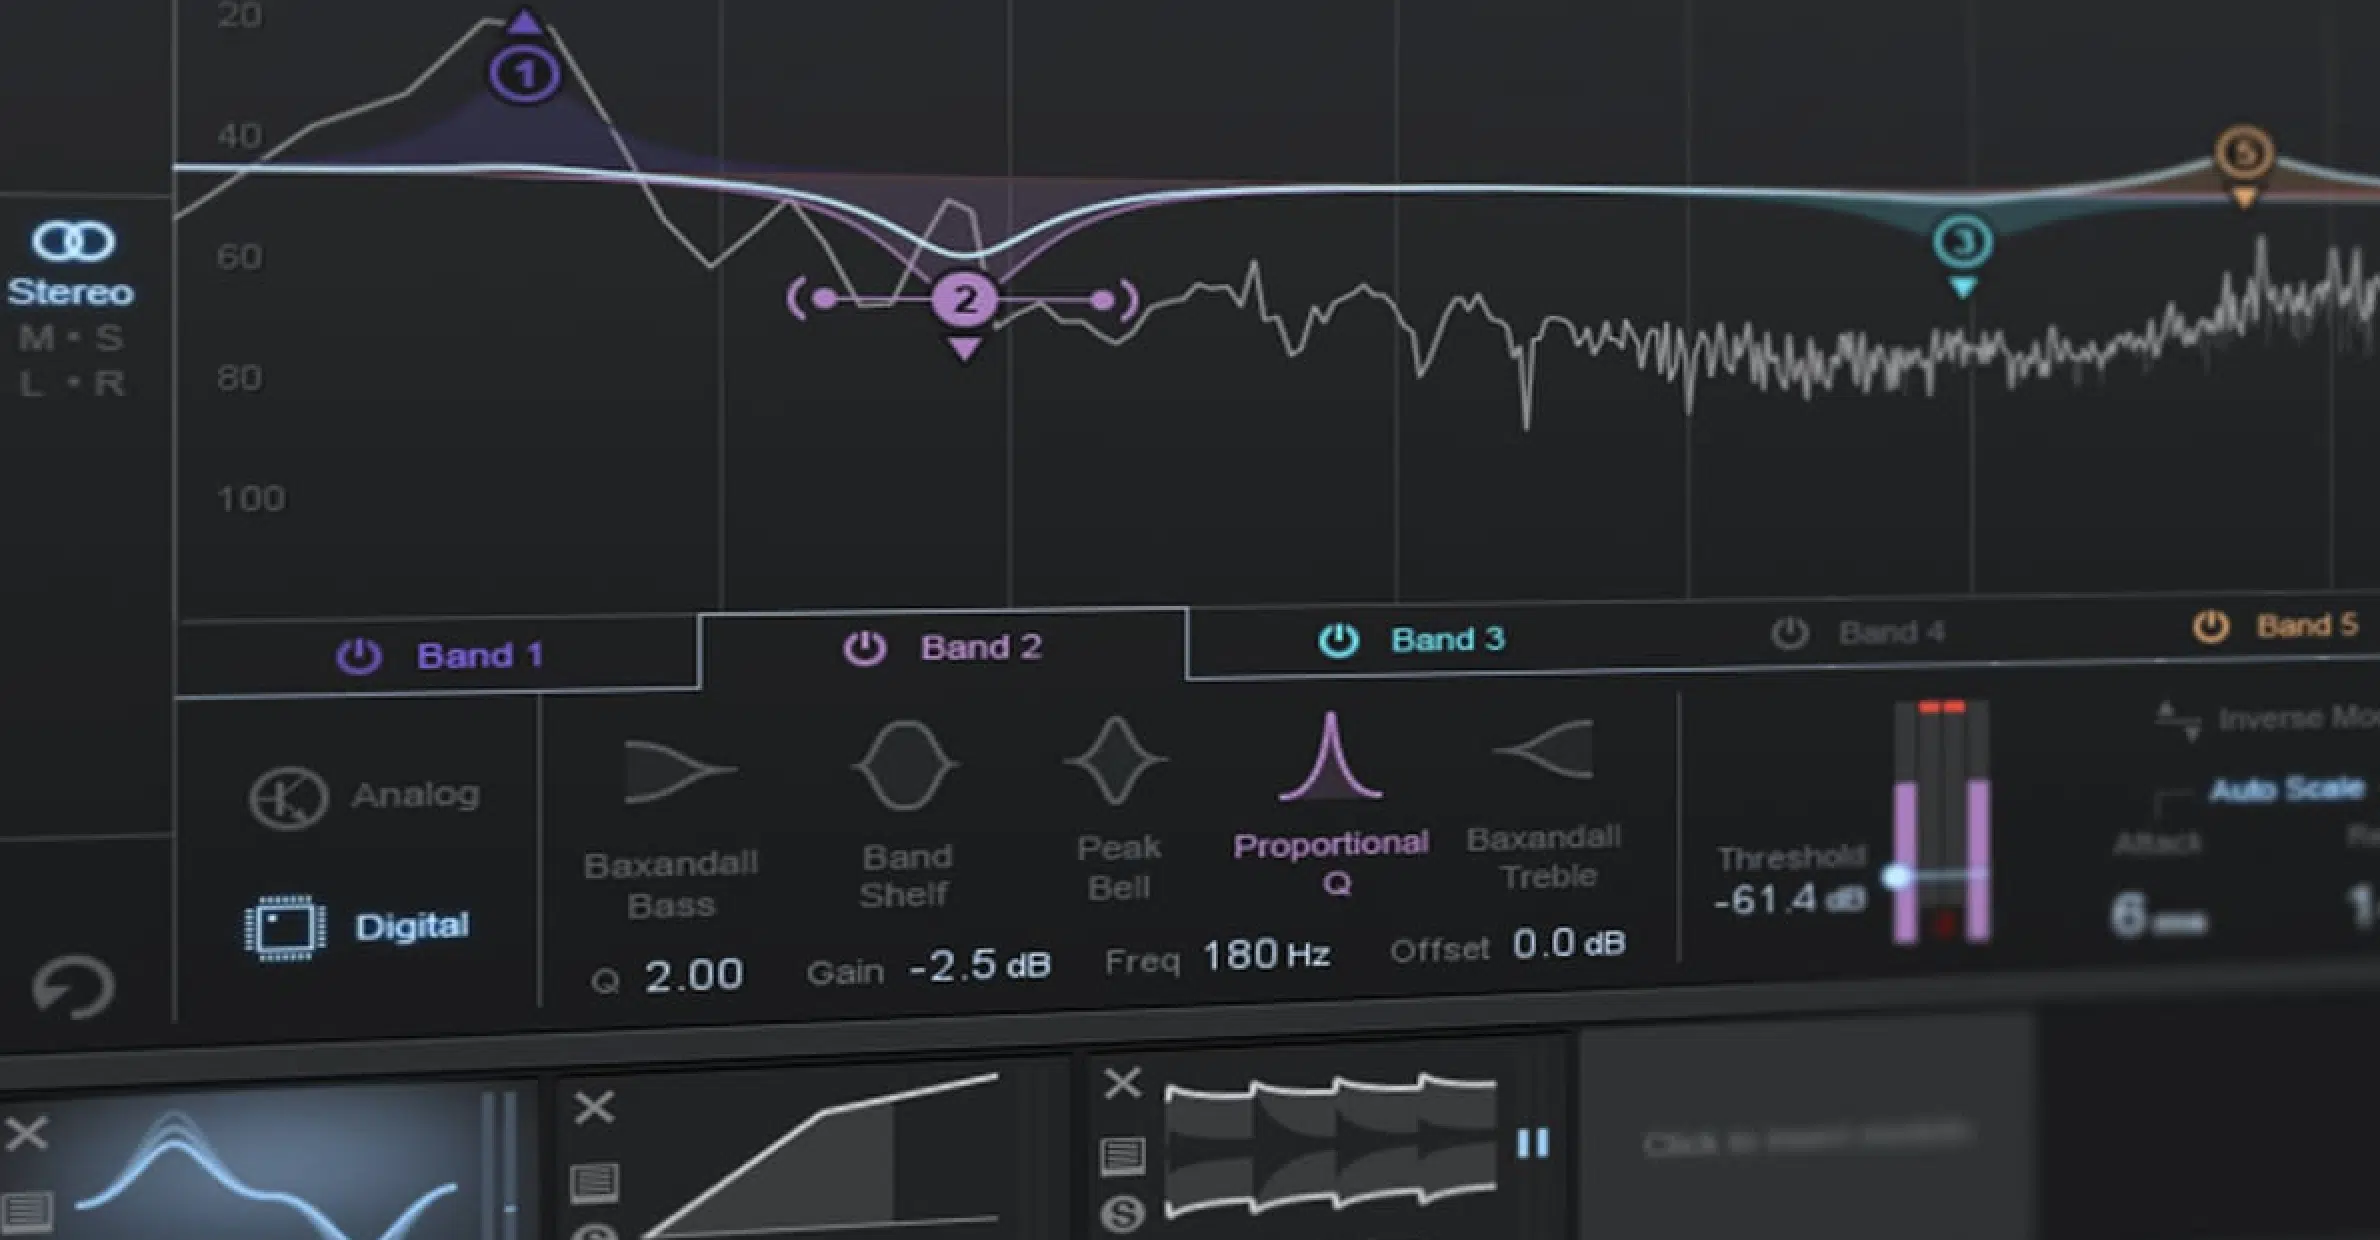
Dynamic EQ is like a surgical tool for your mix and you’ll need to be very familiar with it when you’re learning how to mix music.
It’s perfect for addressing problems that static EQ might miss 一 giving you precise control over dynamic frequencies that change throughout the track.
Unlike static EQ, which applies the same adjustment all the time, dynamic EQ only acts when specific frequency ranges exceed a threshold.
This makes it ideal for fixing issues that pop up inconsistently like, lets say, harsh vocal peaks, muddy low-mids, or boomy bass notes.
For example, if a vocal sounds harsh when the singer hits loud notes, set a dynamic EQ to cut 4–5 dB at 3–4 kHz, with a Q factor of 2–3 for precision.
Don’t forget to adjust the threshold so the EQ only engages when the harsh frequencies exceed a certain volume, not all the time.
This makes sure the vocal stays clear and smooth without dulling its overall tone.
On bass, dynamic EQ can tame rumbling low-end frequencies without cutting them out entirely, so you’ll want to set the threshold to dip 60–80 Hz during louder passages.
This lets the bass drum sit tightly with the kick drum.
Adjust the attack time to 20 ms and the release to 50 ms to keep the transitions between notes smooth and create a tighter, more focused low-end.
PRO TIP: Make sure to use dynamic EQ on cymbals or acoustic guitars with harsh highs. A gentle cut at 7–8 kHz that activates only during louder sections can balance the brightness while retaining detail.
Lastly, don’t forget to listen in context because dynamic EQ adjustments should serve the overall frequency spectrum of the mix, not just individual tracks.
When you’re learning how to mix music you have to keep in mind that a good balance here can make the difference between a fluid sound and a cluttered one.
#2. Applying Harmonic Saturation
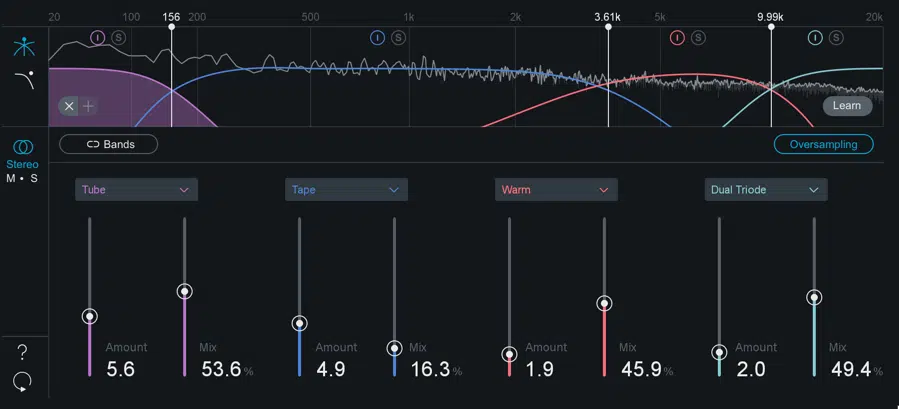
Harmonic saturation is going to be your best friend for adding warmth and character to digital mixes.
It subtly enhances the frequency spectrum by adding pleasant overtones to mimic the amazing effect of analog gear (one of my favs, can’t lie).
For vocals, tape saturation plugins like Softube Tape or Kramer Master Tape are fantastic, but use whatever you’re comfortable with.
Set the drive to around 20–30% for vocals and experiment with the high-frequency roll-off at 8–12 kHz to smooth out sibilance while adding richness to the midrange (think 500–800 Hz).
On drums, tube saturation is where it’s at for adding punch and weight.
You’ll want to apply a light amount (around 15%) to your drum bus to make any kicks and snares feel fuller without overpowering the mix.
You’ll want to focus on subtle enhancements in the low-mids (150–250 Hz) for kick drum punch and in the highs (8–10 kHz) for cymbal sheen.
Then, blend it in at around 20% wet for a balanced, energetic drum sound that doesn’t overpower the mix.
For bass guitar, harmonic distortion can bring clarity to low-end notes that might otherwise get lost/drowned out.
Remember to boost the saturation slightly in the midrange (100–300 Hz) to help it cut through smaller playback systems.
Just don’t overdo it because saturation is about subtlety because a small adjustment can make a big difference without muddying the mix.
PRO TIP: Harmonic saturation also works beautifully on synths or pads.
For example, lightly saturate a synth lead with a tape emulator 一 setting the bias to 50% and the drive to 10% to add that vintage grit.
#3. Creative Sidechain Compression Techniques
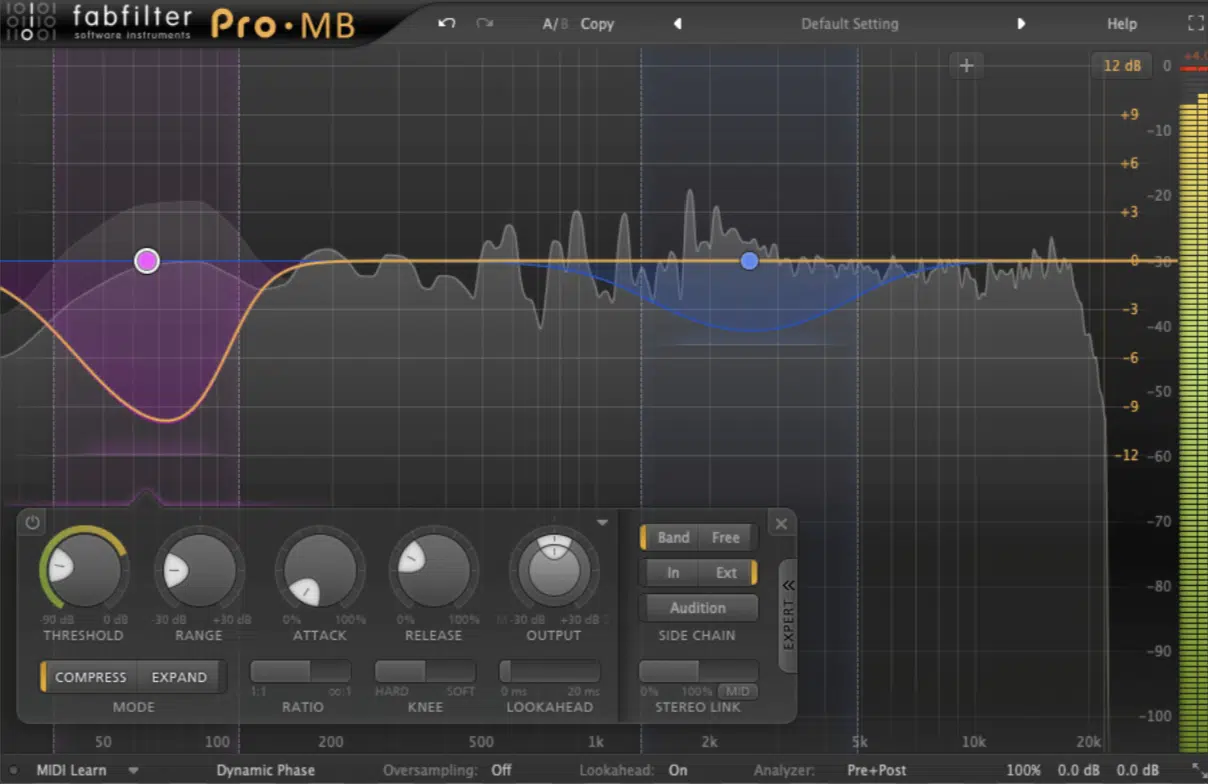
Multiband Sidechain Compression
Sidechain compression is most commonly used to balance the kick drum and bass, but it has plenty of creative techniques beyond that actually.
If you’re not already experimenting with sidechaining beyond the basics, trust me, you’re missing out big time.
For example, you can sidechain synth pads to duck slightly when vocals are present to make sure the vocal stays upfront while maintaining the pad’s lush texture.
Set the threshold to trigger around -12 dB with a ratio of 4:1 for noticeable but smooth results and then tweak things however you’d like.
Also, adjust the attack to 5 ms for a quick response and the release to 40 ms so the ducking feels natural rather than abrupt.
You can also use sidechain compression to create some extra rhythmic movement.
On a sustained synth or pad, set the compressor to duck in time with the kick 一 creating a pulsing effect that adds energy to the track (people love it too).
Start with a ratio of 3:1 and a medium-fast attack (10 ms) to let the kick punch through cleanly, then fine-tune the release so the synth swells back up before the next kick hits.
For effects, you can apply sidechain compression to the reverb on a snare so it ducks slightly when the kick hits.
This keeps the low-end tight and ensures the reverb doesn’t muddy up the mix.
Start with a subtle threshold of -10 dB and a ratio of 2:1, just enough to reduce the reverb’s presence without removing it entirely.
PRO TIP: Play around with unconventional sidechain sources, like using hi-hats to trigger compression on a riser to create dynamic interactions that bring the track to life.
Set the attack to 15 ms and the release to 30 ms for a rhythmic, dynamic interaction that breathes life into the track.
You’ll find this trick is super helpful when you’re learning how to mix music in EDM or pop genres where tension and release are key to the song structure.
#4. Multiband Compression
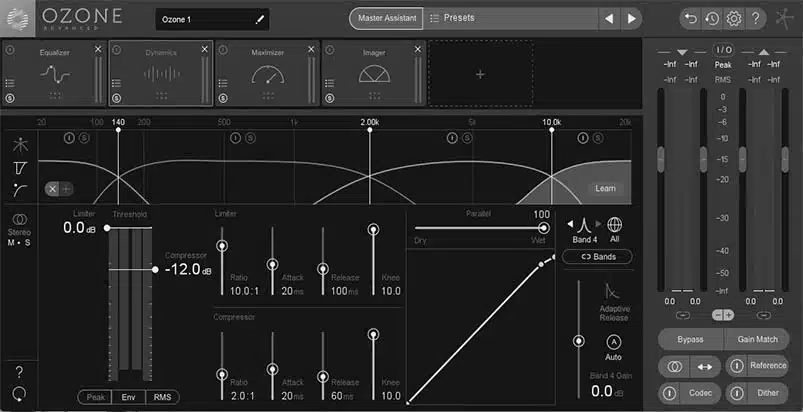
Multiband compression is an absolute game-changer for targeting specific frequency ranges without affecting the rest of the track.
When you’re learning how to mix music, keep in mind it’s excellent when things are more complex.
For example, you can control the low-end by compressing frequencies below 100 Hz with a:
- Ratio of 3:1
- Attack to 15 ms
- Release to 50 ms
This lets the initial transient of the bass or kick drum come through on point while controlling any lingering boominess.
When it comes to vocals, compress the midrange 一 focusing on 1–3 kHz with a ratio of 2:1, and setting the threshold to kick in only during peaks.
Keep the attack around 10 ms to preserve the natural dynamics, and use a medium release (40 ms) to avoid unnatural pumping.
Just keep the threshold just above the quieter passages so it only kicks in when needed.
Drums can benefit too, like using multiband compression on the drum bus to control the highs (above 6 kHz) separately from the mids.
A ratio of 4:1, with an attack of 10 ms and a release of 30 ms, works well here.
This keeps cymbals from becoming overpowering while preserving the punch of the snare and kick, which is always a plus.
PRO TIP: You can also apply subtle multiband compression on the master bus to glue the mix together.
Divide the frequency spectrum into three bands: lows (below 120 Hz), mids (120 Hz–4 kHz), and highs (above 4 kHz).
Just don’t forget to set each band to reduce no more than 1–2 dB.
For example, use a 2:1 ratio with an attack of 20 ms on the mids and highs to add cohesion without killing any dynamics.
#5. Enhancing Presence with Exciters
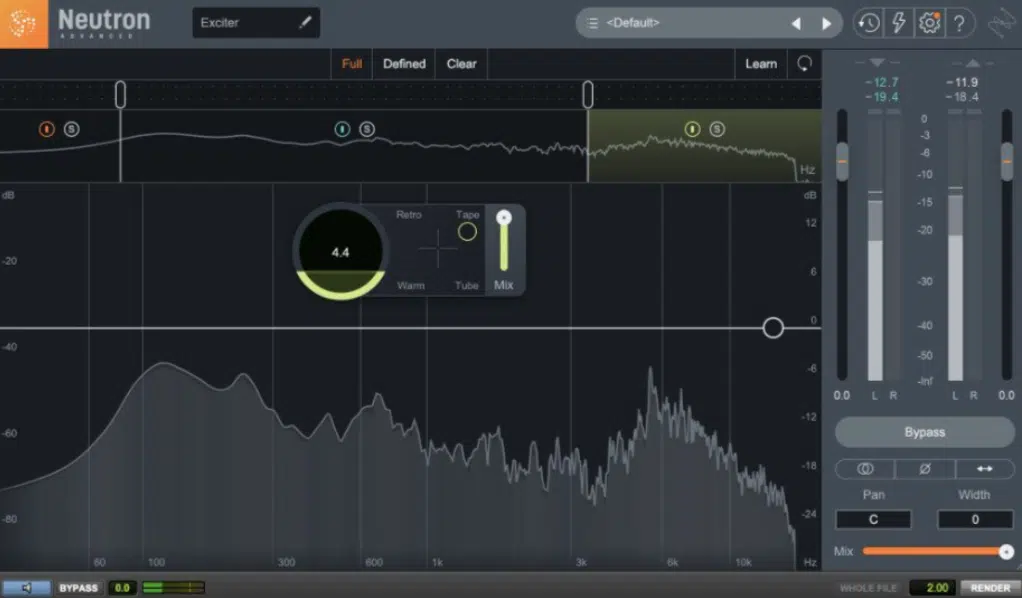
Exciters are incredible mixing tools for bringing out detail and clarity in your tracks, especially when some elements sound dull or lack presence.
They work by adding subtle harmonic distortion in specific frequency ranges so your track feels more alive without altering their balance.
For example, apply an exciter to your lead vocal and focus on the high frequencies (6–10 kHz).
A small boost in this range (usually around 10–15% intensity) can make the vocal sparkle without adding harshness.
If the vocal is sounding overly sharp, try rolling off frequencies above 12 kHz on the exciter to keep things smooth.
On the same note, on background vocals, an exciter can hype up their airiness and help them blend better with the lead so everything is on point.
Set the intensity slightly lower (8–10%) and target the same high-frequency range.
This gives the backing vocals a lift without overwhelming the lead or making the mix feel too bright.
Exciters work well on drums too and you can use one on your drum bus to enhance the snap of the snare and the sheen of the cymbals.
Start with a subtle boost in the highs (7–10 kHz) at 8–12% intensity.
Just be careful not to go overboard, as excessive excitation can make the cymbals sound harsh or unnatural.
For toms, experiment with boosting the mids (2–5 kHz) to bring out their body and resonance.
PRO TIP: Apply an exciter on the master bus with caution to add an overall sense of brightness and energy to the entire song.
Adding a gentle boost to the highs (around 10 kHz) and the upper mids (3–5 kHz) can give the entire song a sense of brightness and energy.
Set the mix to about 5–7% to keep the effect subtle.
If you feel like the overall tone is becoming too sharp, dial back the wet/dry mix or reduce the intensity to maintain the natural balance of your own music.
Remember when you’re learning how to mix music, it’s all about learning the little subtleties that can make or break your entire mix.
#6. Parallel Saturation for Impact
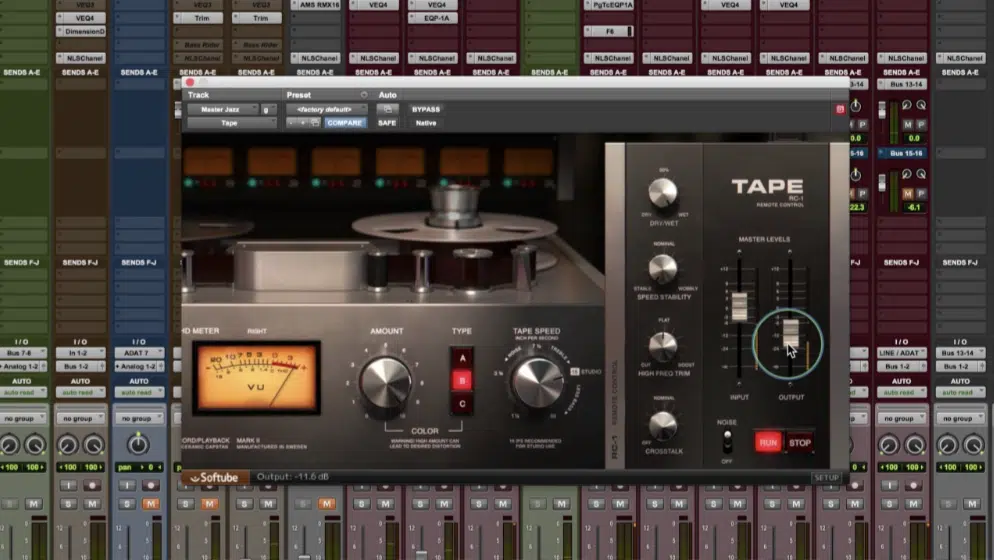
Parallel saturation is one of the best-kept secrets for making a mix feel polished and alive and if you’re learning how to mix music, you shouldn’t overlook this one.
The concept is straightforward: take a heavily processed version of a track, typically with harmonic distortion or saturation, and blend it back with the original.
This adds warmth, depth, and energy (it’s subtle but transformative when done right).
Let’s start with bass… Duplicate the bass track and apply a tape saturation plugin, like Softube Tape or Kramer Master Tape.
Set the drive to 40% to introduce subtle distortion, and adjust the tape speed to 15 ips for a warmer low-end.
Next, EQ the duplicate to focus on the midrange, boosting around 150–200 Hz by 3–4 dB.
Finally, mix the saturated bass layer back in at 20–30% wet to add richness and definition, especially on smaller speakers.
On drums, parallel saturation works wonders for enhancing punch and clarity.
You’re going to want to route your drum bus to a separate AUX track and load a tube saturation plugin like Saturn 2.
Focus on the low-mids (200–500 Hz) to add weight to the kick drum, and lightly saturate the highs (8–10 kHz) for cymbal shimmer.
Set the wet/dry mix at around 25% and gradually bring it up until the drums feel fuller without sounding harsh; remember, gradual is key.
Vocals, particularly in dense mixes, can also benefit from parallel saturation.
For lead vocals, duplicate the track and use a warm tube emulator like the UAD LA-610 with medium drive (30–50%) to add harmonic richness.
Apply a subtle high-shelf boost around 10 kHz on the duplicate for extra air, then blend it back at 15–20% to preserve the original clarity while adding presence.
PRO TIP: Play around with saturation on synths or pads, for example, duplicate a lush pad track, apply heavy saturation, and low-pass it around 2 kHz.
Blend it back in to add subtle analog warmth without overwhelming the frequency spectrum.
Just remember, if your mix starts sounding harsh or muddy, dial back the processed layers.
#7. Using Mid/Side Processing Creatively
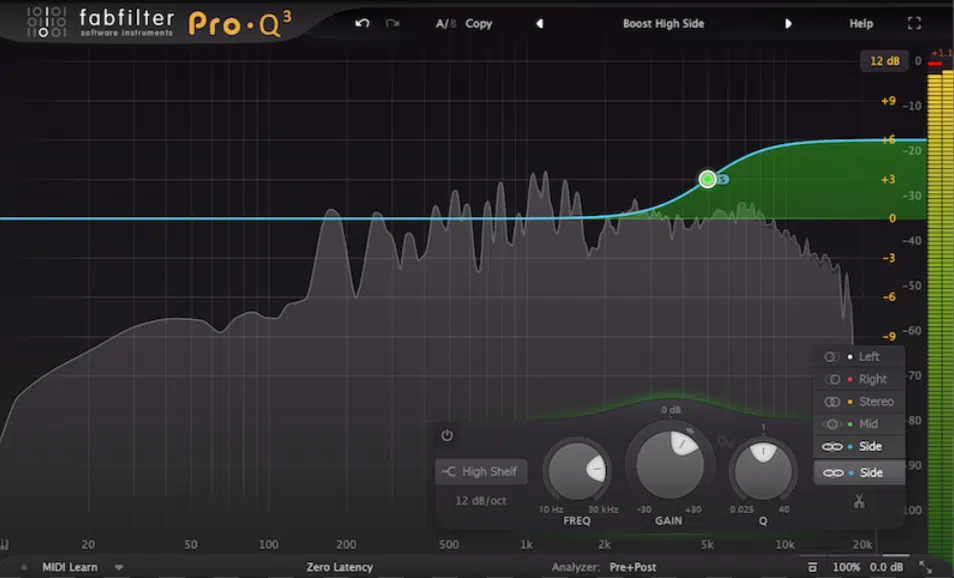
Mid/side processing lets you manipulate the center (mid) and sides of your mix independently for unparalleled control over your stereo image.
It’s perfect for enhancing width or cleaning up the center of your mix.
For example, on a synth pad, boost the highs (8–10 kHz) on the sides by 2–3 dB using a mid/side EQ to make it feel wider while leaving the mid frequencies untouched.
Just make sure to leave the mid frequencies untouched to keep the center clean and avoid cluttering the vocal or bass space.
On the master bus, use mid/side EQ to carve out space.
For instance, cut 200–300 Hz in the mids to reduce muddiness and boost 1–2 dB at 12 kHz on the sides to add air and clarity.
Vocals benefit from mid/side compression too, and it’s all about adding depth and focusing on the right areas.
Apply light compression to the mids (center) of a vocal track with a ratio of 2:1 and a threshold just above the quieter phrases.
This keeps the vocal upfront and consistent, while applying wider reverb or delay effects to the sides creates a spacious, polished sound.
PRO TIP: Use mid/side processing to clean up competing instrument sounds.
For instance, if your electric guitars are clashing with the lead vocal, use mid/side EQ to cut the mids by 1–2 dB at 2–3 kHz, while boosting their sides slightly by 1 dB.
This adjustment gives the vocal more room in the mix while ensuring the guitars still feel wide and present.
And yes, I’m going to say it again: always listen to your mix in mono after making any adjustments.
This ensures your changes translate well across all playback systems, even those that collapse the stereo image into a single channel.
#8. Make Sure to Color Code When you Mix a Song
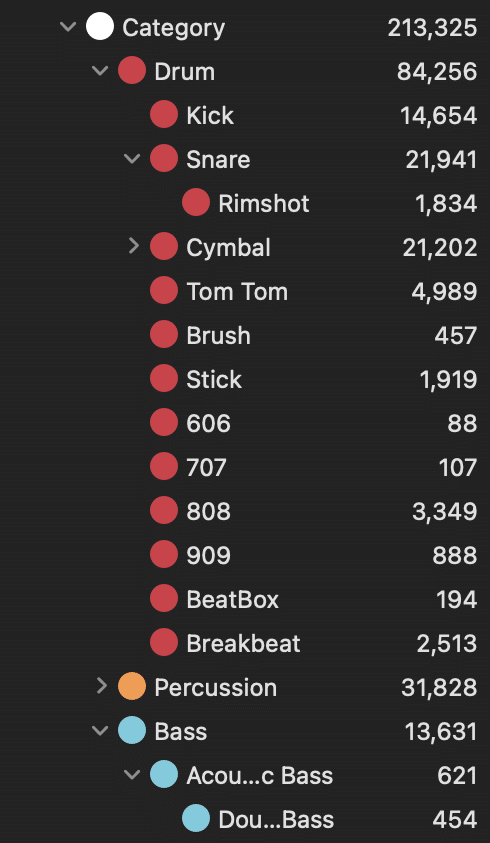
And lastly, when you’re learning how to mix music one of the most important things to do is color coding because it will keep your session organized.
And, in turn, your audio mixing process on point, of course.
It guarantees you can quickly identify groups of tracks, which makes it easier to focus on the individual tracks that need attention.
For example, assign:
- Green to your drums
- Blue to your vocals
- Purple to your synths
If you have multiple layers of background vocals, simply use different shades of the same color to differentiate between harmonies and doubles.
It also helps when working with large sessions containing all the instruments.
I mean, imagine trying to find a single pad buried in 60 tracks 一 it’s so much faster when you can rely on its assigned color.
PRO TIP: Extend color coding to your buses and AUX tracks.
For instance, color your drum bus the same green as your drum tracks, and match your vocal bus to the same shade of blue as the vocals.
This way, you can instantly see which tracks are grouped together and focus your adjustments.
Finally, remember that the goal is clarity because an organized session lets you spend less time searching and more time making creative audio mixing decisions.
Once you’ve got this system down, you’ll wonder how you ever worked without it.
It’s an easy way to stay on top of even the most complex sessions and achieve a professional mix, which is obviously key when learning how to mix music.
Final Thoughts
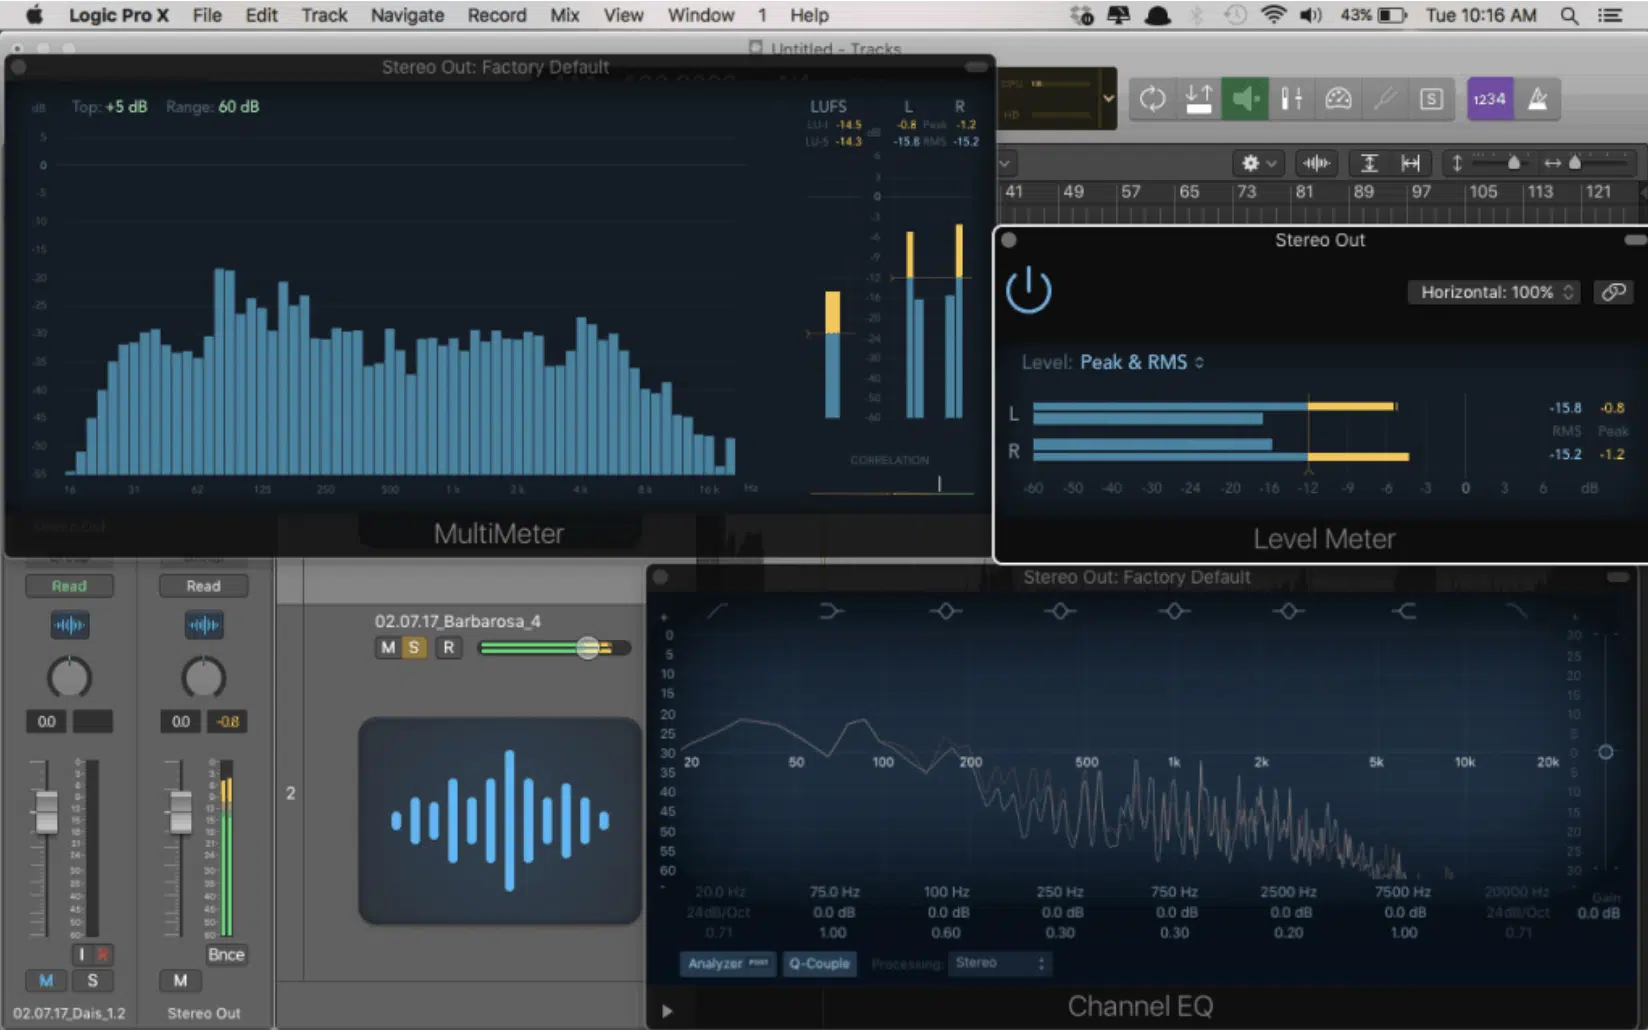
And there you have it: everything you need to know when learning how to mix music, along with some advanced tips for those already in the mixing game.
Remember, it’s all about mastering the basics like EQ, compression, effects, etc., as well as having a super organized workflow.
And keep in mind that it’s always important to trust your ears, use reference mixes, and practice your skills all day.
This way, your mixes will sound polished every single time.
As a special bonus, you should check out the absolute best mixing course in the entire industry: the Beatmaking Secrets Course.
This invaluable course, led by platinum producer LMC, offers over 8 hours of streamlined, no-fluff training videos designed to elevate your beat-making skills.
It covers everything from mindset and creative processes to sound selection, arrangement, mixing, mastering, sound design, and even marketing strategies.
It’s for all skill levels and provides expert techniques in any DAW so you can produce industry-level beats and land major placements.
If you want to learn how to mix music like a boss in the shortest possible amount of time, this is your key (it’s like having all the cheat codes).
Bottom line, when you’re learning how to mix music, you should stay organized and keep refining your techniques and learning new ones all the time.
After that, you’ll be mixing your tracks like a pro in no time.
Just remember to keep hustling, practice consistently, think outside the box, and always stay true to your unique style.
Until next time…


Leave a Reply
You must belogged in to post a comment.