Sound design is all about creating, shaping, and controlling the sounds that bring your tracks to life, and going as crazy as you want in the process.
Whether it’s designing synthesized sounds, adding modulation for movement, or layering various synths for a unique style, every choice you make affects the final result.
As producers, knowing all about sound design can seriously level up your creativity.
Plus, enhance your workflow and give you the skills to play around with more advanced techniques (while making music that really dominates the competition).
That’s why I’m breaking down the #1 sound design tutorial in the industry, which includes everything you need to know, like:
- The basics of oscillators, waveforms, and synthesis ✓
- Advanced techniques like granular & additive synthesis ✓
- How to use modulation ✓
- Layering and combining synths & techniques for synths ✓
- Creating expressive tones with pitch manipulation ✓
- Designing professional sounds with delay-based effects ✓
- Expanding your skills with physical modeling ✓
- Building creative effects chains for unique results ✓
- Pro tips from professional sound designers all throughout ✓
- A bunch of other stuff that makes it the best sound design tutorial ✓
With this sound design tutorial, you’ll know all about waveforms, modulation, synthesis, and tonal control.
Plus, how to recreate professional sounds, master advanced techniques, and make your tracks sound polished and professional every single time.
This way, your skills will skyrocket, and your tracks will always be on point, like the best sound designers in the game.
Table of Contents
- Sound Design Basics
- The Best Sound Design Tutorial (Unison Sound Design Secrets)
- Course Modules Breakdown
- Module 1: Painting With Sound
- Module 2: Mastering Synthesis
- Module 3: Oscillators and Waveforms
- Module 4: Modulation and Movement
- Module 5: Loudness and Timbre
- Module 6: Pitch Manipulation
- Module 7: Controllers and Voicing
- Module 8: Combining Sounds
- Module 9: Expanding Your Tonal Skills
- Module 10: Filters and Complex Tones
- Module 11: Delay-Based Effects
- Module 12: Evolving Tones with Wavetables
- Exclusive Bonuses
Sound Design Basics
Before we break down the sound design tutorial itself, let’s just talk about the basics of sound design first.
Sound design is all about creating and shaping sounds to fit the mood, energy, and style of your track in super creative ways.
This could be tweaking basic waveforms into complex textures or layering different synths to build entirely unique timbres.
Or, even using unconventional techniques like sampling real-world noises and transforming them into musical elements.
Every sound you hear (whether it’s the booming impact of drums or the evolving sweep of a low-frequency oscillator) has been designed to perfection.
For producers like us, knowing how to control modulation, different synthesis types, and signal chains is what separates amateur tracks from professional-level music.
The basics always start with understanding synthesis, so I’ll quickly break it down for you:
- Subtractive synthesis 一 Shapes sounds by cutting away frequencies.
- Additive synthesis 一 Layers simple sine waves for complete control over harmonics and timbre.
- Wavetable synthesis 一 Uses evolving waveforms that can morph over time, perfect for creating ever-changing tones.
- FM synthesis 一 Uses one waveform to modulate the frequency of another.
- Granular synthesis 一 Breaks down audio into tiny grains, letting you rearrange and manipulate them for entirely new textures.
Add filters, modulation, and effects into the mix, and suddenly you’re not just making music, you’re actually building legendary soundscapes.
If you’re wondering where to begin, mastering foundational concepts like oscillators, waveforms, and basic sound design tips is the place.
That’s why a sound design tutorial like Unison Sound Design Secrets is such a game-changer 一 it teaches you to start simple but think big (massive, really).
The Best Sound Design Tutorial (Unison Sound Design Secrets)

When it comes to learning sound design, not all tutorials are created equal because you have the basic, boring ones and the ones that literally blow your mind.
The Unison Sound Design Secrets course is one of those mind-blowing ones (the best in the game in fact).
It doesn’t just teach… it transforms how you think about sound in general.
It’s packed with over 150 in-depth videos, covering everything from basic waveforms to advanced synthesis techniques across various synths like Serum and Omnisphere.
What makes this tutorial stand out is the focus on real-life skills.
You’ll learn how to recreate sounds you hear in professional tracks, all while developing a unique style that sets you apart as a producer.
This isn’t just a sound design tutorial 一 it will give you the confidence/skills to play around constantly and master sound design, no matter your genre or unique style.
And, one of the highlights of this course is its instructor, Peter Potyondy.
With over two decades of experience, Peter has worked in electronic music, audio engineering, and sound design, which makes him a trusted name in the industry.
His teaching style is super engaging and clear, giving you expert/insider advice to master everything from drum synthesis to modulation.
Now let’s break down all of the modules so you can really get the full picture of what this epic sound design tutorial offers (and trust me, it’s not only invaluable, but fun too).
Download The #1 Sound Design Tutorial Ever
Course Modules Breakdown
The Unison Sound Design Secrets course is broken up into 12 distinct modules, each including a different key area of sound design. So, let’s break it down.
Module 1: Painting With Sound
The first module of this sound design tutorial introduces the concept of treating sound like a blank canvas, where every decision you make adds detail and character.
It starts with the foundational elements of sound:
- Pitch (how high or low a sound feels)
- Timbre (the tonal quality that makes a sound unique)
- Amplitude (the volume or strength of a sound)
- Duration (the length of time a sound lasts)
These elements are the building blocks for designing any sound you can think of.
For example, when shaping a bassline for electronic music, it’s important to decide if the sound will feel smooth and warm or sharp and aggressive.
This involves layering multiple components, such as basic waveforms like sine waves for their clean, pure tone, or saw waves for a brighter, more textured sound.
The center focus of the first module in this sound design tutorial is layering.
By starting with a simple waveform and adding subtle noise (a random combination of frequencies) or harmonics (additional frequencies layered above the fundamental tone), you can create textures that are super dynamic.
It teaches you to approach sound design like the pros do, which is super methodically 一 making deliberate choices to enhance the overall tone.
Another important takeaway is the idea of critically listening to your sounds.
Each adjustment to frequency, volume, or modulation has a noticeable impact on the mix, and this module emphasizes the importance of small, precise changes.
Remember when it comes to sound design, the little changes can make the biggest difference.
Starting with the basics, like understanding how to tweak waveforms and adjust their frequencies, forms the foundation for building more complex sounds.
Module 2: Mastering Synthesis
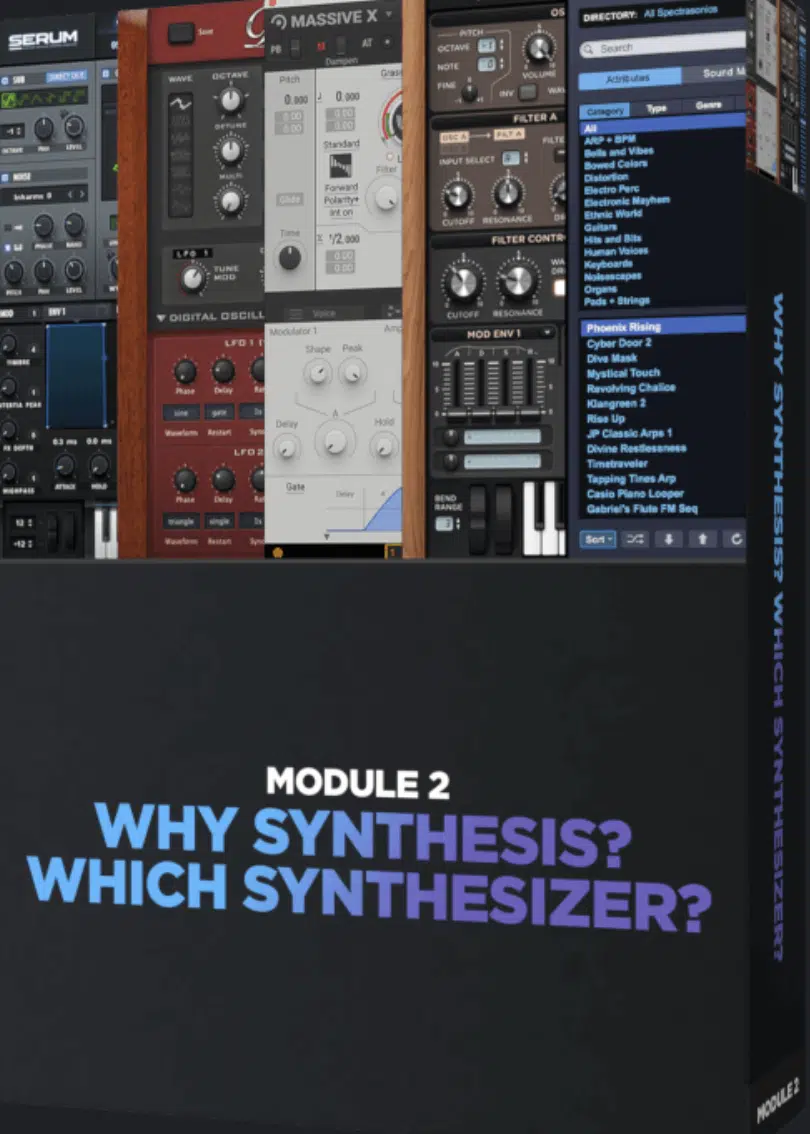
The second module of this sound design tutorial provides an in-depth exploration of synthesis 一 focusing on the three primary methods:
- Subtractive
- Additive
- Wavetable
Subtractive synthesis involves starting with a harmonically rich waveform (such as a saw wave) and using filters to remove unwanted frequencies.
It creates cleaner, more defined sounds.
Additive synthesis, on the other hand, builds sounds by stacking individual sine waves, allowing for intricate tonal control.
Wavetable synthesis uses pre-recorded waveforms that can be morphed over time, creating evolving tones.
For example, subtractive synthesis is ideal for creating smooth pads or punchy leads by removing specific frequencies using a low-pass filter.
A low-pass filter removes high frequencies 一 letting only the low ones to pass through, which is great for softening harsh sounds or adding warmth.
This module also emphasizes the use of envelopes and low-frequency oscillators (LFOs) to shape the movement and dynamics of a sound.
Envelopes control how a sound evolves over time, from its attack (how quickly it starts) to its release (how long it fades out).
LFOs, which modulate parameters like pitch or volume, add rhythmic movement and create super dynamic effects.
Another key focus is combining synths for a fuller sound, which might take a little bit to master, but it’s certainly worth it.
For example, layering a warm pad from one synthesizer with a bright lead from another can create a well-balanced sound that occupies different frequency ranges.
Sound Design Tip: Small adjustments to envelope settings, such as lengthening the attack or shortening the release, can drastically change how a sound interacts with the mix.
Experimentation is key to mastering these tools, which you’ll also learn in this legendary sound design tutorial.
Module 3: Oscillators and Waveforms
Oscillators and waveforms are the fundamental starting points of any sound design process, and this module dives deep into their roles.
Oscillators generate the raw sound by producing consistent vibrations, and these vibrations create waveforms, which determine the sound’s tone and character.
The four most common waveforms (with their own distinct characteristics) are:
- Sine
- Square
- Triangle
- Sawtooth
A sine wave produces a pure, smooth tone with no harmonics, while a square wave is more aggressive with a hollow, reedy sound due to its strong odd harmonics.
The third module of this sound design tutorial breaks down how to mix multiple oscillators to create complex, layered textures.
For example, blending a sine wave with a subtle amount of noise adds grit and realism to the sound that can completely alter it.
You’ll also find out how to fine-tune everything.
Fine-tuning parameters such as detune (slightly shifting the pitch of multiple oscillators) can create a lush, wide stereo effect, especially useful for pads and leads.
Waveform manipulation is also a huge part of this section, so you’ll discover techniques like pulse-width modulation as well.
Side note, pitch-width manipulation alters the duty cycle of a square wave 一 giving it a more dynamic and shifting tonal quality.
This is essential when creating evolving textures that keep the listener engaged.
Sound Design Tip: Always use a spectrum analyzer to visualize the harmonics and frequencies in your waveforms. This allows you to precisely control which parts of the sound stand out and which are removed in the mix.
Module 4: Modulation and Movement
The 4th module of this sound design tutorial breaks down how modulation can breathe new life into static sounds by introducing movement and variation.
Modulation involves using a source (like an LFO or an envelope) to dynamically alter parameters such as pitch, volume, or filter cutoff over time.
For example, applying an LFO to a low-pass filter creates a sweeping effect that’s commonly heard in electronic music.
You’ll also learn how to control modulation depth and rate for precise results, like:
- A slow modulation rate is perfect for subtle, evolving textures
- Faster rates can create rhythmic effects like tremolo (rapid volume changes) or vibrato (slight pitch variations).
The module will show you the most popular examples, such as automating the filter cutoff to gradually open up the sound during a build-up.
Or, using envelope modulation to shape the attack and decay of percussive elements, ensuring they punch through the mix without overwhelming it.
But, you’ll also get access to more advanced techniques as well, like modulating multiple parameters at the same time.
For example, assigning an LFO to control both pitch and amplitude creates a complex, organic effect often used in cinematic sound design.
Sound Design Tip: Experiment with different waveforms for your LFOs, such as sine for smooth modulation or square for abrupt changes, to find the right movement for your sound.
Module 5: Loudness and Timbre
The 5th module of this sound design tutorial explains how loudness and timbre are used to shape a sound’s impact and tonal identity.
Loudness (measured in amplitude) determines how prominent a sound is within a mix, while timbre refers to the unique tonal quality that distinguishes each sound.
For example, a flute and a violin playing the same note have different timbres due to the way their frequencies are distributed.
Adjusting loudness is about more than just volume, it’s also about dynamics, and that’s another thing you’ll learn here.
This module teaches techniques like using compression to control a sound’s dynamic range so it remains consistent without losing its natural movement.
Compression is especially useful for drums, where controlling transient spikes can make a snare or kick sound tighter and more focused.
And if you’re curious about harmonic enhancement, it’s covered here too.
For example, adding slight distortion introduces additional harmonics, which can make a dull sound feel richer and more present.
On the same note, you’ll find out how using a chorus effect thickens the sound by creating subtle, detuned duplicates that enhance the overall texture.
Sound Design Tip: Pay close attention to how loudness and timbre interact with other elements in your mix. A sound that’s too loud or overly bright can overpower the mix, while a sound with a soft, balanced timbre often blends perfectly.
Professional sound designers will tell you that it’s all about getting that perfect balance.
Module 6: Pitch Manipulation
Pitch manipulation is vital when it comes to knocking out expressive, dynamic sounds, and this module focuses on how to use it properly (and creatively).
Pitch refers to the frequency of a sound, measured in Hertz (Hz), which determines how high or low it feels.
For example, a low bass note might sit around 60 Hz, while a high lead could reach 2,000 Hz or higher.
The 6th module of this sound design tutorial covers essential techniques like pitch shifting, which allows you to transpose a sound up or down by semitones.
Pitch shifting is super useful for creating harmonies or layering sounds that need to complement each other.
For example, duplicating a lead sound and pitching it up an octave can add brightness and depth.
You’ll also learn about glide (portamento), which smoothly transitions the pitch between notes which is commonly used in synth leads to create a flowing, expressive quality.
Another key focus is pitch modulation, like applying a vibrato effect by modulating the pitch with an LFO.
Advanced techniques, like pitch bending, are also explored.
For instance, automating pitch bends in a bassline can add energy and movement during transitions 一 helping to build excitement in a track.
Sound Design Tip: Use pitch manipulation sparingly in the lower frequency ranges to avoid creating a muddy mix.
Focus on subtle shifts and layering to achieve a cleaner, more controlled result.
Module 7: Controllers and Voicing
The 7th module of this sound design tutorial focuses on how MIDI controllers and voicing techniques can enhance your sound design workflow.
Controllers allow you to manipulate parameters in real time 一 giving you a more dynamic and hands-on approach to creating sounds.
For example, assigning a MIDI knob to control filter cutoff or resonance enables precise, expressive control while performing or recording automation.
Voicing, on the other hand, determines how many notes a synth can play simultaneously and how those notes interact.
This module covers mono (single-note) and poly (multi-note) voicing modes, and when exactly to use each one.
For example, mono voicing is ideal for basslines and leads, while poly voicing is perfect for chords and pads.
You’ll also learn all about layering voices and using unison mode, which duplicates and slightly detunes the voices to create a fuller and wider stereo image.
This technique is commonly used in EDM leads to achieve that “big room” feel.
This module also dives into velocity sensitivity, which adjusts a sound’s dynamics based on how hard or soft you press a key.
For example, a harder press can increase the volume or brightness of a sound, adding more expression to your music.
Sound Design Tip: When programming voicing settings, experiment with voice allocation and detune amounts to ensure your sound blends well with the rest of your mix without overwhelming it.
Become a Sound Design Master Now
Module 8: Combining Sounds
Combining sounds is a powerful way to create unique textures and tonal complexity, and this module gives you all the best tips, tricks, and techniques.
It begins by showing how to layer different sounds while ensuring each occupies its own frequency range.
For example, how combining a sub-bass sine wave with a midrange growl adds depth without causing frequency clashes.
You’ll also discover how blending sounds from various synths can result in a more dynamic and edgy final output.
For instance, layering a warm pad from Serum with a sharp lead from Massive creates a sound that’s both smooth and cutting.
For clarity, it also emphasizes the need to use EQ to carve out unnecessary frequencies from each layer.
Another technique is using complementary envelopes and modulation settings.
For example, one layer might have a long attack and release, while another has a snappy, percussive envelope 一 this contrast adds movement and interest to the sound.
The 8th module of this sound design tutorial also highlights the importance of panning layers in the stereo field (placing one sound slightly to the left and another slightly to the right creates a wider, more immersive mix).
And if you were ever curious about how subtle reverb and delay can glue the layers together for a cohesive result, look no further.
Sound Design Tip: Always solo each layer while designing to ensure it contributes something unique. Combining sounds is about collaboration, not redundancy.
Module 9: Expanding Your Tonal Skills
In order to expand your tonal skills like the pros, you have to push the boundaries of traditional sound design to bring new sonic possibilities to the table.
The 9th module of this sound design tutorial introduces advanced synthesis techniques, such as using wavetables that morph over time to create evolving, otherworldly sounds.
By experimenting with non-standard waveforms, like random or user-drawn shapes, you can achieve tones that really stand out.
It also explains how to incorporate unusual sound sources, like field recordings or organic noises, into your design, which is super dope.
For example, how layering the sound of crinkling paper with a snare drum can add a unique texture, showing you how synthetic and organic sounds make magic.
Harmonic enhancement is another focus, showing how to introduce additional frequencies through:
- Subtle distortion
- Saturation
- Harmonic exciters
So, if you want to thicken leads and give your basslines more character, this is key.
It also highlights how to use spectral effects like vocoders or spectral morphing to transform your sounds further.
For example, how applying a vocoder to a pad can create a vocal-like texture and add a more human element to your sound design.
Sound Design Tip: Expand your tonal palette by experimenting with unconventional sources. Dragging random audio files into a granular synth can spark new ideas you wouldn’t have discovered otherwise.
Module 10: Filters and Complex Tones
Filters are one of the most powerful tools in sound design, and in this module, you’ll discover all of their creative and technical applications.
A filter shapes a sound by removing or emphasizing certain frequencies, and this module explains how to use different types, such as:
- Low-pass
- High-pass
- Band-pass
- Notch filters
For example, a low-pass filter can smooth out harsh high frequencies 一 making a sound feel warmer and more polished.
The 10th module of this sound design tutorial also explores filter resonance, which amplifies frequencies near the cutoff point, adding character and intensity.
Adjusting resonance on a high-pass filter, for instance, can make your bass sound more aggressive and cutting without overwhelming the mix.
Advanced filtering techniques, like using multiple filters in parallel, are also covered, which lets you process different parts of the frequency spectrum independently.
This will help you create a more complex tonal structure to enhance your skills.
Another example is modulating the filter cutoff with an LFO to add movement and rhythm to static sounds.
Combining filters with effects like distortion or delay can result in truly unique tones, and you’ll find out exactly how to do this.
For example, applying a band-pass filter to a distorted sound and then layering it with reverb creates a haunting, spacey effect perfect for cinematic or ambient tracks.
Sound Design Tip: When working with filters, always listen for how they interact with the overall mix. Slight adjustments to resonance or cutoff frequencies can dramatically change the character of your sound.
Module 11: Delay-Based Effects
Delay-based effects are essential for adding depth, dimension, and rhythmic interest to your sounds, as I’m sure you know.
Luckily, the 11th module of this sound design tutorial begins by explaining the mechanics of delay, where an audio signal is:
- Recorded
- Played back after a set time
- Repeated
Other types of delay are also included, such as tape delay for a warm, vintage character and ping-pong delay for dynamic, stereo movement.
This could be things like using a short delay time to create a doubling effect 一 making leads or vocals sound fuller.
Longer delay times, on the other hand, are perfect for building atmosphere in ambient or cinematic music.
An example is syncing the delay to your track’s tempo and adjusting the feedback to create rhythmic echoes that complement your groove.
Another technique you’ll learn about in full is applying delay in subtle amounts to percussive elements like snares or hi-hats.
This adds a sense of space without overpowering the dry signal.
Layering delay with effects like reverb or modulation (such as chorus or flanger) can produce complex textures that evolve over time, so buckle in for that.
Sound Design Tip: When using delay, always EQ the wet signal to control unwanted frequencies, ensuring the effect doesn’t muddy your mix. For instance, cutting low frequencies on a delayed signal prevents it from clashing with your bassline.
Module 12: Evolving Tones with Wavetables
Wavetable synthesis (modulating between different waveforms) is one of my favorite topics, and you’ll be blown away by what it’s capable of.
The 12th module of this sound design tutorial explains exactly how wavetables work, showing off how they contain a series of waveforms that can be morphed over time.
This technique is ideal for creating pads, leads, and basslines that shift and evolve throughout a track and really make people stop and listen.
For example, morphing between a sine wave and a saw wave can produce a sound that starts soft and warm before becoming bright and aggressive.
This module also covers how to automate wavetable positions using LFOs or envelopes, which lets you control how the sound evolves in real-time.
I hope you’ll take advantage of this one because it’s legendary.
You’ll also learn about different advanced techniques that include layering wavetables with noise or additional oscillators to add texture and complexity.
Another example is using filters and modulation on specific parts of the wavetable to emphasize certain harmonics or create rhythmic movement.
It also emphasizes using wavetable synths like Serum or Massive X, which offer extensive modulation options and visual feedback.
You’ll learn how to fine-tune modulation rates and depths to achieve the exact tone and movement you’re aiming for.
Sound Design Tip: Use random modulation on your wavetable position for organic, unpredictable changes that make your sounds feel alive and unique.
Exclusive Bonuses

This legendary sound design tutorial also comes with exclusive bonuses designed to enhance your learning and production workflow even more, believe it or not.
My favorite is the Unison Patch Match Vault 一 a collection of high-quality patches worth $500 that can be used with popular synths.
These seriously mind-blowing patches serve as starting points or inspiration and can help you design unique sounds quickly and easily.
Another bonus is access to a completely private Facebook group where you can connect with other producers, share ideas, and get feedback on your tracks.
This community offers invaluable support as you go along your sound design journey.
You’ll also receive a certification upon completing the course, showcasing your expertise as a sound designer and adding credibility to your professional profile.
So, bottom line, you’ll certainly have a lot of perks.
-
Note: Pricing & How to Enroll

This sound design tutorial is priced at $997, which includes lifetime access to all modules and bonuses.
Enrollment is straightforward… Simply visit the official website, secure your spot, and gain immediate access to the content (easy peasy).
And yes, a 60-day money-back guarantee guarantees you can explore the course risk-free, so go give it a try!
If you want to learn all about sound design and how to master every single part of it, this sound design tutorial can completely change your life.
Discover The Best Sound Design Secrets Now


Leave a Reply
You must belogged in to post a comment.