If you’re a producer or sound designer, knowing all the different synthesis types is not only fun, it’s a must, no doubt about it.
It can help you create unique sounds, design signature tones, and experiment with new ideas that you might not have even thought about before.
Plus, you’ll be able to build killer basslines, detailed pads, and expertly layered leads 一 This way, your tracks will stand out, and your skills will seriously increase.
That’s why we’re breaking down all the different types of synthesis you can think of, plus some advanced tips and techniques so you can really blow up.
This includes things like:
- Additive synthesis/subtractive synthesis/FM synthesis ✓
- Wavetable synthesis for dynamic textures ✓
- Granular synthesis for evolving sounds ✓
- Using physical modeling for realistic tones ✓
- Sample-based synthesis tricks ✓
- Exploring microtonal scales in audio synthesis ✓
- Layering multiple synthesis types ✓
- Different techniques for every digital synthesis type ✓
- Much more about all the different synthesis types ✓
By knowing all about the different synthesis types, from subtractive synthesis to granular synthesis, you’ll seriously elevate your sound design game.
Plus, you’ll be able to successfully build tracks with deeper textures, experiment with advanced modulation, and even layer complex soundscapes like a boss.
Talk about invaluable, am I right?
Table of Contents
- Different Synthesis Types You Need to Know
- #1. Subtractive Synthesis
- #2. Additive Synthesis
- #3. Wavetable Synthesis
- #4. Frequency Modulation (FM) Synthesis
- #5. Phase Distortion Synthesis
- #6. Granular Synthesis
- #7. Physical Modeling Synthesis
- #8. Sample-Based Synthesis
- #9. Spectral Synthesis
- #10. Vector Synthesis
- #11. Resynthesis
- Bonus: Using Hardware Synthesizers/Analog Synthesizers
- Advanced Synthesis Techniques
- Final Thoughts
Different Synthesis Types You Need to Know
Synthesis types give you different ways to create sounds for your tracks. Whether you’re laying down a bassline, building a lead, or designing experimental effects, understanding all the different synthesis types will seriously help you enhance your skills and create killer beats. So, let’s kick things off with the most popular sound synthesis types in the industry.
#1. Subtractive Synthesis
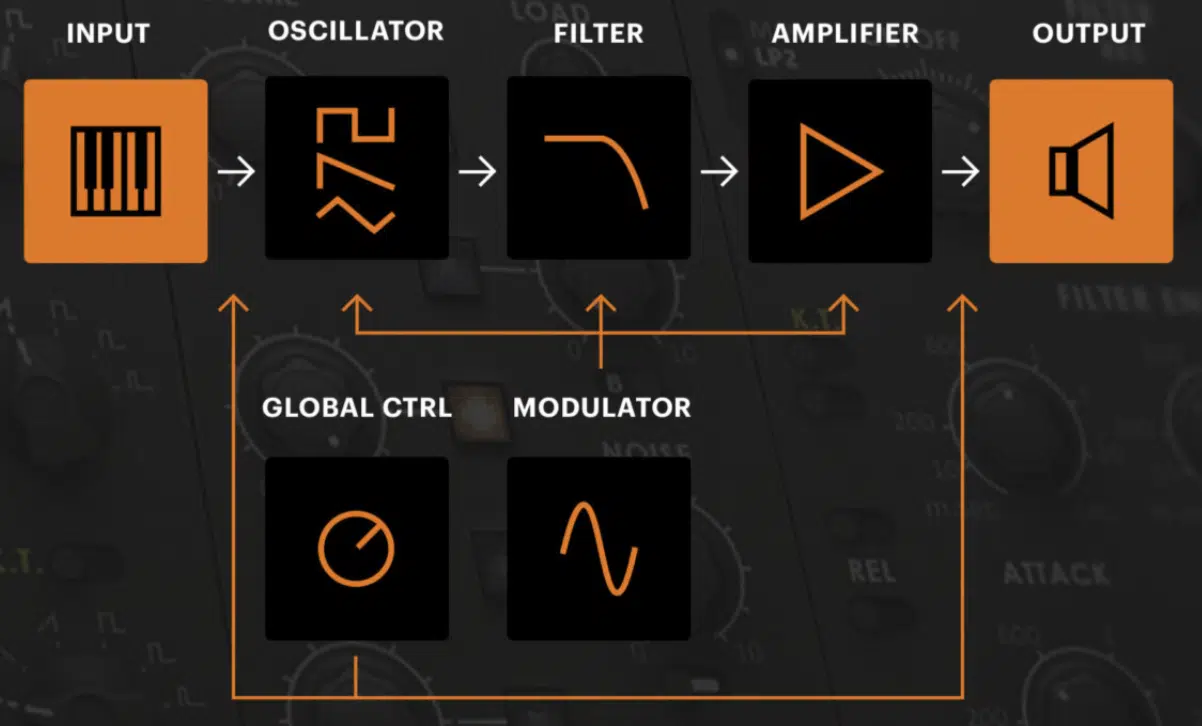
Subtractive synthesis is one of the simplest and most effective ways to create clear, powerful sounds, and it all start with basic waveforms, like:
- Sawtooth waves
- Square waves
- Pulse waves
Then, sculpts the sound by removing frequencies using filters.
For example, you can set an oscillator to a sawtooth wave, then apply a low-pass filter with a cutoff around 200 Hz to smooth out the highs and focus on the low-end.
To add more edge, you can increase the resonance to about 30%, which creates a noticeable boost near the cutoff frequency.
This is perfect for building basslines, leads, and pads that sit comfortably in a mix.
If you’re working on a lead sound, you can try detuning two oscillators by ±10 cents to thicken the sound while maintaining clarity.
It will show you exactly what subtractive synthesis is all about… It’s great when it comes to genres like house or techno, where tight, consistent tones are key.
Actually, popular synths like the Moog Minimoog or Roland Juno 106 are built on subtractive synthesis 一 making them OGs for everything from house to hip-hop.
Subtractive synthesis is perfect when you want a warm, familiar sound that’s easy to tweak without overwhelming complexity.
Key Features of Subtractive Synthesis
- Oscillators: The starting point, offering basic shapes like sine, sawtooth, or square waves. You can combine multiple oscillators and slightly detune them for a thicker sound.
- Filters: The low-pass filter is the most common, cutting off high frequencies while leaving the low end on point. Adjust the cutoff frequency and resonance for all the control you can ask for.
- Modulation: Envelopes and LFOs let you automate changes in pitch, volume, or the filter cutoff to make sounds more dynamic.
- Resonance: Boosts frequencies near the filter cutoff point, which creates sharper or more aggressive tones.
Pro Tip for Subtractive Synthesis

When banging out basslines, start with a low-pass filter cutoff around 150 Hz and slightly boost the resonance to emphasize the low-mid range.
Use an envelope with a short attack (around 10 ms) and medium decay (around 400 ms) to create plucky, rhythmic movement in your sound.
If your excellent synth allows it, try modulating the cutoff with an LFO set to 1/8 sync for subtle yet super intriguing basslines.
Again, this technique works great for electronic genres like techno and deep house because it really adds depth and groove to your low end.
All while keeping the energy hyped up and addicting.
#2. Additive Synthesis
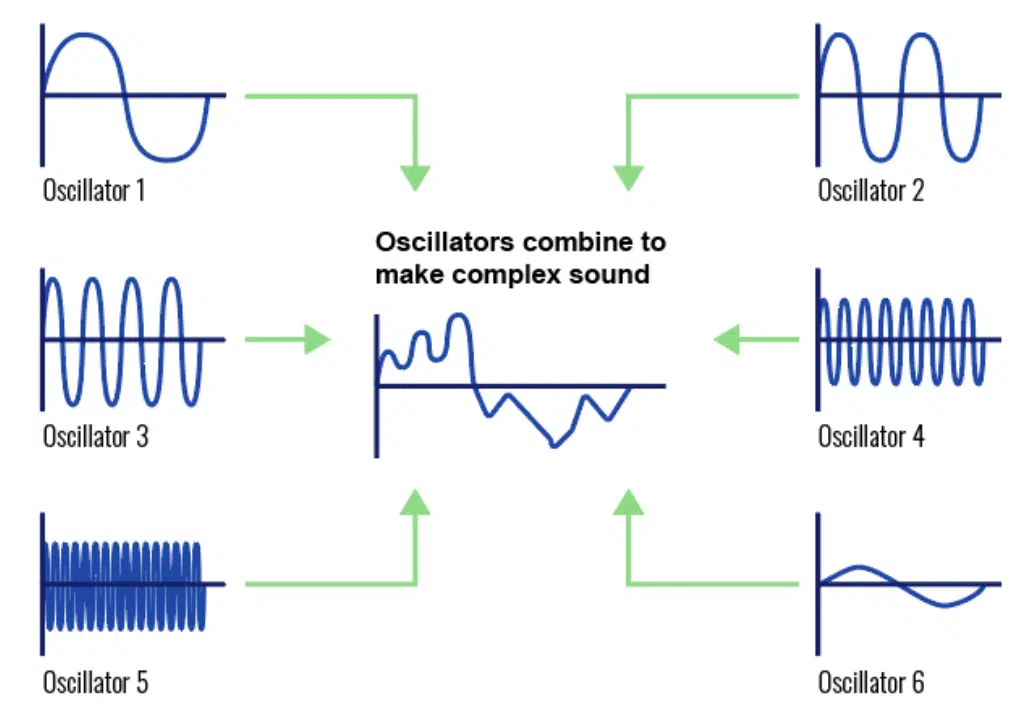
Additive synthesis takes a completely different approach than subtractive synthesis by building sounds from the ground up using sine waves.
Each sine wave (aka a ‘partial’), represents a specific frequency and amplitude, and layering these creates a complex tone.
For example, to create a bell-like sound, you might combine a fundamental frequency (e.g., 440 Hz for an A4) with its harmonics at 880 Hz, 1320 Hz, and so on.
But make sure to tweak their levels to shape the timbre.
Plugins like Harmor and Razor are great for additive synthesis because they let you visually control and adjust each harmonic however you want.
You can get super creative with additive synthesis, but it can feel overwhelming at first due to the level of detail, but just practice and you’ll be fine.
Bottom line, additive synthesis is perfect for creating clean, evolving textures or unique sounds you won’t find in traditional subtractive methods.
Key Features of Additive Synthesis
- Harmonics: Each sound is built by layering sine waves, which represent individual frequencies.
- Dynamic Control: You can adjust the amplitude and frequency of each harmonic in real-time to evolve the sound.
- Visualization: Many additive synths provide visual feedback, showing you how each harmonic contributes to the overall tone.
- Resynthesis: Some tools let you analyze audio and rebuild it using sine waves, giving you full control over the recreated sound.
Pro Tip for Additive Synthesis
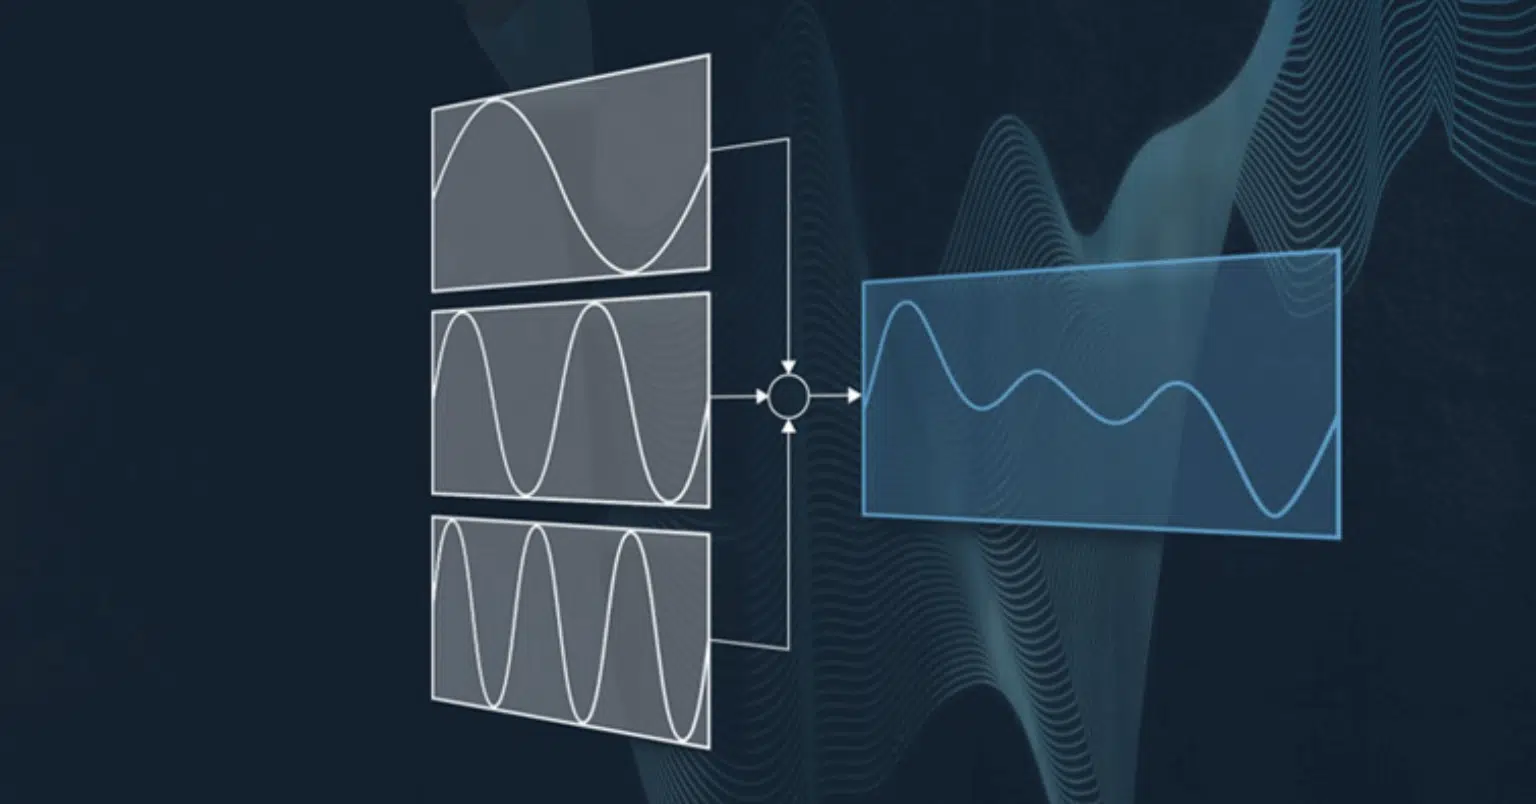
Start simple by layering just a few harmonics…
For a soft pad, use a fundamental sine wave (e.g., 110 Hz for A2) and add harmonics at 220 Hz and 330 Hz with reduced amplitudes (e.g., -12 dB and -18 dB).
Slowly introduce modulation to the higher harmonics for a shimmering texture 一 add a touch of reverb to soften the edges and make the sound have a more ambient vibe.
#3. Wavetable Synthesis
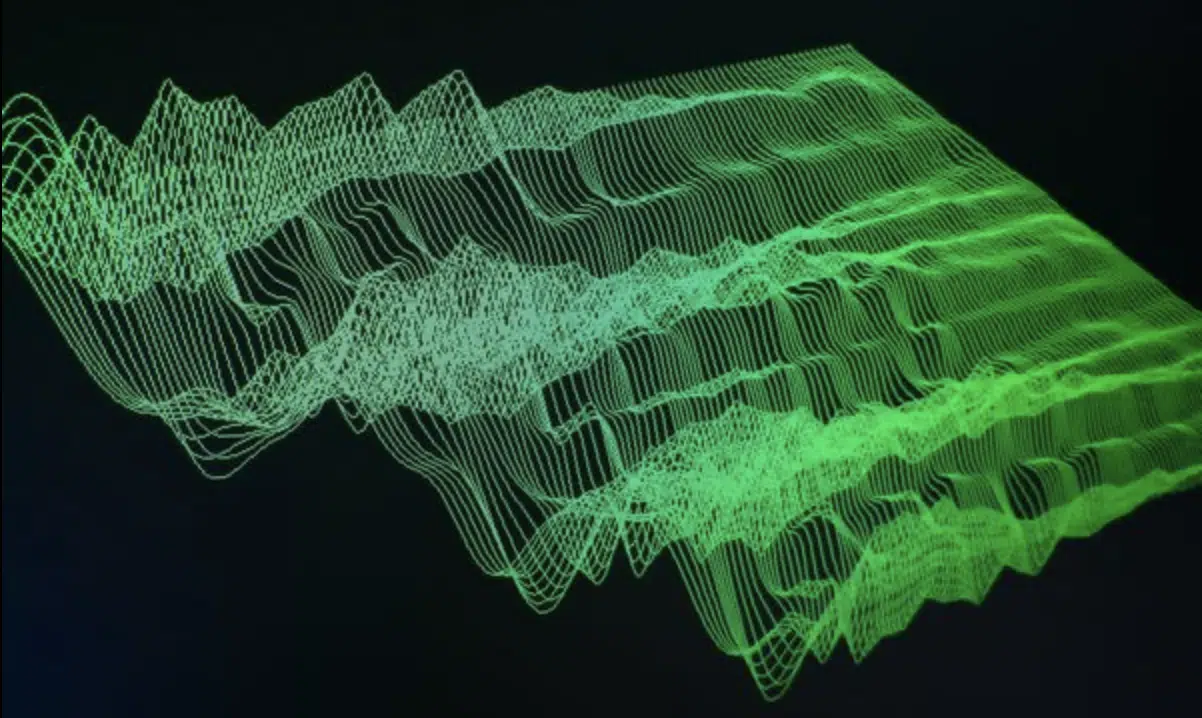
Wavetable synthesis is a modern, versatile (and extremely fun) way to create unique sounds by morphing between different waveforms.
Instead of being limited to simple shapes like saw or square waves, you can load or create complex waveforms, then sweep through them for epic tones.
For example, Serum lets you automate the wavetable position, so your sound moves from a smooth sine to a gritty, jagged waveform in real time.
This makes wavetable synthesis perfect for creating:
- Mind-blowing basslines
- Lush pads
- Experimental textures
You can also use FM or distortion to add even more complexity to the waveforms 一 making the possibilities pretty much endless.
If you’re into electronic music production, you’ll definitely need to get familiar with wavetable synthesis.
It’s incredibly powerful, especially because it can help you produce highly dynamic and aggressive sounds all day.
Key Features of Wavetable Synthesis
- Wavetable Morphing: Sweep through different waveforms in real-time for evolving textures.
- Modulation Options: Automate the wavetable position using LFOs, envelopes, or even an external controller.
- Customization: Some synths, like Serum, let you draw your own wavetables or load samples.
- Layering: Combine multiple wavetables to create highly-complex sounds that evolve over time.
Pro Tip for Wavetable Synthesis
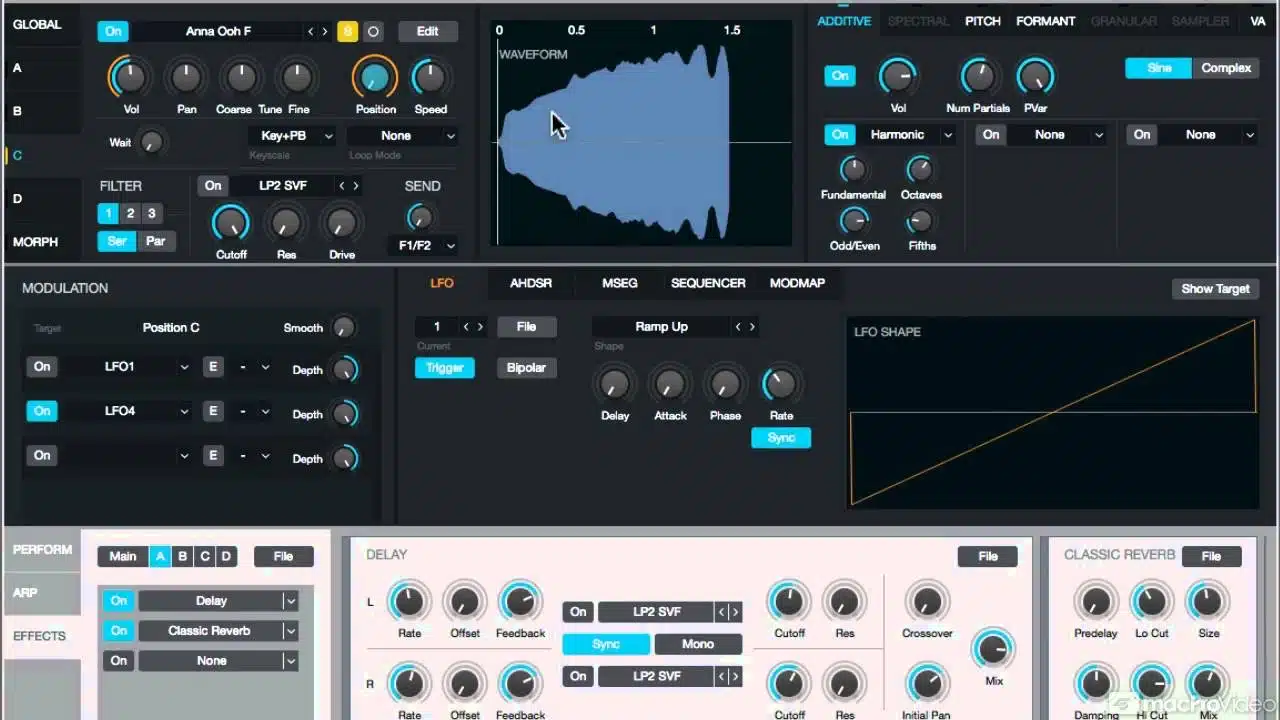
For a growling bass, choose a wavetable with sharp harmonics, like “Spectral Monster” or “Vowel Formant” (if using Serum).
Set the envelope controlling the wavetable position with a 10 ms attack and a 150 ms decay for punchy, rhythmic movement.
Adjust the wavetable position modulation range between 30-60% for a balanced sweep.
Add distortion (e.g., Tube or Hard Clip with drive around 50%) and automate a notch filter sweeping between 200 Hz and 600 Hz with an LFO at a rate of 1/4 note sync.
This combination creates aggressive textures perfect for dubstep or trap.
#4. Frequency Modulation (FM) Synthesis
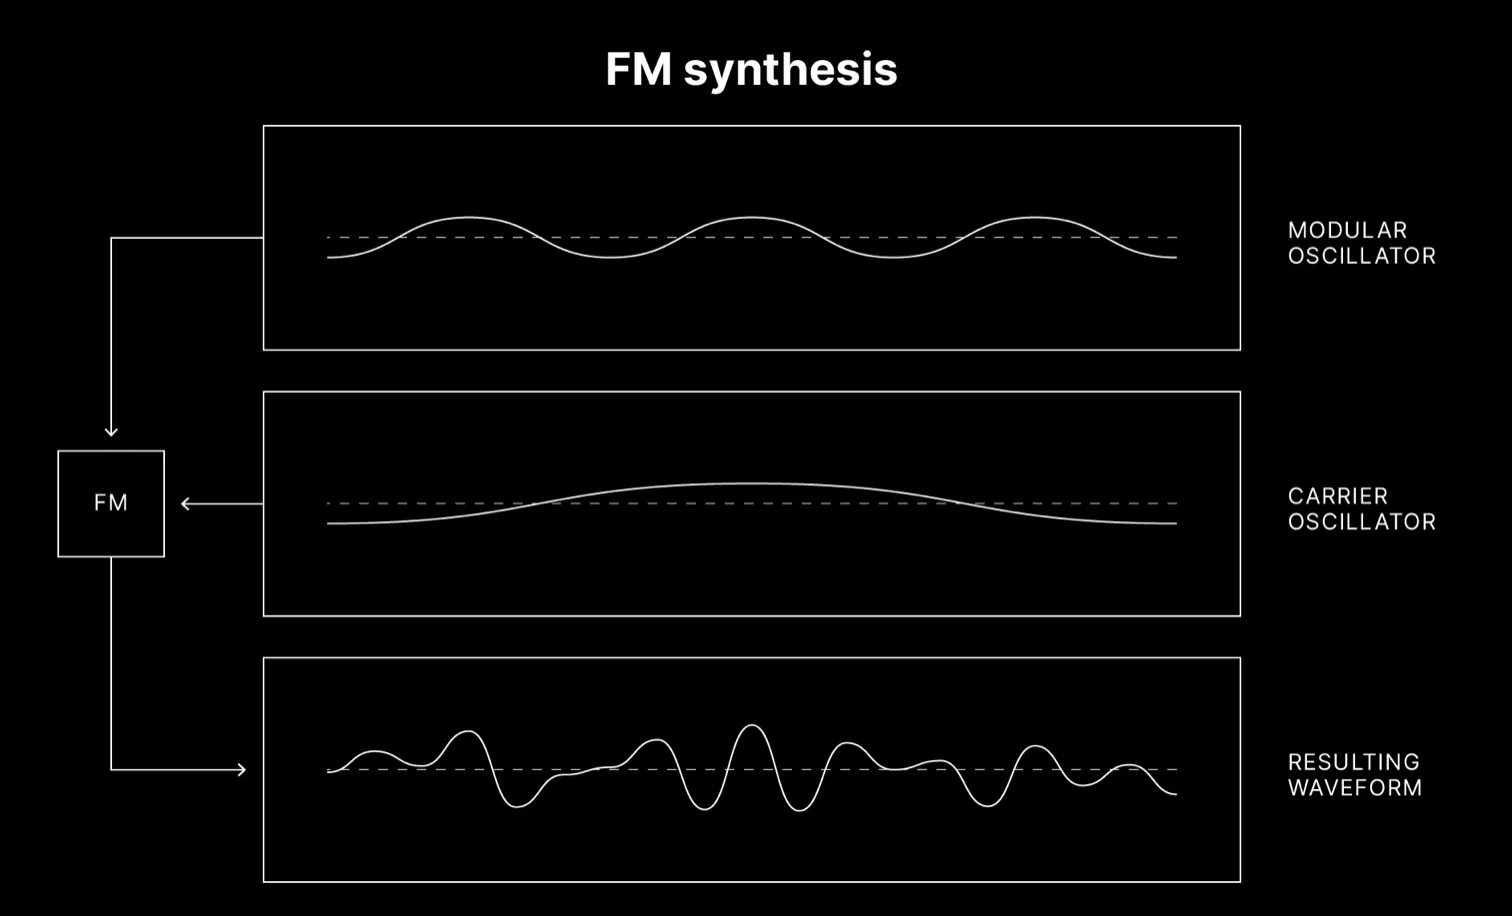
FM synthesis creates sound by using one simple waveform (the modulator) to change the frequency of another waveform (the carrier) at audio rates.
If you’re looking for complex harmonics, you’ll certainly find it here.
This process lets you create anything from smooth, glassy tones to harsh, metallic textures and everything in between (get as crazy as you want).
For example, let’s say you were working with Ableton’s Operator…
You can set the carrier to a sine wave at 110 Hz (A2) and modulate it with a second sine wave at 220 Hz (A3).
Adjusting the modulation index (depth of modulation) to around 50% creates a rich, bell-like tone 一 pushing it to 100% adds more aggressive overtones.
FM synthesis can help you create crazy basslines, and is famous in genres like drum and bass or dubstep.
If you’re just trying it out for the first time you can set your carrier frequency low, around 50 Hz, for a deep, subby foundation.
And, use a modulator with a slightly higher frequency, such as 100 Hz for a 2:1 ratio.
Play around with the modulation index (the intensity of modulation) to around 50-70% to introduce rich harmonic layers and controlled grit.
NOTE: While FM synthesis can seem a little overwhelming at first, focusing on simple carrier-to-modulator ratios like 1:1 or 2:1 makes it much easier to understand.
These settings provide harmonic results that sound clean all without running into any problems or chao.
Once you’re more comfortable, you can see what’s up with other ratios, like 1.5:1, for more complex tones.
FM synthesis is all about experimentation, so take your time tweaking the modulation depth and frequency relationships to dial in the perfect bass for your track.
Key Features of FM Synthesis (Frequency Modulation Synthesis)
- Operator Ratios: Carrier-to-modulator frequency ratios (e.g., 1:1, 1:2) dramatically change the sound, from harmonic tones to dissonant textures.
- Modulation Index: Controls the strength of the modulation; lower settings produce subtle harmonics, while higher settings add complexity or noise.
- Dynamic Control: Using envelopes or LFOs to modulate the modulation index adds movement to the sound.
- Algorithm Options: Many FM synths, like Yamaha DX7, let you configure operators in series, parallel, or feedback loops for advanced sound design.
Pro Tip for FM Synthesis
To create a classic FM bass using FM synthesis, start with a sine wave carrier at 55 Hz (A1) and a modulator at 110 Hz (A2) for a clean harmonic relationship.
Set the modulation index to 40-60% for subtle growl or push it to 80% for more aggressive textures as we talked about above.
For extra depth, layer this with a sub-bass sine wave one octave below the carrier frequency.
#5. Phase Distortion Synthesis

Phase distortion synthesis manipulates the phase of a simple waveform to create new harmonics (the perfect digital alternative to FM or subtractive synthesis).
Instead of using multiple operators, phase distortion alters a single waveform’s phase curve in real-time, producing sounds that are sharp, complex, and distinctly digital.
You can take a sine wave and apply distortion to transform it into a shape resembling a square or sawtooth wave.
For example, using a synth like Casio’s CZ-101, you’ll want to start with a sine wave as your foundation/base…
Gradually increase the distortion depth to around 50-60%, which will morph the waveform into something closer to a square or sawtooth wave.
Then, adjust the amplitude envelope to create a bright, percussive pluck that’s on point with:
- A 5 ms attack
- A 300 ms decay
- No sustain
If you’re designing pads, try using a slow attack (1 second) and a 70% distortion depth for a smooth, glassy texture.
This technique is great for creating pads, leads, and even percussive plucks, especially when they’re retro-inspired or lo-fi genres.
Phase distortion excels when you want digital tones that are harmonically complex but don’t feel overwhelming in a mix.
If you want your sound to feel more immersive, throw on a chorus effect with a 30% wet mix and a reverb decay of 4 seconds (it’ll soften the edges to do so).
Key Features of Phase Distortion Synthesis
- Phase Curve Control: The heart of phase distortion. It’s for reshaping the waveform’s phase, which directly alters its harmonic frequency content.
- Waveform Starting Point: Typically starts with a simple sine wave, which can be distorted to mimic a more complex waveform/shape.
- Envelope Flexibility: Many phase distortion synths allow detailed envelope control for pitch, amplitude, and distortion amount.
- Digital Sound: Produces tones that are sharp and precise 一 making it a go-to choice for clean, modern sounds or retro digital vibes.
Pro Tip for Phase Distortion Synthesis

For a retro lead, start with a sine wave and apply phase distortion at around 50-70% depth to create a sharp, metallic tone.
Use an amplitude envelope with a fast attack (5 ms), short decay (200 ms), and no sustain to create a plucky sound.
Add a subtle delay (time: 1/16 sync, feedback: 30%) and chorus for a retro vibe that works well in synthwave or chiptune tracks.
If the tone feels too harsh, slightly reduce the distortion depth or apply a low-pass filter with a cutoff around 4 kHzto smooth out the highs.
#6. Granular Synthesis
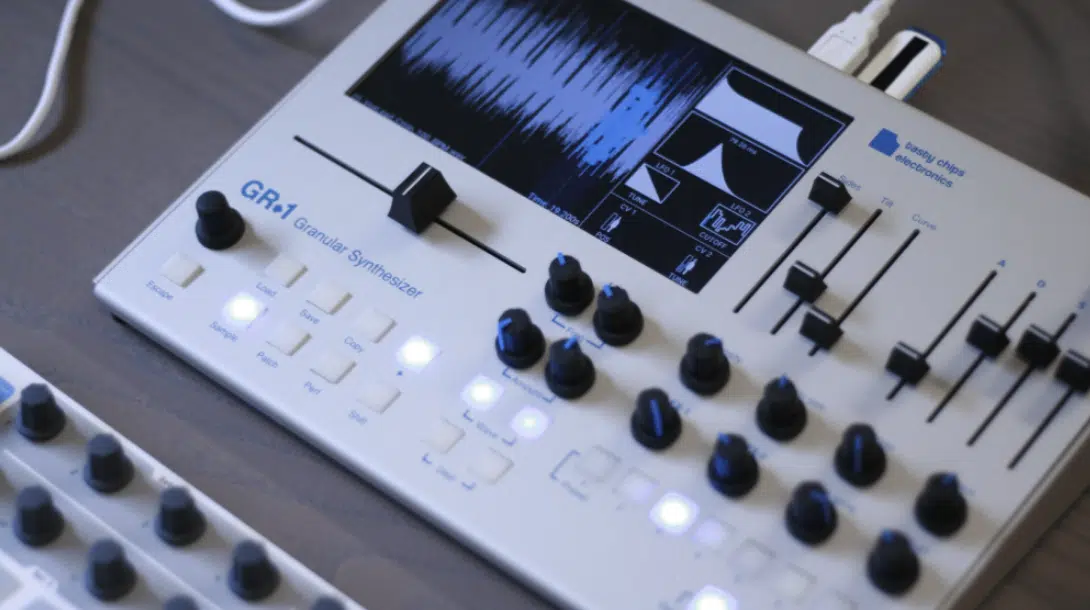
Granular synthesis works by breaking audio into tiny fragments, called “grains,” which can be manipulated to create completely new sounds.
Each grain typically ranges from 1 ms to 200 ms, and you’ll be able to transform a familiar sample into lush textures or glitchy effects using parameters like:
- Grain size
- Density
- Position
For example, you could use a vocal sample and set the grain size to 50 ms for a smooth, airy pad or reduce it to 5 ms for stuttering, percussive effects.
Synths like Granulator II in Ableton Live or Arturia’s Pigments are perfect for playing around with this synthesis type as you’ll have visual control for grain manipulation.
One of granular synthesis’ strengths is its ability to stretch time independently of pitch 一 making it perfect for atmospheric or experimental genres.
While it can sound chaotic, if you carefully tweak Randomness and Pitch it can really bring some awesome organic sounds to the table.
For example, if you were to take a vocal recording and set the grain size to around 50 ms while randomizing the pitch by ±2 semitones, you’d get a sick ethereal texture.
Mix this with a density of 20 grains per second and position automation sweeping through the sample over 8 bars, and you’d create an evolving, otherworldly pad.
One that feels alive, unpredictable, and show-stopping all around.
Key Features of Granular Synthesis
- Grain Size: Controls the duration of each grain. Shorter grains (e.g., 1-10 ms) create choppy sounds; longer grains (e.g., 50-200 ms) produce smoother tones.
- Density: Determines how many grains are played at the same time; low density creates textures here and there, while high density fills out the sound.
- Position Automation: Automating the starting point of grains along a sample allows for evolving, unpredictable patterns.
- Randomization: Adds variation to pitch, position, or timing to make the sound more dynamic and less repetitive.
Pro Tip for Granular Synthesis
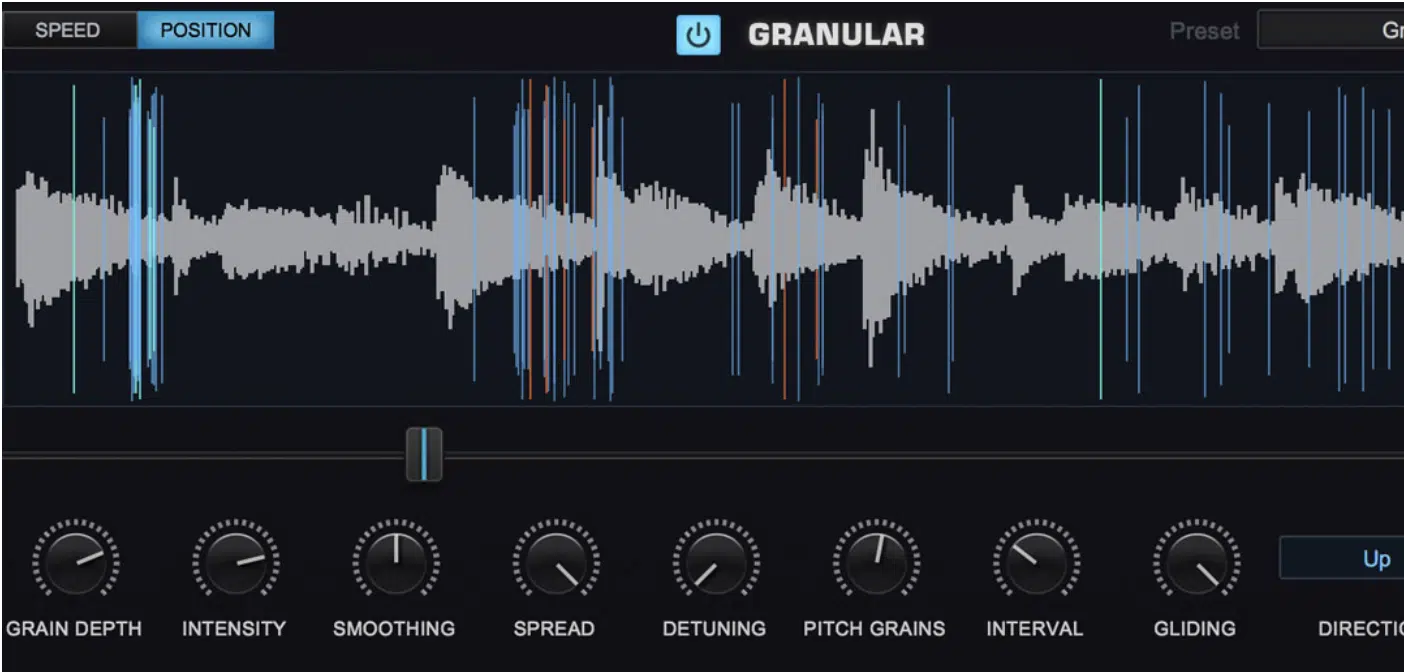
Start with a field recording, like rain or wind, and set the grain size to 20-50 ms for a smooth texture.
Add pitch randomization of ±2 semitones and increase the density to 15-20 grains per second to create a full and legendary atmosphere.
For evolving pads, automate the grain position to sweep through the sample over 8-16 bars 一 dealer’s choice.
To make the sound even better, layer multiple instances of the granular synth, each with slightly different grain settings, and pan them across the stereo field.
#7. Physical Modeling Synthesis
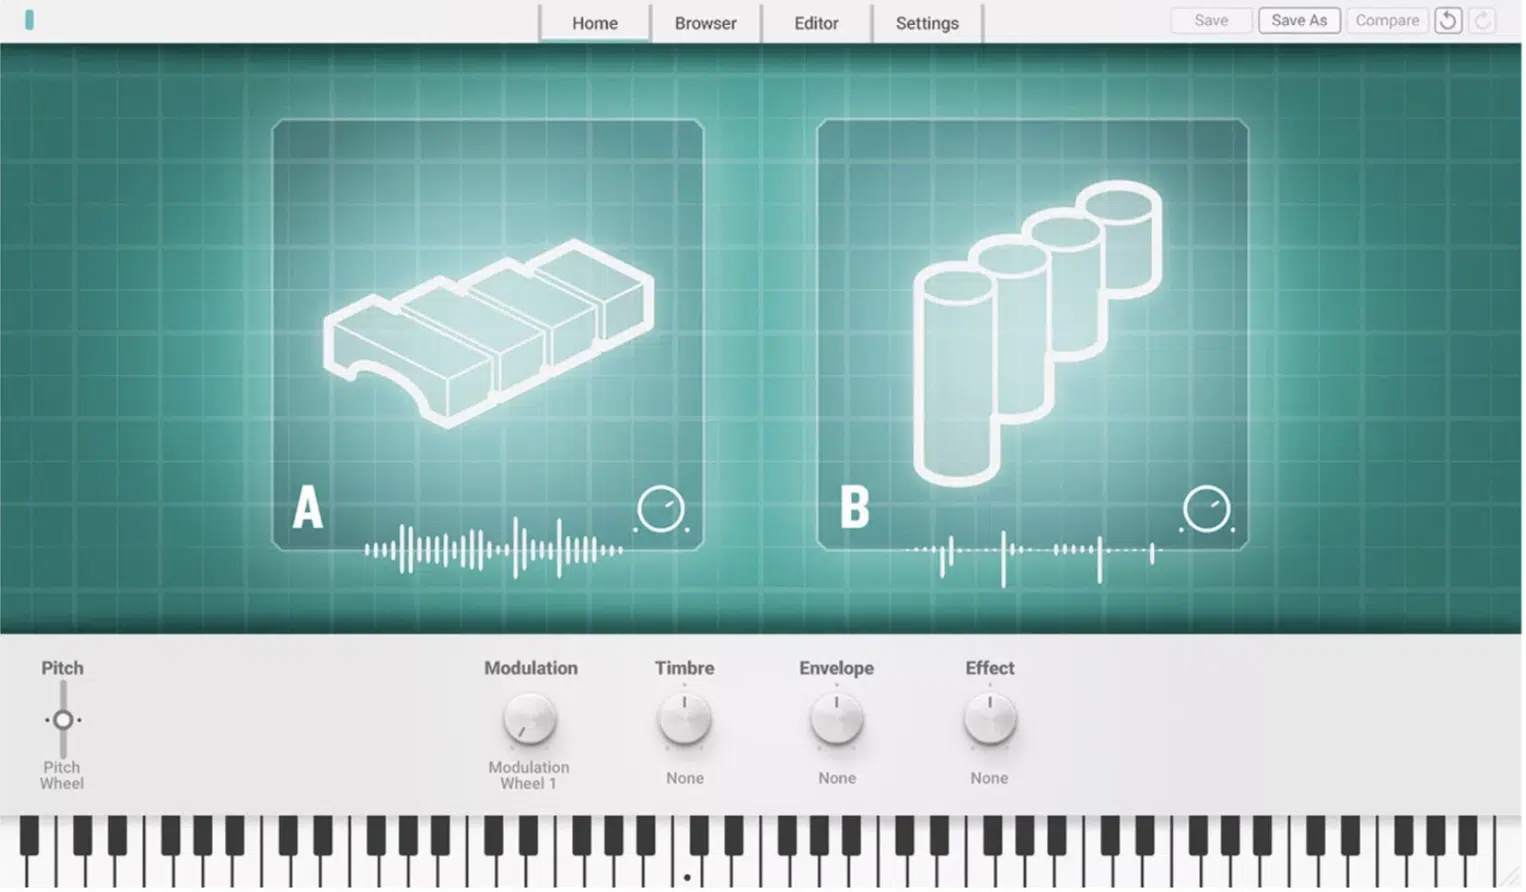
Physical modeling synthesis uses mathematical algorithms to simulate the behavior of real-world instruments like:
- Strings
- Drums
- Wind instruments
Instead of relying on sampled audio, it recreates the physical properties of materials such as wood, metal, or air for a natural and organic sound.
For example, Arturia’s Pianoteq or AAS’s Chromaphone can flawlessly replicate piano strings or a struck membrane with spot-on realism.
Make sure to adjust parameters like tension, stiffness, or resonance to drastically change the tone and fine-tune all your sounds to fit your track.
Physical modeling is perfect for producers like yourself who want realistic yet customizable instruments because it offers more flexibility than static samples.
It also excels at hybrid sound design (my specialty), where natural and synthetic elements are blended to create unique textures.
So, if this one sounds like your kind of thing, definitely go for it.
Key Features of Physical Modeling Synthesis
- Material Emulation: Simulates properties of real-world materials, such as wood, metal, or air.
- Interaction Control: Allows detailed adjustments to how objects are struck, plucked, or blown (e.g., hammer strength or bowing speed).
- Dynamic Expressiveness: Responds well to velocity and modulation for natural-sounding performance.
- Efficient CPU Usage: Requires less processing power than sample-based instruments, making it ideal for lightweight setups.
Pro Tip for Physical Modeling Synthesis
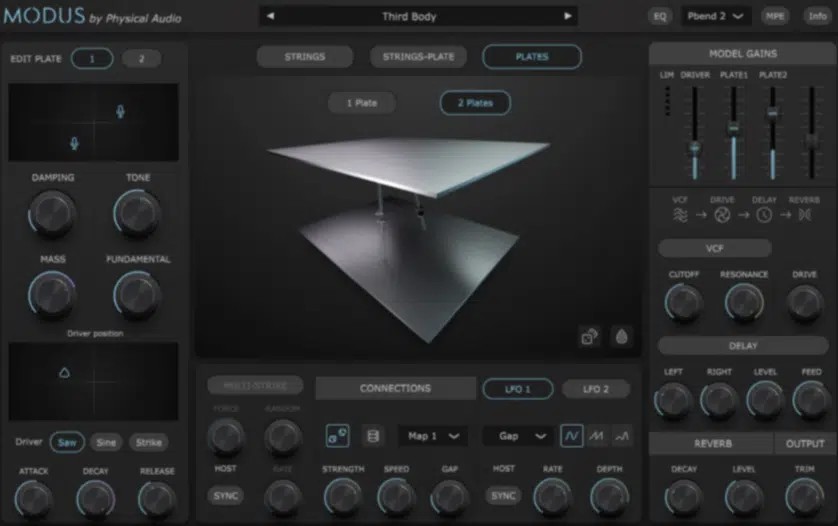
Let’s say you wanted to knock out a very realistic plucked string…
Set the material stiffness to 50%, adjust the decay time to around 1.5 seconds, and increase the resonance slightly for added warmth.
Use an LFO to modulate the pitch subtly (depth: ±3 cents) for more realness.
Add a touch of reverb with a decay of 3 seconds and a pre-delay of 10 ms to give the sound a sense of space.
If you’re designing percussive instruments/acoustic instruments, tweak parameters like impact strength and body resonance to match the tone of your mix.
#8. Sample-Based Synthesis
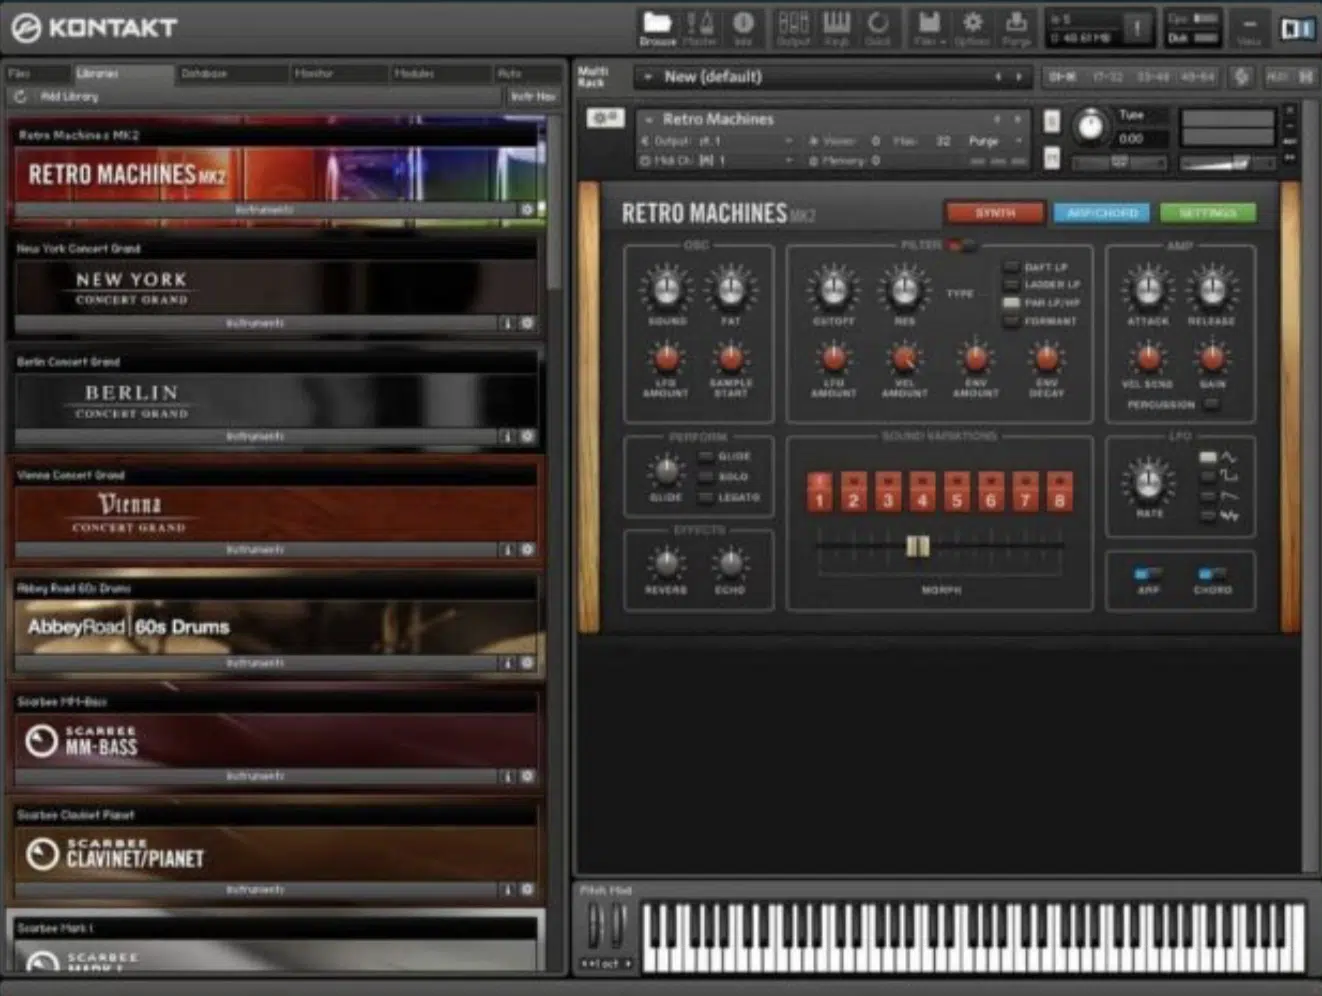
Sample-based synthesis creates sound by manipulating recorded audio samples, offering unparalleled realism and flexibility.
Unlike traditional synthesis types, it uses existing recordings as its foundation, which can then be:
- Looped
- Layered
- Edited
For example, in Kontakt or Logic’s Sampler, you can load a piano sample, adjust its pitch and velocity sensitivity, and layer it with strings for a hybrid texture.
Sample-based synthesis is perfect for instruments like electric pianos, orchestral elements, or drum kits, as it captures the little details that are hard to replicate synthetically.
Parameters like start position, pitch envelopes, and looping controls let you creatively manipulate the sample for entirely new results.
Sample synthesis excels in genres where realism is key, like cinematic or acoustic productions, but it can also be used creatively in EDM or experimental music.
Key Features of Sample-Based Synthesis
- Multisampling: Uses multiple samples across different velocities and pitches for realistic playback.
- Start and Loop Controls: Adjusting the start point or setting loop points lets you reshape the sound.
- Layering: Combine samples (e.g., a piano and a pad) to create complex, hybrid instruments.
- Time Stretching and Pitch Shifting: Allows you to adjust the length or pitch of a sample without losing quality.
Side note, if you want to know everything about time stretching or pitch shifting, I got you.
Pro Tip for Sample-Based Synthesis
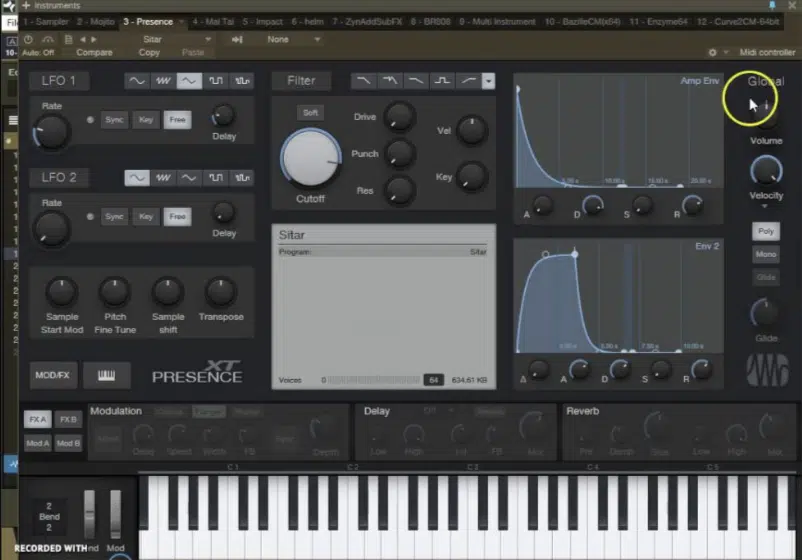
Load a vocal sample into your sampler and set the start point to 50 ms to avoid any harsh attacks and other unpleasant things.
Use a pitch envelope with a fast decay (200 ms) to create a subtle glide effect.
To add movement, automate the filter cutoff with an LFO set to 1/4 sync, and layer the sample with a sine wave for extra low-end warmth.
For a polished sound, use a stereo widener at 50% width and a touch of reverb to glue everything together.
#9. Spectral Synthesis
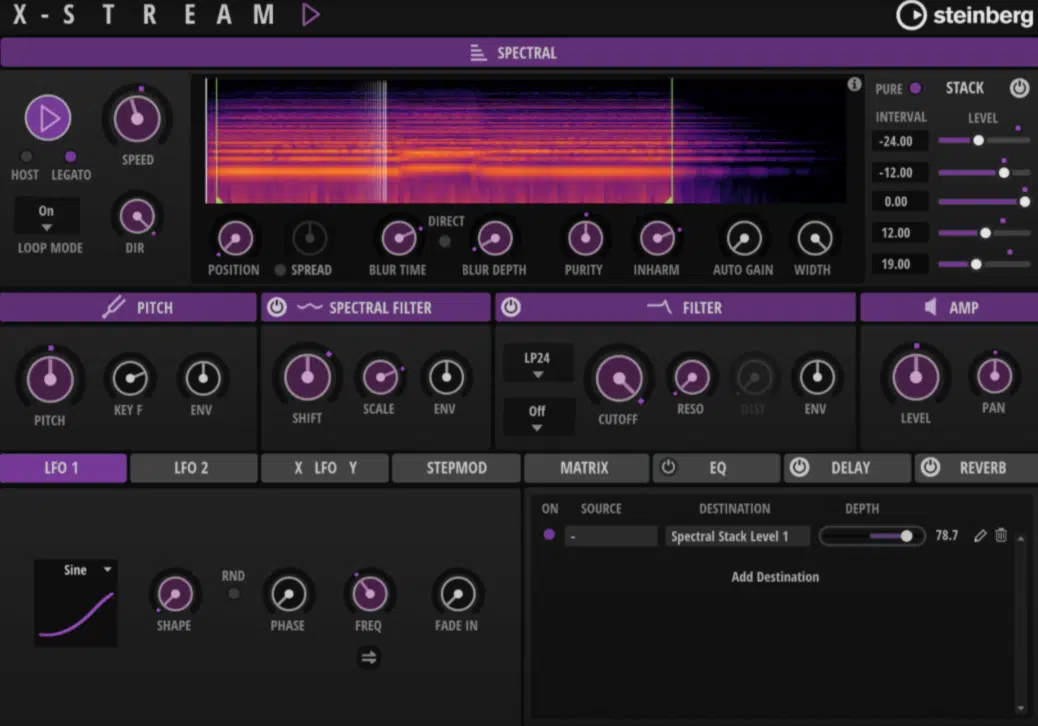
Spectral synthesis works by analyzing the frequency spectrum of a sound and manipulating its individual components to create something new.
Unlike traditional methods that rely on oscillators or samples, spectral synthesis deconstructs sound into its harmonic and inharmonic elements.
It gives you unparalleled control over tone and texture.
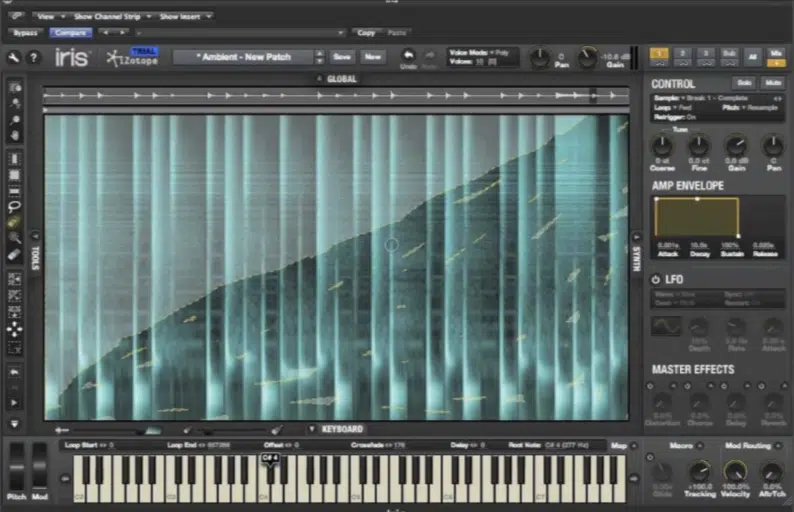
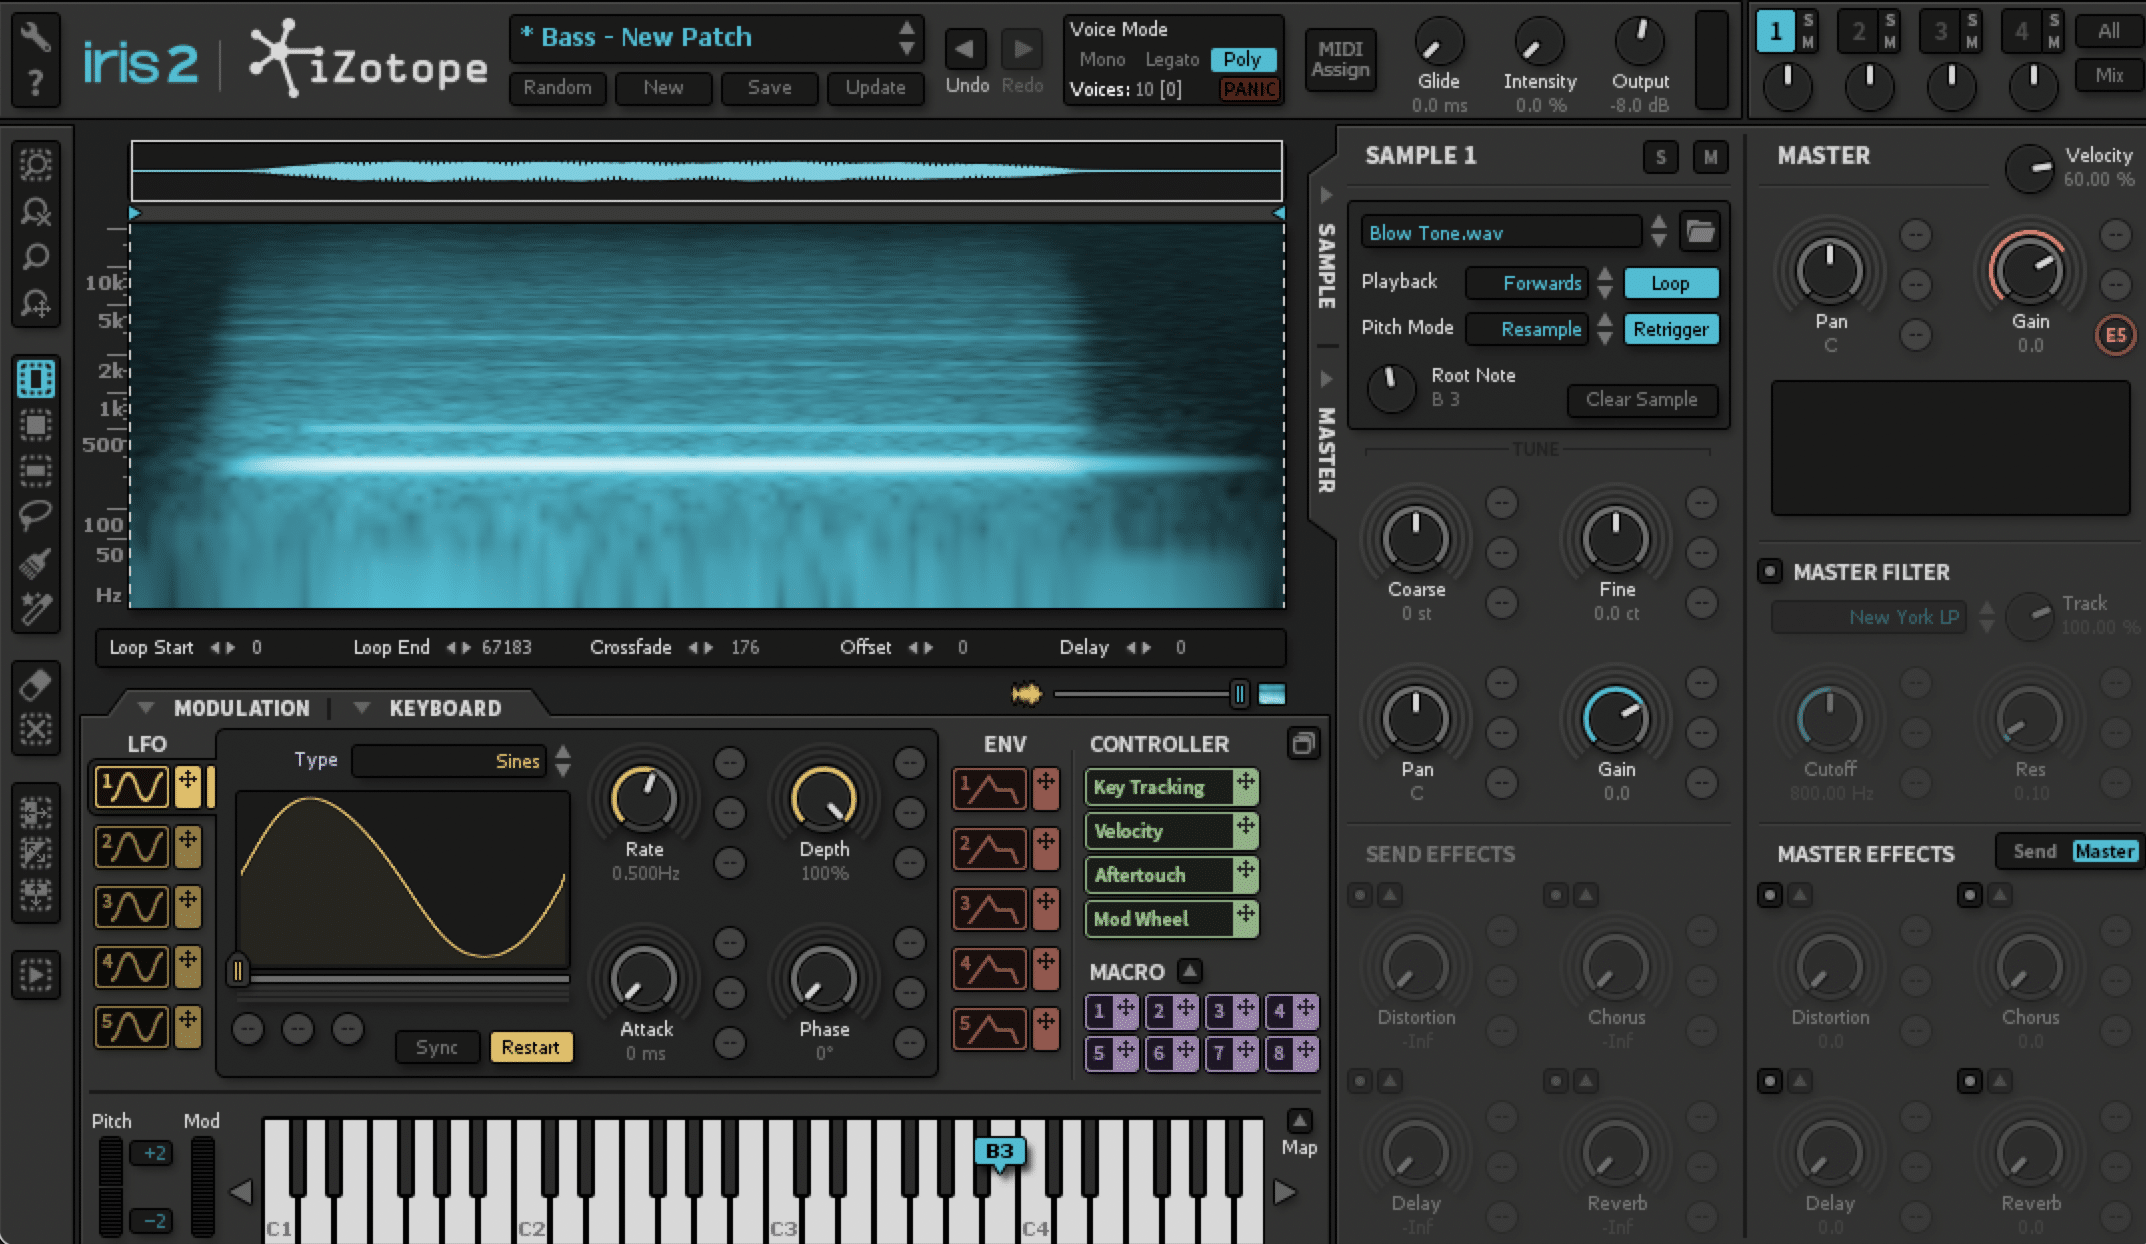
For example, tools like iZotope Iris let you isolate specific frequencies in a recording, such as only the high-pitched harmonics of a bell, and use them to create ethereal pads.
You can do this by selecting a range above 2 kHz with the spectral brush tool.
From there, you can loop the selected frequencies and stretch them using the time-stretch feature set to 200% 一 creating ethereal, sustained pads.
You can also reshape noise into melodic elements by applying a spectral EQ to cut frequencies below 400 Hz and then using Iris’ pitch-shifting feature to shift the selected range up by +12 semitones.
Then, you can freeze parts of the spectrum using the Freeze function with a decay time of 4 seconds for a hybrid texture.
One that combines melodic movement with organic randomness perfectly.
Key parameters include the ability to freeze parts of the spectrum, stretch time, and apply frequency-dependent effects.
Key Features of Spectral Synthesis
- Frequency Isolation: Allows you to isolate specific frequencies or ranges from a sound, creating unique evolving timbres.
- Morphing and Reshaping: Blend or reshape harmonic and inharmonic elements to produce entirely new textures.
- Spectral Filters: Apply EQ-like controls directly to the frequency spectrum for precise sound sculpting.
- Time Manipulation: Stretch or freeze specific spectral components for ambient or otherworldly effects.
Pro Tip for Spectral Synthesis
Start with a field recording, such as ocean waves, and use spectral filtering to isolate frequencies above 3 kHz to keep the shimmering high-end.
Freeze this section to create an airy pad, then layer it with a reversed version of the same sound to add depth.
Use pitch shifting to transpose the frozen pad down by -12 semitones for a deeper layer and apply a large reverb with a 10-second decay to make it epic/expansive.
Automate the spectral position over 16 bars to create evolving, atmospheric textures that are perfect for ambient or cinematic tracks.
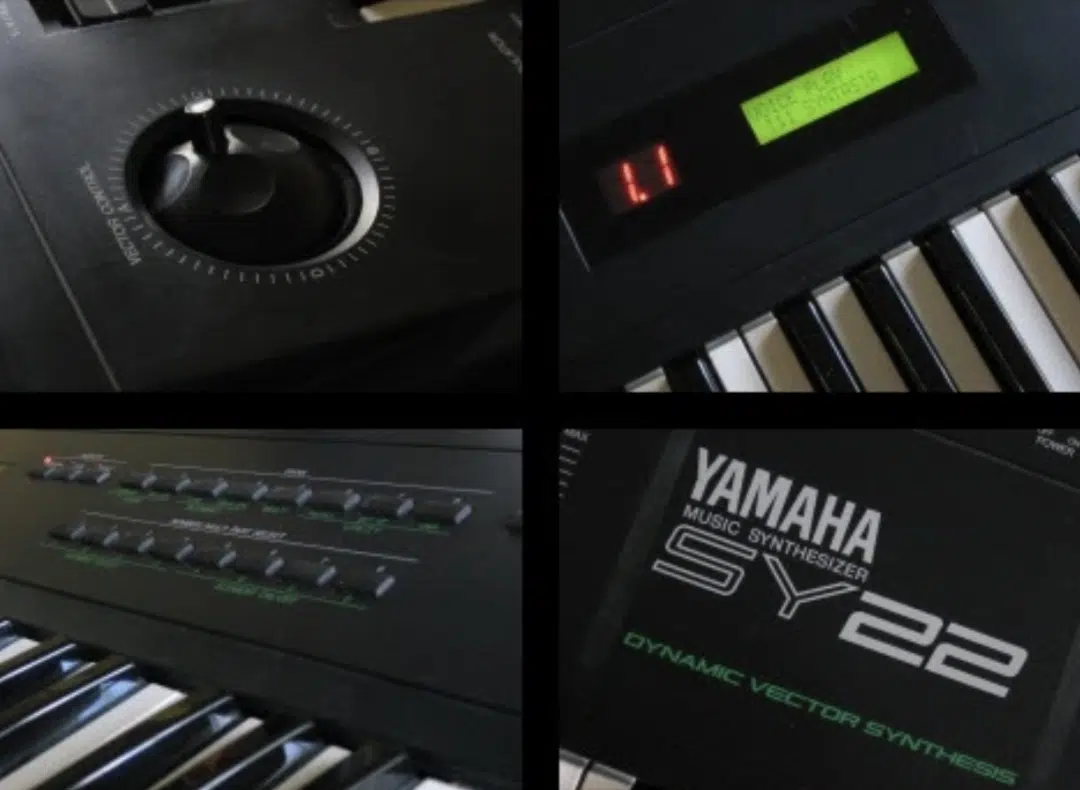
#10. Vector Synthesis
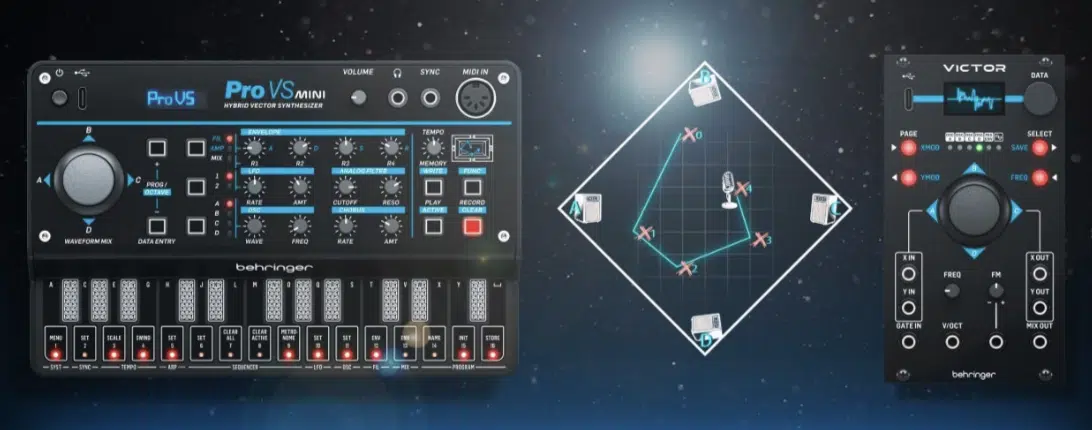
Vector synthesis is one you don’t hear as much as, let’s say basic subtractive synthesis or even physical modeling synthesis, but it’s pretty awesome.
It blends multiple sound sources in a two-dimensional space so you’re able to morph between them in real-time like a boss.
You could place a sine wave, a square wave, a sawtooth, and noise in each corner of an X-Y grid, then move a cursor through the grid to blend these elements dynamically.
Popular/modern synthesizers like the Sequential Prophet VS or Arturia’s Pigments use vector synthesis to create lush pads, evolving leads, or unique soundscapes.
NOTE: Assign the X-axis to control timbre (e.g., saw vs. sine) and the Y-axis to control modulation depth 一 giving you hands-on control over your sound’s evolution.
For example, set the Y-axis to modulate filter cutoff, with a range from 100 Hz to 2 kHz so you can control the brightness and intensity as you move through the grid.
Vector synthesis is super useful for creating sounds that change subtly over time without requiring extensive automation.
For instance, automate the cursor to move in a circular pattern over 8 bars, blending the sound sources in a rhythmic, hypnotic way.
Adjust the movement speed to 0.2 Hz for slower transitions or 1 Hz for faster, more energetic changes.
It’s also beginner-friendly because the visual representation of blending sound sources is intuitive and easy to grasp.
Key Features of Vector Synthesis
- X-Y Grid Control: Blend up to four different sound sources by moving a cursor on an X-Y grid.
- Dynamic Morphing: Create evolving sounds by automating the cursor’s movement over time.
- Layering Capabilities: Combine multiple single-cycle waveforms or textures for rich, layered sounds.
- Easy-to-use Interface: The visual approach makes it accessible, even for producers new to synthesis.
Pro Tip for Vector Synthesis
Set a sine wave in the bottom-left corner, a sawtooth in the top-right, and noise in the bottom-right corner of the grid.
Automate the cursor to sweep diagonally across the grid over 8 bars 一 blending these textures into a dynamic pad.
Don’t forget to adjust the modulation depth for each corner to around 40%, so transitions feel natural and not overly dramatic or ridiculous.
Add a multi-band compressor to balance the tonal blend and a light phaser effect with a 0.5 Hz rate for extra movement.
#11. Resynthesis
Resynthesis is actually another pretty interesting one you don’t hear every day.
It works by analyzing a recorded sound and reconstructing it using synthesis techniques like additive or spectral synthesis.
Resynthesis is especially great for creating hybrid sounds, as you can flawlessly blend natural recordings with synthetic textures.
This is widely used in genres like future bass, ambient, and experimental electronic music, where sound design plays a key role.
Key Features of Resynthesis
- Audio Analysis: Breaks a sample into harmonic and spectral components for precise manipulation.
- Playability: Converts static audio into a playable instrument across your MIDI keyboard.
- Hybridization: Combine natural and synthetic elements for unique textures.
- Time and Pitch Control: Independently manipulate the timing and pitch of the resynthesized sound.
Pro Tip for Resynthesis
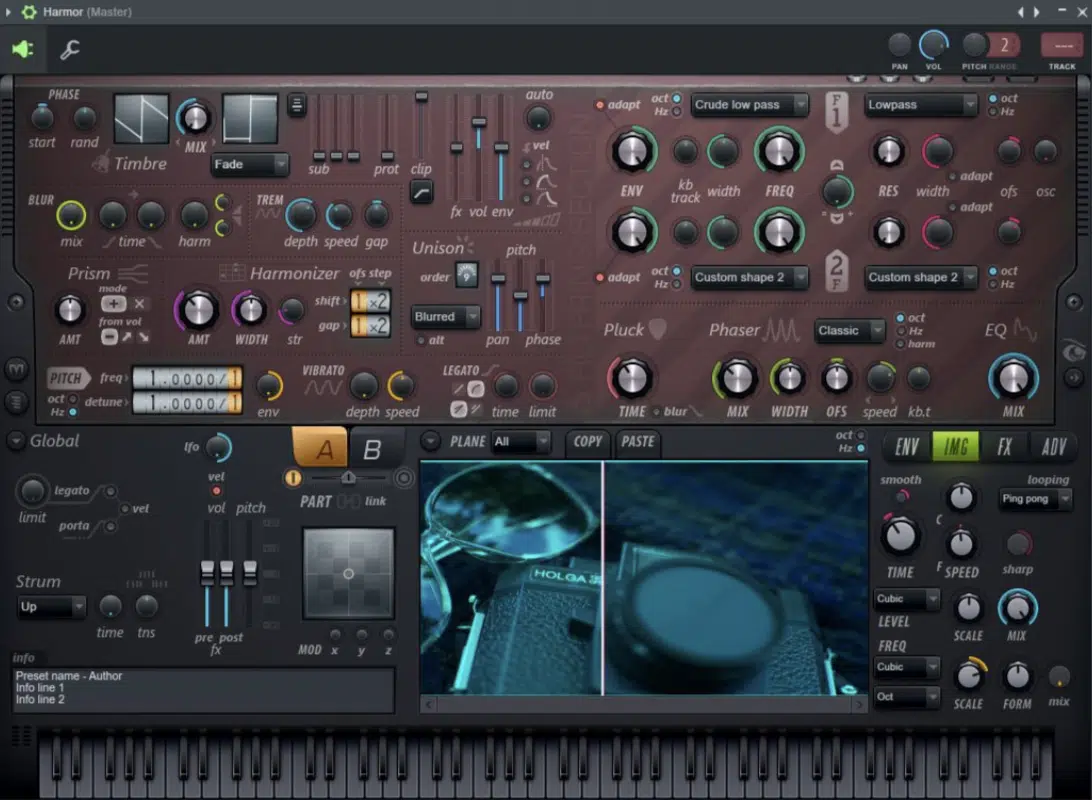
Load a short vocal phrase into your resynthesis engine, such as Harmor, and set the formant shift to +2 semitones for a brighter character.
Apply harmonic detuning at ±10 cents to add depth, and automate the filter cutoff from 500 Hz to 2 kHz for evolving tonal movement.
To enhance the sound further, use a granular reverb with a 60% wet mix to add a shimmering, spacious effect.
This technique is great for creating vocal leads or atmospheric elements in electronic or cinematic tracks.
Bonus: Using Hardware Synthesizers/Analog Synthesizers
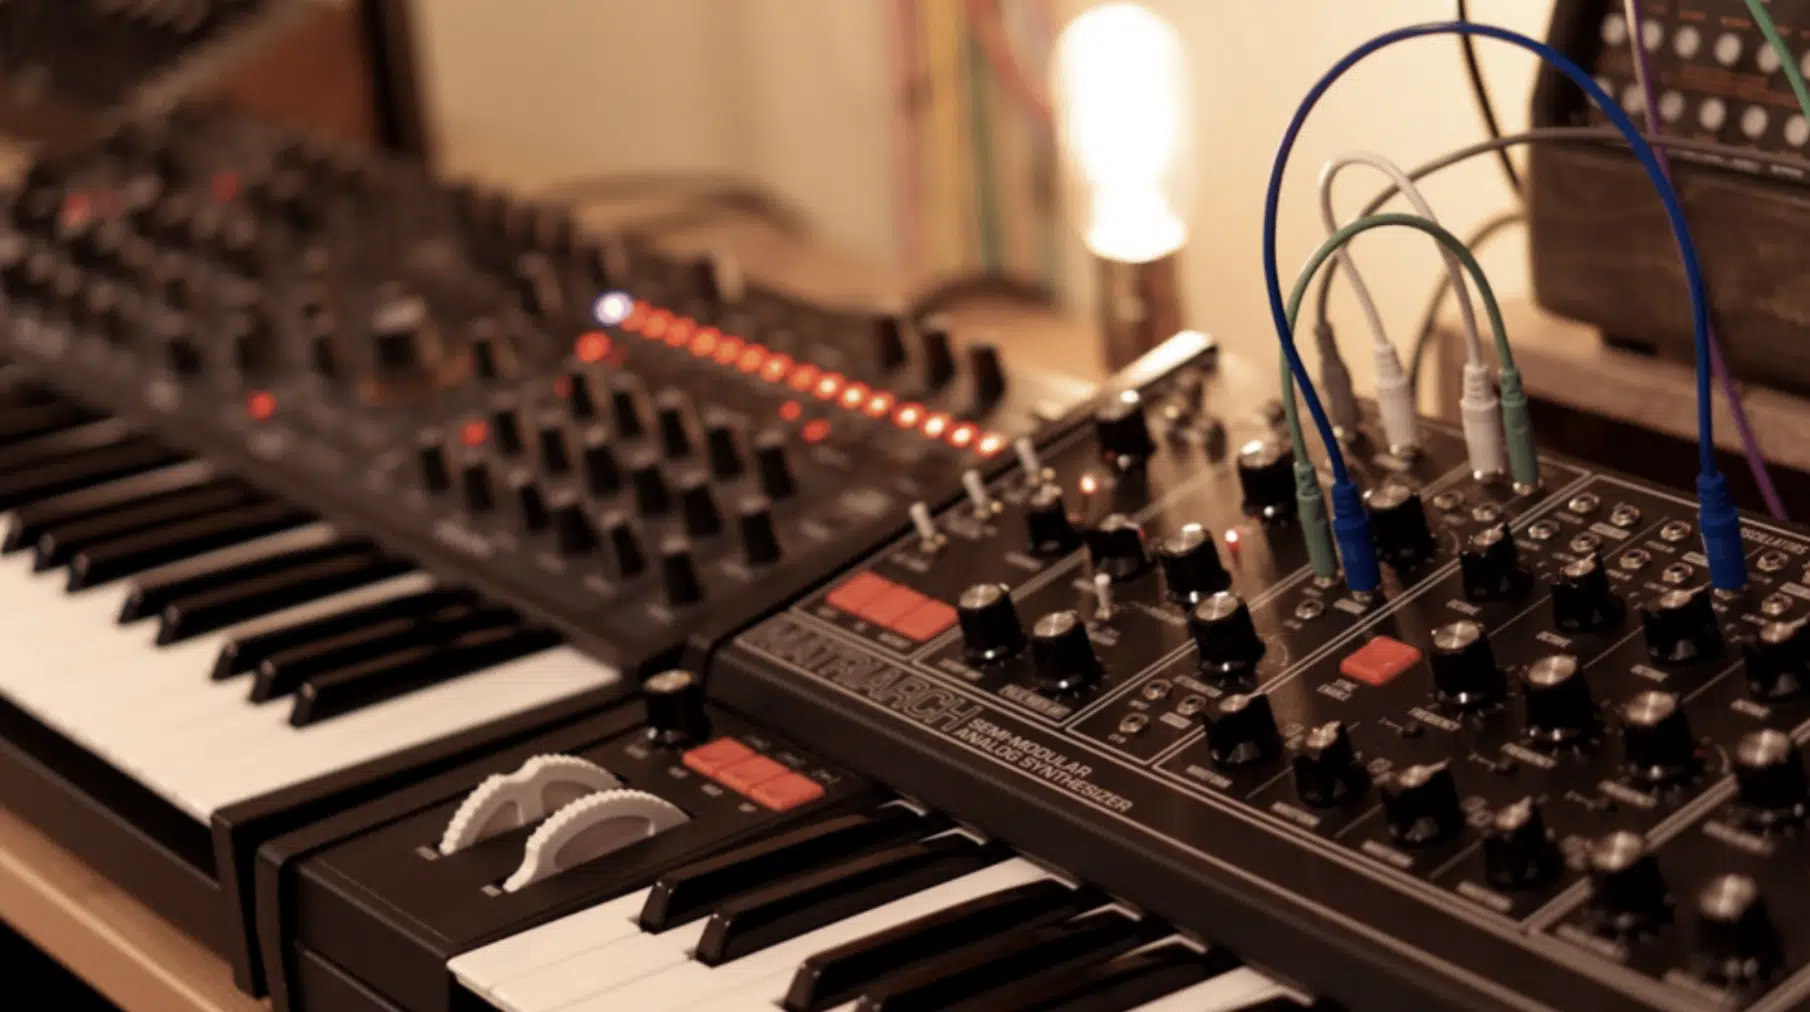
Aside from the popular digital synths like Native Instruments Massive or Serum, we have hardware synths.
Hardware synthesizers offer a hands-on, tactile approach to sound design that any soft synth can’t quite replicate.
For example, the Moog Sub 37 lets you adjust its filter cutoff or oscillator detune in real-time with physical knobs 一 giving you immediate, intuitive control.
Unlike digital instruments, many hardware synthesizers, like the Sequential Prophet-6 or Roland Juno-60.
It features analog circuitry (sequential circuits)that creates a natural warmth and subtle imperfections, perfect for genres like synthwave or techno.
One advantage of hardware is their standalone functionality… Some models, like the Korg Minilogue XD, even allow patch saving and on-board sequencing.
To integrate hardware synthesizers into your DAW setup, you’ll need an audio interface to record their output and a MIDI controller or USB connection for synchronization.
For beginners, compact hardware synthesizers like the Korg Volca Keys are a great way to start exploring the world of hardware without breaking the bank.
Whether you’re layering analog basslines with digital pads or using hardware to sequence live performances, hardware synthesizers add a unique dimension to your production process.
Advanced Synthesis Techniques
Now that you know all the different synthesis types, it’s time to get a little crazy with your sound synthesis techniques (my favorite thing). You can try combining them or using advanced modulation techniques to take your sound design to the next level. So, now let’s break down some ways to creatively extend the possibilities of synthesis types through layering, modulation, and macro control.
-
Layering Multiple Synthesis Types in a Single Patch
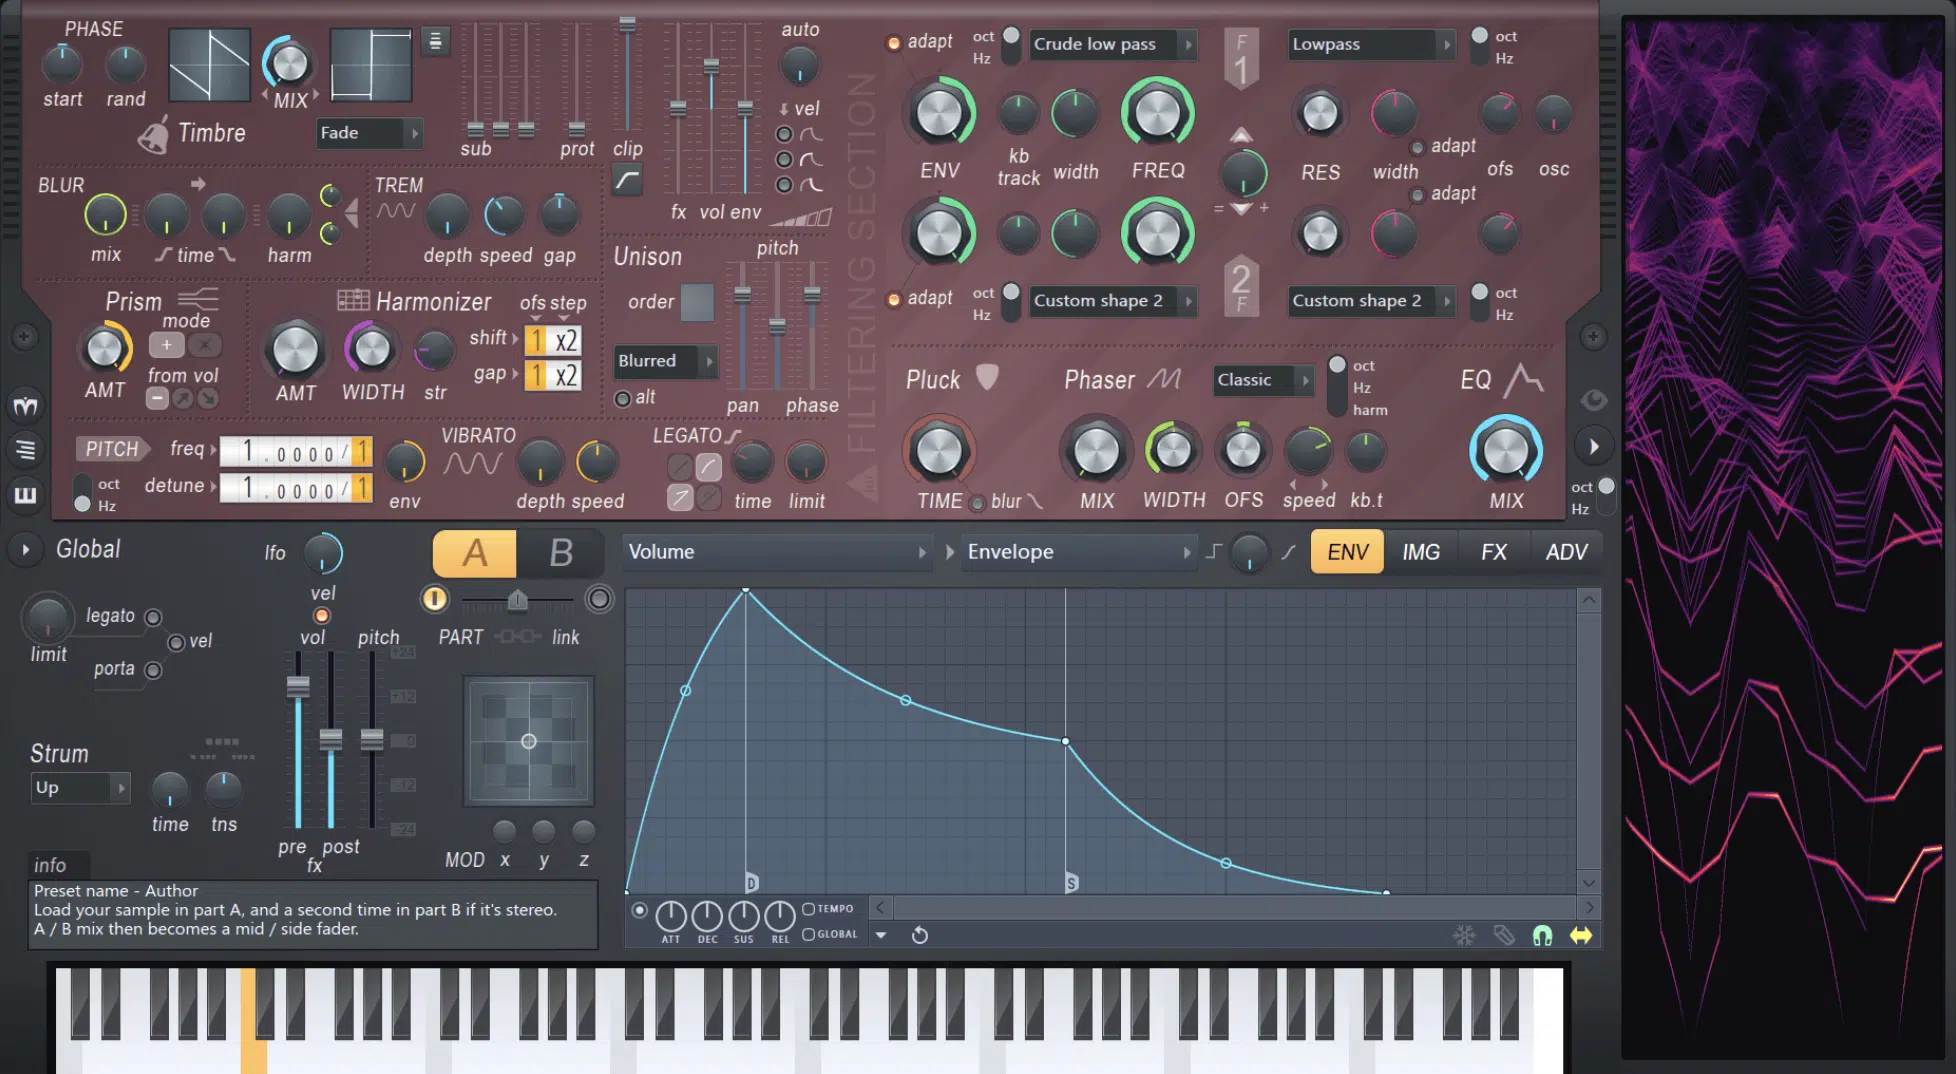
Layering different types of synthesis (like additive synthesis and subtractive synthesizers) can create incredibly complex textures.
For example, use an additive engine like Harmor to create a bright, evolving harmonic pad, then layer it with a subtractive bassline generated using Serum with a low-pass filter set to 200 Hz.
To blend the layers properly, pan the pad slightly left (-10) and the bassline slightly right (+10) to maintain clarity in the mix.
Finally, add a shared reverb (e.g., decay: 4 seconds, wet: 30%) to glue the layers together and create a super fluid soundscape.
-
MOD Matrix Madness
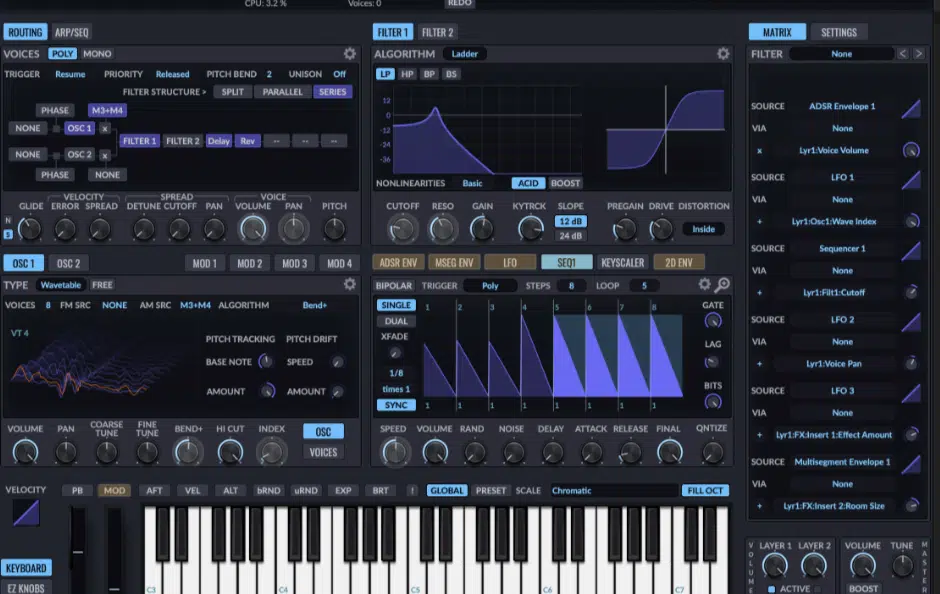
A modulation matrix allows you to assign multiple modulators (e.g., envelopes, LFOs) to different parameters letting you play around with intricate sound manipulation.
For example, in Pigments, route an LFO to control both filter cutoff and wavetable position simultaneously, with the modulation depth set to 50% for subtle movement.
Pigments is my absolute favorite, so if you get the opportunity, definitely try it out.
Add a second envelope to modulate pitch, starting with a 5 ms attack and a 300 ms decay, to introduce dynamic pitch sweeps.
NOTE: Using multiple destinations in the matrix can turn a simple pluck into a constantly evolving sound perfect for cinematic or ambient tracks.
-
Creating Dynamic Textures with Macro Controls
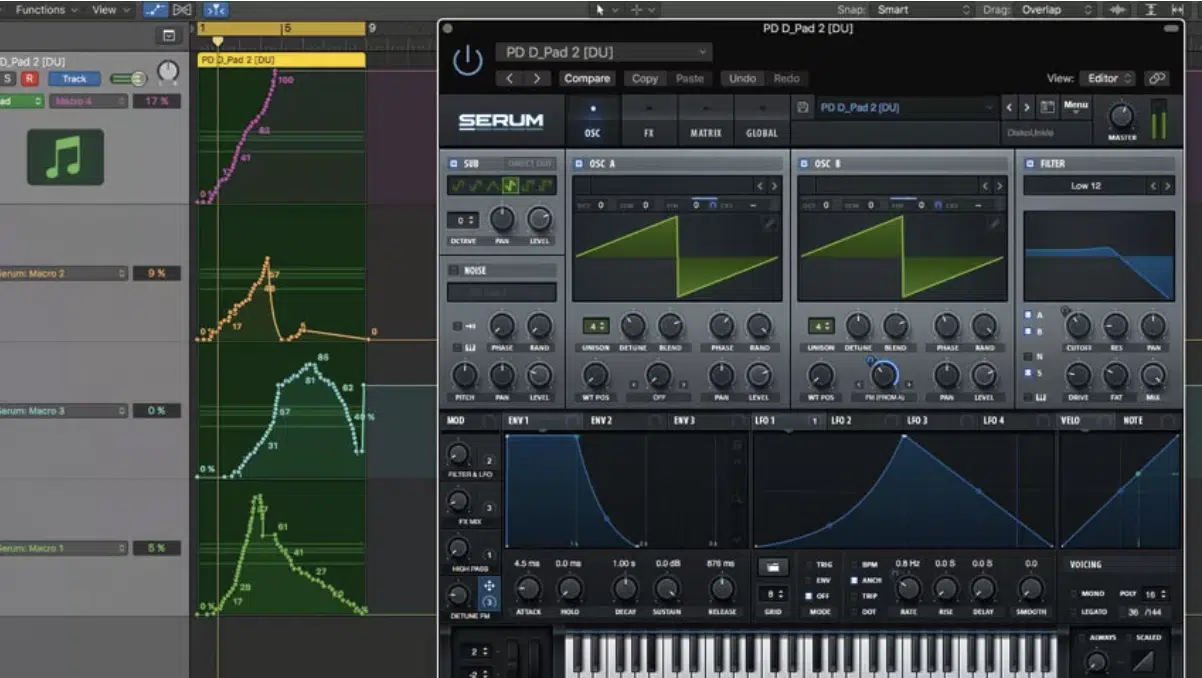
Macro controls let you manipulate multiple parameters with a single knob, making it easy to introduce dramatic changes in a performance or sound design session.
For example, in Serum, map a macro to control both filter cutoff and distortion amount, with the cutoff sweeping from 1.5 kHz to 300 Hz.
And, the distortion set to increase from 20% to 70%.
Assign a second macro to modulate reverb mix (wet: 10%-40%) and size (decay: 2-6 seconds) for creating spacious, evolving atmospheres.
You can even use macro controls in live settings to introduce gradual buildups or drops without needing to adjust multiple parameters manually.
-
Exploring Microtonal Scales in Synthesis
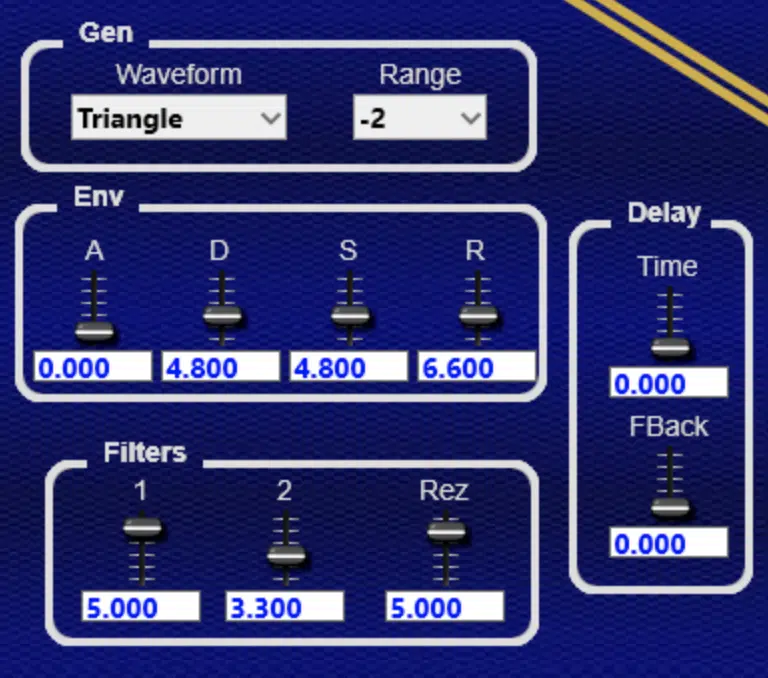
Microtonal scales use intervals smaller than a semitone, which lets you really unlock unconventional harmonies and tones that traditional 12-tone scales don’t allow.
And, if you’re anything like me, you love pushing boundaries and messing around with forbidden or rare things.
For example, in Surge XT, you can load a custom microtonal scale like a 31-tone equal temperament to create haunting, otherworldly melodies.
Set the base pitch to A = 432 Hz for a warmer, more natural feel, and pair it with a wavetable oscillator to create shimmering textures with subtle detune.
NOTE: Use microtonal scales in genres like ambient, experimental, or even cinematic scoring to evoke unique emotional responses that conventional scales can’t achieve.
Final Thoughts
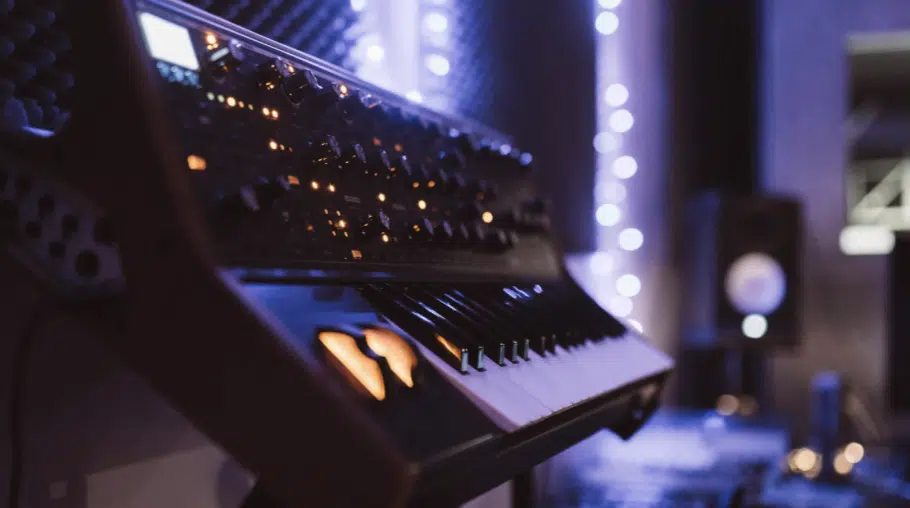
Synthesis types, whether it’s subtractive, physical modeling, or granular, can really help you create unique sounds, design dynamic layers, and develop textures that stand out.
Plus, they allow you to experiment with complex tones, up your sound design skills, and play around with new possibilities in every genre.
Remember, it’s all about understanding how synthesis types work and using techniques like modulation, layering, and advanced effects to make your sounds more engaging.
As well as combining different synthesis types (and taking advantage of things like macro controls), you’ll be on your way to mastering sound design.
As long as you follow the tips and techniques we talked about today for all the synthesis types, you’ll be in great shape in no time.
And, as a special bonus, since we mentioned Serum so much, you’ve got to check out these show-stopping Free Serum Essentials.
These epic free Serum preset banks provide the most clean, professional sounds for every genre.
Plus, each preset is fully loaded with macros and flexible parameters 一 letting you tweak and customize them to fit your tracks perfectly like we talked about.
It’s one of the best free resources available in the industry, so trust me when I tell you that you definitely don’t want to miss out.
Just remember, to master all the synthesis types, you need to stay curious, experiment all day, and keep challenging yourself.
So, always learn, practice, and explore new techniques, and your music will only get better from here, that’s a fact.
Until next time…


Leave a Reply
You must belogged in to post a comment.