Mastering is all about achieving a professional, polished sound and making sure your tracks stand out on any platform or system.
As producers, knowing how to master your own track is super important so you have the whole package (you don’t want to depend on mastering engineers forever).
You’ll be able to take complete control over your sound so your track always hits the right balance of loudness and dynamics.
Plus, mastering is the key for ensuring your music can compete, in terms of quality, with all the industry-standard releases out there.
That’s why we’re breaking down the best mastering techniques, as well as the #1 audio mastering course in the industry, which brings ENDLESS value to the table.
In today’s article, you’ll learn everything about audio mastering, like:
- The #1 audio mastering course in the game ✓
- Breaking down the mastering process step-by-step ✓
- Essential techniques for gain staging ✓
- How to use automation in when you master tracks ✓
- Perfecting your sound with EQ transparency ✓
- Compression/dynamic control ✓
- Adding warmth with saturation ✓
- Balancing loudness and dynamics ✓
- Pro tips from a true mastering engineer ✓
- Finalizing your tracks for translation across systems ✓
- Advanced techniques ✓
- Much more knowledge about audio mastering ✓
After today’s article, you’ll know exactly how to master a track and achieve that professional, super clean sound like the pros.
As well as be able to apply advanced audio mastering techniques and strategies to every track you produce which I threw in at the end.
If you want your tracks to be on point every single time, this is the key.
Table of Contents
Breaking Down the Mastering Process Step-by-Step
Before we break down the best audio mastering course in the industry, it’s important that you understand the audio mastering process. From preparing your mix to the final touches to ensure your tracks are ready for release, audio mastering is all about attention to detail. So, let’s kick things off with the actual mastering process.
-
Step 1: Preparing Your Mix for Mastering

Preparing your mix is one of the most critical stages in the mastering process because a poorly prepared mix will limit the effectiveness of your audio mastering techniques.
You’re going to start by making sure your track peaks at about -6 dB to -3 dB, which provides enough headroom for mastering while avoiding clipping.
This headroom ensures you can use EQ, compression, and limiting to shape the track without any distorting or overloading.
Export your mix in a lossless format, such as WAV or AIFF, at 48 kHz/24-bit or higher to maintain audio quality and avoid degradation.
And keep in mind that your mix should be completely balanced before you get to mastering.
For example, your bass elements should be powerful but not overwhelming, typically peaking around -10 dB, while vocals should sit slightly higher for clarity.
Always avoid over-processing on your mix bus…
This includes avoiding unnecessary compression, EQ, or limiting, as it can restrict your ability to fine-tune the master (and nobody has time for that).
NOTE: You can solo different frequency ranges using an analyzer like SPAN by Voxengo, ensuring that each range is contributing proportionally to the overall mix.
Also, make sure to eliminate all clicks, pops, or unwanted noise, as these will become even more noticeable after mastering.
It makes your tracks sound amateurish, unprofessional, and straight up whack.
I like to double-check transitions between sections (like intros or breakdowns) for any inconsistencies that might mess up your track’s overall flow.
Bottom line, preparing your mix properly saves you time and energy in the mastering process so you can focus on enhancing the track’s sound rather than fixing issues.
Remember, mastering is all about broad strokes and it can’t make a horrible mix better 一 if your mix is a mess, mastering isn’t some magical solution, so be on point here.
-
Step 2: Analyzing the Frequency Spectrum
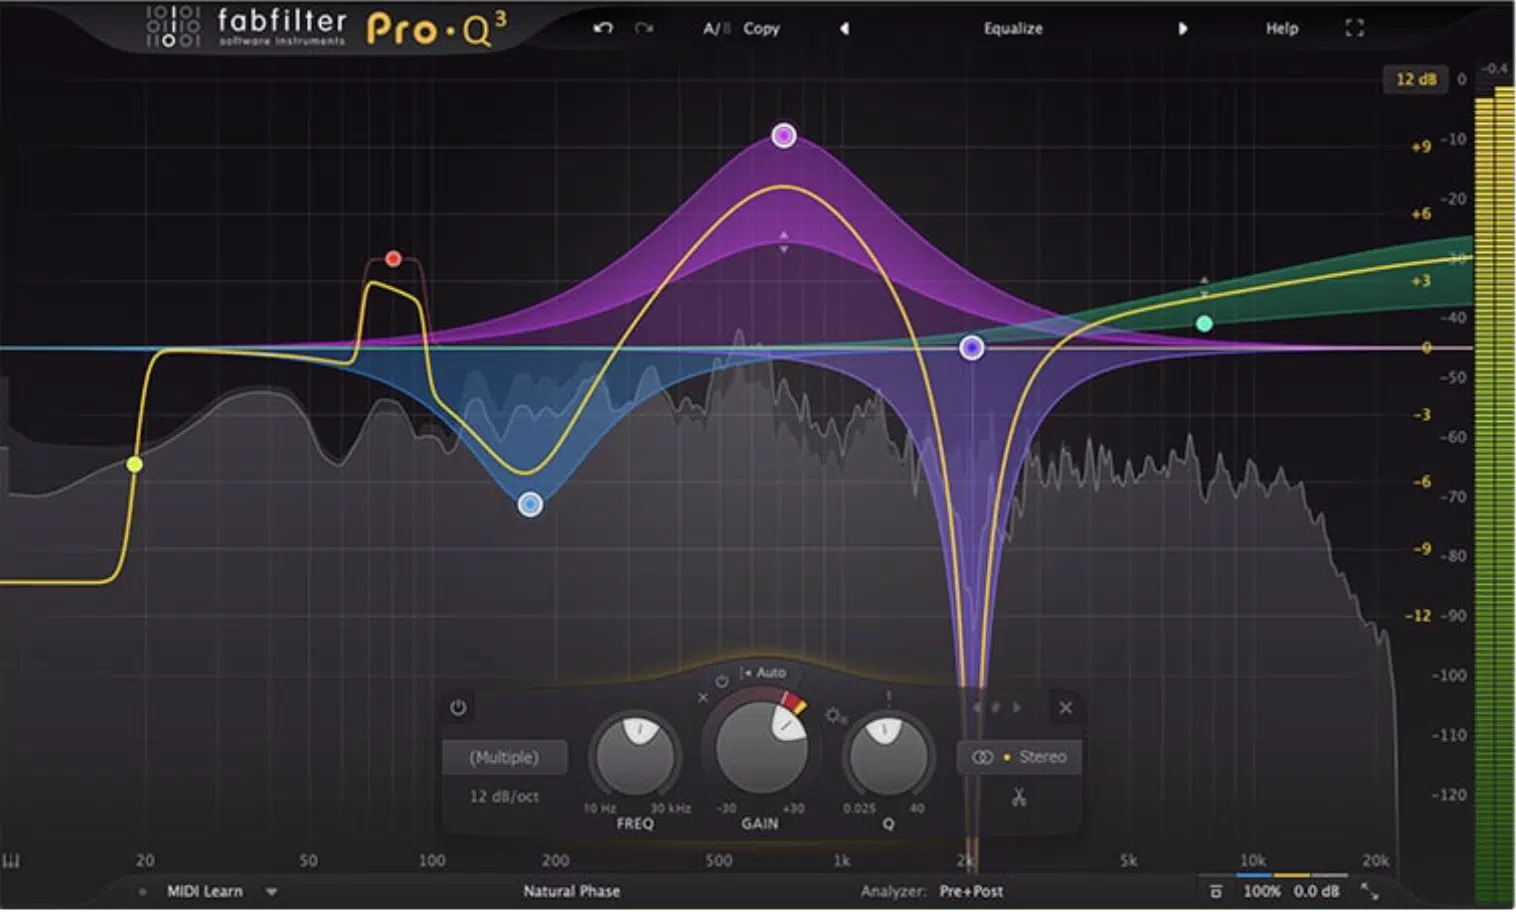
Up next you’ll need to analyze the frequency spectrum to make sure your track has a balanced tonal foundation before diving into EQ or compression.
Using a frequency analyzer (my favorite is FabFilter Pro-Q 3 or Insight 2 by iZotope) can visually show you any frequency imbalances.
For example, if your low-end is way too dominant below 50 Hz, it can muddy the mix and overpower the kick and bass relationship.
Make sure to pay close attention to the 200–500 Hz range, where boxiness or muddiness often hides, and tackle these issues early.
A common issue in this range is bass spill, which is where low frequencies bleed into other elements of the mix, and you certainly don’t want that to happen.
On the flip side, you’ll want to check the 2–4 kHz range as well because that’s where clarity and presence live (thoroughness is everything my friends).
Overemphasis here can cause ear fatigue, so make sure this range is strong but not overly harsh.
Also, it’s very important to listen carefully in all different listening environments, on as many different playback systems as possible.
If you notice big differences between, let’s say, headphones and monitors, there may be imbalances in your spectrum.
One trick I use is comparing the spectral curve of my track against a professionally mastered reference track in the same genre.
It will show you any areas where your mix is either over- or under-emphasized, so you can tweak things to perfection.
KEEP IN MIND: Spectrum analyzers are tools to guide your ears, not replace them.
Always Combine visual analysis with critical listening to ensure the frequencies are balanced without being overly dependent on one single method.
-
Step 3: Equalization (EQ) for Transparency
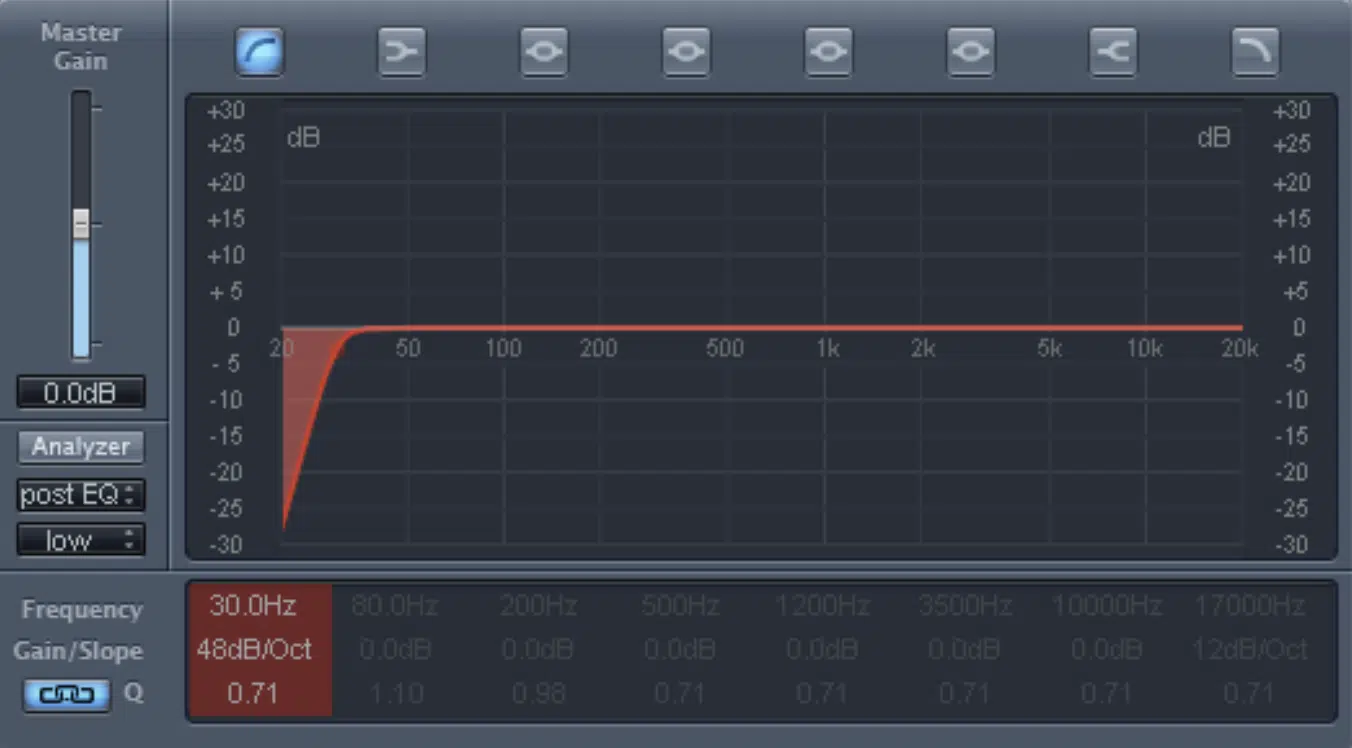
EQ’ing is your first real chance to shape the tone of your track in the mastering process, with the goal being total transparency.
In other words, correcting imbalances without completely altering your mixes’ character and overall edge.
The first thing you’re going to do is knock out any problem areas with subtractive EQ, like cutting rumble below 30 Hz or taming boxy frequencies around 250–400 Hz.
Use a narrow Q setting for cuts to avoid affecting surrounding frequencies.
For example, if your vocals feel a little muffled, a -2 dB cut at 300 Hz with a Q of 4 can clean things up without losing warmth, which is perfect.
For brightness and air, you can apply a high-shelf boost above 10 kHz, but keep it subtle (about 1–2 dB) to avoid introducing harshness.
NOTE: Always, always, always A/B your EQ changes with the bypass button to ensure you’re improving the sound and not overprocessing it.
I also recommend using mid/side EQ to fine-tune your stereo elements…
For instance, boosting the sides in the high frequencies can add width 一 cutting low mids in the center keeps the mix clean.
If you’re working with a genre where stereo width plays a huge role, like EDM or trap, then this is not only effective, but super important.
Bottom line, the key to effective EQ in mastering is making subtle changes that enhance the mix without overshadowing the original intent.
Your focus should always be on creating a tonal balance that sounds natural and professional across all playback systems, period.
-
Step 4: Dynamic Range Control with Compression
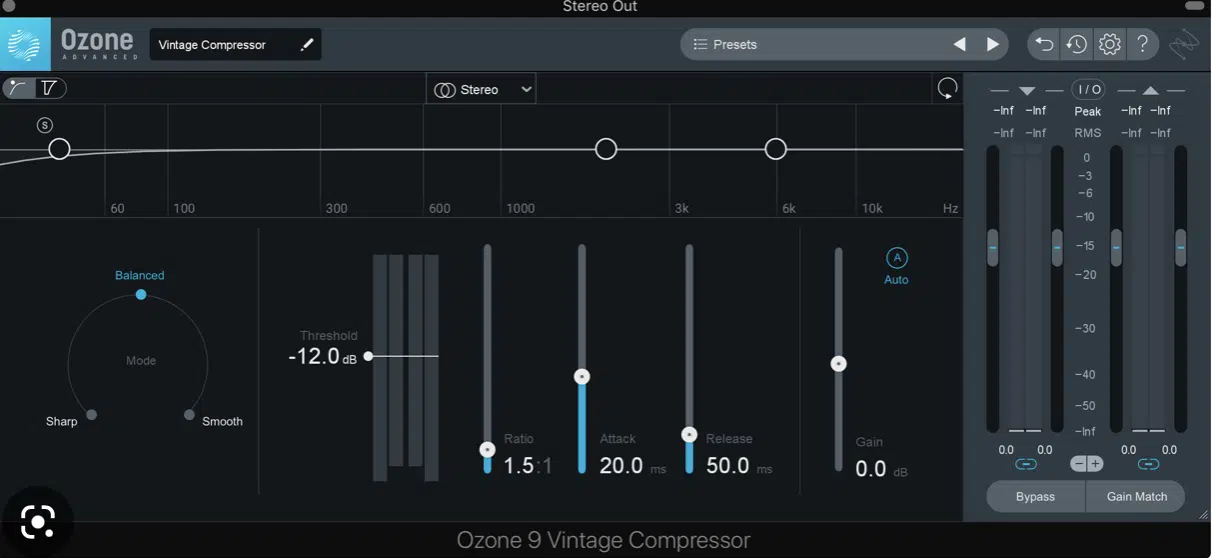
Compression in mastering is all about controlling the dynamic range without losing the energy or natural feel of the track.
You’re going to start with a ratio of 2:1 to 4:1, which is gentle enough to smooth peaks while preserving transients.
Then, adjust the attack time based on the track’s tempo:
- Slower attacks (20–30 ms) let transients shine
- Faster attacks are perfect for more mellow or vocal-driven tracks
For example, if you’re mastering a punchy EDM track, a 25 ms attack and 100 ms release will maintain the energy of the kick while keeping the mix controlled.
Pay attention to gain reduction 一 1–3 dB of compression is usually enough to tighten the track without making it feel squashed, so begin there.
If you find the mix losing its dynamics, simply dial back the threshold slightly or use parallel compression for a more transparent effect.
Talking about targeting specific frequency ranges, then I have to mention multiband compression of coursse, because it’s the perfect tool for this very thing.
With it, you can compress only the low-end around 60–120 Hz, which tames boomy basses without affecting the clarity of the mids and highs.
KEEP IN MIND: Over-compression can dull the overall mix, so always practice critical listening because even the best of the best sometimes fall short in this area.
Side note, if you want to learn all about over-compression and other deadly mixing mistakes that can completely destroy everything, we got you.
Just remember that for this step the goal is to create a master that feels controlled but still dynamic.
I always test the track with and without compression to make sure the adjustments you made are enhancing rather than killing the energy of the music.
And , needless to say, I highly recommend you do the same.
-
Step 5: Adding Depth with Stereo Imaging
Stereo imaging adds dimension and space to your master to make it feel wide and immersive without losing focus.
Start by widening the stereo field on elements above 200 Hz (where the ear perceives width most effectively) and keep frequencies below 150 Hz centered.
This will lay down a solid foundation for the bass and kick.
A technique I personally use all the time is mid/side processing to enhance width…
For example, boosting the sides around 10 kHz can add sparkle and air, while subtly cutting the mids at 500 Hz can clean up muddiness.
Just be careful not to overdo stereo widening, as excessive width can lead to phase issues and you want to avoid that at all costs.
Also, always check your mix in mono using tools like Voxengo SPAN (which is completely free) to ensure important elements remain intact.
For more dramatic effects, you can use automation to dynamically adjust the width.
Narrowing the stereo image during verses and gradually expanding it when the chorus hits can create contrast and excitement, so definitely mess around with that.
Another trick is adding subtle (and I emphasize ‘subtle’) delays or reverb to the side channels 一 giving the mix a sense of space without overcrowding the center.
Stereo imaging is about finding the perfect balance between spaciousness and clarity so your track feels engaging while maintaining its core focus.
Oh, and just like all the other steps this far and the next one, testing your mix on different playback systems will help you fine-tune this step to perfection, including studio monitors, headphones, car speakers, and smartphone speakers.
-
Step 6: Finalizing with Limiting
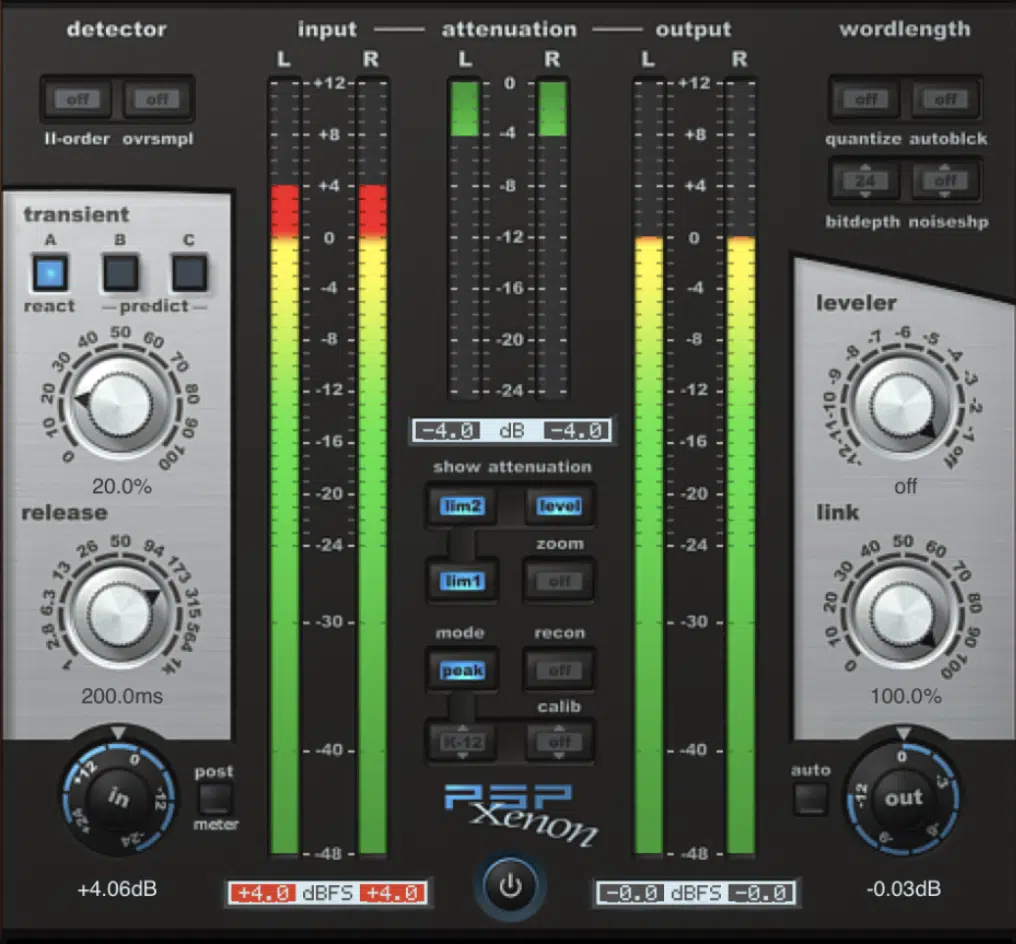
Limiting is the final step in the mastering process. It helps you achieve competitive loudness without distortion.
You’ll want to kick things off by setting your ceiling to -0.3 dB to avoid clipping on streaming platforms while maintaining headroom for inter-sample peaks.
Use a true-peak limiter like FabFilter Pro-L 2 to ensure transparency and minimize distortion during this phase.
Also, make sure to adjust the threshold carefully 一 aiming for 2-4 dB of gain reduction to boost loudness without squashing dynamics as we talked about.
Use the loudness target of -14 LUFS integrated for streaming platforms like Spotify or slightly louder (-10 LUFS) for club or DJ settings.
Always monitor how the limiter interacts with your low end…
Aggressive limiting can flatten your bass frequencies, so make sure to play around with the attack/release settings to preserve punch.
A/B your limited master with and without the limiter engaged to ensure you’re enhancing the sound, not compromising it.
Make sure to pay attention to how the bass translates on smaller systems and how the high-end clarity holds up on less detailed playback devices.
NOTE: If you want to learn all about the limiting process, or discover the best free limiter plugins in the game, we got you covered.
-
Pro Tip: Reference Tracks for Mastering
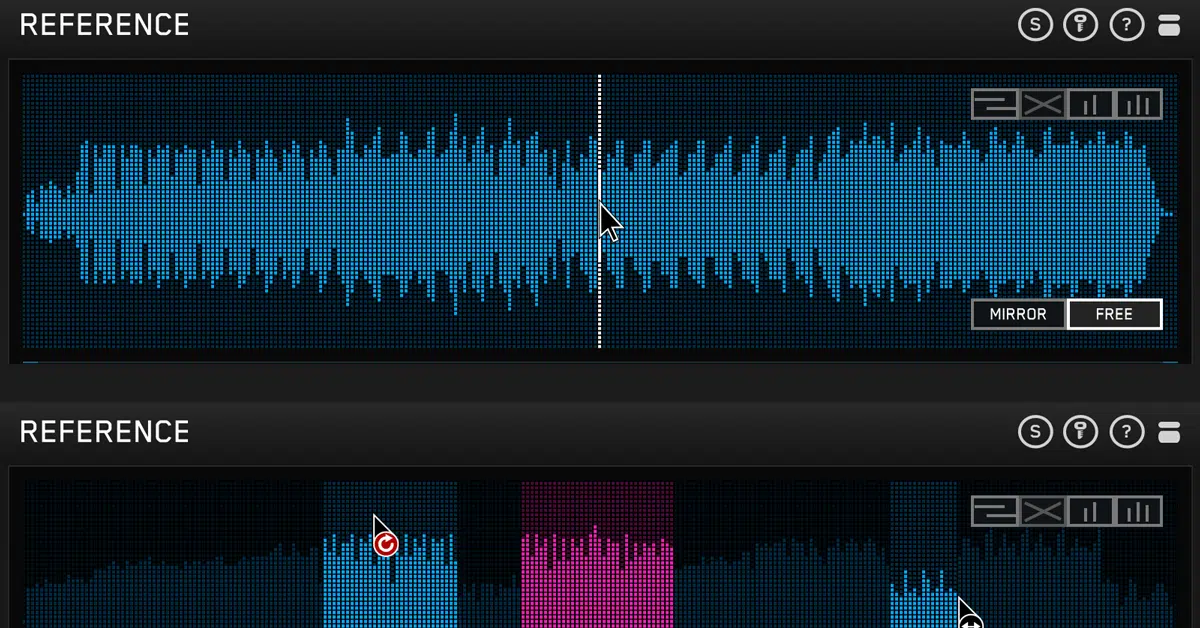
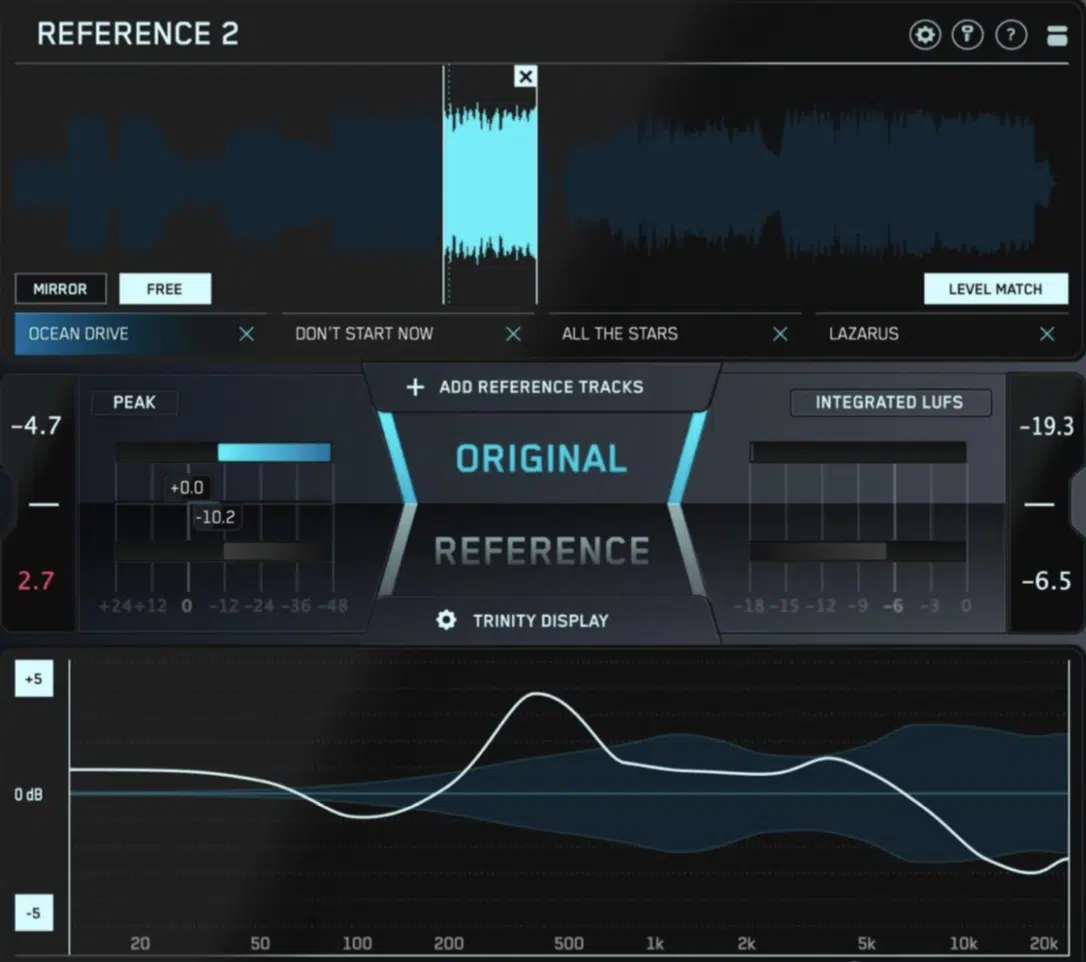
I said it once, I’m most likely going to say it a million times: use a reference track (it’s one of the most accurate ways to make sure your master is on point).
The process itself is simple 一 choose a track that aligns with the genre and style of your music, make sure it was mastered to perfection, and compare the:
- Tonal balance
- Dynamic range
- Stereo width
Use tools like Metric AB to toggle between your master and the reference track, focusing on elements like loudness (LUFS), low-end balance, and transient clarity.
Regularly comparing your work with a polished track will help you refine your audio mastering techniques and develop a deeper understanding of professional standards.
It’s exactly what any expert mastering engineer would do, so trust me it’s worth it.
The #1 Audio Mastering Course in the Industry: Unison Beatmaking Secrets
Now that you have a general idea about audio mastering, let’s get to the fun stuff: the number one audio mastering course in the industry to date. Unison Beatmaking Secrets not only covers audio mastering techniques, but everything you need to know about making a beat, from start to finish and crushing your music production process. Let’s break it down so you can see how invaluable it would be.
-
Overview of This Legendary Audio Mastering Course

The Unison Beatmaking Secrets Course is an invaluable (industry favorite) audio mastering course led by multi-platinum producer LMC.
If you’re not familiar with him, he’s worked with major artists like Lil Skies, Gucci Mane, and many more legendary artists.
This audio mastering course includes over 8 hours of video tutorials, broken down into 5 extensive modules (below) covering the entire music production/mastering process.
Producers like yourself will gain access to over 200 unique tools in the Beatmaking Secrets Toolkit 一 including loops, samples, and templates.
All are tweaked for different mastering and mixing workflows.
Where it really gets crazy is the hands-on project file walkthroughs, where LMC dissects his beats and breaks down the exact steps to achieve professional sound quality.
By completing this audio mastering course, you’ll develop a deeper understanding of audio mastering techniques and be able to implement them like a boss.
All while building your skills in mixing, arrangement, and production as well (epic!).
Best of all, this audio mastering course emphasizes critical listening and practical application so you can master your tracks to meet industry standards.
You’ll be free to master your own tracks and not have to worry about it sounding sloppy or amateurish ever again.
NOTE: The content focuses on real-world audio mastering techniques, with detailed examples demonstrated in FL Studio.
But, it applies to other DAWs too, like Ableton Live, Logic Pro, and Pro Tools as well, so don’t worry.
Download the #1 Mastering Course in the Industry
The Mastering Module
The Mastering Module in the Unison Beatmaking Secrets Course offers an in-depth exploration of audio mastering techniques, guiding you through the final phase of music production to achieve industry-standard sound quality. Led by multi-platinum producer LMC, this module has 5 comprehensive lessons totaling about 1 hour and 35 minutes. Here is the lesson breakdowns:
-
Epic Mixing Tips
In this module, you’ll dive into essential mixing techniques that elevate your beats to a professional standard.
The part covers setting optimal levels for each track to ensure balance and clarity, preventing any element from overpowering the mix.
You’ll learn epic panning strategies to create a spacious stereo field, allowing instruments to occupy their own space and enhancing the overall listening experience.
Also, you’ll learn all about EQ to carve out frequencies so each unique instrument sits well in the mix without clashing.
Compression techniques are also thrown into the mix (no pun intended) to control dynamics so your tracks are always consistent and punchy.
This audio mastering course also emphasizes the importance of using reverb and delay to add depth and dimension 一 making your beats sound more polished and engaging.
By the end of this module, you’ll have a super solid foundation in mixing principles, helping you produce beats that stand out in today’s competitive music industry.
NOTE: I’ve personally taken this course myself, naturally, and I can promise you it’s invaluable and you’ll learn more than any YouTube video or other course out there.
-
Processing Chains for Mixing

This section focuses on building the best processing chains to enhance the quality of your individual tracks.
For a fluid, professional sound, you’ll learn how to sequence processors like:
- EQ
- Compression
- Saturation
- Spatial effects.
It provides insights into every processor order, such as applying EQ before compression to shape the tonal balance before controlling dynamics.
Plus, you’ll see examples that demonstrate how different processing chains affect various elements like drums, bass, and melodies.
This way, you can understand their impact on the overall mix.
By mastering these processing chains, you’ll be ready to not only enhance your skills tenfold, but make the right decisions to enhance the sonic qualities of your beats.
-
Mixing Vocals
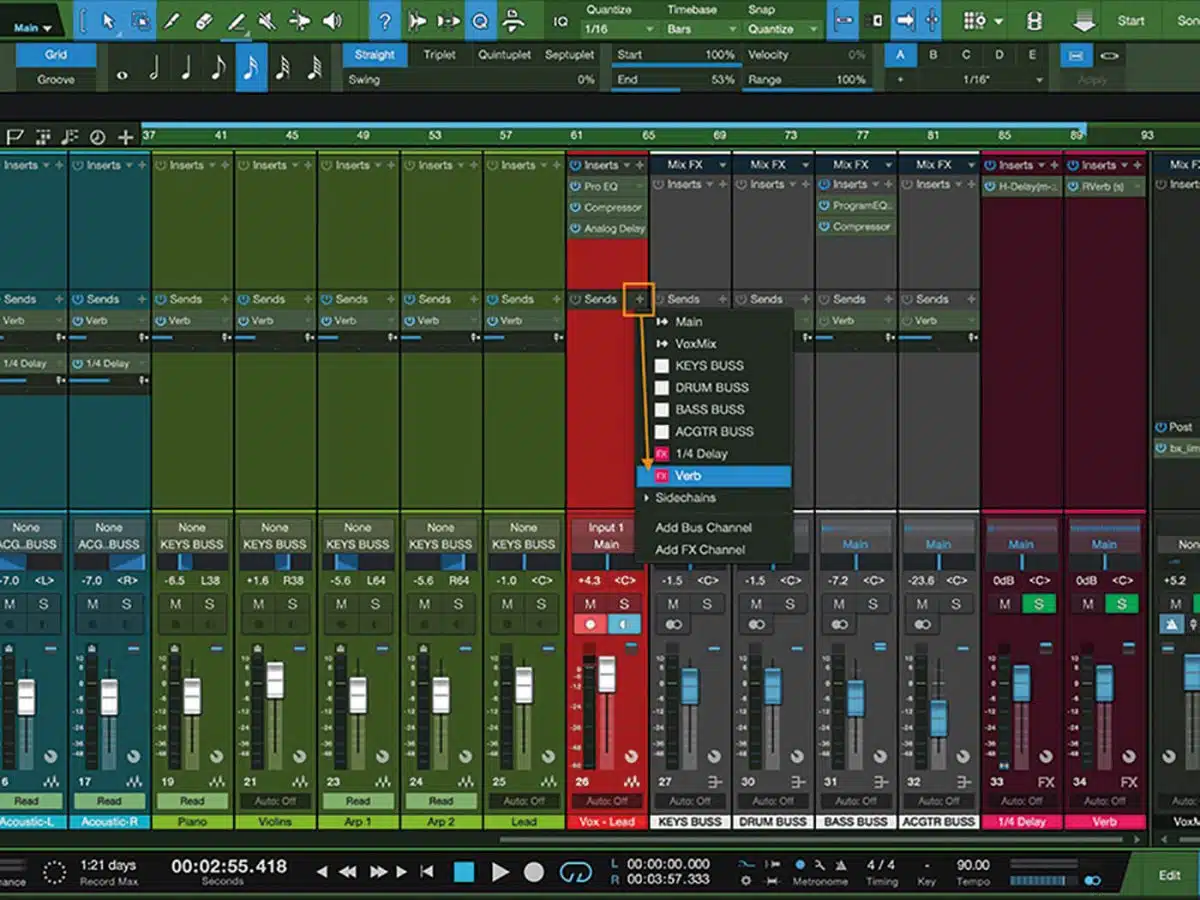
Vocals are a key component of many tracks, and this module teaches you how to mix them like the best in the industry.
You’ll explore different techniques for EQing vocals to achieve clarity and presence 一 ensuring they cut through the mix without sounding harsh or obnoxious.
It breaks down vocal compression settings so they maintain consistent levels and add warmth and de-essing tricks to control sibilance.
Also, LMC will teach you exactly how to apply reverb and delay to vocals so you can add depth without overwhelming your listeners.
By the end of this section of the #1 audio mastering audio you’ll have the skills to make your vocal tracks sound polished and professional like you never imagined.
-
Mastering Chain
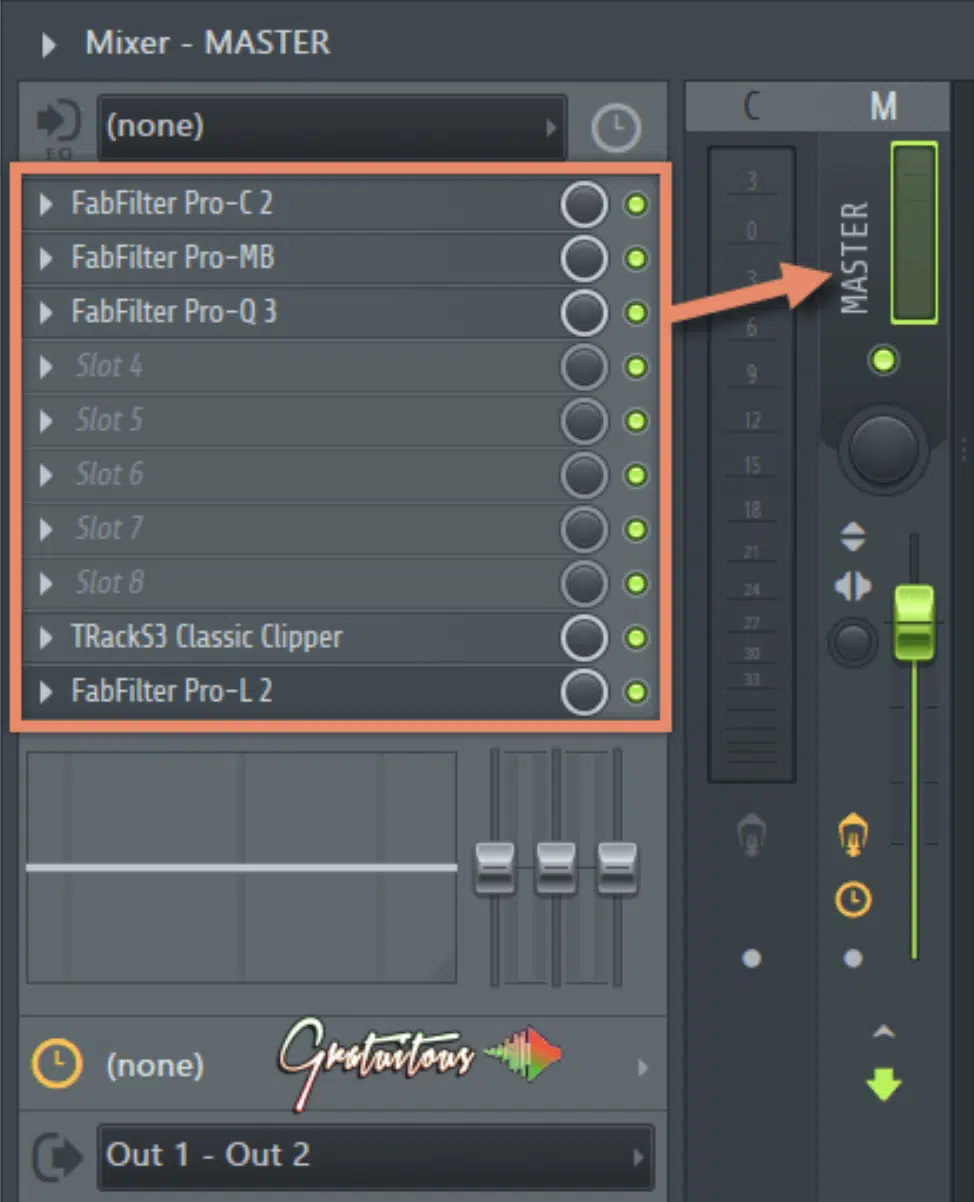
If you’re curious about the mastering chain in detail, this module is perfect because it focuses on the sequence of processors even more.
You’ll learn about the role of EQ in audio mastering to correct tonal imbalances and enhance the overall frequency spectrum.
It also covers multiband compression techniques to control dynamics across different frequency bands for a balanced and cohesive sound.
You’ll see, firsthand, how to use various stereo imaging tools to widen your mix and create a more immersive listening experience.
Limiting is of course thrown in here too because you’ll need to increase your track’s loudness (to competitive levels) without causing unwanted distortion.
And I’m not talking general, basic, boring information you can get any place, you’ll discover exact settings and parameters to make your final master pop.
By understanding this audio mastering chain, you’ll be able to prepare your tracks for distribution and end up on the top of everyone’s playlists.
Side note, since we keep talking about industry standards, if you’re curious about the loudness wars at all, I got you covered.
-
Exporting Stems & Preparing Everything for Download
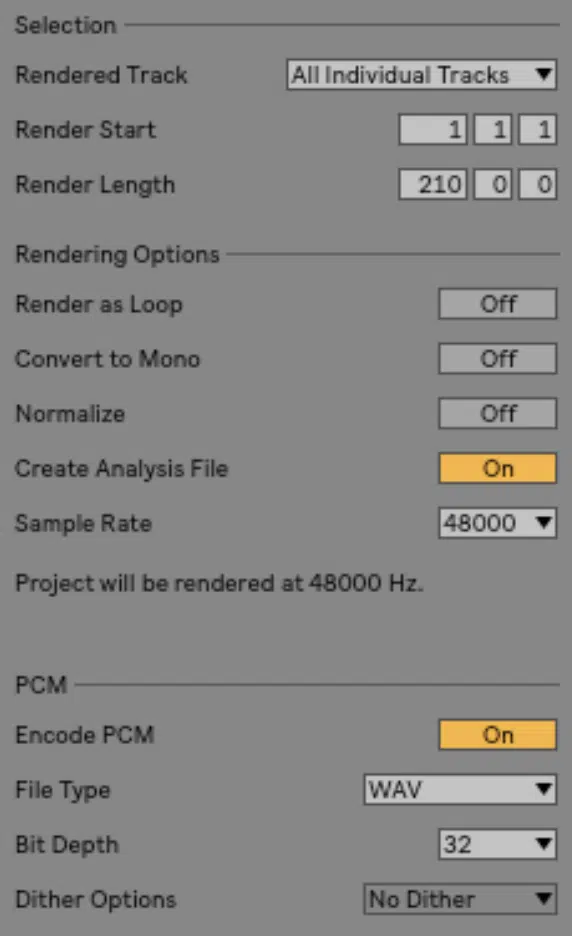
In this final module, you’ll learn the absolute best ways to export your project files so you can share, collab, etc.
I know it sounds like a little thing, but trust me, this little detail makes a huge difference.
You’ll learn the complete process of:
- Exporting stems
- Properly labeling them
- Formatting them
- Everything else important
You’ll understand the importance of maintaining consistent start and end points for all stems… Can you say flawless integration in other sessions? For sure.
It also covers the appropriate file formats and bit depths to use when exporting, preserving the quality of your audio.
By following these steps, you’ll be able to share your projects professionally, whether for collaboration, mixing, or audio mastering techniques (big value!).
Side note, aside from the legendary LMC, if you’re wondering who the other top mastering engineers in the game are, we got you covered.
Mixing Module
The Mixing Module in the Unison Beatmaking Secrets Course is just as valuable. You’ll get access to industry-hidden mixing techniques for professional tracks. It includes detailed lessons on sound selection, arrangement, and key effects to enhance the overall mix. Here are the key components:
-
Sound Selection & Sound Design

In this module of this epic audio mastering course, you’ll not only learn how to choose the right sounds, but create your very own (matching your unique style).
You’ll also learn techniques for layering sounds to create show-stopping, textured elements 一 enhancing the depth and complexity of your tracks.
Plus, if you’re like me and all about the sound design, you won’t be disappointed because it teaches you the best ways to manipulate waveforms, apply filters, and use modulation techniques.
Plus, you’ll see exactly how to create custom drum kits, synth patches, and effects so you can create your very own signature sound.
By mastering sound selection and design, you’ll elevate your productions 一 making them stand out in the competitive music landscape.
-
Arrangement
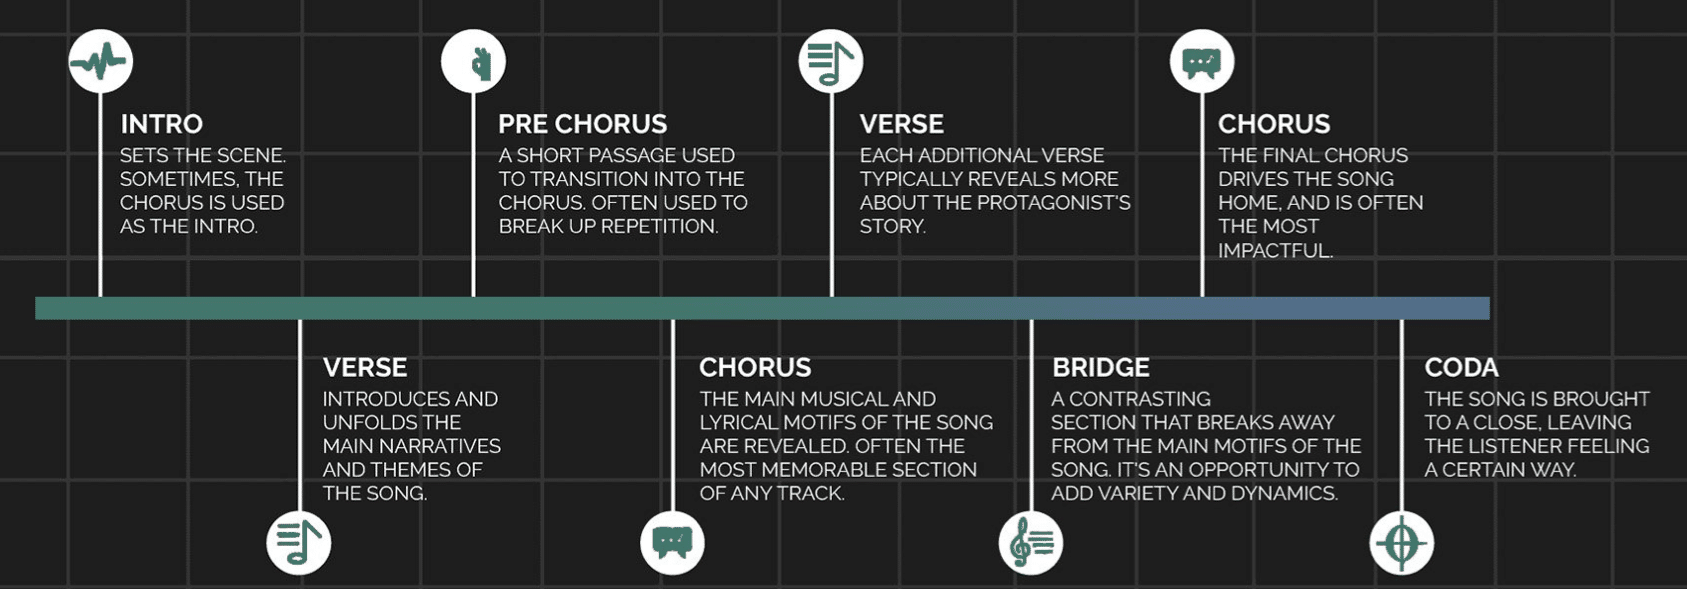
This section focuses on structuring your compositions to keep your listeners hooked from start to finish, which is what any fire beat does.
You’ll study the components of song structure, including intros, verses, choruses, bridges, and outros to understand how to really tell a story with your music.
Plus, learn professional strategies to create unmatched emotional impact, like:
- Building tension and release
- Using dynamics
- Instrumentation
- Pacing
Also, how to transition between song sections so you have smooth progressions that keep that interest.
This module of this audio mastering course is all about the importance of variation/contrast.
It will teach you how to introduce new elements or modify existing ones to prevent your beats from being basic, repetitive, or boring.
By applying these arrangement techniques, your tracks will have a solid flow 一 enhancing their appeal and replay value.
-
Effects Processing
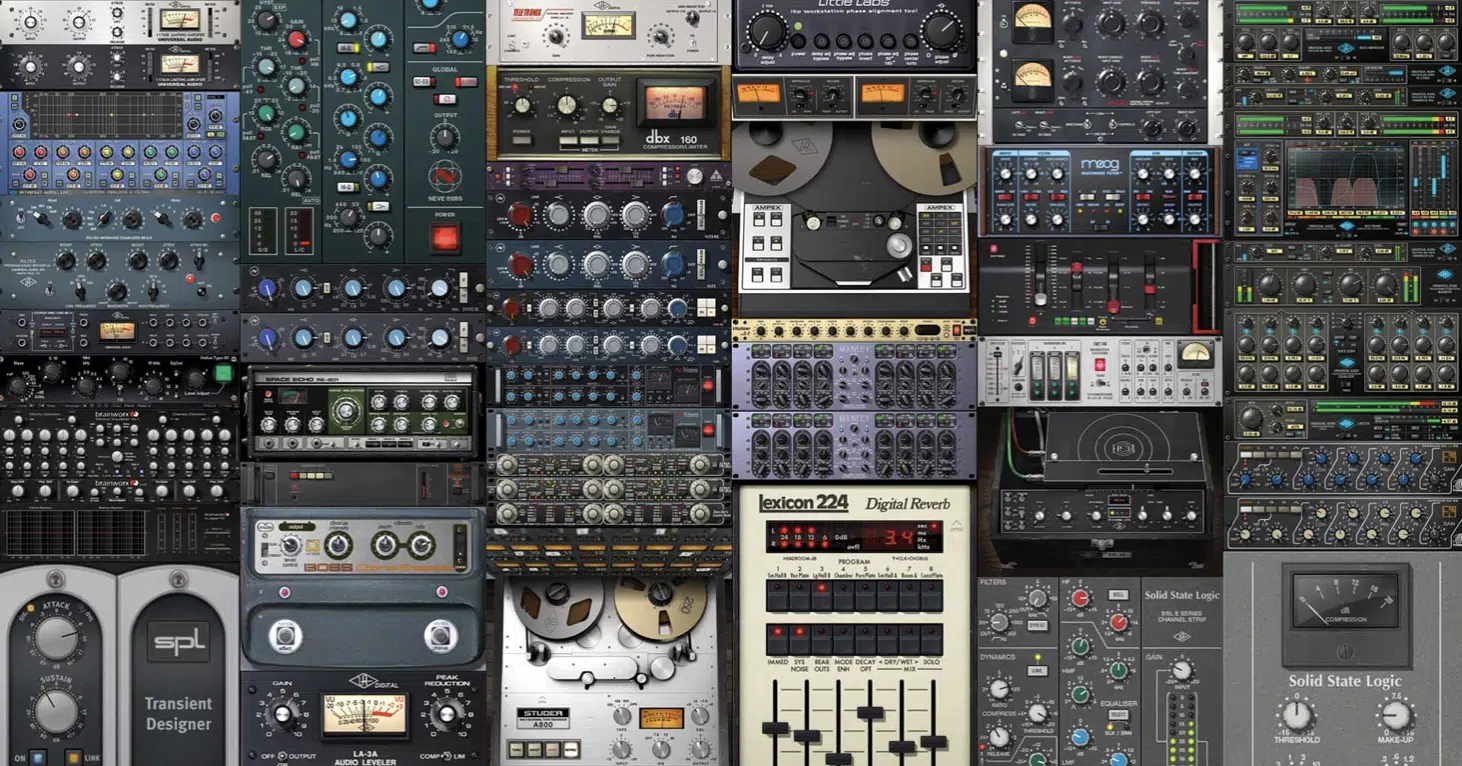
In this module, you’ll discover how to use audio effects to enhance and transform your sounds creatively.
The course covers a range of effects like reverb, delay, chorus, flanger, phaser, distortion, and more so you really know how to use them creatively.
Afterward, you’ll be able to apply these effects like a boss, understanding parameters like:
- Wet/dry mix
- Decay time
- Feedback
- Modulation depth
The module also provides insights into creating space and depth in your mix, using reverb and delay to simulate different environments and add dimension.
Plus, learn all about automating parameters to add movement and interest, or using distortion to add grit and character, that kind of thing.
By audio mastering effects processing, you’ll be able to add polish and creativity to your tracks 一 making them more engaging and professional.
Download the Unison Beatmaking Secrets Course Now!
Bonus: Expert Audio Mastering Techniques
Now that you know the #1 audio mastering course in the game, I’ve included some bonus audio mastering tips, tricks, and techniques. Remember, mastering isn’t just about running your tracks through a limiter and calling it a day… It’s where the magic happens, turning good mixes into professional, polished releases. So, here are some expert tips from a professional mastering engineer (yours truly) to refine your process and bring your music up to industry standards every single time.
-
Gain Staging Like a true Mastering Engineer
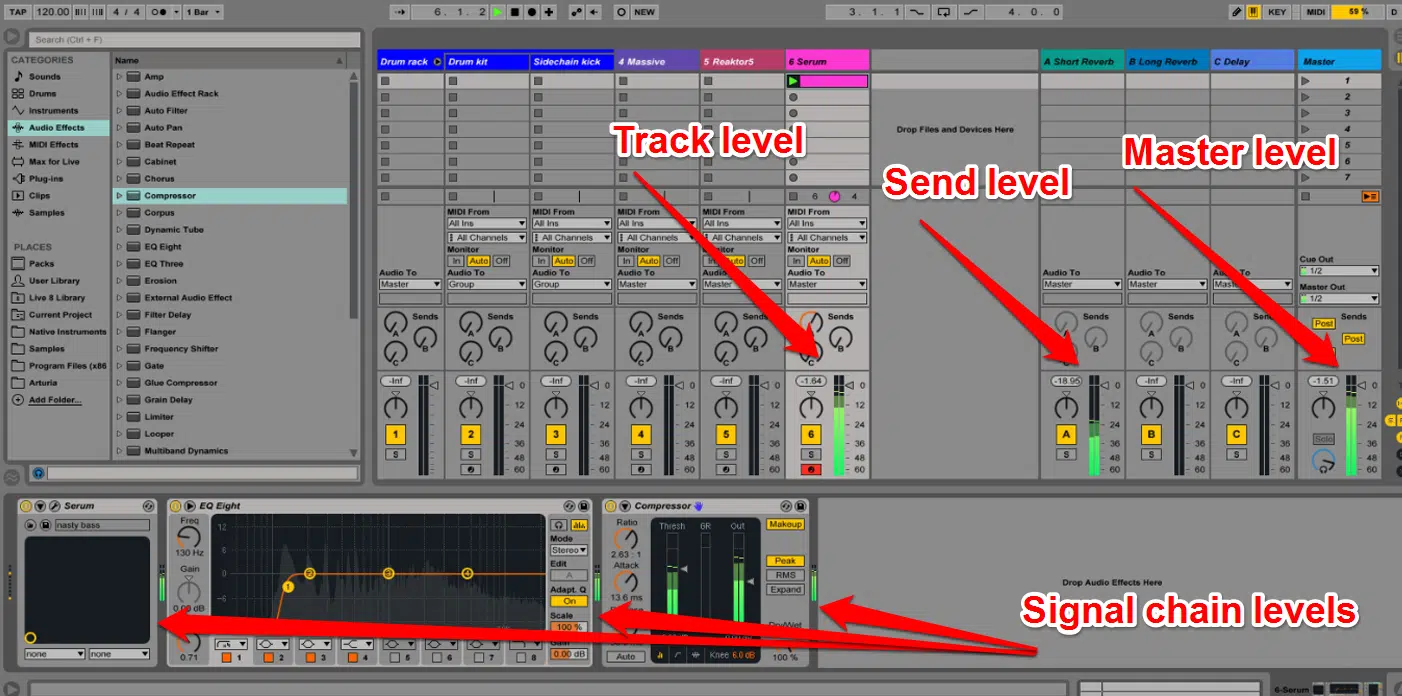
Gain staging is where professional audio mastering starts, and it’s all about getting your track ready for the processing chain ahead.
Honestly, a lot of people overlook this step, and I’m telling you straight up, you’ll never have a flawless master without it (do NOT be one of those who overlook it).
Think of it as giving every element its own “lane” to avoid overcrowding the mix.
Start by ensuring your mix peaks at -6 dB to -3 dB, leaving enough headroom for EQ, compression, and limiting as we talked about earlier.
For individual elements, kicks and bass can sit around -10 dB, while vocals can peak slightly higher, closer to -6 dB.
A balanced gain structure will guarantee clarity and prevent distortion, especially when your mastering software starts working its magic.
My advice is to solo each stem and listen for balance… Then, ask yourself if they sound clean and well-placed without overpowering each other.
Using LUFS meters can help identify if certain elements feel too loud in relation to others, so certainly don’t skip over that.
Also, remember to listen at low volume and if anything sounds out of place or gets completely lost, you’ll be able to tweak it to perfection.
I also like to slightly reduce the gain on elements like snares or hi-hats if they feel too sharp when played back on smaller systems.
Once the mix levels feel balanced, run the track through a simple limiter to double-check for clipping so no unwanted peaks creep through before mastering begins.
NOTE: Avoid over-fixing during this stage 一 your goal is to create clean, workable audio material, not a final product.
I won’t lie, gain staging can certainly be tedious, but it’s 100% necessary and will give you full control when shaping the dynamics and tone of your track.
-
Using Automation

When it comes to mastering, automation is another one that gets overlooked, believe it or not, but it’s one of the best ways to make your tracks dynamic and show-stopping.
It’s not just about volume 一 it’s about creating subtle changes that bring energy to the song that people really need to stay tuned in.
For example, adding a 1-2 dB volume boost to your chorus can make it pop without relying on heavy limiting.
On the same note, you can use automation to lower harsh frequencies during a busy section (like cutting 200 Hz in the verse to avoid muddiness).
Automation also works wonders for stereo imaging.
Narrowing the stereo field in quieter sections creates a more intimate feel, while gradually widening it in the chorus adds excitement and energy.
I like to automate reverb tails during transitions myself to let the reverb slightly swell before a drop or fade out during a breakdown.
It adds a sense of space and anticipation that really gets people hyped up.
Another technique is to automate your subtle EQ adjustments, such as boosting 3–5 kHz during softer parts to make vocals shine without increasing overall volume.
NOTE: When automating, make things smooth and gradual because super sharp transitions can sound jarring and disrupt the flow of your track, and nobody wants that.
Just make sure to A/B everything and remember that it’s all about small details, but when done right, those details can make a huge difference in how your music feels.
-
The Role of Saturation in Audio Mastering
Saturation is like adding a final brushstroke to a painting… It’s subtle, but it can transform the entire piece.
Sorry, that was super corny, right? Won’t happen again lol.
By introducing harmonic distortion, saturation can give your track warmth, cohesion, and a polished finish every time.
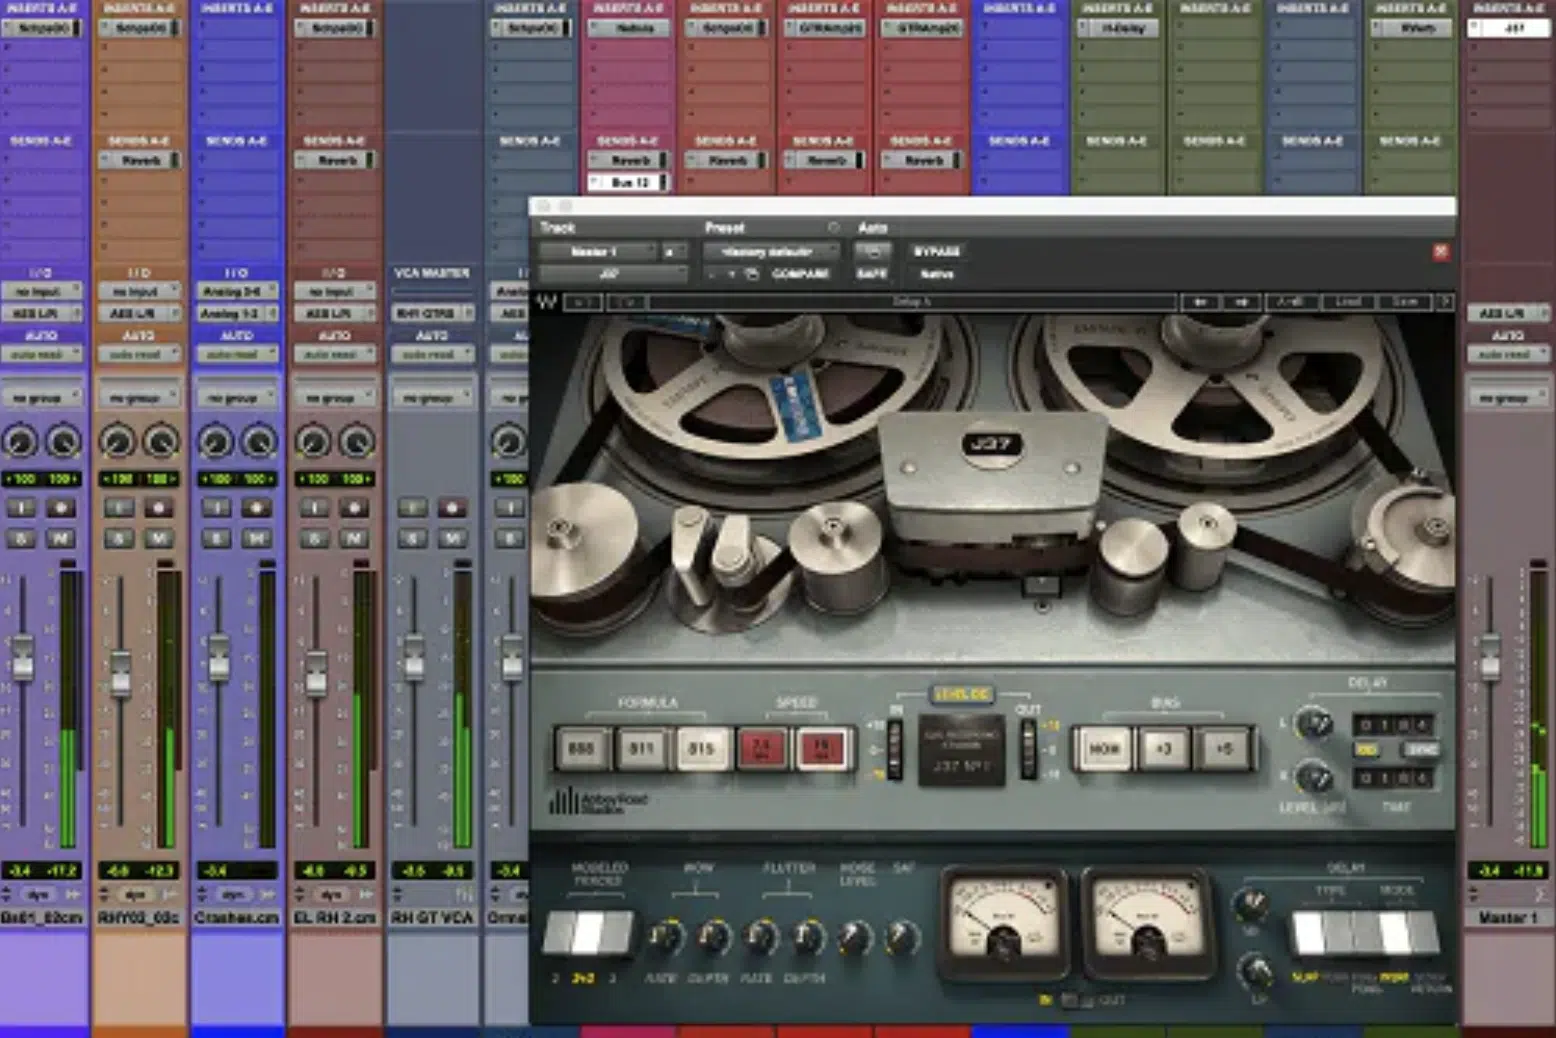
I like using tape saturation on the low end, focusing on 50–100 Hz to make your bass more powerful and controlled.
For vocals and leads, applying light tube saturation around 2–4 kHz can add presence and clarity without introducing harshness, so definitely play around with that.
Multiband saturation is another great option, which lets you target specific frequency ranges.
For example, adding saturation only to the mids can enhance instruments like pianos or guitars while leaving the highs crisp and clean, just like it should be.
On the master bus, a small amount of saturation (I’d say around 10–15% wet) can glue the entire mix together beautifully.
Be cautious, though; too much saturation can muddy your sound.
Saturation isn’t just about warmth, but rather taming overly-sharp transients as well to give your track a way more cohesive feel, like the professional mastering engineers do.
The trick with saturation is to find the sweet spot where it enhances the overall tone without drawing attention to itself, period.
-
Balancing Loudness and Dynamics
Balancing loudness and dynamics is the heart of mastering, and finding the right balance is what separates amateur masters from professional ones.
Your track should be loud enough to compete but still dynamic enough to feel alive, so make sure you set your limiter ceiling to 0.3 dB.
This will prevent clipping and give you enough headroom for inter-sample peaks, like you’ll learn all about in the above audio mastering course.
When it comes to streaming platforms, aim for -14 LUFS integrated, while club tracks can push closer to -10 LUFS for more punch 一 again, the magic is in the littlest details.
Compression plays a big role here too, my friends.
A gentle ratio of 2:1 with a slow attack (20–30 ms) can preserve transients in punchy tracks, while faster attack times suit smoother genres.
Over-compressing will completely flatten the energy, so be aware of that, and instead, rely on the limiter to bring up overall loudness while retaining the dynamic range.
One technique I like is checking the loudness balance between sections…
Meaning, if my chorus doesn’t feel significantly louder or more energetic than the verse, it’s time to tweak and switch things up.
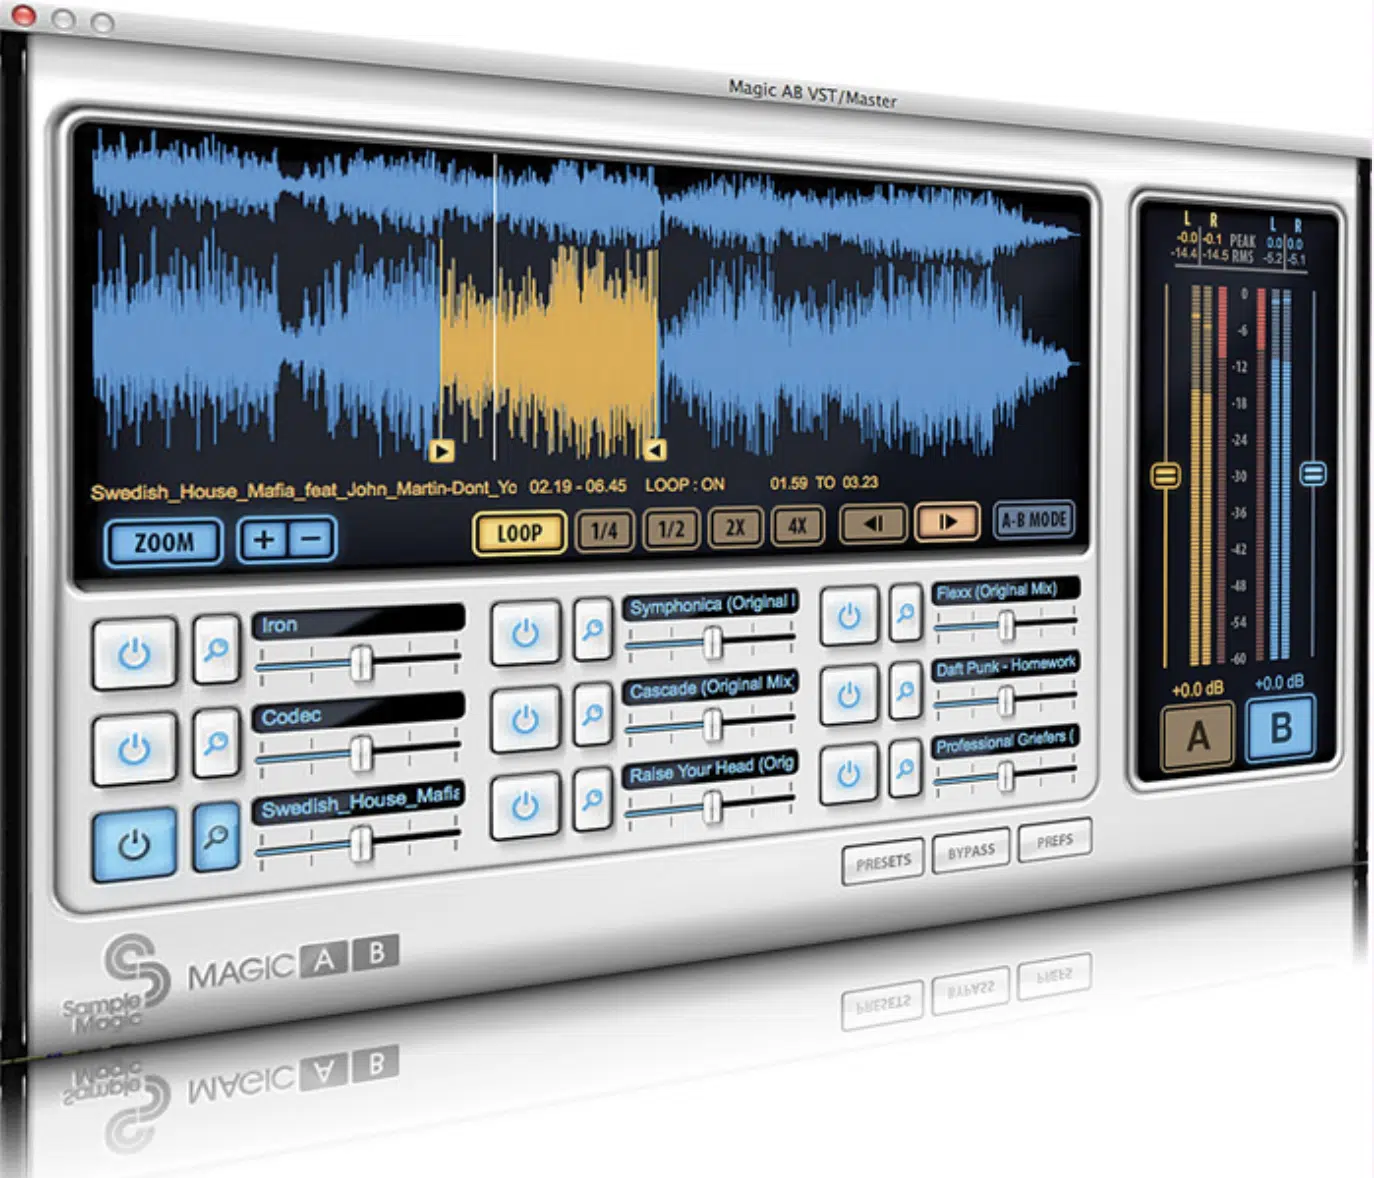
Again, testing your master on multiple playback systems is essential and using reference tracks within the same genre can help you fine-tune the dynamics and loudness.
Balancing loudness and dynamics isn’t about just hitting numbers 一 it’s about creating a track that feels polished, exciting, and instantly ready for release.
-
Frequency-Specific Sidechain Compression
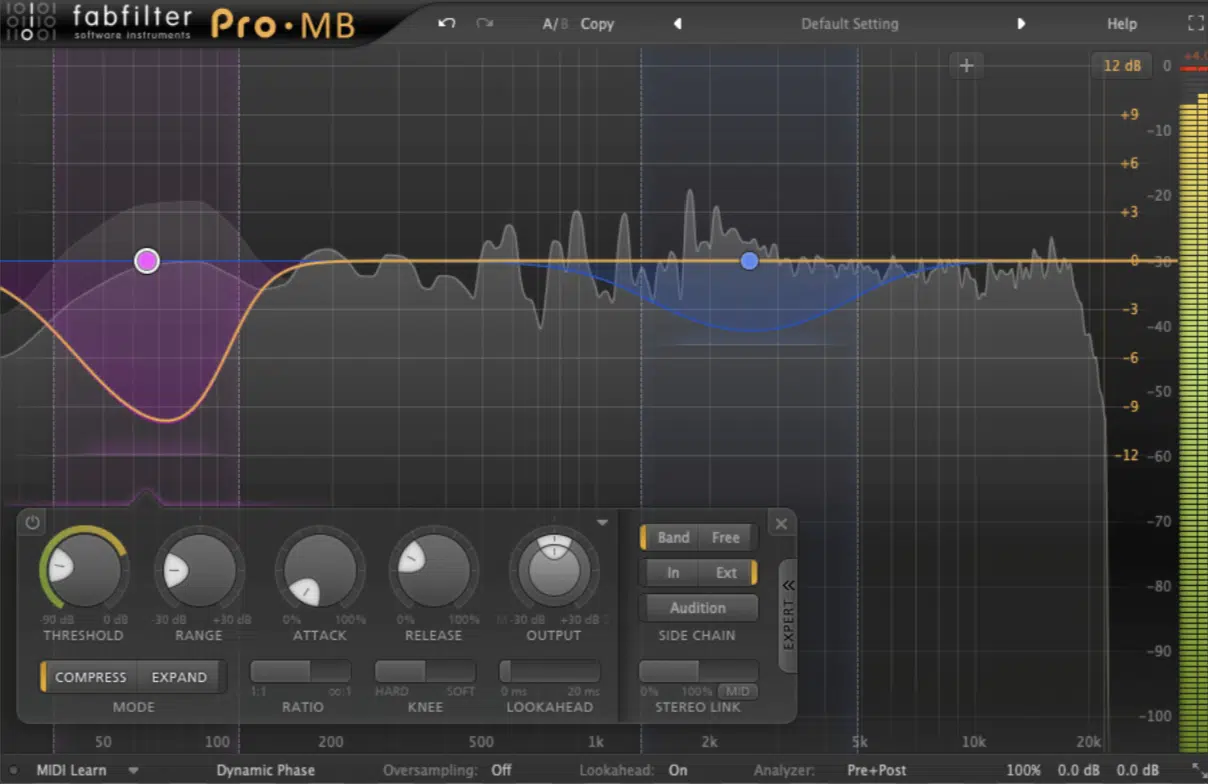
Sidechain compression, when used on specific frequency ranges, is a highly effective audio mastering technique for creating space in dense mixes.
Let’s say your low-end is clashing with the punch of your kick drum…
Using a multiband compressor with a sidechain trigger to duck only the 60–120 Hz range whenever the kick hits will let the kick shine without suppressing the bassline.
The key here is precision, precision, precision.
So, set the attack and release times carefully to ensure a natural transition, with attack around 10 ms and release between 50–100 ms.
Depending on the track’s tempo, of course.
You can also use this approach in regards to other problem areas, such as reducing harshness in the 2–5 kHz range when vocals clash with cymbals.
By targeting only the troublesome frequencies, you preserve the balance and dynamics of your mix while keeping the clarity.
-
Linear Phase EQ for Transparent Adjustments
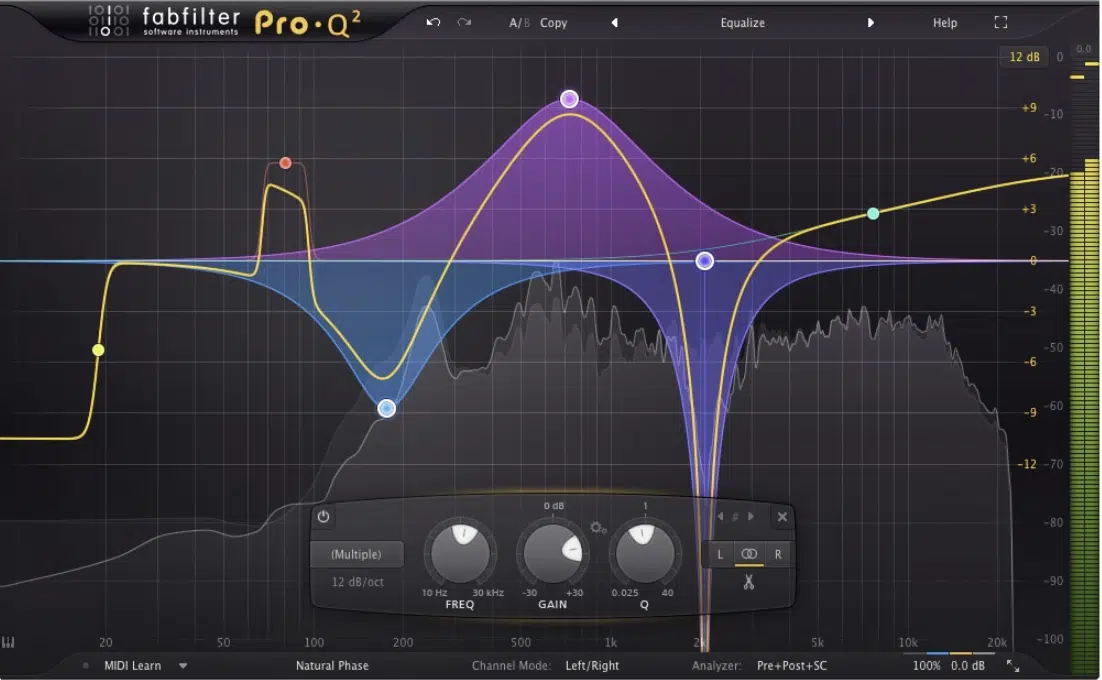
Linear phase EQ is an essential mastering tool which you should use when you need to make surgical adjustments without introducing phase distortion.
Unlike traditional EQs, which can subtly shift frequencies around the adjusted range, linear phase EQ maintains phase coherence.
This makes it ideal for fine-tuning stereo mixes or acoustic recordings.
For example, if a track feels dull, apply a 1–2 dB boost around 10–12 kHz to add airiness without affecting the balance of lower frequencies.
This technology is super valuable in genres where preserving the integrity of the original mix is critical (which is, literally most of the smoother ones.
To avoid over-processing, focus on subtle, broad boosts or cuts 一 i near phase EQ can sometimes introduce pre-ringing artifacts, which are nasty.
When it comes to the mastering chain, it should usually be placed first to address global tonal balance issues, like the audio mastering course will break down for you.
-
Dynamic EQ for Problematic Frequencies
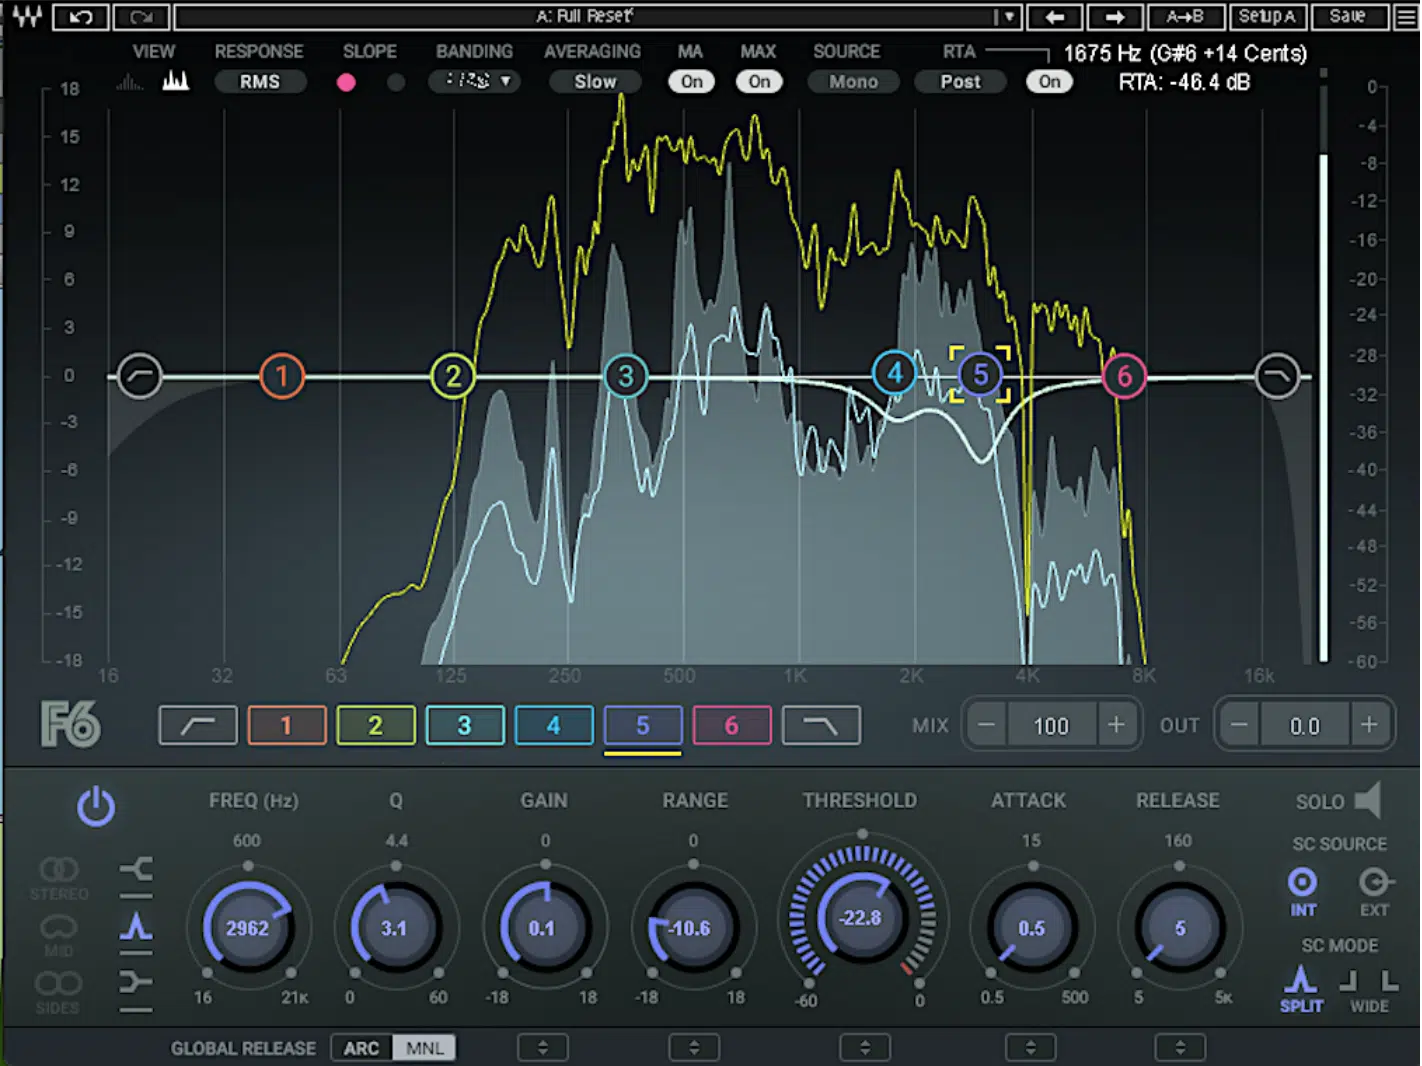
Last but not least, let’s talk about dynamic EQ, which is an advanced solution for managing frequencies that only become problematic during certain parts of a track.
Unlike static EQ (which permanently adjusts a frequency range) dynamic EQ reacts to the input signal, applying changes only when needed.
For instance, if your vocals become harsh around 3–4 kHz during a chorus, a dynamic EQ can reduce this range without dulling the entire mix.
Start with a threshold of -6 dB and adjust the ratio to 2:1 一 targeting the precise moments when the problem pop up.
Dynamic EQ also excels in taming excessive bass resonance around 80 Hz, which might only occur during drops or climaxes.
NOTE: Use audio mastering software with extensive dynamic EQ options, like iZotope Ozone or FabFilter Pro-Q 3, to integrate this technique into your workflow.
By addressing transient issues dynamically, you maintain the musicality and energy of the track while resolving tonal imbalances with precision, no two ways about it.
Final Thoughts
So, there you have it… Not only have you learned the sickest audio mastering techniques and tricks, but you also know the #1 audio mastering course in the game.
With all this new information, you now know how to dominate the mastering process so your tracks will always be super clean, on point, and extra polished.
Not to mention radio-ready and streaming ready, of course.
You’ll be able to balance dynamics, enhance tonal clarity, and create a sound that competes with industry standards every single time.
Plus, you’ll be able to translate your creative vision into tracks that sound amazing on any platform or playback system.
And, if you do the smart thing and invest in this audio mastering course, make sure to give it your all (and then some).
Seriously, this audio mastering course isn’t just about following steps.
It’s about developing your skills as a producer, building your knowledge of mastering software and technology, and learning how to straight up kill it.
This way, you’ll know exactly how to master tracks for different genres, but also produce clean, dynamic, and impactful mixes that really impact your listeners, in a good way.
Taking the time to dive deep into this audio mastering course can help you achieve clarity in your workflow beyond your wildest dreams.
And you’ll get sick industry-secret techniques too that I’m not going to give away now, but trust me, they’ll blow your mind.
Every project from here on out will sound fluid, dynamic, and ready to shine.
Just remember, audio mastering is an art form, and now you have the tools to be freakin’ Bob Ross up in here.
Until next time…
Become a Mastering Master Today!


Leave a Reply
You must belogged in to post a comment.