Drum processing is all about refining, enhancing, and polishing your drum sounds to make them cut through the mix properly.
If you want them to sound unique and more on point, this is your golden ticket.
It helps you add punch, clarity, and depth so that every drum element in your mix is balanced and impactful just how you want it.
As producers, knowing all about drum processing can seriously improve the quality of your tracks 一 making your drums sound more cohesive and powerful.
That’s why I’m breaking down everything you need to know about drum processing, including:
- Gain staging and leveling ✓
- EQing for clarity and punch ✓
- Compression techniques ✓
- Parallel compression for added impact ✓
- Saturation and distortion for character ✓
- Reverb and delay for ambiance ✓
- Transient shaping for definition ✓
- Mixing drums like an absolute boss ✓
- Using effects like flangers and phasers ✓
- Professional/advanced drum processing techniques ✓
- Even things for live drummers (e.g., drum recording) ✓
By the end of this article, you’ll have a complete understanding of drum processing, so your drum mixes always sound punchy, clean, and professional.
You’ll be able to apply specific settings and techniques, plus get expert insight into mixing drums, automation, transient shaping, and sidechain compression.
Your drum sounds will always be on point, ready to stand out in any mix.
Table of Contents
- What is Drum Processing?
- Setting the Foundation: Understanding Drum Types
- Drum Processing: A Step-by-Step Breakdown
- #1. Gain Staging & Leveling Your Drums
- #2. EQing Drums for Clarity and Punch
- #3. Compression Techniques for Drums
- #4. Adding Saturation & Distortion for Character
- #5. Reverb & Delay for Drum Ambiance
- Advanced Processing
- #6. Transient Shaping for Drum Definition
- #7. Sidechain Compression for Dynamic Groove
- #8. Automation
- #9. Flangers, Phasers, and Beyond
- #10. Panning Drums & Stereo Imaging
- Bonus Drum Processing Tip For Recording Drums Live
- Final Thoughts
What is Drum Processing?
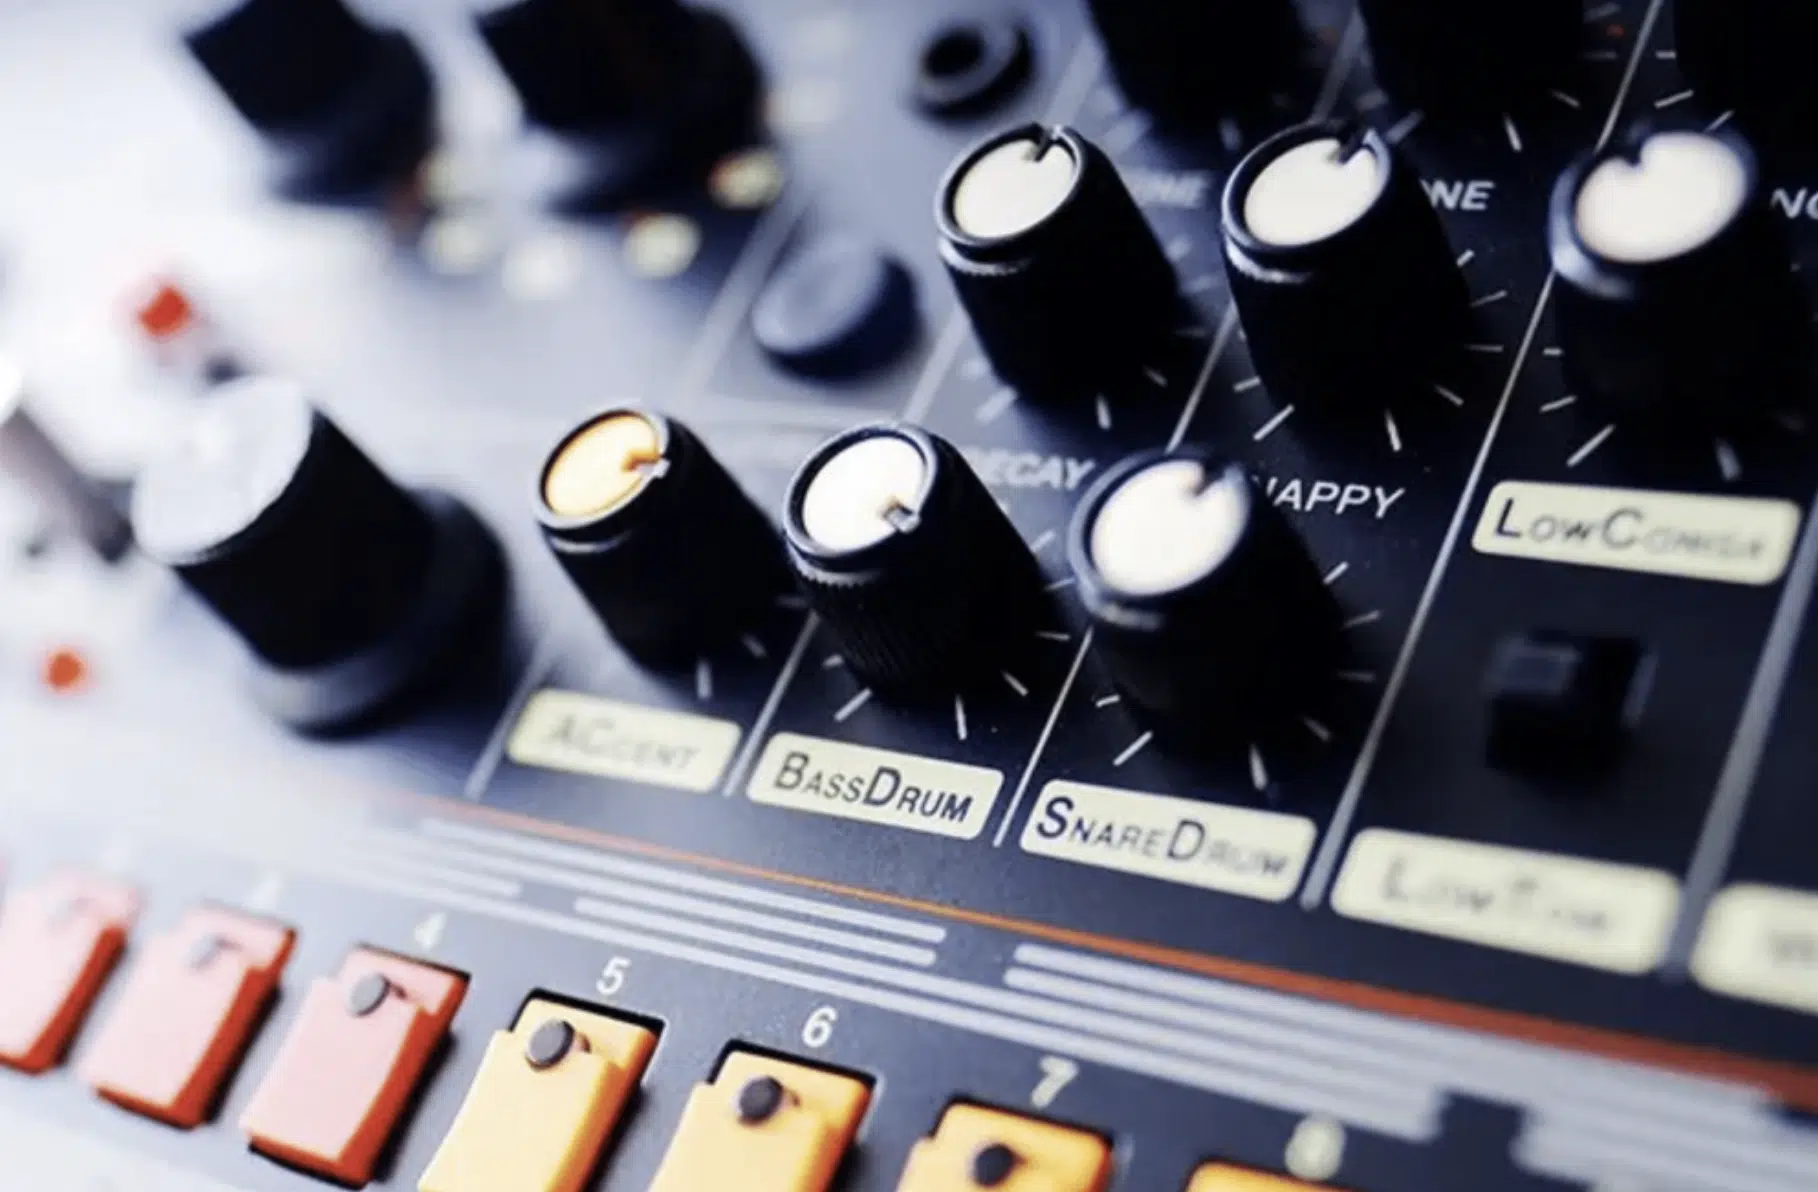
Drum processing is the technique of enhancing and refining your drum sounds to achieve a clear, punchy, and professional sound that fits flawlessly within the mix.
It’s also key to taking a classic drum sound (like an 808 or a snare we’ve all heard countless times) and putting your own signature spin on it.
Whether you’re working with a digital drum kit, individual drum samples, or recorded drums, processing is all about shaping the:
- Frequency spectrum
- Dynamic range
- Overall character of each drum hit, sample, or track
For example, when mixing drums, you can enhance the kick drum’s punch with EQ and compression, or add depth to a snare drum using reverb and a touch of delay.
Side note, a slapback delay usually works best here, but we’ll cover all that later.
The goal of drum processing is to create a modern drum sound that stands out without overpowering other instruments, which you always want to avoid.
To do this properly, you’ll need to apply techniques like EQ, compression, transient shaping, and parallel compression to each drum track or channel.
Understanding how to process drums correctly is key for achieving a solid drum sound that can sit perfectly within the entire mix.
Luckily you’ve come to the right place to learn absolutely everything you’ll need to know.
Setting the Foundation: Understanding Drum Types
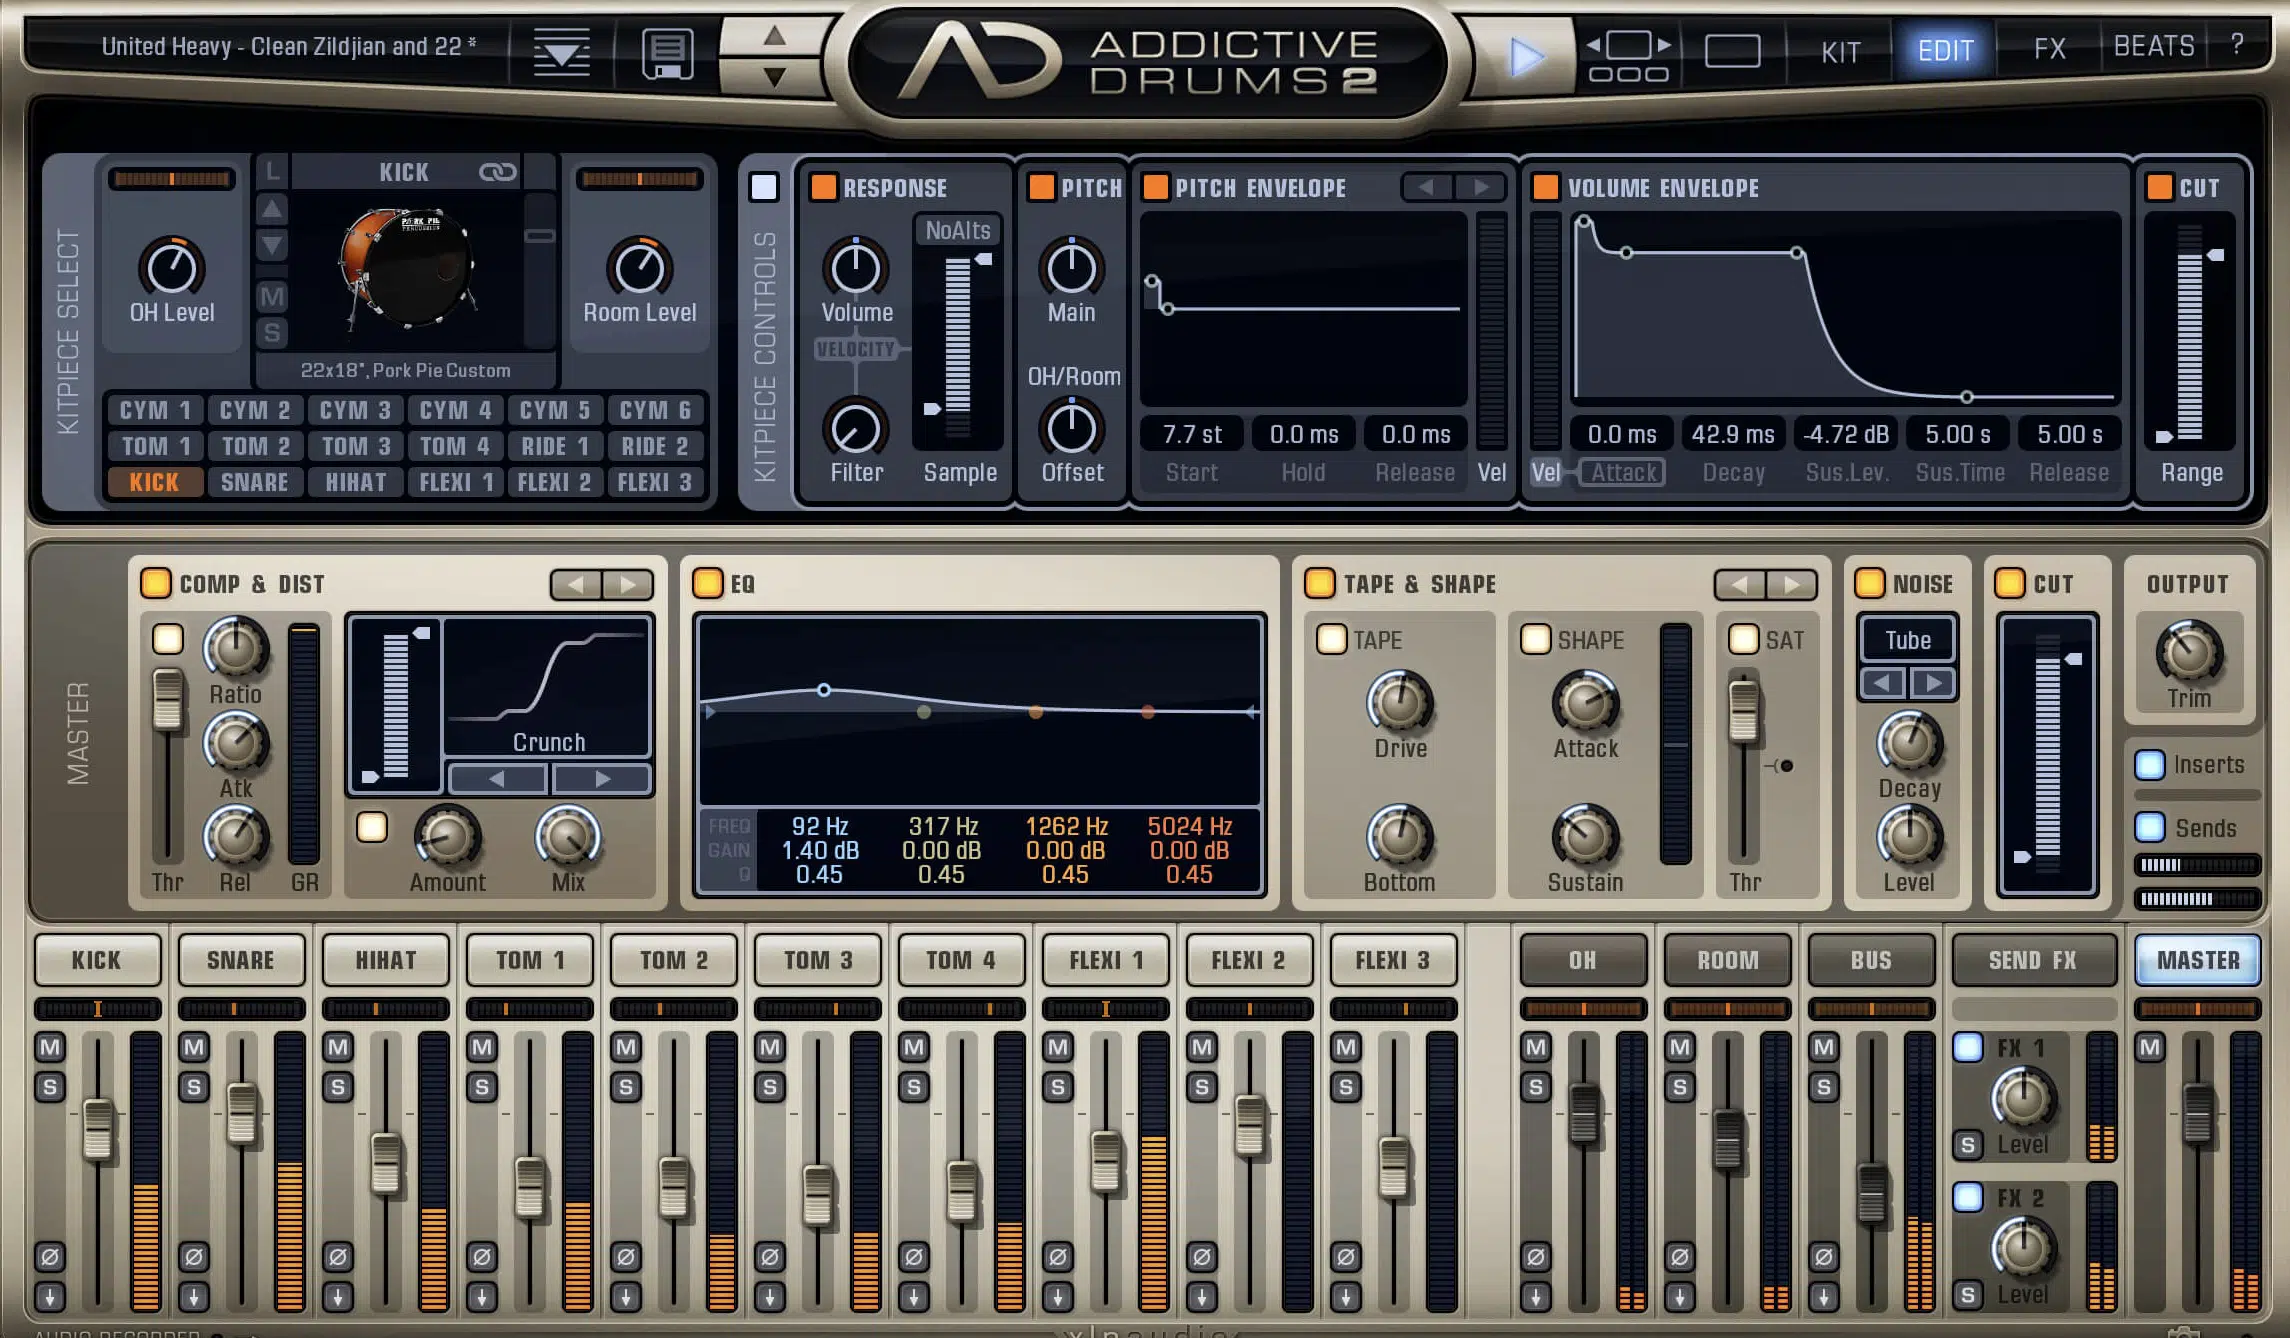
When working with drum processing, it’s super important to understand each drum type’s specific role in shaping your drum sound because they’re all unique.
The kick drum drives the low-end and is typically centered around the 50-100 Hz range.
You can use a low-pass filter to remove unwanted high frequencies 一 allowing the fundamental frequency to dominate, as it should here.
The snare drum, usually focused in the 200-250 Hz range, adds punch and definition to the drum mix, and I usually boost around 5 kHz to add more snap.
Keep in mind a small reverb tail here enhances depth without muddying the sound.
Hi-hats and cymbals occupy the high frequencies (8-12 kHz), adding brightness and energy 一 a high-shelf filter can help them cut through the mix.
Toms, like rack toms and floor toms, provide midrange body and resonance, often sitting between 100-400 Hz.
EQing the mid-lows can prevent them from clashing with the kick drum.
Percussion elements like shakers, claps, and rimshots add rhythmic texture and often require transient shaping to maintain clarity (which we’ll talk about in a minute).
By understanding these roles/differences, you’ll be processing each drum track like a boss so you’ll have a balanced, cohesive drum sound across the entire mix.
Drum Processing: A Step-by-Step Breakdown
Now that you have a solid idea about what drum processing is and the different drum types, let’s get into a step-by-step breakdown of drum processing as a whole. These techniques will cover everything from gain staging to compression, and everything in between.
#1. Gain Staging & Leveling Your Drums
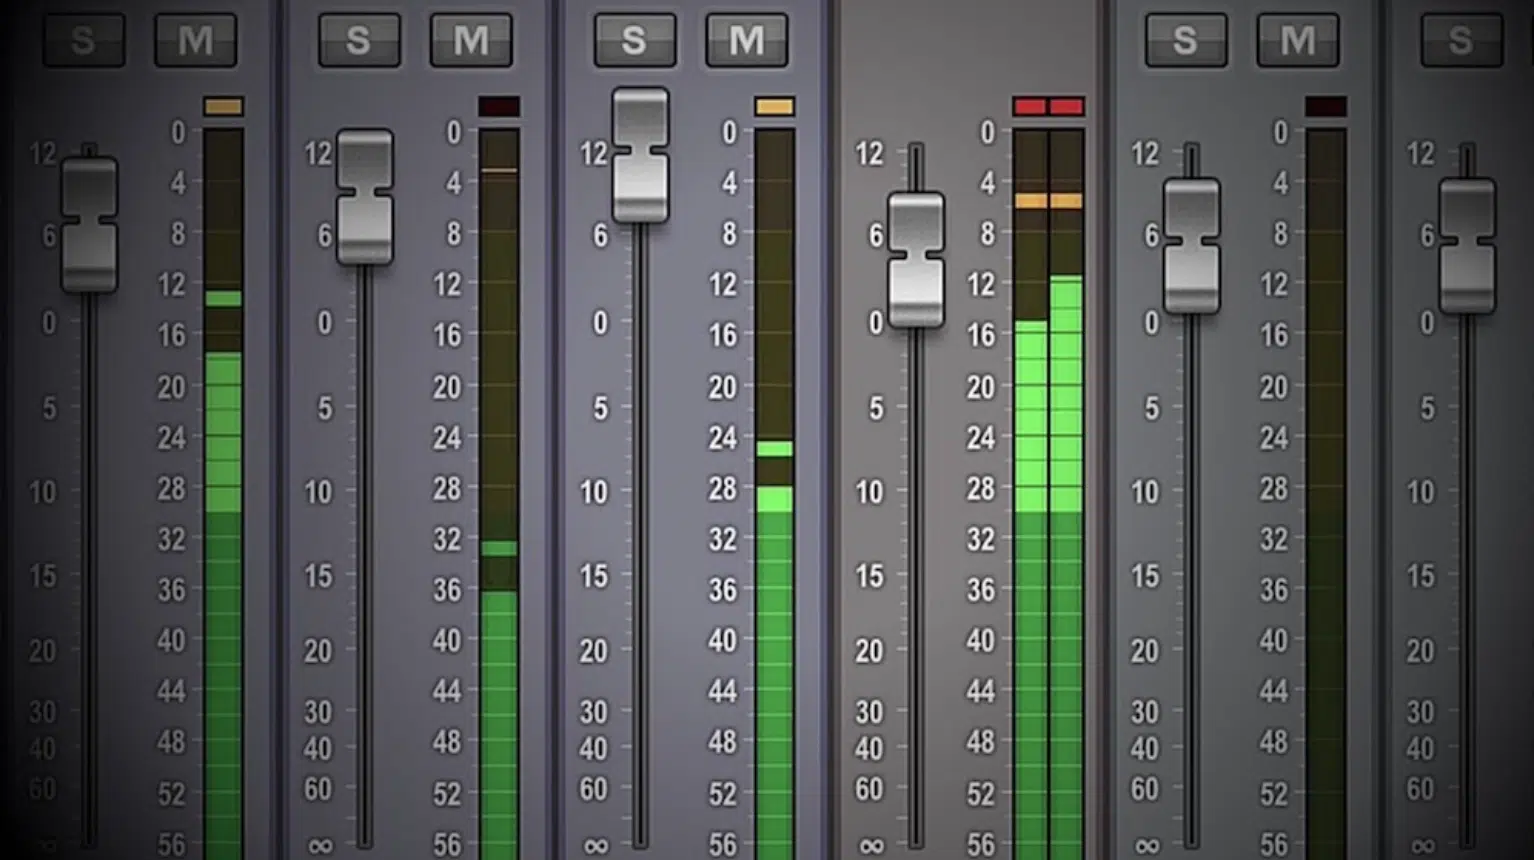
Gain-staging is essential when it comes to achieving a clean drum mix with plenty of ample headroom for further processing tasks.
I start by setting each drum track to peak between -12 dBFS and -8 dBFS using a trim plugin or, preferably, the clip gain of the track itself.
Avoid using the gain knob on the drum channel strip for this step.
For kick drums, aim for initial peaks around -10 dBFS to ensure the low-end energy doesn’t cause distortion later on, which will ruin everything.
Snare drums should peak between -8 dBFS and -6 dBFS to make them punchier and more present in the mix.
Hi-hats and cymbals should peak around -15 dBFS to -12 dBFS to maintain clarity in the high frequencies without becoming overly harsh and obnoxious.
Adjust the faders incrementally… I usually start with +0.5 dB or -0.5 dB adjustments to fine-tune the balance between each unique drum element.
Check the overall drum bus to ensure peaks stay around -6 dBFS which will prevent clipping.
Use a VU meter to ensure consistent perceived loudness across the drum mix 一 helping each element maintain presence while blending smoothly into the entire mix.
-
PRO DRUM PROCESSING TIP
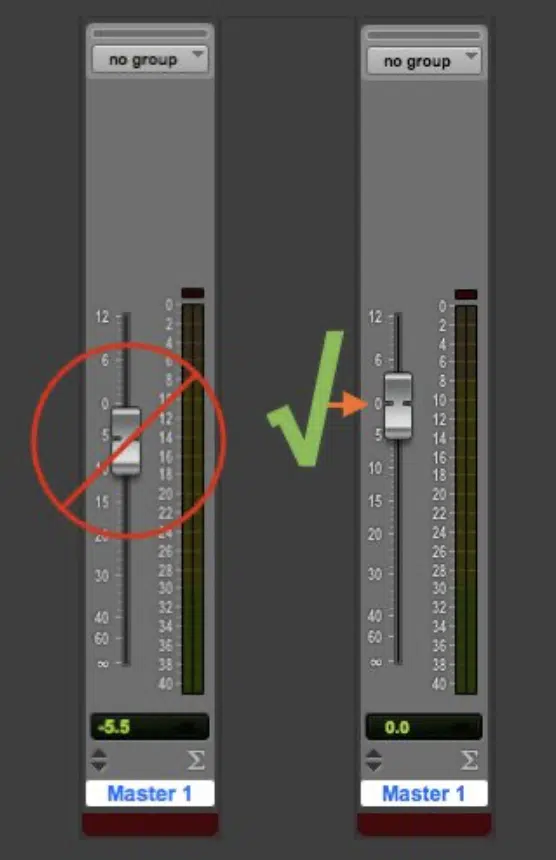
Many producers overlook this step and wonder why their drums sound weak or basic, please don’t let that be you!
As most pros like myself do, it’s often best to set every drum hit at a consistent level (around -12 dBFS) with all your mixer tracks at unity gain (0 dB).
Then, use the mixer to adjust the levels of your drum tracks accordingly.
Remember, the levels mentioned above are guidelines and will vary based not only on the track but also on the specific genre.
#2. EQing Drums for Clarity and Punch
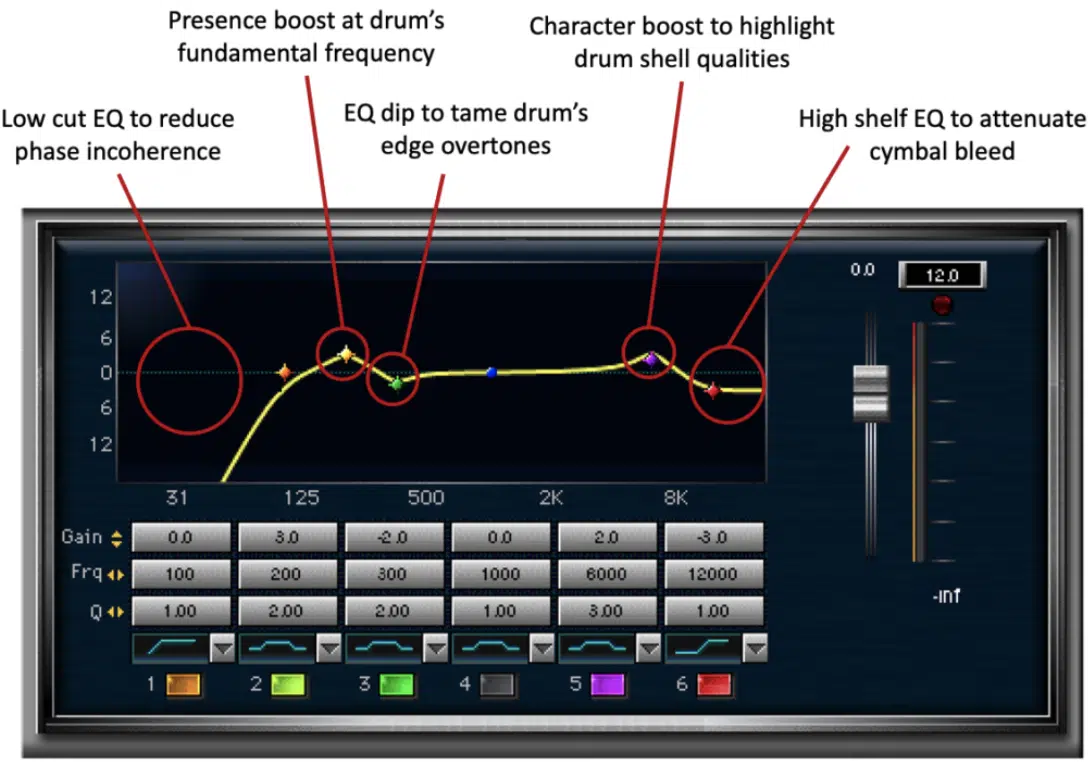
EQing is the key to shaping each drum’s frequency spectrum, which helps them sit well within the mix.
Start by using a high-pass filter to remove low-end rumble from elements like hi-hats and cymbals, which I usually set around 100-150 Hz.
For kick drums, boost the fundamental frequency around 50-80 Hz to emphasize the low-end punch, while cutting the midrange (300-400 Hz) to prevent boxiness.
On snare drums, boost around 200-250 Hz for body and 4-6 kHz for extra snap, which adds more clarity to the snare without cluttering the mix.
Toms can benefit from a slight boost in the 100-300 Hz range for resonance, paired with a low-pass filter above 10 kHz to keep high frequencies under control.
To achieve a modern drum sound, try throwing a dynamic EQ on the drum bus to manage harsh frequencies dynamically, especially during louder drum hits.
When you mix drums, this helps you get a cleaner overall sound and enhance perceived loudness across all drum tracks.
-
PRO DRUM PROCESSING TIP
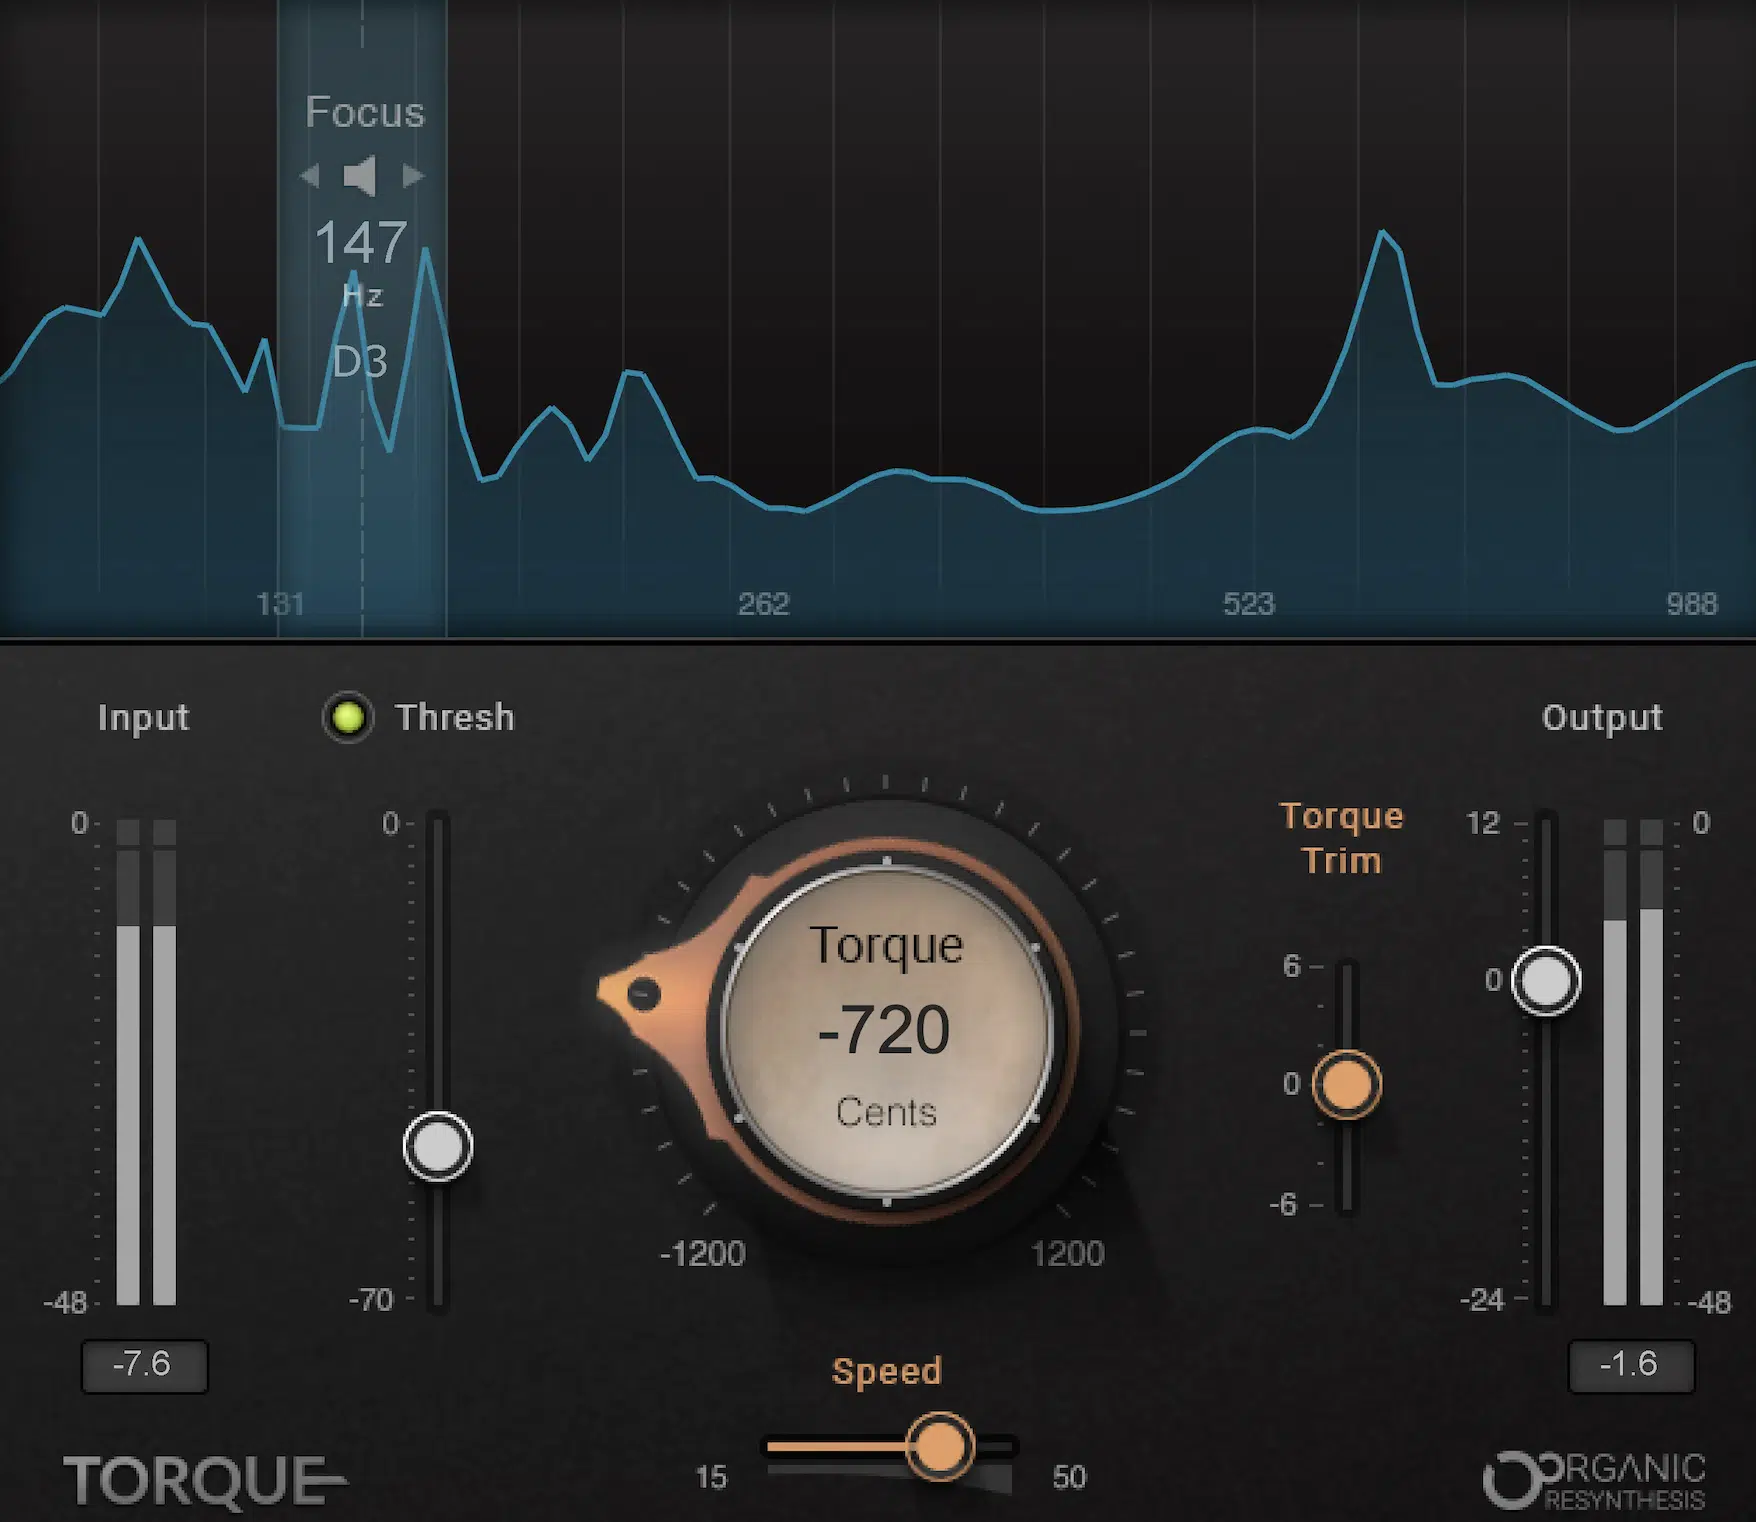
What I like to do is use EQ to tune my drums.
To do so, start by identifying the fundamental frequency of each drum; for kick drums, boost around 50-80 Hz to emphasize the low-end punch.
For snare drums, a boost around 200-250 Hz adds body, while 5-7 kHz enhances the snap (it’s all about the vibe you’re going for).
Adjust these boosts by 1-3 dB to fine-tune the drum’s pitch and character, making sure it blends well with other elements in the mix.
Always use a narrow Q when boosting to avoid affecting unwanted frequencies.
#3. Compression Techniques for Drums
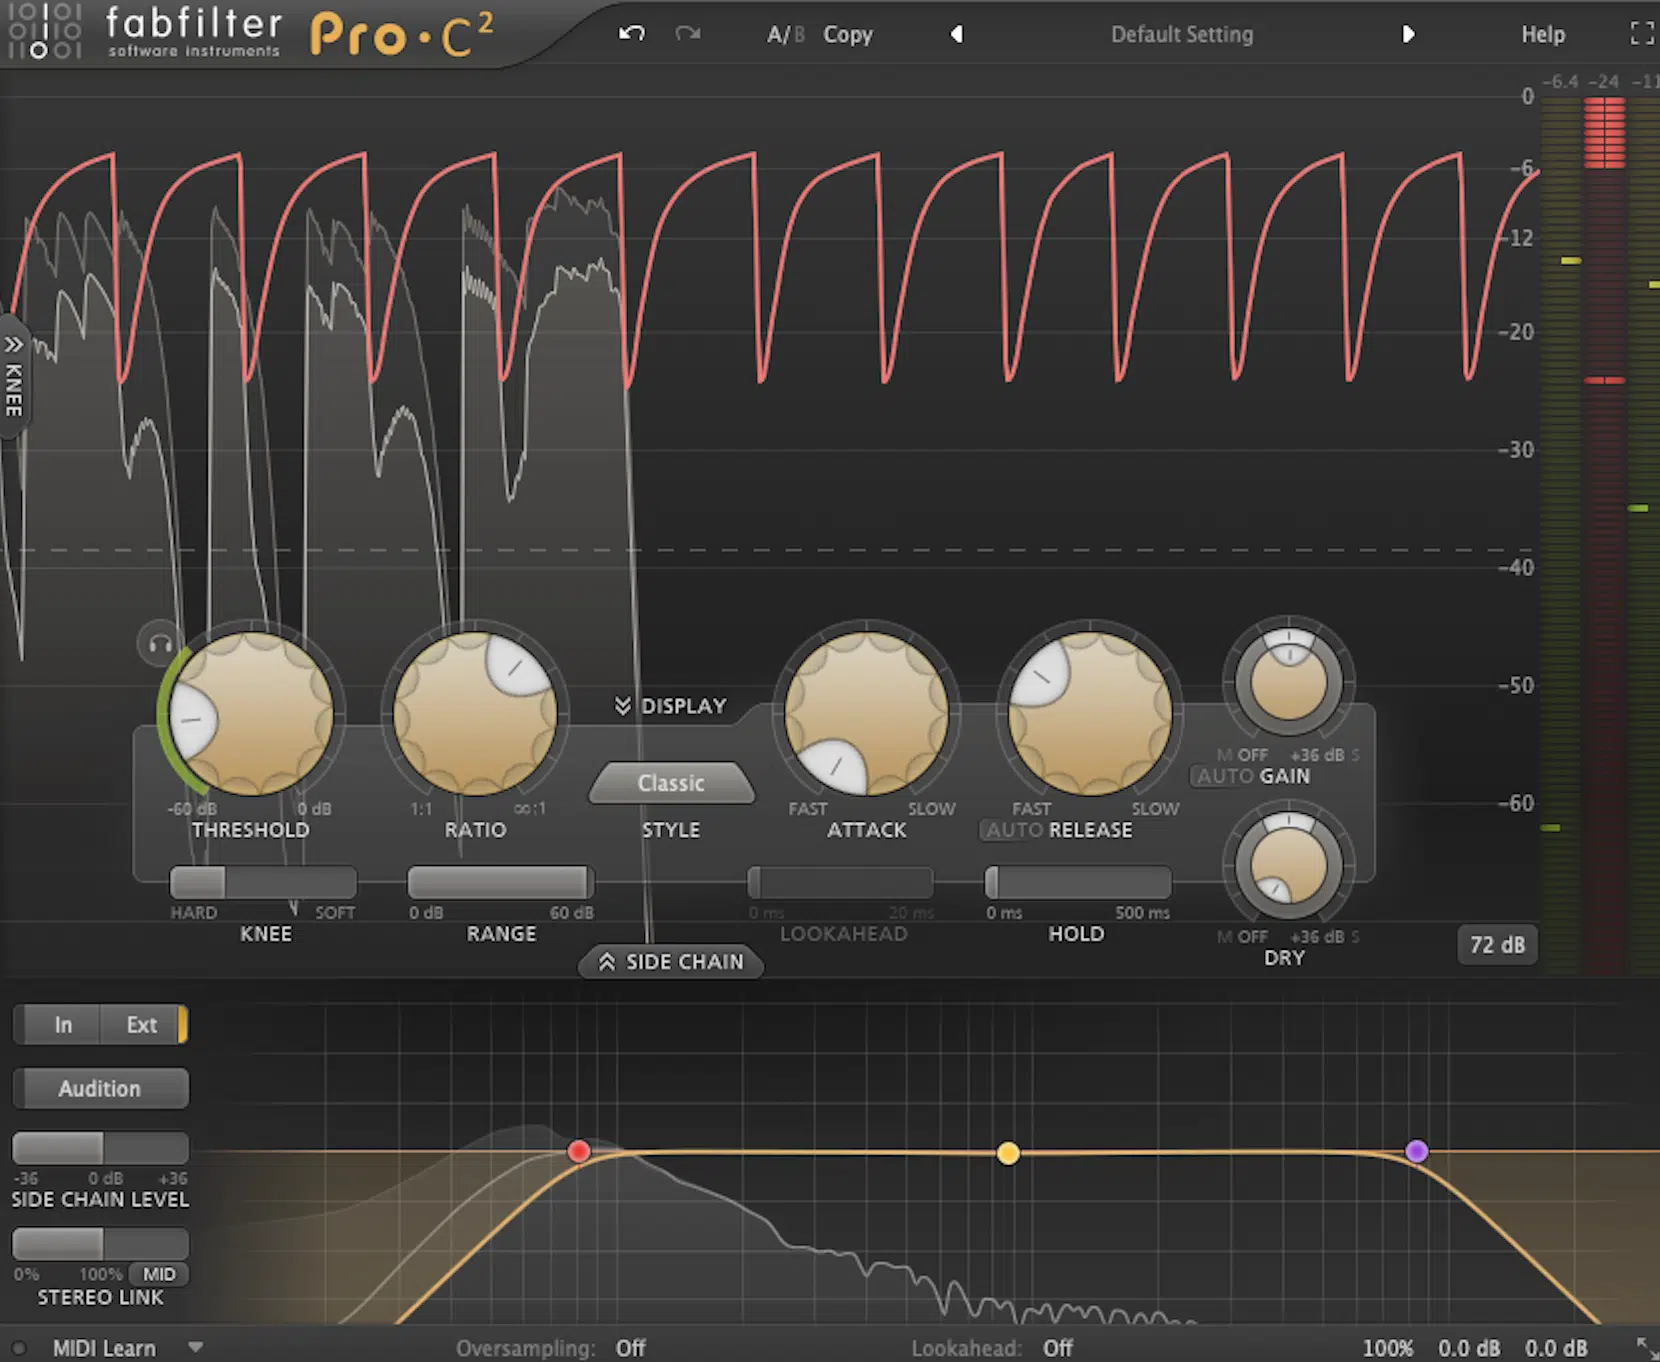
Compression helps control the dynamic range and adds punch to your drums so they sound cohesive and professional.
You’re going to want to start by setting the attack time based on the drum type:
- Slow attack times (10-15 ms) on kick drums to preserve the initial transients
- Faster attack times (1-5 ms) are better for snare drums to tame peaks
The key here is to adjust the release time according to the drum’s natural decay.
Use quicker releases (50-100 ms) for shorter hits like snares, and longer releases (200-300 ms) for kick drums to maintain their sustain.
The ratio should typically be set between 3:1 and 5:1 to achieve a balance between punch and control.
Use a compressor known for its punch (I use an 1176-style compressor) to enhance both the attack and sustain of your drums.
This works super well for giving kick drums and toms more impact.
NOTE: When you’re processing drums, remember to apply parallel compression on the drum buss for additional punch without sacrificing the dynamic range of the original signal. Adjust the threshold until you achieve around 3-4 dB of gain reduction so the compressed signal blends naturally with the dry sound. See the following section for details.
-
Parallel Compression (NY Compression) for Punchier Drums
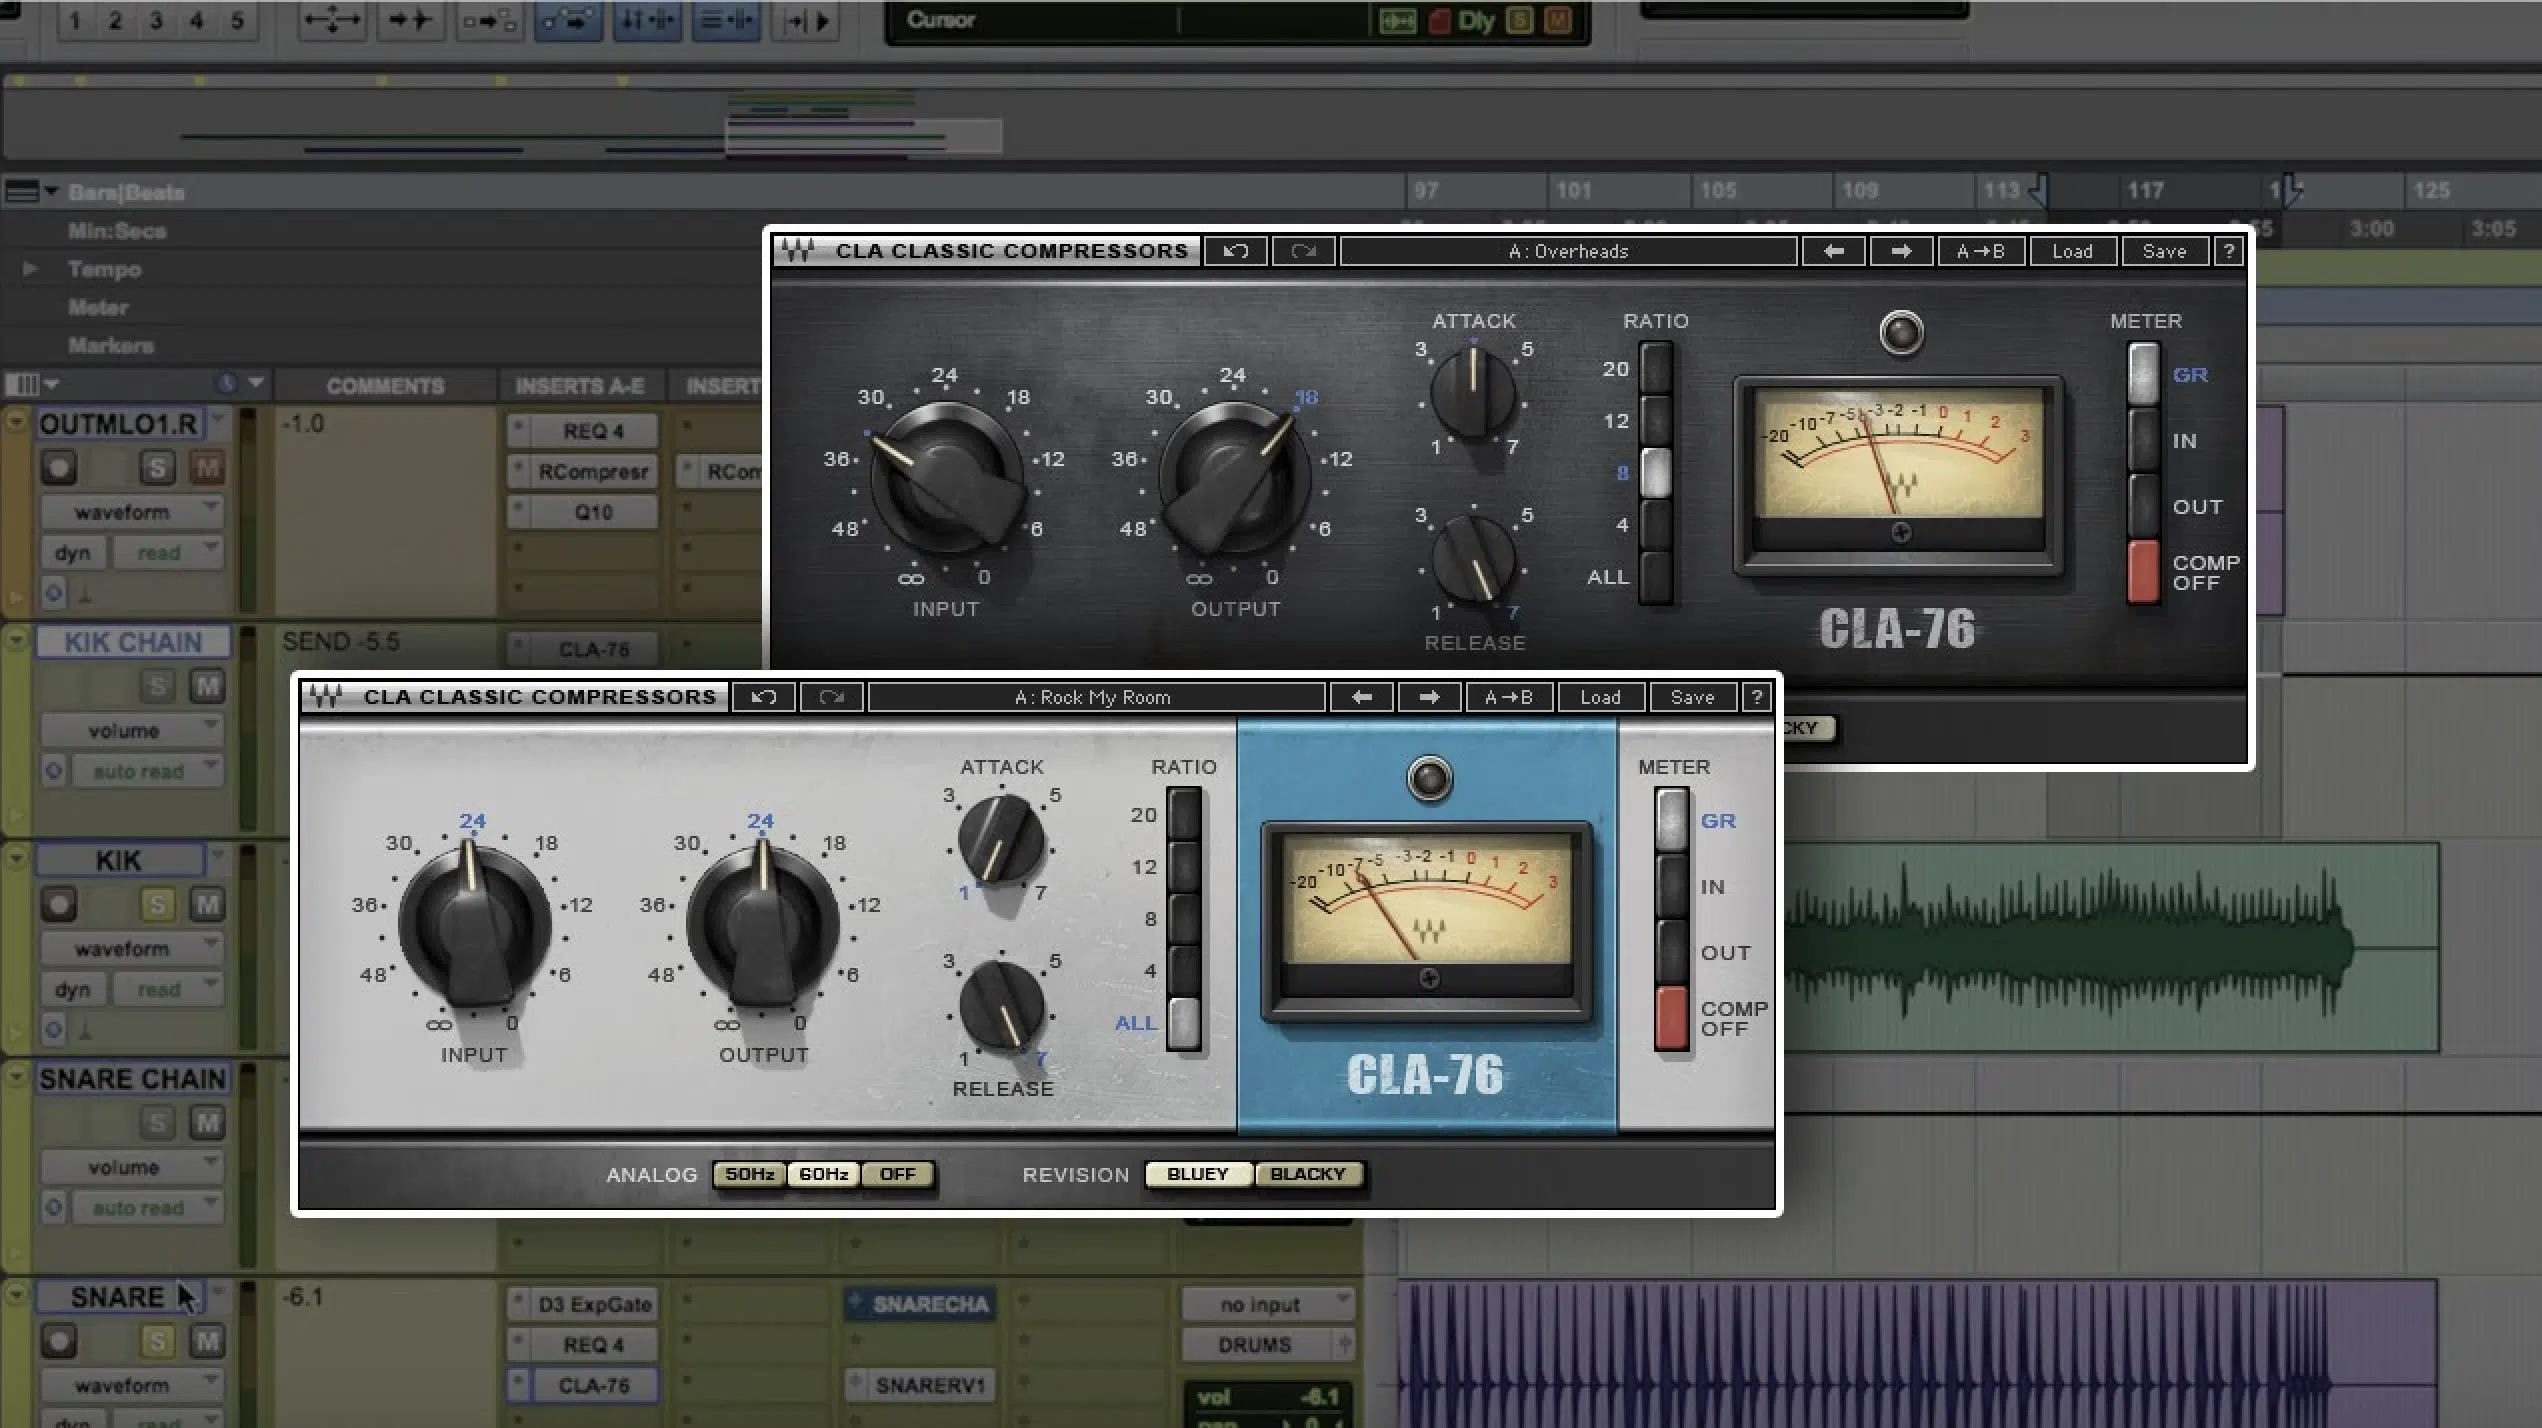
Parallel compression (aka NY compression) is a great way to add punch to your drum mix without sacrificing dynamics when you’re drum processing.
To set it up, create an AUX track and send all individual drum tracks to this parallel channel.
Use a compressor with a fast attack time (around 5-10 ms) and a medium release time (around 100-150 ms) to capture the transient peaks while maintaining sustain.
Set the ratio high, around 8:1, 10:1, or even higher by using a limiter, to achieve heavy compression 一 aim for 6-10 dB of gain reduction or more on the compressed signal.
The idea is to “squash” the AUX return track, and to do that you have to apply much more compression than you normally would.
On its own, it might sound overly compressed, but once you blend it back into the mix, it plays a huge part in adding punch and thickness (enhancing the overall drum sound).
Blend this parallel channel back into the main drum bus 一 keeping the dry sound prominent to maintain the natural dynamics of the original drum tracks.
NOTE: For even more punch, apply heavy parallel compression settings primarily to kick drums and snare drums, as they benefit most from this technique.
Adjust the parallel channel’s fader until the drums sound punchier and more cohesive, ensuring they cut through the entire mix, and voila!
#4. Adding Saturation & Distortion for Character
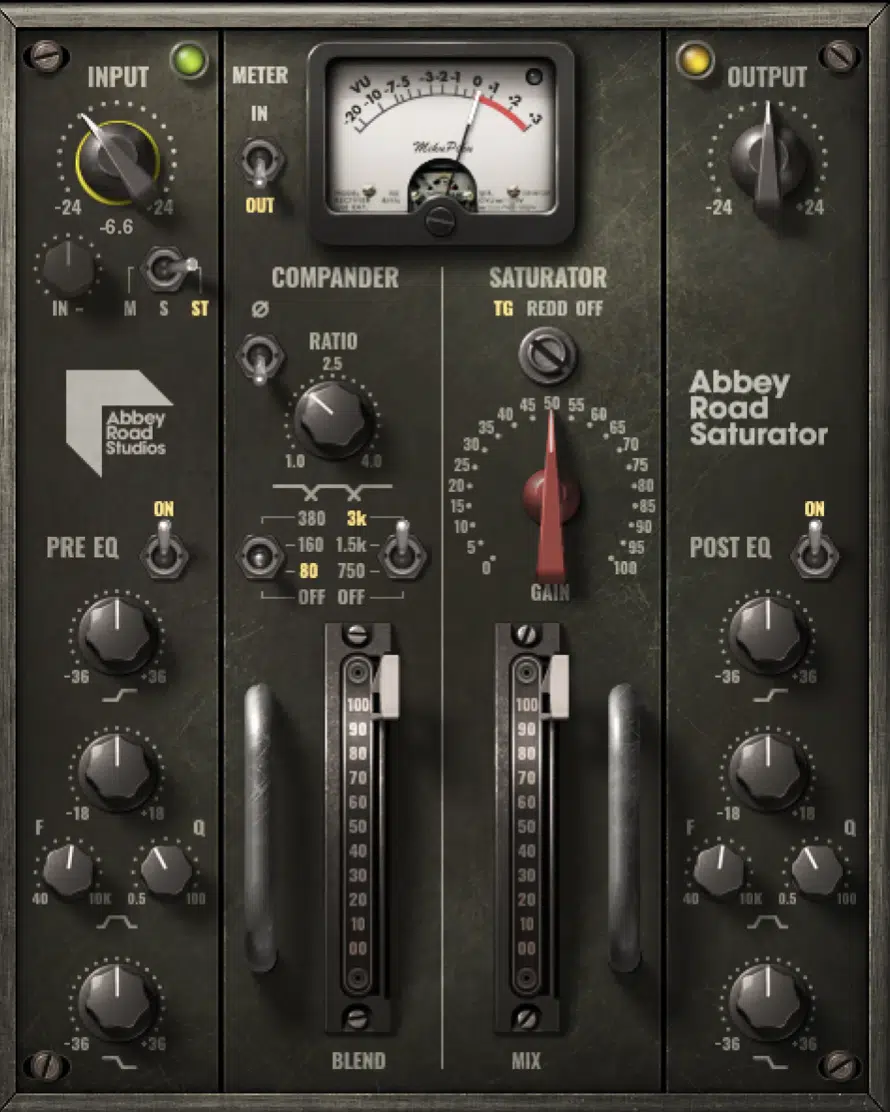
When it comes to drum processing, saturation and distortion are great for adding even more warmth, color, and grit to your drums.
For saturation, use a tape saturation plugin on the drum bus, or even on every drum track if you’re using an analog tape machine emulation (more ‘glue’ and bottom end).
You’re going to add warmth by setting the saturation knob to around 30-50%, which helps boost low and midrange frequencies.
It’ll make the drum sounds fuller and more textured.
Distortion can be applied to individual drum tracks, like snare drums or toms, using a distortion plugin with the drive level set around 20-30% for clarity/character.
For kick drums, apply a small amount of saturation (around 10-15%) to enhance harmonics without muddying up the low end.
Use a mix knob to blend the saturated signal with the dry sound 一 preserving natural dynamics as you should.
NOTE: Be careful with high-frequency elements like hi-hats, as excessive saturation can make them harsh, and use a high-shelf filter afterward to tame any harshness if needed.
#5. Reverb & Delay for Drum Ambiance
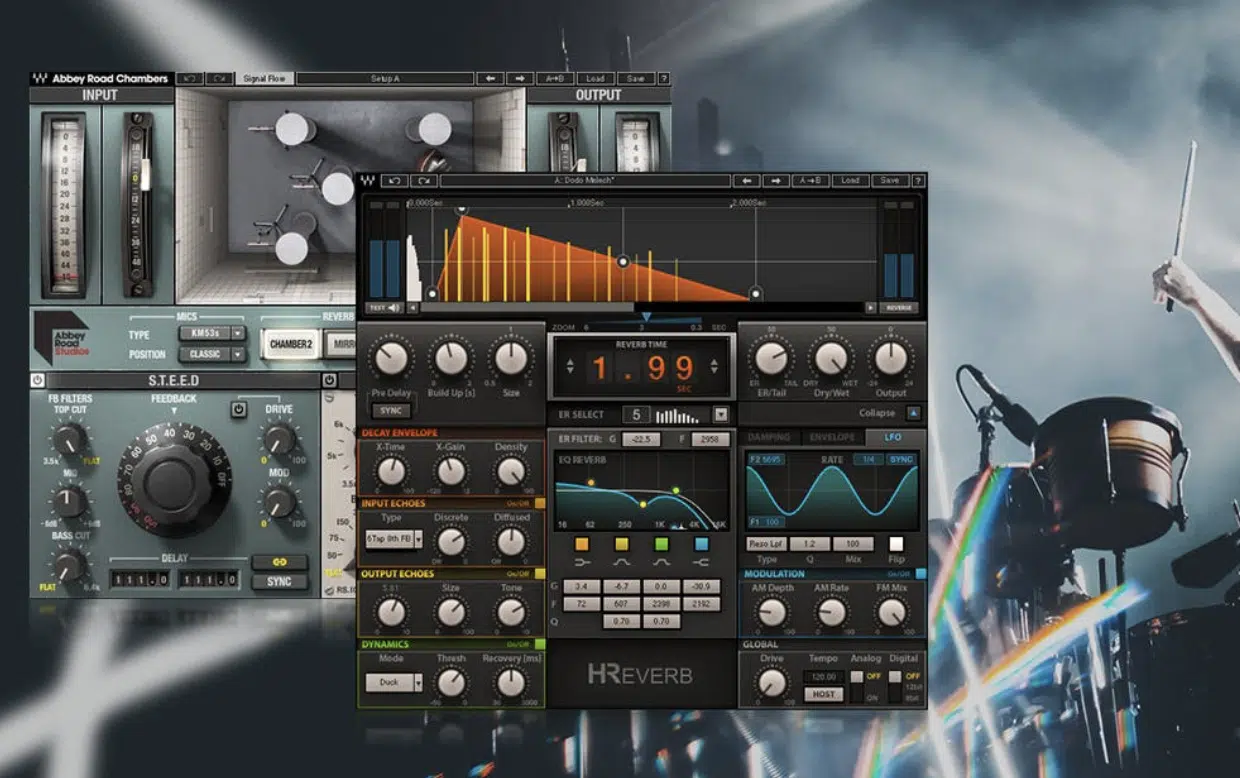
Reverb and delay are essential for creating a sense of space and depth in your drum mix, but they should be used selectively.
Reverb should be applied to snares, claps, and percussion elements to add depth…
Start with a room reverb setting, with decay set around 1.5-2 seconds and the reverb tail adjusted to blend naturally.
For snares, try using a plate reverb with a slightly shorter decay (1-1.5 seconds) to retain clarity while adding some epic ambiance.
Delay works well on percussion elements, such as shakers or claps, using a quarter-note delay at 20-30% wetness to add rhythmic interest.
Avoid adding reverb or delay to kick drums, as it can muddy the low end and weaken the overall punch, except in very specific creative situations like breakdowns or intros.
This is something I’ve learned the hard way, so take it from me.
And don’t forget to use volume automation to control the reverb tail, keeping it from interfering with the main drum hits and ensuring a cohesive, clean drum mix.
-
PRO DRUM PROCESSING TIP
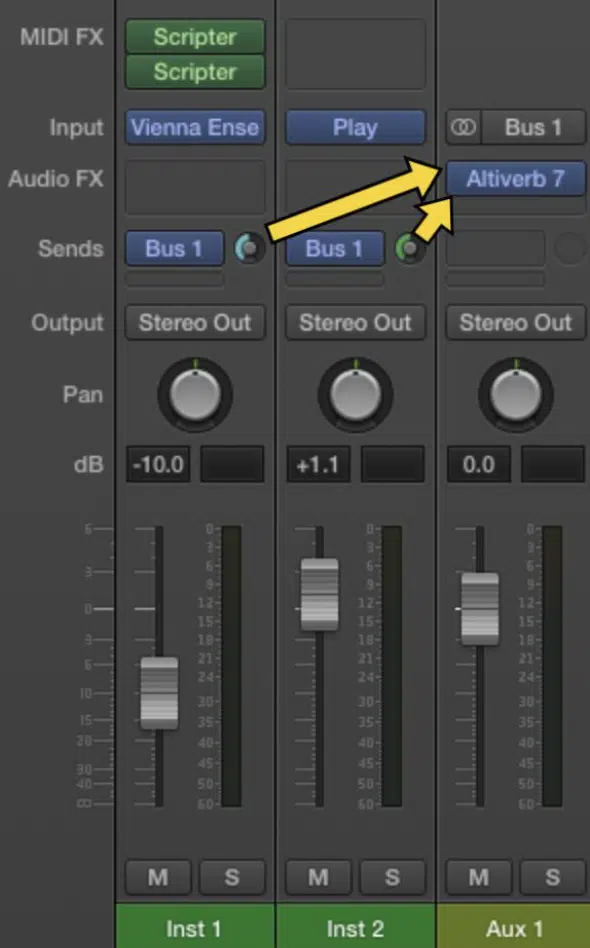
When it comes to drums, it’s usually best not to put reverb and delay directly on the drum track itself.
Instead, route your drums to two separate AUX/return tracks (one for reverb and one for delay) to keep the original drum sound clean while still adding proper depth.
And, as I tell my students, don’t be afraid to use multiple AUX tracks… different drum types often benefit from different reverb and delay settings.
For example, snares might sound best with a plate reverb and a slapback delay, while toms could benefit from a room reverb with a longer delay.
Experiment with these different settings, and you’ll see that each drum element gets the space it needs without muddying up your mix.
It’s all about finding the right blend and letting each drum have its special moment.
Advanced Processing
To take your drum mix to the next level, we’re going to cover some advanced processing techniques in this next section, starting with transient shaping. It’ll help you fine-tune your drums, create dynamic movement, and add depth to your entire mix. So, let’s get into it because you want to mix drums like a boss, am I right?
#6. Transient Shaping for Drum Definition
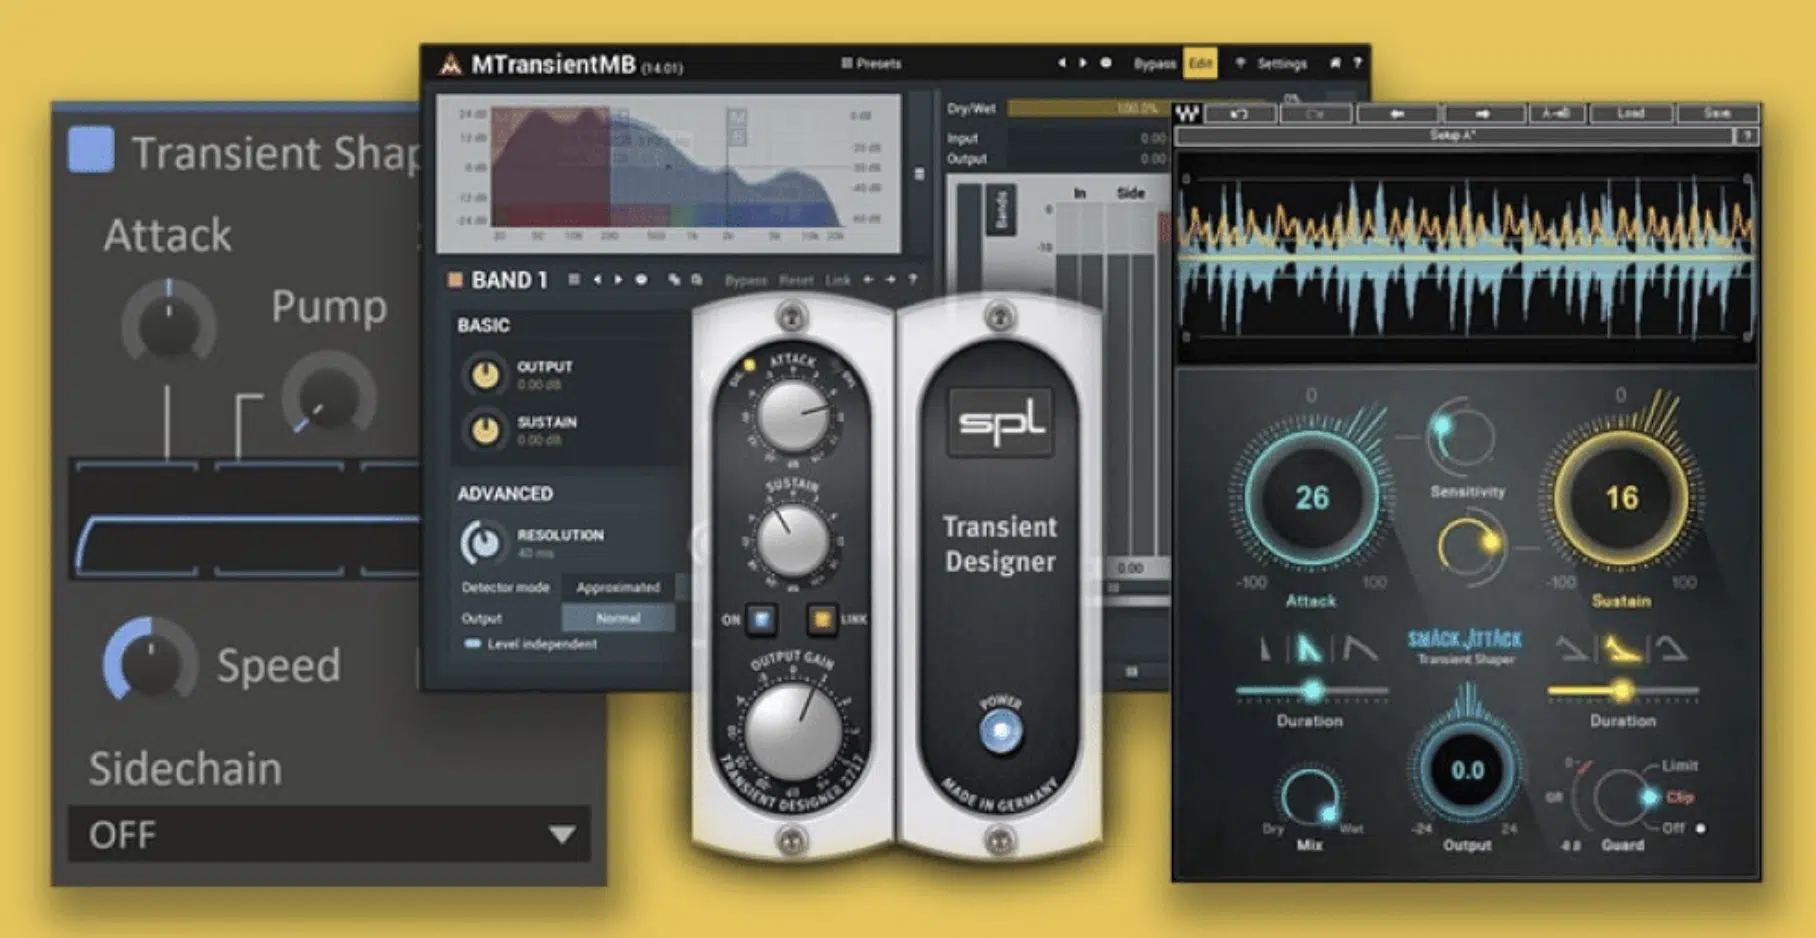
Transient shaping is one of those secret weapons for getting your drums to sound punchy and defined when drum processing (by enhancing the attack and sustain).
Use a transient shaper plugin, like Smack Attack, to target the initial transient of each drum track, especially kick hits and snare drums.
Set the attack knob to increase by 2-4 dB for more punch, while keeping sustain unchanged.
Or, what I sometimes like to do is bring the sustain down rather than increasing it, for a much tighter sound.
On hi-hats, you might want to increase attack by only 1-2 dB only to retain clarity without making the high frequencies way too harsh.
And, as I touched upon before, you might need a high-shelf filter afterward to smooth any harshness, so just keep that in mind.
For toms, adjust the sustain to be slightly longer 一 increasing it by 2-3 dB to add body and resonance.
My trick is to apply transient shaping specifically to individual drum tracks rather than the entire drum buss, as it allows for more precise control over each drum sound.
Make sure to check how transient shaping affects the frequency spectrum so that any changes enhance the drum mix rather than creating phase issues.
This technique is super effective for giving a modern drum sound with clear attack and balanced sustain, so play around with it for sure.
-
PRO DRUM PROCESSING TIP
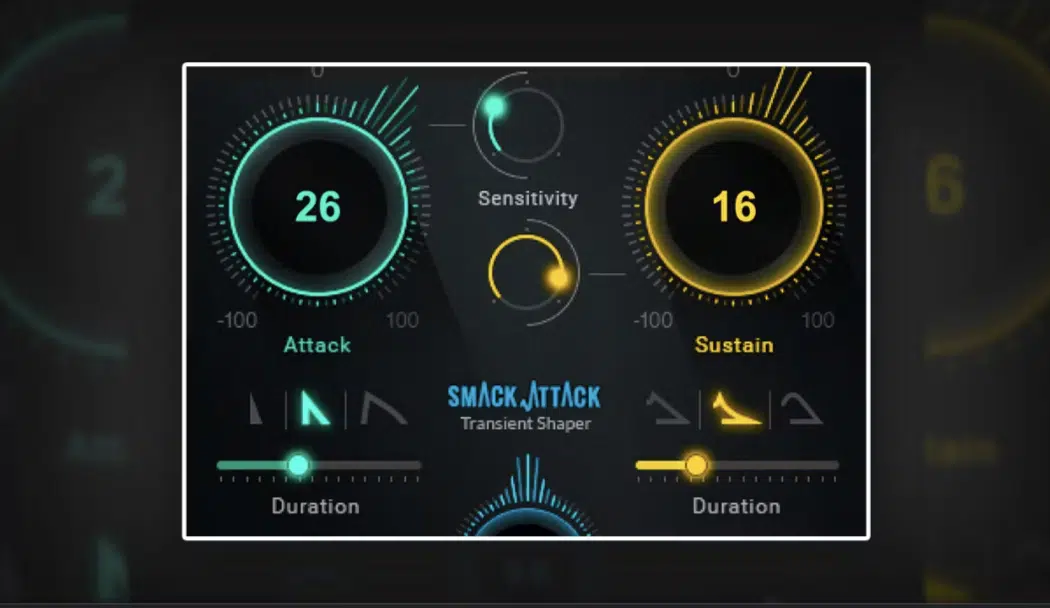
A transient shaper can be used creatively to enhance the feel of the entire mix.
For instance, try using a transient shaper on parallel drum tracks, boosting attack and sustain aggressively to add extra punch while blending it back into the dry mix.
You can also apply a transient shaper on the drum buss, but keep the adjustments subtle (approx. 1-2 dB for attack and sustain) to avoid phase problems.
Play around with transient shaping on percussion elements like claps or shakers to create a more dynamic groove 一 giving your drums a truly professional edge.
#7. Sidechain Compression for Dynamic Groove
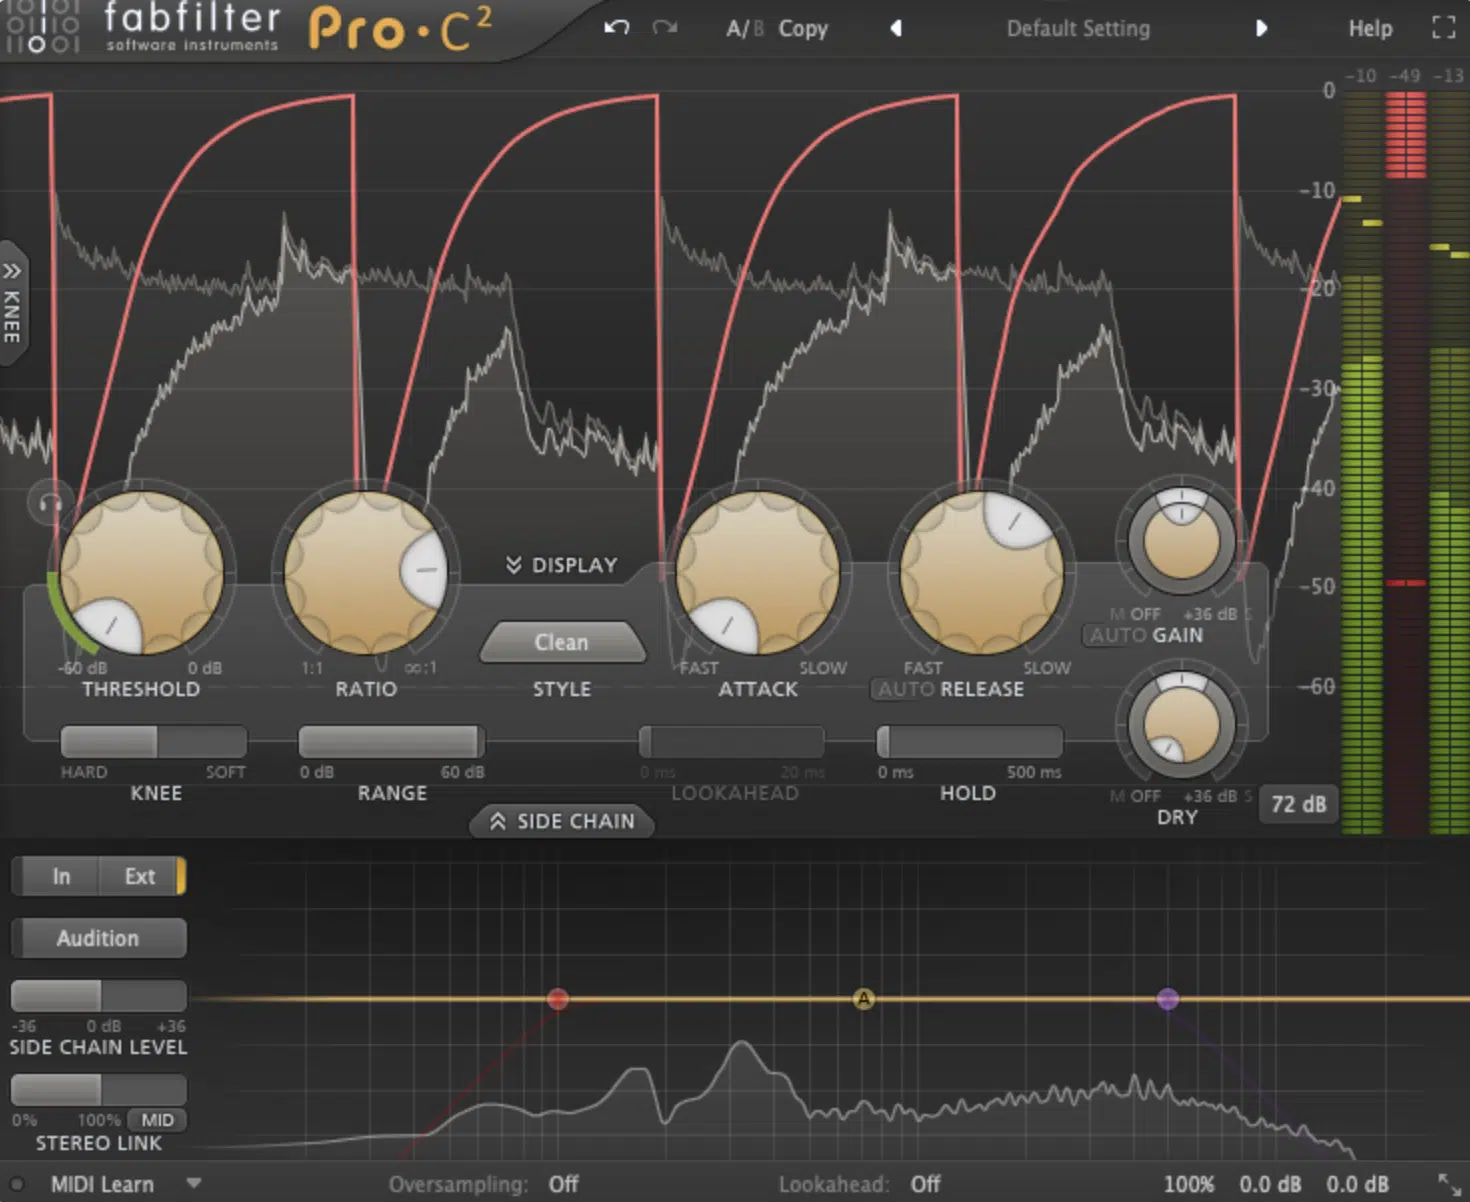
In my opinion, you can’t talk about drum processing without talking about sidechain compression, so pay close attention.
Sidechain compression is a powerful tool for creating a more dynamic drum groove and adding rhythmic interaction with other instruments (and one of my personal favs).
Set up a sidechain compressor on elements like kick drums and snare drums, using a:
- Medium attack time (5-10 ms)
- Short release time (50-100 ms)
This let the drums successfully cut through while ducking other elements.
For the sidechain input, use the kick drum or snare drum as the trigger source, depending on which element you want to emphasize in the mix, of course.
Adjust the ratio to 4:1 and lower the threshold until you achieve 3-5 dB of gain reduction on the sidechained signal.
This will create a pumping effect 一 adding control and dynamic range while allowing the drums to sound punchy and prominent.
Just remember to use sidechain compression sparingly when drum processing because you want to create a groove that complements the entire mix, not destroys it.
And, for all my Ableton users, I broke down exactly how to do this process.
#8. Automation
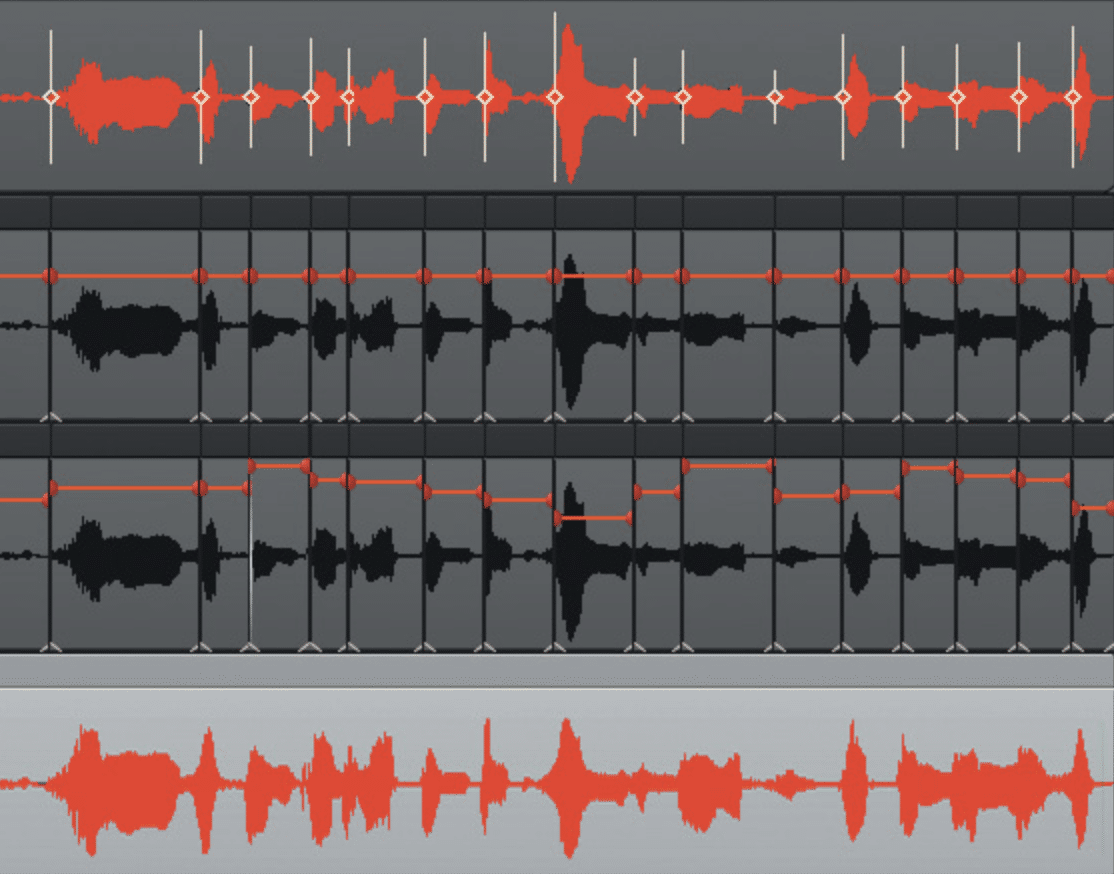
Automation when processing drums is key to making your drum mix dynamic and engaging throughout the track.
Start by automating the volume of individual drum tracks (especially kick drums and snare drums) to emphasize different sections of the song.
For example you can boost the snare drum’s volume by 1-2 dB during the chorus for more impact.
Use automation lanes to control the intensity of reverb tails, adjusting them during breakdowns or transitions to add depth or maintain a dry sound.
Automate EQ settings to enhance high frequencies during buildups 一 making the drums sound brighter as the energy of the track increases.
You can also automate parallel compression settings on the drum buss, increasing compression during the chorus for a denser, more aggressive drum mix.
Try using volume automation on the drum buss to create gradual changes, like slowly decreasing volume during breakdowns to build anticipation for the next section.
-
PRO DRUM PROCESSING TIP

Don’t forget that your AUX/return tracks (especially for reverb and delay) can always benefit from a bit of automation, no matter what element you’re processing.
Automating the wet/dry signal, reverb tail length, or delay feedback can create more dynamic movement and keep things feeling alive throughout your track.
For example, you can increase the reverb level during breakdowns for extra depth or slowly decrease the delay during verses to keep things tight.
These little adjustments help add interest and energy to your mix 一 making everything feel more intentional, immersive, and polished.
#9. Flangers, Phasers, and Beyond
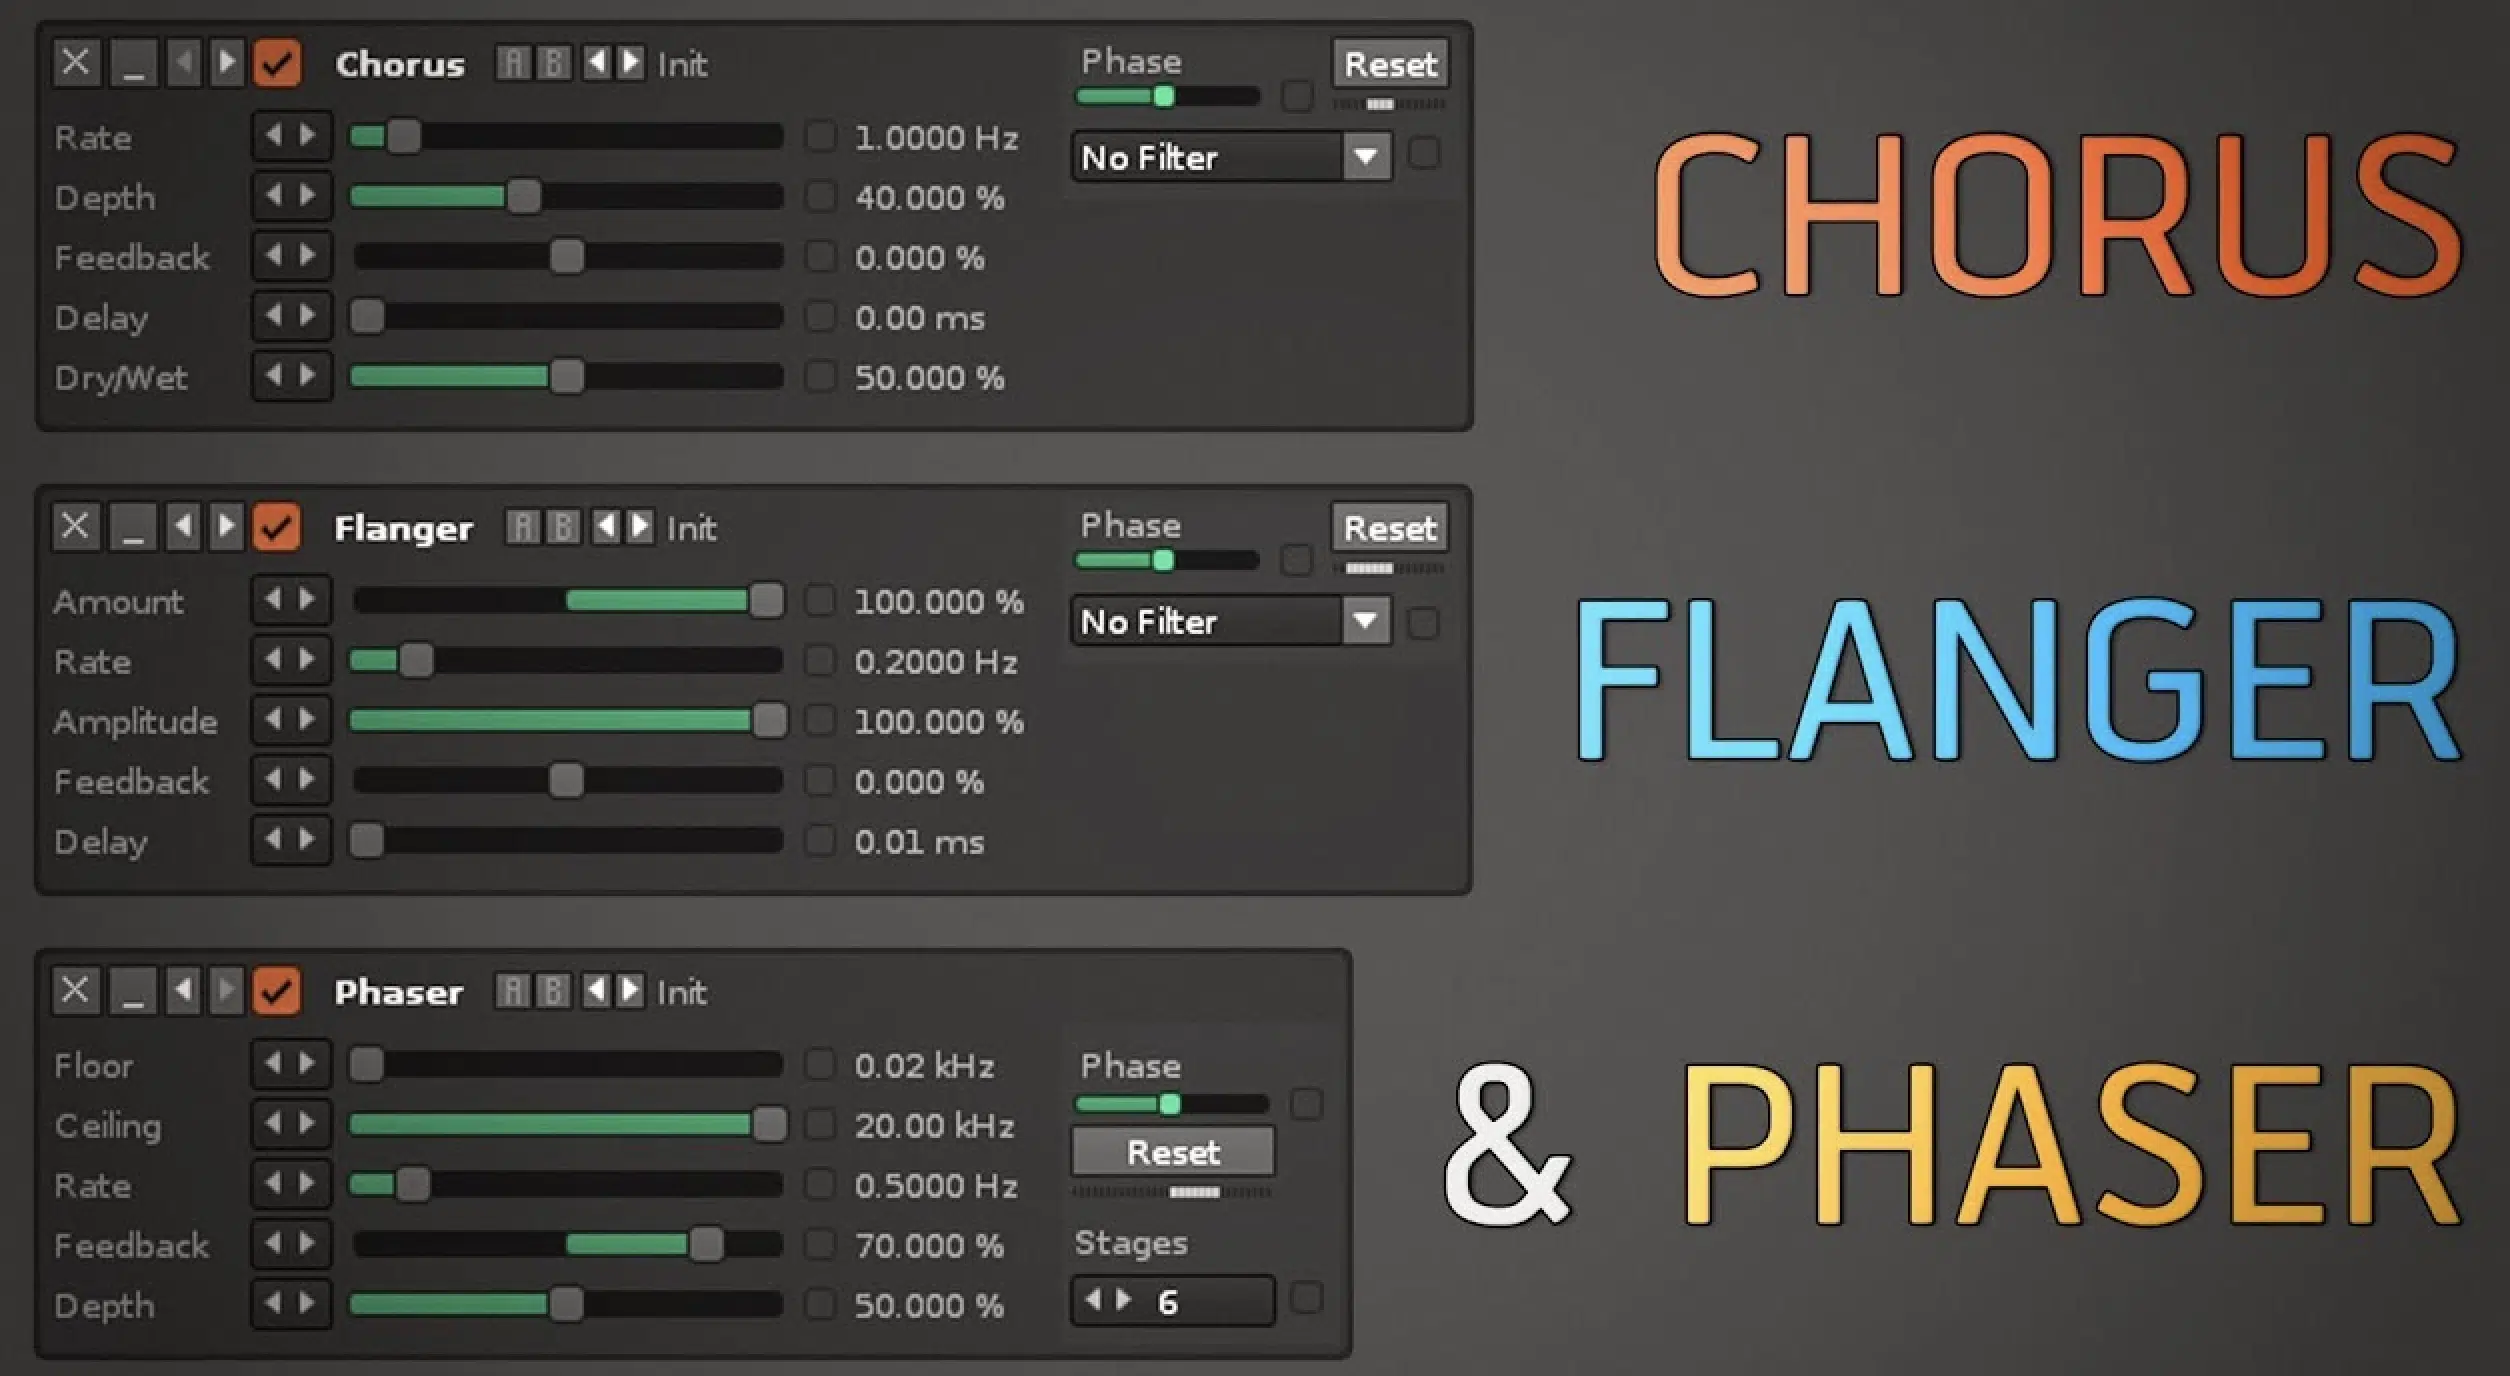
Subtly applying advanced effects like flangers and phasers can add unique textures to your drum mix, making it stand out in modern music.
To start, use a flanger plugin on hi-hats or snare drums, setting the mix knob to 20-30% to maintain clarity while adding movement.
Adjust the rate to 0.5-1 Hz and keep the depth moderate to avoid overpowering the original drum sound.
Phasers are great for creating a swirling effect on percussion elements 一 set the rate between 0.3-0.7 Hz and use a wet/dry mix around 25-35% for subtle modulation.
You can also try using a chorus plugin on individual drum tracks like toms to create a wider stereo image.
For kick drums, applying modulation effects sparingly is key, as they can interfere with the low-end focus, and you certainly don’t want that.
To avoid muddiness, try using a high-pass filter on the effect; I ’ve found that this technique works beautifully.
Modulation effects generally work better on higher-frequency drum sounds (usually not kicks or other low-end-heavy elements), but always check for phase problems.
Especially when you’re combining them with parallel processing.
If you do encounter phase issues, try adjusting the phase: either flip it or reverse the polarity on your mixer track or a utility plugin.
If that doesn’t solve it, you may need to make some manual adjustments to align the waveforms and clear up the sound.
NOTE: Use automation to slowly increase or decrease the intensity of these effects during breakdowns or transitions, adding depth and maintaining dynamic range.
#10. Panning Drums & Stereo Imaging
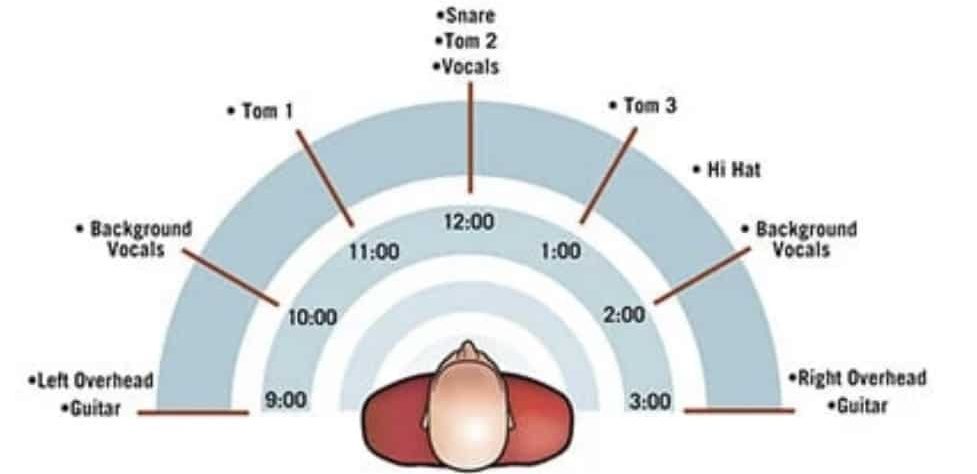
When you’re mixing drums the goal is to create a realistic, immersive experience for your listener, and panning drums is a great way to achieve that.
You can either set up the drum mix from:
- The drummer’s perspective.
- The audience’s perspective.
From the drummer’s view, the hi-hats would typically be panned to the left, the floor tom to the right, and the rack toms centered to slightly left or right.
Depending on how they’re positioned, of course.
From the audience’s perspective, this setup would be flipped… For example, hi-hats would be panned right, and the floor tom would move to the left.
It all comes down to the vibe you want to create, whether you want the listener to feel like they’re behind the kit or watching a live performance.
In addition to panning, stereo imaging plays a huge role in drum processing as well.
Some drum elements benefit from wider imaging, while others should remain narrower or even mono otherwise they’d sound super out of place.
For instance, kick drums and snare drums are usually kept mono or near-mono, as they need to anchor the center of the mix.
On the flip side, overheads and cymbals work best with wider stereo imaging, which creates a spacious feel that adds depth and air to the mix.
Use a stereo imaging plugin to control how wide or narrow each element should be.
For toms, try a moderate stereo spread 一 pan them slightly left or right to match their position on the kit, but keep the imaging tight.
Percussion elements (like shakers or claps) can be pushed wider to add movement and excitement to the sides of the mix.
Bottom line, balancing panning and stereo imaging helps your drums sound natural while still leaving space for other instruments to breathe.
-
Pro Tip: Multiband Compression
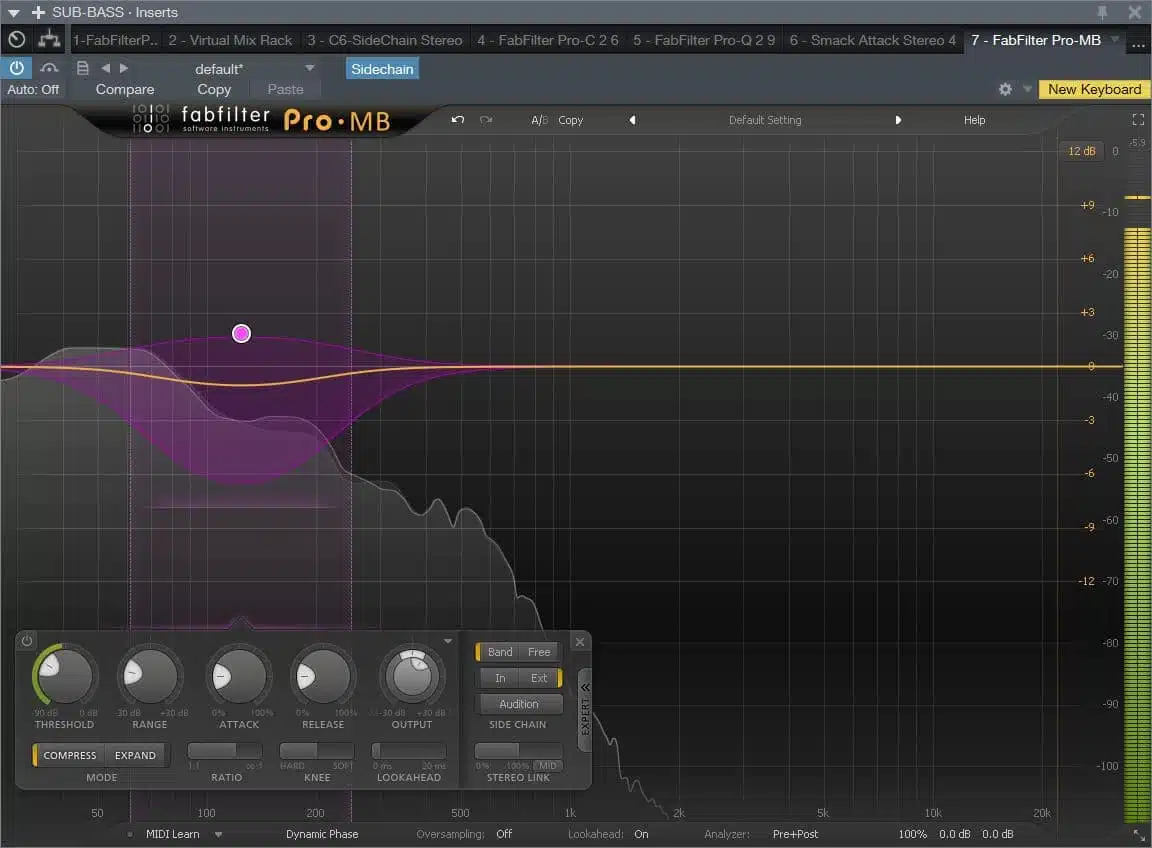
Multiband compression in regards to drum processing is a solid technique that divides the frequency spectrum into separate bands.
The reason being: more precise control over each range, which is ideal.
Start by splitting the drum buss into three bands:
- Low (below 100 Hz)
- Mid (200-500 Hz)
- High (above 8 kHz)
Apply 4-6 dB compression to the low band to control kick drum punch 一 using a fast attack (5-10 ms) and short release (50-80 ms) to maintain transients.
For the mid band, use 2-3 dB compression with a medium attack (10-15 ms) to preserve snare character so it enhances its presence without overpowering.
The high band benefits from 1-2 dB compression to control cymbals, so use a slower attack (15-20 ms) to smooth out harshness.
In the end, multiband compression offers more nuanced drum processing all to expertly prevent muddy lows and harsh highs while keeping dynamics intact.
NOTE: Adjust ratios (start at 3:1) and thresholds carefully so each band enhances clarity and punch without losing the overall drum mix’s energy, which would suck.
Bonus Drum Processing Tip For Recording Drums Live
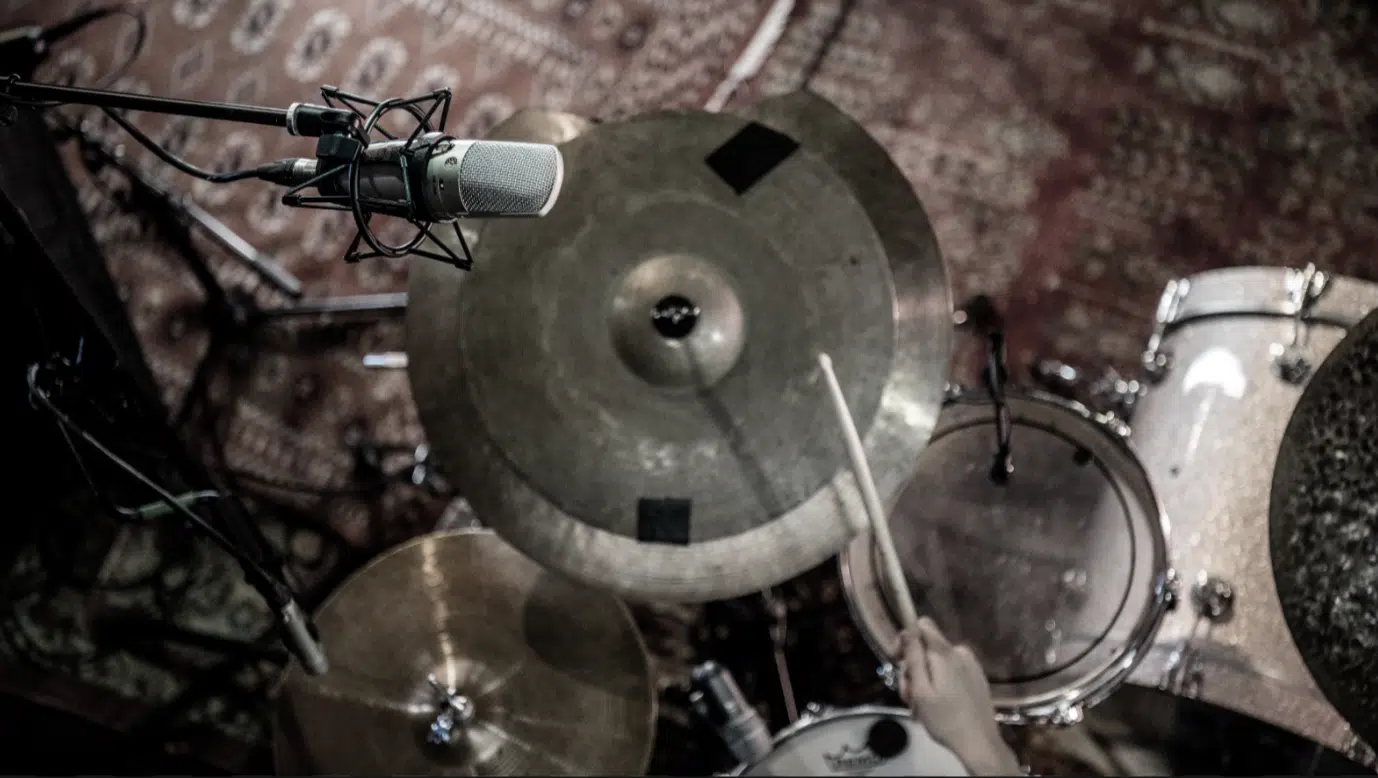
I felt like we should include a bonus section for all of you who are working with actual live drums/drum sets, so let’s get into it.
Recording drums live requires a pretty different approach to achieve a solid drum sound because you’re working with things like room mics and drum bleed.
When dealing with drum recordings, make sure to position overhead mics to capture a balanced stereo image, focusing on cymbals and overall drum ambiance.
Room mics should be set up further away to capture the natural reverb tail.
Also, you’ll want to use tom mics to emphasize rack toms and floor toms, keeping their levels consistent to avoid harsh dynamics in the final mix.
Drum bleed is inevitable, but you can control it by placing close mics directly on kick drums, snare drums, and other individual drum tracks.
Make sure to use gating to minimize unwanted sounds.
When you’re recording drums you’ll need to make sure that all mic levels peak around -6 dBFS to leave headroom for later processing (just like you would digitally).
Check for phase problems between mic placements 一 adjusting mic positions to achieve the desired effect while maintaining a cohesive drum sound.
-
DRUM PROCESSING PRO TIP
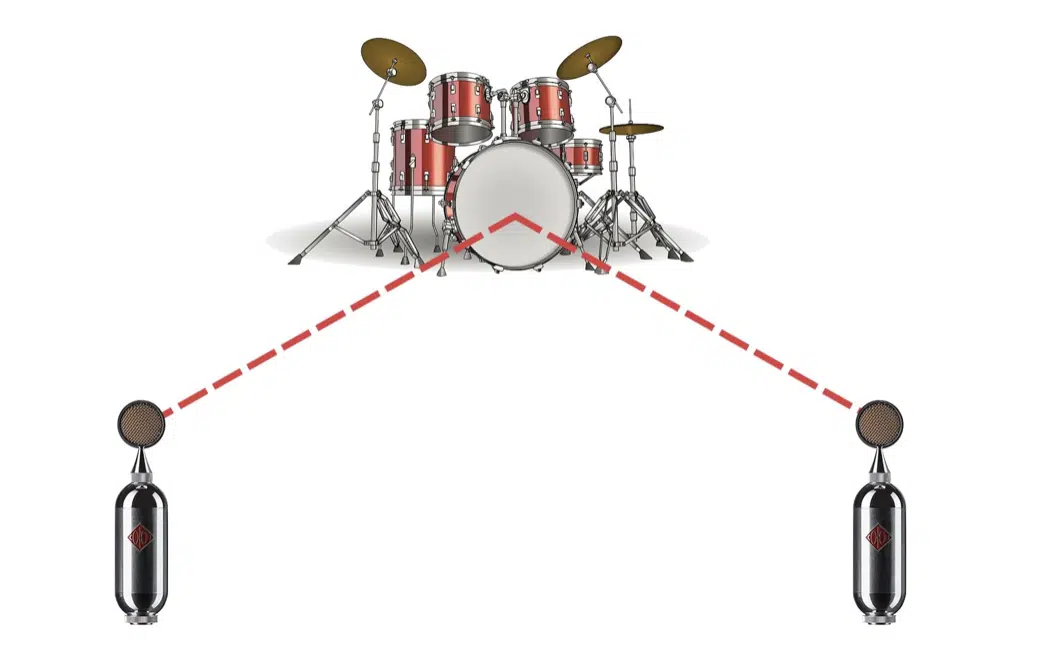
When working with live drum recordings, using parallel compression on the room mics can add more depth without making the drums too muddy.
Apply around 6-10 dB of heavy compression to the parallel track, focusing on enhancing the room’s natural reverb tail.
Blend this back into the dry mix subtly.
This helps retain the live ambiance while maintaining the punch and clarity of each individual drum hit, and there you have it.
Final Thoughts
Drum processing, as you now know, can make or break your entire mix.
It requires attention to detail, a strong understanding of techniques, and the ability to adapt to different drum sounds.
With all the drum processing tips, tricks, and techniques you’ve learned today, you’ll never have to have weak, lackluster drums again.
Your drum sounds will always hit hard, and your mixes will never feel incomplete.
By the way, if you’re looking to enhance your drum sounds further, check out this legendary Free LoFi Drum Kit that can completely change the game for you.
This free drum kit comes packed with 40+ drum samples, loops, and MIDI stems, including kicks, snares, claps, toms, and more.
All of which were created by the industry’s top professionals to deliver warm, vintage tones that fit perfectly with modern drum processing techniques.
It’s also royalty-free and designed to help you add character and texture to your mixes, so you’ll be getting unmatched deals here people.
With these drum processing insights and top-tier tools at your fingertips, you’re now ready to create drum mixes that sound professional and cohesive, no excuses.
So keep experimenting, fine-tuning, and exploring new drum processing techniques to find your signature sound.
This way your drums will never be boring, basic, or unprocessed again, instead they’ll be cleaner, punchier, and on point like never before.
Until next time…


Leave a Reply
You must belogged in to post a comment.