Mastering a song might sound simple, but if you don’t know what you’re doing, you can completely destroy your tracks (and even a good mix itself).
It requires precision, attention to detail, and a solid understanding of tonal balance, dynamic range, stereo width.
Plus, there are plenty of tools, techniques, and processes that all work together perfectly to completely transform your mix into a polished, radio-ready master.
As producers who want to learn how to master a song yourself, you really need to know both the basics and more advanced techniques.
I mean, if you want to stay ahead of the competition, that is (which I’m sure you all do).
So, today, I’m breaking down absolutely everything you need to know about how to master a song, including:
- Gain staging and level matching ✓
- EQ adjustments for tonal balance ✓
- Compression for controlling dynamic range ✓
- Limiting to increase perceived volume/perceived loudness ✓
- Stereo widening with (with stereo imaging tools) ✓
- Applying saturation & harmonic distortion ✓
- Using reference tracks like a boss ✓
- Mid/Side EQ and processing techniques ✓
- Multiband compression and dynamic EQ ✓
- De-essing for clear high frequencies ✓
- Proper monitoring levels and A/B testing ✓
- Advanced metering tools so you’re not mastering blind ✓
- Dithering & exporting for digital distribution ✓
- Creating multiple versions of your master track ✓
- Finalizing your master for streaming platforms ✓
- Much, much more about how to master music ✓
After this article, you’ll know exactly how to master a song from start to finish.
You’ll be able to fine-tune your EQ, manage dynamics effectively, and control perceived volume.
Plus, you’ll be able to successfully increase stereo width, maintain clarity, and balance loudness properly.
This way, your tracks won’t sound sloppy, unbalanced, or straight-up whack.
Your tracks will always translate well across different playback systems, whether it’s in the car, on a laptop, or through a pair of high-end studio monitors.
Table of Contents
- What is Mastering Exactly? Breaking it Down
- Preparing for the Mastering Process
- How to Master a Song: Step-by-Step
- Step 1: Gain Staging & Level Matching
- Step 2: EQ Adjustments for Balance
- Step 3: Compression for Consistency
- Step 4: Enhancing Transients
- Step 5: Adding Harmonic Distortion/Saturation
- Step 6: Adjusting Stereo Width
- Step 7: Final Limiting
- Metering Tools
- Step 8: Dithering
- Step 9: Finalizing Your Master
- Bonus: Advanced Mastering Techniques
- How to Master a Song: Final Thoughts
What is Mastering Exactly? Breaking it Down

Mastering is the final step in music production that refines the overall sound of your track so it translates well across all playback systems, not just one.
Unlike the mixing stage/mixing process, which focuses on individual elements and bringing them all together, mastering focuses on the entire mix as a whole.
There’s a common misconception that mastering is some magical fix… trust me, it’s not.
Mastering is all about enhancing:
- Clarity
- Dynamic range
- Perceived loudness/perceived volume
But, listen carefully: it can not, not, not make a bad mix good, but if it’s done incorrectly, it can surely make your song sound worse.
The actual mastering process involves precise adjustments to the frequency spectrum, dynamics, stereo width, and final loudness 一 making sure your track sounds polished.
The role of the mastering engineer is to keep your song sound balanced while increasing its perceived loudness for a competitive, radio-ready sound.
Don’t worry, we’ll be breaking down everything about how to master a song so you get a solid outline and can start mastering your own music right now.
I just needed you guys to really understand that it doesn’t perform miracles, and in all honesty, if you’re spending more than 20-40 minutes on a master, you’re doing it wrong.
Any experienced mastering engineer would tell you the same, trust me.
-
Pro Tip: Mastering Process vs Mixing Process (Key Differences)
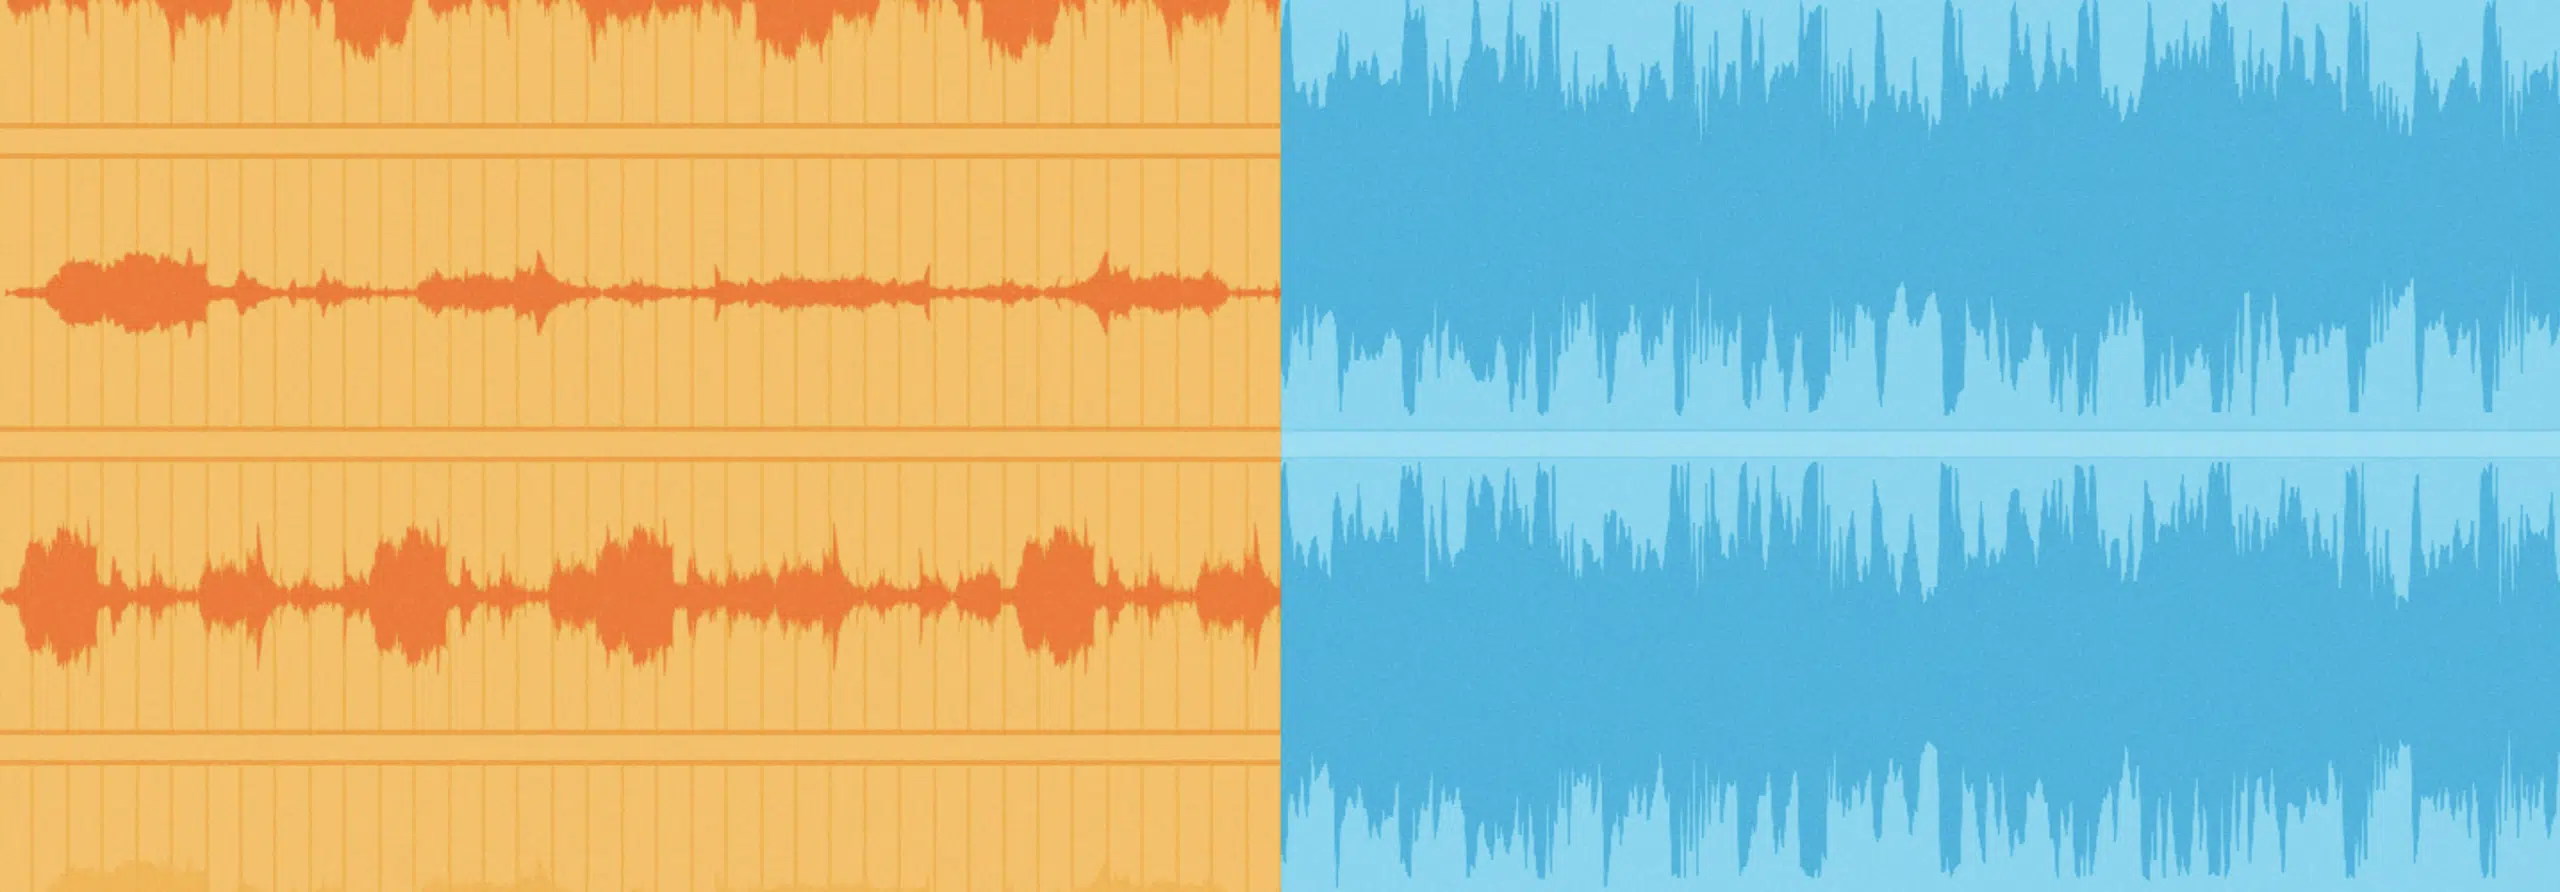
Piggy-backing off the last section, if you’re going to learn how to master a song, you must first know the differences between the mixing process and mastering process.
Yes, they’re closely linked and work together (generally speaking), but they consist of very different and unique things.
- Mixing shapes each element within the track.
- Mastering stage focuses on enhancing the overall sound of the entire mix.
For example, when you’re mixing, you might use EQ to emphasize a vocal, but when mastering music, you’ll apply broad EQ adjustments across the entire mix.
It guarantees a consistent tonal balance all the way through.
If your mix has a muddy frequency range or inconsistent volume levels, mastering can’t create clarity where it’s missing, people.
The key is to have a super clean final mix way before you start the mastering process.
Again, mastering music is all about fine-tuning dynamics, gain reduction, and output level to ensure the song sounds cohesive and polished.
As a rule of thumb, don’t expect mastering to correct mistakes made during the mixing process 一 focus on refining the entire mix for maximum impact.
Side note, if you want to know absolutely everything about mixing vs. mastering, we got you covered.
Preparing for the Mastering Process

Before you begin the mastering stage, it’s important to export your final mix properly.
You’ll want to use a:
- Sample rate 一 Of at least 44.1 kHz.
- A bit depth 一 Of 24-bit for optimal audio quality.
Just a quick tip though, today’s current standard for media is a sample rate of 48 kHz, so keep in mind.
That said, use the same sample rate and bit depth that the mix was originally exported at, to maintain the same level of detail and dynamic range.
In order to set up your DAW for mastering music, you’re going to want to create a dedicated session to ensure your master channel is clean.
There should be no plugins left over from the mixing stage and you should have enough headroom (around -12 dB) for processing.
Start with a pre-mastering checklist: listen for any unwanted noise, check for phase issues using a correlation meter, and make sure the mix has proper tonal balance.
Also, analyze the frequency spectrum to identify areas that may need more work during mastering, like overly boomy bass or harsh high frequencies.
Doing all of this will help the mastering processes run way smoother so you can master your song correctly and with razor-sharp precision.
-
Pro Tip: Sample Rate & Bit Depth
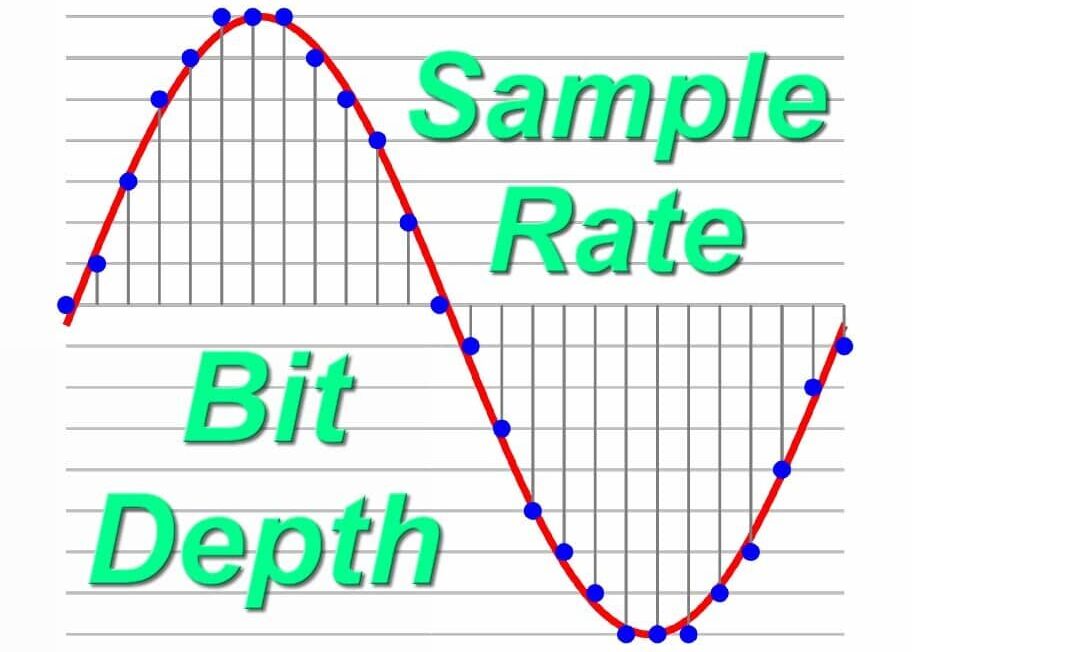
Since we just talked about preparation and we mentioned sample rates/bit depths, I wanted to just quickly break down what they are for my newbies.
The sample rate determines how many times per second audio is captured, measured in kilohertz (kHz).
For example, a sample rate of 44.1 kHz means that the audio is sampled 44,100 times per second, preserving more high-frequency detail for a smoother sound.
The bit depth, on the other hand, affects the dynamic range and detail of the audio.
For instance, a higher bit depth (like 24-bit) captures soft sounds better and more ample headroom for the loud parts than a lower one.
Always export your final mix at the original sample rate (e.g., 44.1 kHz or 48 kHz) because upscaling doesn’t improve quality, and can even introduce artifacts.
Together, the right sample rate and bit depth enhances clarity and dynamic range of your audio file (for optimal mastering results).
NOTE: Using a 24-bit depth reduces the chances of digital distortion when processing so your track keeps a natural sound throughout the entire mastering stage.
How to Master a Song: Step-by-Step
Now that you understand the tools involved, let’s break down each step of mastering music, in detail. You’ll learn how to master a song like a true professional 一 using specific settings, parameters, and the best techniques. All tweaked to help you achieve professional results.
Step 1: Gain Staging & Level Matching
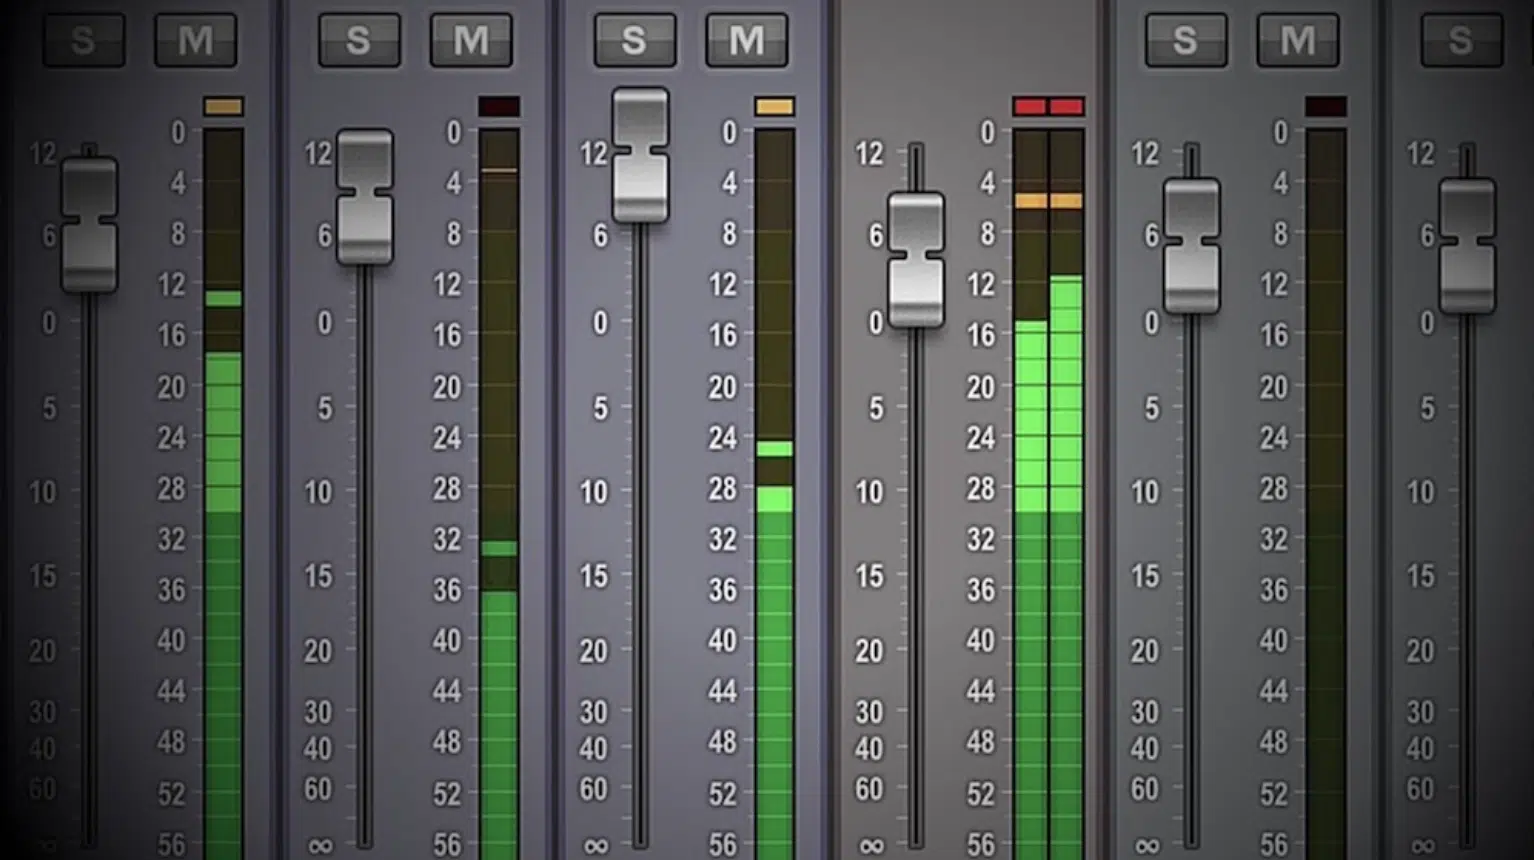
The first step is proper gain staging, setting the foundation for the mastering stage.
Please do NOT skip this step like many other people do when they’re learning how to master a song, because this will show that you’re an amateur.
All the best mastering engineers in the world would tell you it might even be the most important step, but it’s overlooked all day (don’t be one of those people!).
Start by checking the input gain of your final mix… You’ll want about -6 dB of headroom so you have space for EQ, compression, and limiting.
Use a gain plugin to adjust this initial level, ensuring your track isn’t too loud or quiet before adding other processing tools.
Level matching is key to understanding if your adjustments are truly improving the sound 一 A/B test by toggling the gain plugin on and off, it’s super easy.
You just need to make sure both versions are at the same volume.
I find that using a LUFs meter helps here, so aim for a pre-master LUFS reading around -18 to -14 LUFS for a balanced starting point.
When comparing, make sure you’re not fooled by louder tracks sounding “better” because it just feels that way due to the increase in perceived volume.
Remember, making your track louder doesn’t mean it will sound better.
Once you’ve set the input gain, check your output level to prevent clipping, using a true peak meter to keep peaks around -0.1 dB.
NOTE
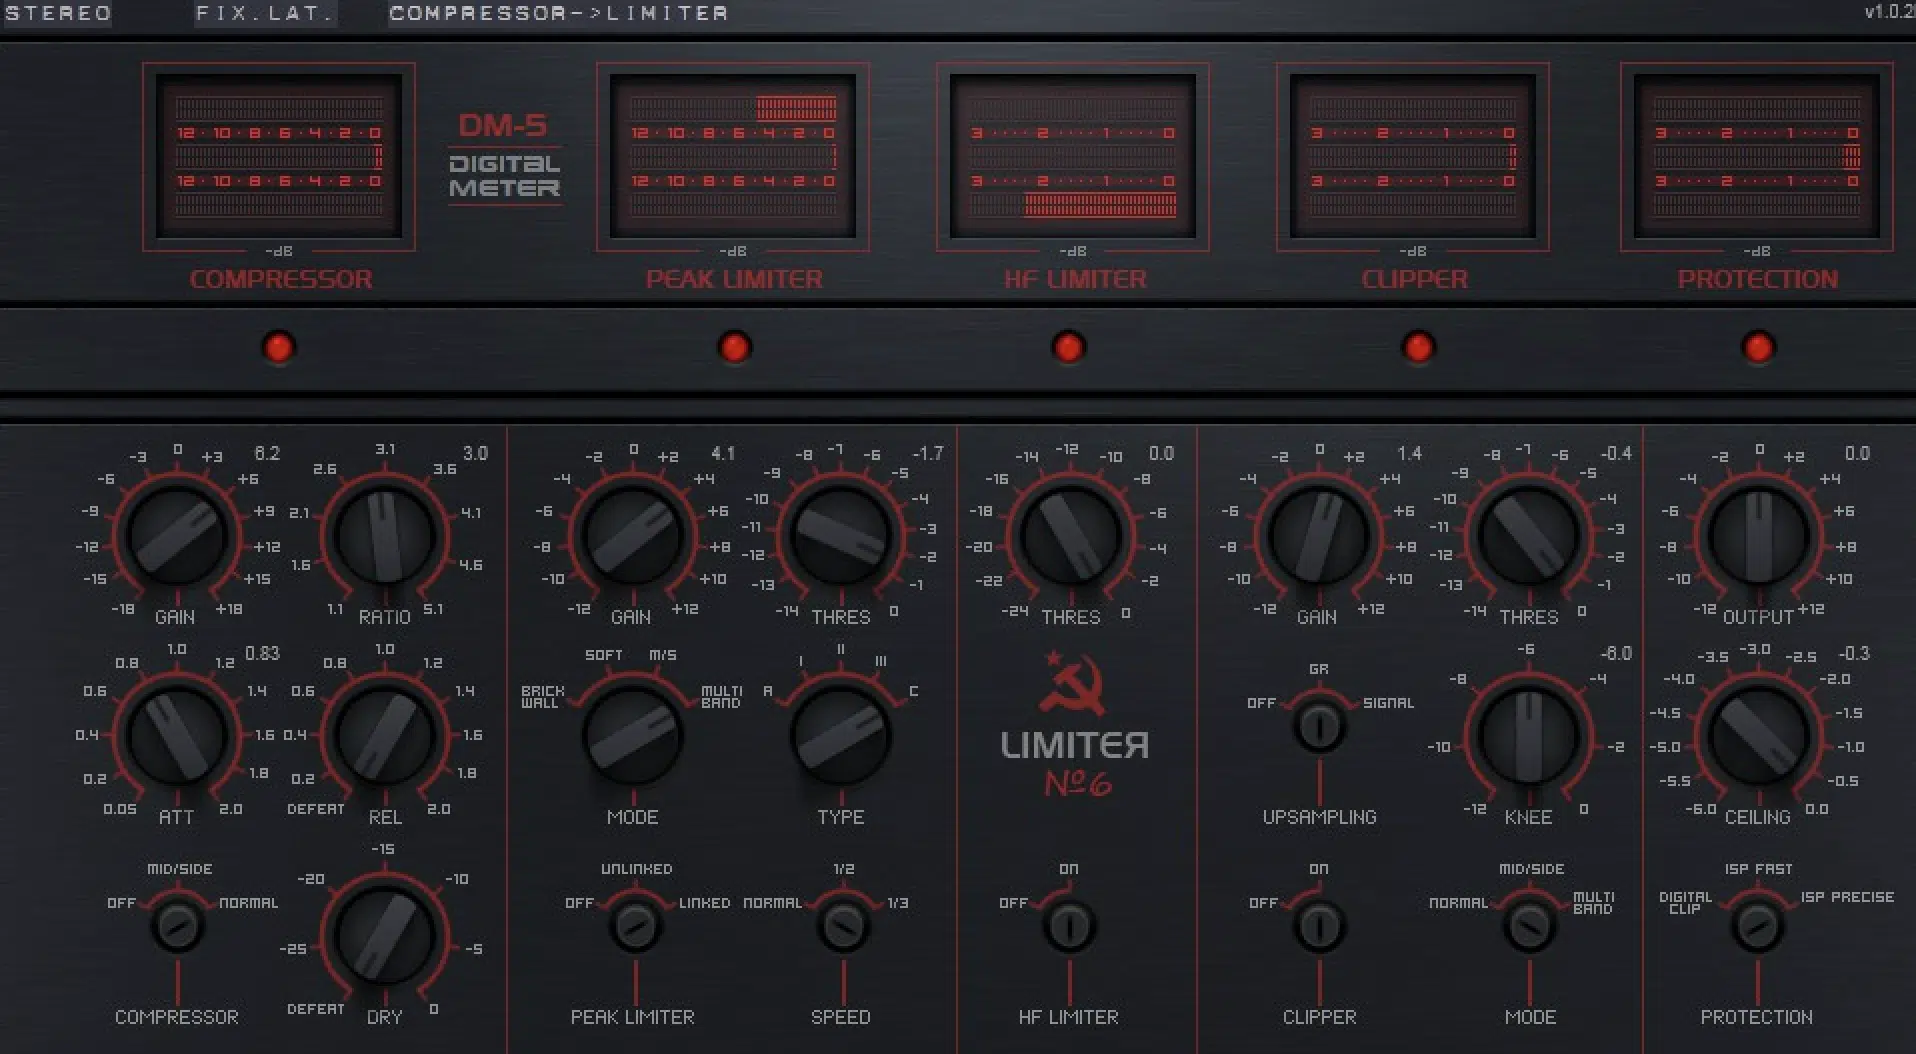
If any distortion is detected, lower the output gain or add a limiter to catch peaks without sacrificing clarity.
Expert gain staging helps maintain the dynamic range of your track, setting you up for a clean, transparent master.
And another thing you’ll want to do when learning how to master a song by yourself is always listen with fresh ears the next day.
You might hear some things that need just a tad of tweaking.
Step 2: EQ Adjustments for Balance
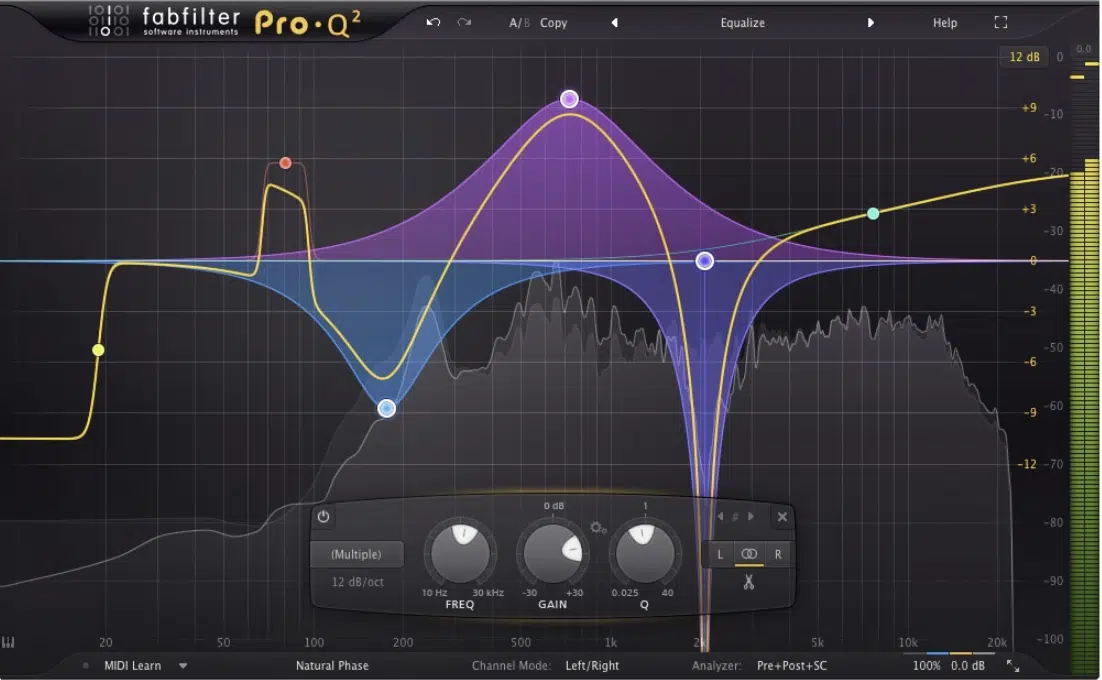
EQ (Equalization) is the process of adjusting the levels of different frequencies within a track to achieve a balanced frequency spectrum and make things sounds good.
It’s used during the mastering stage to:
- Enhance clarity
- Reduce muddiness
- Create a more natural overall sound
It’s all done by boosting or cutting specific frequency ranges and the right EQ adjustments are the heart of achieving tonal balance in your master.
Start with corrective EQ… Use a narrow Q (0.5-1) to notch out harsh frequencies, such as 3-5 dB cuts in the 2-4 kHz range, to reduce harshness in vocals or snares.
If your mix feels muddy, a small cut (e.g., 1-2 dB) around 250-350 Hz can clean up the low-mids without thinning the overall sound.
I, and many other professional mastering engineers, like to apply a low-cut filter at 20-30 Hz to remove subsonic rumble, which isn’t audible but can seriously eat up headroom.
For a touch of air and presence, add a gentle high-shelf boost around 12-16 kHz, just be careful not to overdo it because too much can make the track sound harsh.
Also, use a frequency spectrum analyzer to visualize changes so each adjustment creates a balanced, natural sound across the entire mix.
For example, if you’re working with a bright pop track, you might boost around 8 kHz to add vocal clarity, but for darker genres, focus more on controlling mids and lows.
Try to make small, broad adjustments rather than narrow, drastic changes to maintain the original character of the master track.
The goal is to make subtle but impactful changes that enhance the overall sound without introducing any new issues (which is the whole point of mastering).
NOTE: When you’re learning how to master a song like a professional mastering engineer, you’ve got to keep in mind that if you’re boosting or cutting more than 2-3 dB, that usually means you should go back to the mixing stage.
It’s always better to fix those issues in that section rather than attempting to when you’re mastering.
Mid/Side EQ
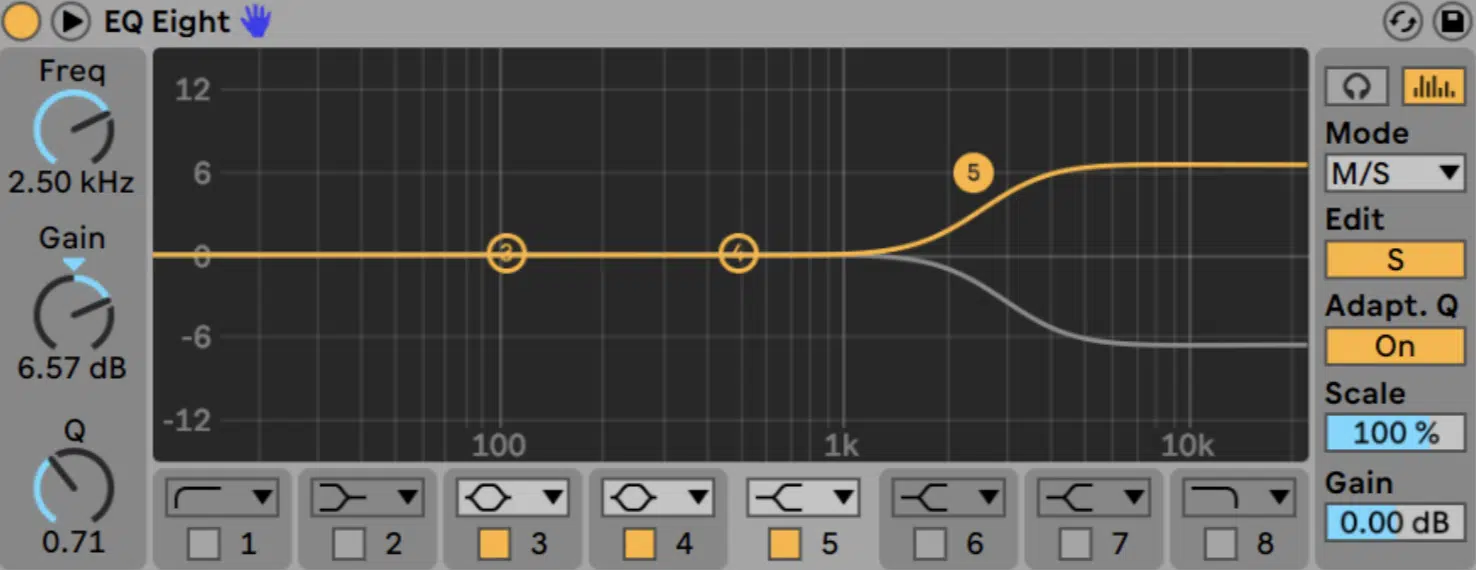
Mid/side EQ is a powerful technique that allows you to adjust the center (mid) and sides of the stereo field independently.
This is especially useful for stereo widening without affecting elements that should stay centered, like the kick or bass.
For example, a subtle boost of 1-2 dBs in the sides at higher frequencies (e.g., above 8 kHz can make the track feel more spacious and open.
It adds a sense of width to your mix without pushing vocals or low-end elements out of focus or making them drown altogether.
When controlling harsh frequencies with mid/side EQ, use a narrow Q (around 1.5-2) and target the sides in the 4-6 kHz range.
This will reduce cymbal harshness while preserving vocal clarity in the center.
Beyond EQ, other forms of mid/side processing (like compression or saturation) can also help enhance the stereo field while locking down a solid mono foundation.
For example, applying a slight mid/side compressor on the sides can add cohesion and keep the mid content focused and punchy.
NOTE: Keep the ratio around 1.5:1 for subtle control, and set the attack to be slower (e.g., 30-50 ms) to maintain transients while gently widening the mix.
If you want your master track to maintain both impact and width, translating well across all playback systems and environments, this is key.
Step 3: Compression for Consistency
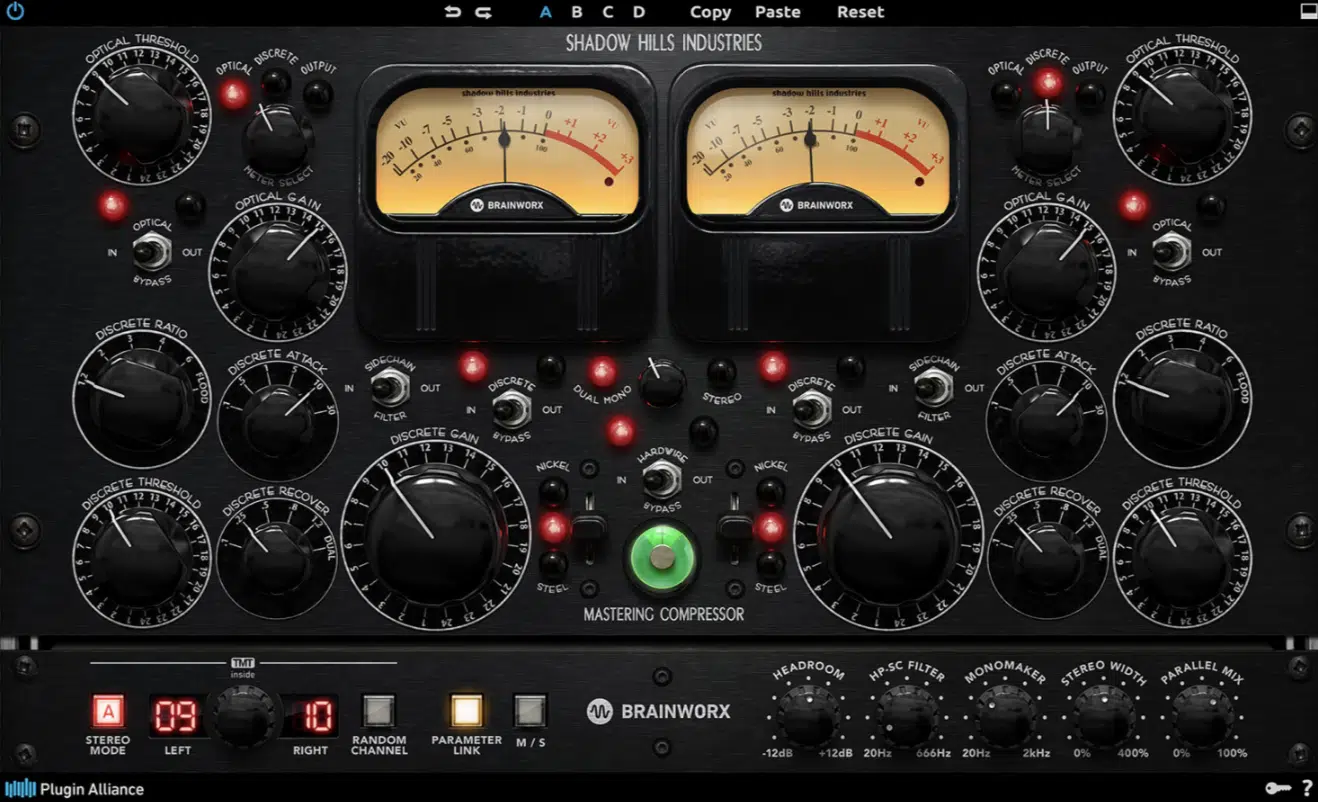
Compression in mastering is all about controlling the dynamic range, which is the difference between the loudest and softest sounds of a track.
It works by reducing the level of louder signals while keeping softer signals intact for a more consistent and cohesive sound.
Creating consistency and glue across the entire song is the name of the game here.
Just be sure to use what’s known as a “mastering compressor” or “bus compressor” because it responds/reacts differently than typical compressors.
I typically start with a soft ratio, like 1.5:1 or 2:1 一 this allows for a gentle reduction of peaks without crushing the dynamics to smithereens.
Set the threshold so you’re getting about 1-3 dB of gain reduction—this ensures you’re controlling volume fluctuations while preserving punch.
Adjust the attack and release settings based on the track’s rhythm.
Use a slower attack (e.g., 30-50 ms) to let transients breathe and a longer release (e.g., 100-200 ms) to maintain a smooth dynamic range.
-
Multiband Compression
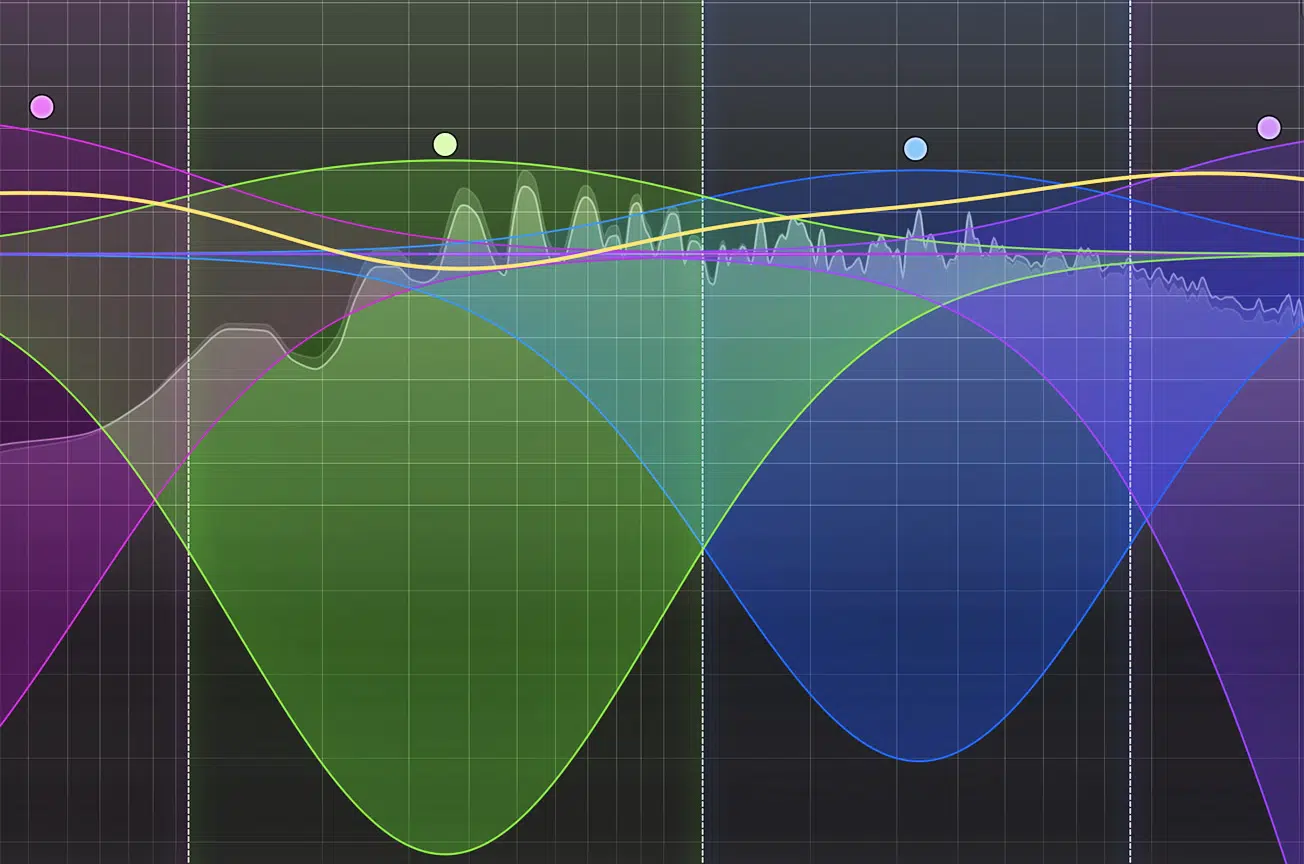
Multiband compression divides the frequency spectrum into bands so you can compress each one independently.
If your mix has more aggressive peaks, like in EDM or trap, use a multiband compressor to target the midrange or highs specifically, keeping the lows intact.
For the low end, you can tighten the low end (0-200 Hz) while leaving the mids and highs more open, preserving dynamic range where it’s needed.
Set the ratio to 2:1 or 3:1 for the low band, with a slow attack (e.g., 50-80 ms) to let the kick and bass punch through.
For the mid band, use a moderate ratio (e.g., 2:1) with a faster release (e.g., 30-50 ms) to maintain vocal clarity and presence.
In the high band, keep the compression light, using a lower threshold to catch only the harshest peaks, ensuring smoothness.
Always apply makeup gain after compression when you’re mastering your own song to maintain consistent loudness and avoid dips in perceived volume (LUFs meter).
This way you can make sure you’re hitting your target loudness without squashing the mix, which is what you want to avoid at all costs.
Multiband compression/using a multiband compressor gives you precise control over the overall sound so you can be on the same level as any pro mastering engineer.
NOTE: When A/B testing, make sure to listen at the same volume to accurately judge whether the compression improves the overall sound or not.
If you want to learn more about multiband compression, we got you covered.
-
PRO TIP

You want your master to sound great everywhere, am I right?…
Well, to really ensure your master sounds on point, you’ll need to check it out across multiple playback systems.
I usually start with high-quality studio monitors to catch any subtle nuances, but I always switch to regular headphones and earbuds too.
This is where most listeners will hear your track.
NOTE: You don’t need professional studio monitors, I threw together a list of the best budget monitors that can certainly get the job done.
Also, play your master through a small Bluetooth speaker 一 this helps reveal whether the frequency spectrum is well-balanced or if certain elements are getting lost.
Let’s say the bass disappears or the highs feel too harsh, you’ll know adjustments are needed in the frequency range.
Your car is another good listening space, as car speakers are great for evaluating low-end power and perceived loudness.
Also, try mono playback; using a mono button or even a cheap mono speaker helps you catch phase issues and see how well your stereo image collapses to mono.
.
I also recommend listening at lower volumes because it helps highlight any masking issues, where softer elements are buried by louder ones.
As the best mastering engineers would tell you: the more playback systems you check your final master on, the better.
If your master track sounds consistent and polished across them all, you’re good to go.
Step 4: Enhancing Transients
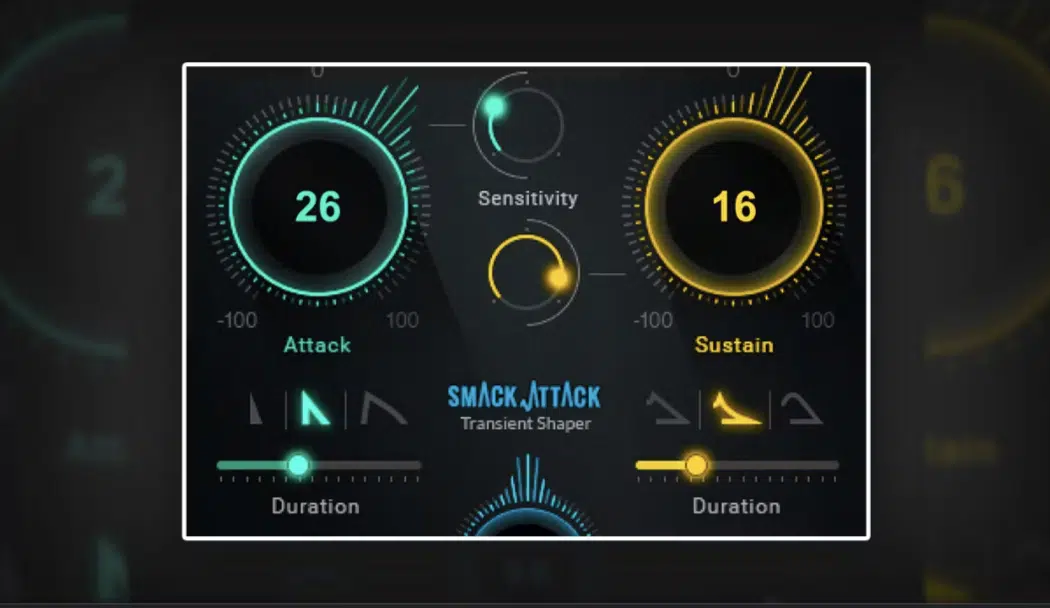
Enhancing transients is all about making your track punchy and clear, especially when it comes to drums and percussive elements.
Start by using a transient shaper plugin (mine happens to be Smack Attack, but any audio mastering software in this category will work; dealer’s choice).
Set the attack to around +10-15% MAX to add more snap to kicks or snares and help them stand out in the mix.
If your kick drum is losing impact, increase the attack setting to sharpen the initial hit while keeping the release at a moderate level to maintain a natural sound.
Just remember to use the transient shaper carefully 一 overdoing it can make the overall sound harsh or unnatural, especially on softer tracks like ballads.
Always A/B test the effect to ensure the transients enhance the track without making it sound too aggressive or distorted.
NOTE: Like when using any processor during the mastering stage, less is always more.
Step 5: Adding Harmonic Distortion/Saturation
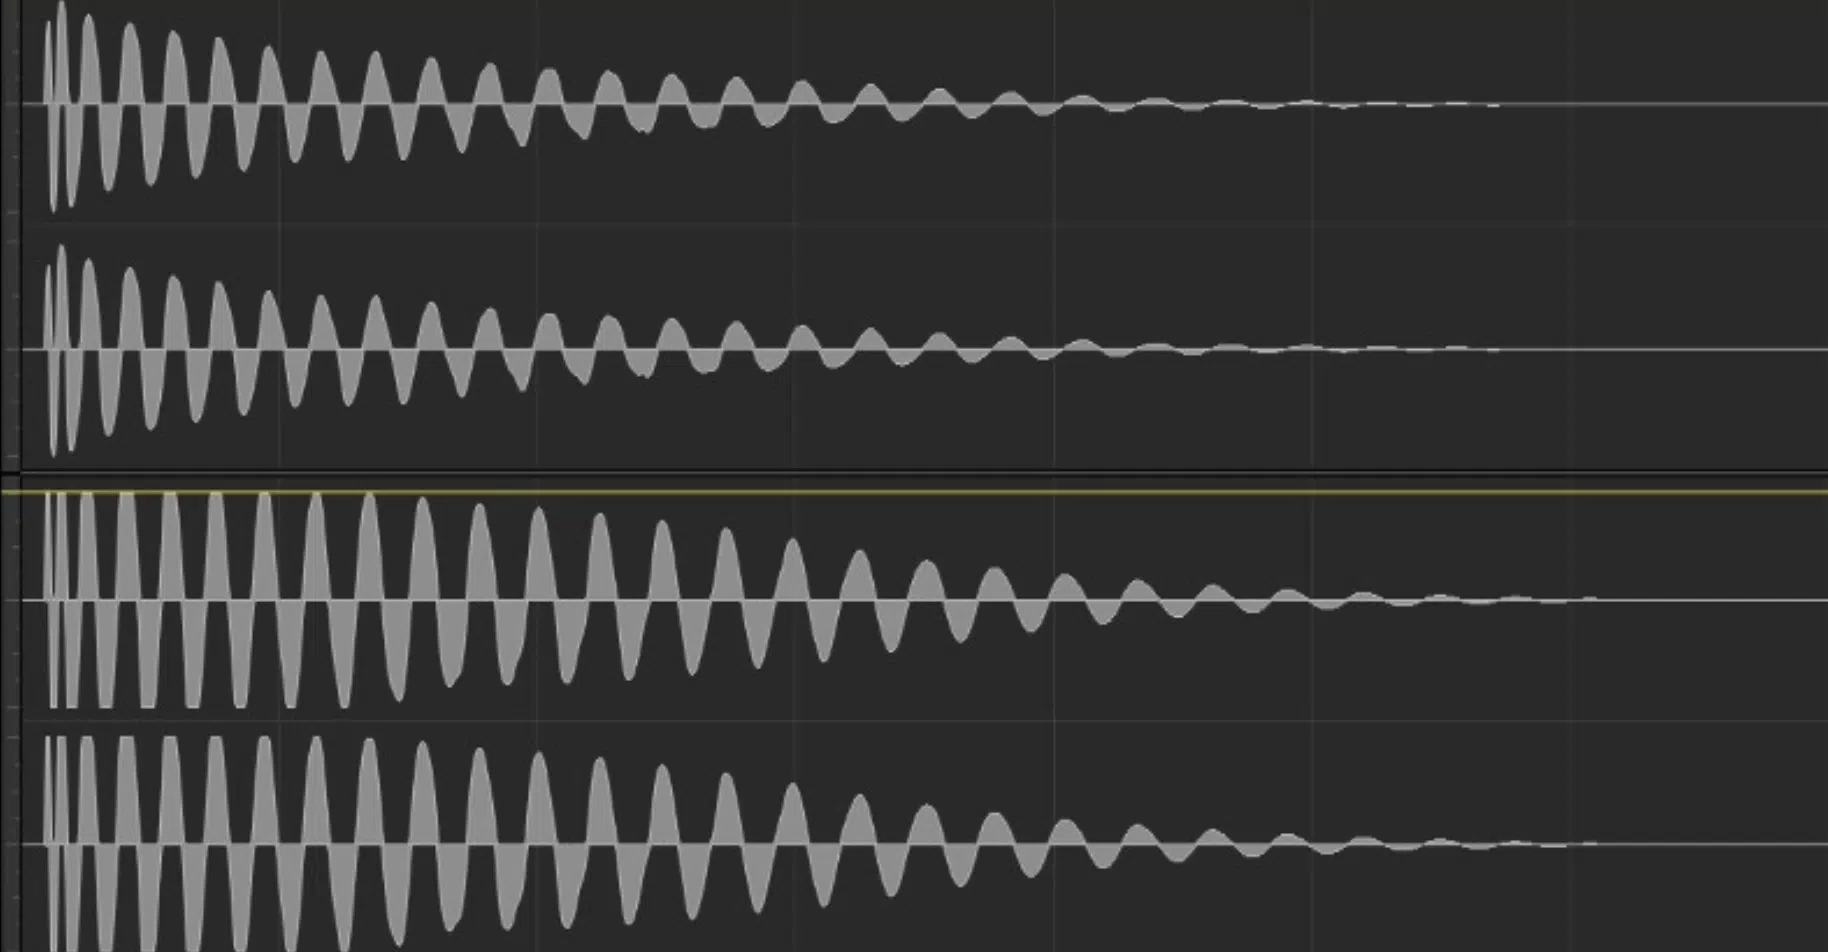
Harmonic distortion or saturation adds unmatched warmth, depth, and color to your master track (often emulating analog gear).
It works by introducing harmonic distortion that makes the entire mix sound richer and fuller, and of course more professional all-around.
When mastering your own music, subtle saturation can enhance the perceived loudness of your track without increasing the actual output level.
I typically use tape or tube saturation to introduce subtle harmonics, especially in the mids, to give vocals more presence and edge.
Start with a low drive setting (e.g., 5-10%) and increase it gradually 一 always listen for warmth without compromising clarity, which you never want to do.
For tracks that feel a bit sterile, harmonic distortion can add that “analog glue,” making the overall sound feel more cohesive.
Try multiband saturation to target specific frequency ranges, like adding a bit more grit in the 200-400 Hz range for a thicker low-mid presence.
NOTE
When you’re first learning how to master a song like the pros do, you might tend to overdo a few things because you’re excited or whatever.
Just be cautious with saturation on the high end, as it can easily introduce harshness.
Keep the mix percentage low, around 5-8%, to avoid brittle tones.
Use a true peak meter to monitor levels 一 saturation can easily push levels over 0 dB, so be ready to reduce the output gain to maintain a clean master.
Step 6: Adjusting Stereo Width
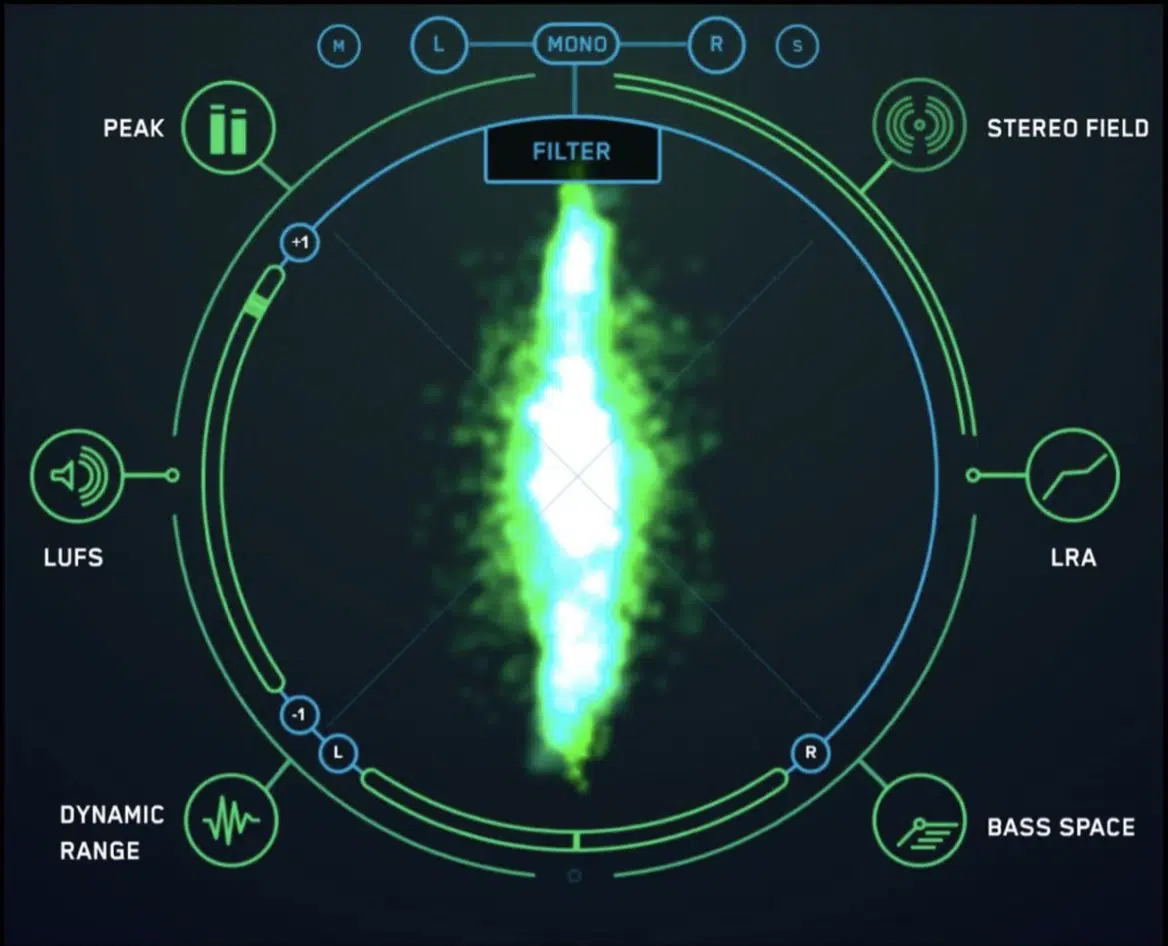
Stereo imaging is the process of widening or narrowing the stereo field of your track, enhancing its spatial presence to make things sound more immersive.
By using a stereo imager, you can widen the upper mids and highs, making your instruments like synths or hi-hats feel more show-stopping/expansive.
You’ll want to start with a stereo imager plugin and widen frequencies above 4 kHz by about 10-20% to create a more expansive top end, perfect for:
- Synths
- Hi-hats
- Other ‘bright’ elements
Keep the low end mono; use a high-pass filter in the stereo imager to maintain bass clarity and punch in the center of the stereo image.
Again, mid/side EQ is a solid technique as well.
If you forgot, you’re going to be boosting the sides slightly in the upper mids (around 2-4 dB at 6-8 kHz) to make the mix feel wider without affecting the center.
Be careful not to overdo it, as excessive stereo widening can make the mix sound hollow or introduce phase issues when played in mono.
Always check the correlation meter to ensure your adjustments don’t cause phase cancellation, which can weaken the overall sound.
Remember, the goal is to create a wider and more engaging soundstage while preserving the balance and impact of the original master track.
Side note, if you’re looking for the premium mastering plugins, look no further.
Step 7: Final Limiting
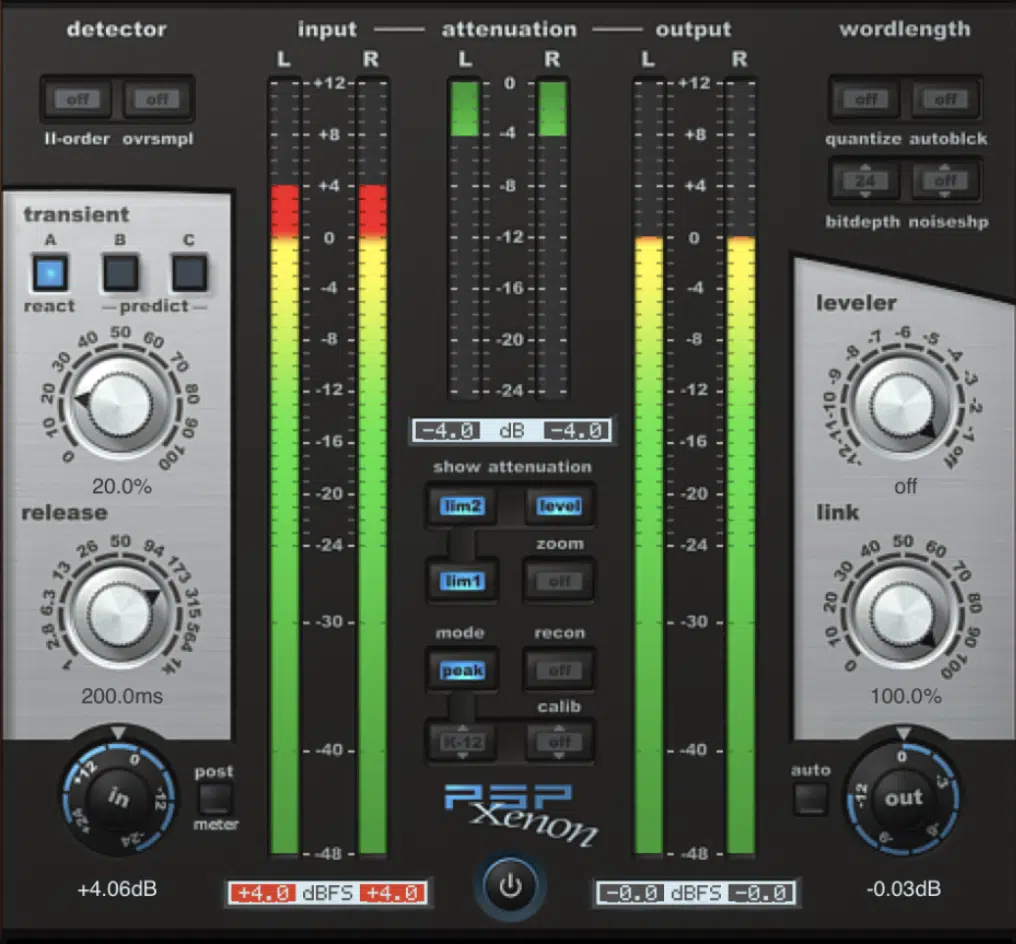
Final limiting is the final step in the mastering stage (last plugin in the mastering chain).
It ensures your track reaches commercial loudness levels without distorting by preventing the audio from exceeding a set ceiling, avoiding digital clipping.
I consider it to be a stricter form of compression.
However, unlike compression, which manages dynamics, limiting primarily controls peaks 一 making sure the output level doesn’t exceed 0 dB.
So, you’re going to start by setting the ceiling of the limiter to -0.1 dB to prevent clipping, especially on streaming platforms where true peaks can cause distortion.
Adjust the threshold to achieve about 1-3 dB of gain reduction 一 focusing on controlling only the loudest peaks without squashing the dynamic range.
Use a fast attack (e.g., 1-3 ms) to catch transients quickly and a release time of 30-100 ms, depending on your track’s tempo, to maintain punch and clarity.
If you’re aiming for a loud master (e.g., -9 LUFS for electronic music), slowly lower the threshold while keeping an eye on the true peak meter to avoid unwanted clipping.
Always A/B compare your limited version with the original final mix at the same volume to make sure the limiter isn’t making it sound overly compressed.
Or, losing its natural dynamics, of course.
The goal is to make your song sound mastered properly, aka balanced and loud enough for commercial release, while maintaining clarity and impact.
Metering Tools
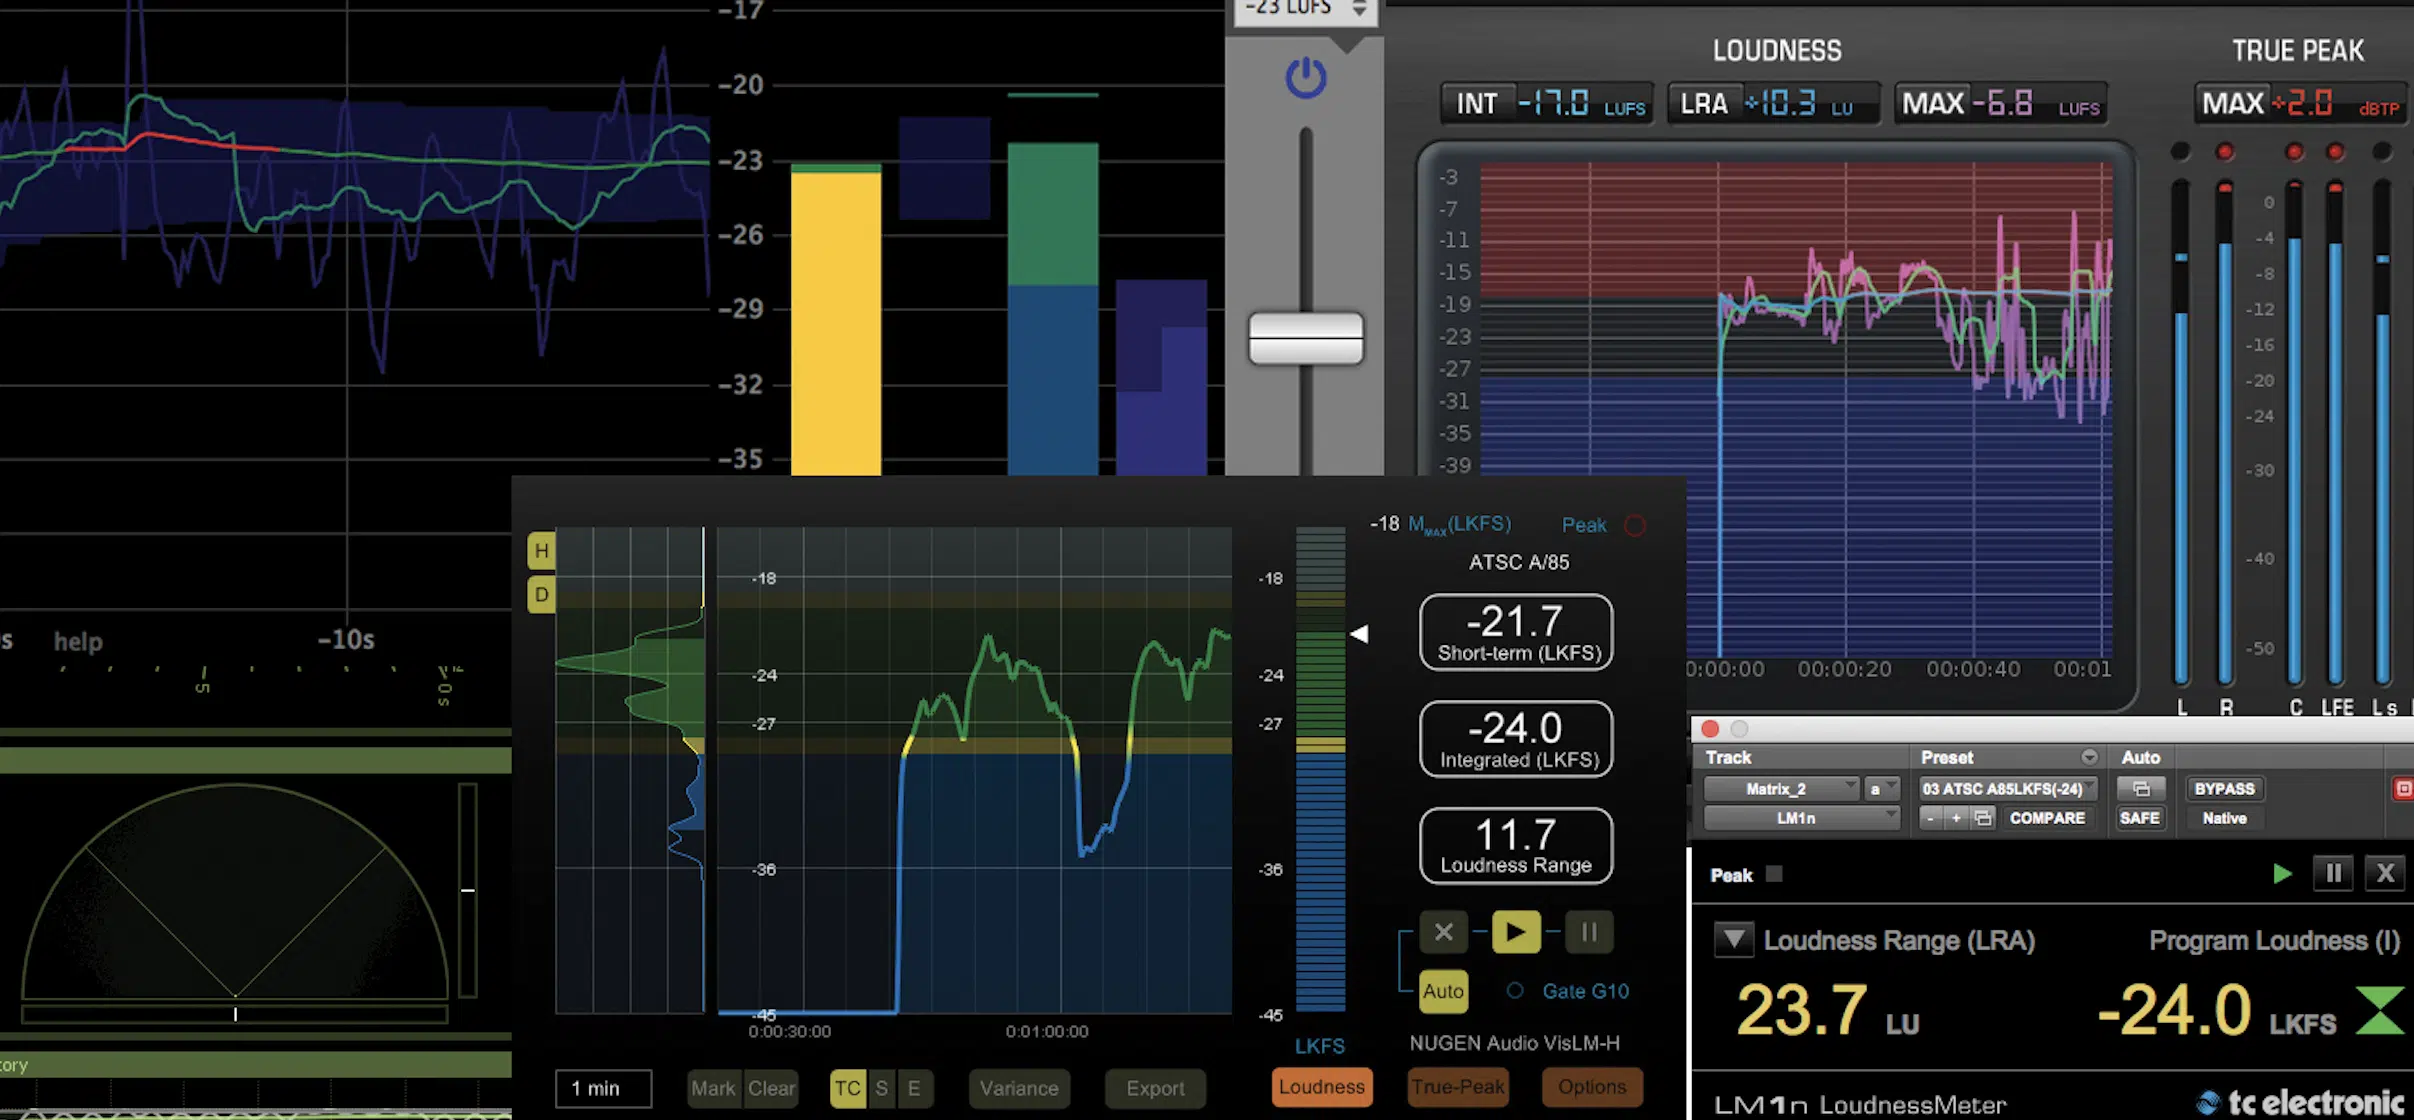
We’ve spoken a lot about metering tools throughout this how to master a song article, so I figured I’d break down exactly what they do real quick so you really understand.
Metering tools are essential for monitoring loudness, dynamics, and phase alignment during the mastering stage.
When you’re learning how to master a song yourself, as opposed to using an automated mastering service or hiring a professional mastering engineer, you have to master them.
And yes, that pun was definitely intended.
-
True Peak Meters
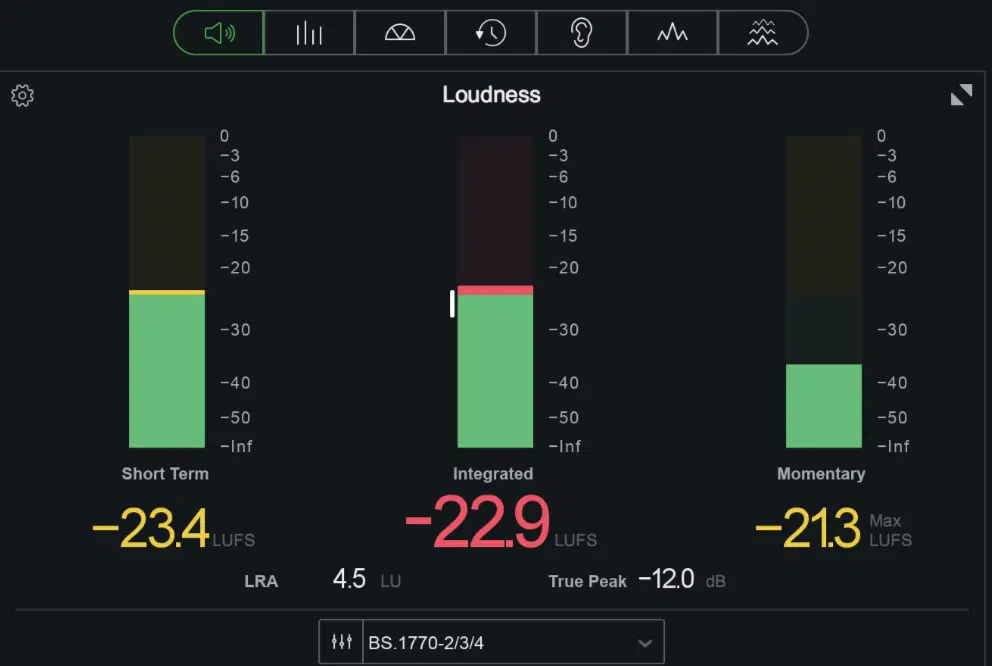
A true peak meter shows whether your track exceeds 0 dB, which can lead to clipping and distortion on streaming platforms.
-
LUFs Meters
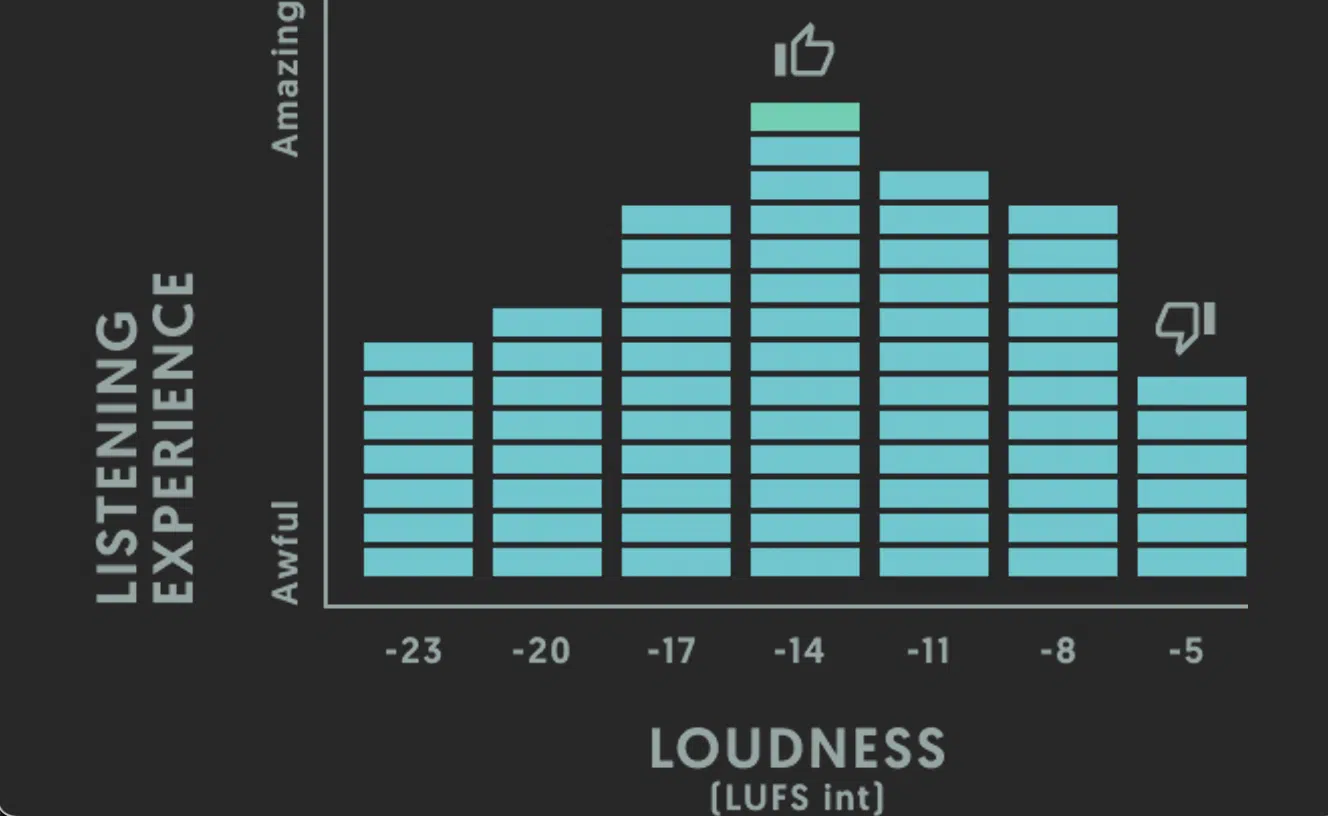
LUFS meters measure perceived volume, helping you achieve consistent loudness across different tracks while preserving dynamic range.
Aim for -14 LUFS for streaming, but adjust to -9 to -11 LUFS for genres like EDM or hip-hop where louder mixes are common (you want your own mixes/masters to sound just as on point as the professionals).
-
RMS Meters
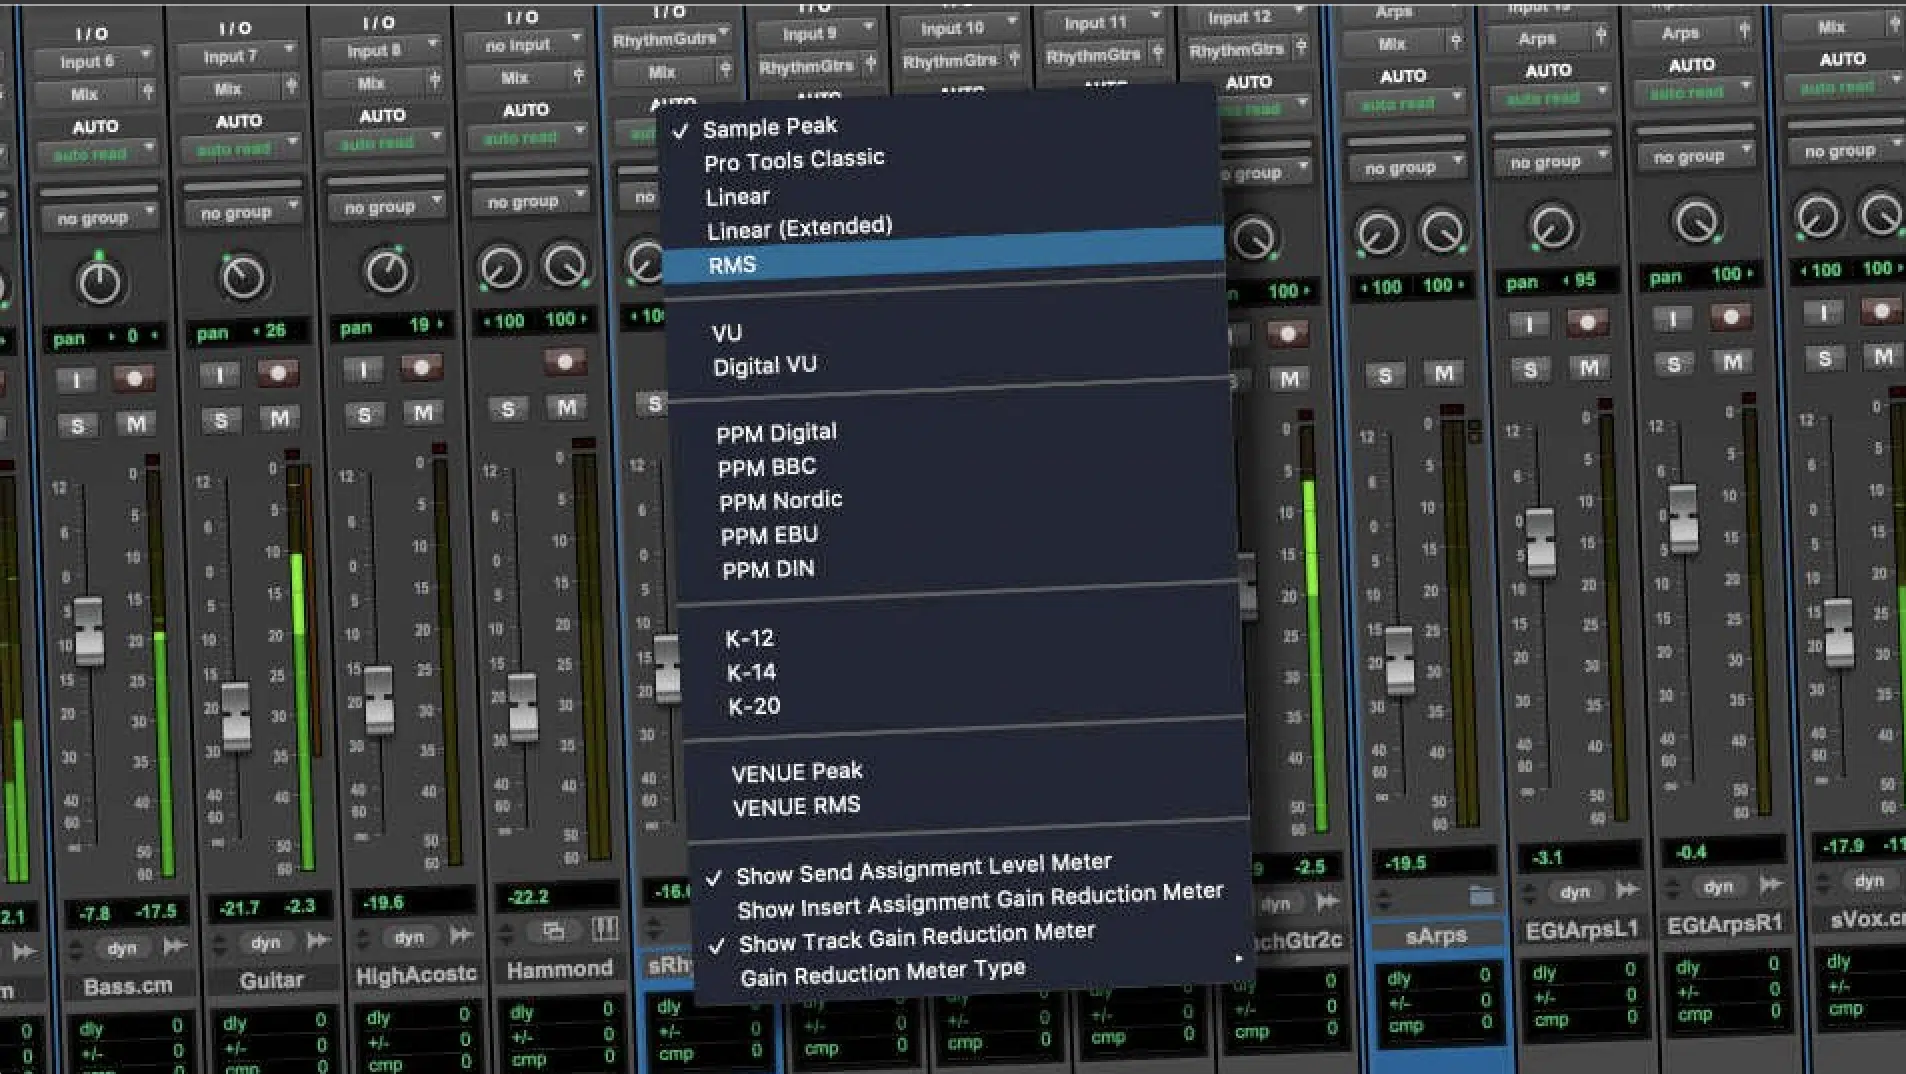
RMS meters provide a more traditional measurement of average loudness 一 helping you balance compression and makeup gain during mastering.
-
Correlation Meters
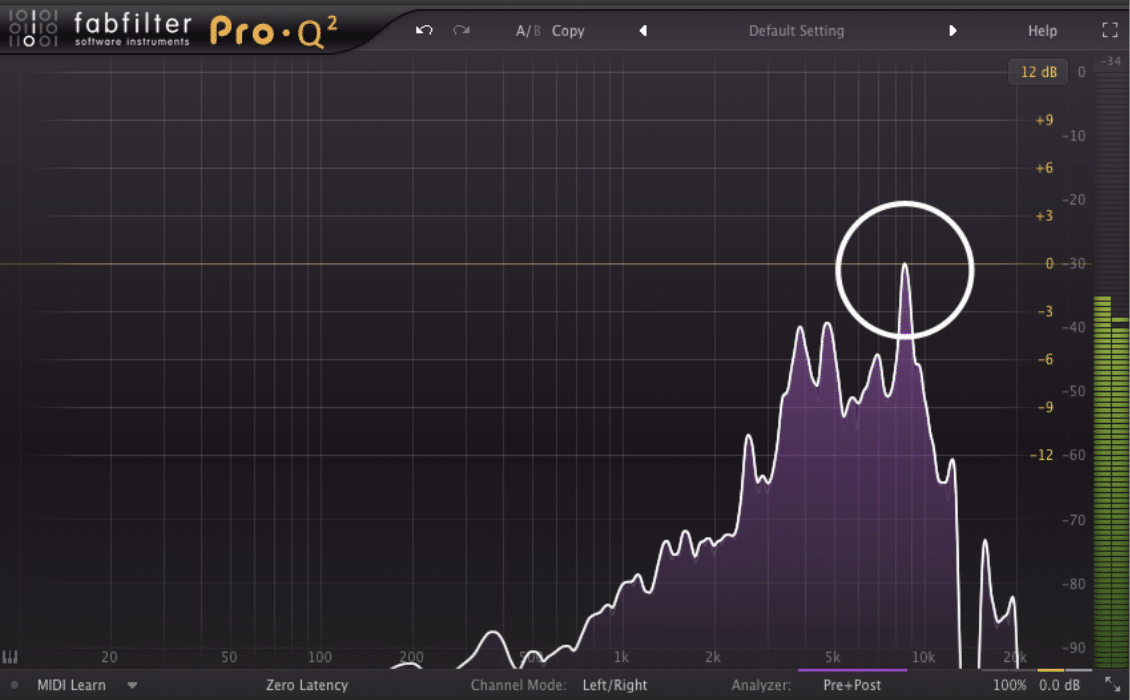
A correlation meter is also vital for checking phase alignment so that your own track maintains a solid stereo image without phase cancellation.
The frequency spectrum analyzer allows you to see how frequencies are distributed for a balanced and full sound across the board.
Together, these tools can help you maintain control over your audio mastering processes so everything sounds professional and polished on any system.
-
PRO TIP
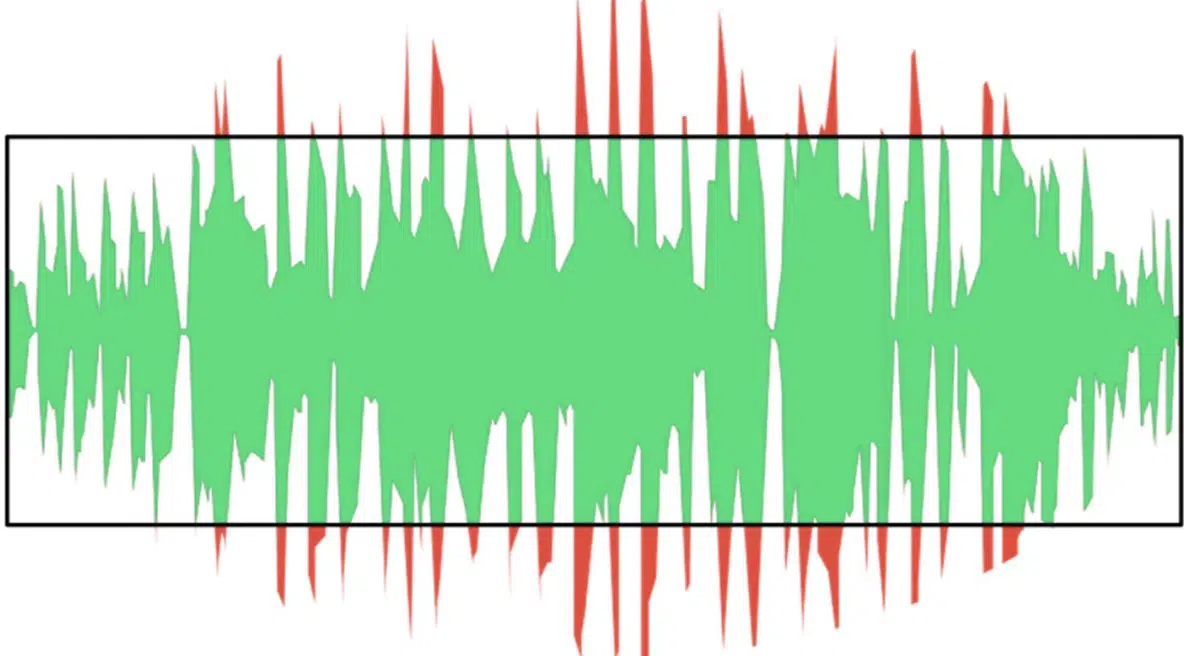
Proper monitoring levels are key for accurate audio mastering decisions
I recommend setting your monitoring level to around 79 dB SPL for mastering, as this is considered a good reference point for most genres.
Listening at a consistent volume helps you better judge tonal balance, perceived loudness, and dynamics without being misled by changes in volume.
Check your own master at lower levels too… If it still sounds clear and balanced, you know your master track is on the right path.
Always use a dB meter to ensure consistent monitoring, as fluctuating levels can lead to inconsistent mastering choices and sloppy work, which you definitely don’t want.
Step 8: Dithering
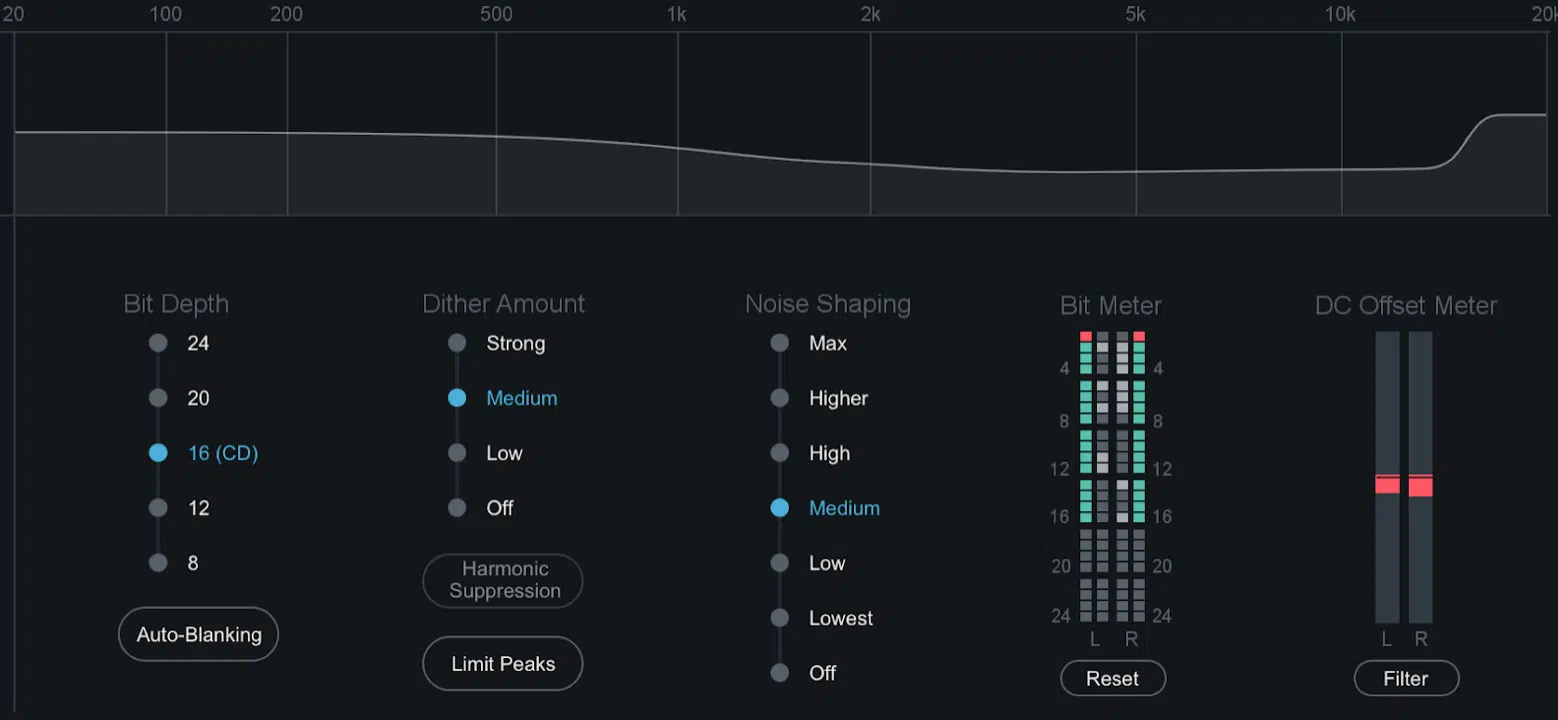
Dithering is the process of adding low-level noise to prevent quantization distortion when reducing bit depth.
It’s subtle, for sure, but it’s very important because when exporting your audio file for final distribution, it makes a world of difference.
Simply enable dithering in your limiter or dedicated dithering plugin (it’s usually best to select a triangular or noise-shaped dithering type for mastering).
Triangular dithering adds a uniform noise that’s more neutral, while noise-shaped dithering distributes noise to higher frequencies, making it less noticeable to the ear.
NOTE
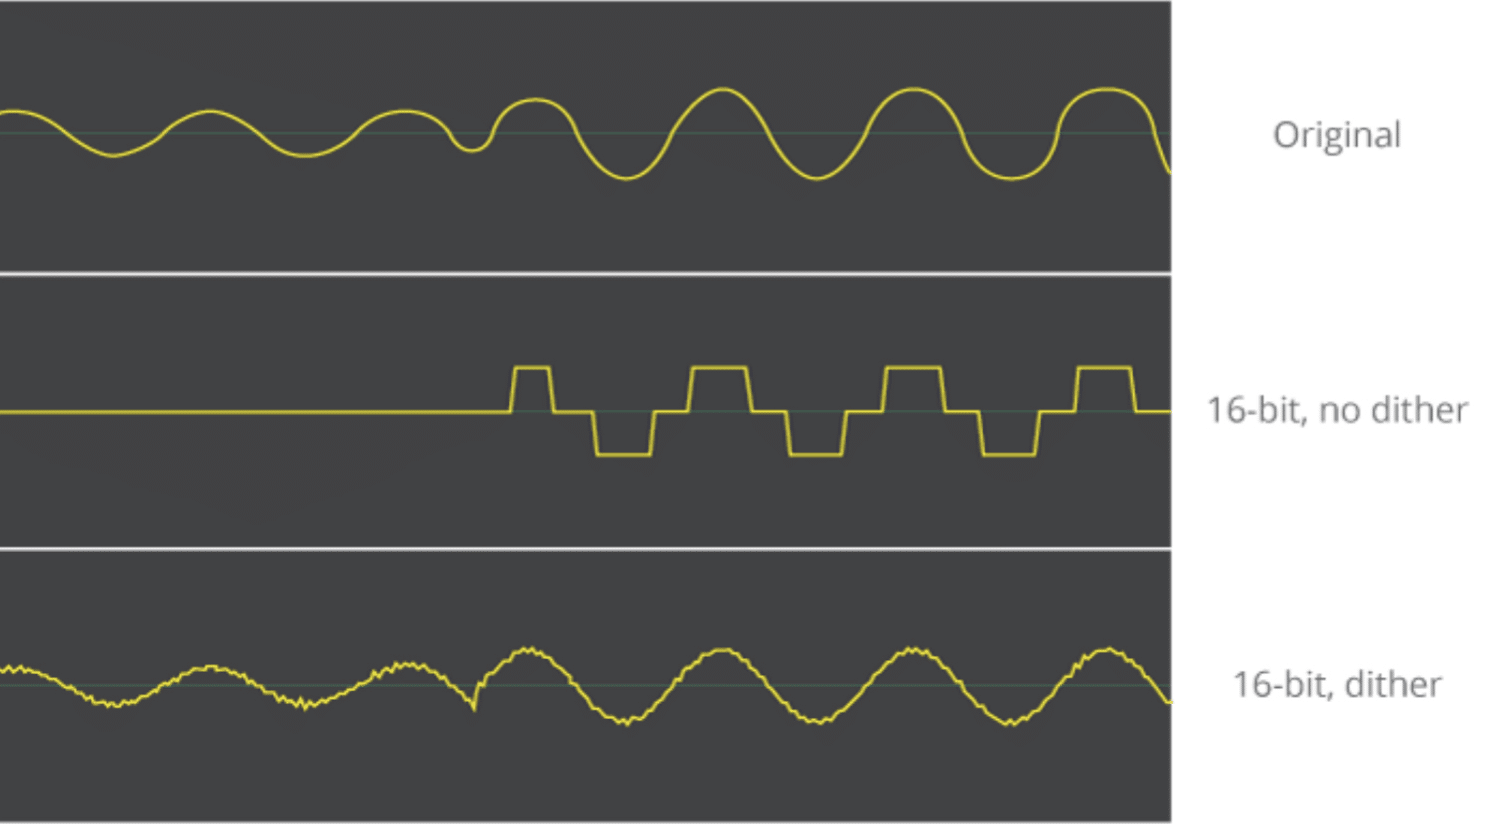
Set the dithering option only during the final export to 16-bit 一 applying it more than once can introduce unnecessary noise and degrade the overall sound.
For tracks intended for streaming platforms, leave your bit depth at 24-bit and disable dithering (most platforms handle the conversion automatically).
Proper use of dithering ensures your entire mix retains its clarity and dynamic range, which makes it sound smooth across all playback systems/in any listening space.
Step 9: Finalizing Your Master

Once you feel super confident in your final master, it’s time to export it and make sure it’s set up properly for digital distribution.
When you’re attempting to be a mastering engineer, you have to understand that finalizing your master is just as important as everything else required.
Simply export the master track at 24-bit and 44.1 kHz… This is the standard format for most streaming platforms and maintains the best quality.
If you’re creating a version for CD (which I’m sure you’re not), export it at 16-bit and remember to apply dithering during the bounce to prevent quantization distortion.
It’s smart to have an alternate master at -14 LUFS, matching the volume normalization used by most streaming services, so your track isn’t unnecessarily squashed.
When song mastering, I also like to create a louder version, around -9 LUFS, for promotional use.
This works better for platforms like YouTube, where more aggressive loudness can cut through better.
-
NOTE
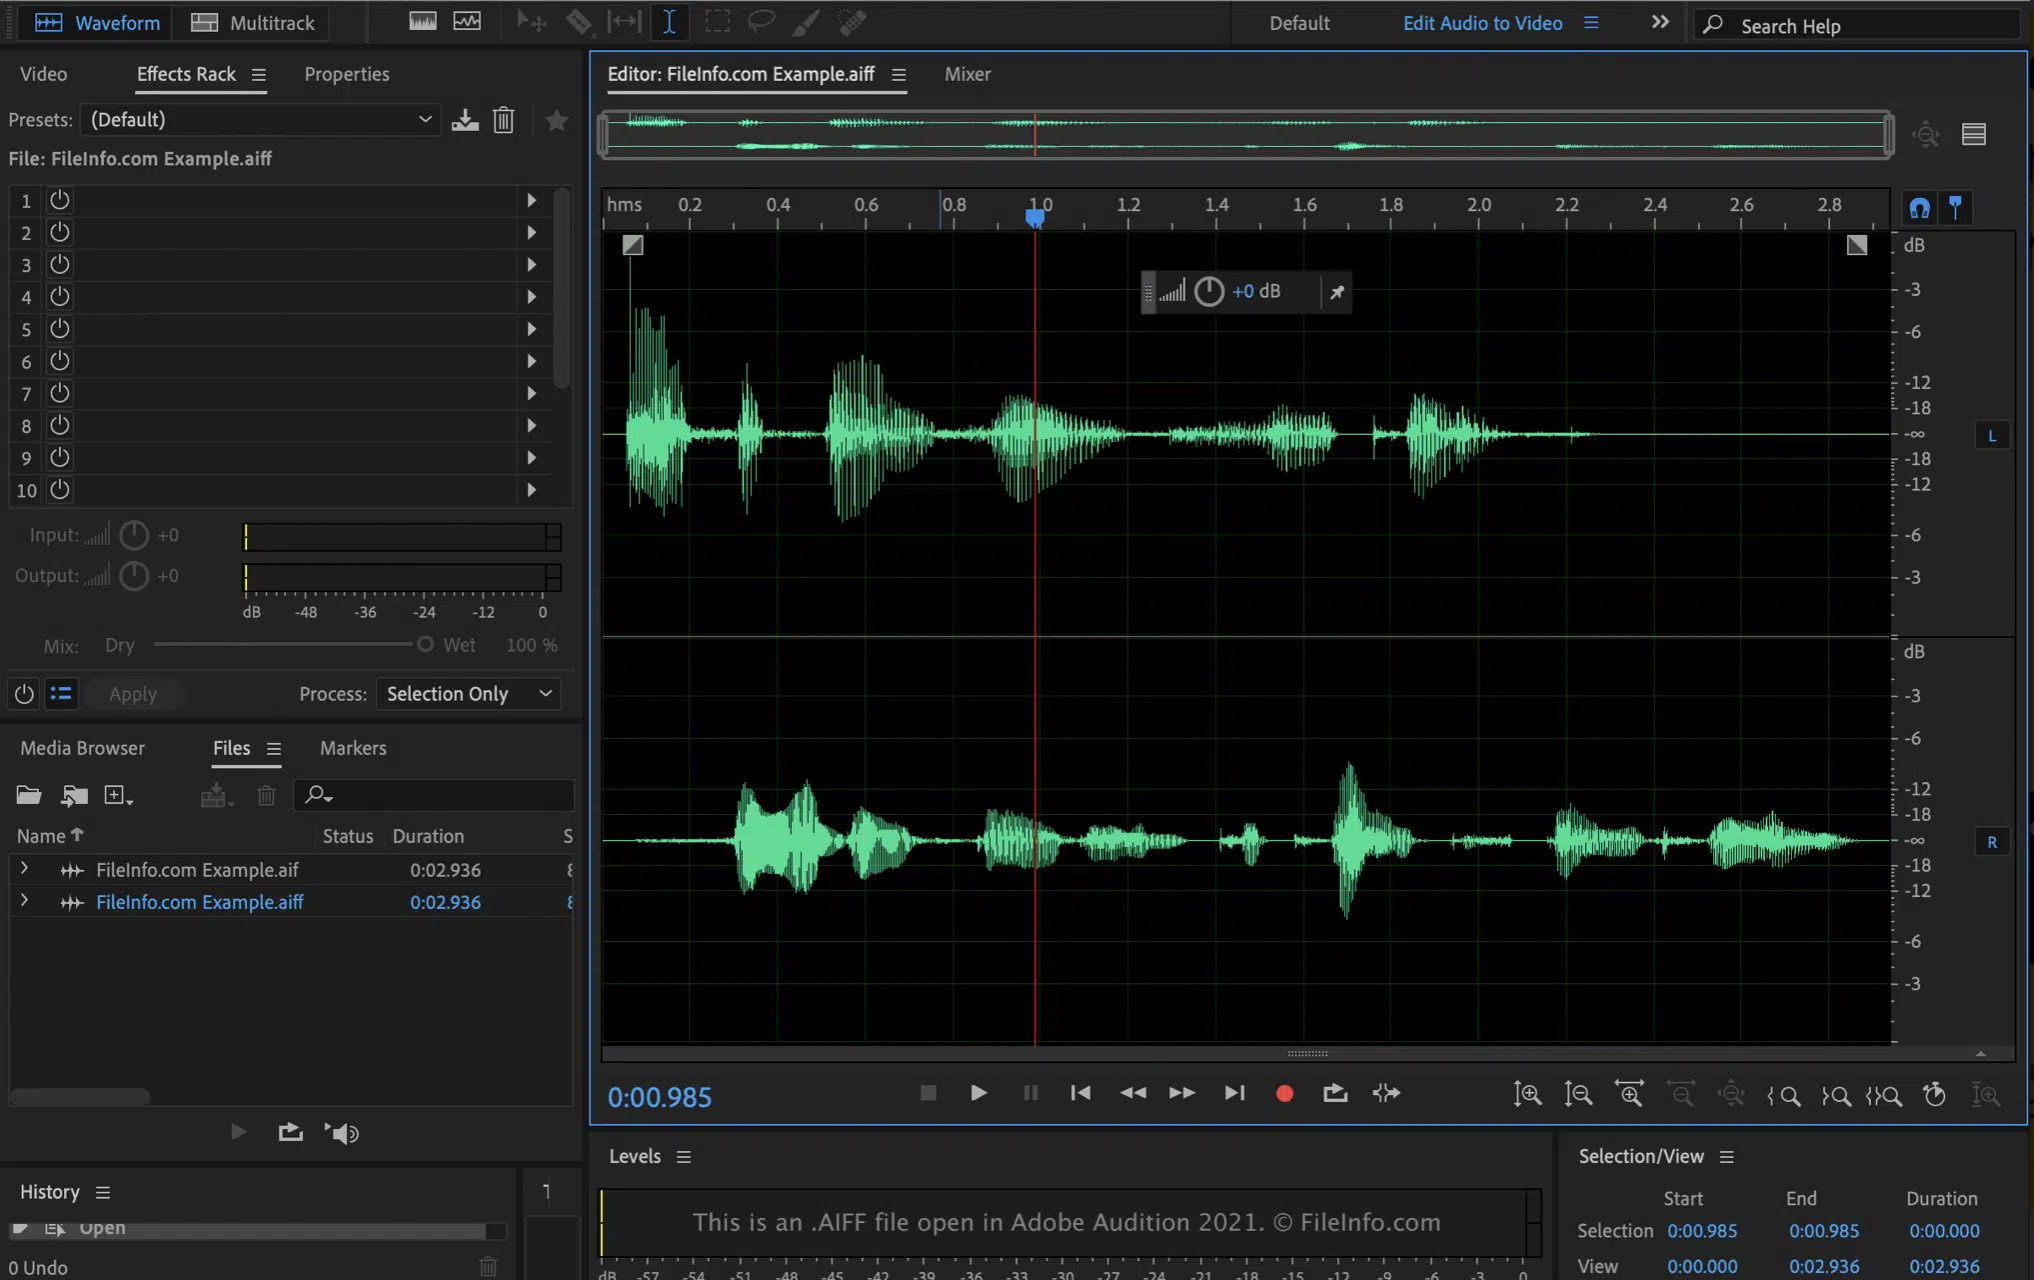
Stick to WAV or AIFF formats for the final export, as they preserve the highest audio fidelity; only convert to MP3 if you specifically need a compressed version.
Make multiple versions of your master, too, so you’re covered for different formats while keeping that same high-quality sound across all platforms.
Bonus: Advanced Mastering Techniques
Now that we’ve covered the foundational aspects of how to master a song, it’s time to dive into some more advanced techniques (my favs). These tricks will help you refine your masters 一 making them sound even more polished and professional.
-
Using Reference Tracks
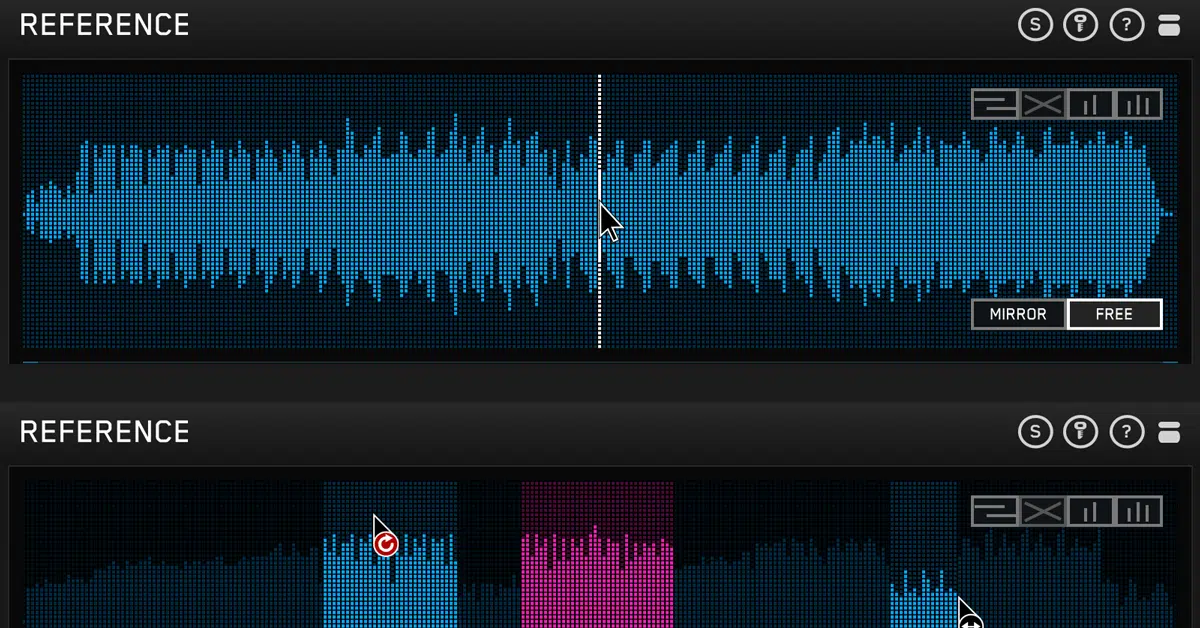
I know I threw it around a couple of times throughout the article, but it truly deserves its very own section because reference tracks are such a vital part of your master.
Reference tracks are one of the best ways to keep your master in check.
Using a reference track is basically like having the cheat codes because you can see exactly how a professionally mastered track sets the standard for:
- Tonal balance
- Loudness
- Clarity
Load the reference track into your DAW and make sure it’s level-matched to your master, so you’re not fooled by differences in volume.
I like to use an EQ analyzer to see how the frequency spectrum of the reference track compares to my own.
This can reveal if my mix needs more low-end punch or high-end airiness.
Using reference tracks is also helpful when checking the stereo image 一 if your master doesn’t feel as wide or open, you may need to tweak the stereo width.
Switch between your master and multiple reference tracks in the same genre to see whether your mix holds up in terms of dynamics and overall feel.
NOTE: Don’t just use one reference track. The more you use, the more you’ll understand how different mastering decisions affect the final sound (super beneficial).
-
Dynamic EQ
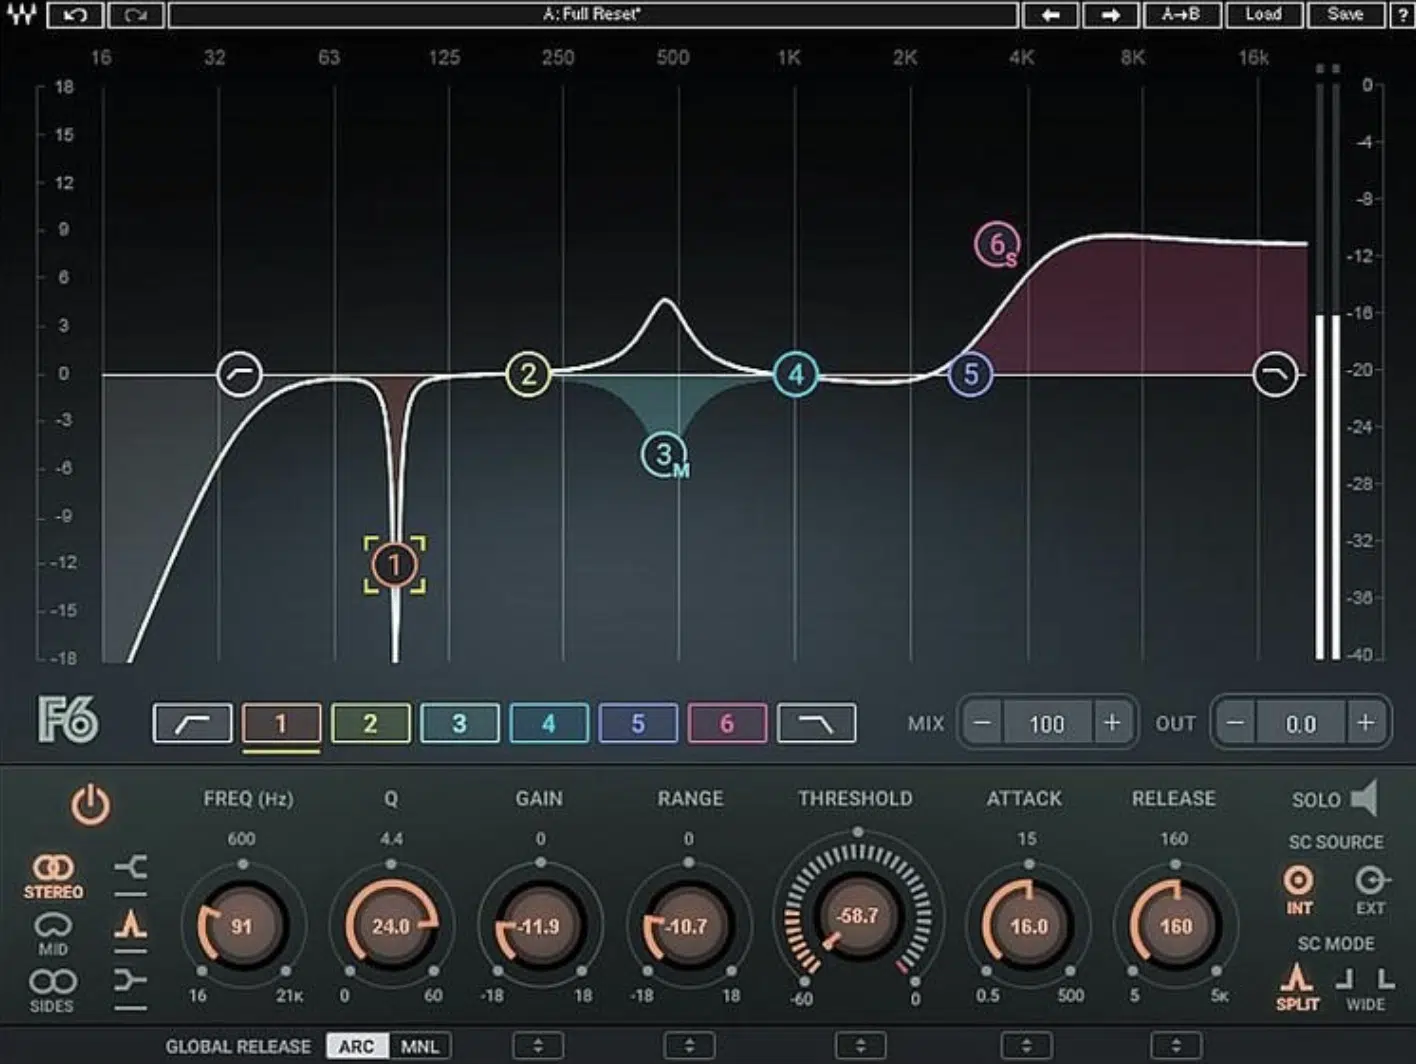
Dynamic EQ gives you precision that standard EQ can’t match, especially when dealing with problem frequencies (which you’ll come across quite often).
Instead of just cutting a frequency, it only reduces it when it gets too loud, like a smart EQ-compressor combo.
For example, I use dynamic EQ to control harsh vocals in the 5-8 kHz range and only reduce them when they become too sibilant.
It’s also useful for taming boomy bass in the 100-200 Hz range 一 keeping the low end clean without affecting the overall mix.
When using dynamic EQ, set a gentle ratio (e.g., 1.5:1) and a moderate threshold to avoid making the sound feel too controlled or unnatural.
Dynamic EQ is a sick tool that can add clarity while maintaining the natural feel of your entire mix, so make sure to play around with it.
-
Parallel Saturation
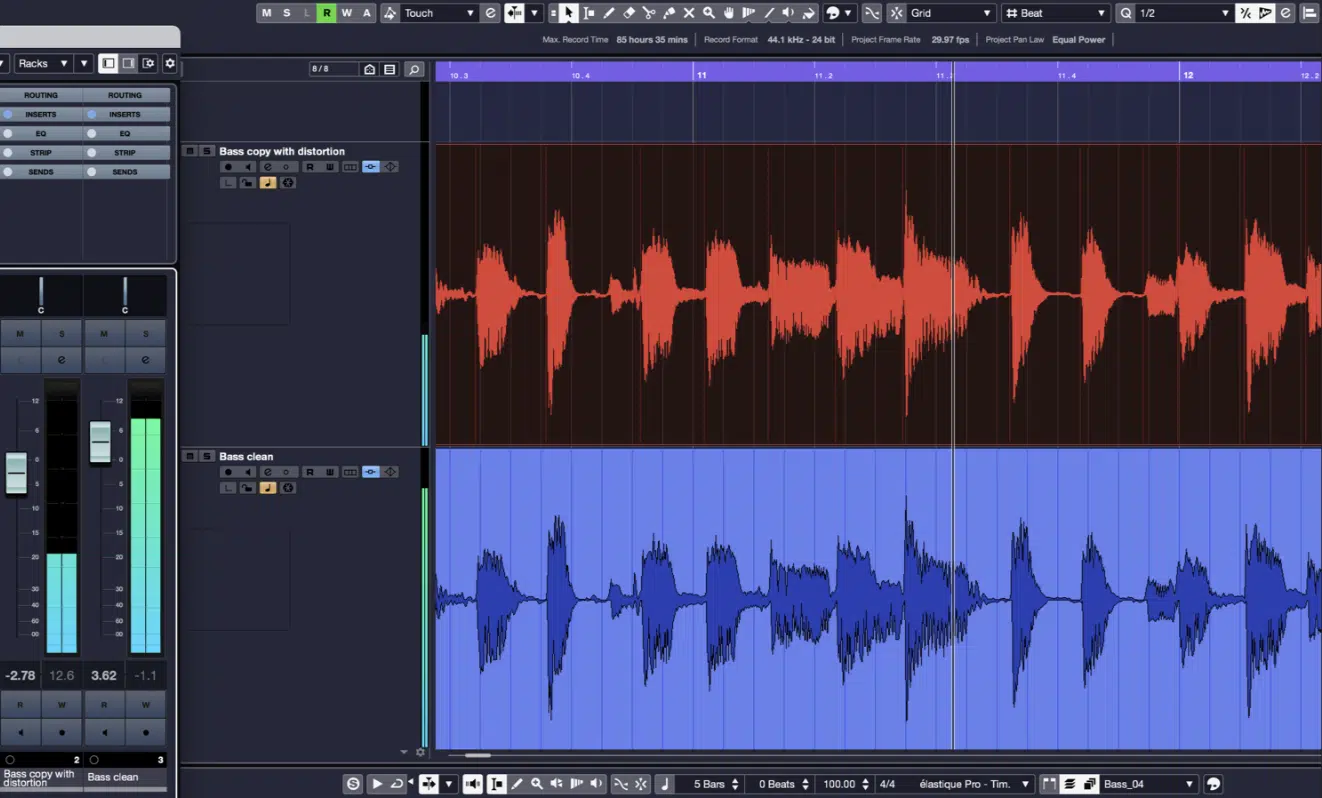
Parallel saturation adds warmth and depth without overwhelming the entire mix.
Blend the saturated signal with the original, setting the mix knob to around 10-20% to maintain clarity while adding harmonic edge.
For instance, I often target the mid frequencies (around 500-1,000 Hz) to give vocals more presence without affecting the dynamic range.
Be sure to monitor the output level, as saturation can increase perceived volume and potentially cause clipping.
It helps you retain a natural sound while still making your master track sound full and vibrant.
-
De-Essing on Your Master Buss
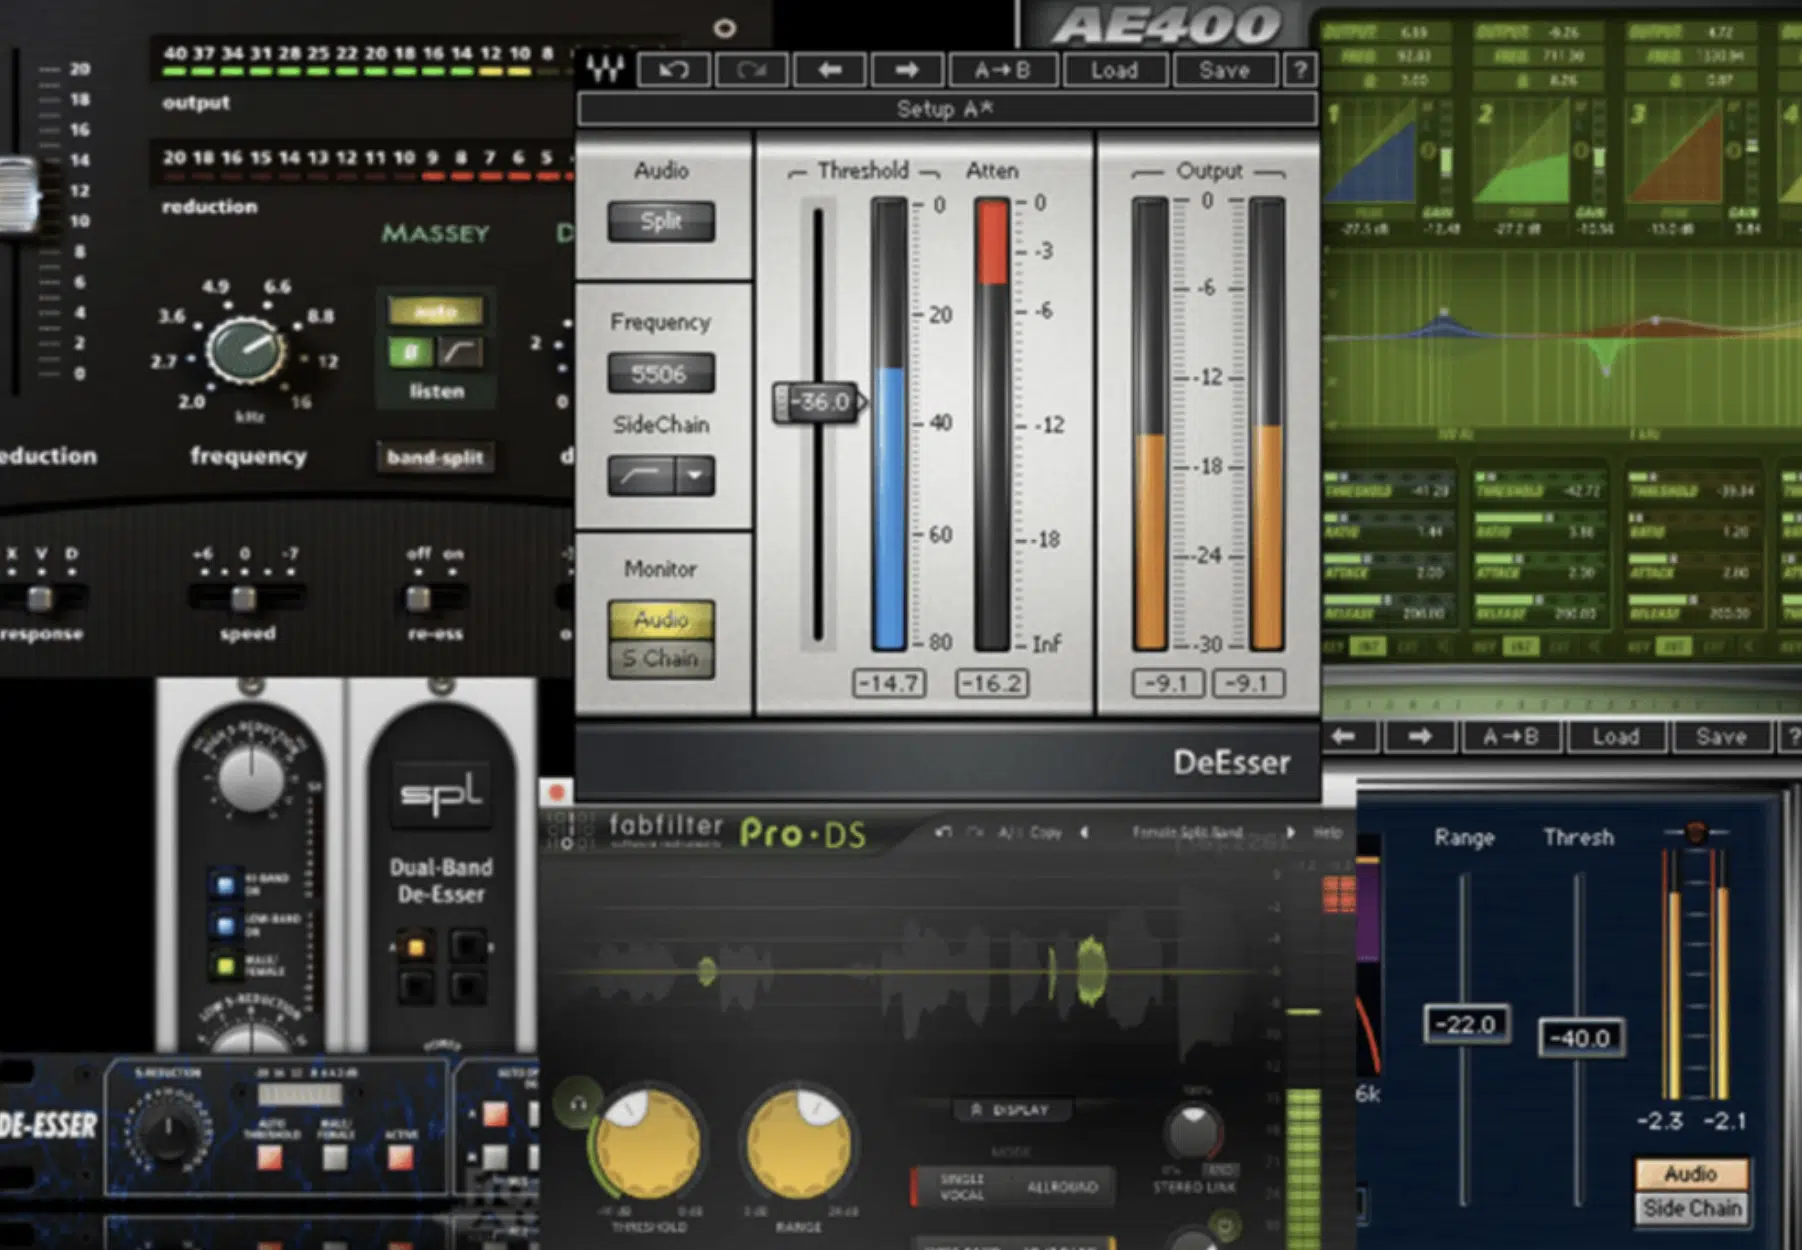
De-essing on the master buss tames sibilance across the entire song, focusing on harsh high frequencies, usually between 5-8 kHz.
Simply set the threshold to catch only the harshest peaks, applying about 1-2 dB of gain reduction for a more natural sound.
Use a wide frequency range to ensure you’re capturing all problematic sibilant tones without dulling the overall sound.
NOTE: I personally prefer a fast attack and release to catch sharp sibilants quickly without affecting clarity, but it’s up to you.
De-essing at the end of the mastering stage ensures your track doesn’t become overly bright on certain playback systems.
Remember, a mastering engineer’s job is all about smoothing everything out and making all your elements cohesive.
-
Linear-Phase EQ
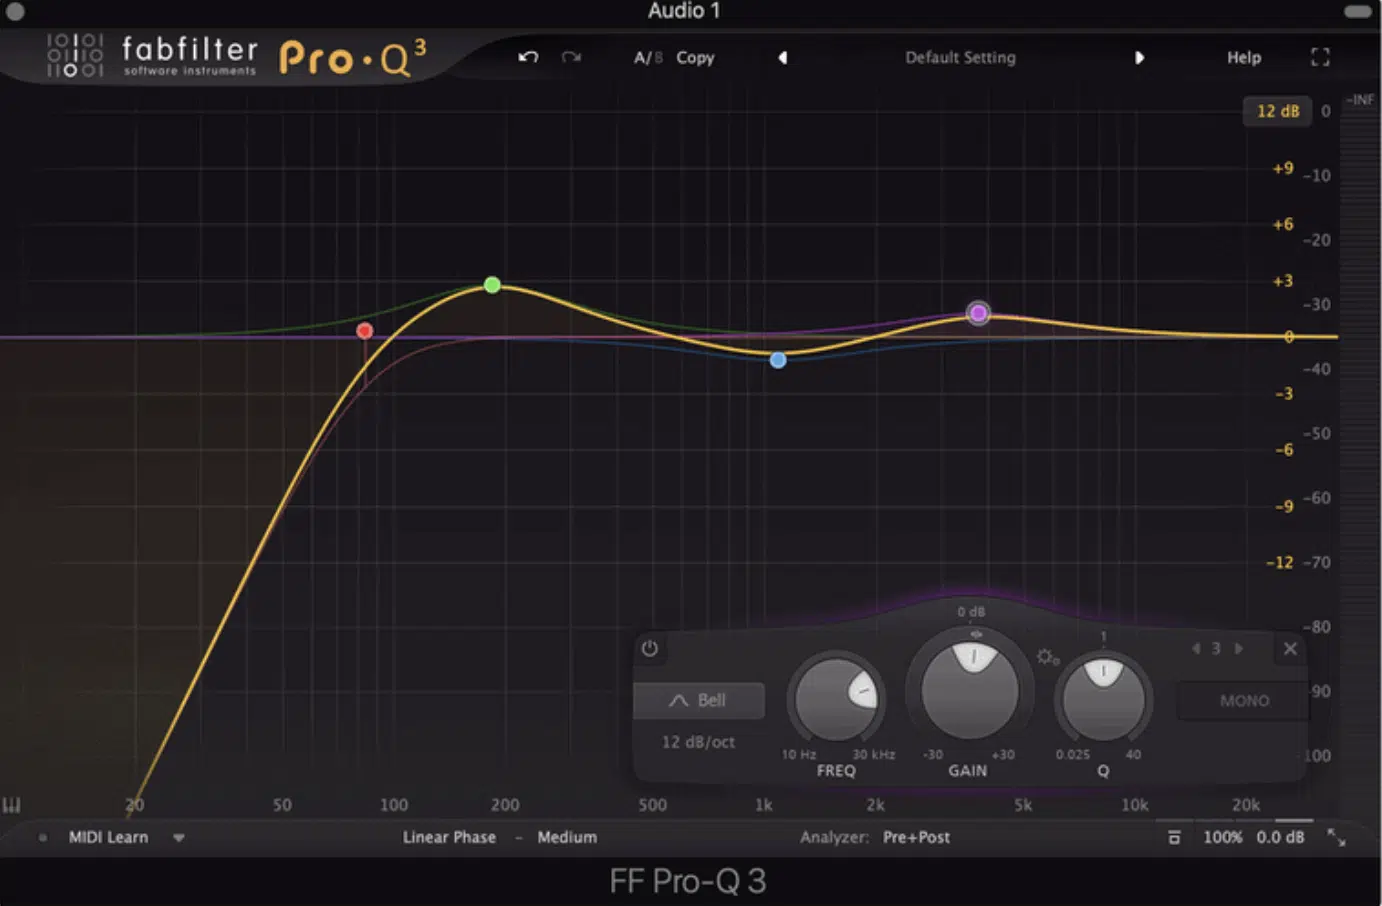
Linear-phase EQ is perfect for audio mastering because it avoids phase shifts, especially in the low end of the frequency spectrum (phase accuracy is the goal).
It’s super useful for making subtle cuts or boosts without affecting the phase relationship between frequencies, maintaining tonal balance.
For example, if I’m boosting 100 Hz to add weight to the kick, I’ll use linear-phase EQ to prevent phase issues that could muddy the mix.
Just watch out for latency and pre-ringing because linear phase EQ is known to do that if you’re not careful, so just use it when absolutely necessary.
This EQ type is best for achieving a transparent, clean sound across the entire mix while maintaining the integrity of the master track.
-
Multiband Stereo Imaging
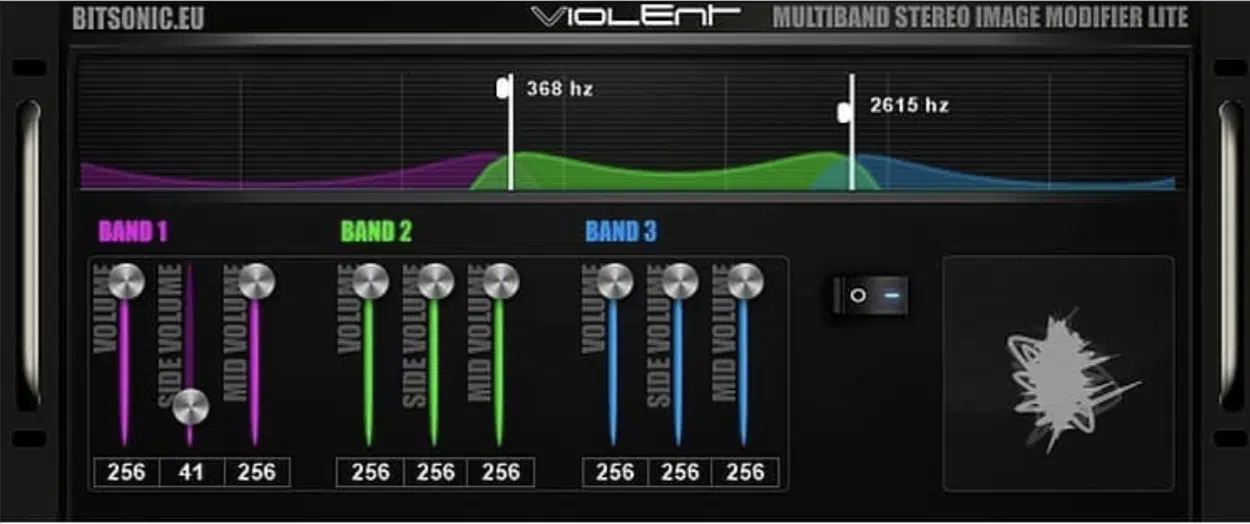
Multiband stereo imaging lets you widen specific frequency bands to enhance the stereo image without screwing up the mastering stage.
For example, you might widen frequencies above 4 kHz to create a spacious high-end, while keeping the low end tight in the center.
When I’m mastering audio, I find this technique especially useful for making synths, hi-hats, and other bright elements feel more expansive.
All while maintaining a focused bassline, which is ideal.
Don’t forget to check the correlation meter when you’re mastering your own song (like I mentioned before) to avoid phase cancellation.
Otherwise, it can weaken the overall sound when played in mono.
Bottom line, it’ll give you more control over the stereo width and make your master track feel both wide and solid across all playback systems.
-
Sidechain Compression
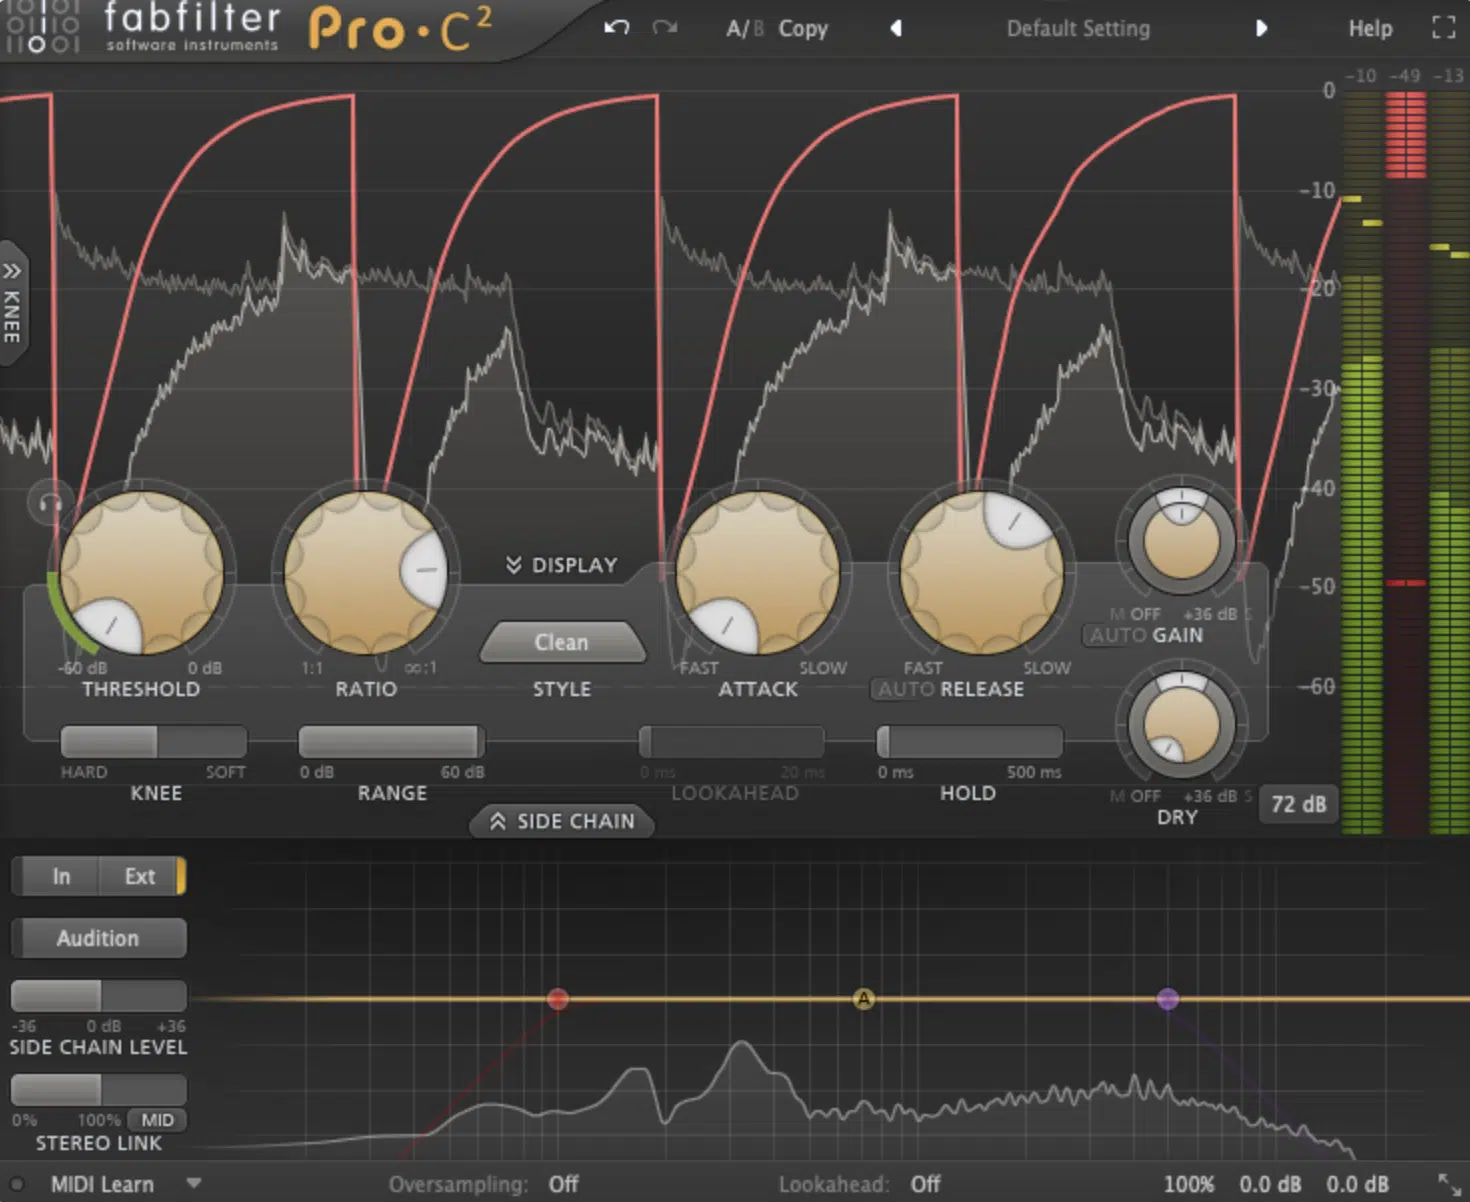
Even though sidechain compression is a more subtle effect when it comes to audio mastering, it’s super effective for creating space in the overall sound.
What you’re going to do is use a compressor to duck certain elements, like reducing the volume of the entire mix slightly when the kick hits, for a punchier low end.
I like to set the attack to be fast (e.g., 1-3 ms) and the release to be quick (e.g., 50-100 ms) to avoid affecting the track’s natural dynamics.
Make sure to adjust the ratio to 2:1 or 4:1 一 keeping gain reduction minimal to maintain clarity while adding impact to the low end.
It keeps the mix dynamic while allowing important elements to cut through clearly and enhances the perceived volume of your track.
How to Master a Song: Final Thoughts
Learning how to master a song is complicated at first, there’s no doubt about it.
But now, after today’s article, you’ll know exactly how to master a song like the professionals do.
It’s going to take practice, patience, and consistent effort, of course.
Plus, you’ll need to keep refining your techniques, listening critically, and staying updated with new tools and methods.
But I’m confident you guys will use all the tips, tricks, and techniques we talked about today to master it in no time.
If you want to take your mastering skills even further (much faster), you’ve got to check out this invaluable, highly-renowned Free Project Files pack.
It includes 3 professional-quality DAW templates for Ableton Live, FL Studio, and Logic Pro that show you all the secrets to music production.
They were created by industry experts and show you the entire production process, from arrangement to mixing and mastering, and everything in between.
You’ll get a hands-on look at high-quality mixing tricks and mastering chains 一 making it easier to understand how pro-level tracks are put together.
It’s the best resource in the game for improving your mastering skills because you’ll see firsthand how it’s done (in real-time).
Plus, you can compare your own masters to the ones in these templates, which makes fine-tuning your approach simpler and more efficient than you could ever imagine.
Bottom line, with the right knowledge and tools (which you now have), you’ll be able to create polished, radio-ready tracks all day long.
Just make sure to stay consistent, keep refining your skills, and never lose that passion when you’re learning how to master a song.
Until next time…


Leave a Reply
You must belogged in to post a comment.